


| FAQ |
| Members List |
| Social Groups |
| Calendar |
| Search |
| Today's Posts |
|
#321
 02-09-2017, 12:14 PM
|
||||
|
||||
|
Here's a shout-out to LadyTATA. Teri found me a nice '74 329353 spindle which will work great. Since we are snowed in today, that gives me some extra time to degrease it and drill out a couple broken dust shield bolts, then we are ready to go.
Thanks Teri!!!! |
|
#322
02-18-2017, 01:13 PM
|
||||
|
||||
|
Things are moving along nicely.
Here are the new coil springs. I got them from Coil Spring Specialties http://www.coilsprings.com/ They build your springs to order using the factory specs, out of specific coil material. They don't just hack an inch off of some unversal sized coil. It usually takes a week or two to get them made. They did an awesome job making me a set of springs for the black 72 Formula a few years ago which had the car sitting perfectly - not too high, not too low. I looked up my old invoice and had them build the same set again, under that work order. The spec was for a 72 T/A 455 with A/C and a one-inch ride height drop. (Even though the spec were for a lower ride height, the springs had the car sitting at the exact ride height as original). Here they are. They are shorter than the factory spring but made of a stiffer material. If I put my weight on the old spring I can compress it a little...not with the new spring! 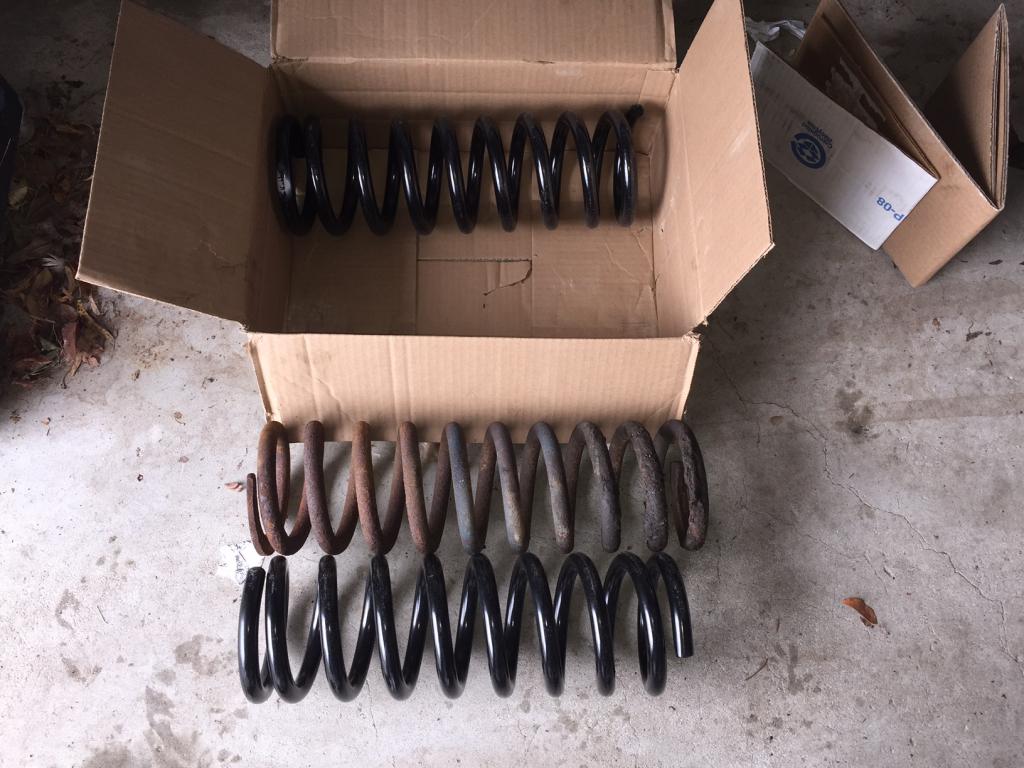 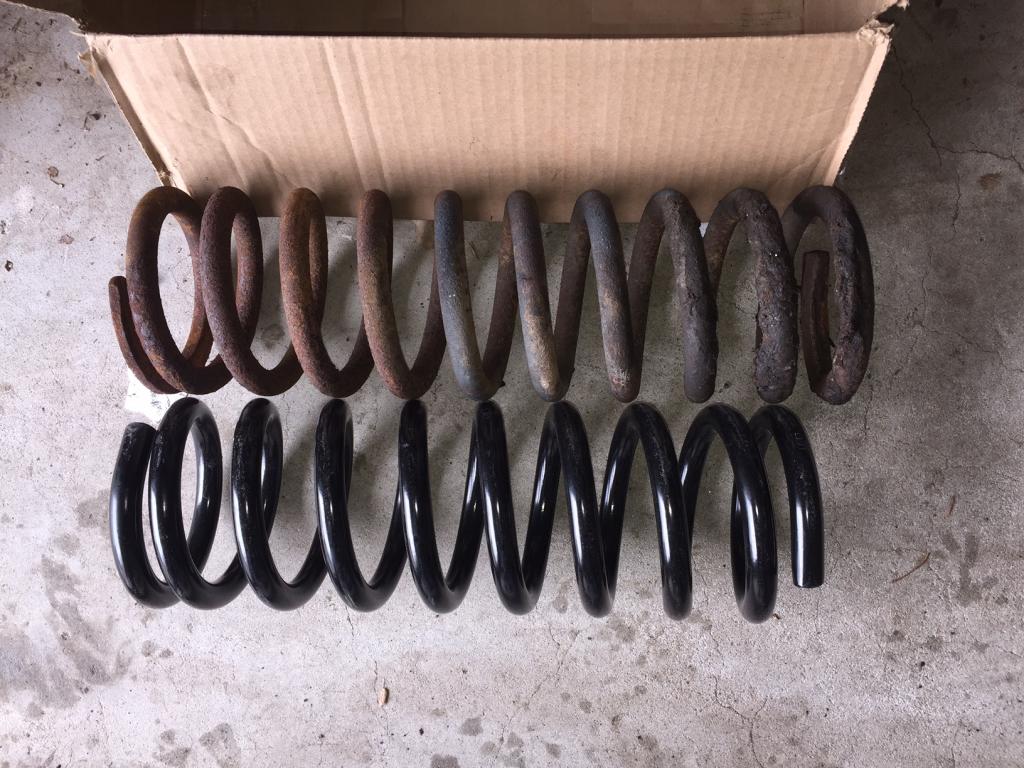
|
|
#323
02-18-2017, 01:20 PM
|
||||
|
||||
|
On Monday I dropped off the control arms and inner fenders at Xtreme powder coating in West Easton, PA http://xtremecustomcoatings.com/. They had them blasted and powder coated and ready for pickup on Friday! Now that's service! Very good price too. I was lucky in that they had a load of other stuff to do in semi-gloass black scheduled that week and I came by at the exact right time to add it to the batch.
Once I got them back, I painted the bare metal portions with stainless steel paint to duplicate the original undipped portion of the arms. Now it's time for pressing in the new bushings and balljoints. 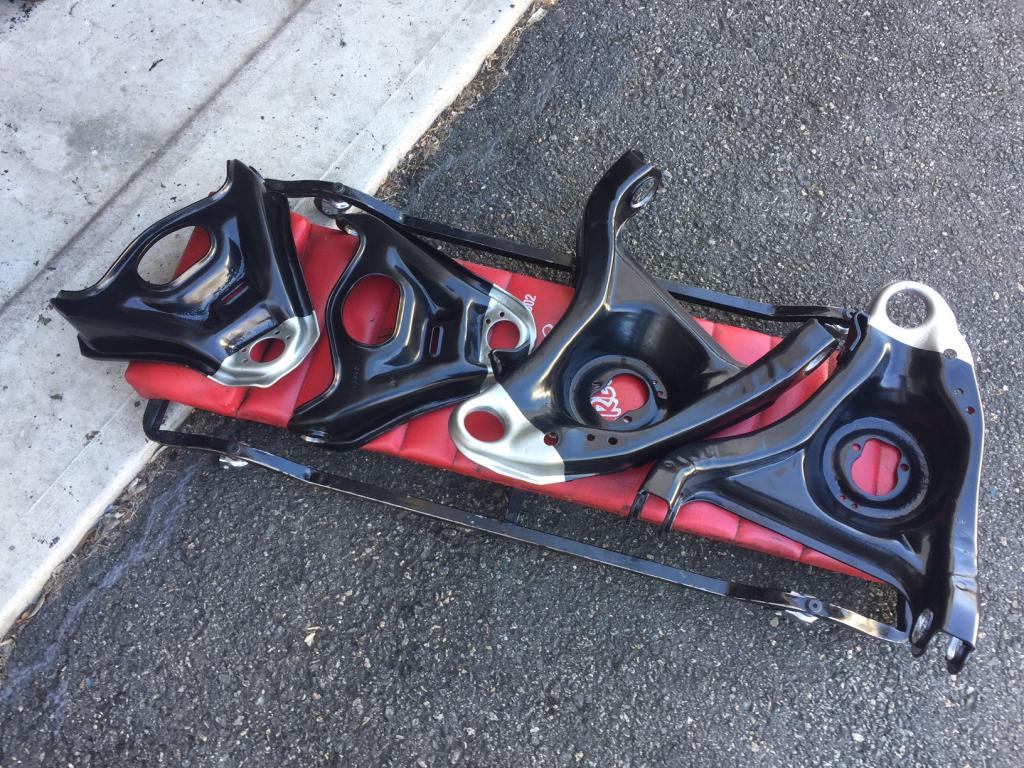
|
|
#324
02-18-2017, 01:57 PM
|
||||
|
||||
|
Steve,
I bought a set of coils for my 71 GTO from those guys and you are correct, they do excellent work. The stance on the car improved dramatically after I replaced the coils and shocks. It was perfect factory ride height after I did the work. It rode so much better, too. My wife could not get over how good that car rode. BJ
__________________
1971 GTO 455 HO 4-speed - Cameo White, White Vinyl Top, Jade Green Interior, Ram Air Hood, AC, Honeycombs and 8-track 1974 Formula 455 I Owned in 1975-1976. Now Own Its Twin From Same Dealership 
|
|
#325
02-18-2017, 08:18 PM
|
||||
|
||||
|
The installation of the lower control arm bushings was not too difficult. I used the bench vice and several 3/4 drive sockets to press them . The powder coat held up fine. I oiled the bushings so they'd slide a little easier.
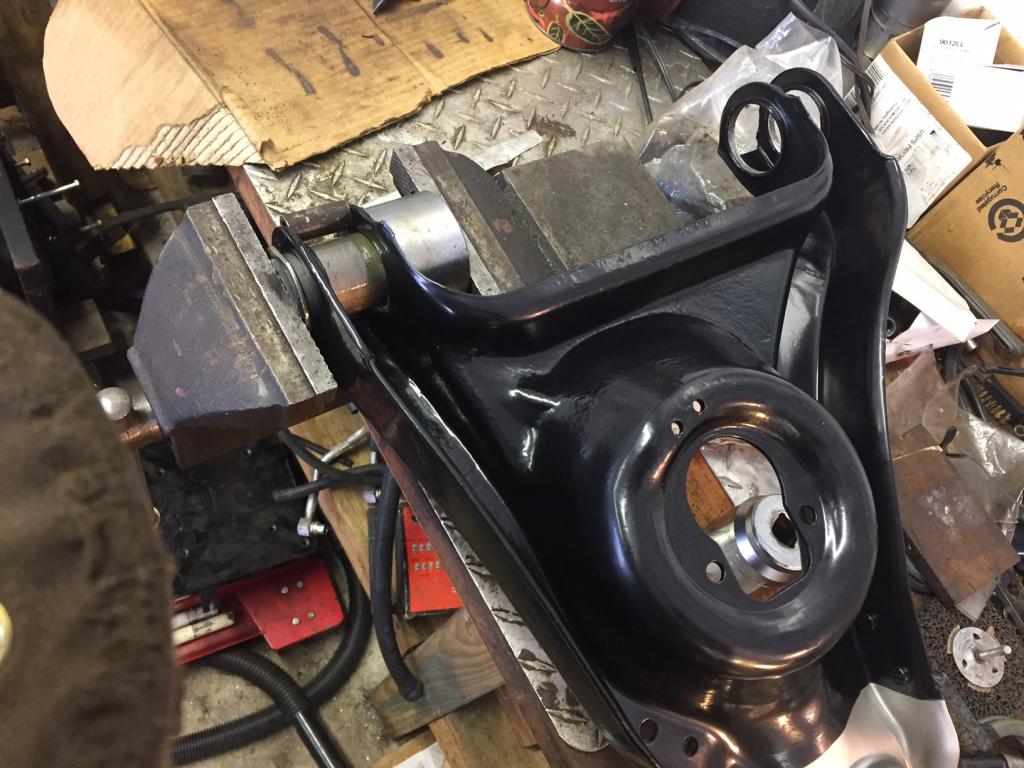 Make sure you use a spacer to keep the flanges from bending inward. I used a section of Mopar alternator bushing for the lower control arms. 
|
|
#326
02-18-2017, 08:19 PM
|
||||
|
||||
|
The upper control arms are a little more involved. If you try to press both bushings in without supporting the inner arms where the flanges are, it will bend the entire arm in half and destroy it. Originally there was a dealer issued tool (no longer available) that supported the area between the two arms while using a press. So I built my own...
First, I used the vice to press in the smaller bushing (1975 used a large and a small bushing, while earlier models used the same small bushing on both sides). I then set the pivot bar in place, passing it through the larger bushing hole and set the large bushing in place. I then set up the spacer bar I fabricated from the old central pivot bar that I had to cut off due to the factory welded-on nut. I cut it to the exact length that could run parallel to the new bar. This way I could use a couple long bolts to pin them together to hold the spacer bar from flying outward under pressure. It worked great! 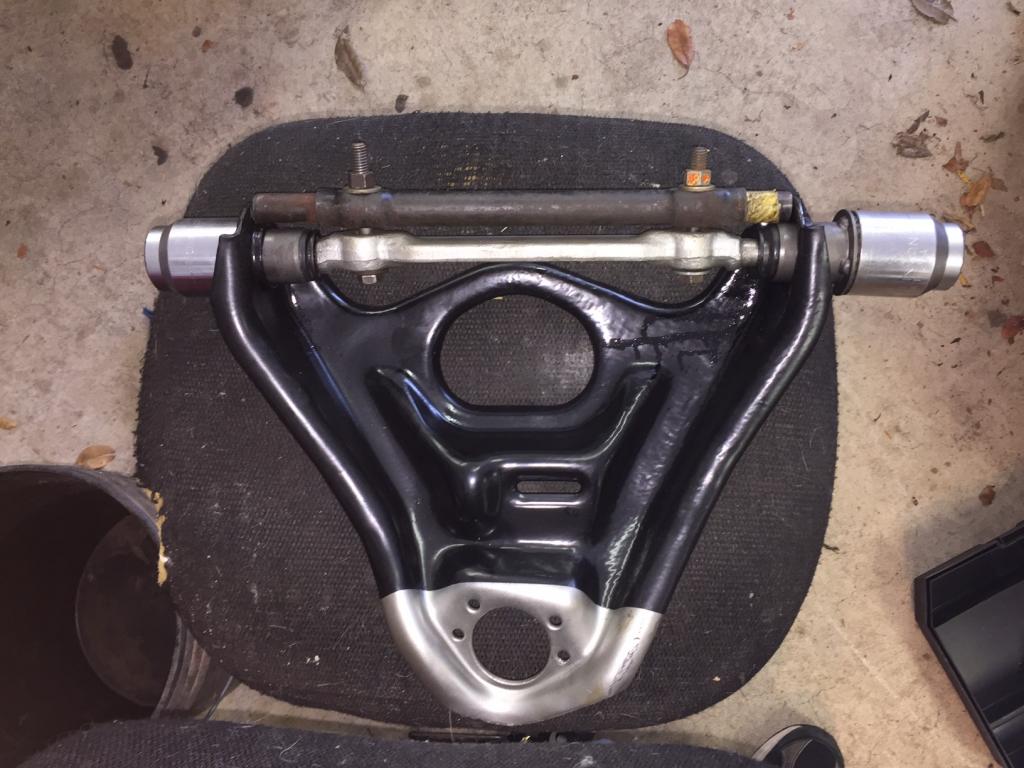 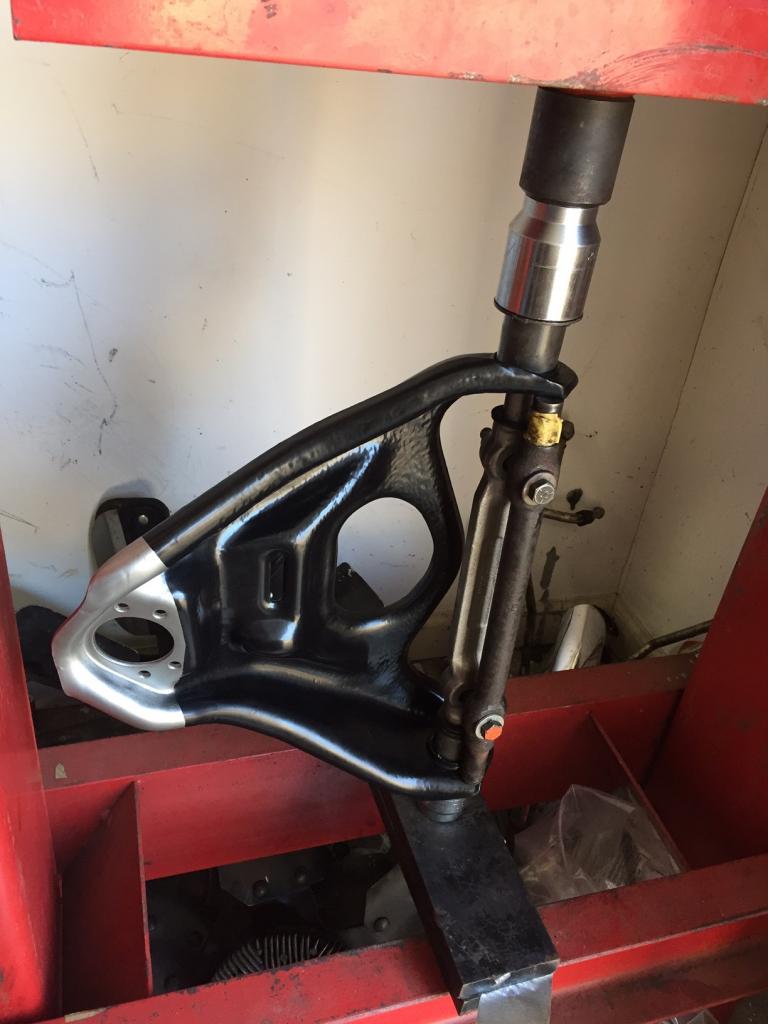 As for the powder coating holding up, it survived the process relatively unscathed. The silver paint did scratch off when I pressed the lower ball joints in but that was easily resprayed, and it didn't hurt the underlying black powder coating either. (although I had to buy another Moog ball joint after I neglected to account for how far the balljoint stud would protrude through the large sockets when pressed, and it bound up against the press'es floorplate and ruined the internal parts. So I had to go out and buy another one at the local auto parts store. They actually had the same Moog part in stock (at twice the price I paid for the first one). Last edited by njsteve; 02-18-2017 at 08:42 PM. |
|
#327
02-19-2017, 06:41 PM
|
||||
|
||||
|
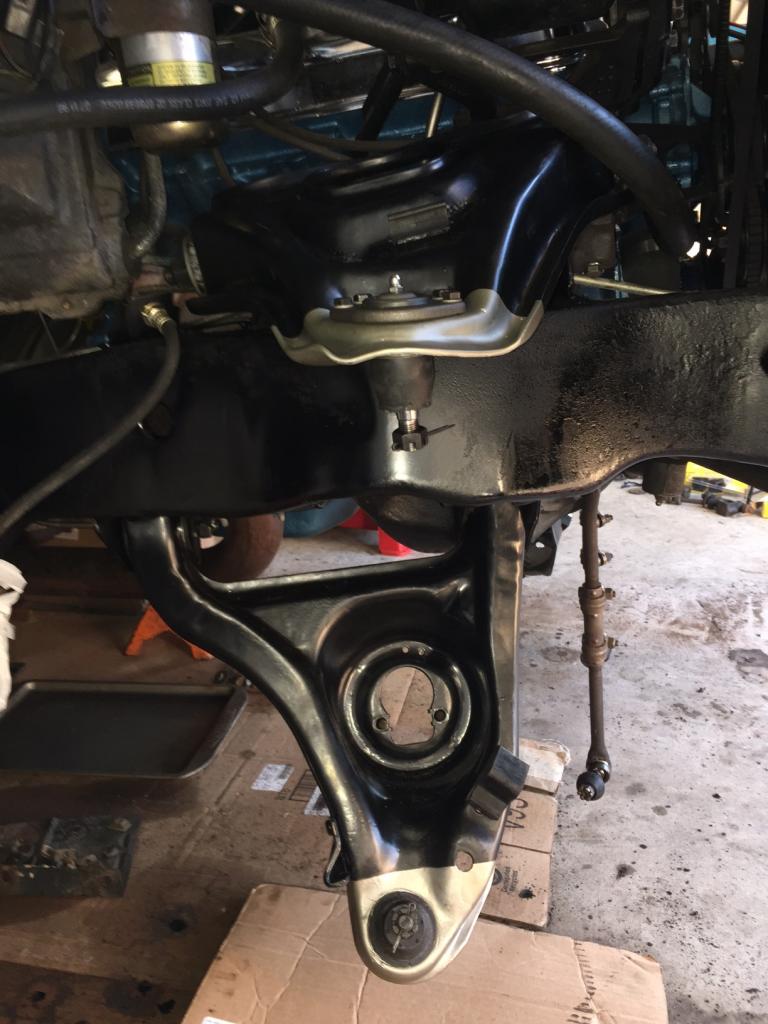
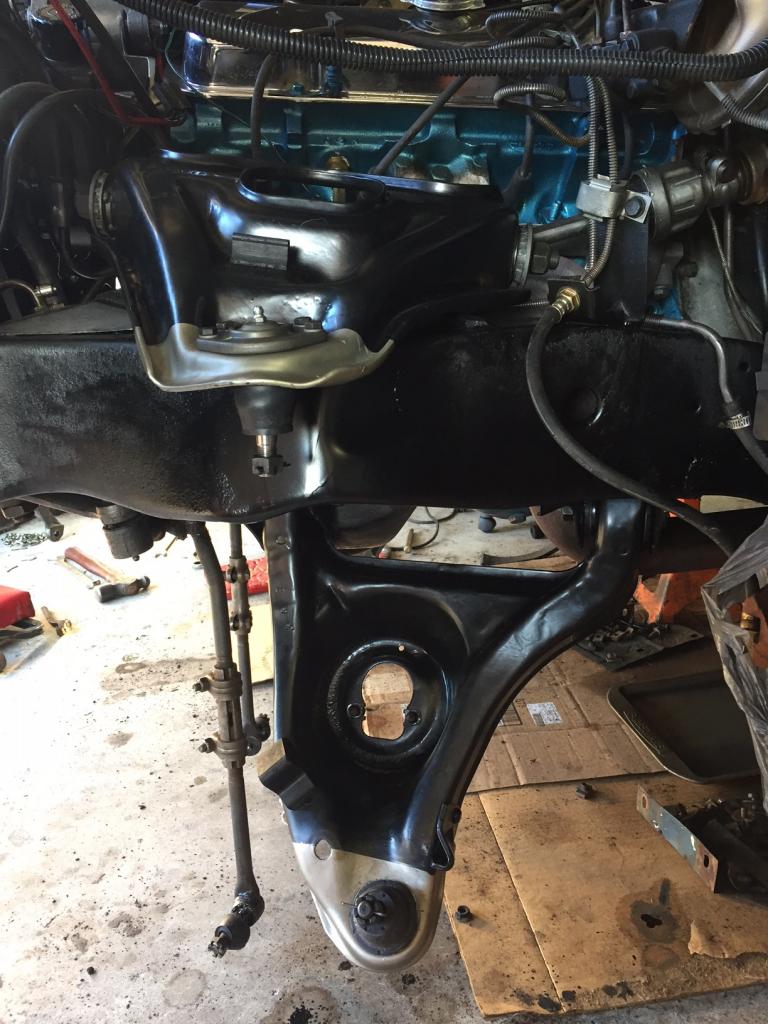
Got the replacement ball joint pressed in today and then went ahead with installing the lower and upper control arms on the car. I figure I'll leave off the freshly powder coated inner fenders so I can bring the car for an alignment and not have to worry about the guy leaning all over everything and trying the wrangle a wrench onto the upper control arm bolts if he needs to install some shims. (especially difficult on the passenger side with the A/C compressor blocking everything).
|
|
#328
02-19-2017, 08:17 PM
|
||||
|
||||
|
My cars, the Alignment gets done, the cars hood never opens. He has a special wrench and a bar he uses over top the front tires, I was impressed, on an old bear alignment rack.
__________________
"The Future Belongs to those who are STILL Willing to get their Hands Dirty" .. my Grandfather |
|
#329
02-20-2017, 07:10 AM
|
||||
|
||||
|
Mine at the alignment shop after fresh paint....hood never opened. Guys is the chair under car.
Old school... 
__________________
Mike/Illinois |
|
#330
02-20-2017, 09:02 AM
|
||||
|
||||
|
Mike, all the times I've looked at that picture, I never saw the guy!

__________________
Some guys they just give up living And start dying little by little, piece by piece, Some guys come home from work and wash up, And go racin' in the street. Bruce Springsteen - Racing In The Street - 1978 |
|
#331
02-20-2017, 08:56 PM
|
||||
|
||||
|
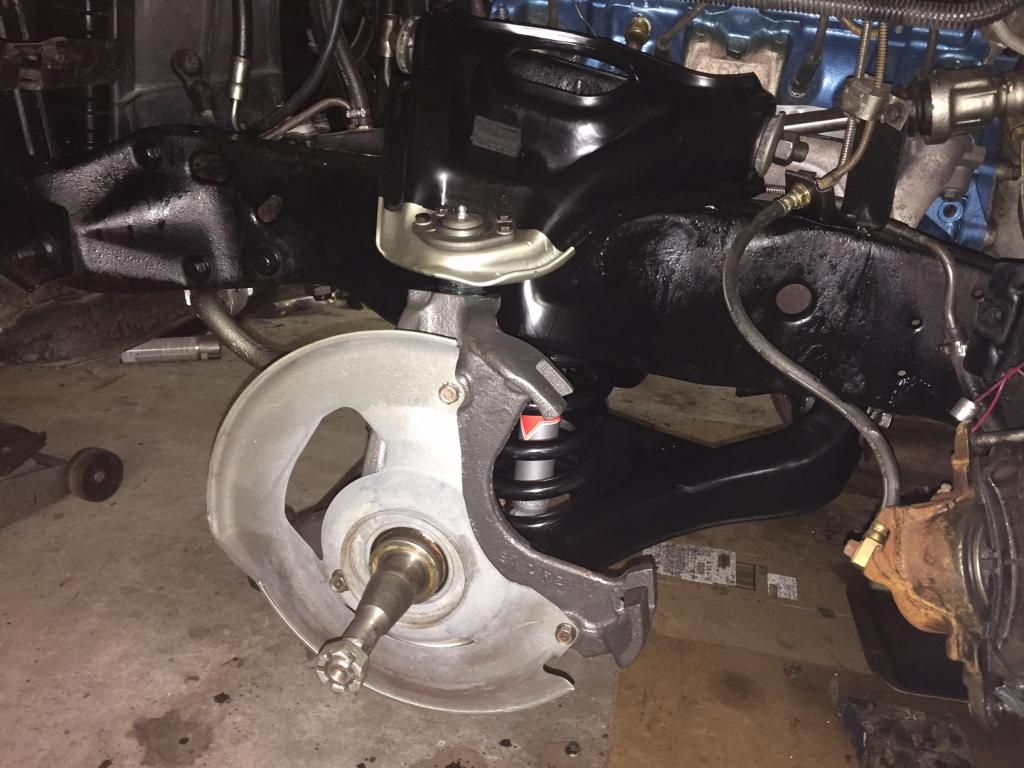
This morning I went out and was all ready to install the coil springs and then remembered that I did not have a coil spring compressor. Luckily my mechanic buddy in town had a vintage one he loaned me for the day. After a couple hours of labor I got the coil springs, spindles, new KYB gas shocks, new sway bar bushings, and the end links installed. Only thing left is the repacking the wheel bearings and painting the calipers. Then installing the inner fenders and getting an alignment, of course.
|
|
#332
02-25-2017, 09:04 PM
|
||||
|
||||
|
Got everything back together today including the powder coated inner fenders. They are quite the endeavor to install without scratching them. I ended up using duct tape around the fender flanges and the underside of the fender in the engine compartment. This alowed the inner fender to painlessly jockey for position while I used some screw drivers to pry it til it fully slipped under the fender well flanges and engaged in place.
Tomorrow I'll take her off the jackstands and see how she sits.  
|
|
#333
02-25-2017, 09:20 PM
|
||||
|
||||
|
Looks really good Steve, I have been contemplating doing the same thing with mine. Just too small of a garage to do during the winter.
__________________
1973 Formula 400 4 spd 04C build date Norwood assembly plant. |
|
#334
02-26-2017, 01:09 AM
|
||||
|
||||
|
Looks great!
__________________
"The Future Belongs to those who are STILL Willing to get their Hands Dirty" .. my Grandfather |
|
#335
02-26-2017, 12:26 PM
|
||||
|
||||
|
Took Gramma's car out for a test drive this morning. Very smooth. No floating or tire rubbing during suspension movement when going over bumps. Actually no real wallowing or jouncing at all, like it did with the old parts. It rides very nicely now. Not even a hint of a rub at full lock in either direction any more.
Prior to the suspension rebuild, the passenger side front tire was a good 3/8" further out of the wheel well (when viewed from above) than the driver's side - due to the worn control arm bushings. Now it is in the exact location as the driver's side tire. YAY! Once I pull the rear end out, rebuild the rear springs and replace the bushings and shocks, she should level out a bit. The ride height is as follows: Left Front: 28-11/16" to fender edge..................Right Front: 28-8/16" to fender edge Left Rear: 28-13/16" to fender edge...................Right Rear 28-6/16" to fender edge I thought it a little odd that the driver's side is taller than the passenger side. I then went and measured the 19,000 mile SD455 fender heights and found that it had the exact same stagger gap between left to right. Here is a photo of the car with the factory 80,000 mile suspension components:  And today with the new front springs (prior to the test drive) 
|
|
#336
02-26-2017, 12:41 PM
|
||||
|
||||
|
Looks good Steve. How about an underhood shot to show off the inner fenders?
|
|
#337
02-26-2017, 12:59 PM
|
||||
|
||||
|
Here you go! Now I guess it's time to start detailing the rest of the engine bay...
Anyone have an extra set of the T/A fender-to-radiator support bars that would fit on this car? 
|
|
#338
02-26-2017, 04:30 PM
|
||||
|
||||
|
I was thinking (always a dangerous endeavor)...it's probably all the A/C gear that causes these things to sit lower on the passenger side. You have that heavy A-6 compressor, the evaporator and fiberglass box, and all the hoses and extraneous other shrapnel that go along with the system. Not to mention the heavy radial spare tire and rim on the right side as well. All that would tend to make the car unevenly weighted to the right side.
Last edited by njsteve; 02-26-2017 at 04:47 PM. |
|
#339
02-26-2017, 04:47 PM
|
||||
|
||||
|
Quote:
As far as the height difference between drivers side and passenger side. Do you think they are taking into account for a driver? Granted I know that will change again once you get more passengers in the vehicle. It would be interesting to get height dimensions of AC vs non AC cars.
__________________
1973 Formula 400 4 spd 04C build date Norwood assembly plant. |
|
#340
02-28-2017, 05:13 PM
|
|||
|
|||
|
What about non-a/c cars. The battery, alternator, power steering, and starter are all on the drivers side. I have the engine and trans out of the 71 right now, and it sits noticeably higher on the drivers side.
Quote:
|
| Reply |
|
|
The PY Online Forums is the largest online gathering of Pontiac enthusiasts anywhere in the world. Founded in 1991, it was also the first online forum for people to gather and talk about their Pontiacs. Since then, it has become the mecca of Pontiac technical data and knowledge that no other place can surpass.


 Linear Mode

