| FAQ |
| Members List |
| Social Groups |
| Calendar |
| Search |
| Today's Posts |
|
#1081
|
||||
|
||||
|
I just installed a set on my Gramma's 75 Firebird last week. They were powdercoated and I didn't have any scratch problems. Used the old style internal clamp compressor and just clamped between four and five coils.
http://forums.maxperformanceinc.com/...gramma&page=17 |
|
#1082
|
||||
|
||||
|
Can I assume Bob that this method when you get to the floor jack stage under the lower control arm, will only work if the sub frame is installed in the car with some weight pressing down ? If the sub frame is separate, won't the floor jack just raise the whole sub frame and not push up only the lower control arm?
Sent from my iPhone using Tapatalk
__________________
...Steve T. "Resurrection of a 1970 Trans Am" Blog www.455hota.wordpress.com ------------------------------------- 1966 GTO 4 speed Hardtop Alabama car (Marina Turquoise w turquoise interior) 1970 TA 4 speed Canadian car (Lucerne Blue w bright blue interior) |
|
#1083
|
||||
|
||||
|
Quote:
The "hooks ( which are angular so they match the curve of the spring angle) are inside the spring, threaded on the jacking bolt. YOu use a Impact Gun ( oil on threads) to tighten the "hooks" and pull them towards the top of the shock tower, making sure your spring is "clocked" into the Grove for it. This pulls the spring up enough to swing the lower A frame up and connect it to the spindle. If you use a thick ratchet strap under the A frame for safety youll Not scratch anything. You can also use 2 sets of hooks and squeeze the spring together ( loading it with a lot of tension), then slide the unit up into the shock tower and connect the A Frame, then unscrew. This second way , to me is a bit more dangerous having all the energy in your hands and not much chance for a safe escape if something ( made in china) broke. ( Hex end of threaded rod goes Down for this type of install) Fact, Springs in later 70's, Brand new, On the Transport, had little to Zero paint, and had scratches in a few spots too)
__________________
"The Future Belongs to those who are STILL Willing to get their Hands Dirty" .. my Grandfather |
|
#1084
|
||||
|
||||
|
The old timer methud for installing springs in an empty frame was to wrap a chain around the bottom of the floor jack and the top of the frame rail and lock the loop of chain in place with a minimum of slack. This way when you start to lift the subframe with the jack, at a certain point the chain will be be fully extended with no slack and the jack will now start compressing the control arm and spring.
|
|
#1085
|
||||
|
||||
|
Thanks for the clarification. The jack is truly just lifting the lower control are in to place. The compressed energy of the spring is held in place by the spring compressor. The floor jack is not doing any additional compressing of the spring. I understand now. This method would have helped a lot when I di mine a couple years back!!! Thanks!
Sent from my iPhone using Tapatalk
__________________
...Steve T. "Resurrection of a 1970 Trans Am" Blog www.455hota.wordpress.com ------------------------------------- 1966 GTO 4 speed Hardtop Alabama car (Marina Turquoise w turquoise interior) 1970 TA 4 speed Canadian car (Lucerne Blue w bright blue interior) |
|
#1086
|
||||
|
||||
|
Quote:
PS. RENTING a OEM internal spring compressor used from up top ( one set of hooks) is FREE at auto zone ( $50.00-$100.00 deposit till returned)
__________________
"The Future Belongs to those who are STILL Willing to get their Hands Dirty" .. my Grandfather |
|
#1087
|
||||
|
||||
|
That was the way they taught us at Denver Automotive and Diesel College back in 1980. So I am officially Old School, with the diploma to prove it! ;-) They did also advise us to use a second section of chain looped through the coil and frame to prevent it the coil from flying out and killing you if it sprung out of the pocket during the process. (a common occurence).
|
|
#1088
|
||||
|
||||
|
The subframe was strapped to the lift as shown in the pictures below. Using this method the jack is providing significant lift to compress the springs. You only use the compressor enough to get the spring in the pocket and then let the Jack provide the rest of the energy needed to compress the spring enough to get the spindle on. The Jack is much more controlled and safer than the spring compressor. I can't imagine doing it the other way with a fully cocked and loaded spring in your hands. This method took about 30 minutes each side.
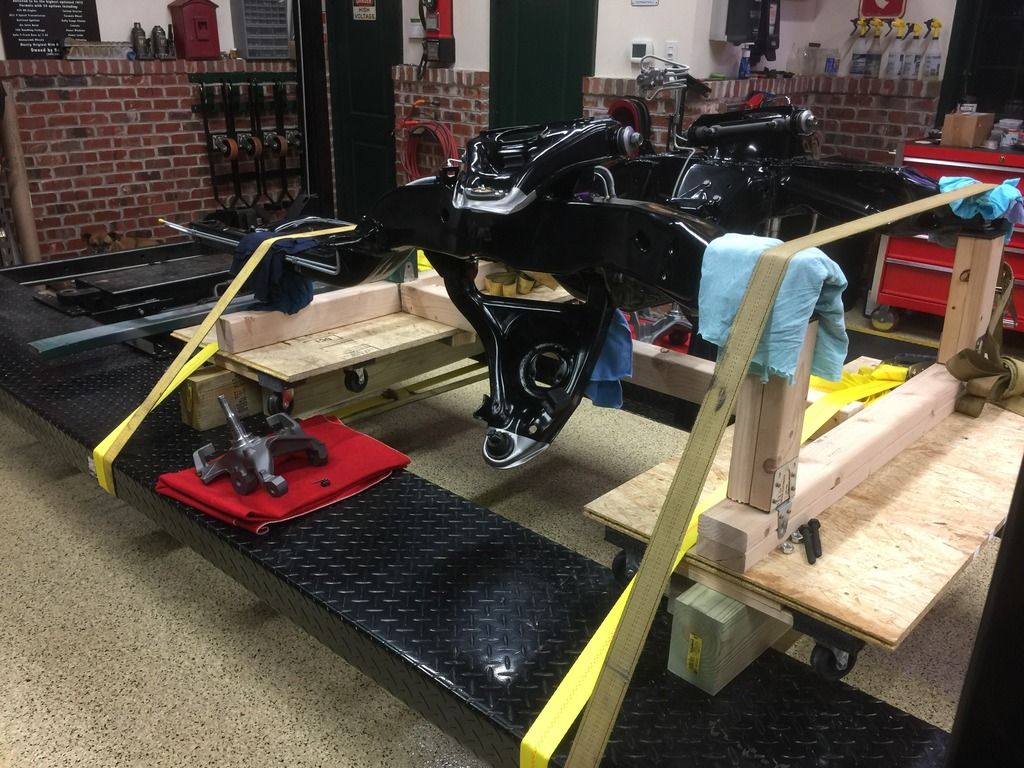 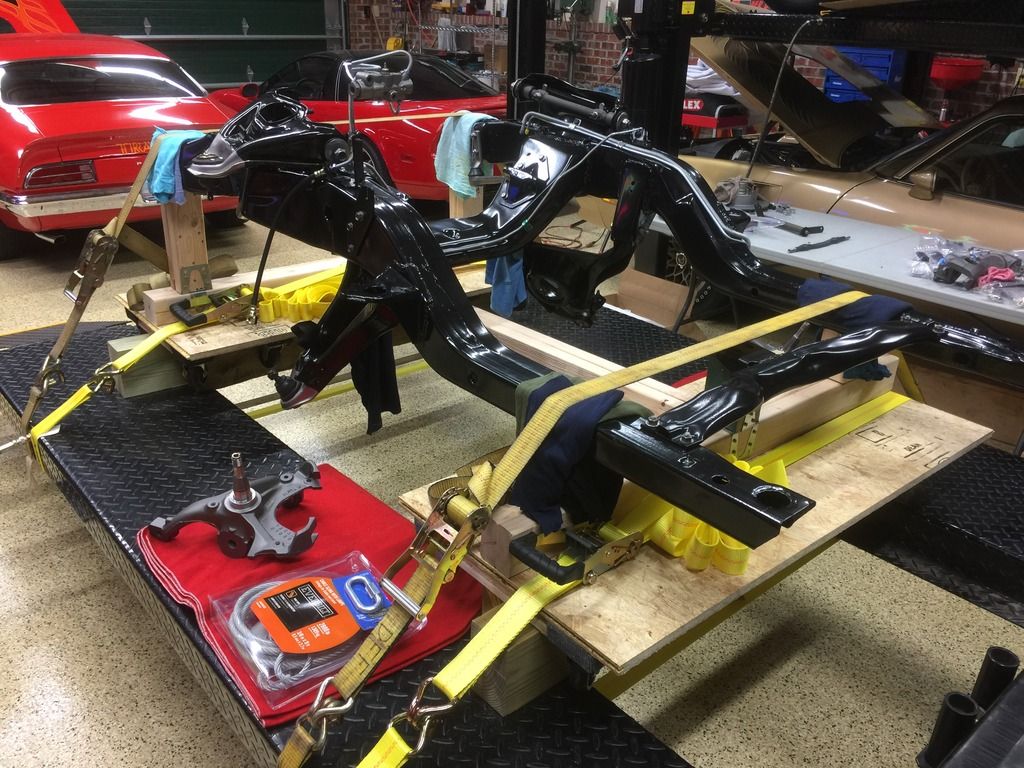 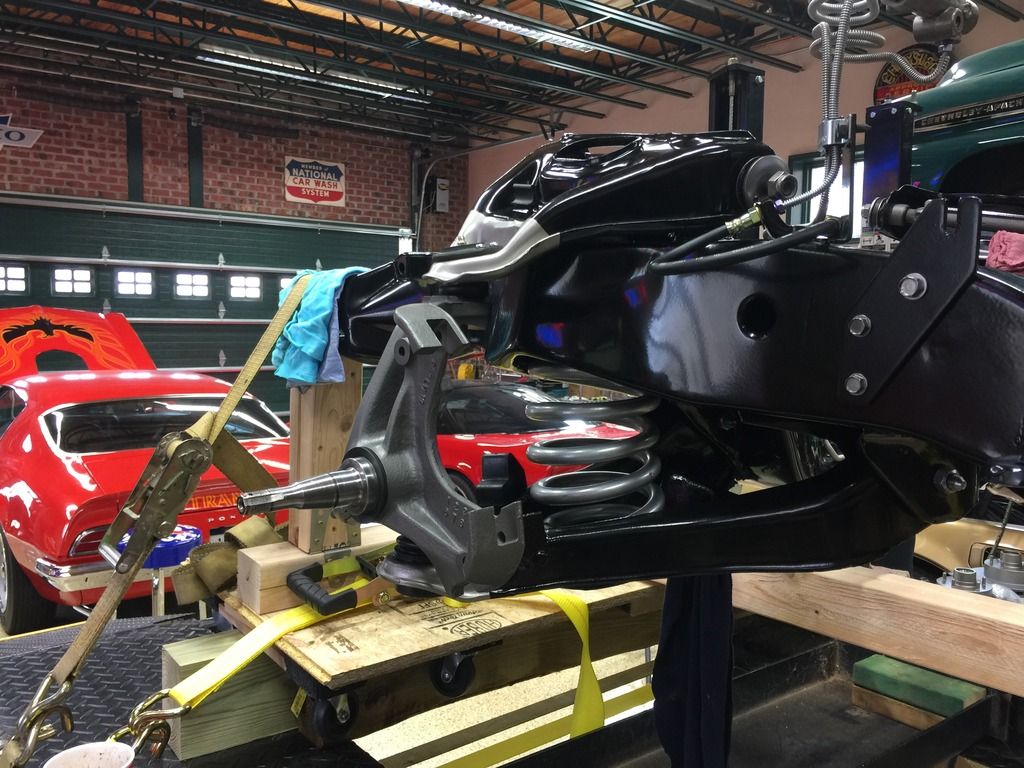
|
|
#1089
|
||||
|
||||
|
Wheels are on. Barring some unforeseen problem the drivetrain and subframe should get reunited this weekend. I'm ready to get this done and move onto the next phase.
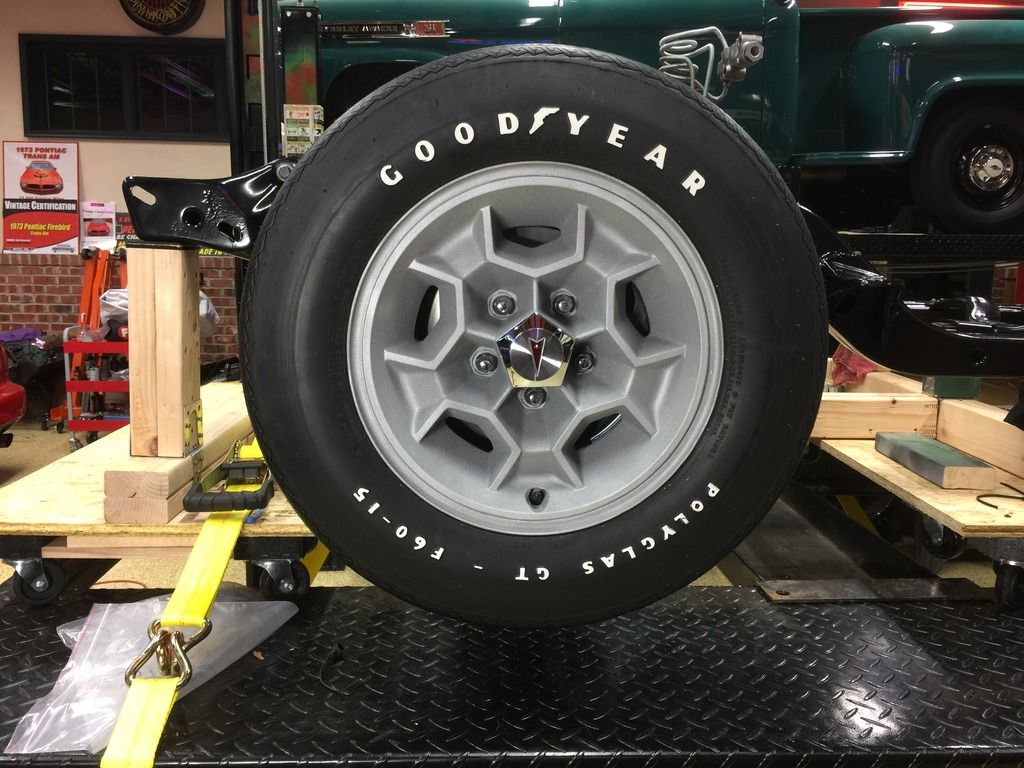
|
|
#1090
|
||||
|
||||
|
What's the next phase after the engine drop in?
__________________
Mike/Illinois |
|
#1091
|
||||
|
||||
|
Probably start digging into some of the interior stuff. Seat tracks, pedal assemblies, emergency brake, dash, steering column, seat belts. Also need to bite the bullet and decide what I am going to do on the AC suitcase and heater box. Rear axle and springs is out there also, but that will have to wait until Darrell gets the car on a rotisserie.
|
|
#1092
|
||||
|
||||
|
Quote:
|
|
#1093
|
||||
|
||||
|
So, things are ready for dropping in the drivetrain. The subframe is on the tires and off the jig in front. I can't wait to get this thing nailed down tomorrow.
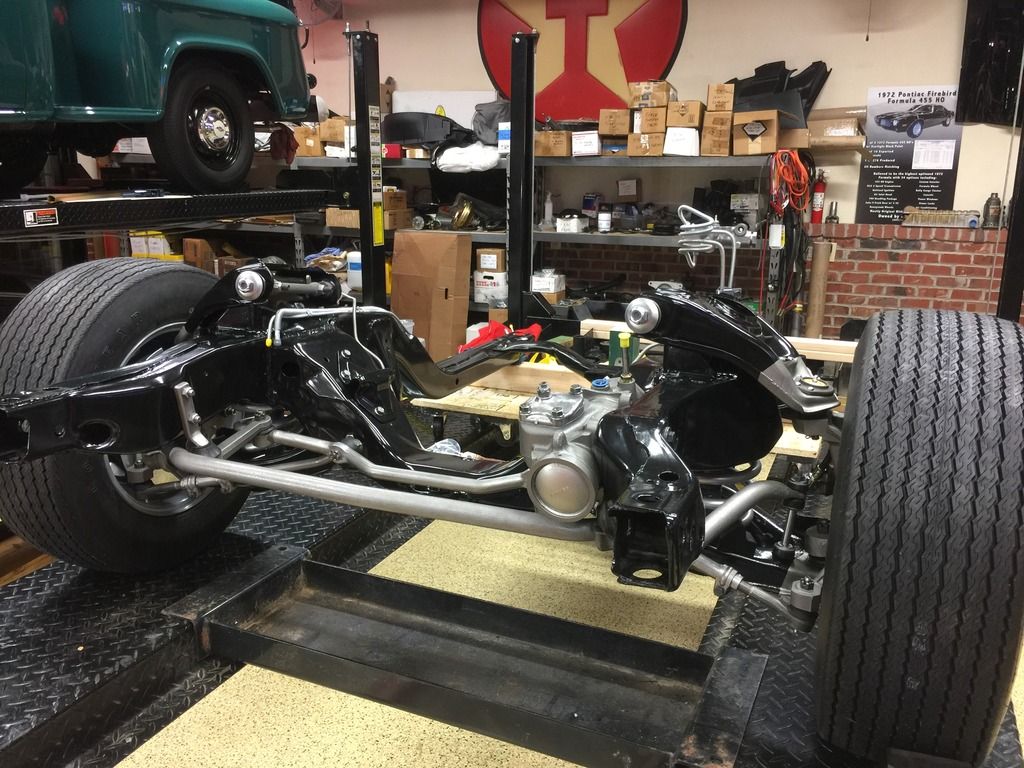 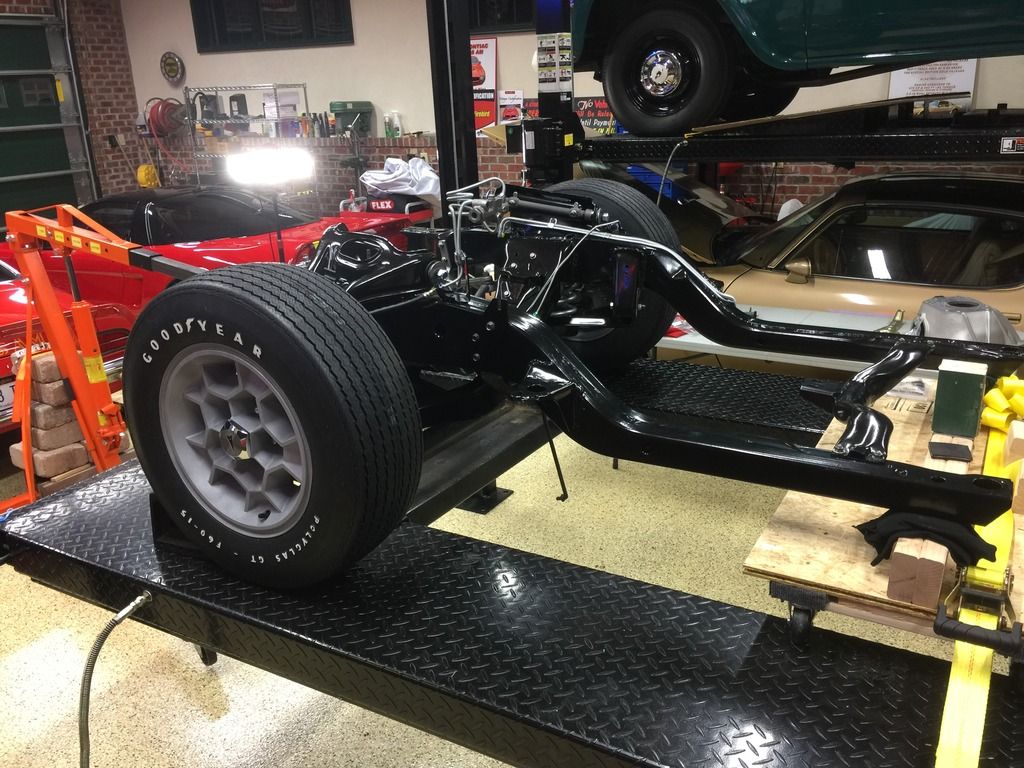
|
|
#1094
|
||||
|
||||
|
Looking Great Bob!! wow, a sure motivation to the rest of us !
__________________
"The Future Belongs to those who are STILL Willing to get their Hands Dirty" .. my Grandfather |
|
#1095
|
||||
|
||||
|
Just so nice!
__________________
Some guys they just give up living And start dying little by little, piece by piece, Some guys come home from work and wash up, And go racin' in the street. Bruce Springsteen - Racing In The Street - 1978 |
|
#1096
|
||||
|
||||
|
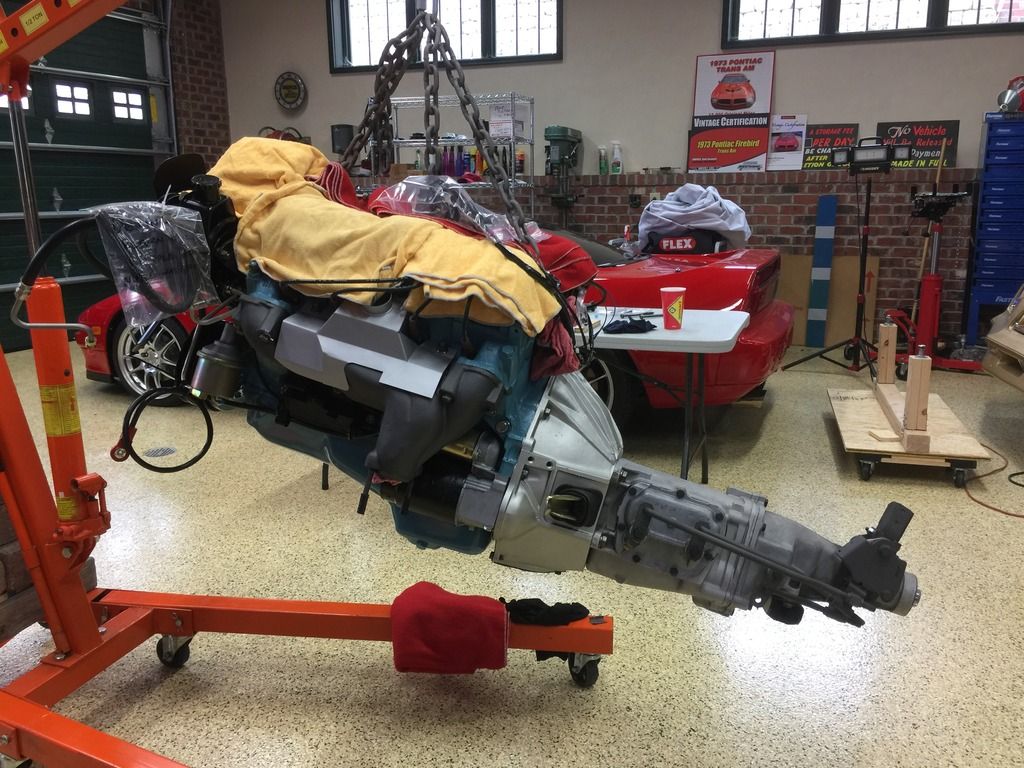
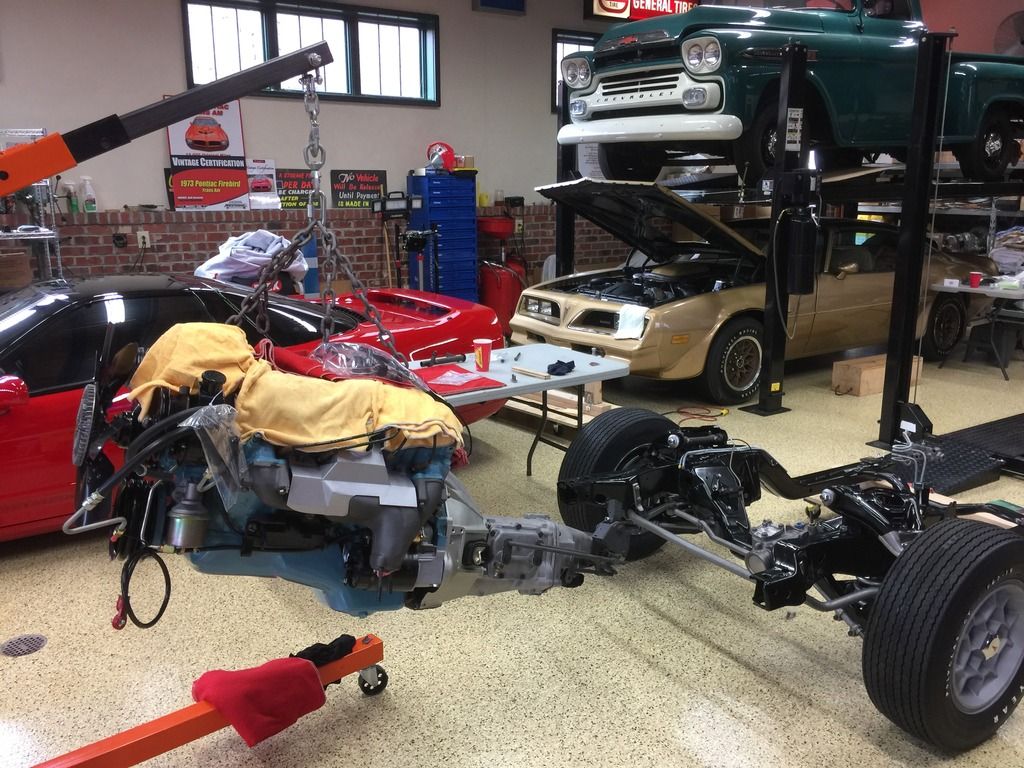
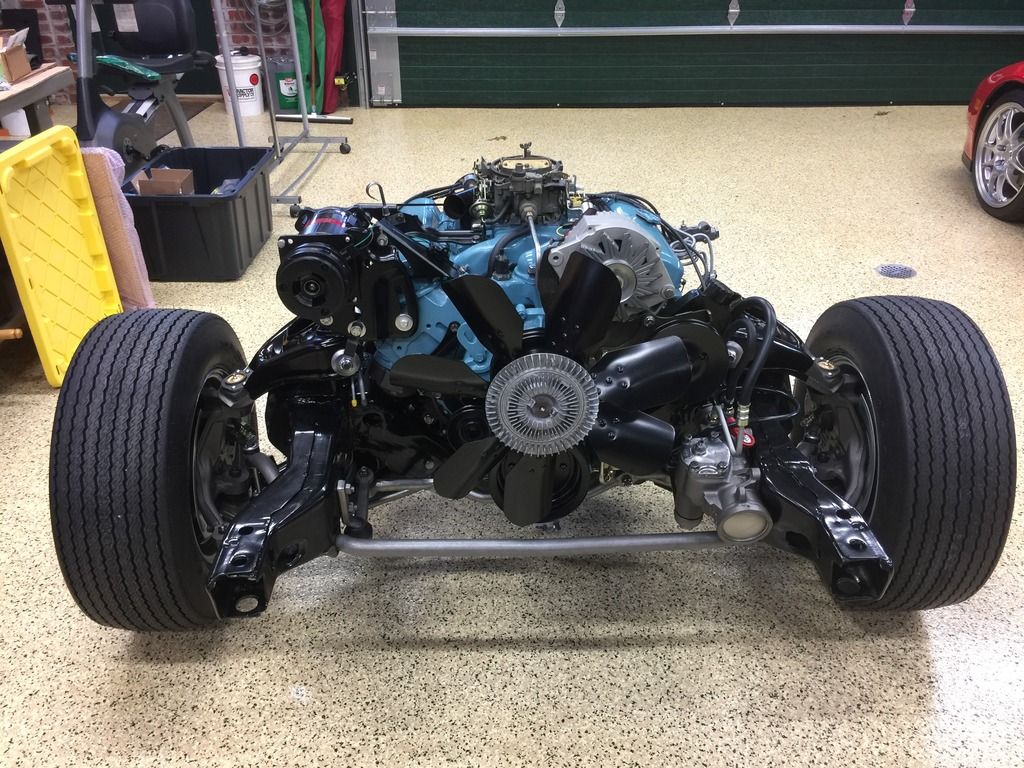
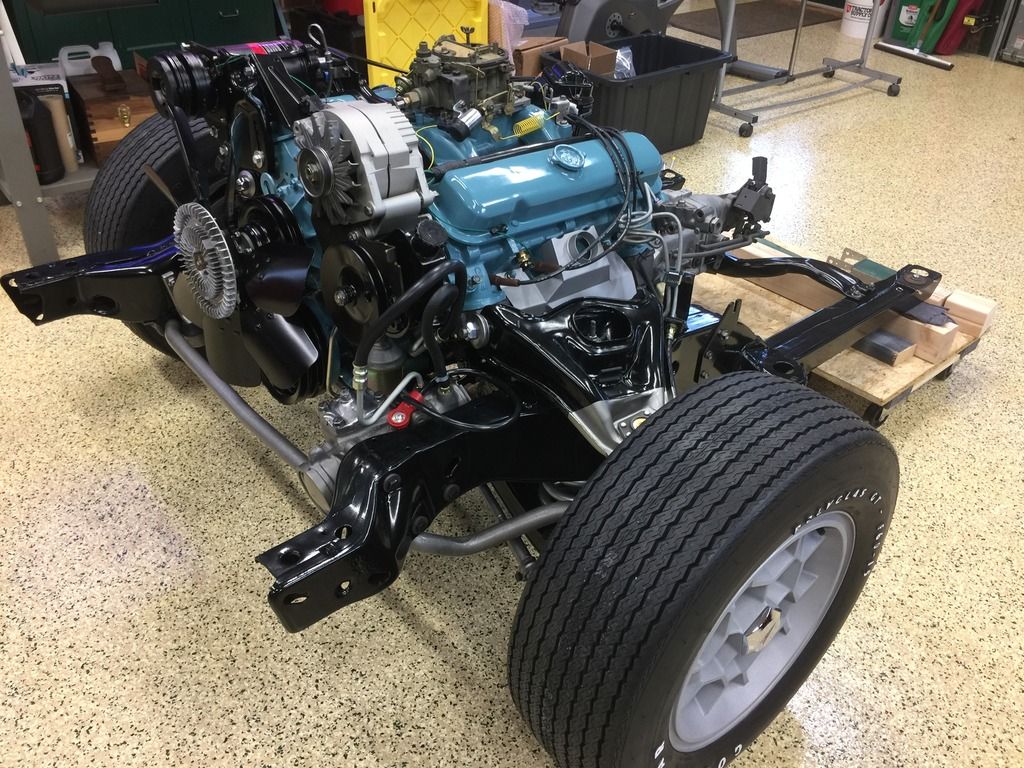
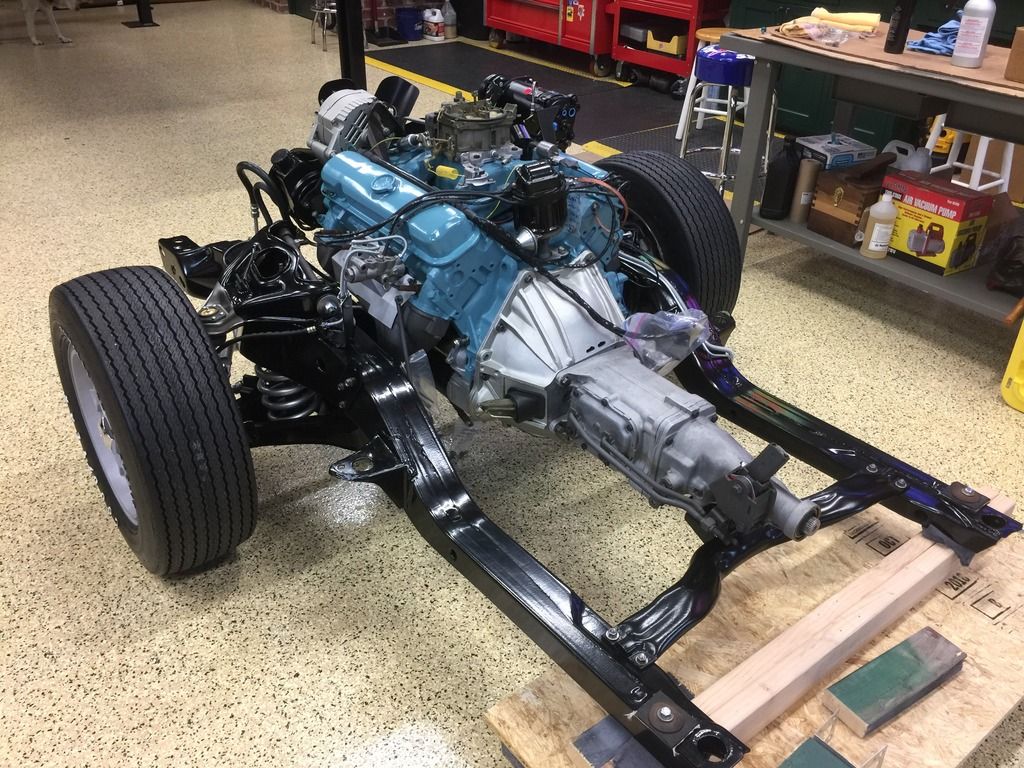
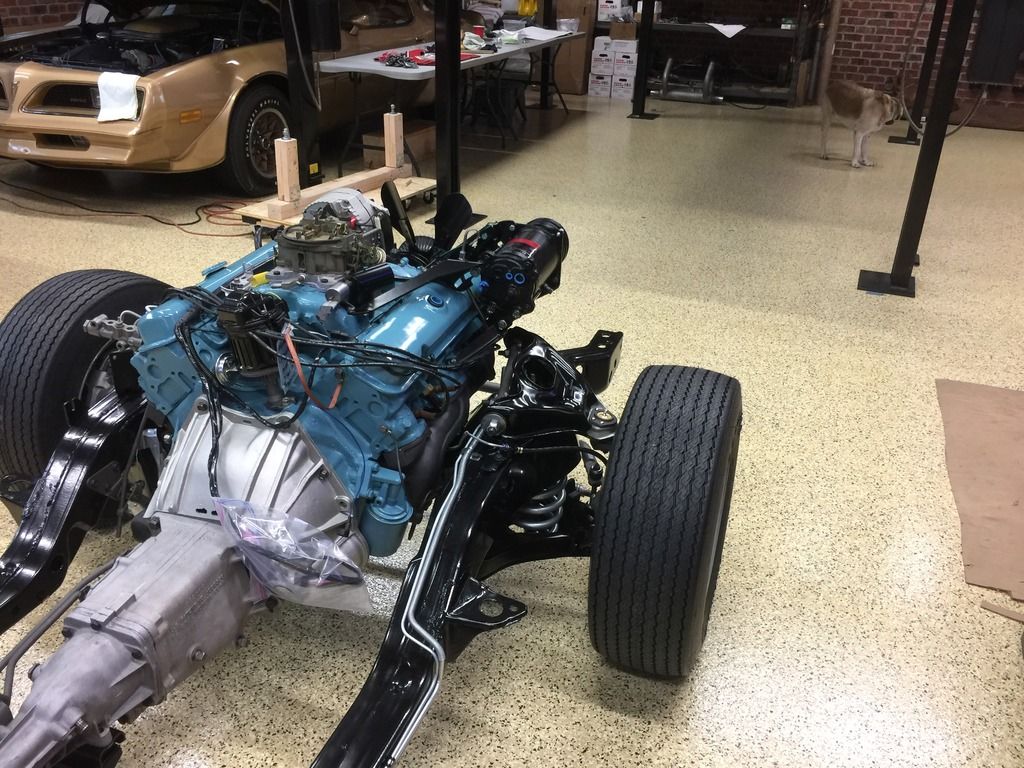
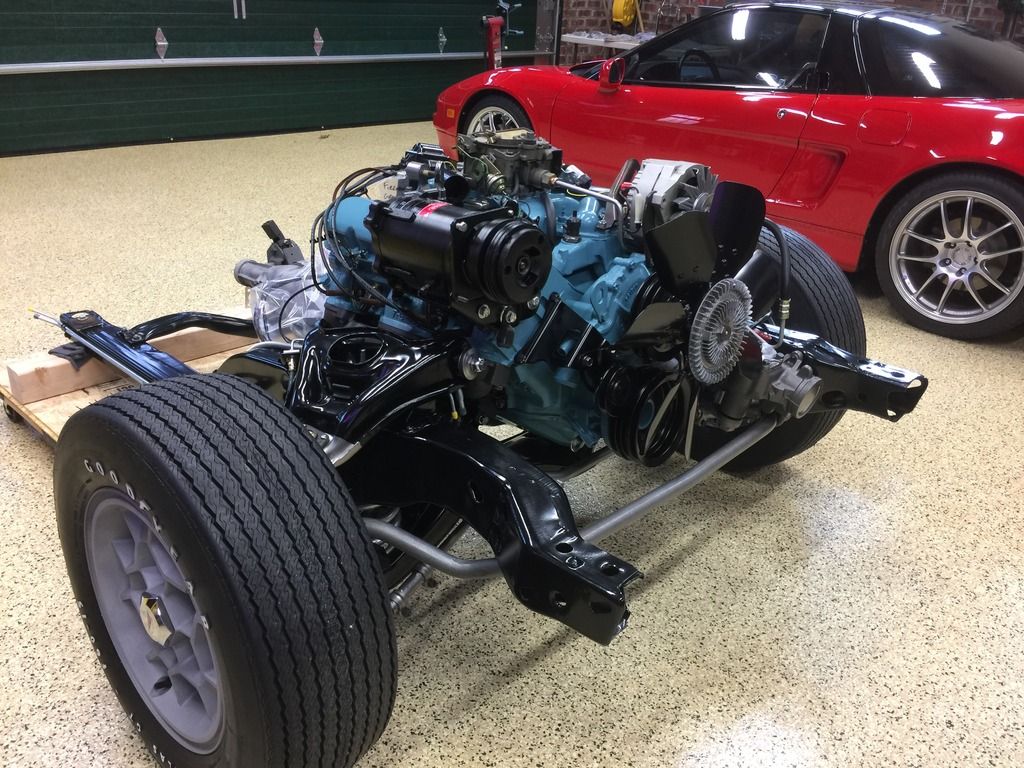
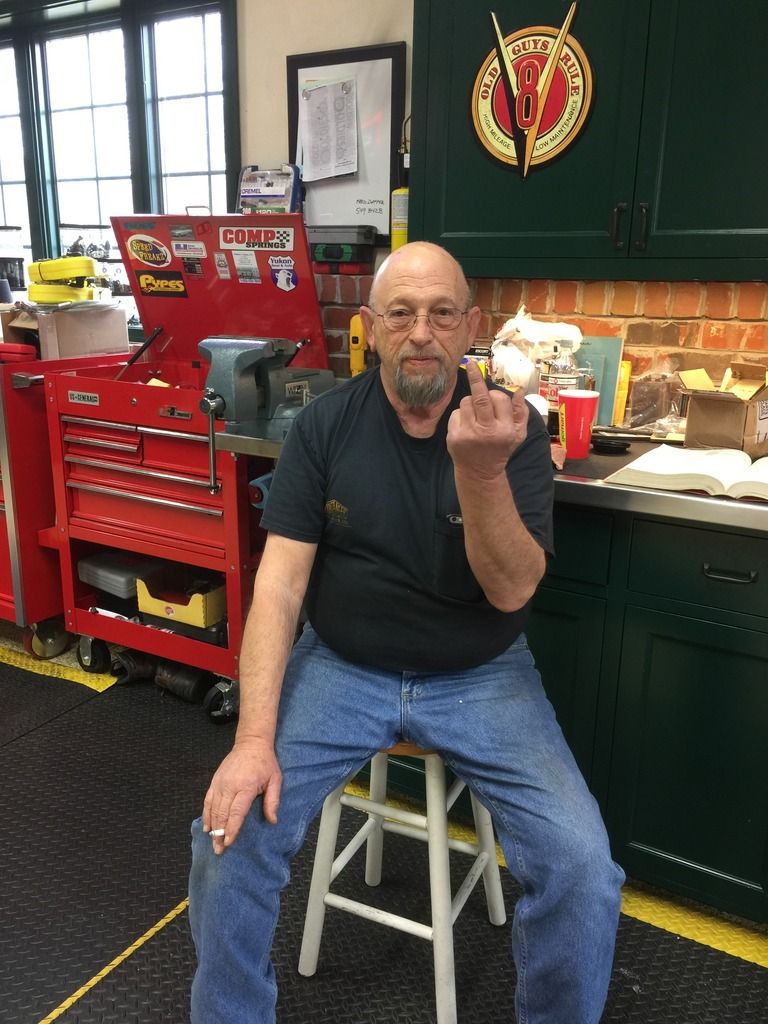
Well, a lot got done today and the drivetrain is now reunited with the subframe. It all went pretty well with no casualties, bruised egos or broken parts. There are a couple small touch ups needed, but extremely minor. The biggest problem we had was the weld nut on the left motor mount had damaged threads, so we ended up having to pull the motor after getting it set, removing that mount and tapping the hole. There was no way to do it in place. We did weinie out on trying to support the fully dressed engine and trans from a lift plate mounted to the aluminum intake. Maybe unnecessarily, but better safe than sorry. Here's a few pics along with greetings from MPD.
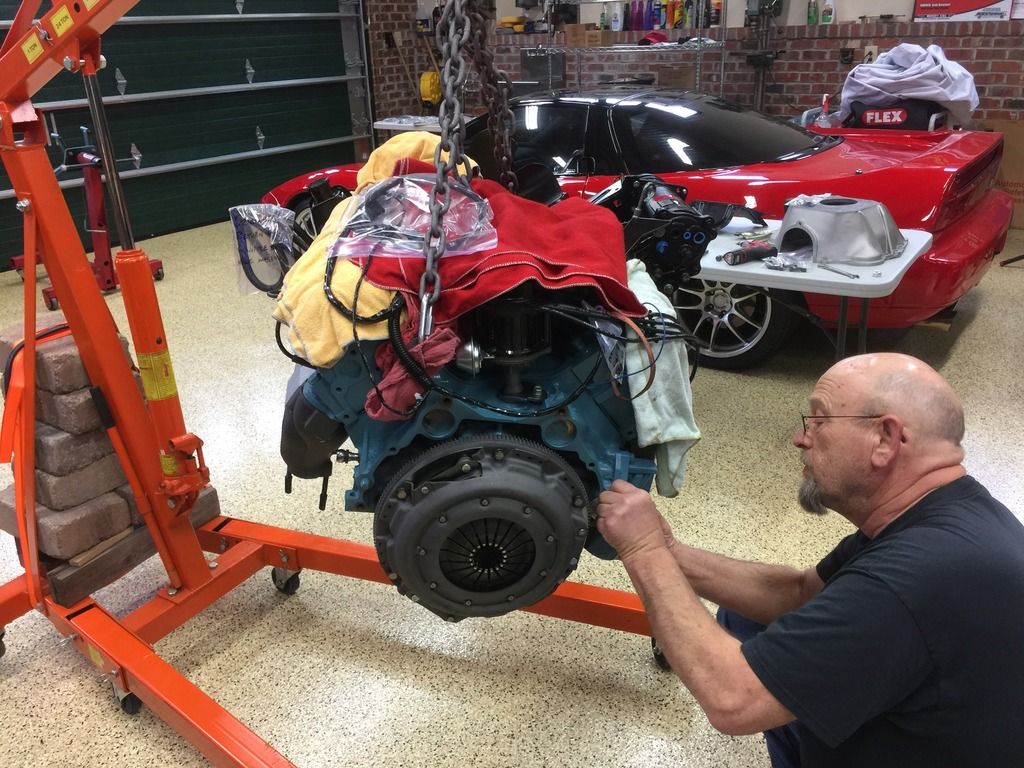 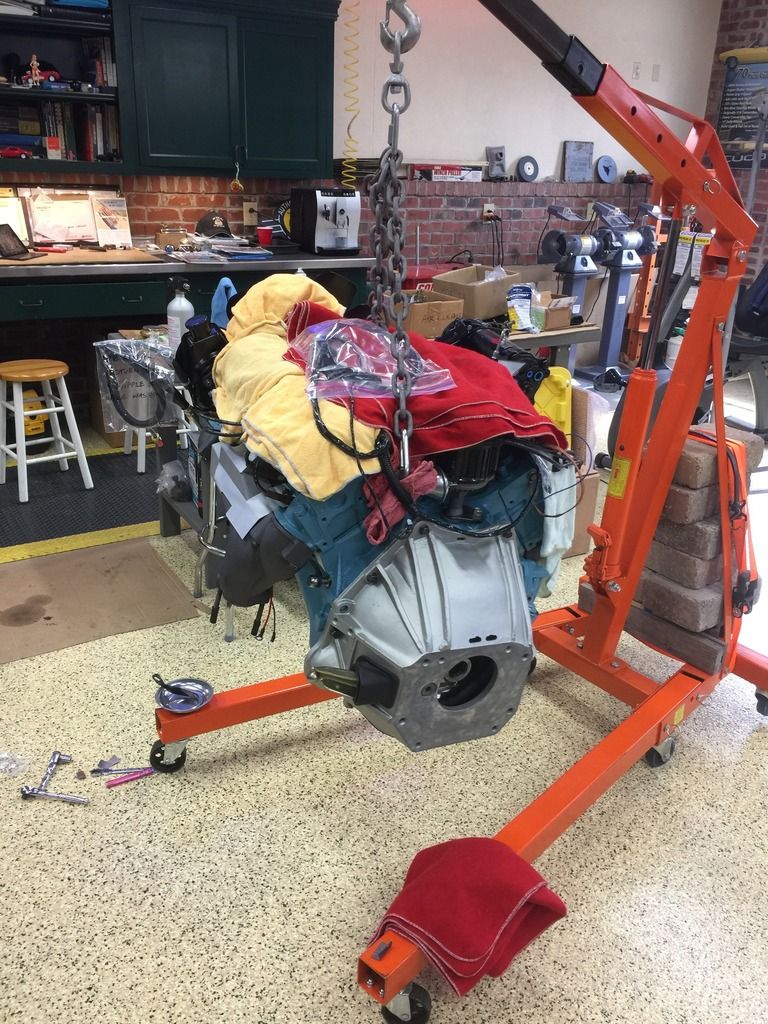        
|
|
#1097
|
||||
|
||||
|
A work of art, cheers to the master flipper
|
|
#1098
|
||||
|
||||
|
Beautiful work Bob/Dave! Your attention to detail is amazing. Do you follow any documentation for type of plating, or color/shade of paint for the various components and fasteners? I have thought in the past to do research on different plating and paint used, but it looks like you really put a lot into making sure anything painted or plated has the right color/sheen applied. Just currious if this is all written down somewhere, or wether you had to research every nut, bolt, and component as you restored each piece.
Thanks. I save your pics as a reference....even the ones of MPD
__________________
1966 GTO Vert automatic. 1969 CR Judge Ram Air III 4sp Pattern Car. 1969 GTO standard 350HP TH-400. 2006 GTO Phantom Black 6spd. 1972 Formula 455HO Ram Air. 1976 LE Trans Am 50th Anniversary Edition with T top. 1976 Formula 350. 1977 Grand Prix Model J 350. 1978 Trans am 400 Pontiac. 1979 Trans am 403 Olds. 1968 Olds 442. 1971 TR6. |
|
#1099
|
||||
|
||||
|
Love your clean shop Bob. Your and Daves work looks fantastic.
__________________
1972 Trans Am Lucerne Blue /white 4spd 1973 Trans Am 455 4spd, White/Black..Junior Gold POCI 2012 1974 Trans Am SD455 4spd. 29k mile unrestored. Buc Red/white 1948 Lincoln Continental Cabriolet V12. Restored. 1951 Willys Jeepster 6 cyl. 1968 Olds Cutlass W31 Ram Rod. Nocturne Blue, 4spd, stripper 1969 Hurst Olds survivor 1970 Challenger RT Convert . 383 4spd. Plum Crazy/white 1971 Datsun 240Z 1978 Datsun 280Z Black Pearl edition 1983 Jeep CJ7 Renegade 2013 Corvette Gran Sport |
|
#1100
|
||||
|
||||
|
Bentwheelbob's car world is like an alternate universe of perfection and toys... I love peeking in.... nice job on latest....... I keep looking for like an oil spill to point out, never happens....

__________________
72 Bird |
| Reply |
|
|