| FAQ |
| Members List |
| Social Groups |
| Calendar |
| Search |
| Today's Posts |
|
#1
|
||||
|
||||
|
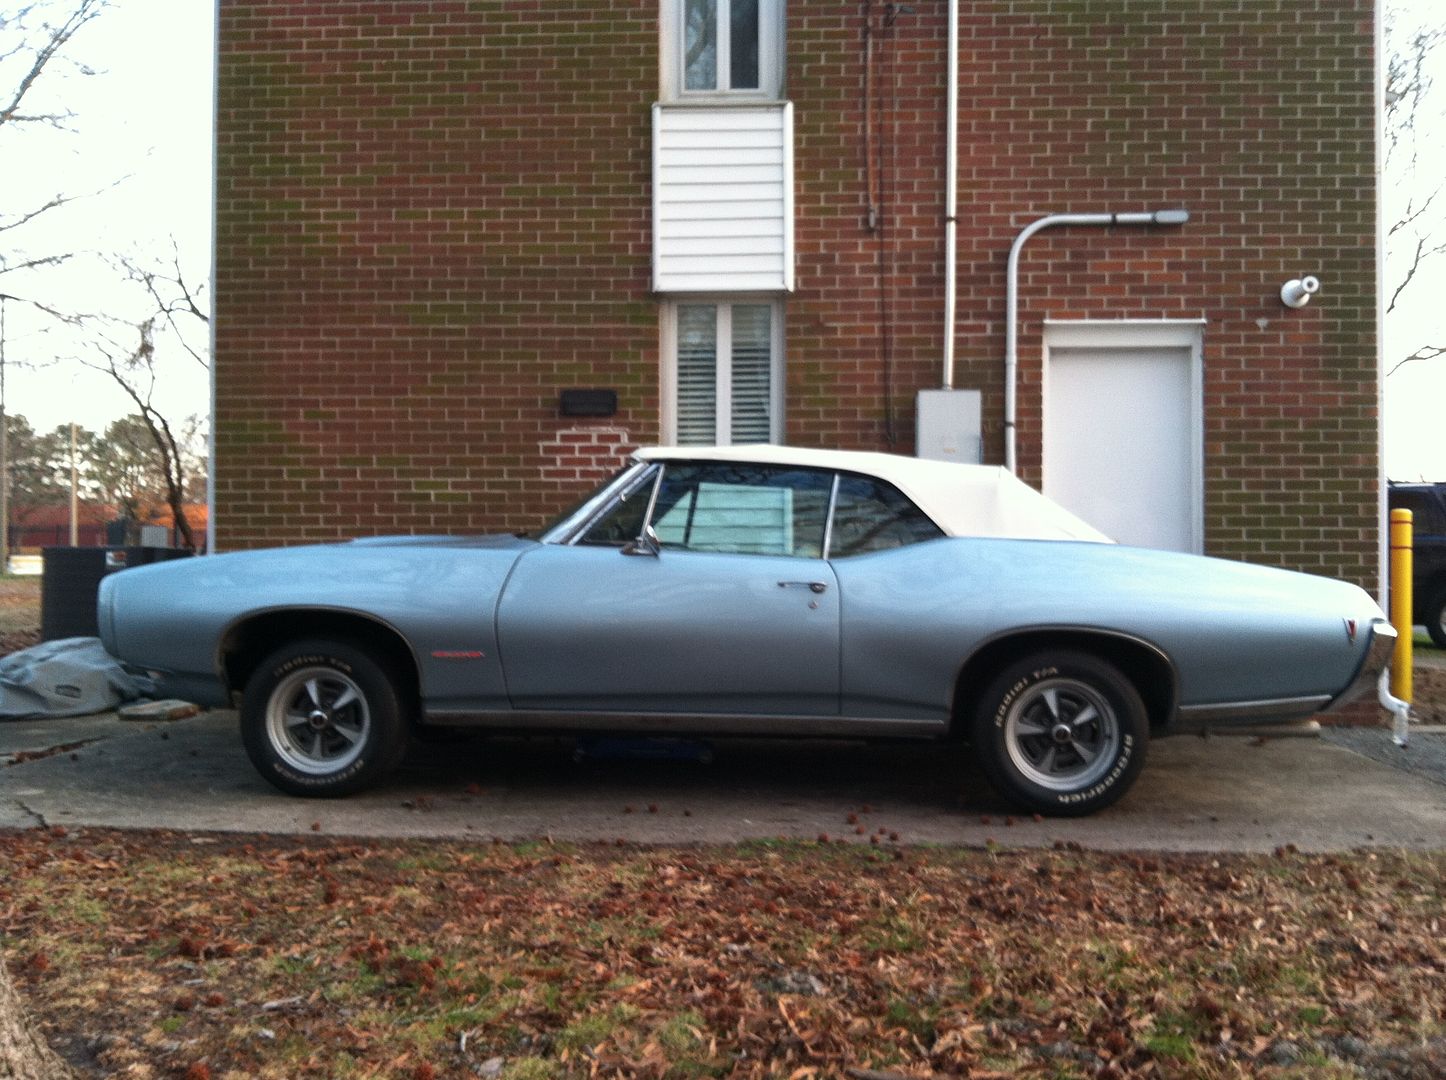
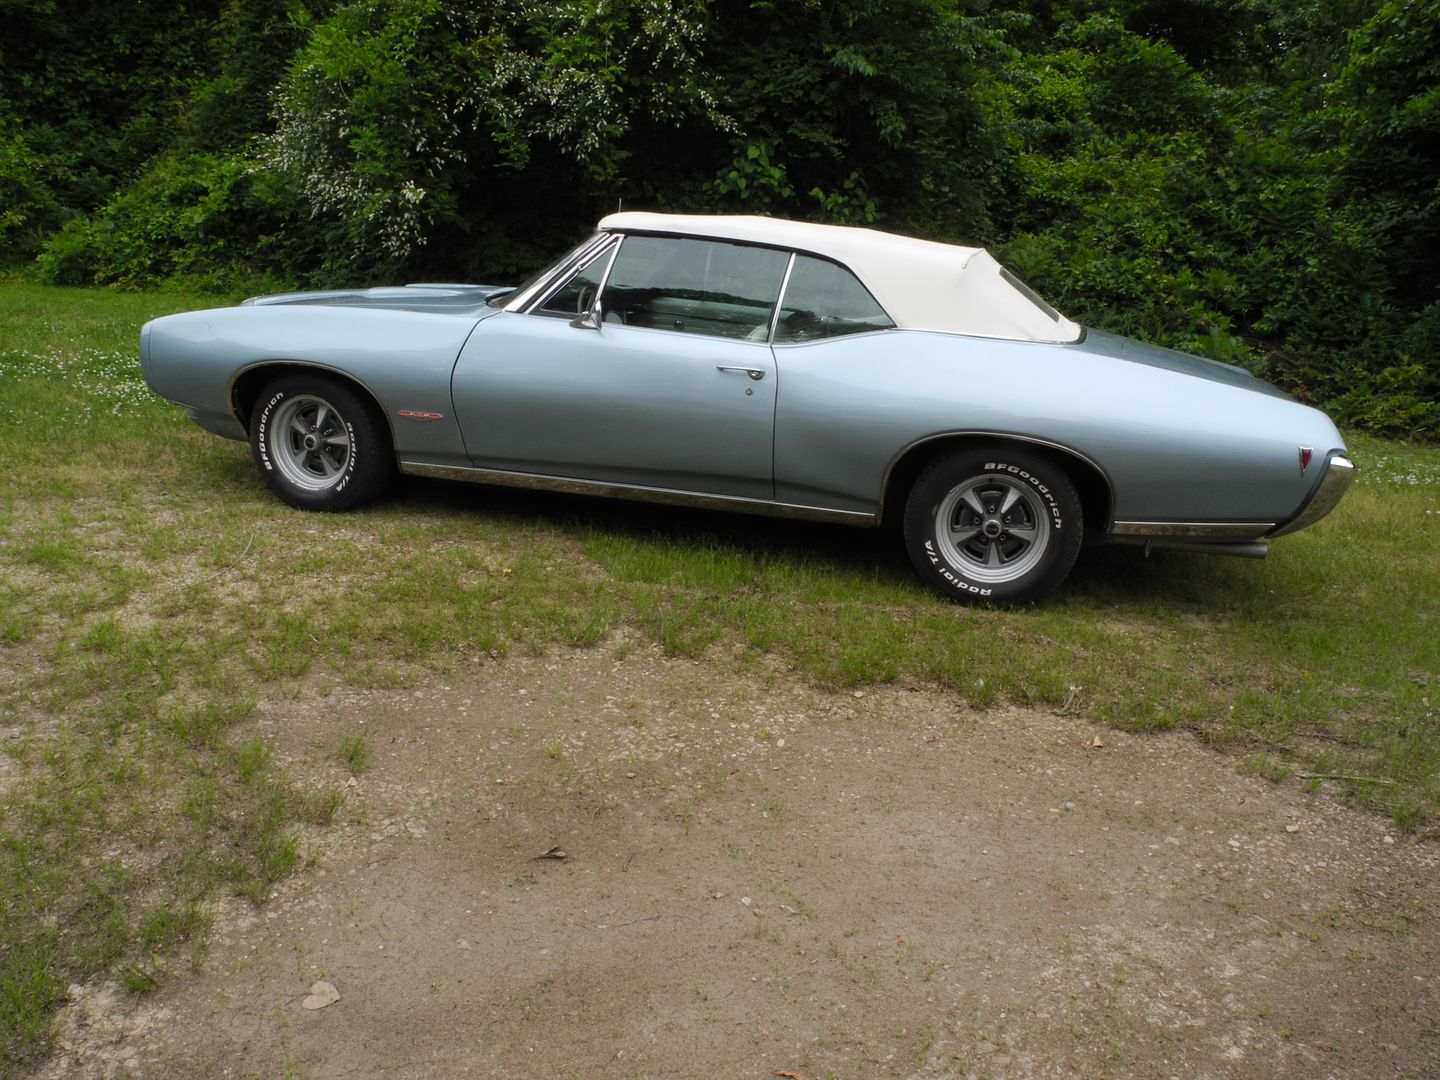
So I yanked the tired stock springs on my 68 and installed some stiffer Umi springs front and rear. Supposed to be "stock height." But that doesn't look like stock height to me.
I can remove the front coils and trim them to drop the front a bit; currently it's sitting a tad higher than the rear, so I definitely want to do this. The problem is the back -- it looks pretty high here. And the springs have a pigtail top and bottom, so you can't trim them. Think I need to return them and ask for the springs with a 1" or 2" drop. Car is a cruiser, but I would like it to handle reasonably well. Also has tubular control arms front and rear with Bilstein's all around. Or I could leave it as-is, install some Buckshot Mudders, and go hit the mud... Thanks, Scott After spring swap:  Before spring swap: 
__________________
Please check out my YouTube channel for vintage/classic car and truck builds and shenanigans! https://www.youtube.com/watch?v=jq61KxKp1Is&t=14s |
|
#2
|
||||
|
||||
|
...do the fronts first.
My 68 had a similar high stance 12 years ago. The front has settled down some but not to the goal. If i had a care, id redo the fronts first. |
|
#3
|
||||
|
||||
|
I was kind of hoping you'd recommend that I go with the mudders...
Looks like I can get 1" and 2" lowering springs from UMI. I'll have to do a bit of measuring to see what would work better.
__________________
Please check out my YouTube channel for vintage/classic car and truck builds and shenanigans! https://www.youtube.com/watch?v=jq61KxKp1Is&t=14s |
|
#4
|
|||
|
|||
|
A factory body manual would have the curb heights at the rockers for a new car. I believe they were a little higher in the front than rear right out of the box. Not sure why the factory did that.
Those do look pretty high all around though. Have you driven it much? Springs will settle a little bit. Or just put the mudders on it and go have some fun!
__________________
---------------------------- '72 Formula 400 Lucerne Blue, Blue Deluxe interior - My first car! '73 Firebird 350/4-speed Black on Black, mix & match. |
|
#5
|
||||
|
||||
|
If the springs are not indexed properly in the lower control arms pockets you can get that "look"
Have you checked that out when you installed the springs? Tom V.
__________________
"Engineers do stuff for reasons" Tom Vaught Despite small distractions, there are those who will go Forward, Learning, Sharing Knowledge, Doing what they can to help others move forward. |
|
#6
|
||||
|
||||
|
Quote:
Haven't driven it with the new springs yet. Thanks
__________________
Please check out my YouTube channel for vintage/classic car and truck builds and shenanigans! https://www.youtube.com/watch?v=jq61KxKp1Is&t=14s |
|
#7
|
||||
|
||||
|
Quote:
Thanks
__________________
Please check out my YouTube channel for vintage/classic car and truck builds and shenanigans! https://www.youtube.com/watch?v=jq61KxKp1Is&t=14s |
|
#8
|
|||
|
|||
|
Looks like about 3" too high all around by looking at the pics.
And, as mentioned by Will, it will settle some when you 'break in' the springs by driving it around. But normally only about 1" or so.  You're probably going to need to cut off about 1 full coil in the front and then get shorter rear springs to get it down where it needs to be. Or you could cut down the front springs and fill the trunk with about thirty cases of root-beer.  Good luck! |
|
#9
|
||||
|
||||
|
Remember that cutting springs increases the stiffness of the remaining coil. If that matters to you.
Sam
__________________
-- Sam Agnew Where you come from is gone; where you thought you were going to, weren't never there; and where you are ain't no good unless you can get away from it. Ministry - Jesus Built My Hotrod |
|
#10
|
||||
|
||||
|
Back in high school when we used to cut springs with a grinder, we’d make people drive ‘em for a few days before we cut more - they’d tend to “settle.” I’m pretty sure that the new “drop springs” did that too.
Edit - I just saw that Joe mentioned that, too. You’ll still want to let them settle before you start cutting.
__________________
 1965 Pontiac LeMans. M21, 3.73 in a 12 bolt, Kauffman 461. 1965 Pontiac LeMans. M21, 3.73 in a 12 bolt, Kauffman 461.
|
|
#11
|
||||
|
||||
|
For 1968 GTO´s you can use TRW/MOOG OEM replacement springs 5386 in front and 5401 (regular) or CC501 (cargo coil) in rear.
Mudders are optional. |
|
#12
|
||||
|
||||
|
You didn't mention if you have the a arms off or not but they should be tightened up with all the weight on them. If it is on jackstands when you tighten everything up you will get that look
|
|
#13
|
||||
|
||||
|
Quote:
__________________
Please check out my YouTube channel for vintage/classic car and truck builds and shenanigans! https://www.youtube.com/watch?v=jq61KxKp1Is&t=14s |
|
#14
|
||||
|
||||
|
Yep. I'm familiar with how that works. I'm hoping for a firm ride; was way too loosey goosey before the spring swap.
__________________
Please check out my YouTube channel for vintage/classic car and truck builds and shenanigans! https://www.youtube.com/watch?v=jq61KxKp1Is&t=14s |
|
#15
|
||||
|
||||
|
Quote:
__________________
Please check out my YouTube channel for vintage/classic car and truck builds and shenanigans! https://www.youtube.com/watch?v=jq61KxKp1Is&t=14s |
|
#16
|
||||
|
||||
|
Quote:
Scott
__________________
Please check out my YouTube channel for vintage/classic car and truck builds and shenanigans! https://www.youtube.com/watch?v=jq61KxKp1Is&t=14s |
|
#17
|
||||
|
||||
|
Quote:
Thanks for the input. Scott
__________________
Please check out my YouTube channel for vintage/classic car and truck builds and shenanigans! https://www.youtube.com/watch?v=jq61KxKp1Is&t=14s |
|
#18
|
|||
|
|||
|
I put Cargo Coils on a '67 Lemans convertible and a '87 Cutlass Supreme. In both cases I thought the ride quality and the ride height was perfect.
|
|
#19
|
||||
|
||||
|
Quote:
The factory spec is 9.6" at the front (bottom of rocker to ground) and 9.1" in the rear. I did a quick measurement and came up with 12" in the front (2.5" too high) and 11.5" in the rear (also 2.5" too high). Figure I'll need to slice some in the front and replace the rear springs. Thanks Scott
__________________
Please check out my YouTube channel for vintage/classic car and truck builds and shenanigans! https://www.youtube.com/watch?v=jq61KxKp1Is&t=14s |
|
#20
|
||||
|
||||
|
IIRC .50" of coil cut results in 1" of drop.
I had to pull mine out and trim them up. Keep in mind that they will settle eventually. I trimmed my coils to provide an additional 1" of drop, but after a year of cruising I'm sitting at 2" of drop overall.
__________________
"Those poor souls have made the fatal mistake of surrounding us. Now we can fire in any direction" 1970 Trans Am RAIII 4 speed 1971 Trans Am 5.3 LM7 1977 Trans Am W72 Y82 1987 Grand National |
| Reply |
|
|