| FAQ |
| Members List |
| Social Groups |
| Calendar |
| Search |
| Today's Posts |
 |
|


Menu
| The Body Shop TECH General questions that don't fit in any other forum |


| Reply |
|
|
Thread Tools | Display Modes |
|
|
| The Body Shop TECH General questions that don't fit in any other forum |
| Reply |
|
|
Thread Tools | Display Modes |
|
#121
 04-11-2008, 01:52 AM
|
||||
|
||||
|
Hey Vince, nah, the thread's just been on a little vaca - I don't want to fill it up with senseless babble just to keep it toward the top.
You are doing an excellent job with the pans, I can't wait to see them after you have them welded in. I did get the CD and your PM, just haven't had a chance to get back to you. The CD is awesome, thank you so much again for sending it. For anyone reading this thread who's never done this type of work before and thinking about taking on a project like this, I HIGHLY recommend the Hot Rod CD's, they are simply great for showing you step-by-step how to do this. I've been slowly working at cutting out the trunk pan, I cut the major portion of the damage out with a sawzall. I've been working on taking the pan off the right frame rail. I am happy to report that the frame rail has only slight surface rust on some areas. I can even see remnants of the original orange primer underneath; I was lucky that the rot didn't continue to do more damage than it did. My compressor took a dump on me so I'm not able to use the air hammer; I have to do it the old-fashioned way of drilling the spot welds and using a baby sledge hammer, long screw driver, vise grips, tin snips and a big chisle to get this section out. Since I can get in further into the trunk, the insides of the 1/4's look to be in good shape; there is rot around the outside edges both front and back, but for the most part they look to be fairly solid. I'm planning on spending a few hours on it tomorrow night so I'll take and post some pictures of the progress. It's a good feeling to know that with each spot weld I drill out and every inch of bad metal I take out that I'm getting closer to bringing this TA back to life. The work is very tedious and time-consuming; patience and diligence are the key. I do have a question - obviously the weld on the new pan will be flange welded to the old pan towards the top, and the sides of the pan will be plug welded the the flanges on the trunk extensions and frame rails. Where towards the top of the pan would be a good place to do the flange weld? There's at least a good foot of nice pan left at the top; I'll have to sand down the rusted areas of the pan that didn't rust through to see how much more, if any, needs to be cut.
__________________
'70 Trans Am Resto - Where Every Bolt is an Adventure........... |
|
#122
04-11-2008, 01:36 PM
|
|||
|
|||
|
join the pans where it'll be easy to hide the seam and finish it out.
mike
__________________
so many pontiacs, so little time.................. moderator is a glorified word for an unappreciated prick.................. "Only two things are infinite, the universe and human stupidity, and I'm not sure about the former." --Albert Einstein "There is no such thing as a good tax." "We contend that for a nation to tax itself into prosperity is like a man standing in a bucket and trying to lift himself up by the handle." - Winston Churchill |
|
#123
04-11-2008, 02:05 PM
|
||||
|
||||
|
Thanks Mike, I'll post photos tonight or tomorrow so you can point out the best area to join the pans.
__________________
'70 Trans Am Resto - Where Every Bolt is an Adventure........... |
|
#124
07-16-2008, 02:13 PM
|
||||
|
||||
|
Bump!
Just wondering if there's been any progress to the T/A? I need a good dose if inspiration for my project. I've been stuck in Home Improvment Hell Lately, No work done to my car lately.
__________________
Jason Rackawack 1975 455 Trans Am - 1975 Firebird 400 
|
|
#125
07-16-2008, 02:31 PM
|
||||
|
||||
|
Quote:
The other reason for no new progress is I decided to wait to get another air compressor, I got tired of trying to blast through spot welds with a chisel and baby sledge. I picked up another compressor about a month ago, so I'm now ready to get back at it with an air chisel (when I can find the time). I actually found myself looking at Barracuda project cars on eBay last night... Thanks for the kick in the ass  , I'll try to get back at it soon to provide you with some more inspiration... , I'll try to get back at it soon to provide you with some more inspiration...
__________________
'70 Trans Am Resto - Where Every Bolt is an Adventure........... |
|
#126
07-16-2008, 03:19 PM
|
||||
|
||||
|
I can symphatize, let us know what type of compressor you got
and how it works, all I've seen progress on is Bub Brooks 74 and it looks to be mostly a strip and repaint deal, I need to see some carnage being repaired (lol!) The working 6-7 days would get to me too! What kinda 'cuda? early or late? They eat up $$$ faster than a SD! I'd need 3-4 jobs just to get a good front fender for a 'cuda
__________________
Jason Rackawack 1975 455 Trans Am - 1975 Firebird 400
|
|
#127
07-16-2008, 06:22 PM
|
||||
|
||||
|
Ive been wondering also ..... My welder broke a few months ago while installing the driver floor pan ... had to replace the wire feed motor ... but after fixed I have done nothing but Home projects ,had 150 yrds of dirt brought in ,finishing the irrigation , planting sod ,clearing more land ,,,shake my head evertime I walk past her.looks like it will have to be sept. before i get back on it ,, Also need some $ for parts rear bumper and door ... cant believe none of my stimulate check did not go toward the goat
__________________
73 GTO 455 TKO 600 3.90 |
|
#128
07-16-2008, 07:52 PM
|
||||
|
||||
|
Quote:
http://cgi.ebay.com/ebaymotors/ws/eB...MEWA:IT&ih=013 I'll let you know how it works; it has enough cfm to drive air tools and maybe even my blast cabinet too. Strip & repaint ain't nuthin compared to what I'm up against - you want carnage, you got carnage! The 'cuda I was looking at is a '73 - here's the link: http://cgi.ebay.com/ebaymotors/ws/eB...MEWA:IT&ih=009 I was also looking at this '70 Challenger: http://cgi.ebay.com/ebaymotors/RARE-...QQcmdZViewItem Hmmm, 3-4 jobs sounds like you would never sleep!  Quote:
__________________
'70 Trans Am Resto - Where Every Bolt is an Adventure........... |
|
#129
03-11-2009, 04:12 PM
|
||||
|
||||
|
Okay, so after a long lay-off and now that I'm getting back into this again, I have a question:
Is there any way that I can cut out the trunk pan/tail light panel/rear valance from the Formula parts car as one assembly and get it into the TA? A new full trunk floor is around $400; it seems like it would be a lot less work to to take out the panels I need from the Formula as one assembly, rather than having to cut out the rear section and drill out the spot welds in the tail light panel and valance, only to have to re-attach everything to the TA. And please...no comments about short clipping - that will not be an option; I want to keep the TA intact as much as possible. BTW, I've also decided to go with a LS6/T-56 drive train...no sense trying to take the TA back to original when it's not original in the first place...
__________________
'70 Trans Am Resto - Where Every Bolt is an Adventure........... |
|
#130
03-11-2009, 04:46 PM
|
||||
|
||||
|
This was my 1972 formula 455HO 2 years ago after sandblasting
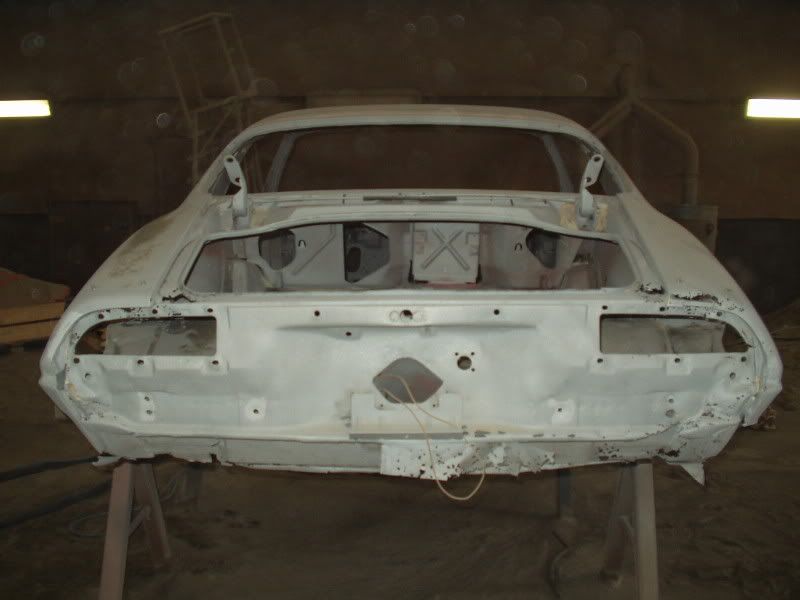 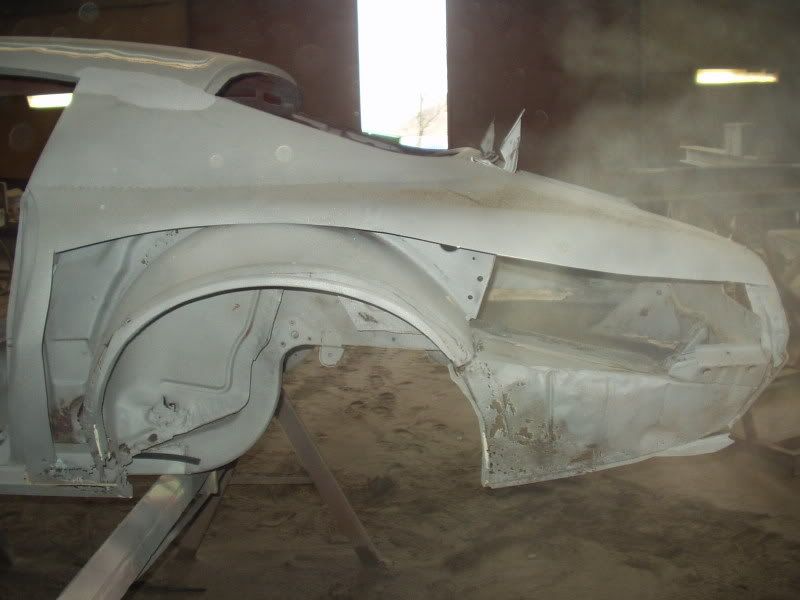 both sides new outer wheel well's and quarter panels  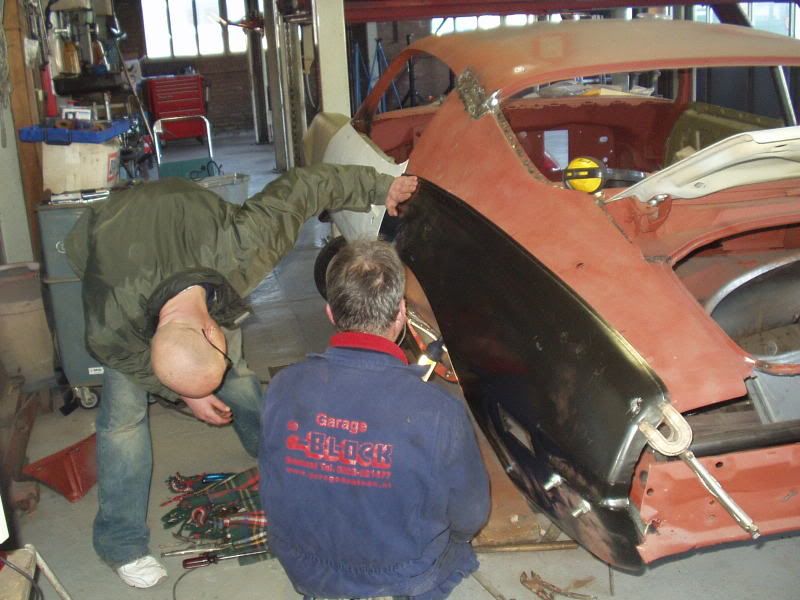 New front where the window lies in 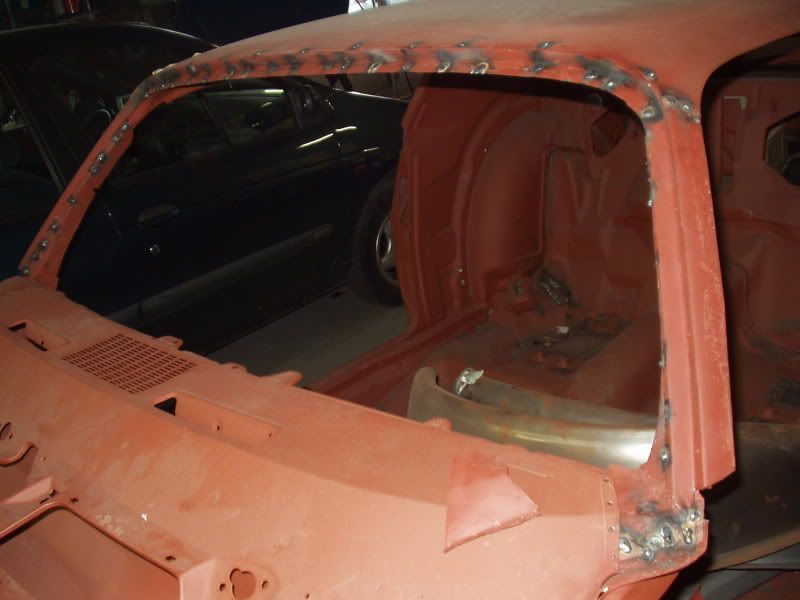 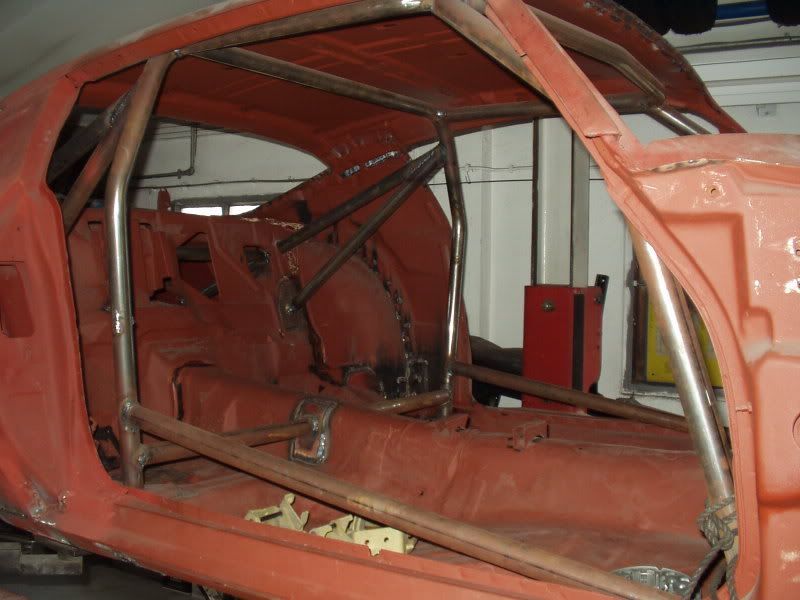 This is the car at this moment, we're grinding the welds and then it will be sandblasted one more time before making it paint ready  Took me 2 years to finish it so far, the upper quarter panels, window trim, rear tail panel etc are all original from a 1972 esprit only the lower quarters and trunk and and outer wheel well's are reproduction. Daan |
|
#131
03-11-2009, 05:09 PM
|
|||
|
|||
|
went a little hog wild bracing up the body didn't you? ;~}
70RAIIITA--despite the extra effort it takes, using a drill on the spot welds is the best method as it doesn't brutalize both pieces of metal. the trick is to use an oversize bit--5/16th to 3/8 and only drill through the top layer and just a point into the second layer. this usually wipes out the weld entirely. you'll actually see a line at all the way around the inside of the drill concavity that tells you the weld is gone. 90 percent of the time you don't need the chisel or scraper to pop it. drill from the side of the metal you don't want to keep. in the last 3 weeks i've probably knocked out several hundred welds this way on the old mga i'm working on. the parts just drop right out and are still in good shape for templates to fab new ones from. as far as removing the entire section, it can be done but the hardest part will be where the quarter, valance and trunk meet. it's a 3 layer metal sandwich that's nearly inaccessible. on the parts car you'll need to cut the quarter right next to the valance. to install it, you'll have to open that layer up to get the quarter in, or you can use the rear section fo the quarter from the donor car if it isn't too rusty. all of your welds should be drilled or ground out from underneath the car and inside it for the trunk pan. tight work, a right angle drill would be handy. |
|
#132
03-11-2009, 05:32 PM
|
||||
|
||||
|
It's just a normall cage kit we only changed some things so the rear seats can go in without large modifications and that someone can get in the car or rear seat without big problems.
Daan The Netherlands |
|
#133
03-11-2009, 07:31 PM
|
||||
|
||||
|
Quote:
My thinking on taking this out as an assembly is to cut the 1/4's off the parts car to get access to the trunk pan/tail panel/valance assembly and go from there, and as you said, save a little bit of the 1/4's to attach the the TA. I know there's an area on the rear driver's 1/4 of the TA that's rusted through so that might not be a bad way to go. The only problem with that is the left 1/4 on the donor car is a replacement panel from Goodmark that whoever welded it back on could have done a better job on... Floffy: Thanks for sharing the photos of your project; it's good to see that others have done what I'm attempting to do and I appreciate your post. I know this work is very time consuming, but at the same time it won't get done if you don't work on it.
__________________
'70 Trans Am Resto - Where Every Bolt is an Adventure........... |
| Reply |
|
|
The PY Online Forums is the largest online gathering of Pontiac enthusiasts anywhere in the world. Founded in 1991, it was also the first online forum for people to gather and talk about their Pontiacs. Since then, it has become the mecca of Pontiac technical data and knowledge that no other place can surpass.


 Linear Mode

