


| FAQ |
| Members List |
| Social Groups |
| Calendar |
| Search |
| Today's Posts |
|
#21
 05-14-2014, 05:20 PM
|
||||
|
||||
|
Craig, the car was bought from a guy in Canberra, i took a trip down there one weekend to take a look as i was looking for a project. From what i can see it spent some time in Raleigh, NC. I'll scan the PHS sheet when i get a moment.
The engine is a YS code 400, not matching numbers tho. Block at the engineering shop about to get started on maching etc, as there was a bit a water sitting in the cyliders which was not a pretty sight. Ive bought a bunch of gear from Butler performance, such as:
I'm keeping the #16 heads, and are in the process of porting them atm. I have a new Yukon centre for the diff, and will likely keep the original 3.08 ratio. The TH400 will need a rebuild, and intend to buy a kit from Jakes Performance. And an aluminium radiator would be preferred. I was at the All American Car SHow in Melbourne recently, and the we saw a Mustang painted in Ruby Red, the wife loved the colour, so its looking like that will be it. Its a 3 part paint system that will need a pretty good painter, so i guess that counts me out. The original colour is Mayfair Maize, i cant see me driving that around. Id like an original colour but not really inspired by many of them. If i can have all the body work (welding ) done by the end of the year i will be happy, that means completing the quarter patches, inner w house repairs, boot replacement, tail panel, deck lid repairs, bonnet repairs, re skin & repair both doors. As far a wheels go, i have a rough set of rally 2, that need some repair, though i will go bigger, 18's most likely, i like the US Bandit or the AMES knock offs. A lot depends on brakes, i will be fitting new discs to the front, and not sure about the rear. I think i might need enginnering approval?? any clues here? Hope i havnt bored any one, but thats my plan roughly 
|
|
#22
05-15-2014, 04:36 AM
|
||||
|
||||
|
So, after, a little practice patch on the lhs rocker, i got stuck right into it, my first real patch. I had no idea how to go about it, i just had a go. Drawing on heavy plate skills i had from my original trade (boilermaker). I only have some panel hammers, a tiny vice & and anvil made from a section of railway track.
The small hole i could see in the lower left front cowl turned into a rather large hole. While i was there i cleaned out the void in behind the rocker, it was totally chock a block with crap. 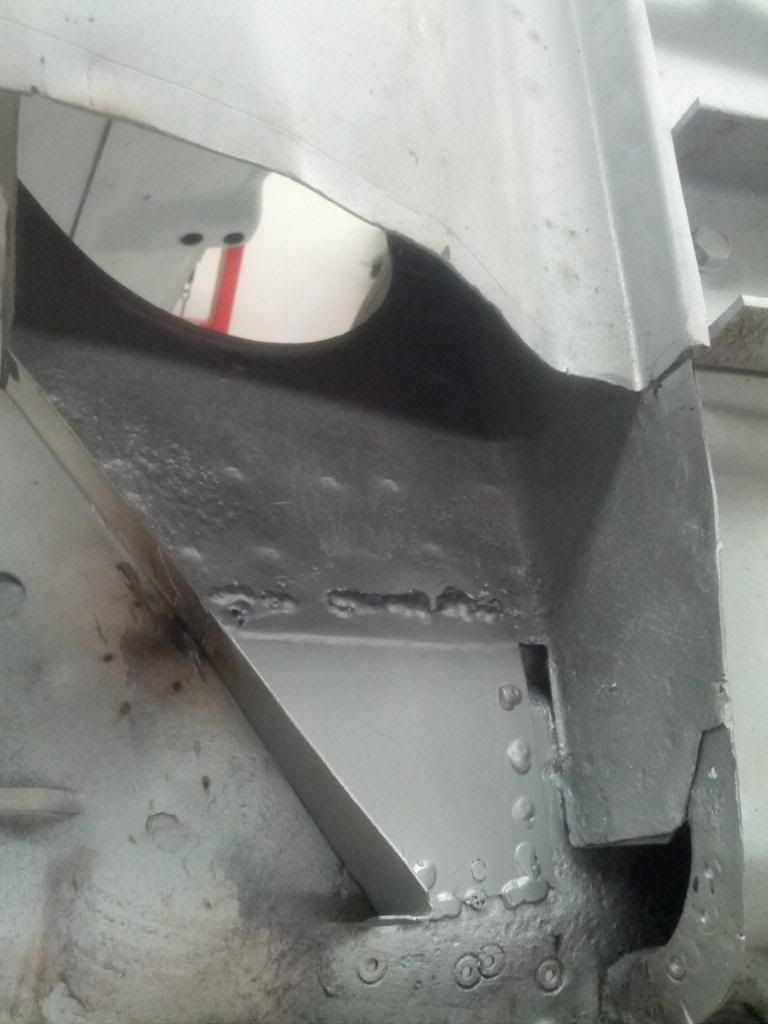
|
|
#23
05-15-2014, 04:38 AM
|
||||
|
||||
|
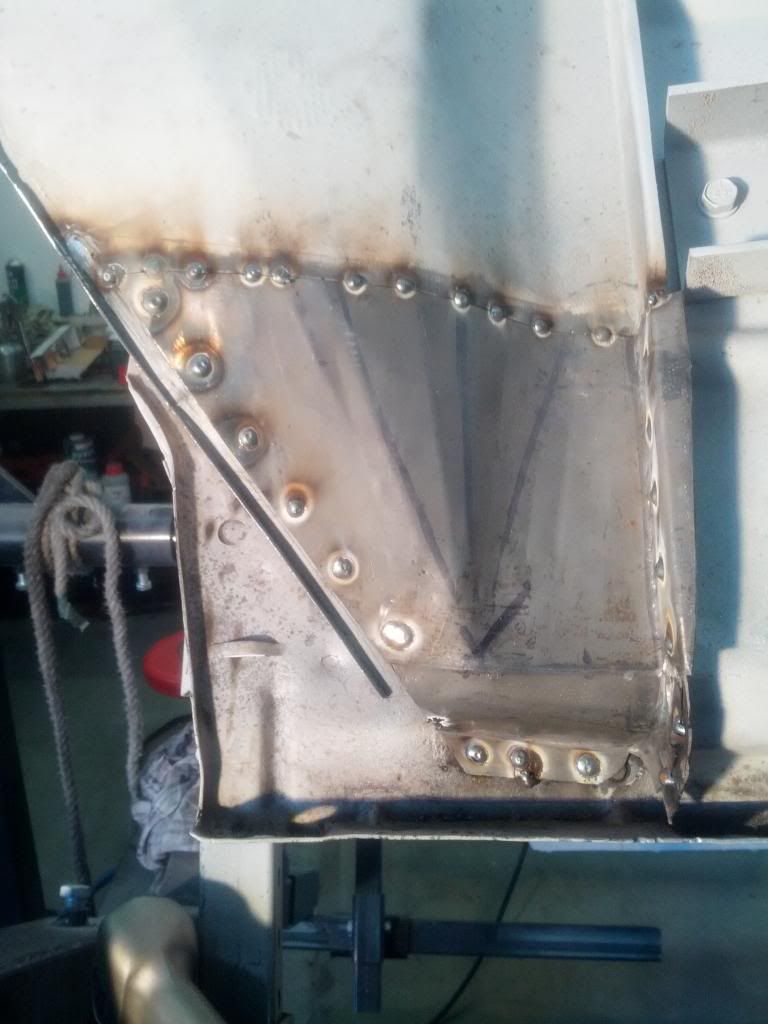
Patch fabed up and in place permanently
|
|
#24
05-15-2014, 04:40 AM
|
||||
|
||||
|
All smoothed off, and looking ok, Pretty happy with the result. a bit of a confidence booster.
Last edited by Gtozy; 05-15-2014 at 04:40 AM. Reason: No pic, oops |
|
#25
05-15-2014, 04:41 AM
|
||||
|
||||
 ooops |
|
#26
05-15-2014, 06:01 AM
|
|||
|
|||
|
send us a PM about radiator
|
|
#27
05-15-2014, 06:07 AM
|
|||
|
|||
|
I think i might need enginnering approval?? any clues here?
change over to disk using after market has now changed to approvals but you can get around it by installing a Abody disk rear end or you spend a lot of money and put in a full willwood system and replace everything they are approved by ADR Read the hot rodder forms in Aus about conversions |
|
#28
05-17-2014, 06:52 AM
|
||||
|
||||
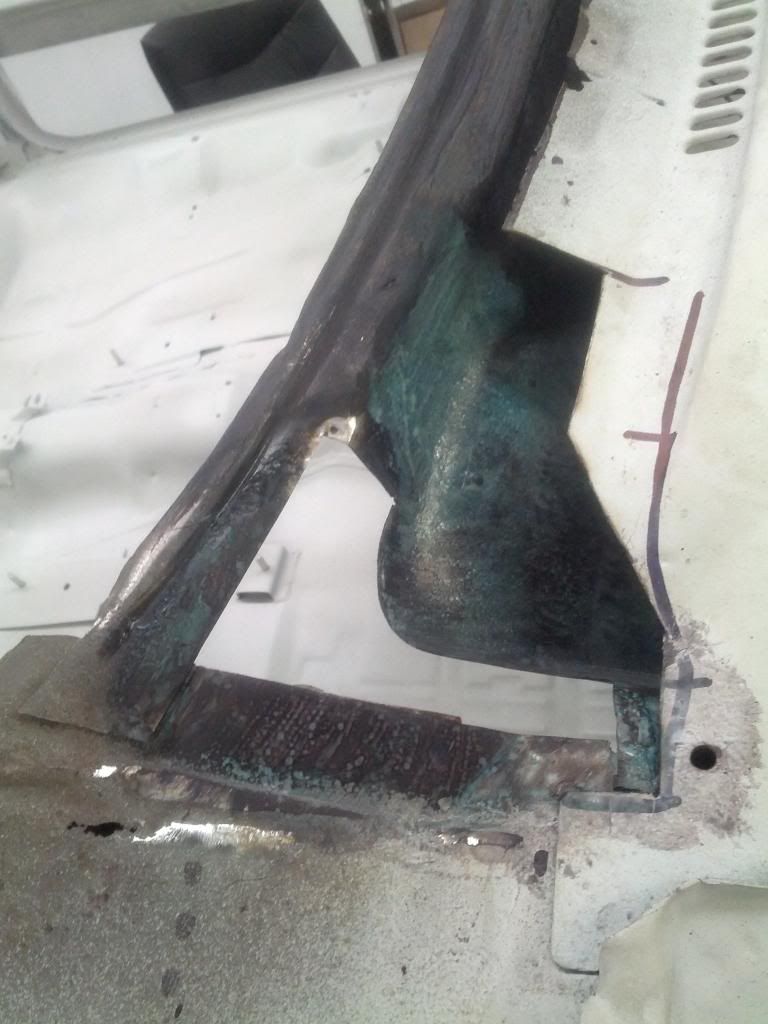
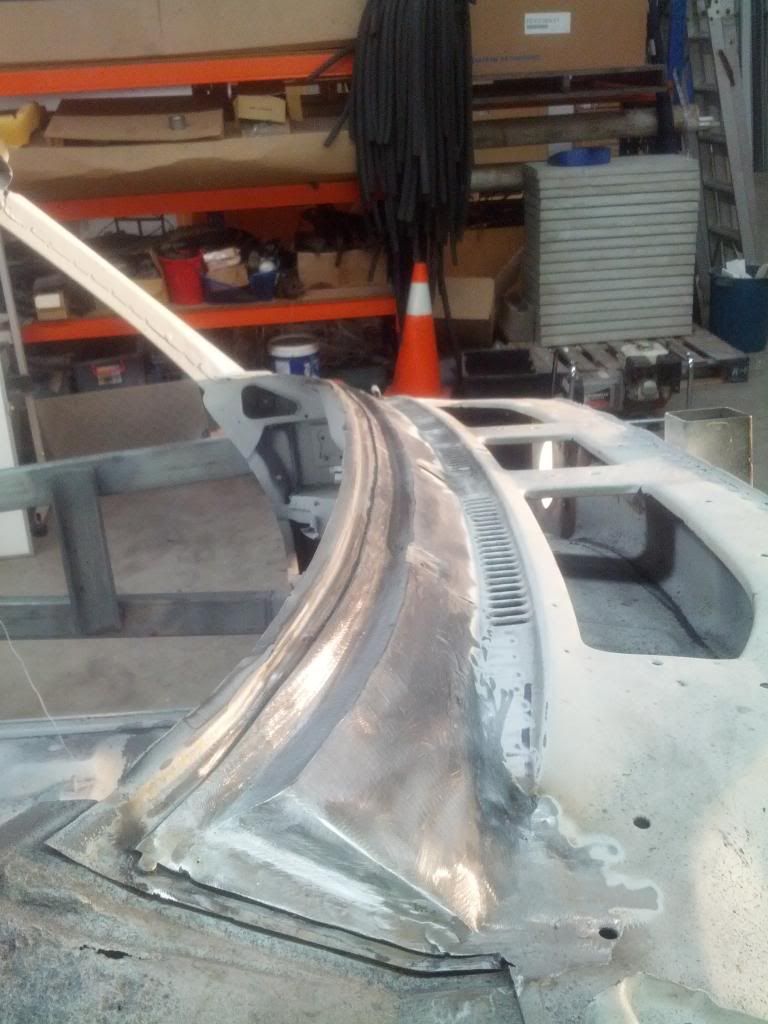
 So finally its time to hit the upper cowl and windscreen sections. even though I have been a bit apprehensive about this, but its gotta be done.[IMG] So finally its time to hit the upper cowl and windscreen sections. even though I have been a bit apprehensive about this, but its gotta be done.[IMG] [/IMG] [/IMG]
|
|
#29
05-17-2014, 07:07 AM
|
||||
|
||||
|
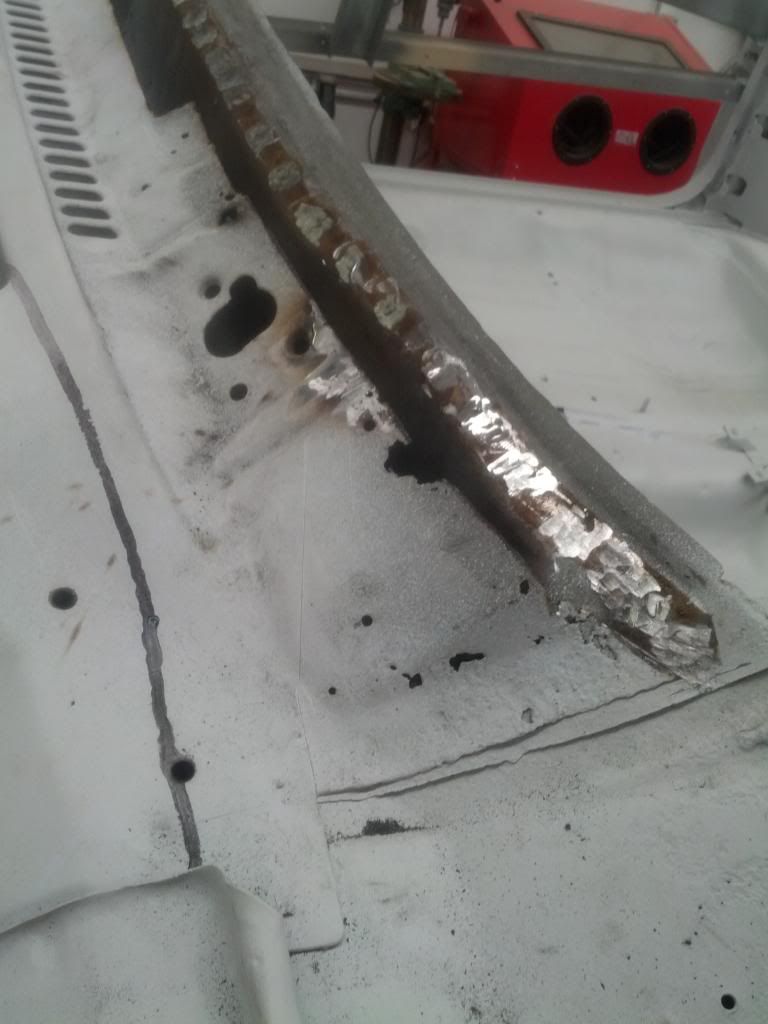
Unfortunately there is 3 layers of rust here, this is the lower level. And it just had to have all those contours. The black finish on some of the pics is the 3M rust converter & primer i use.
|
|
#30
05-17-2014, 07:11 AM
|
||||
|
||||
|
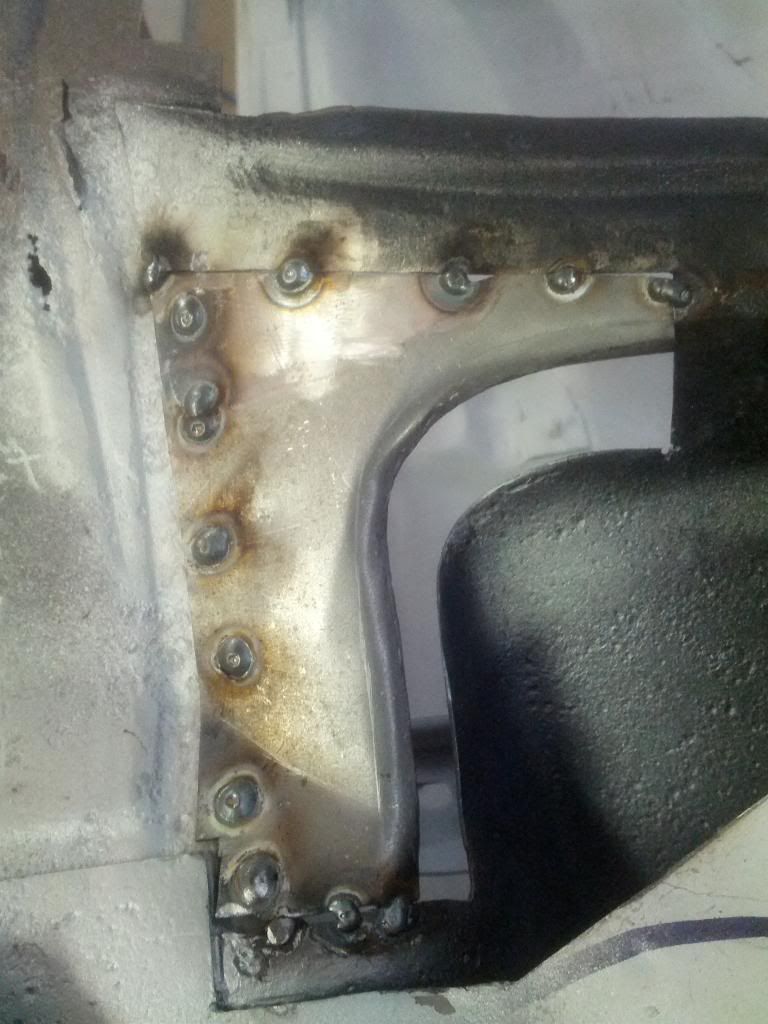
I used a two part patch for this end of the cowl
|
|
#31
05-17-2014, 07:19 AM
|
||||
|
||||
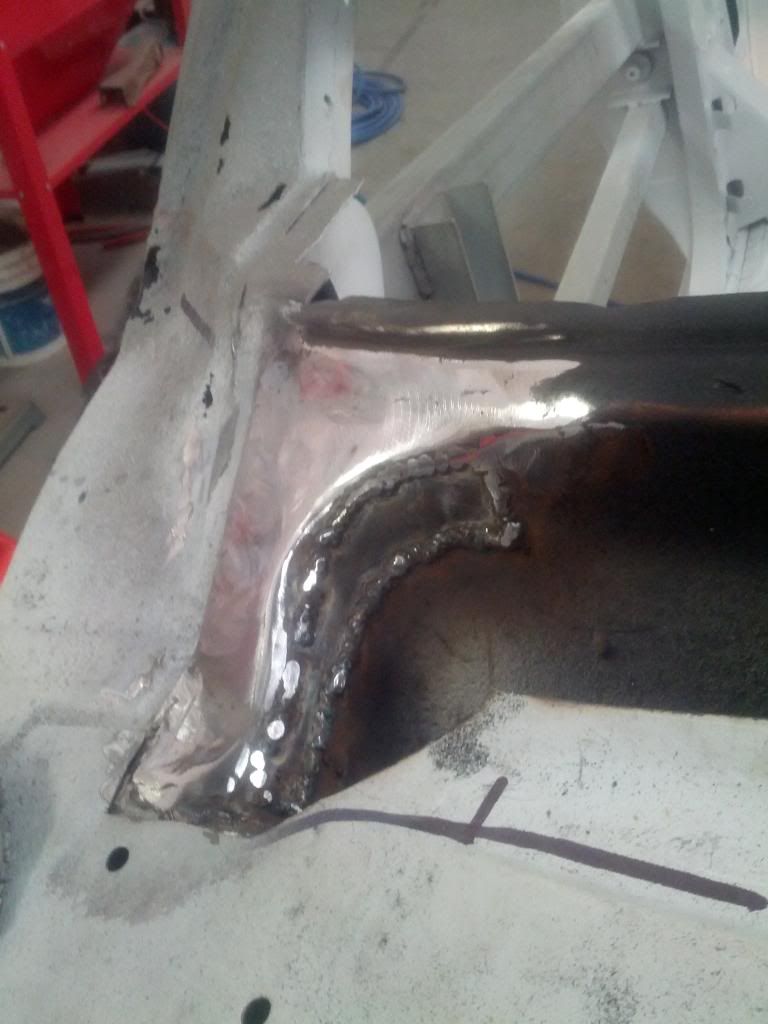 this bit was tricky, but it worked fine. |
|
#32
05-17-2014, 07:46 AM
|
||||
|
||||
   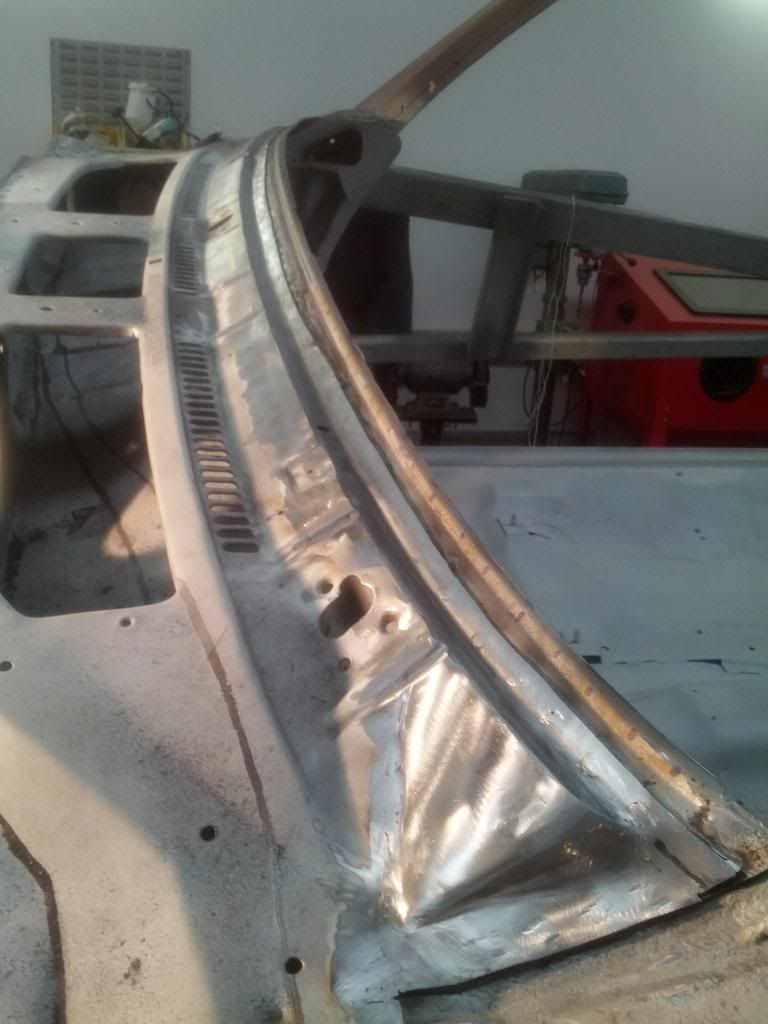 Done 
|
|
#33
05-17-2014, 08:00 AM
|
||||
|
||||
|
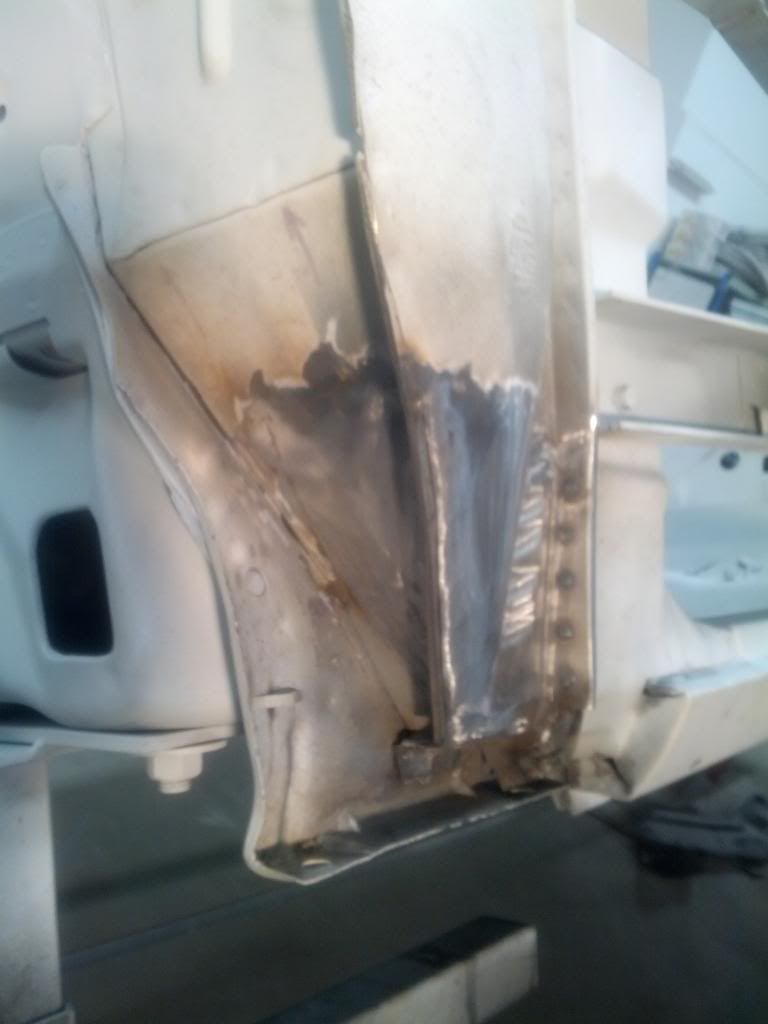
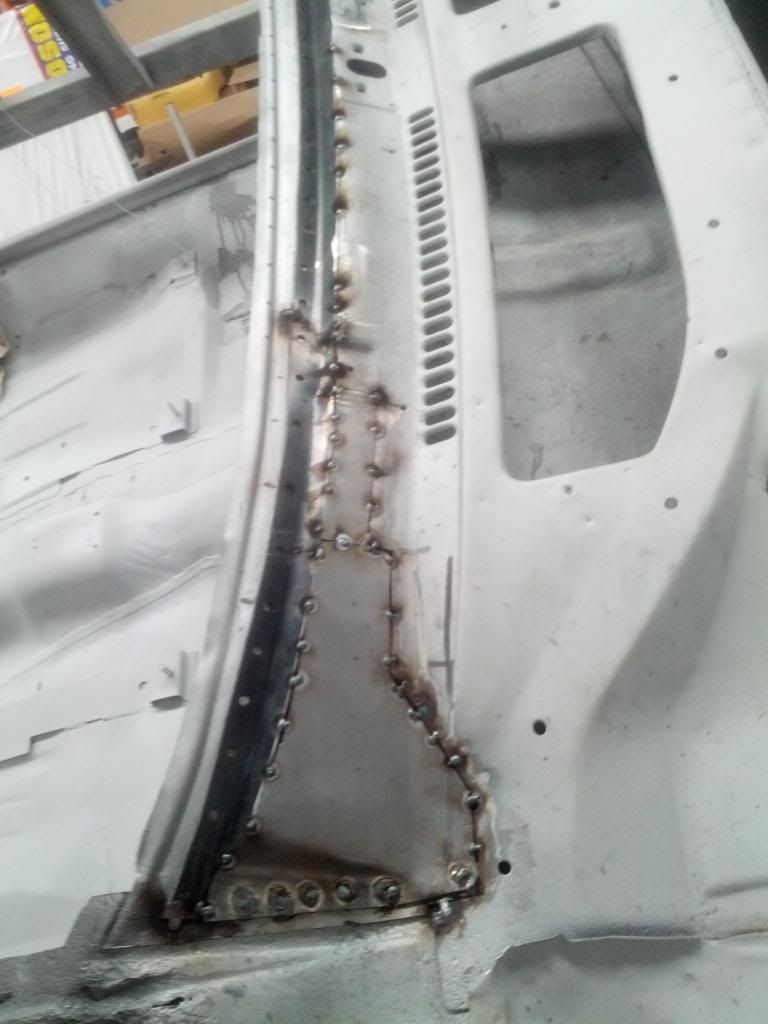
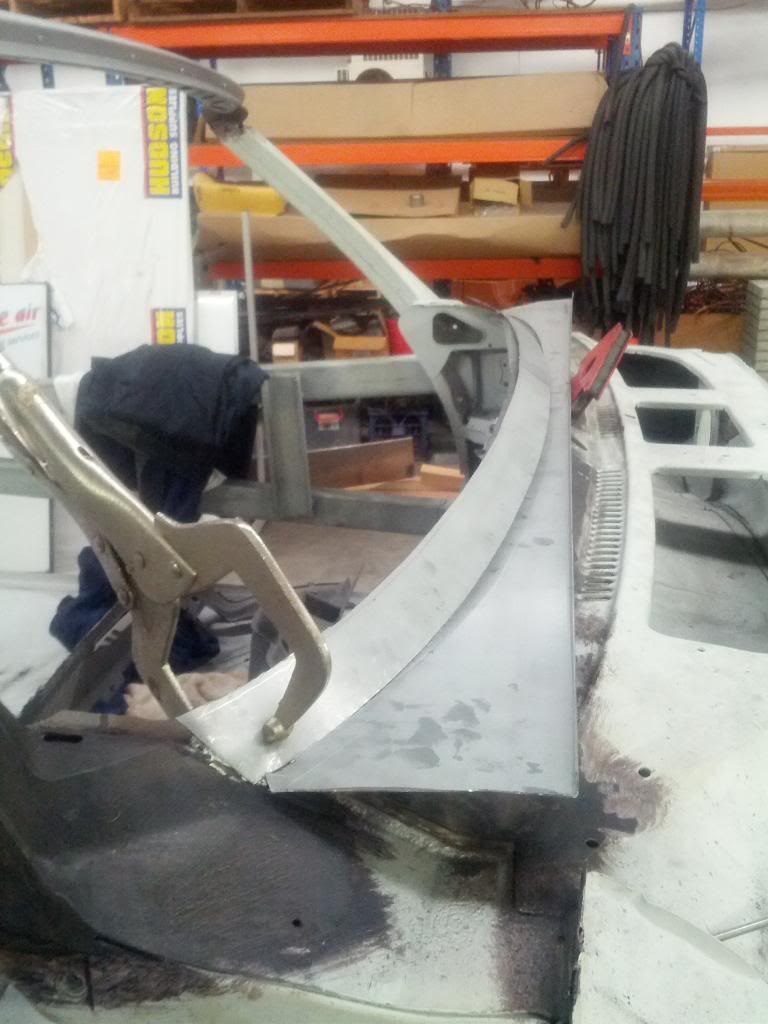
I thought that before i fix the lower section of the dash, i'll have a crack at the A Pillar. A panel beater freind kindly donated some thicker steel for this job, so that in hand i marked out and started cutting.
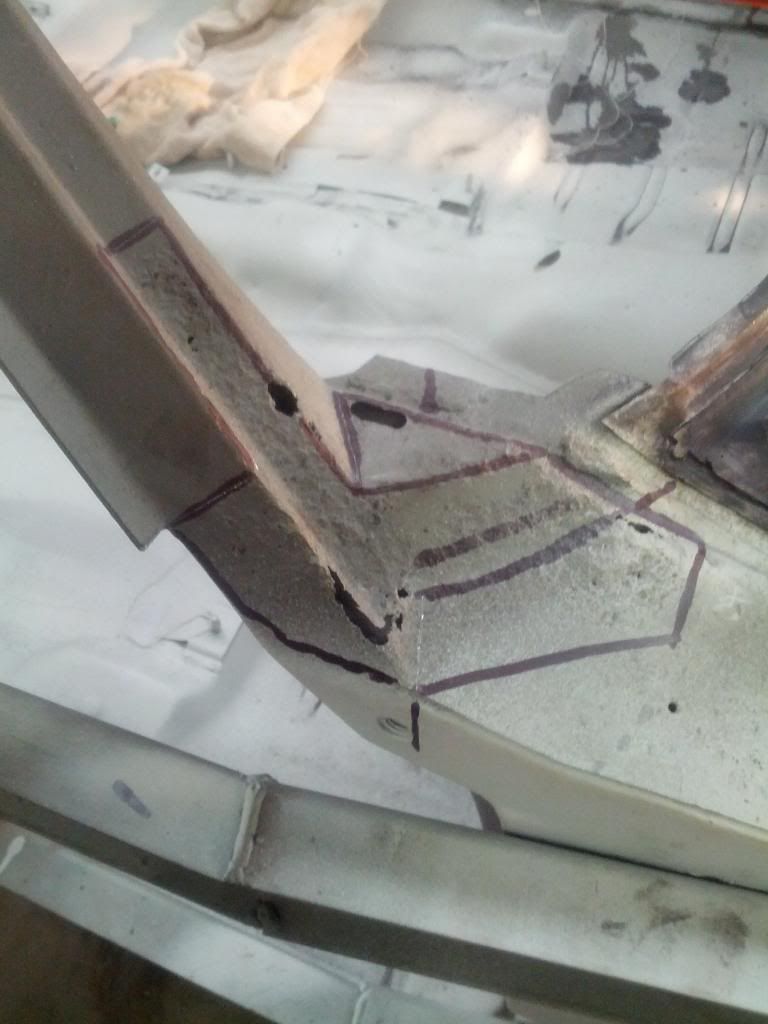 I was going to do the patch in two pieces, though i got lucky with a go at a one piece, with some manipulation it went ok. 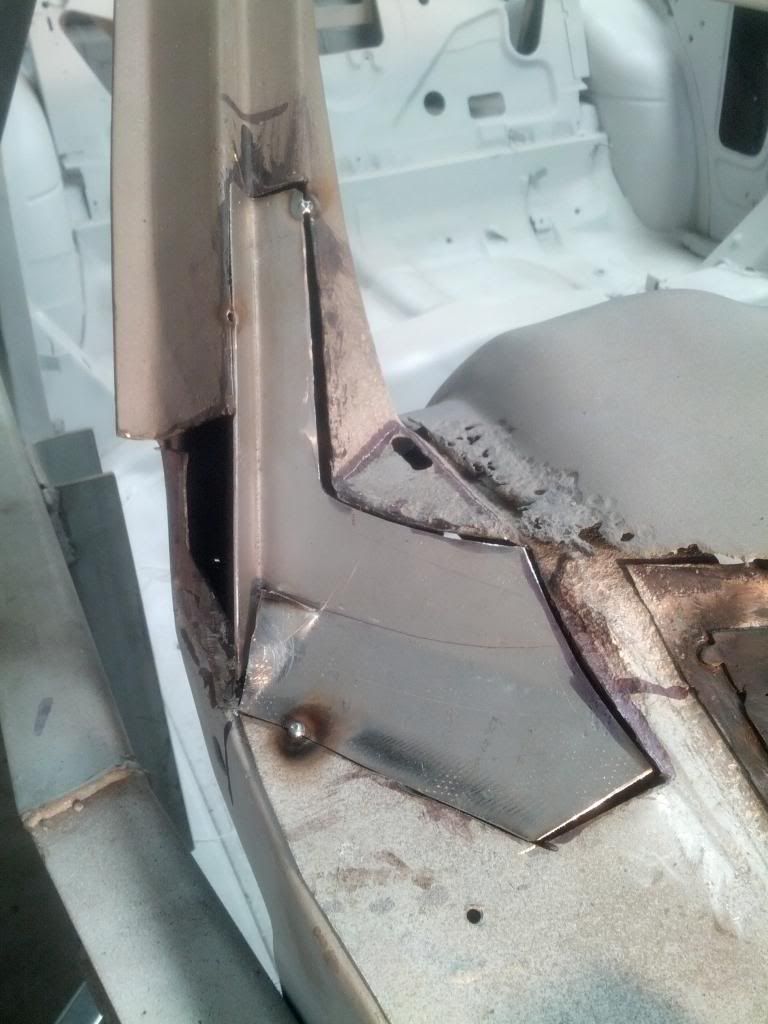 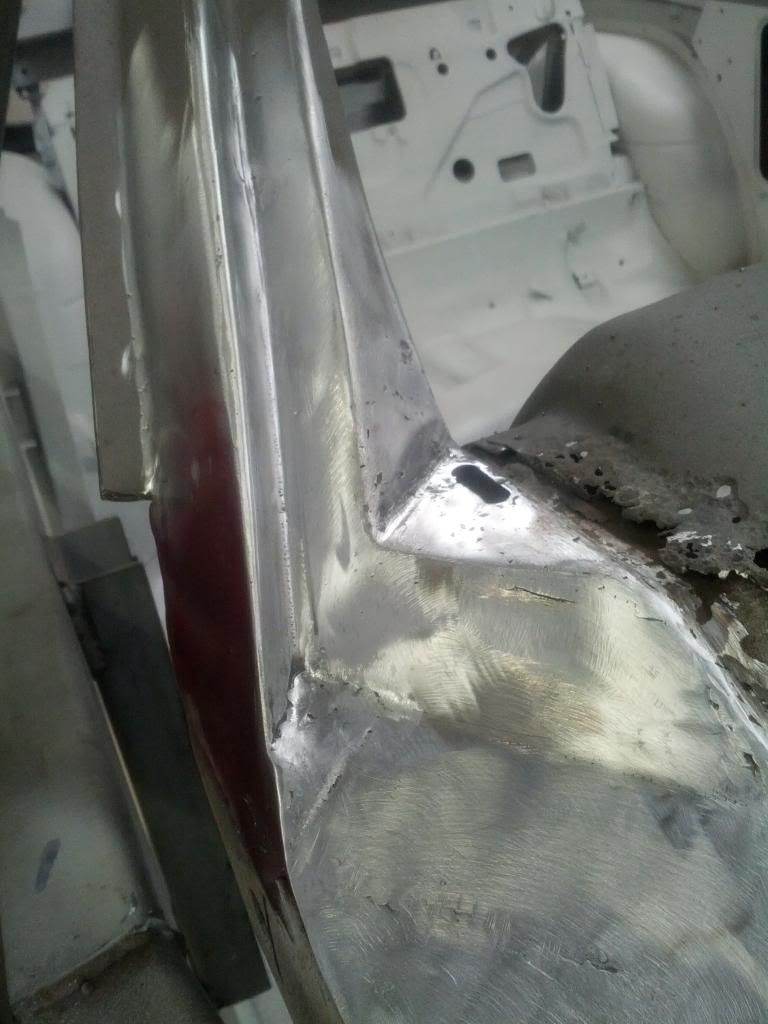
|
|
#34
05-17-2014, 08:07 AM
|
||||
|
||||
|
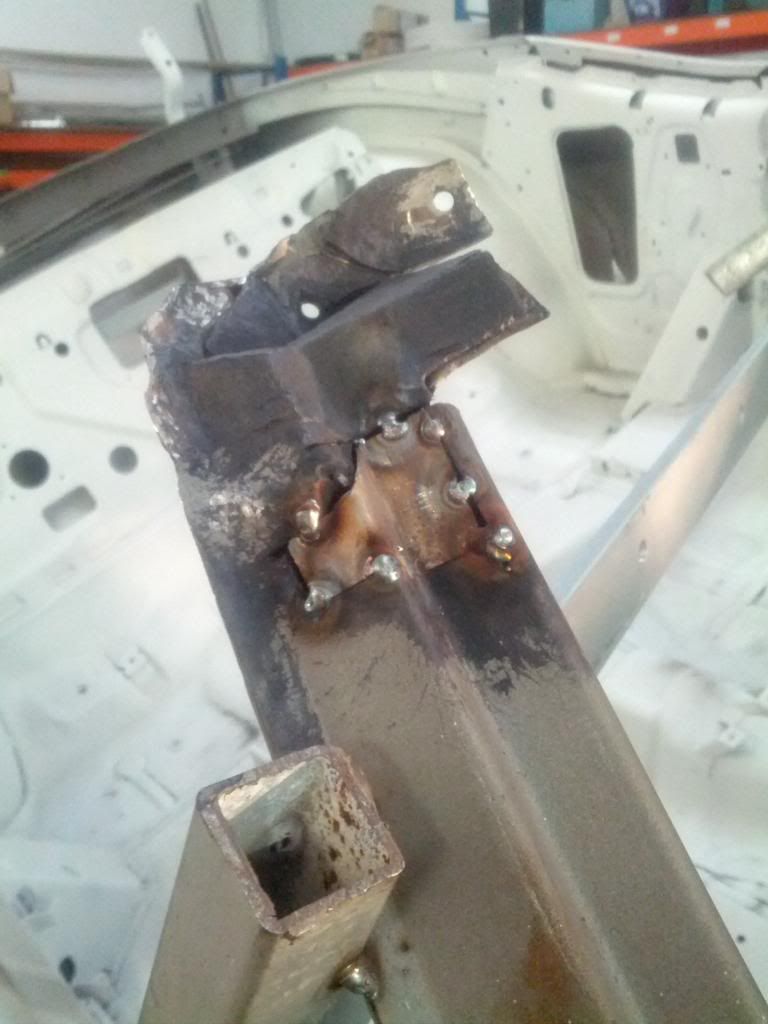
Working my way around the windscreen , it was time to replace the header section. I dont have apic, but i braced both A Pillars to prevent any movement, then gave it the chop
|
|
#35
05-17-2014, 08:21 AM
|
||||
|
||||
|
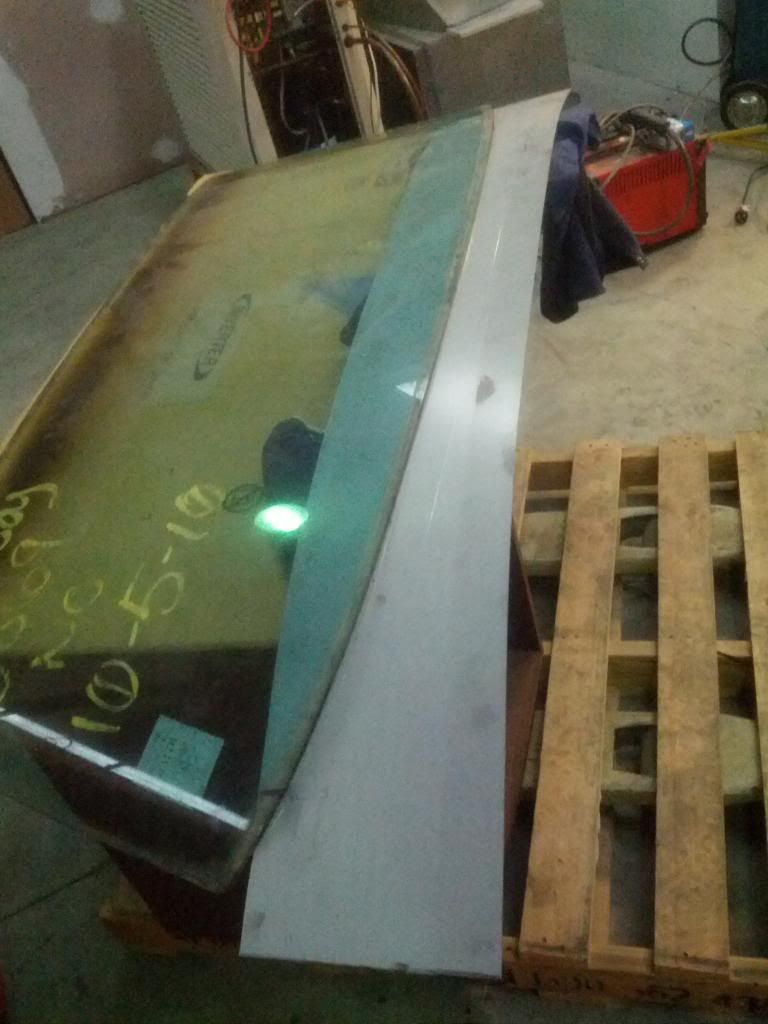
With all that done, i had to take on the dash repair. I had been thinking for a while about how i might go about this, i decided to use the windscreen it self as a template. Thank fully it worked out.
Last edited by Gtozy; 05-17-2014 at 08:34 AM. |
|
#36
05-17-2014, 08:47 AM
|
||||
|
||||
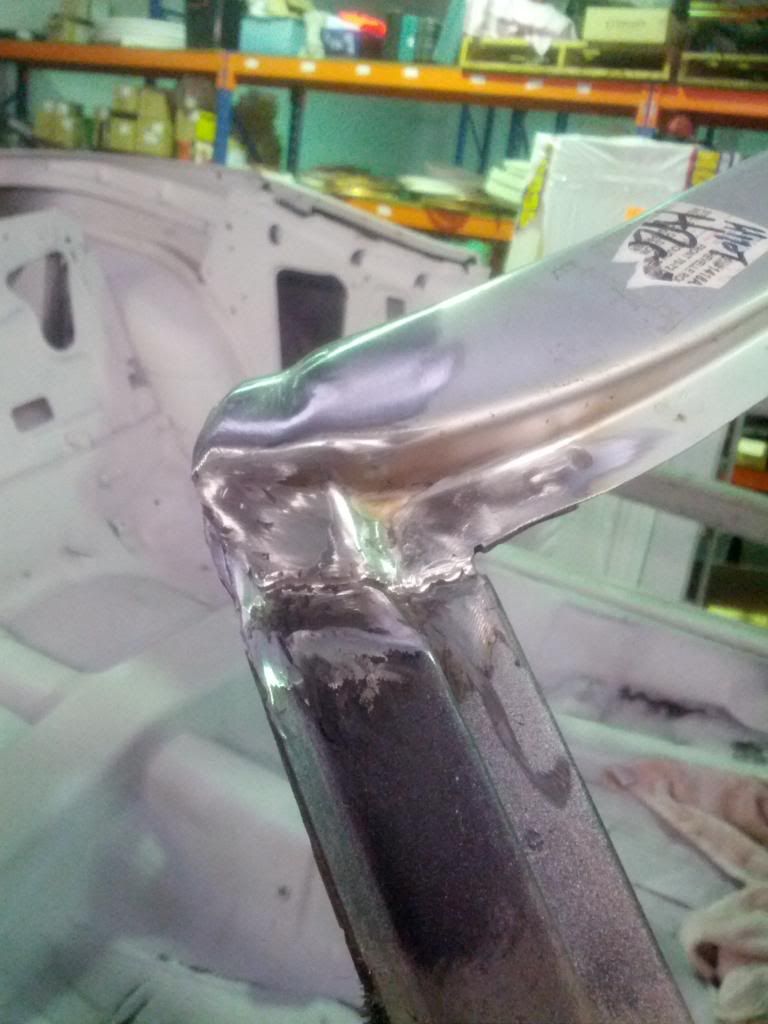
 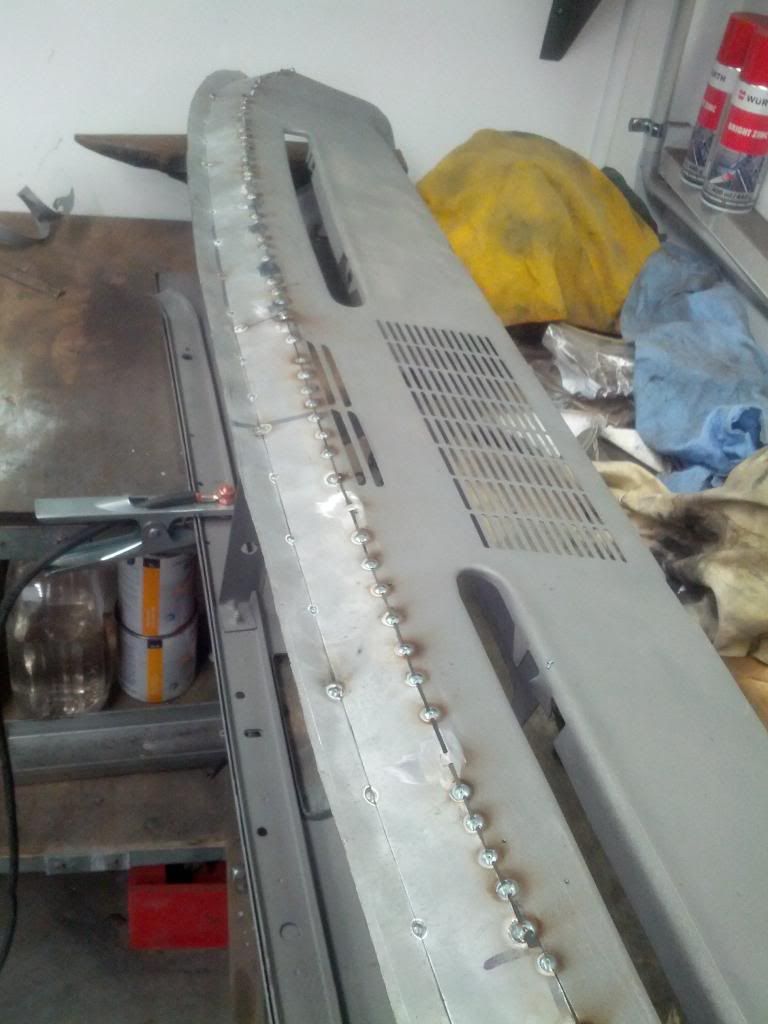 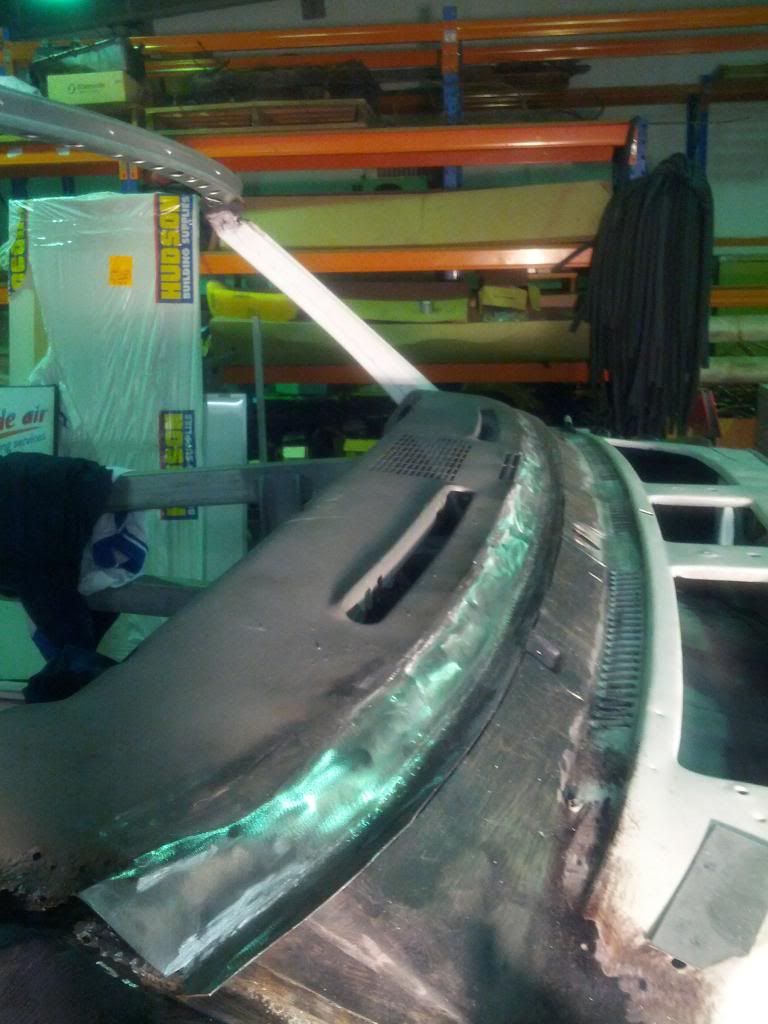 Almost done, just need to finish the end bits. w e are up to date now, as this was done today. Pretty happy with the way this has turned out. I'll get some etch primer on it next week after a sand down. |
|
#37
05-26-2014, 11:25 AM
|
||||
|
||||
|
Awesome work!! You should be proud.
|
|
#38
07-13-2014, 02:04 AM
|
||||
|
||||
|
So,with the front basicly done, i have turned my attention to the back end. The part that had me most concerned, the 1/4 patches are the worrying part.
I have taken her off the rotisserie now, time to replace the boot /trunk floor. I have 3 piece patches for this. I cut out all the metal, and sand blasted the crossmembers etc.Grinding all those spot welds is a task thats for sure. 
|
|
#39
07-13-2014, 02:13 AM
|
||||
|
||||
|
Fitting the new floor was a challenge, i put the two side sections in first, which allowed me to sit on the middle on a stool, and work to each side. The centre section was a pain, literally. The part where the panel steps up at the back seat support area, did not match up well at all, and needed some serious modification. Though it turned out ok.
Funnilly, i read a post on this forum somewhere before i started the floor, and the common theme was remembering their aching backs. I'm thinking - i'll be right. OMFG, it took at least two weeks for my back to return to near normal. 
|
|
#40
07-13-2014, 02:20 AM
|
||||
|
||||
|
Thanks to Scott (Thelander) i was able to buy a patch to repasir the dash back to original. Not sure if i will put an original back in. If i did i reckon i would have it converted to FM and have blue tooth fitted etc. has any one done this, or used the retro ones that come similar to this?

|
| Reply |
|
|
The PY Online Forums is the largest online gathering of Pontiac enthusiasts anywhere in the world. Founded in 1991, it was also the first online forum for people to gather and talk about their Pontiacs. Since then, it has become the mecca of Pontiac technical data and knowledge that no other place can surpass.


 Linear Mode

