| FAQ |
| Members List |
| Social Groups |
| Calendar |
| Search |
| Today's Posts |
|
#1
|
|||
|
|||
|
Hello all been a Lurker off and on for a while now, long time Pontiac fan.
OK The project where to start been working on it for years off and on taking entirely to long to do, I am rebuilding a Very rusty 70 Esprit into a TA/Firebird custom long story short BUT car was gone with rust and had been moused over badly before I got it, needing lots of parts that were either missing or destroyed. Its not going to be matching number correct anything just trying to rebuild what should have went to the crusher long ago. I am nearing the end of all the Rust repairs these included lower rear quarters both sides, full Trunk trunk pan, removal and repair and re-instillation of rear tail panel, Trunk drop offs both sides, A pillar repairs both sides, Cowell Panel and now recently discovered small area of left forward Rocker panel and rear window channel repairs on both sides. As I said above I am getting close to being done with the metal work I am no pro just an armature hobbyist trying to build a Hot rod. as it started 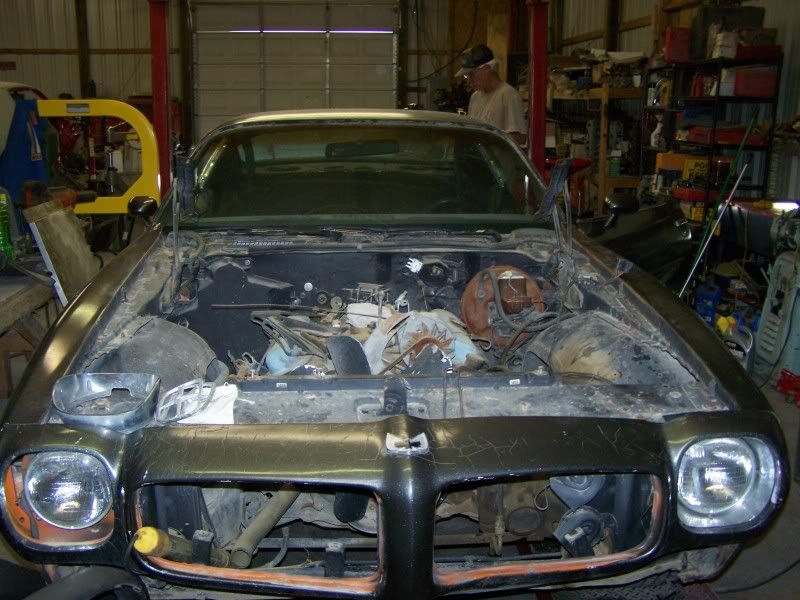 What a mess  It gets better 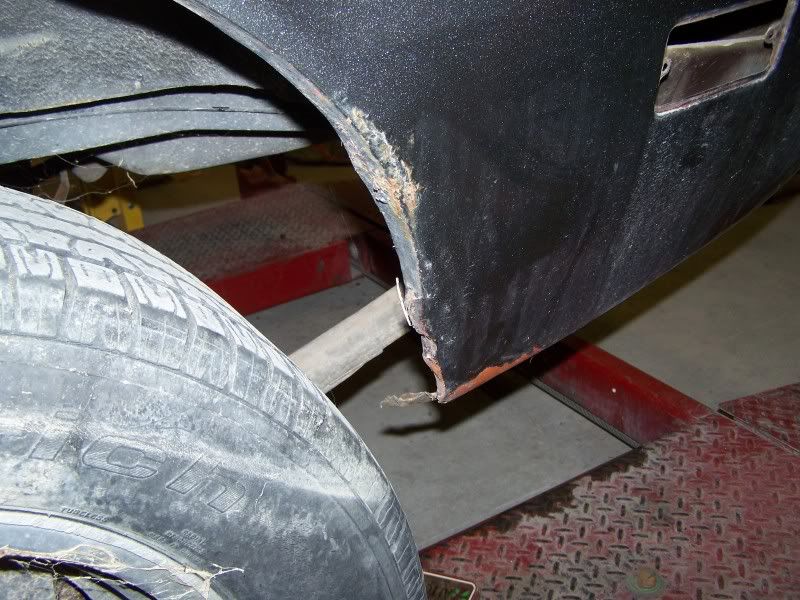 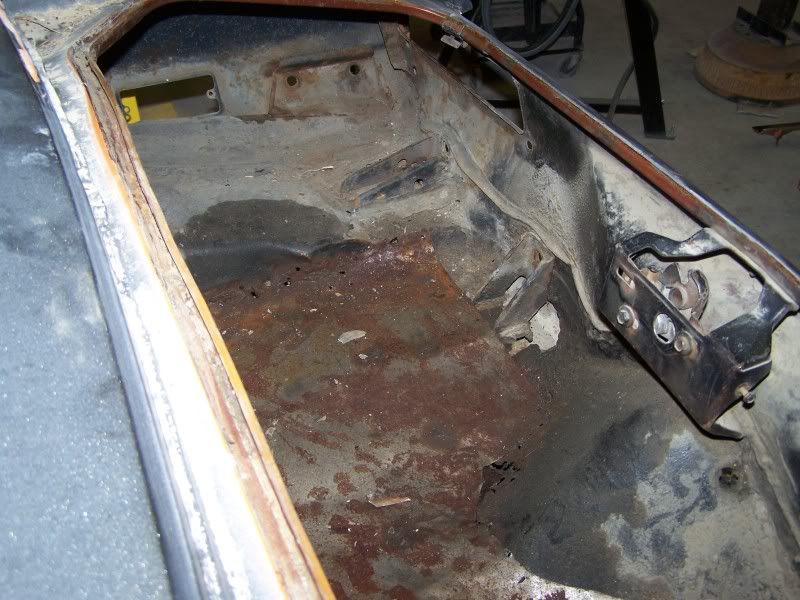  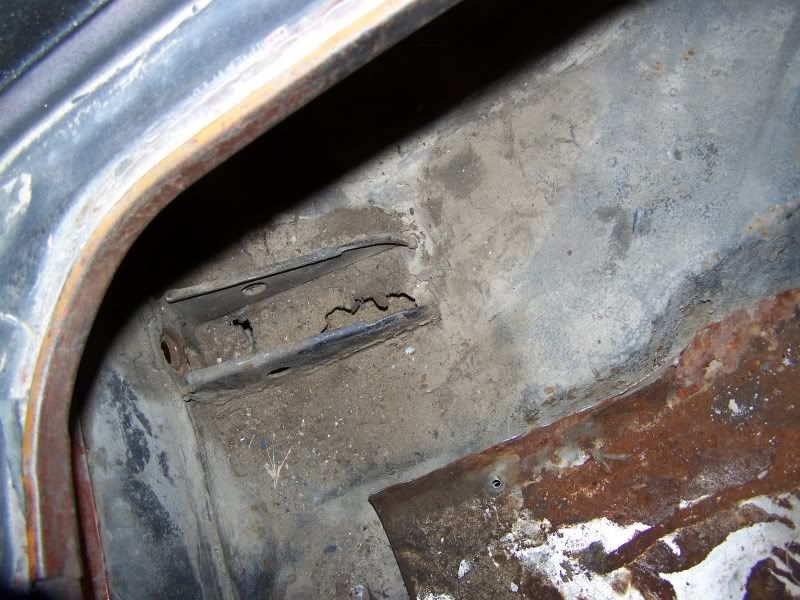  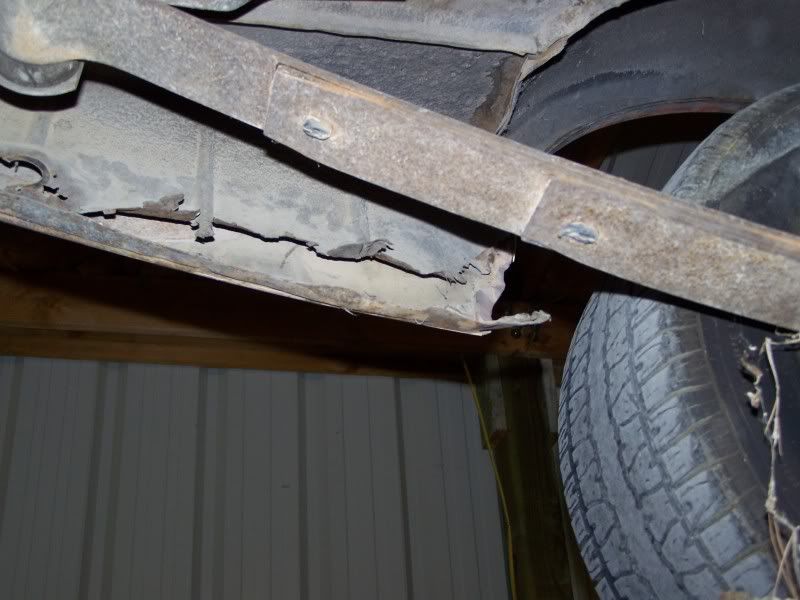 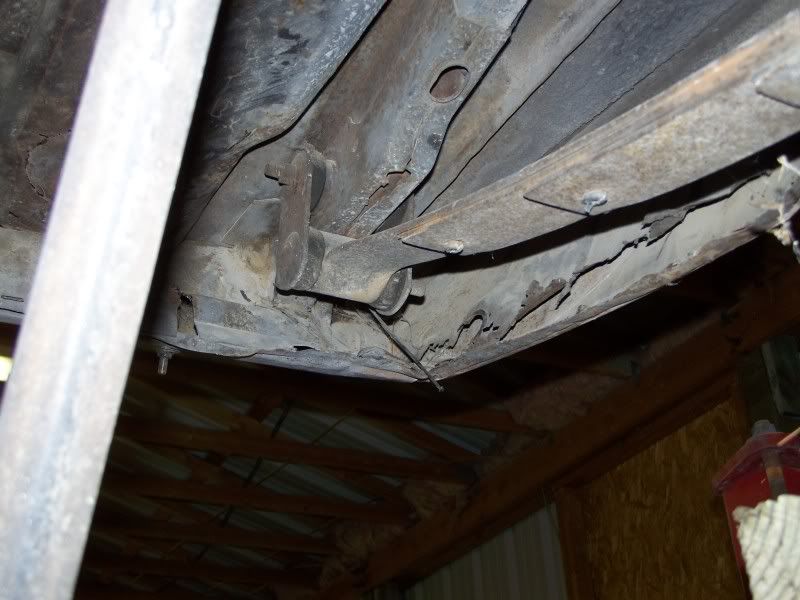 So the cutting and drilling started 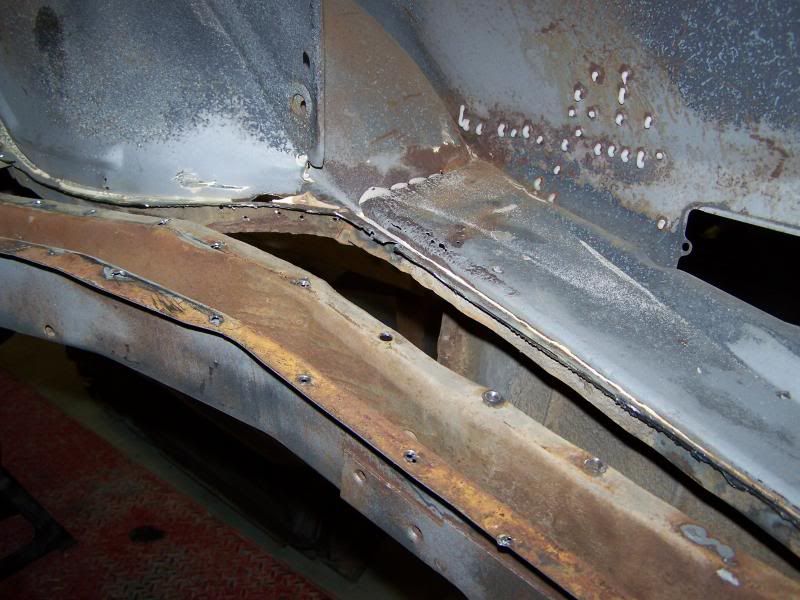 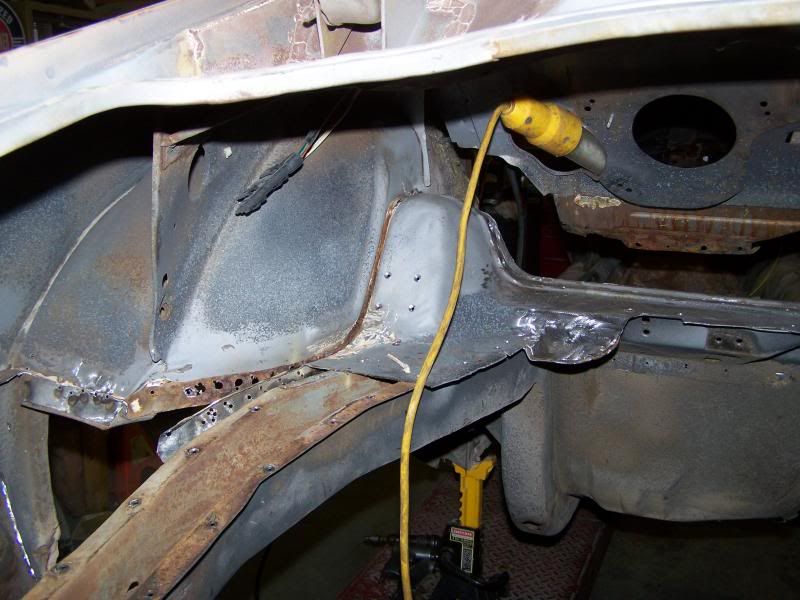 hmmm pretty big to go threw the Trunk 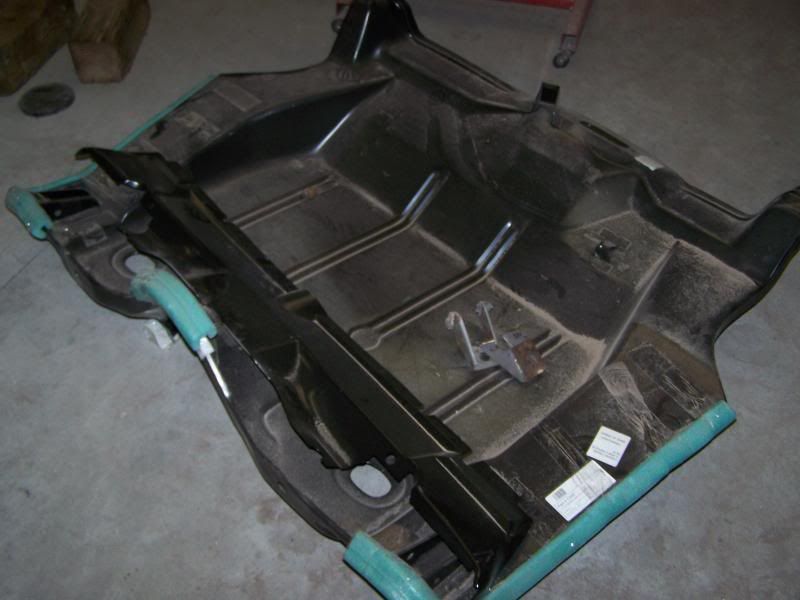 off comes the Tail panel 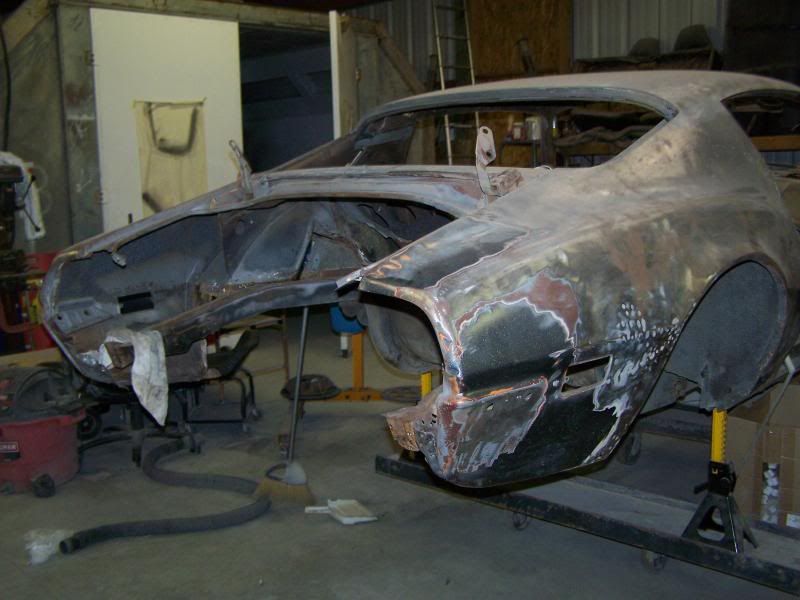 Fitting Trunk pan  Trunk drop offs 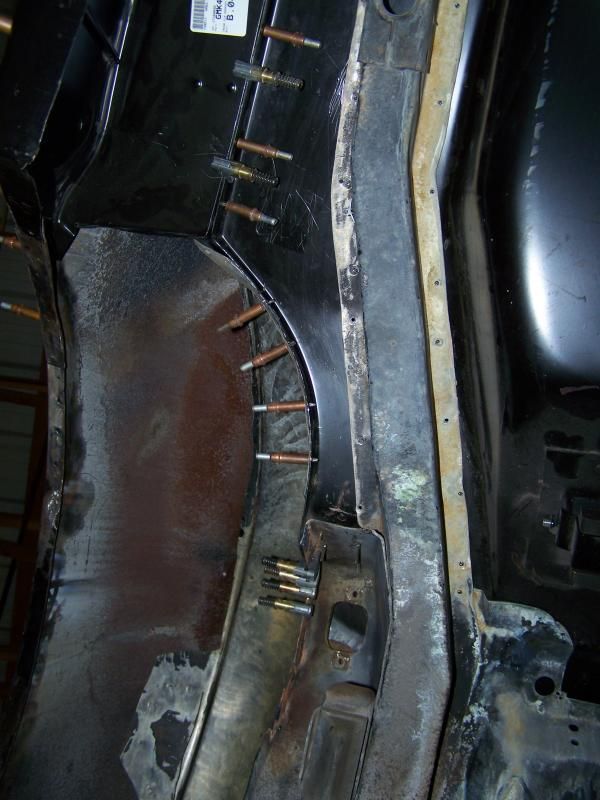 lower quarters patches 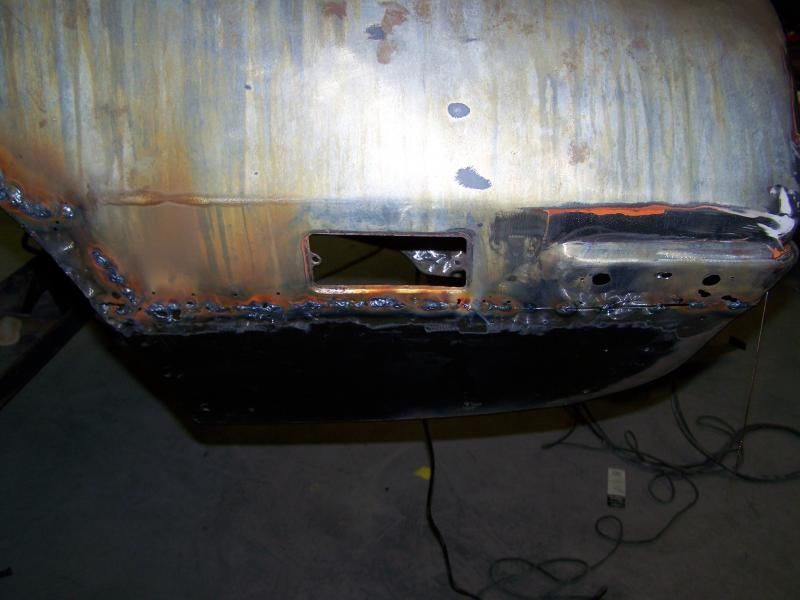   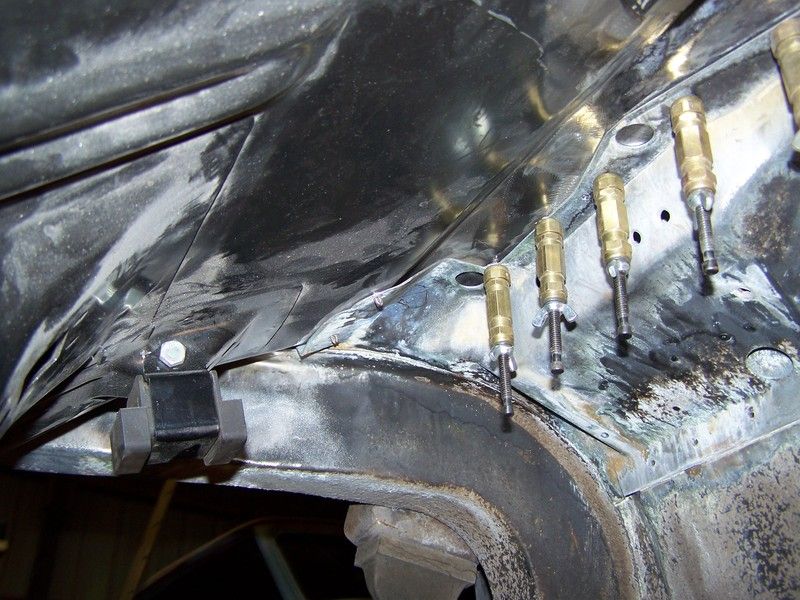 Believe it or not I reused this panel  
__________________
Dennis Barnett Pahrump NV. A&P Mechanic, FCC General radio Telephone Operator Line Maintenance A&P Mechanic and MOC Tech specialist. |
|
#2
|
||||
|
||||
|
Great job on the rust remediation. Honestly, all of that rot is pretty typical for a rust belt 2nd gen
__________________
1976 LeMans B09 Freeway Enforcer, 455/M40 Smokey 1977 Trans Am, 400/M21 Black/Gold Bandit. 44K actual miles 2017 Sierra SLT 1500 Z71 4X4  2019 Canyon SLT Crew 4X4  
|
|
#3
|
|||
|
|||
|
I started this thing 6 years ago many other projects have gotten in the way since starting it and life in general.
but I am back on it and making slow progress. my Tig welding 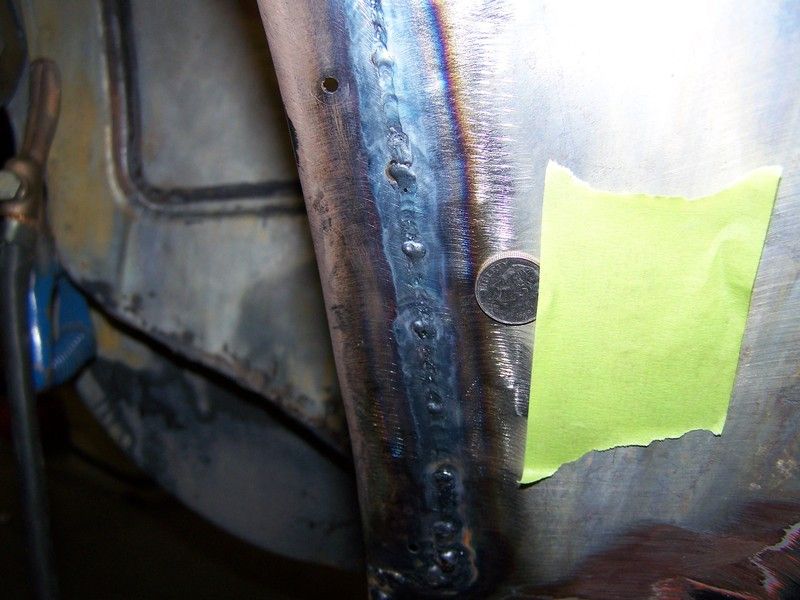
__________________
Dennis Barnett Pahrump NV. A&P Mechanic, FCC General radio Telephone Operator Line Maintenance A&P Mechanic and MOC Tech specialist. |
|
#4
|
|||
|
|||
|
Here's a few more pic's
           I got this panel its the inner tail panel will see how well the new one fits  [/quote] [/quote]
__________________
Dennis Barnett Pahrump NV. A&P Mechanic, FCC General radio Telephone Operator Line Maintenance A&P Mechanic and MOC Tech specialist. |
|
#5
|
|||
|
|||
|
__________________
Dennis Barnett Pahrump NV. A&P Mechanic, FCC General radio Telephone Operator Line Maintenance A&P Mechanic and MOC Tech specialist. |
|
#6
|
|||
|
|||
|
As If all that were not enough for me to deal with, I have this as well.
Why didn't I walk away from this one I knew it was a Rust bucket why oh why 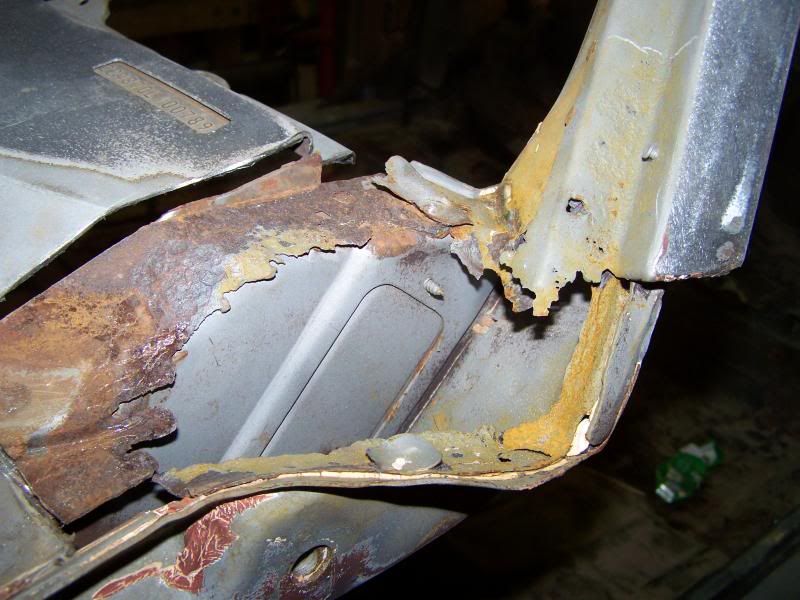 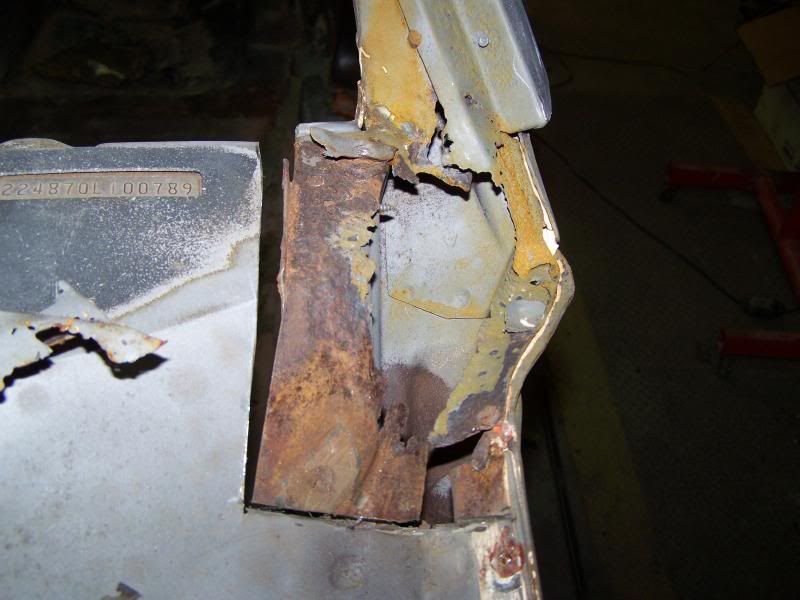 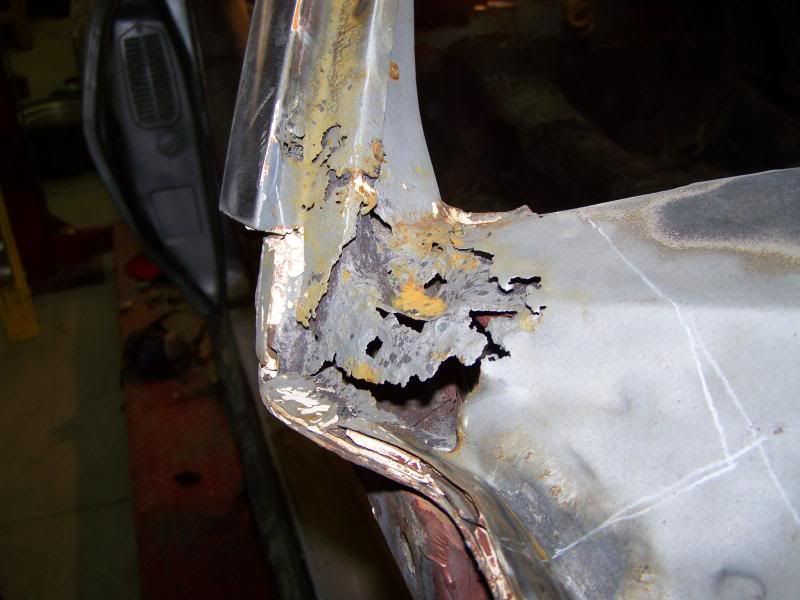 This is gonna get interesting in the repair department :knockout:
__________________
Dennis Barnett Pahrump NV. A&P Mechanic, FCC General radio Telephone Operator Line Maintenance A&P Mechanic and MOC Tech specialist. |
|
#7
|
|||
|
|||
|
__________________
Dennis Barnett Pahrump NV. A&P Mechanic, FCC General radio Telephone Operator Line Maintenance A&P Mechanic and MOC Tech specialist. |
|
#8
|
|||
|
|||
|
Hey guy's how do these look? These are not for this car their for another car Im working on BUT I was thinking about doing it to the Birds parts.
windshield wiper things Before 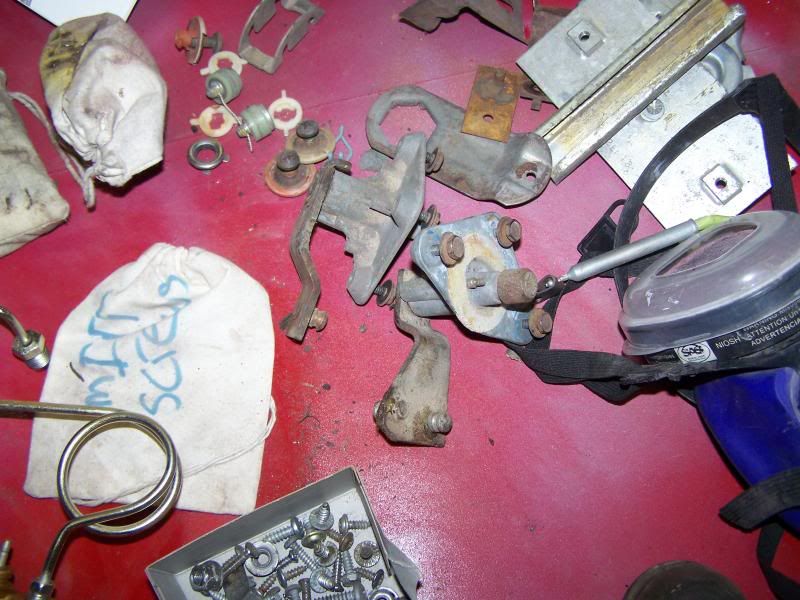 After 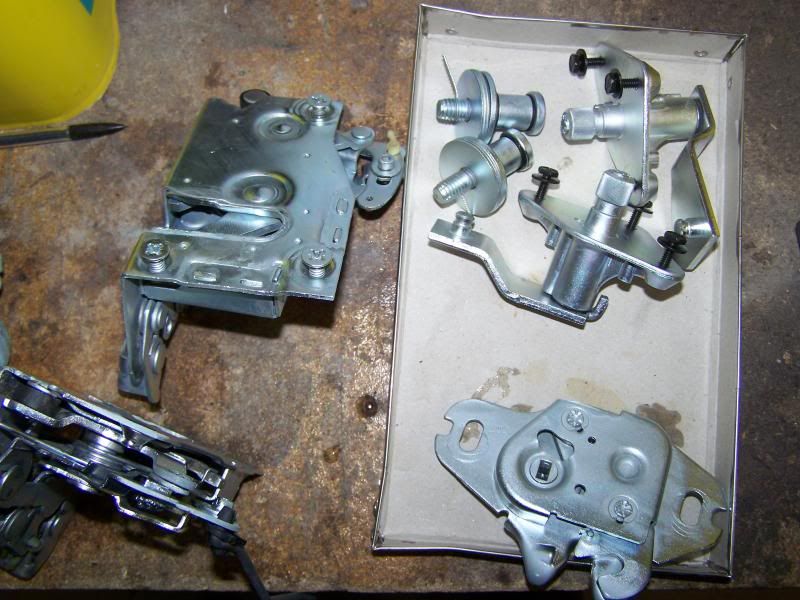 Lets see Door latches, trunk lock, door strikers, windshield thingy's 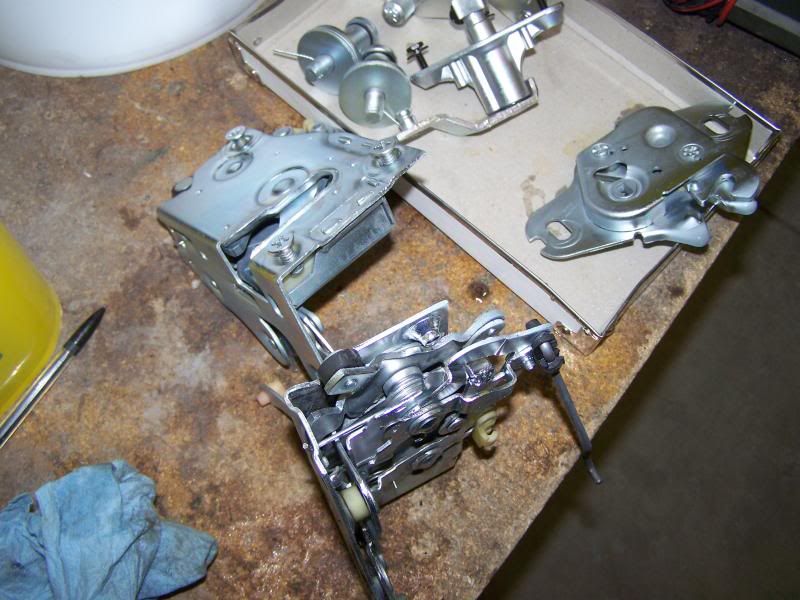 My favorite 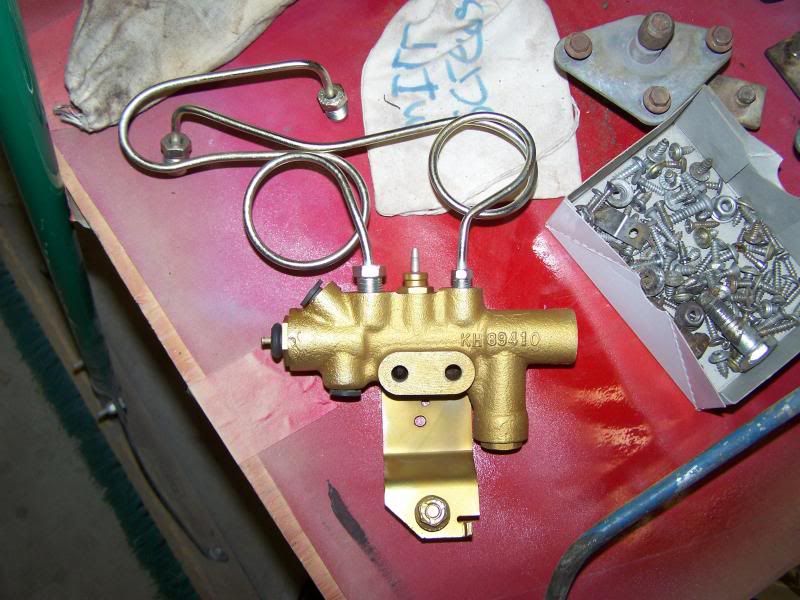 Not bad looking 45 year old hardware in my opinion
__________________
Dennis Barnett Pahrump NV. A&P Mechanic, FCC General radio Telephone Operator Line Maintenance A&P Mechanic and MOC Tech specialist. |
|
#9
|
|||
|
|||
|
Oh shucks almost forgot about today's update
     So hows that for Fit???? Try buying that in any store catalog!  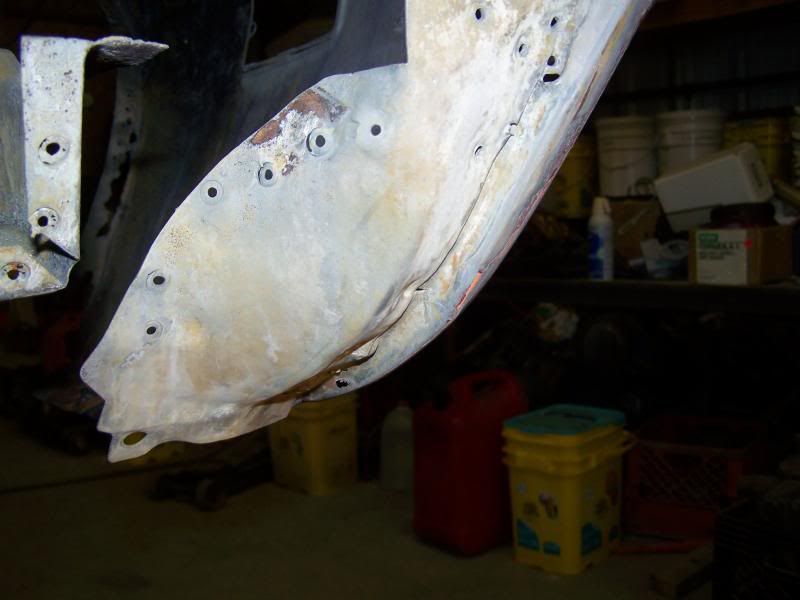 
__________________
Dennis Barnett Pahrump NV. A&P Mechanic, FCC General radio Telephone Operator Line Maintenance A&P Mechanic and MOC Tech specialist. |
|
#11
|
|||
|
|||
|
Why isnt my last posts links working???
I checked my P/B account my band width for linking is unlimited???? I don't understand the problem with my links ?????
__________________
Dennis Barnett Pahrump NV. A&P Mechanic, FCC General radio Telephone Operator Line Maintenance A&P Mechanic and MOC Tech specialist. Last edited by Doright; 11-06-2019 at 02:47 PM. |
|
#12
|
||||
|
||||
|
Looks like an ambitious project, but you're making good progress!
|
|
#13
|
||||
|
||||
|
Always great to see one getting saved!
Based on the VIN, it's an early production car. Did it have the pot metal tail panel filler on it? (if the original was still with it).
__________________
keith k 70 Trans Am RA III / T400 / Lucerne Blue / Bright Blue 70 Trans Am RA III / M20 / Lucerne Blue / Sandalwood 70 Formula RA III / M21 / Lucerne Blue / Bright Blue |
|
#14
|
|||
|
|||
|
Hey Keith
Unfortunately no it had a broken original plastic one on it. If It had the Pot metal one on it I would have just sold it to some one doing a Matching numbers resto though this car is just gonna be a Nice solid driver when done. Im still looking for a Super T10 or a Munci M22 for it (any one????) I have a 455 Im planning on putting in it. I still have the Pontiac 350 and auto tranny I pulled from it if any one needs a 70 350?????? I have no idea if it was original or if it ran I got it home and just pulled it as I knew I was putting a 455 in it.
__________________
Dennis Barnett Pahrump NV. A&P Mechanic, FCC General radio Telephone Operator Line Maintenance A&P Mechanic and MOC Tech specialist. |
|
#15
|
||||
|
||||
|
You have more patience than I ever will. Kudos for bringing it back.
__________________
" Is wearing a helmet illegal" Mike Kerr 1-29-09 |
|
#16
|
|||
|
|||
|
Nice project- love 70-73 birds. What process did you use to clean up the latches, hinges, etc? They look great
|
|
#17
|
||||
|
||||
|
Nice! Looks about as rough as my 70.
Looks like it's coming along great!
__________________
"Those poor souls have made the fatal mistake of surrounding us. Now we can fire in any direction" 1970 Trans Am RAIII 4 speed 1971 Trans Am 5.3 LM7 1977 Trans Am W72 Y82 1987 Grand National |
|
#18
|
|||
|
|||
|
Quote:
I first got started with Plating with a Copy Cad plating kit from Caswell many years ago There are other Plating baths commercially available from other Pro Plating outfits. I started with Caswell doesn't mean you have to use them. I am now getting into Copper & Nickle plating and making my own baths solutions. Most all are proprietary mixes so they can be expensive. I would love to get into Chrome But I would need a dedicated shop or shed for it myself. Just to many steps with Big dedicated Tanks special air extractors needed for the caustic fumes. Im not gonna kid any one Plating can be very expensive especially when first starting out uses dangerous chemicals and Heavy Metals which are dangerous and may cause cancer precautions must be taken proper Proper protective equipment must be used and when done with chemicals they must be properly disposed of also expensive! I keep my tanks sealed air tight when not in use prevents evaporation and check PH when ready to use again may have to raise or lower PH by adding to it but generally last a long time. Hardest part is cleaning the parts, Their is also some math involved to figure out a parts actual sq inch size once you know the Parts square inches you figure the out the Voltage and current to use to plate them then its just polishing the part or protective coatings. Its labor intensive if your doing a lot but easy work goes fast makes 50 year old parts look new again its not for every one. If you want to try Plating small parts get I suggest a small Kit from Caswell with a Battery for a Transformer like I did one thing led to another and I am in it deep! you can also use a Battery charger BUT be forewarned controlling Voltage and current is key to nice plating job you don't need a super expensive transformer or super hi current one for small parts the bigger the part the bigger the Bath the more current you need and bigger transformers.
__________________
Dennis Barnett Pahrump NV. A&P Mechanic, FCC General radio Telephone Operator Line Maintenance A&P Mechanic and MOC Tech specialist. |
| Reply |
|
|