


| FAQ |
| Members List |
| Social Groups |
| Calendar |
| Search |
| Today's Posts |
|
#241
 06-07-2009, 10:26 PM
|
||||
|
||||
|
.....was taken care of today, it was easy to keep putting off doing this unpleasant task.
The stock rubber floor mats need some attention before I can put them back in. 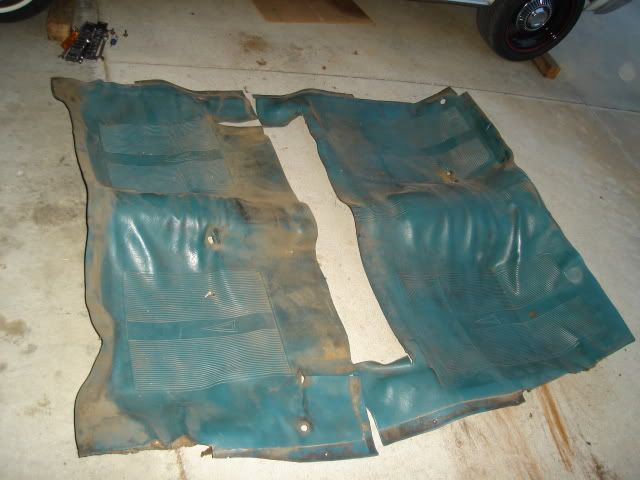 What is left of the old jute padding glued to the backside of the floor mats needed to be carefully scraped off, there are no new replacements available for these mats. 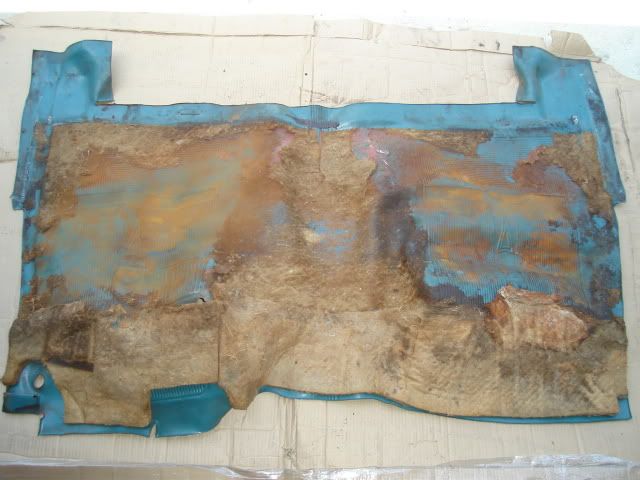 I set the mat in the sun to soften up the old red glue. I was able to scrape most of the old jute and glue off using a plastic spatula of all things, sharp enough to scrape the glue off but not sharp enough to cut through my irreplaceable rubber mat. Some gasoline on a rag was used to remove any remnants of the old glue. 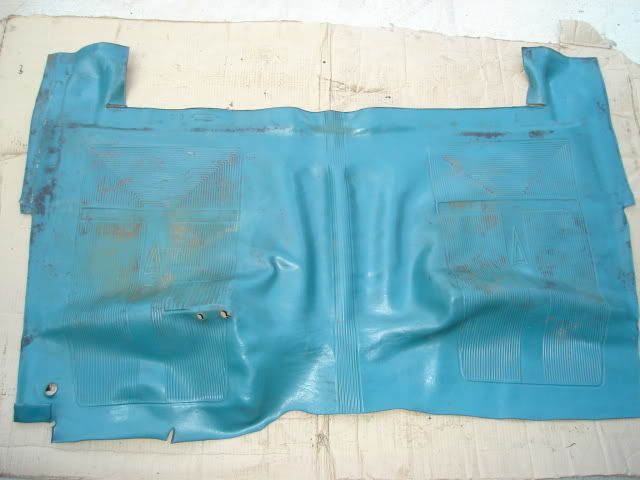 The top side was then scrubbed clean using a small carpet brush and some Simple Green. The color-keyed rubber floor mats used instead of carpet on the low-line Tempest model are just one of the features that add to the charm of these old economy cars. 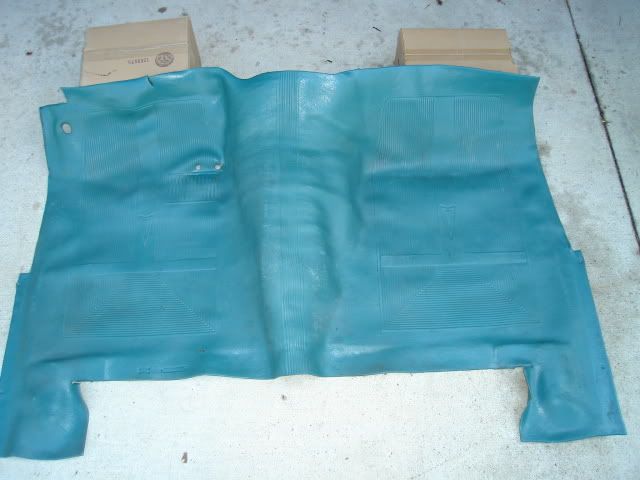 I spent the better part of 5 hours cleaning up the front (shown) and rear mats. I'm pretty sore after all that scrubbing, now I know why I put this off for so long. These old car projects do take a lot of time and patience. 
|
|
#242
06-08-2009, 07:44 AM
|
||||
|
||||
|
Have you thought of using fatmat or something like it under the mat to keep the noise and rattles down? IMO, I would go with some original looking carpet but the mat gives it that 'why bother looking under the hood' look until it's too late.
__________________
_____________________________ She woke up sunny side down and I was still thinking I was too proud to flip her over |
|
#243
06-08-2009, 08:08 PM
|
||||
|
||||
|
Quote:
One layer of Damplifier Pro covered by a layer of Luxury Liner Pro. This old Tempest will be as quiet inside as a new luxury car. I have my chance now to do it up right, this car won't be stripped down like this ever again. |
|
#244
06-11-2009, 12:55 AM
|
||||
|
||||
|
.....is getting some attention after waiting patiently for 6 months.
Today right after work I headed to the garage and freed-up my engine stand that had a Pontiac 400 block stored on it and put the LS3 up on the stand. The cast aluminum Corvette oil pan needs to be replaced with a new steel pan from Autokraft so the engine will fit the A-body chassis, so it has to go up on the stand for the pan swap. 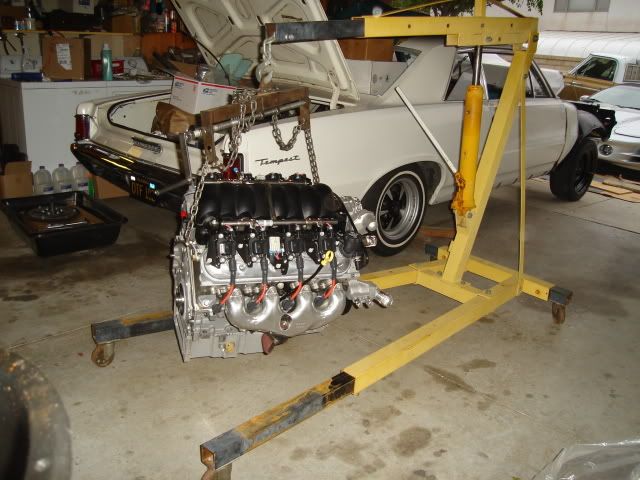 I'm hoping to test fit the engine and trans this weekend. I'll remove the core support and slip it all in from the front. It will have to go in and out a few times to locate the engine frame mounts stands and drill the crossmember to install them. I'm also expecting to do a little hammering on the trans tunnel to clear the fittings for trans cooler lines, and possibly some more dimpling to clear the 3 large bolt bosses at the top of the trans where the main case mates up to the bellhousing. Waiting for the big weekend. 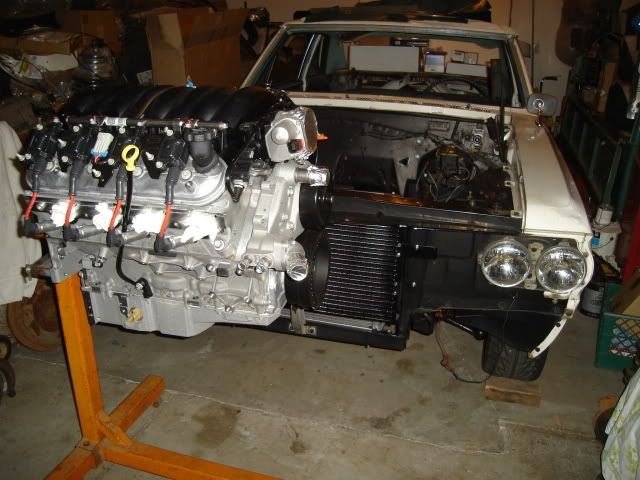 After putting the engine on the stand I pulled off the exhaust manifolds. These are beautifully designed castings with large clean ports that should flow a high volume of exhaust gasses quite nicely. I wish I could use these, but they won't fit my chassis. 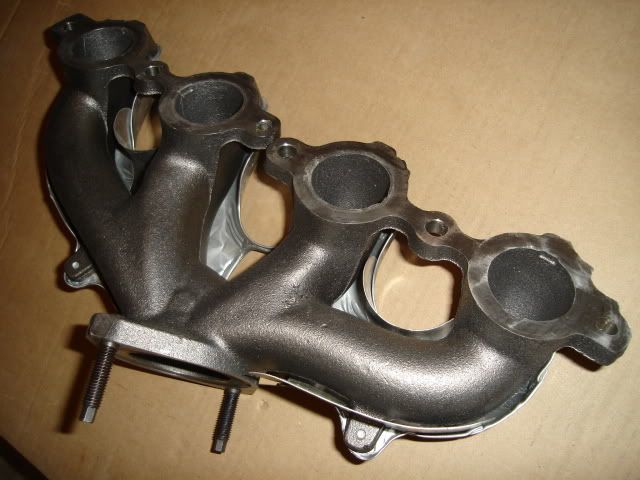 Modern casting technology at its best. The Pontiac V8 guys who use the well-designed factory Ram Air, High Output and Super Duty exhaust manifolds on their performance engines can appreciate these pieces. 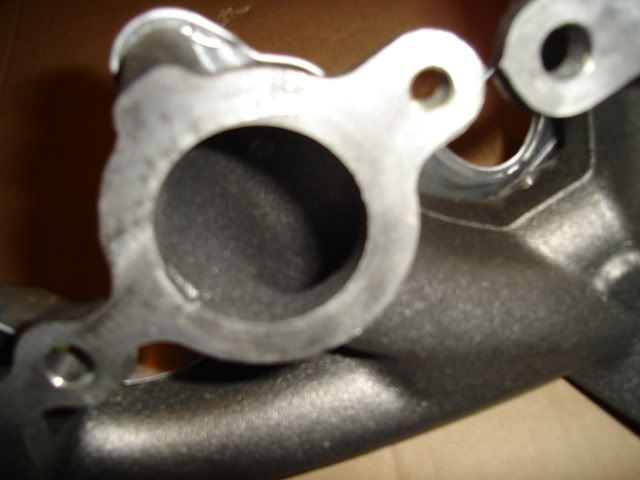 Movin' on. 
|
|
#245
06-11-2009, 09:41 AM
|
||||
|
||||
|
Quote:
Anyway, looking good! Keep at it.
|
|
#246
06-13-2009, 02:33 AM
|
||||
|
||||
|
.....after work preparing the engine.
Last night I swapped out the stock oil pan for the Autokraft pan after draining out and saving the 6 quarts of Mobil 1 5W-30 that the LS3 comes charged with. It's the only aftermarket pan that fits the A-body chassis and allows you to keep the oil filter in the stock location. Both the pan and pickup fit perfectly, no grinding or filing was necessary. I had to shorten all of the M8 factory pan bolts by about .180" (3/16") because of the thinner Autokraft pan rail, the two bolts that hold the filter adapter in place were left alone. The two long M6 X 135mm bolts at the rear of the pan were replaced with much shorter M6 X 25mm bolts. 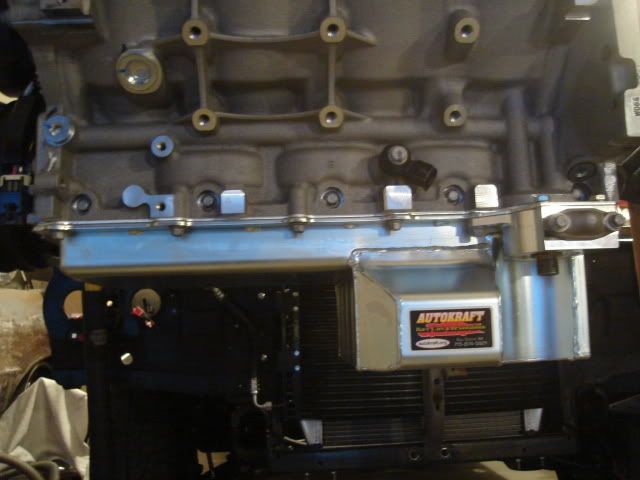 The stock oil filter won't fit the threads on the new filter adapter, I still need to find out what filter I need to buy. 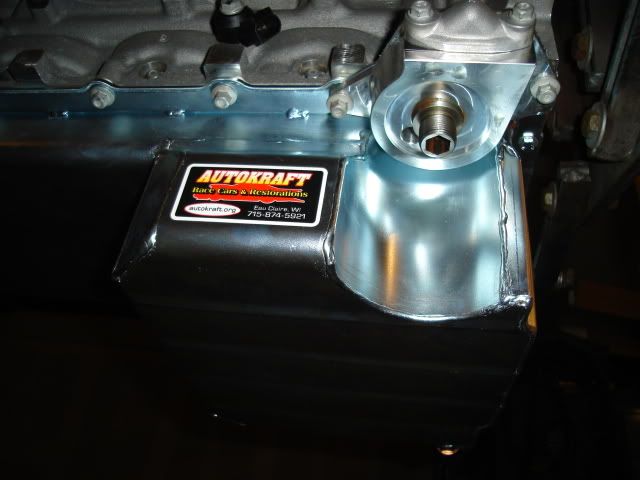 Tonight the Edelbrock engine mount adapter plates were bolted up after doing a slight modification with a half-round file so the 'bump' in engine mount backing plate would clear the inside edge. The file is pointing to the area that needed a little chamfer added. 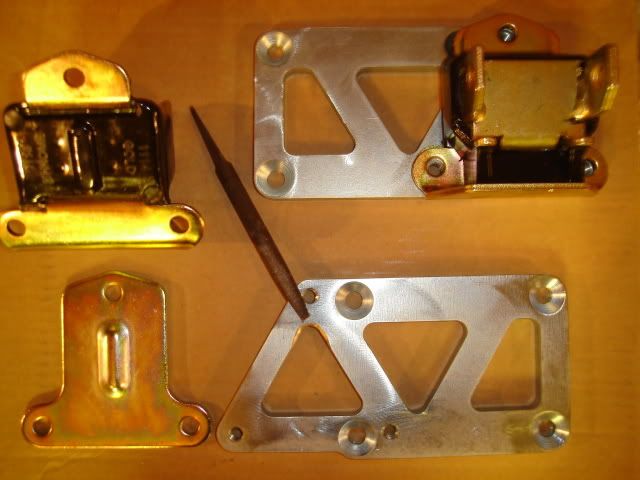 The engine mount adapter plates and Energy Suspension polyurethane engine mounts are now bolted in place using some blue Loctite. 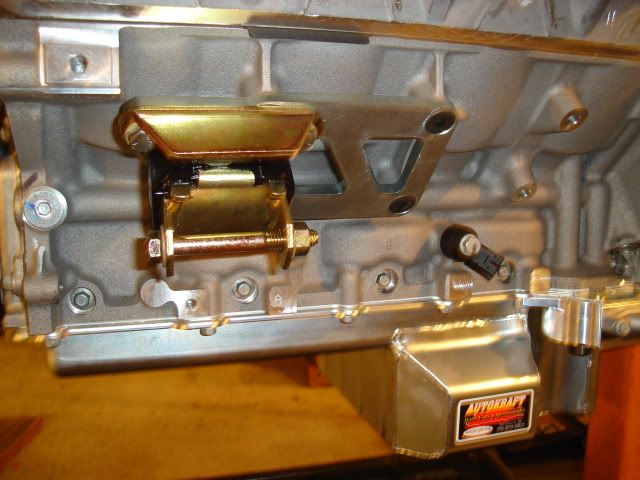 Getting a couple of the little jobs out the way during the week will give me more time for the bigger jobs I need to do this weekend. The weather has been nice and cool for the last few weeks, I have to get as much done as I can before the summer heat hits.
|
|
#247
06-14-2009, 05:13 AM
|
||||
|
||||
|
.....and a few steps back today.
First thing today I installed the new flexplate that I bought to replace the Corvette flexplate that will not work with a standard drivetrain. I took the opportunity to test fit the YANK converter snout into the back of the crank, all was fine. 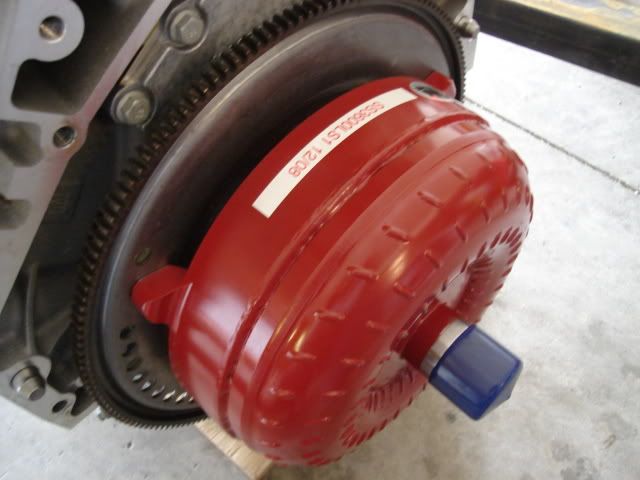 The converter was then primed with fresh trans fluid, I was able to add less than a quart. There was plenty of fluid already in it since the converter and trans were tested together on a transmission dyno. I then measured the distance between the converter mounting lugs and the mounting flange. I did this partly to make sure the converter was seated all the way (it wasn't, it went in another 1/2") and to calculate the need for any shims between the converter lugs and the flexplate. 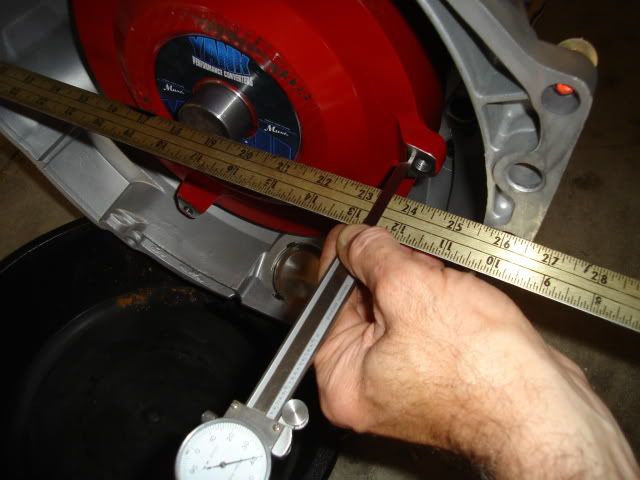 Next I measured the distance from the mounting flange on the block to the face of the flexplate. After doing a little math I found that the converter will need to be pulled towards the engine by .250" in order to mate up to the flexplate, a little too far. It's best to keep this distance between 1/8" and 3/16" (.125" to .1875") to make sure the converter is engaged far enough into the front pump on the trans. I'll find 3 hardened washers that are exactly the same thickness to get it into spec, something between .060" to .100" thick will work. 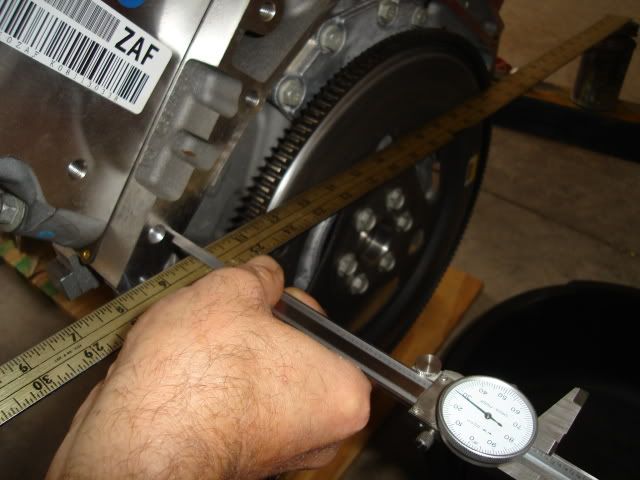 Since clearance inside the trans tunnel will be very tight I removed the straight cooling line fittings and put in a couple of 90 degree fittings. I'll probably loop the trans lines rearward and down before bringing them forward. 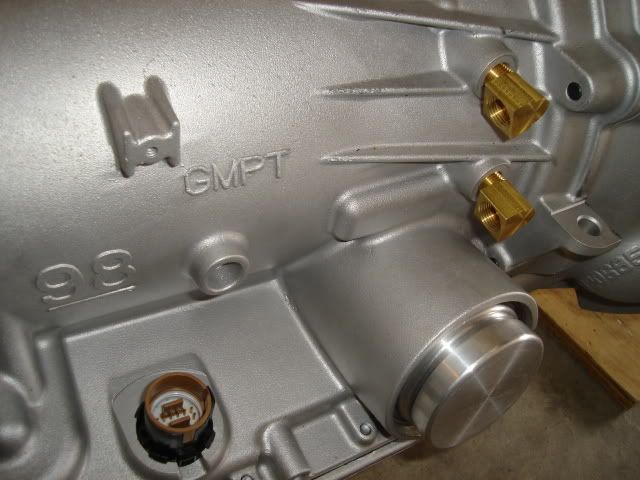 Next I bolted the trans up to the engine, hoping that I could put them in as a unit. 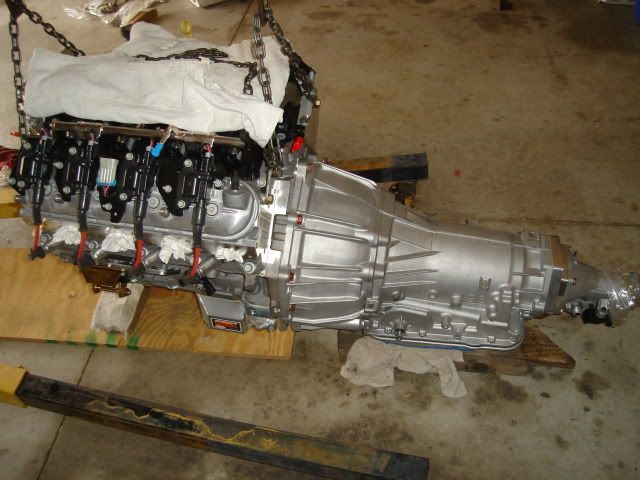 Here goes nothing. 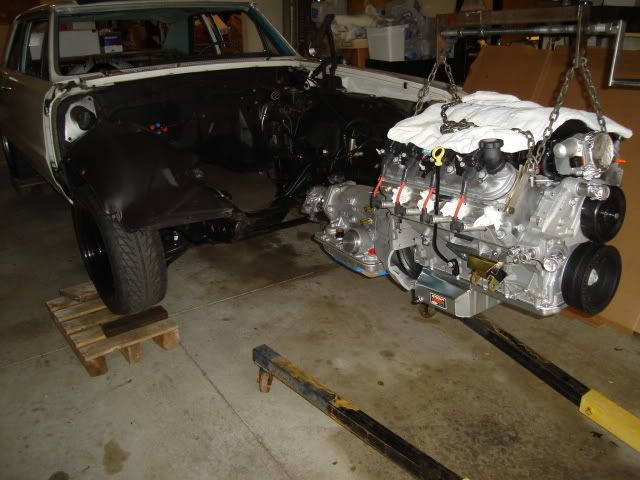 This is as far as it will go, the pan won't clear. The trans is stopped against the top of the tunnel. 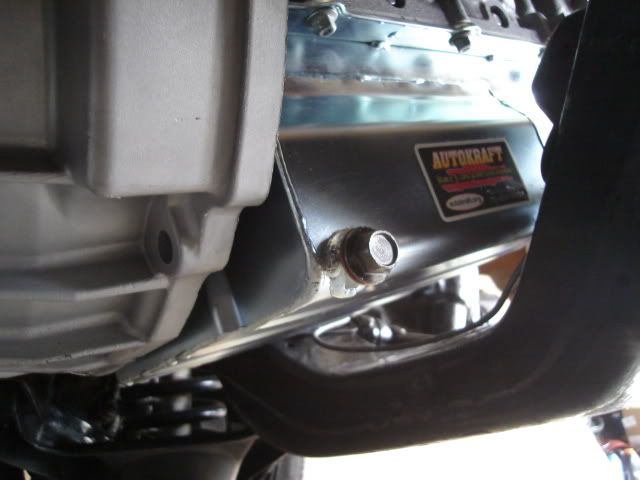 Very close here too, it's time to remove the engine and trans and separate them and put the engine in by itself. I had read that the engine and trans couldn't go in together as a unit but I just had to see for myself. 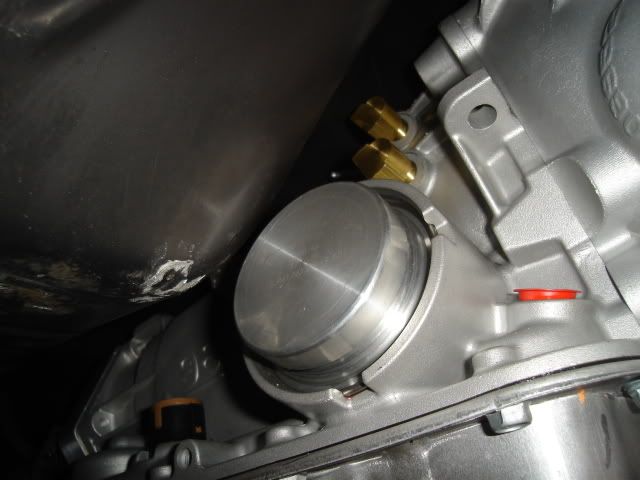 Engine is back in and is now sitting on the mounts where it needs to be, time to pull it back out and drill some holes for the engine mount stands. 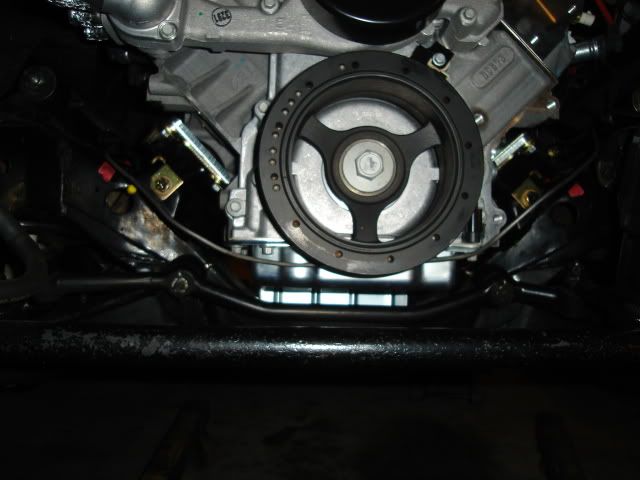 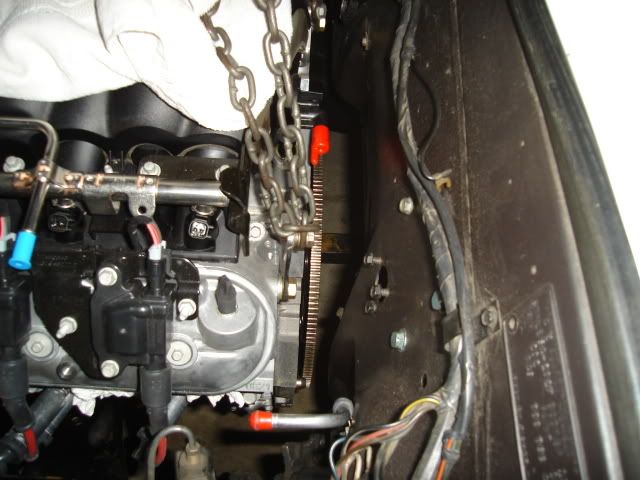 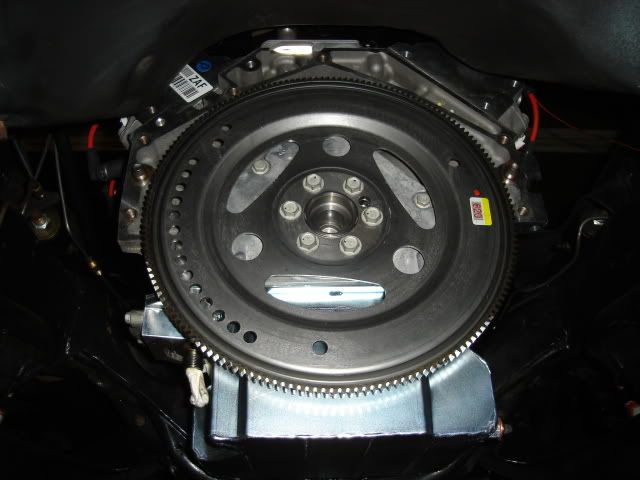 Mounts are now bolted in place on the crossmember and the brake line reconfigured to clear the new mount locations. 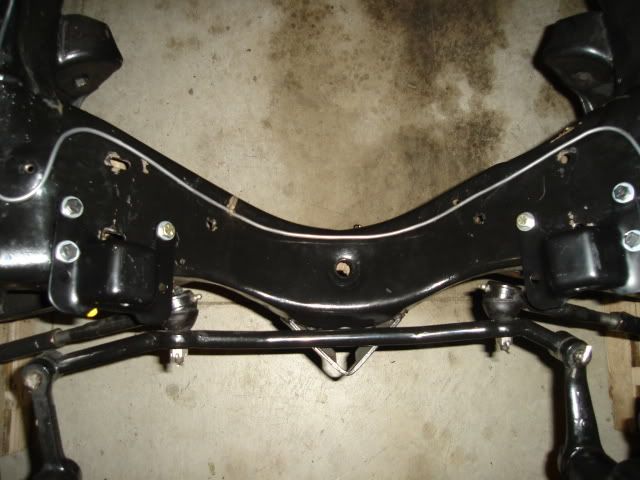 Engine has been set back in place on the freshly installed mount stands. I'll leave it supported by the engine hoist overnight with a floor jack under the back of the oil pan for insurance. 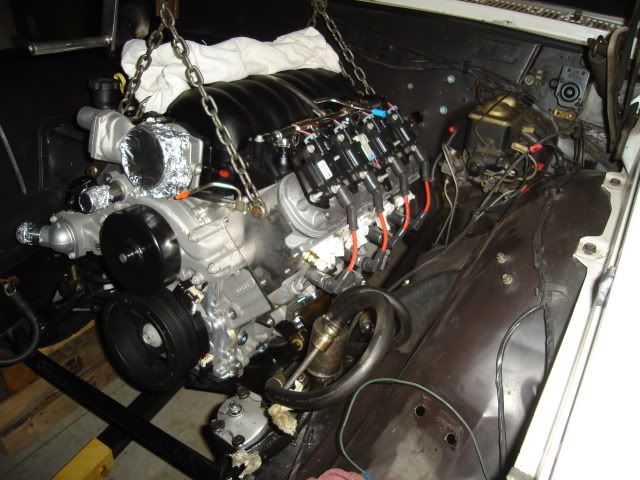 Tomorrow I'll mate the trans up to the engine and do any clearance work necessary on the tunnel (hammer time). I need to figure out where the trans crossmember needs to go, hopefully the original crossmember will work. I'll try to find some time to fit up the headers, I'm hoping they can go in place without removing the engine. End of a very long, busy day.
|
|
#248
06-15-2009, 12:11 AM
|
||||
|
||||
|
.....that the trans crossmember can no longer sit on top of the bottom section of the frame 'C' channel.
I can't slide the crossmember back far enough to get the trans in the car because it hits the supports for the center body mount on both sides. There's no way to put the trans in first and the crossmember in afterwards unless I change the way the crossmember attaches to the frame. The trans crossmember will need some mods done to the ends to keep the crossmember from sitting too low after I bolt it in from underneath the frame rail instead of having it sit on top of the bottom rail. I will make a slice the pretty much right along on the black line at the bottom in the pic and bend the end down so it's even with the bottom of the crossmember and then add a triangular piece to fill the gap. Next I will slice it straight down along the other black line and remove that piece so the frame rail will clear, I can use a piece of 2" X 2" X 3/16" angle iron to fill the gap there. While I'm doing the mods to the crossmember I'll search out a transmission jack to get the trans into the car safely, a floor jack just won't do in this case. 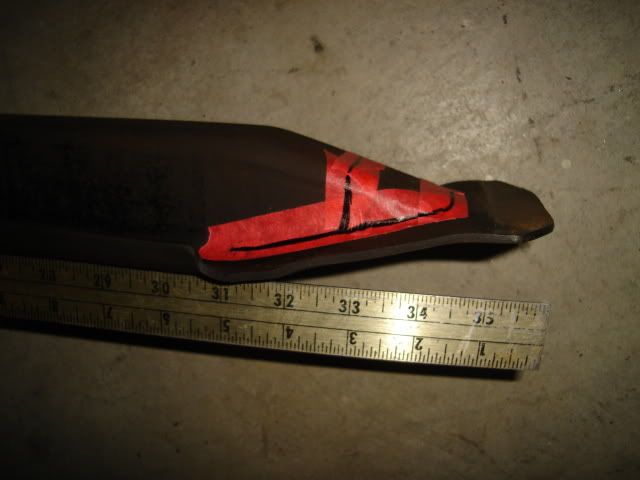 I searched through my scrap metal pile and found an old radiator support crossmember that I made for an old project. I was able to use it as a rear engine support by making a couple of angle iron brackets that attach onto the rear control arm bolts. The oil pan rests on a wood block, this will keep the engine in place while I'm working out the trans fitment and other issues. 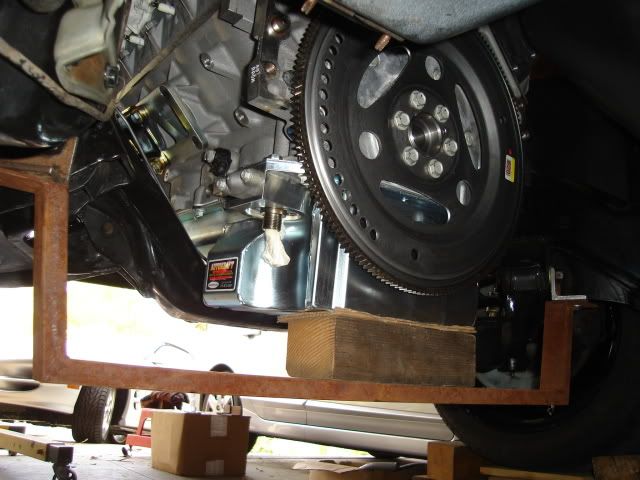 Finally the LS3 is sitting in the car. 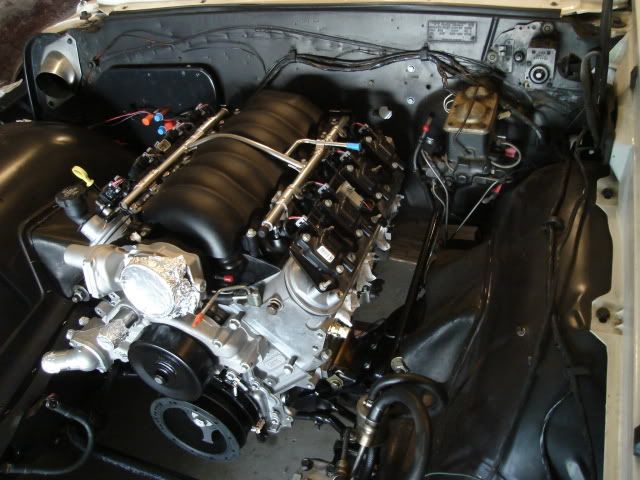 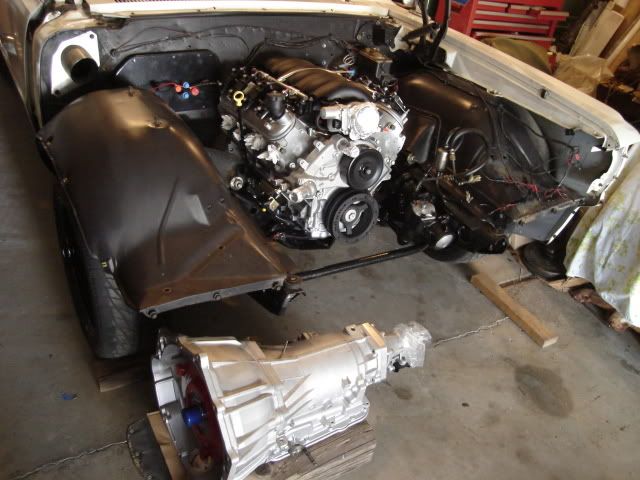 That's all for this weekend.
|
|
#249
06-15-2009, 09:40 AM
|
||||
|
||||
|
I'm following this thread! GOOD STUFF! I am not up on the new stuff and someday I had thought about doing this swap.
__________________
The thick CLOUD of tire smoke ,the SMELL of burning rubber,and the CHEER of the crowd ....PRICELESS. $90.00 fine for an awesome burn-out,worth every penny... http://www.youtube.com/watch?v=iI7beXh7xW8 |
|
#250
06-16-2009, 12:29 AM
|
||||
|
||||
|
.....the trans crossmember tonight.
Before any mods. 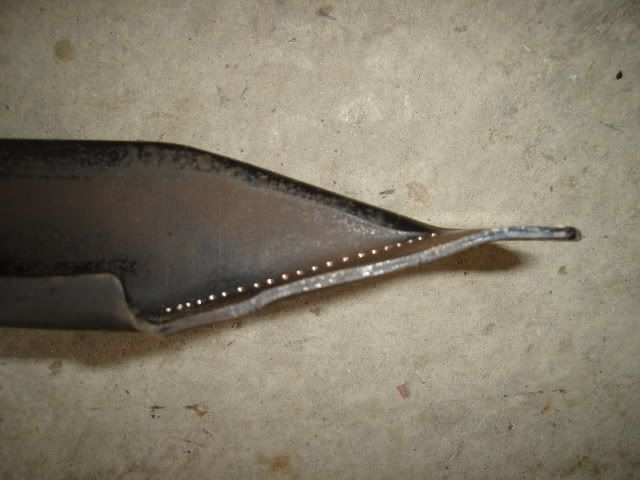 Before doing any cutting I stood the crossmember up in my 6" bench vise and straightened out the tips. Note the series of punch marks where I plan to start drilling some holes. 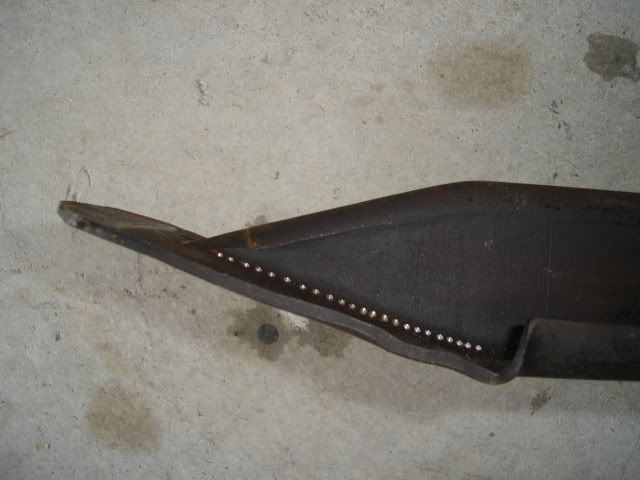 I used a drill that was about the same size as the width of my cutoff wheel to drill the holes. A quick slice with the Sawzall across the end and I'm ready to use the cutoff wheel. 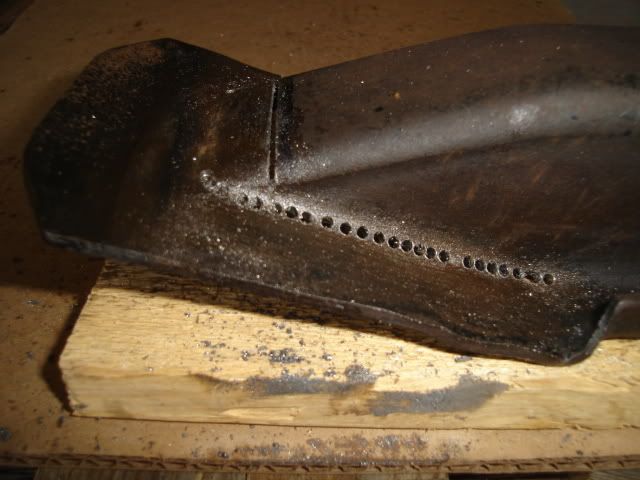 The cutoff wheel work goes quickly and accurately since most of the material on my cut line has been removed by the drilled holes. 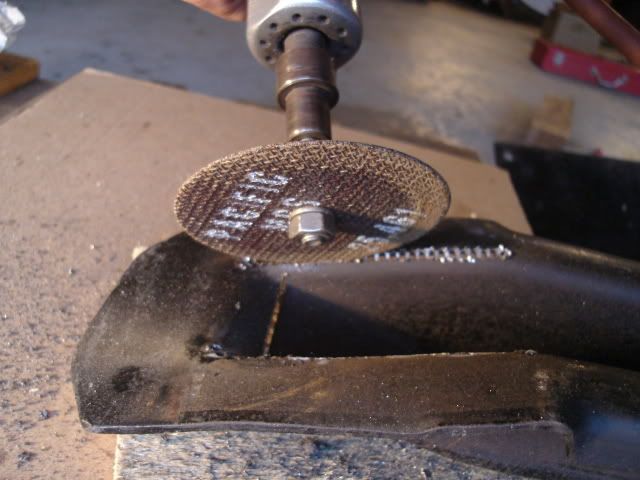 Next another trip through the bench vise to bend and straighten out the flanges and make them even with the bottom of the crossmember. Finally I used the vise like a press and flattened out the ends. 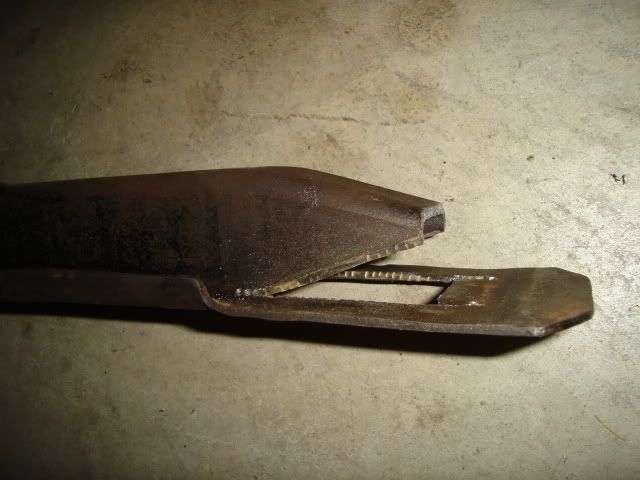 That's all for tonight, I'll fit it up under the car to check for fit and cut some filler pieces next. |
|
#251
06-17-2009, 12:24 AM
|
||||
|
||||
|
b-man, that is coming together nice. That is going to be a fun car when you get it done. Thanks again for sharing with us all. Pat
|
|
#252
06-17-2009, 12:25 AM
|
||||
|
||||
|
.....on the crossmember tonight.
Fitted it up and found that the tips didn't match up to the frame.  A little bit of careful bending in the bench vise took care of that. 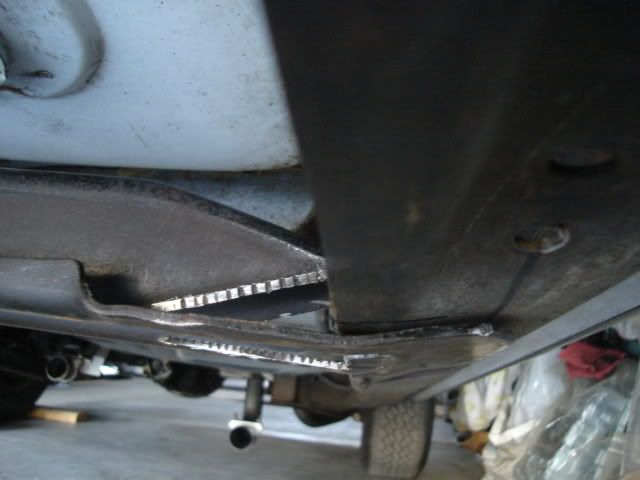 I scrounged up an old bracket made of flat steel plate that just happened to match up with the .135" material thickness of the crossmember to cut up for the filler pieces. After some work with a Sawzall and grinder it's now ready to weld. 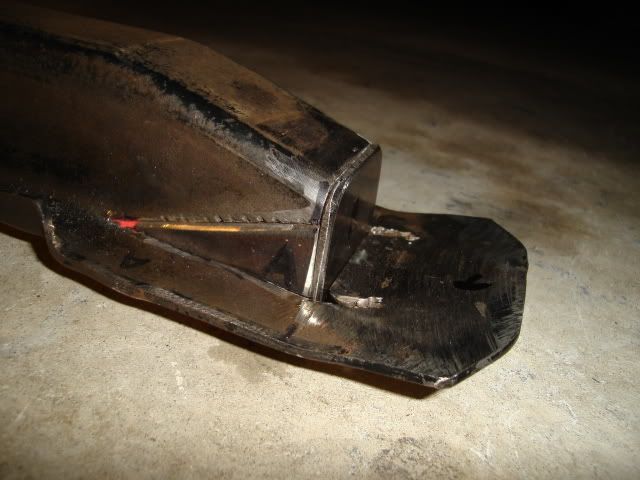 Now to hit up my friend with the MIG welder for a favor.
|
|
#253
06-17-2009, 10:54 AM
|
|||
|
|||
|
This is my new all-time favorite PY forums thread. Go B-man! That is going to be one fine Tempest.
|
|
#254
06-18-2009, 12:53 AM
|
||||
|
||||
|
.....from the bottom of the car.
I knew there was probably a 1% chance of them going in, and of course they didn't. The next time the engine is out they'll have to be set in place in the engine bay and the LS3 will have to be carefully dropped down onto the mounts. Well, at least I took a picture of them. 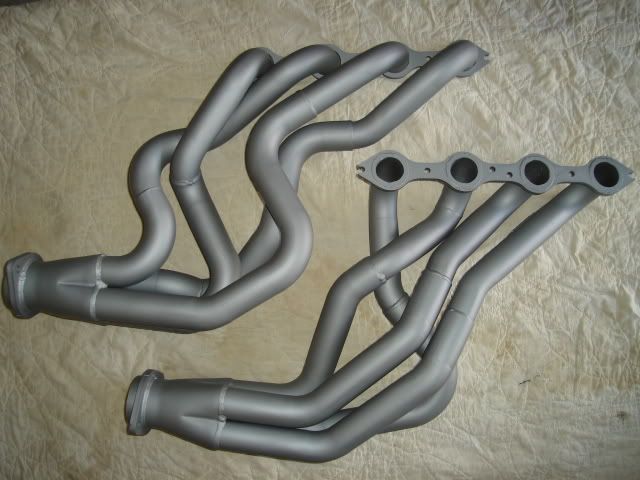 While I had the exhaust system on my mind I spent a little time modifying the muffler hangers, this pretty much consisted of making a couple brackets from 1-1/4" X 1/8" angle iron to bolt onto the hangers. I need to have a center to center distance of 26" for the muffler outlets and the hangers currently put them at 24". That's all for tonight, gotta keep chipping away at it. |
|
#255
06-20-2009, 01:26 AM
|
||||
|
||||
|
.....with Yukon Performance 3.42 gears has been custom-built for the Tempest by Jim Mitschke of JD Race & Restoration in Richfield Ohio (1 330 990 8155) and is now almost ready to ship.
I chose Jim Mitschke (monzaz on Performance Years) to build this rear end because I thought that his small shop that specializes in Muscle Car differentials would pay more attention to detail and build it like it was his own. I have seen Jim advertising and selling quite a few rear ends on PY over the past few years with many satisfied customers so I figured I would contact him. I wanted the '71 -'72 Buick 8.5" rear mainly for its strength and for the tapered bearing bolt-in axles, not to mention it's a direct bolt-in on any '64 -'72 GM A-body. I asked Jim to modify the spring perches so I could use the earlier '64 -'66 springs that bolt onto the perch with a clamp plate. A pair of poly bushings will be pressed into the upper control arm mounts on the housing. Upgrades include a new Eaton 30-spline clutch-type posi (replacing the stock 28-spline unit) that's known for its durability and long-wearing clutch packs. A new set of Moser 30-spline axles were added as well, not only for the added strength but it was the easiest way to get the 5 on 120mm bolt pattern I need to run my BMW-spec aftermarket 18X9" wheels. The axles will come with M12X1.5 studs that are about 1.75" to 2" long to better accomodate the C6 Z06 rotors that are .280" thick at the hub. These are just a couple of the many pics that Jim sent me during the build, this unit will be shipped out to me next week. Thanks for the great communication, pics and fine customer service Jim! 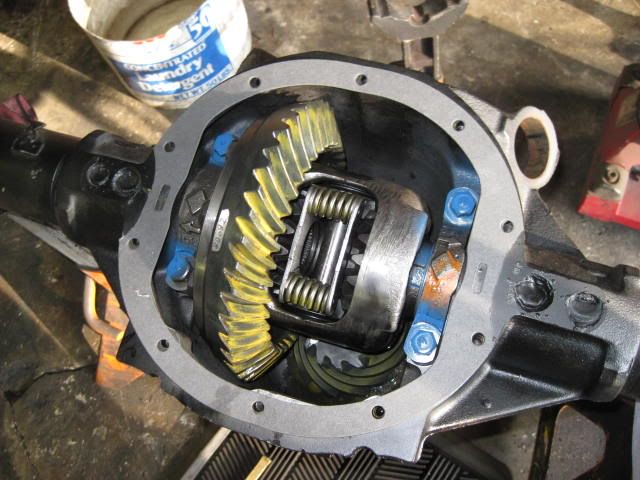 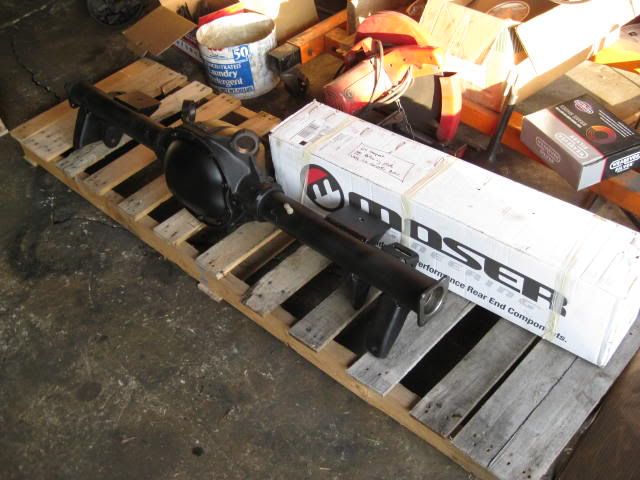 This rearend is the last big expense on the Tempest build. I'll be able to take the Tempest to the dragstrip once or twice without fear of shelling the diff, and do a little bit of 'spirited' driving when I want to. I'll still have to spend a couple of grand before it's all done on a new headliner, windshield, radiator hoses, serpentine belt, tranny dipstick tube, wiring, and all of the little things that nickle and dime you to death. Coming along.
|
|
#256
06-21-2009, 01:39 AM
|
||||
|
||||
|
.....so I can move forward on fitting up the trans, so this morning I spent some time modifying my old floor jack. I had a couple of pieces of 12" X 12" X .200" plate that were already the perfect size and thickness to do the job.
First I drilled and tapped a couple of holes 3/8-16 coarse thread in the jack base and then drilled the bottom plate to match and bolted it down. Next I drilled and tapped another 3/8-16 hole in the center front of the bottom plate so I could use a jacking screw to change the angle of the top plate as needed. A couple of 1/2-13 bolts and nuts are loosely attached at the rear corners so the plates can hinge, some 1/2" clearance holes were already drilled in all 4 corners of the plates.   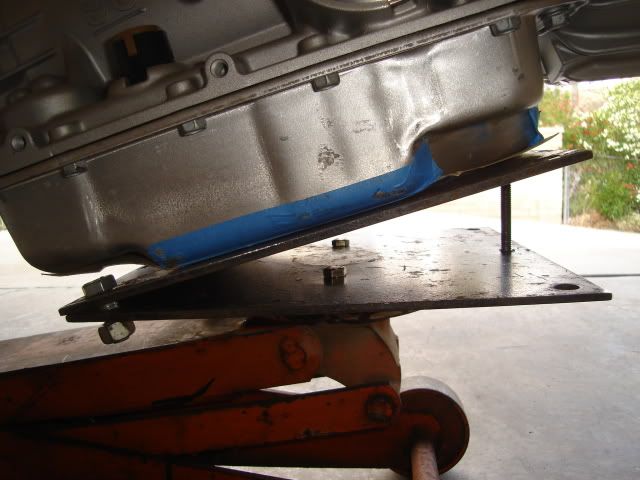 Nothing fancy but it's plenty stable and will do the job. The cost was right in my budget, zero dollars. 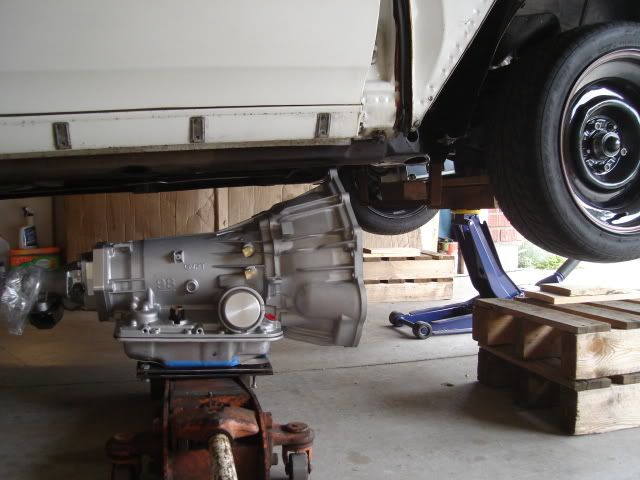 Now to grab my big 2-1/2 pound hammer and have at it.
|
|
#257
06-21-2009, 09:02 AM
|
||||
|
||||
|
Great idea & it looks like it'll do the job, but you may want to put some type of retainer to keep the trans from falling off. Maybe just a piece of angle iron standing up in the front & back of the plate.
Just lookin' out for ya...I want to see this project completed & it would be tough to do with a transmission stuck in the side of your head 
__________________
Tod Hoffmann 1966 GTO Montero Red Hardtop - Holley EFI'd 462, KRE DPorts/Muncie 4spd 1990 Chevy 454SS pickup - Accel DFI/T56 6spd - Hot Rod Power Tour Long Hauler 1996 Chevy K2500 ECSB 'Poopy' 2002 Honda VTX1800C 2016 Cadillac CTS Premium My project thread: http://forums.maxperformanceinc.com/...d.php?t=516826 
|
|
#258
06-21-2009, 10:30 AM
|
||||
|
||||
|
Awesome work, thanks for documenting it.
|
|
#259
06-21-2009, 11:30 PM
|
||||
|
||||
|
.....gently massaging the trans tunnel.
Nothing gentle about it, I'm pretty beat from laying on my back underneath the car swinging that big hammer. There was quite a bit of clearancing needed, I probably had the trans in and out about 15 times before I had the clearance I needed. The trans jack made this difficult job much easier to take on. Driver's side, checking where to start hammering. 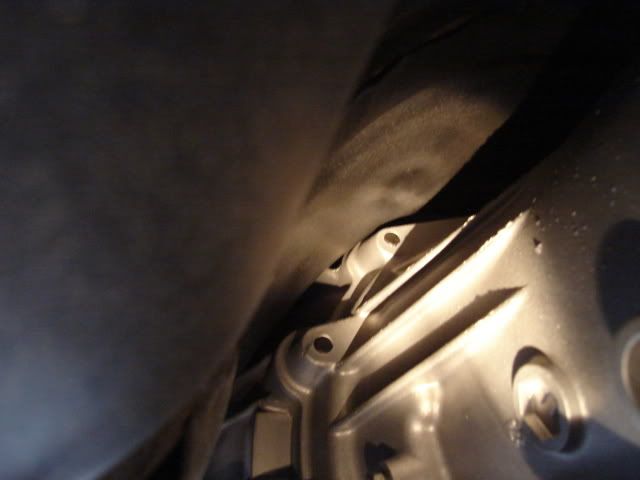 Driver's side, after a lot of hammering sessions. Note how much higher the trans now tucks up into the tunnel. There are spots where there is less than 1/4 inch of clearance, both in the areas I clearanced up front and further back over the top of the trans where I didn't need to do any work. 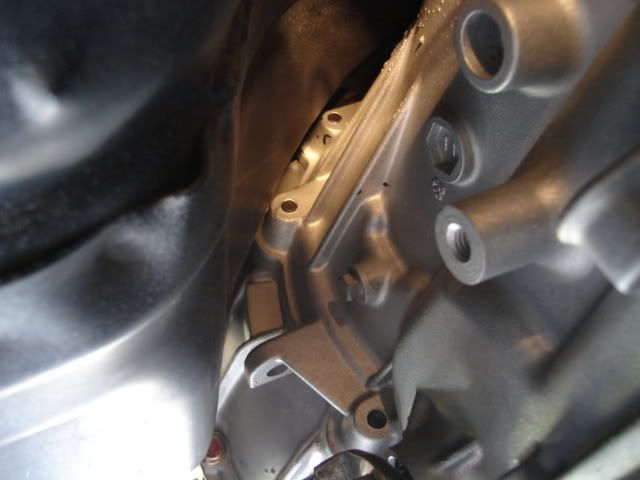 Passenger side before any tunnel mods, the trans cooler line fittings will come close by the time I get further into this. The 90-degree fittings were and absolute must. 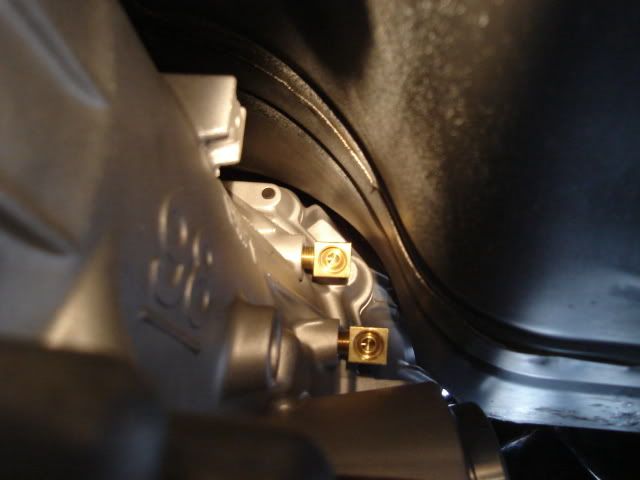 Passenger side again, after the onslaught. Note again how much higher the trans tucks into the tunnel. I also ended up hammering for clearance above the cooler fittings and took the corner off the top one with a file. 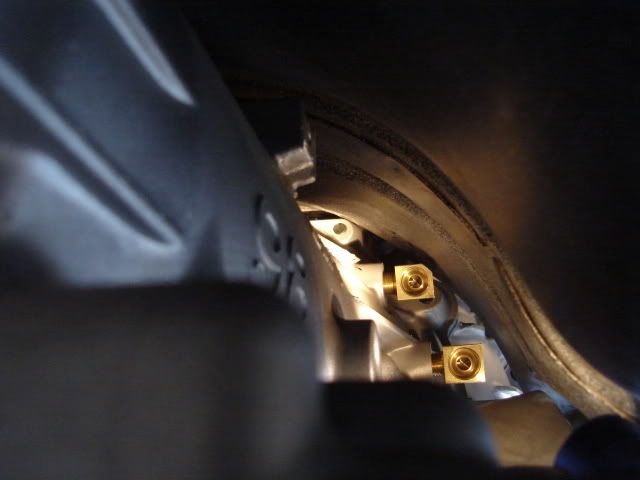 Banged in the floor pan by about an inch to make clearance here, I'll have to do some patching to repair the thin rusted metal that cracked. 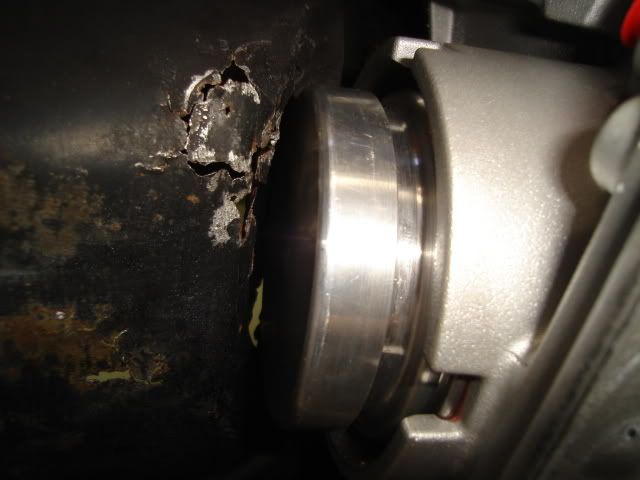 A look inside on the passenger side, I drew a line with a black Sharpie to better show the area that was modified. 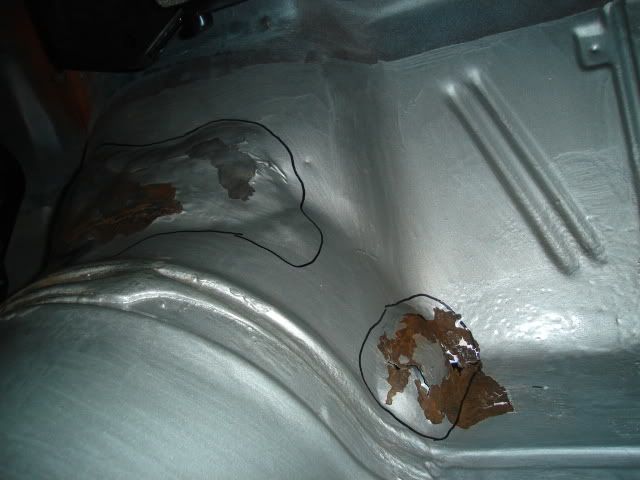 Driver's side, more work was needed on this side due to the less open shape of the tunnel. 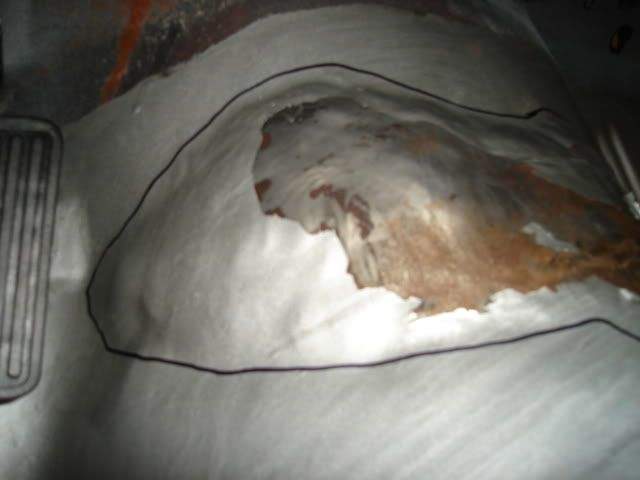 It was more work than I had expected, but the trans sits up nice and high where it belongs and my modified stock crossmember will work perfectly. 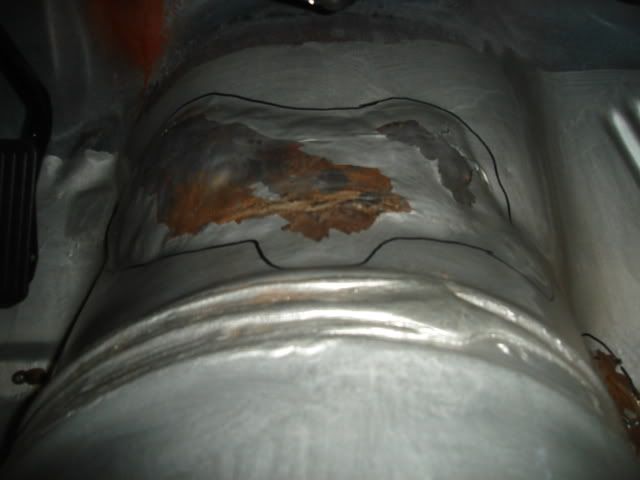 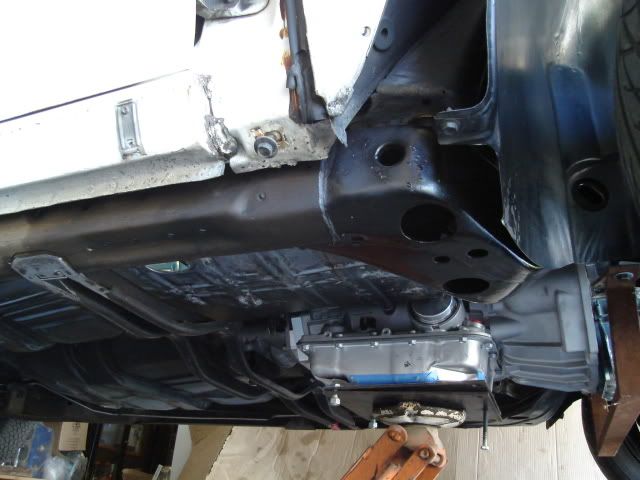 Profile shot, plenty of ground clearance. 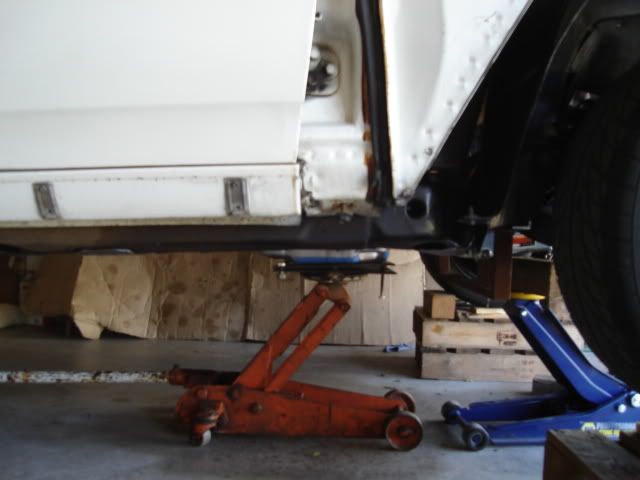 Passenger side head clearance to firewall with the trans in place. In order to mate the trans up to the engine I have to let the engine tilt back on the mounts until the bolt on the back of the head comes to within about 1/4" to 3/8" of the firewall. 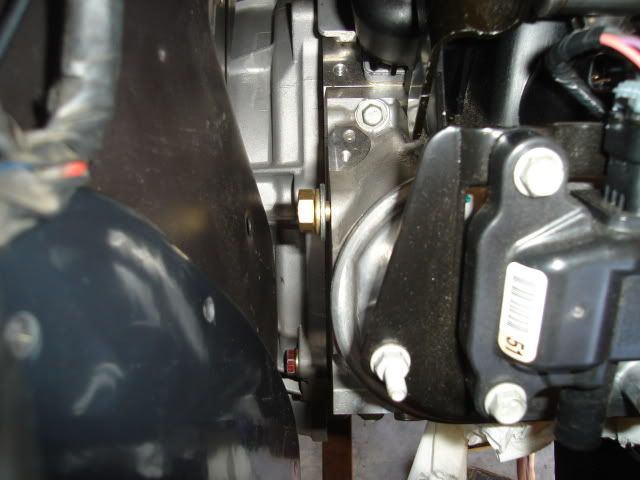 Driver's side head to firewall clearance. 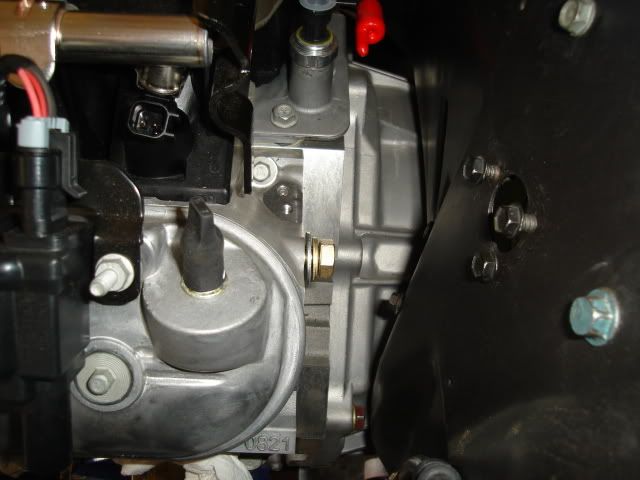 Looks like there's plenty of room for the trans dipstick tube I still need to buy. 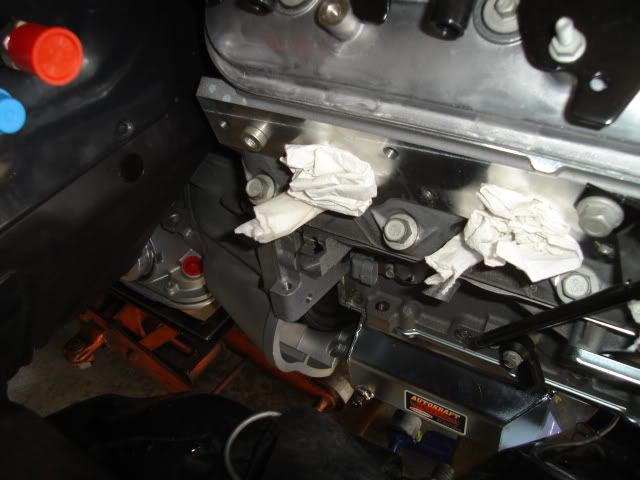 Fitted up the passenger side header from underneath the car. I had to remove my temporary engine support crossmember to get it in there, still a tight squeeze. I also found that I'll need to install my new lower control arms before the headers go in, there's no way to remove the rear control arm bolt with the header in place at least on this side. I made a quick attempt at putting in the driver's side header, but it looks like the steering shaft needs to come out first (this is mentioned in the brief installation instructions from Edelbrock). 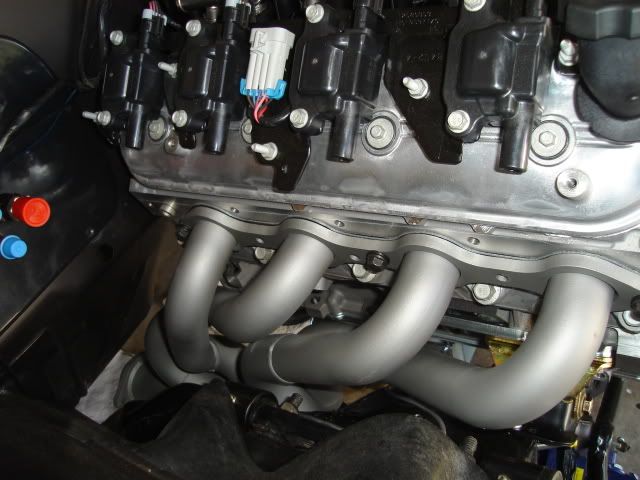 I accomplished one of the bigger tasks this weekend, the trans now fits and my crossmember modification won't need anymore tweaks. After I get the crossmember welded I'll fabricate a couple of 3/16" thick reinforcement plates to bolt underneath the tips where the crossmember attaches to the frame. Happy Father's Day!
|
|
#260
06-24-2009, 12:16 AM
|
||||
|
||||
|
.....after work today and fabbed up the reinforcement plates I need to securely mount the trans crossmember to the frame.
The lower plate that supports the ends of the crossmember is made of 3/16" steel plate, the upper plate that will sit on top of the frame rail is .140" thick. 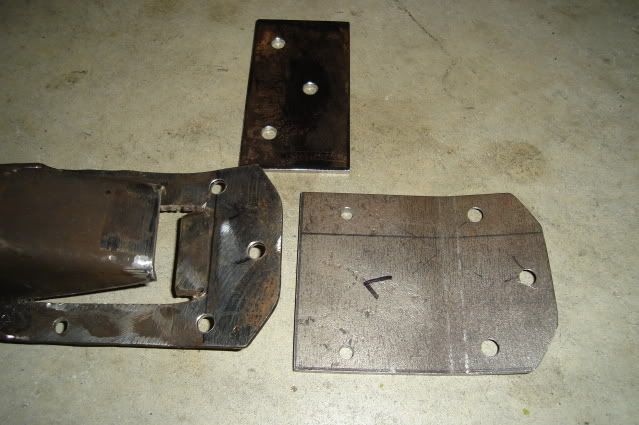 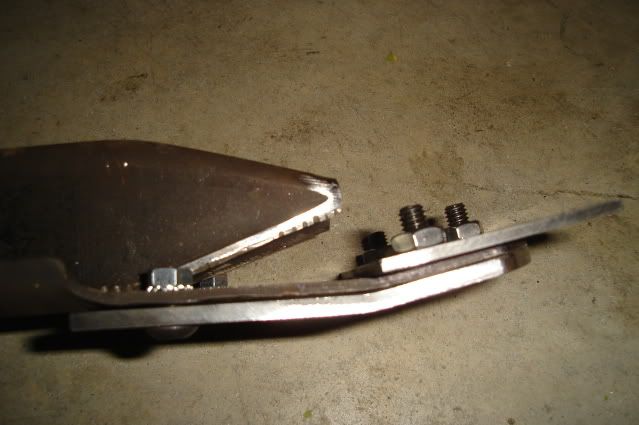 I decided to use three 5/16-18 flat socket head screws for a neater appearance so you won't see any fasteners from the side of the car. The two 1/4" fasteners holding the plate are temporary, I'll use some 1/4-28 hex bolts.  I was able to scrounge all the materials I needed from my stash, it's good thing I never throw anything away (although my wife would most certainly disagree with that). Another little job out of the way. As a side note, I found out that changing out the centerlink and such for parts from a different brand GM A-body won't make any difference. I'll dimple the oil pan a little and live with the reduced turning radius, it's good thing I'm removing the B-body spindles as they just compound this issue. |
| Reply |
|
|
The PY Online Forums is the largest online gathering of Pontiac enthusiasts anywhere in the world. Founded in 1991, it was also the first online forum for people to gather and talk about their Pontiacs. Since then, it has become the mecca of Pontiac technical data and knowledge that no other place can surpass.


 Linear Mode

