


| FAQ |
| Members List |
| Social Groups |
| Calendar |
| Search |
| Today's Posts |
|
#21
 03-09-2008, 10:37 PM
|
||||
|
||||
|
I glass beaded the intake today, and it didn't clean up as good as I hoped. I may need to paint it after all.
__________________
LEAD, FOLLOW, OR GET THE HE!! OUT OF THE WAY!!! HONEST JERRY'S SPEED AND EQUIPMENT
|
|
#22
03-21-2008, 07:25 PM
|
||||
|
||||
|
Actually got some work done today. Worked about 6 hours and finally got the engine pulled and the firewall stripped. Just a few more things to pull off the engine, and then the FUN part of cleaning, refinishing, replating, repainting, etc.
__________________
LEAD, FOLLOW, OR GET THE HE!! OUT OF THE WAY!!! HONEST JERRY'S SPEED AND EQUIPMENT
|
|
#23
04-12-2008, 09:28 PM
|
||||
|
||||
|
Despite the fact that my helper hasn't shown up in over 2 weeks, my wife was in the hospital for 4 days last week, and I took off to the Charlotte swap meet for a couple of days, I have made some progress.
I have gotten a lot of the small parts and pieces cleaned and painted, including the springs, shocks, brake drums, pulleys, alternator brackets, master cylinder. The Offy 2x4 intake and M/T valve covers are restored and ready to go. The alternator and starter have been to the electric shop and restored to show condition. The front swap bar, drag link, idler arm, and tie rods ends have been cleaned and painted. And today I painted the engine. First time I've painted any acrylic enamel in over 15 years. And using a new gun, it took a while to get the finish right on the engine. No pics today, I'll try to get some next week.
__________________
LEAD, FOLLOW, OR GET THE HE!! OUT OF THE WAY!!! HONEST JERRY'S SPEED AND EQUIPMENT
|
|
#24
04-14-2008, 07:07 PM
|
||||
|
||||
|
Some pics of the painted engine, springs and parts, & intake. BTW, for you guys running MT valve covers, what do you use for valve cover bolts? The regular bolts aren't long enough, I'm wondering if the RA IV style bolts would be long enough? Anyone know?
__________________
LEAD, FOLLOW, OR GET THE HE!! OUT OF THE WAY!!! HONEST JERRY'S SPEED AND EQUIPMENT
|
|
#25
04-14-2008, 07:10 PM
|
||||
|
||||
|
Here's the cheater slicks with the 15x7 black steel wheels for the back. Also here is a pic of the Radir wheel I have for the front in 15x4. The 5.60x15 Pro Trac's are on order for them.
__________________
LEAD, FOLLOW, OR GET THE HE!! OUT OF THE WAY!!! HONEST JERRY'S SPEED AND EQUIPMENT
|
|
#26
04-14-2008, 07:21 PM
|
||||
|
||||
|
Quote:

|
|
#27
04-14-2008, 07:30 PM
|
||||
|
||||
|
I've thought about those, but I'd rather stay with the stock look if possible.
__________________
LEAD, FOLLOW, OR GET THE HE!! OUT OF THE WAY!!! HONEST JERRY'S SPEED AND EQUIPMENT
|
|
#28
04-14-2008, 07:48 PM
|
||||
|
||||
|
It's been a very long time since I ran those, but I also ran the stems with the removable wing nuts.
|
|
#29
04-14-2008, 09:17 PM
|
||||
|
||||
|
If I remember right they are 1/4-20 right?? if they are some off of a 454 91'-5' truck would probably work. it has aluminum valve covers and the bolts have the little "bats" and 3/8"heads. I have also used allen head cap screws before on my M/Ts and they looked nice.
besides they stayed pu and didnt turn like the stems and wingnuts did its looking pretty good
|
|
#30
04-14-2008, 09:37 PM
|
||||
|
||||
|
Quote:
The car is really looking good Jerry, keep the progress reports coming. 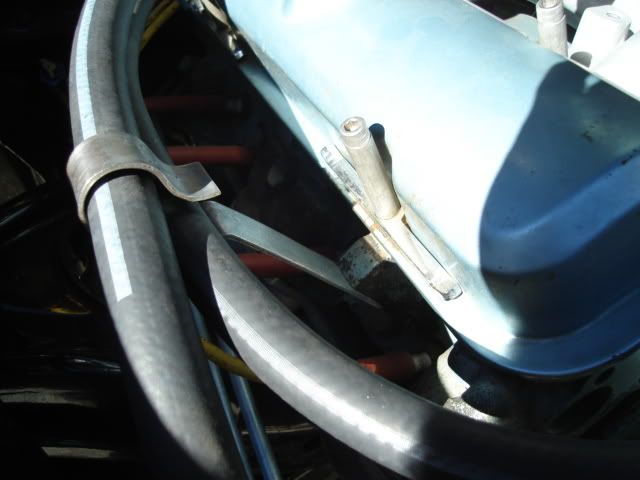
|
|
#31
04-24-2008, 08:45 PM
|
||||
|
||||
|
Well, today has been a big downer! My helper hasn't shown up for almost a month, but had called to let me know what was going on. Last week he called to say he would be here Thursday and Friday. He didn't show. I started trying to reach him Monday, and called his cell several times. Today about lunch time he called me back.
It seems he has taken another job as a firefighter, and has gone to school for 18 weeks immediately! He is going to school during the day, and then working his regular job at the hospital at night. Although I don't blame him for taking this opportunity, it really leaves me in a quandry. I would have never took the car this far down (or had him take it this far down) if I had known that he wouldn't be able to put it back together. Physically I just can't get down and under the car to paint underneath and replace everything. If I get down, I can't get back on my feet with the braces I have to wear. I can do the little things on top, but just can't do hardly any work below knee level where you need to get low. I guess I'll try to find someone else to help out, but this is a very small town mostly filled with retirees. I probably should have known better than to start this and to count on someone else.
__________________
LEAD, FOLLOW, OR GET THE HE!! OUT OF THE WAY!!! HONEST JERRY'S SPEED AND EQUIPMENT
|
|
#32
04-28-2008, 01:29 PM
|
|||
|
|||
|
Quote:
|
|
#33
04-28-2008, 09:33 PM
|
||||
|
||||
|
I just got some regular zinc plated bolts in there now. Doesn't make much difference at this point as I don't know if the car will ever be finished.
__________________
LEAD, FOLLOW, OR GET THE HE!! OUT OF THE WAY!!! HONEST JERRY'S SPEED AND EQUIPMENT
|
|
#34
06-22-2008, 11:42 PM
|
||||
|
||||
|
Just thought I'd post what progress I had made in the past few months. I've gotten all the little parts refinished, painted, etc and all my bolts, fasteners, hood hinges, etc back from the platers. I'm just waiting on someone to paint the underneath of the car, the front frame, firewall and inner fenders. Then everything will be ready for reassembly. I've talked to one guy and he promised to help, but then he started two more jobs. So, the car is still just sitting in my shop until I can find someone to work on it. I was hoping to just about have it finished by now.
__________________
LEAD, FOLLOW, OR GET THE HE!! OUT OF THE WAY!!! HONEST JERRY'S SPEED AND EQUIPMENT
|
|
#35
08-09-2008, 07:10 PM
|
||||
|
||||
|
Got a little work done it the past few weeks. It's been hot here and my shop is not air conditioned and very hot in the afternoons, so I don't go in there much. Got the trunk painted today. The light is the trunk photos is terrible, but it turned out pretty good. A couple of pics of the bolts and fasteners. And a pic of the driveshaft that I spent 4 days on sanding, puttying, sanding, puttying again, sanding again,etc. It was pitted so bad it looked like it had been shot with a shotgun before I started, it looks a ton better now. Hope to get some help soon.
__________________
LEAD, FOLLOW, OR GET THE HE!! OUT OF THE WAY!!! HONEST JERRY'S SPEED AND EQUIPMENT
|
|
#36
08-09-2008, 08:59 PM
|
||||
|
||||
|
from one jerry to another,keep up the great work and keep the pics rolling
__________________
aaaargh |
|
#37
08-21-2008, 12:52 PM
|
||||
|
||||
|
Got my carbs back from the rebuilder and mocked up my manifold this morning. Also got my manifolds coated and the stripes on the driveshaft. Got a call yesterday from a guy who was interested in helping me finish the car. He was supposed to call this morning and come by but I haven't heard from him yet. My luck!
__________________
LEAD, FOLLOW, OR GET THE HE!! OUT OF THE WAY!!! HONEST JERRY'S SPEED AND EQUIPMENT
|
|
#38
08-29-2008, 05:17 PM
|
||||
|
||||
|
I've gotten a couple of minor project done this week. Picked up the tow tabs and got them painted. If anyone else would like a set I have a template I could email you. (Thanks Keith for the detailed pics that my fabricator used to make these up). I also had this bracket made up. Let's see if anyone is reading this thread. This bracket will mount under the dash. What will it be used for?
__________________
LEAD, FOLLOW, OR GET THE HE!! OUT OF THE WAY!!! HONEST JERRY'S SPEED AND EQUIPMENT
|
|
#39
08-29-2008, 05:45 PM
|
||||
|
||||
|
Quote:
 Quote:

__________________
'63 LeMans Convertible '63 Grand Prix '65 GTO - original, unrestored, Dad was original owner, 5000 original mile Royal Pontiac factory racer '74 Chevelle - original owner, 9.85 @ 136 mph besthttp://www.superchevy.com/features/s...hevy-chevelle/ My Pontiac Story: http://forums.maxperformanceinc.com/...d.php?t=560524 "Intro from an old Assembly Plant Guy":http://67-72chevytrucks.com/vboard/s...d.php?t=342926 |
|
#40
08-29-2008, 10:03 PM
|
||||
|
||||
|
Damn Keith, you're good! I matched the knobs to the vent knobs to give it that 'factory' look. What do you think?
__________________
LEAD, FOLLOW, OR GET THE HE!! OUT OF THE WAY!!! HONEST JERRY'S SPEED AND EQUIPMENT
|
| Reply |
|
|
The PY Online Forums is the largest online gathering of Pontiac enthusiasts anywhere in the world. Founded in 1991, it was also the first online forum for people to gather and talk about their Pontiacs. Since then, it has become the mecca of Pontiac technical data and knowledge that no other place can surpass.


 Linear Mode

