


| FAQ |
| Members List |
| Social Groups |
| Calendar |
| Search |
| Today's Posts |
|
#61
 06-14-2013, 10:14 PM
|
||||
|
||||
|
Quote:
I agree wholeheartedly about mechanically sound then good looking but you can have both. Did I understand that engine has only 37,000 miles on it and I assume it's a 400 ci? If so it should be just broken in. The Pontiac 400 is one of the best motors ever designed and built. No big block / small block nonsense. Just rugged. I say this because I have 87,000 miles on mine and it doesn't burn a drop of oil however you will likely have a real seal leak so drops on the floor. So I guess I'm surprised you need to rebuild the engine at this point. As for updates, I just finished (today) a front brake conversion, drum to disk, what a difference. 
|
|
#62
06-20-2013, 12:19 PM
|
||||
|
||||
|
No updates?
|
|
#63
07-24-2013, 04:00 PM
|
|||
|
|||
|
My 2 cents is...go 17" wheels and tires. You can find aftermarket wheels that look like torque thrust II wheels with tires already mounted on ebay pretty reasonably. Just use the bolt pattern as a search guide. Sure, they are not Dunlop tires, but they work well for as much as you'll use the car. Just don't go low profile...stick with a 45 to 55 series tire. Low profile is great for handling but the ride becomes jarring. Lots more tire choices in 17" than 15 or 16" these days.
As for equipment you didn't plan to buy but may need, search craigslist. If you go out and buy a nice Ridgid table saw new it will run you $550. Get one someone cared for used and its $250 plus may come with extra blades, etc. That's just an example, not that you need one. If its a compressor, keep this in mind. DO NOT BUY OIL-LESS. Get a cast iron head compressor that has oil. The ones without don't last. Also, my $1300 compressor is great for putting out a LOT of air, and for some things you need it. But my old (1970's vintage) $75 Sears 3 hp compressor on a 20 gallon tank will do 90% of the tasks I take on. And beyond that I could have taken it elsewhere...but I HAD to have the expensive compressor too. I'd like to say I've learned my lesson, but probably not. lol Final note...GREAT CAR! I hope you and the wife get some time to visit your local cruise nights or shows with the car. People dont only appreciate the spotless trailer queens. I have a 67 grand prix convertible that's coming back to life, and I love it. |
| The Following User Says Thank You to aronhk_md For This Useful Post: | ||
|
#64
07-25-2013, 01:51 PM
|
||||
|
||||
|
keep the pics coming i love this build..... nice ride ...
advice: get a 4 barrel and duel exhaust and u have plenty of the torque and power u need :]
__________________
1967 pontiac bonneville 4door ht 400 ci |
|
#65
08-07-2013, 07:21 PM
|
|||
|
|||
|
In-laws visited for 10 days? Check
5 days off My mom visited for 10 days? Check A lifetime of bourbon and country music? Check well, of country music anyway. Wedding in Toronto? Check So after a rather hectic month of playing tour guide, I had a chance to get the back end up in the air and start taking a look at 1960's big cat booty. First off, after popping the hub cap off the passenger side, there seems to be a stud missing. Sheared off a while ago looking at the rust. So off the bat, that's at least one set of new studs. I'll likely order a set of 10 and new lug nuts as well. 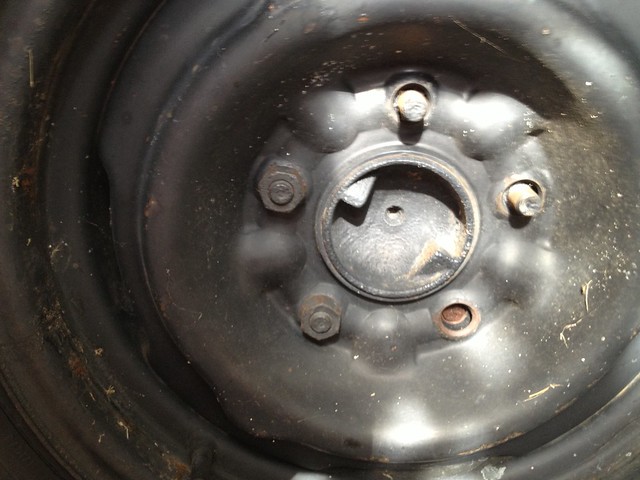 With the wheel off, there is the wonders of a barn find. 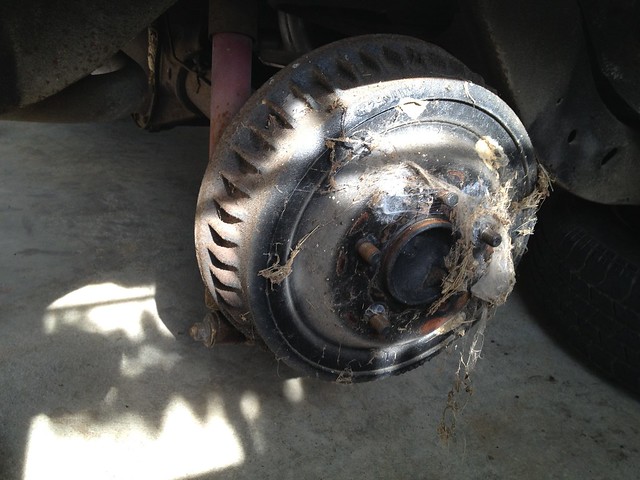 The forward part of the wheel well is showing some half hearted repairs, with lots of bondo and some fiber glass mat. Given that it's brittle and flaking, I'm willing to bet it's of 1980s vintage. That chunk on the ground dropped off as I was taking the wheel off. The wheel is under the frame just in case. and there are the 4 of 5 lug nuts. 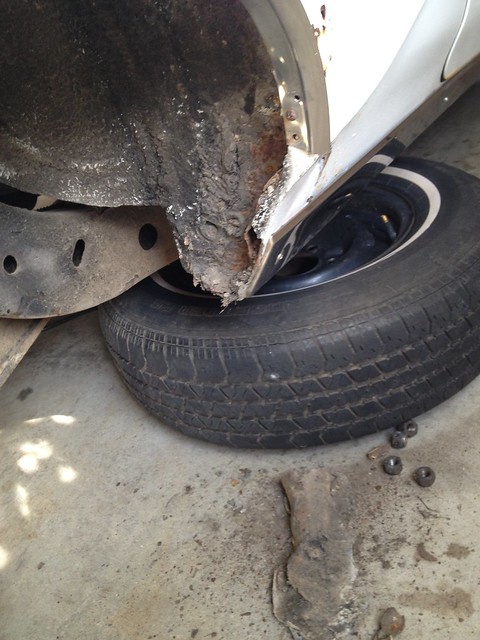 The rear drums are entirely separate units and held on by the wheel and lug nuts, just as I *thought* the front were. This is the driver's side drum with all 5 studs. The meat on the shoes is fairly worn, I'm glad we are getting to this now. 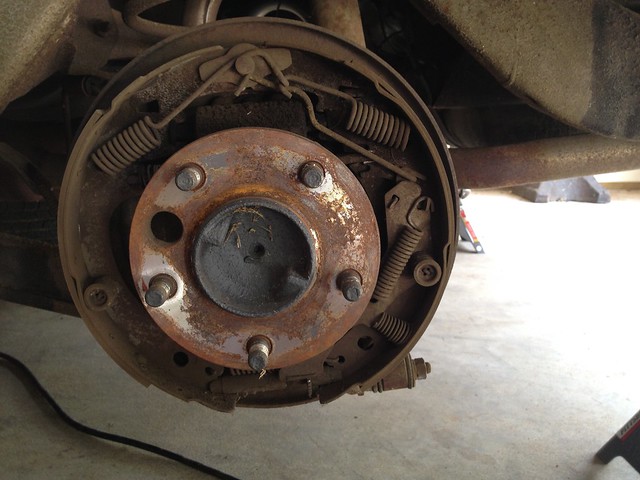 The brake shield is physically attched to the axle by 4 bolts. To remove the shield, you'd have to remove the rotor with wheel studs. and that doesn't seem possible. Not in the shop manual and not in any online resources. So I broke down the brake parts as best as I could. 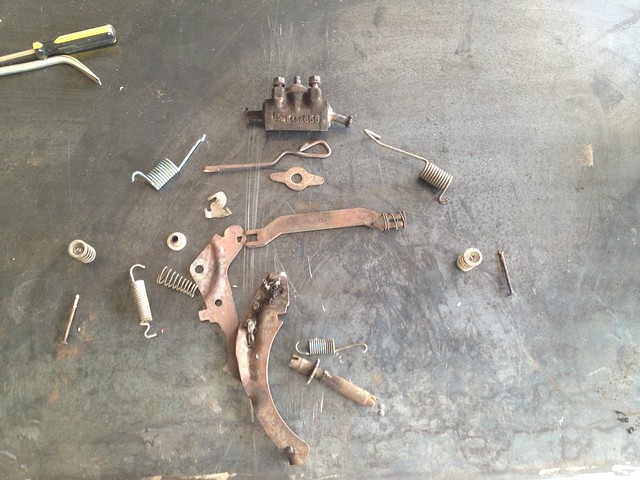 The brake line going into the driver's side is seized going into the wheel cylinder. That will have to soak in a penetrating lube a while. I'm a little worried that it will shear. So while I was debating my next move, I got these nice shots of the awesome exhaust installed at some point. 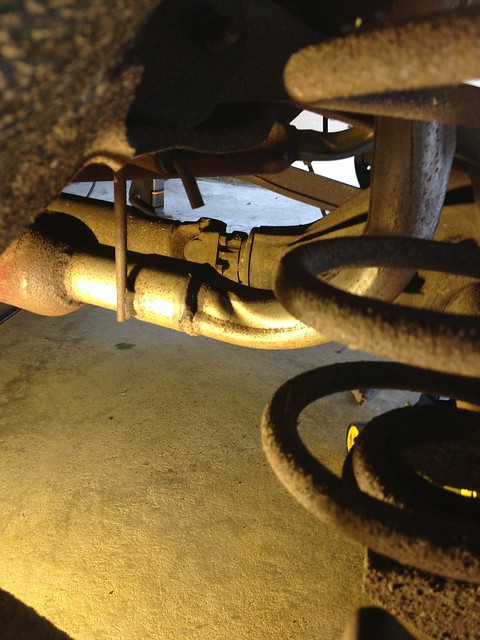 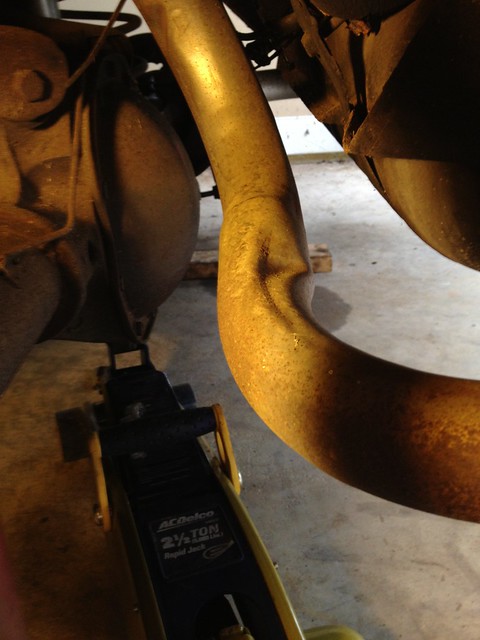 Crazy neat job, huh? yeah, this almost set my OCD into over drive. It looks like it was installed with $20 pipe bender and a hammer. After a quick phone call to my wife to vent, I simply decided to remove the entire rear axle now and work on the brakes off the car. First, off I had to disconnect the bake line from the frame to the 'T' splitter. That was seized solid and given the space I just disconnected the left and right lines from the 'T' and removed the splitter from the differential. After that, I disconnected the lower attachment points for the dampers. That let me lower the entire rear axle and make some room to work. With that, I was able to reach the upper 2 bolts that hold in the dampers. The nuts were practically blind, hidden behind a frame rail, so getting them out was a victory. 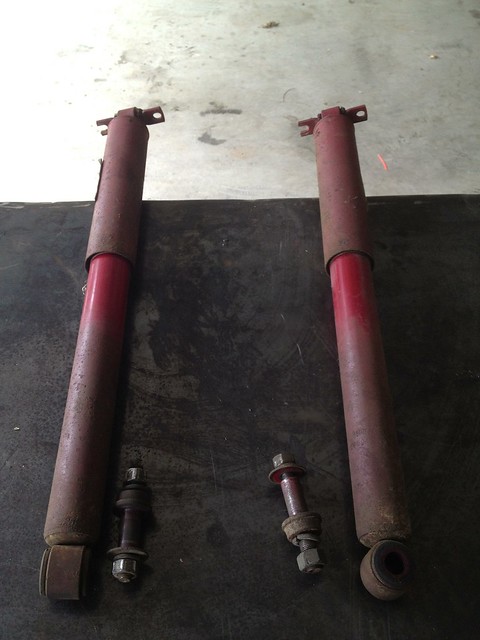 But that allowed me to get the springs out, which was a huge deal, in terms of space and pressure. next up were the control arms. The first was the lower drivers side. The impact wrench sheared the bolt head off so I couldn't get nut off and the brake shield blocked the removal from that side. So, I simply removed the bolts from the frame end. Once all 4 frame bolts where free, it was simply the U bolts the held the yoke to the drive shaft. Then I rolled the jack the entire axle and control arms out. 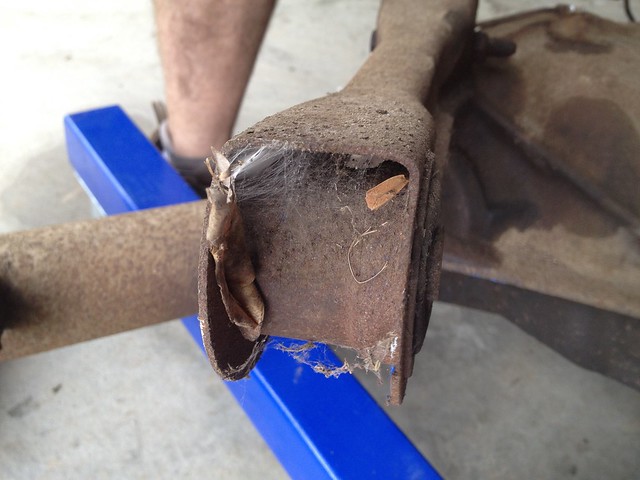 This is the frame side of the passenger upper arm. 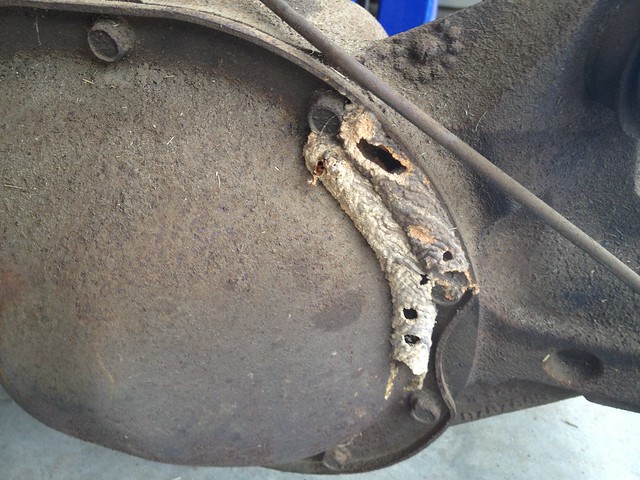 Rear differential nest. 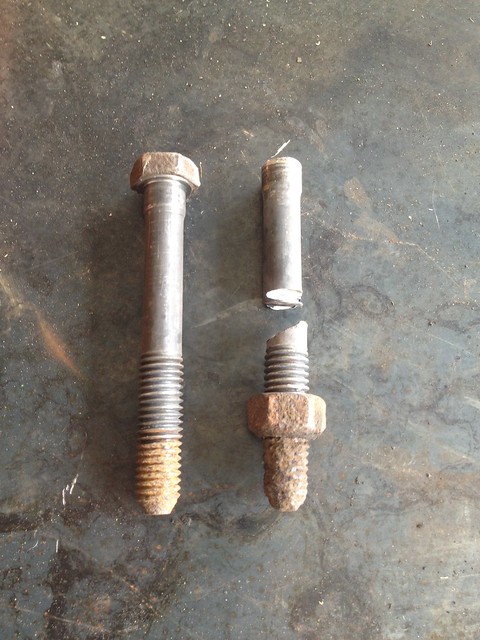 Lower control arm bolts, one cut up and removed in pieces. 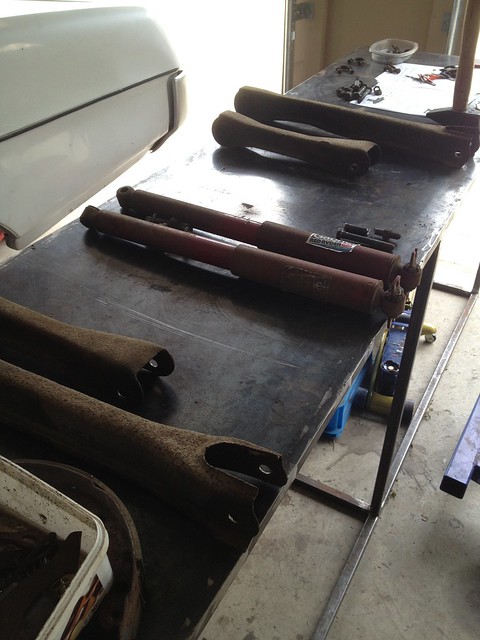 Here are the arms, removed and laid out with the dampers.  And there it is, the bare axle with the brake shields still on. As far as I can tell, to remove the brake shields I need to pull the 1/2 shafts out.
__________________
Slumbering Death|Dachshund of War|TerrierX|1967 Pontiac Catalina|360# Anvil|2 Burner Gas Forge
|
|
#66
08-07-2013, 07:23 PM
|
|||
|
|||
|
So, I went out to get some work done after sleeping in and sorting out some house keeping. Being gone 3 days in Canada left some things in need of doing.
I was actually going out to measure the ends of the control arms to make a spacer that would allow me to remove the bushings with out crushing the ends. It seems to be an issue, even the shop manual has a special tool for it. lo and behold. 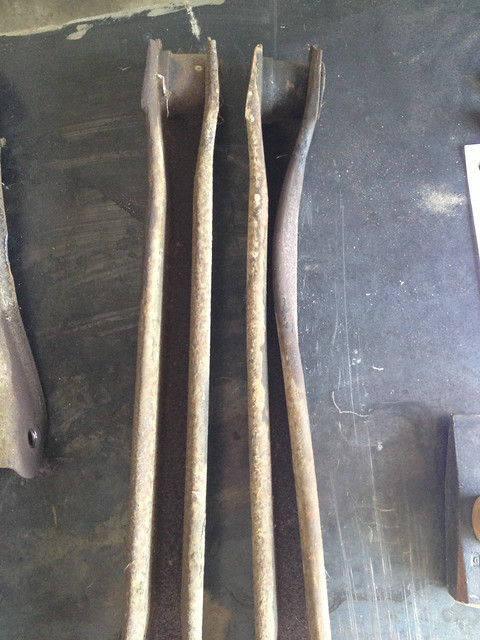 The passenger side lower control arm is very very dented. I'm sure that is 1/2 the problem with the removal and general handling. So my initial day is now revolving around making pizza and finding a new set of control arms. I'd like to get a set of reasonably price tubular ones, although if I can find a set at a breaker yard somewhere for even cheaper, I'd just weld in a boxing kit. I have a thread started here in the suspension section with some awesome feed back. Thanks, smittyseng, for sharing you experience with the RAR control arms.
__________________
Slumbering Death|Dachshund of War|TerrierX|1967 Pontiac Catalina|360# Anvil|2 Burner Gas Forge
|
|
#67
08-07-2013, 07:28 PM
|
|||
|
|||
|
Ok, I got the coils primed and the passenger side brake bits painted.
 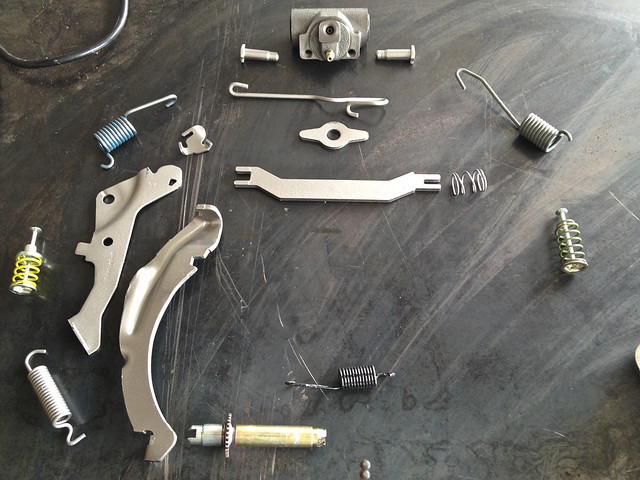 Starting to look more like what I want to drive, little by little. The brake line going into the driver's side wheel cylinder is frozen. It looked like it was going to shear off when I first worked on it, so I soaked it in penetrating oil. No dice, it's still frozen. I can get a complete set of prebent lines for $180, but it seems stupid considering I only need the 2 that run along the axle. I found out today that I can buy unbent lines that are 36" long with fittings on both ends, which then I can bend to match. That will work for me. So I went ahead a removed the lines and the wheel cylinder. 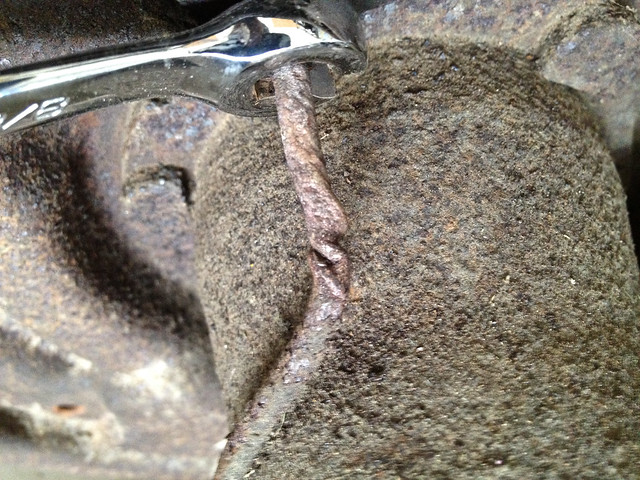 While I was at the parts store I ordered the proper gasket for the diff cover and a new pinion seal. I also ordered new wheel seals for the axle ends. When I got home, I cracked open the diff cover and drained the fluid. Man, that stuff stinks. But the good news is that there was no metal shavings, no unusual wear in the gears and the gasket lacked any sealant. That tells me that it's likely never been opened and that the original 38,000 miles is very very possible. Yesssssss.  The diff cover has a lot of rust pitting, though none of it is very deep. It got degreased and cleaned up. 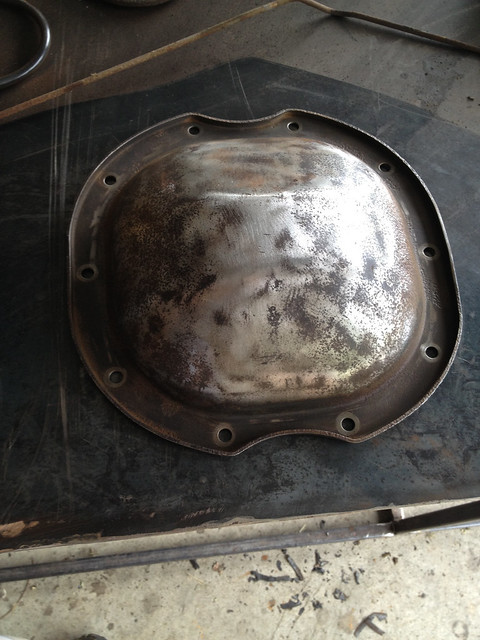 I then primed it and gave it a coat of Pontiac blue engine paint. Everything else will be black and I thought a splash of color would give her something to flash at all the GTOs and Grand Prixs that will be sniffing around. 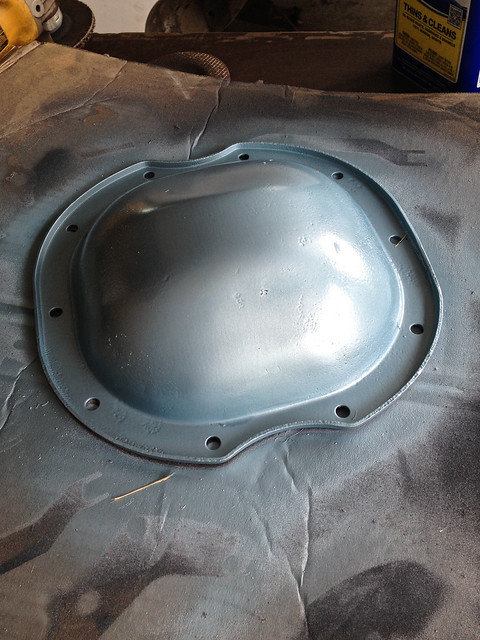 And lastly I removed the passenger side 1/2 shaft completely. I broke the brake backing plate free and gently pulled it over the bearings and seal. That will get cleaned up tomorrow. But I got to see the splines at the end and there is no scratching or unusual wearing. Pristine. 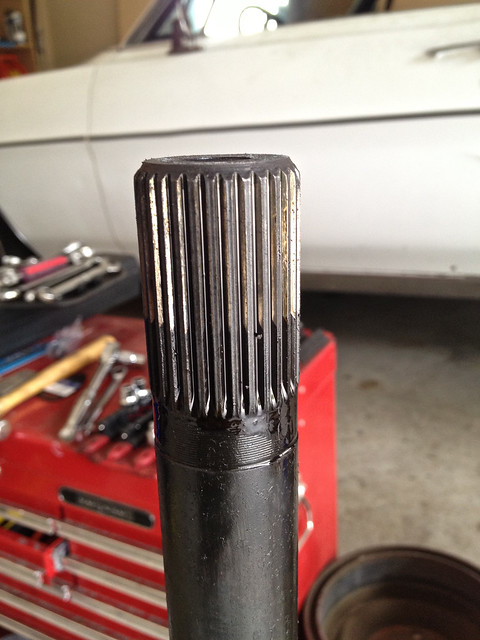 So tomorrow, I should get the backing plate cleaned up and at noon all my parts should be in. Then I can get the passenger side end of the axle all cleaned up. Once all the bits are ready to re assemble, I'll get it all together to the point where I just have to slide the 1/2 shaft in; brakes, seals, gaskets and all. Then do the drivers side. At that point, I will tape off all the openings, clean and paint the physical axle and diff housing. After that I'll replace the pinion seal and main diff gasket. Barring any major setbacks, I think the rear end will be done next week.
__________________
Slumbering Death|Dachshund of War|TerrierX|1967 Pontiac Catalina|360# Anvil|2 Burner Gas Forge
|
|
#68
08-07-2013, 08:03 PM
|
|||
|
|||
|
I love this thread. Detailed builds like this are always something you can learn from. Great car!
|
|
#69
08-08-2013, 12:25 PM
|
||||
|
||||
|
Me too Old Blue 66. Nice camera work Bliss. I needed this update today, yesterday a damn fool teenager rear-ended me in my beloved 95 Plymouth Grand Voyager. It's a complete loss.
|
|
#70
08-08-2013, 12:51 PM
|
||||
|
||||

|
|
#71
08-08-2013, 01:08 PM
|
|||
|
|||
|
Quote:
|
|
#72
08-08-2013, 01:10 PM
|
||||
|
||||
|
But a fine piece of metal.

|
|
#73
08-08-2013, 02:07 PM
|
|||
|
|||
|
Sorry to hear about your mini van, that sucks.
On a brighter note: Does anyone know a source for the inner and outer retention gaskets for the axle (in red)? I can't seem to find them anywhere. 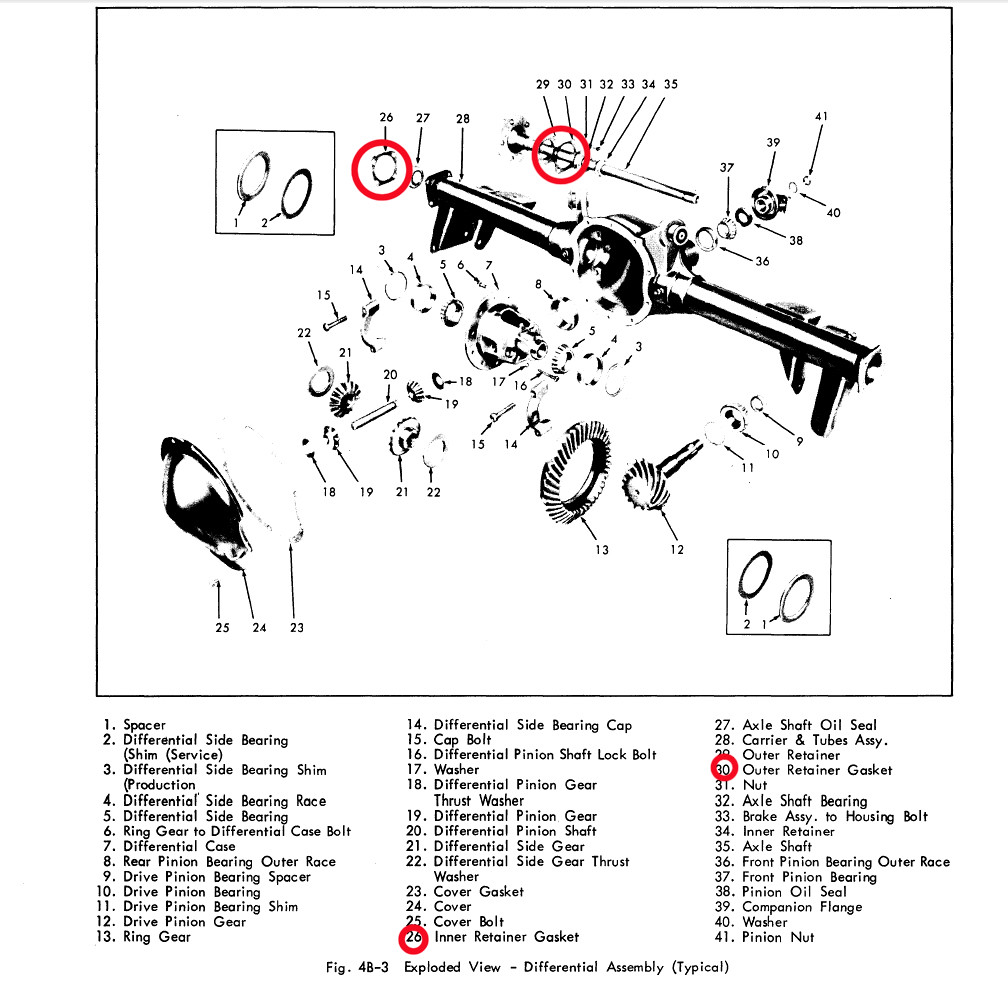
__________________
Slumbering Death|Dachshund of War|TerrierX|1967 Pontiac Catalina|360# Anvil|2 Burner Gas Forge
|
|
#74
08-08-2013, 02:24 PM
|
||||
|
||||
|
I didn't find any at Rock Auto or Performance Years but did fine a little clearer picture and description that might help someone else find them.
http://www.tpocr.com/64-72pontrearaxleipc.html |
|
#75
08-08-2013, 02:54 PM
|
||||
|
||||
|
Just buy a sheet of gasket paper and use a Xacto knife !
__________________
63 Catalina coupe 455 budget drag car 11's 1/4 , 7.4 1/8th 66 Star Chief Executive 57k mile 69 Le Mans 2 dr HT 350 85k mile 15 sec 1/4 69 Firebird 400 Burgandy/Black 70 Olds Rallye 350 F85 4 speed 3.91's 70 Olds Cutlass Cruiser Red Wagon 350 101k miles 15 sec 1/4 12 sec w 455 74 Cheyenne Super C10 LWB Gen 6 454 w ZZ502 cam 3.07gear 13.1 1/4, 8.3 1/8 2020 RAM 1500 SLT 4x4 5.7 A8 Hemi 2007 Hummer H3 3.7 liter turd 2019 Chevy Spark petrol car 38 mpg |
| The Following User Says Thank You to PONTIAC LARRY For This Useful Post: | ||
|
#76
08-08-2013, 05:11 PM
|
|||
|
|||
|
Quote:
__________________
Slumbering Death|Dachshund of War|TerrierX|1967 Pontiac Catalina|360# Anvil|2 Burner Gas Forge
|
|
#77
08-10-2013, 12:08 AM
|
||||
|
||||
|
Hey Bliss, while you have the rear axle cover off, find the tooth count stamp on the ring gear and figure out what ratio you have.
|
|
#78
08-10-2013, 09:38 AM
|
|||
|
|||
|
Quote:
|
|
#79
08-10-2013, 12:32 PM
|
|||
|
|||
|
Quote:
It's a dreary Saturday morning and my wife is out running some errands, so I thought I'd pop out and try my hand at this magic art of gasket making. I used the brake baking plate as a template for the bolt and axle openings. 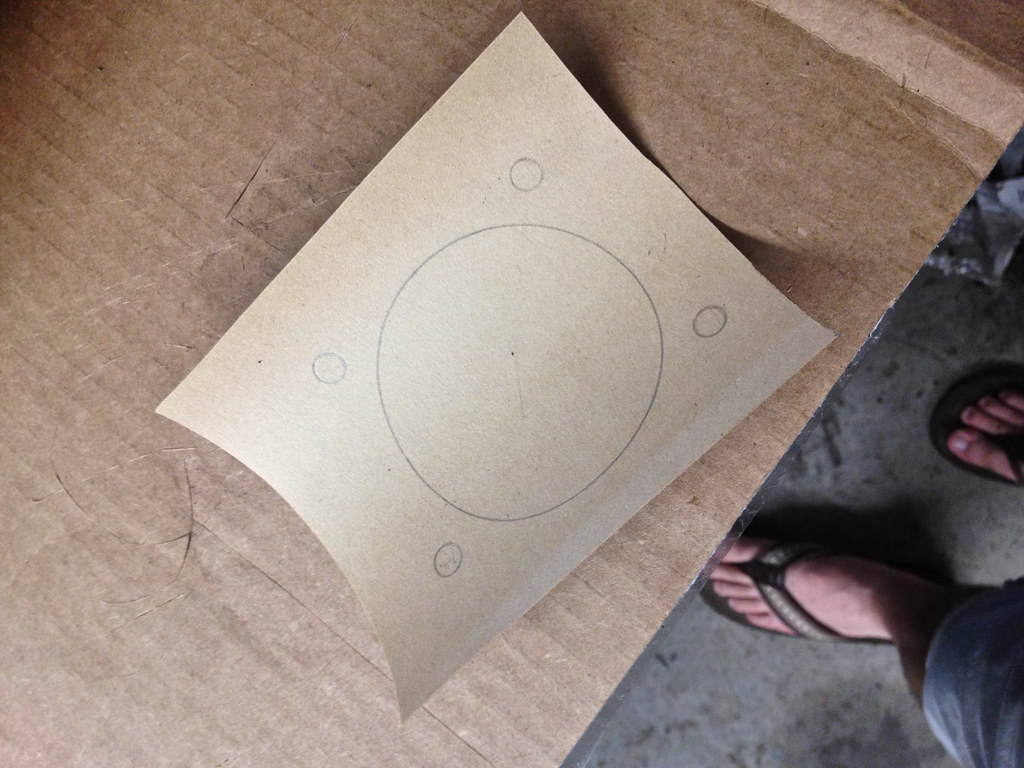 I then slid it down the axle and marked off the sealing plate. A quick trim and I set it down for a test fit. 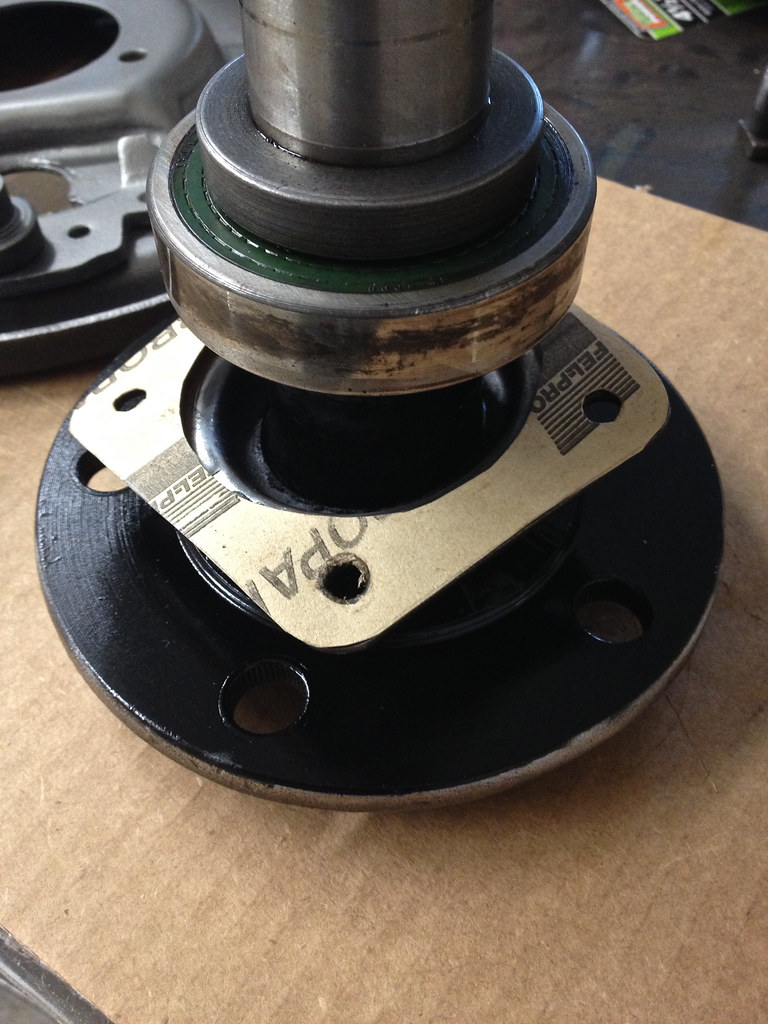 Added some bolts to keep everything in place. 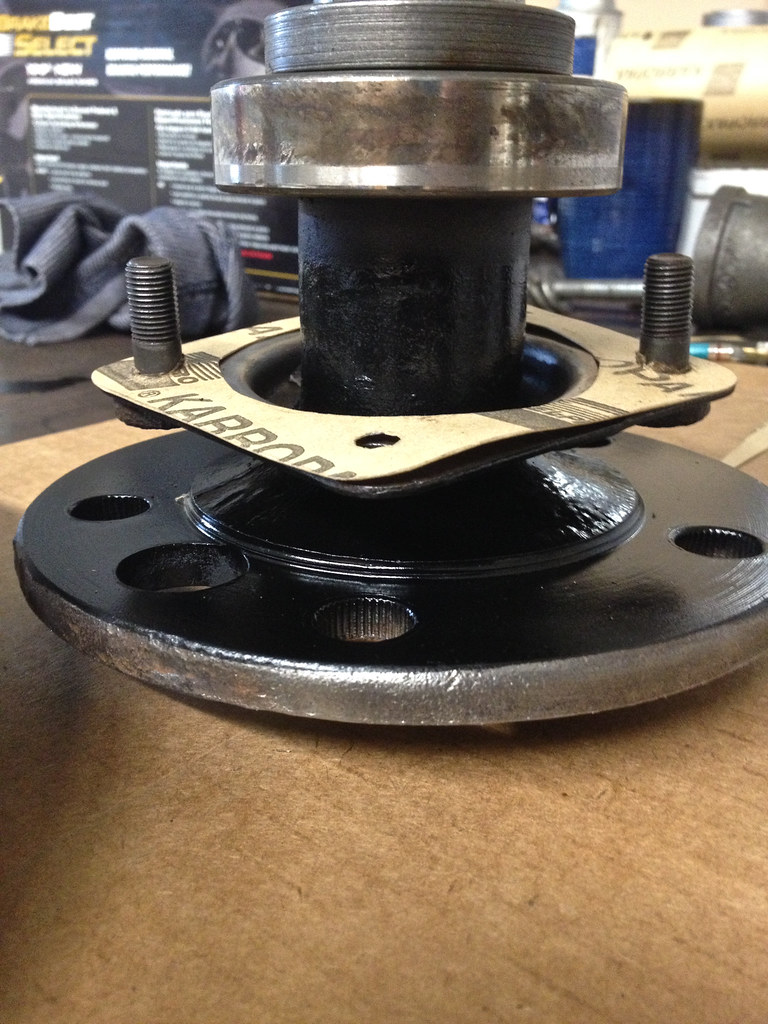 Then I dropped the backing plate over it to see how the fit was. 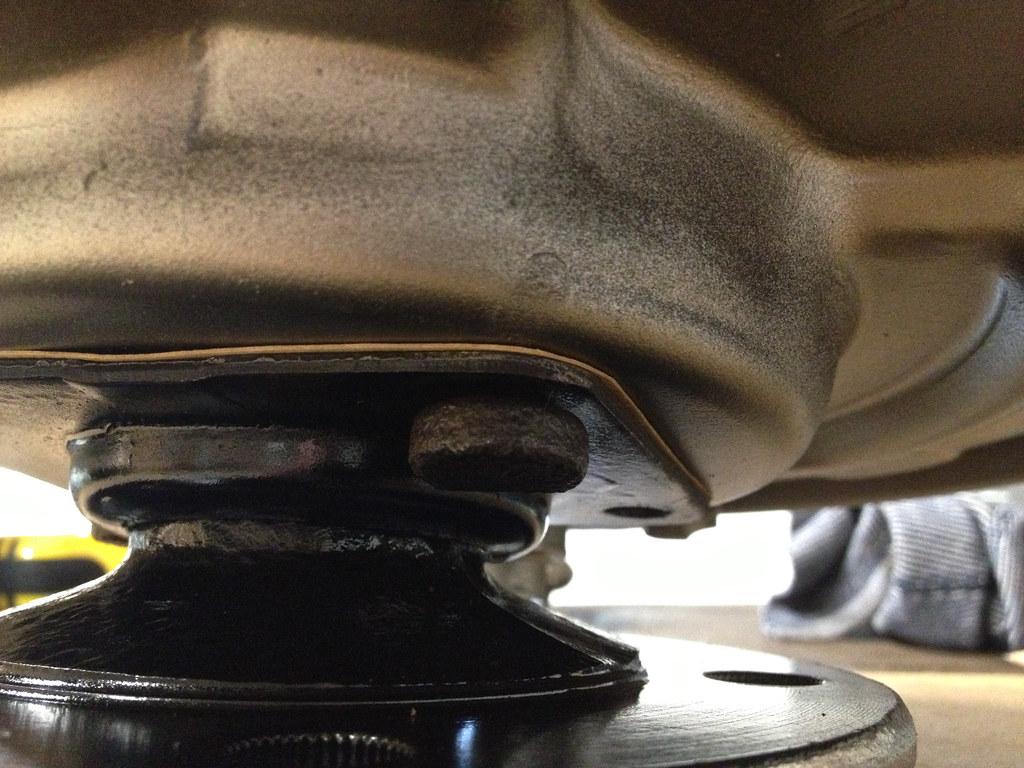 There is a small indent in the axle sealing plate which you see on the left there, it's not actually a misfit. Then I went to the axle end to repeat the process. I had a bit more help then I could handle, but it went well. 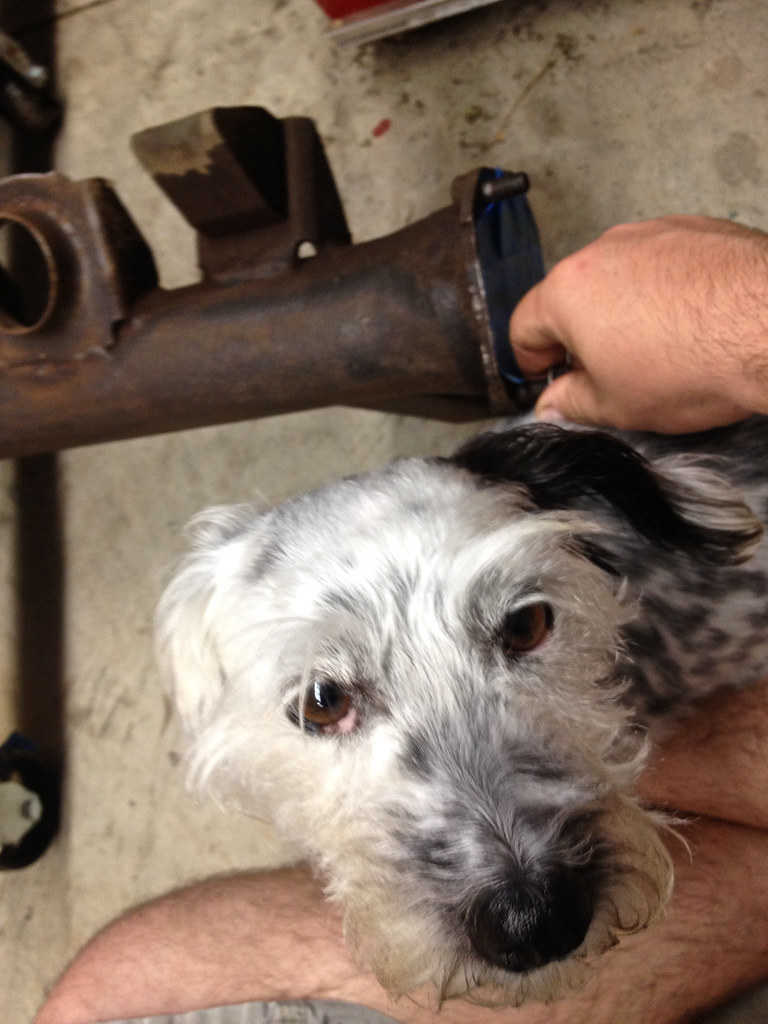 But it turned out well. They look a tad rough, but they fit well. Chances are I'll make a v2.0 jus to be certain of a good seal. I labeled them due to my failing memory. 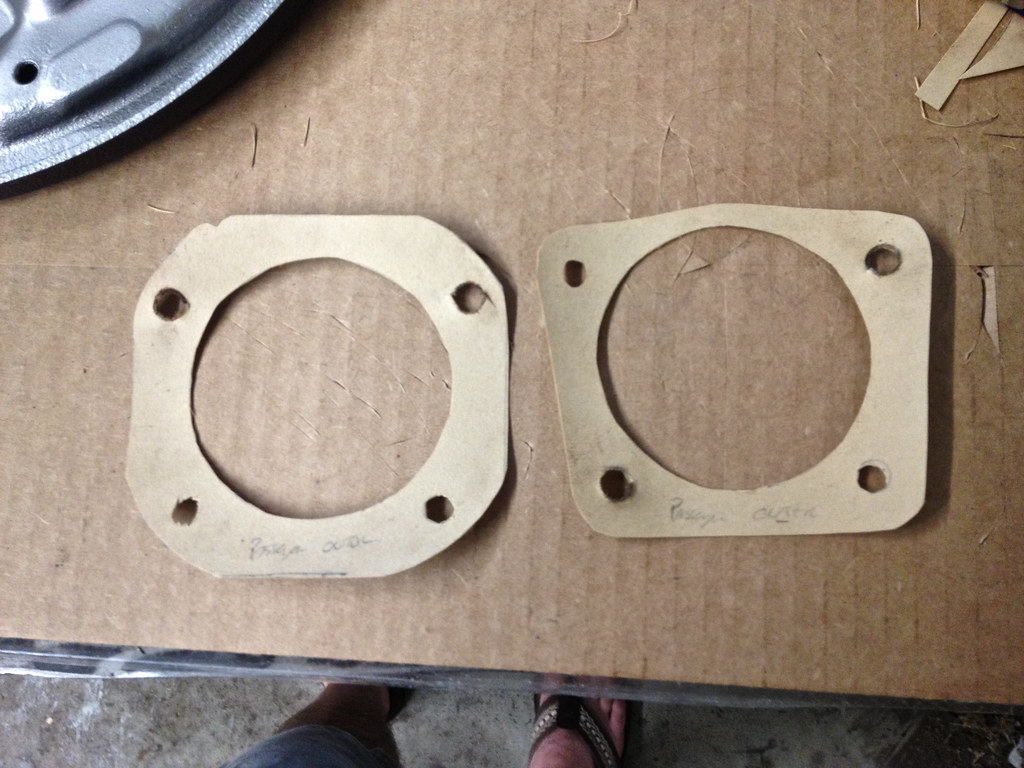 And then I set them aside, because I'm waiting on some parts and paint. 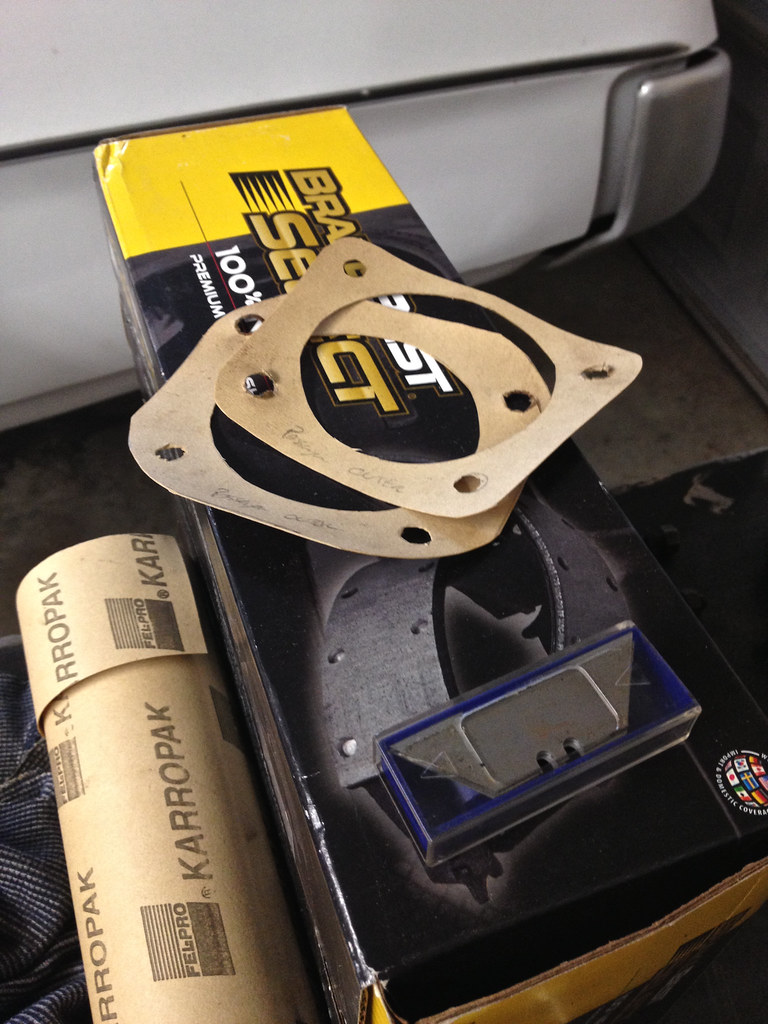 I think it worked out well. The nice thing about doing something for the first time is after going slow and figuring it all out, the 2nd time is significantly faster.
__________________
Slumbering Death|Dachshund of War|TerrierX|1967 Pontiac Catalina|360# Anvil|2 Burner Gas Forge
|
|
#80
08-10-2013, 12:44 PM
|
||||
|
||||
|
That's the "Pay attention to me" look. I know it well.
|
| Reply |
|
|
The PY Online Forums is the largest online gathering of Pontiac enthusiasts anywhere in the world. Founded in 1991, it was also the first online forum for people to gather and talk about their Pontiacs. Since then, it has become the mecca of Pontiac technical data and knowledge that no other place can surpass.


 Linear Mode

