


| FAQ |
| Members List |
| Social Groups |
| Calendar |
| Search |
| Today's Posts |
|
#81
 08-13-2013, 06:36 PM
|
|||
|
|||
|
Brothers, I must confess. I have been remiss in my taking of the photographs. We woke up Sunday morning and went to get a cup of yuppie coffee at Starbucks. That's where my wife mentioned that she needed a few more data points on her car. So we drove out to Chaocia to see the native American city there, of which only the mounds are left. Some pretty cool stuff, I recommend it highly if you are interested in our history. It has the largest earthen structure north of Mexico as well as an lunar calendar called Woodhenge.
 The calendar alone was worth the drive, imo. The various paints arrived yesterday, and I shirked my duties, mainly because of the rain and overgrowing lawn/garden. This late in August things should be dead. 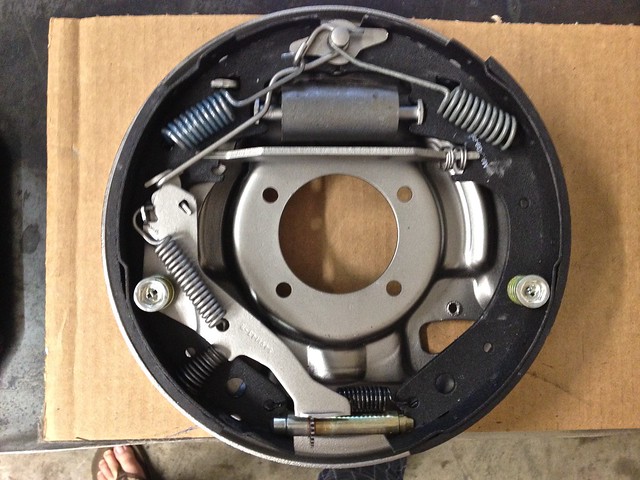 But I got the passenger side brakes reassembled. Then I pulled the driver's side axle out and tore apart the brakes, cleaned them, painted them and reassemble them as well. 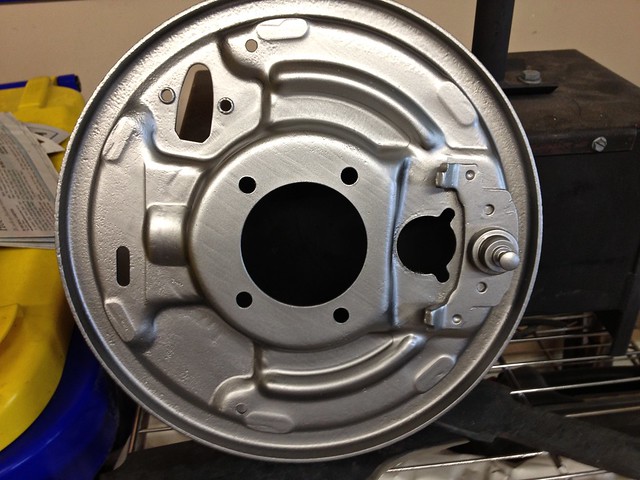 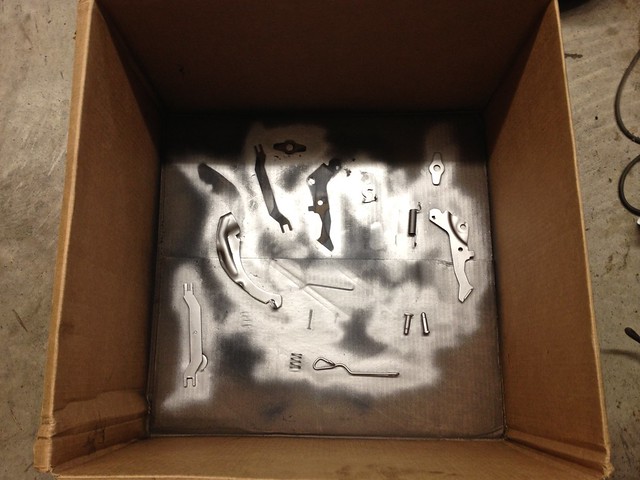 I punched out the wheel studs, cleaned up the rotors and outer plate. Primed and painted them. 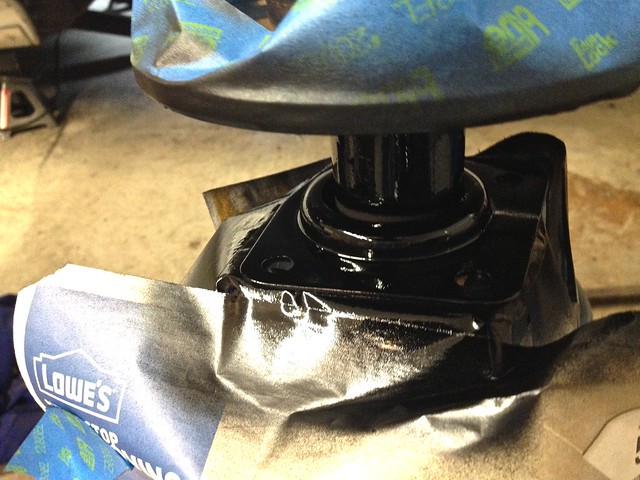 Gently laid out the outer gaskets, held in place with bolts (which are the wrong way around, I know, but they are there only for alignment), lowered the brake assemblies down and set them aside. 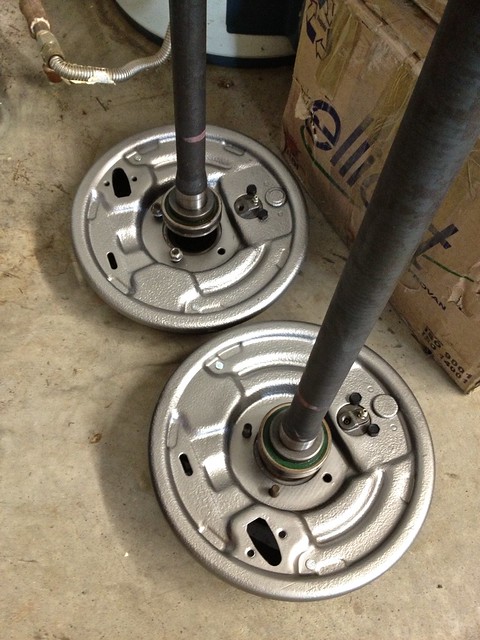 Tomorrow I will remove the bushings on the differential and finish getting it cleaned up. Hopefully that will be relatively fast and I can get the first coat of anti rust primer on it. At noon I have to run up to the parts store to get the new studs and lug nuts. I'll pick up some gear oil and some POR 15 while I'm out. Thursday I'm hoping to replace the pinion seal and then get it all buttoned up. Hopefully I'll get the control arms ordered and the bushings for the differential, which would allow me to get it all back under the car next week. Insha'allah, as they say.
__________________
Slumbering Death|Dachshund of War|TerrierX|1967 Pontiac Catalina|360# Anvil|2 Burner Gas Forge
|
|
#82
08-20-2013, 06:24 AM
|
|||
|
|||
|
Quote:
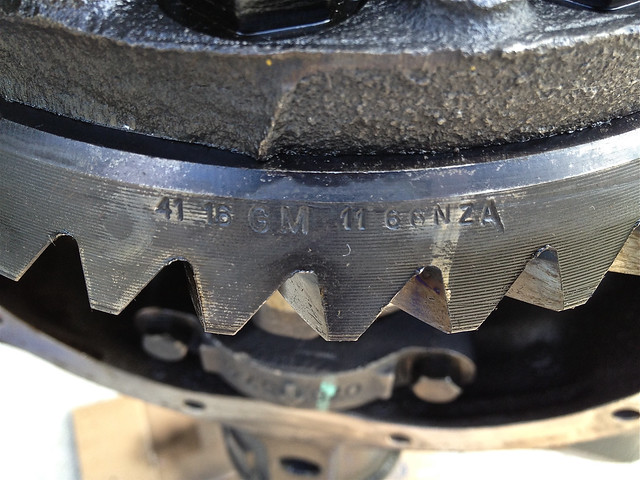 This is the only stamping on the gear that I could see. Is there a key to decipher it? It turns roughly once for every 3 turns of the yoke, so the 2.73 the is listed in the manual could be right. There is a large 'D' cast into the diff housing, so I guessed I have the 'UD' one listed on page 4B-5 of the manual. It has it checked off for Cat 2 hard top and 400 2 bbl. It took a bit longer then I had hoped, but life has a way of getting busy sometimes. I got the whole axle and diff housing cleaned up with a wire wheel and elbow grease. Primarily to remove grime and loose rust. The whole thing is cast iron and virtually indestructible. 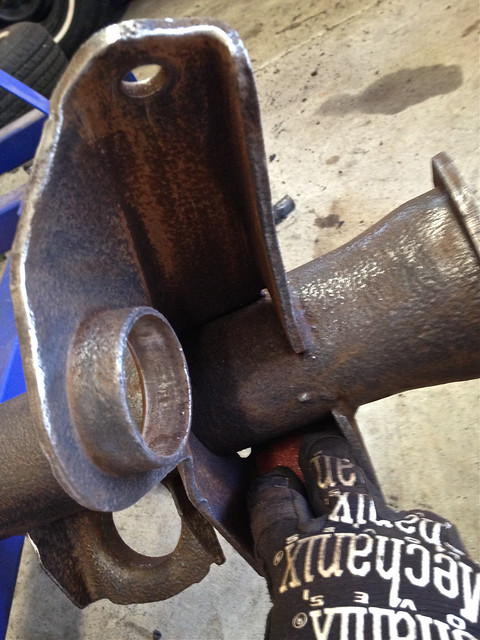 There is it is, mostly clean and wiped down with a degreaser. 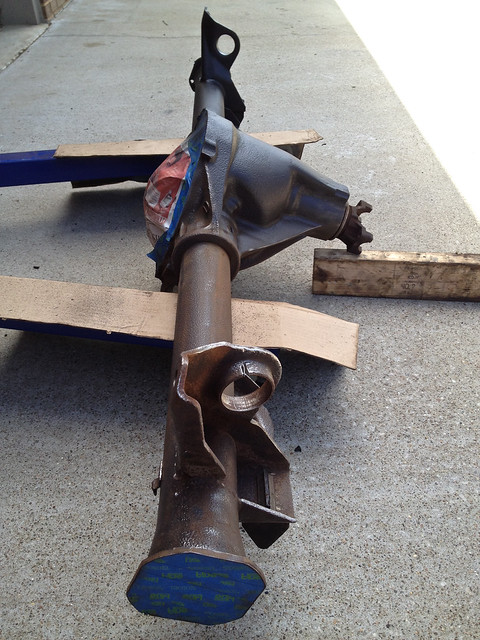 I stood it on end to allow me to paint it with out having to flip it over. It got a healthy coat of or rust preventative. 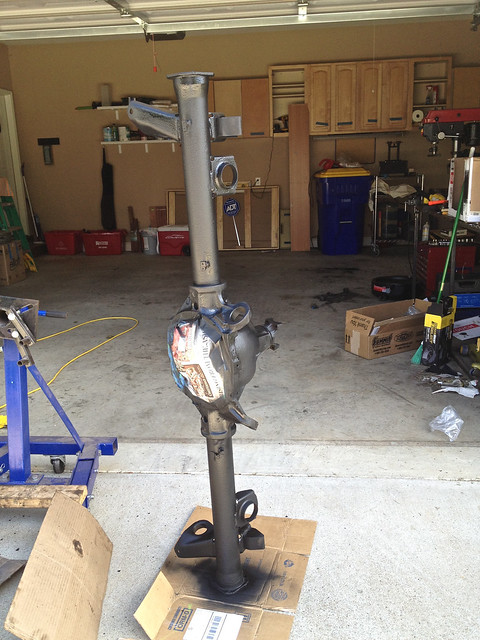 Then a nice coat of chassis coating. 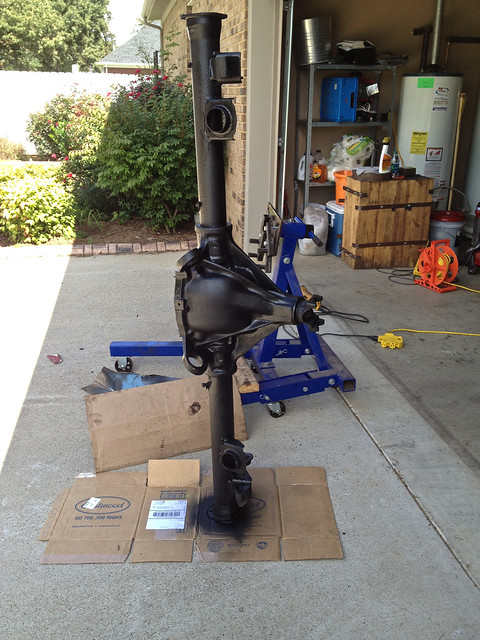 I laid out the new gasket on the diff cover. Held it in place with 2 bolts. 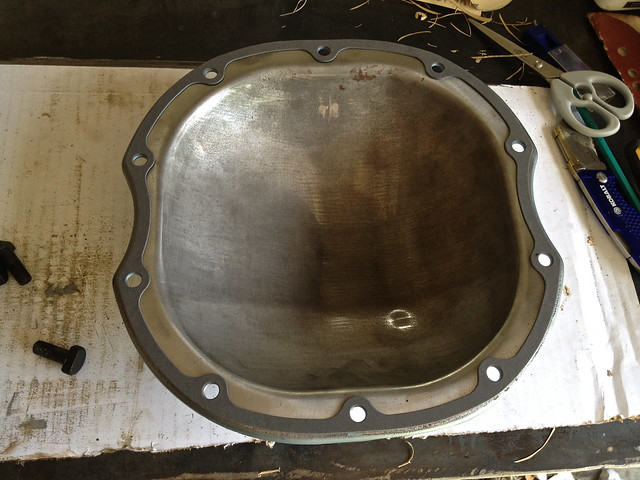 and hand tightened all 10  They got torqued down in a star pattern to 25 foot pounds. It will sit overnight to let the paint cure. On Tuesday I'll install the new bushings and start getting the 1/2 shafts and brakes back into their respective ends. Then filled with 4 1/2 pints of 90 weight gear oil to see if the gaskets are sealing. Then install the new wheel studs.
__________________
Slumbering Death|Dachshund of War|TerrierX|1967 Pontiac Catalina|360# Anvil|2 Burner Gas Forge
|
|
#83
08-20-2013, 02:32 PM
|
||||
|
||||
|
The 41 16 stamping indicates 41/16 = 2.56 gear ratio. Had one just like it in both of my old '67s.
|
|
#84
08-20-2013, 05:44 PM
|
|||
|
|||
|
Quote:
__________________
Slumbering Death|Dachshund of War|TerrierX|1967 Pontiac Catalina|360# Anvil|2 Burner Gas Forge
|
|
#85
08-20-2013, 07:21 PM
|
||||
|
||||
|
Quote:
Decisions, decisions... 
__________________
Eric "Todd" Mitten '74 Bonneville 4dr Sedan (455/TH400/2.93 open) '72 LeMans GT (455/M-13/3.23 [8.5"] posi) '71 GTO Hardtop (400/TH400/3.07 12 bolt posi) 71 GTO Convertible (455HO/TH400/3.23 posi) '67 GTO Coupe (455/ST-10/2.93 posi) '67 Tempest Wagon (428/TH400/2.56 posi) Deuteronomy 8:3 
|
|
#86
08-20-2013, 07:30 PM
|
|||
|
|||
|
Quote:
In any case, it's all buttoned up and fill with gear oil. Changing the ratio will have to wait until after the winter, when the engine will be rebuilt and the brakes upgraded. At that point we'll consider the LSD and a new ratio.
__________________
Slumbering Death|Dachshund of War|TerrierX|1967 Pontiac Catalina|360# Anvil|2 Burner Gas Forge
|
|
#87
08-21-2013, 09:41 AM
|
|||
|
|||
|
did you see the 66 2:56 posi for sale on craigslist in nashville?
http://nashville.craigslist.org/pts/3997983210.html Not mine, dont know if it is still available. |
| The Following User Says Thank You to rustyrelic For This Useful Post: | ||
|
#88
08-21-2013, 09:58 AM
|
|||
|
|||
|
Quote:
__________________
Slumbering Death|Dachshund of War|TerrierX|1967 Pontiac Catalina|360# Anvil|2 Burner Gas Forge
|
|
#89
09-04-2013, 08:46 AM
|
|||
|
|||
|
OK, we left off with the axle being ready for re assembly. I spent a few hours putting together an axle dolly to make moving this lug of metal around easier. Worked out quite well. I used 2x4 for economy, a premade one was something like $130 and I had a hard time being able to justify it. I only have one axle.......so far. But it works, and doesn't mar the paint.
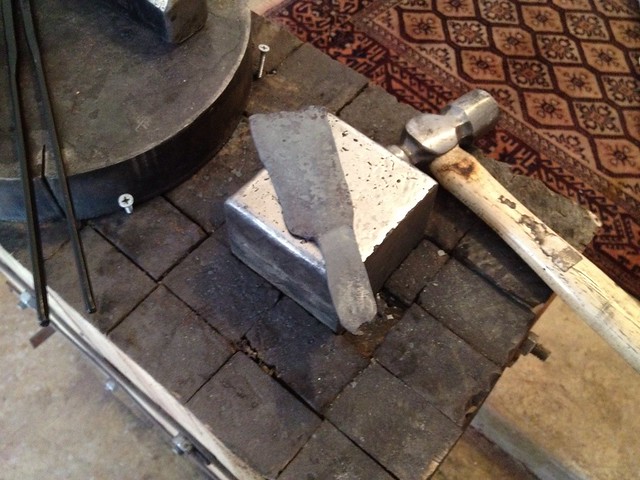
The cautious side of me (not the one that bought the car, lol) went back and did a version 2.0 of the axle gaskets. FYI, I find a good pair of scissors better then a razor knife. They fit great, and I have no leaking. Of course, I'll need to check that after she's been a few miles; so far, so good. 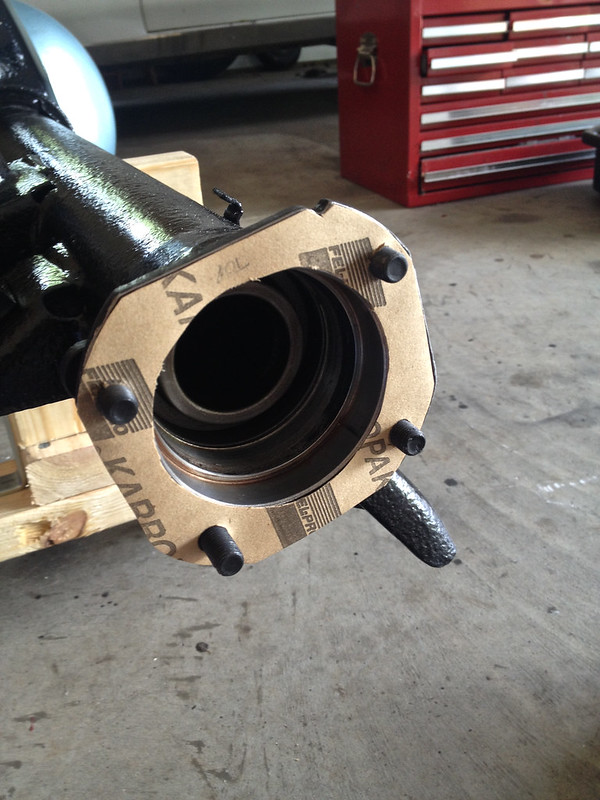 I can honestly say it was worth it, these are sooo much cleaner looking. 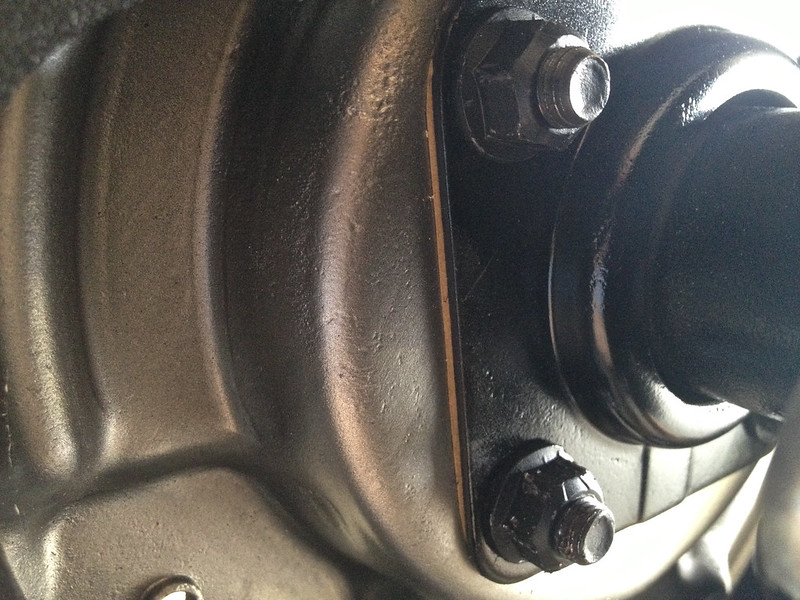 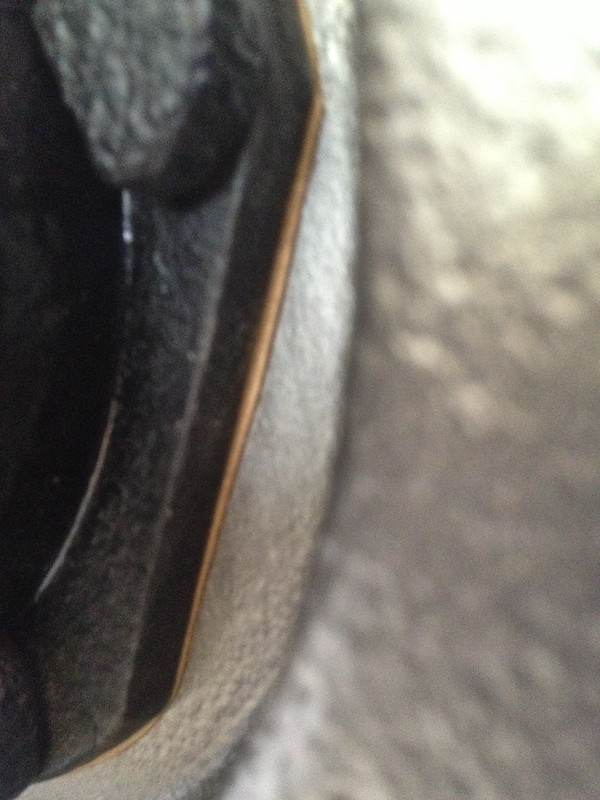 The 1/2 shafts and brake assemblies slid right in with a little jiggle to mate up the splines. 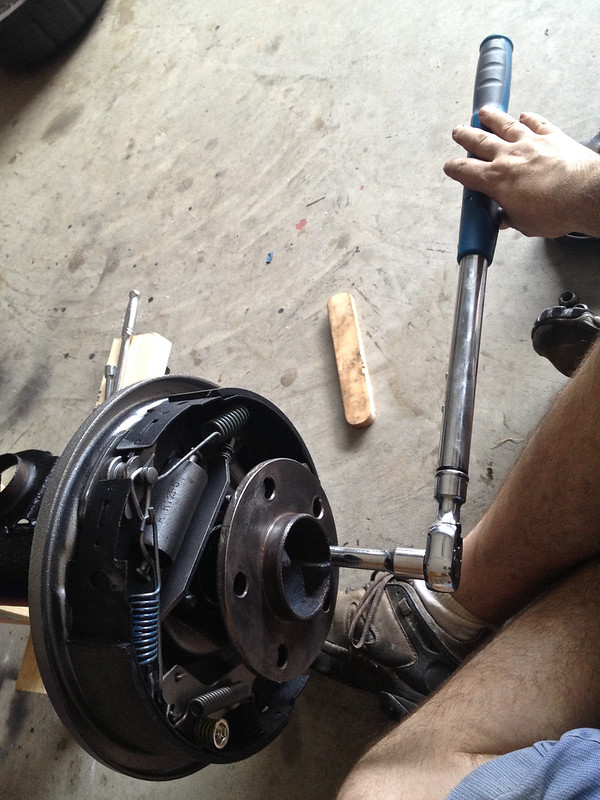 The 4 bolts that hold the whole thing in were torqued down with the Digital Super Torque 5000 (but wait, there's more......). I would note that little hole in the rotor doesn't line up perfectly with the bolts, but we got to the 25 ft/lbs with no difficulty. 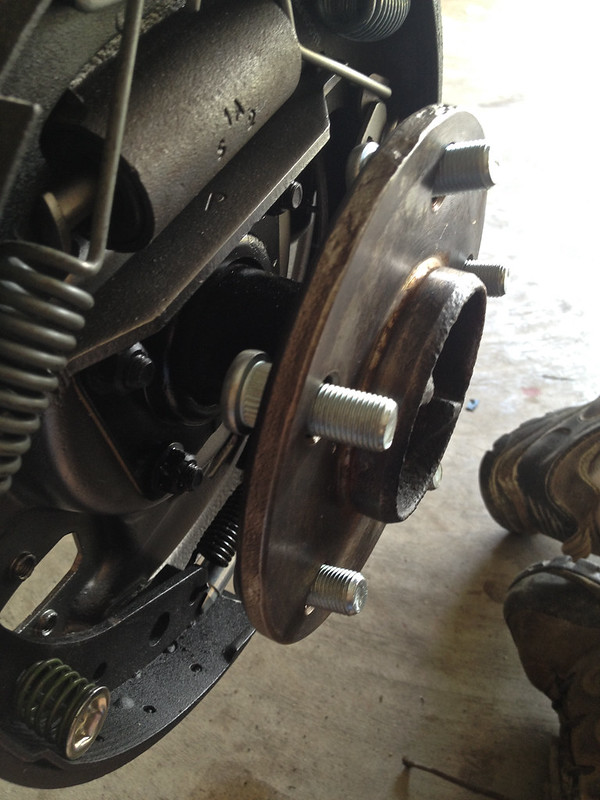 Then the new wheel studs were installed. I used an old lug nut and some anti size lube to press them in with the impact wrench. I used the old ones because the new ones are nice acorn ones. 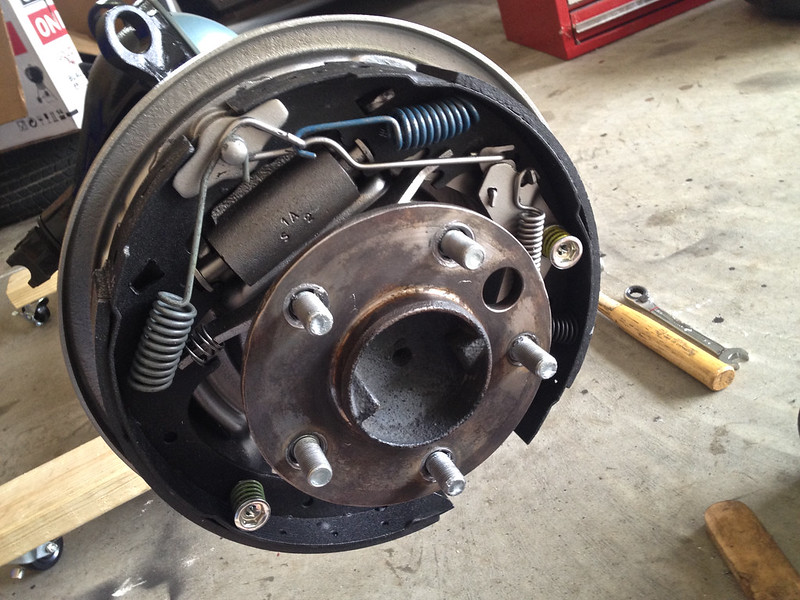 Lather, rinse, repeat. The wheel studs are a story in themselves. Short version, I fired Advanced Auto parts. They have had 3 chances. They pooped the bed all three times. The last time, they actually told me to go to O'reilly's; which is where I should have gone to start. They, and NAPA, have been great with parts and advice. So I'm officially down to 2 local suppliers and the interwebs. The week before labor day weekend a mate of mine called and said his brakes were dragging. He wanted to know if I had ever worked on disk brakes. No. but that's never stopped me. I loaded up the dogs and we were off. 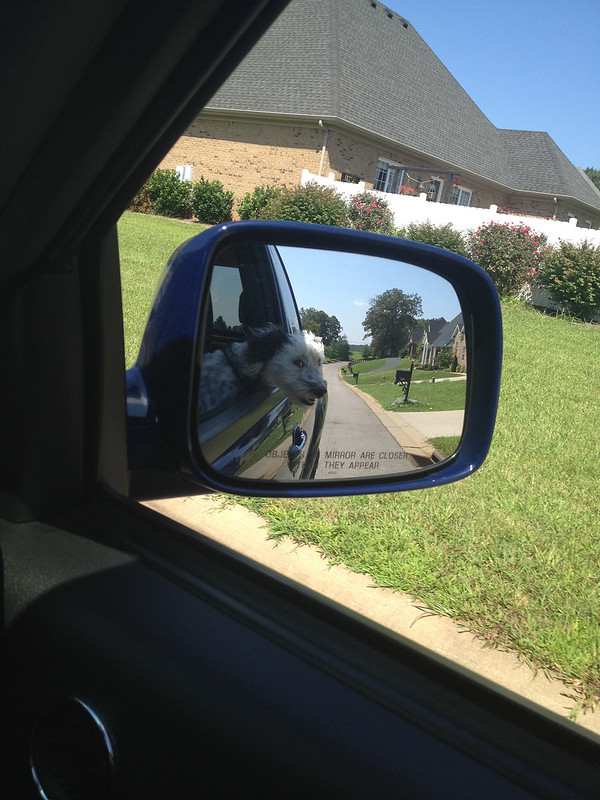 Got to Atlanta in record time, and got The Black Pig in the air. She's a 2006 Saab 9-3 2.0t. He's not a car guy and had 6 different issues including marginal brakes. He was amazed at my trouble shooting abilities, which consisted of wiggling wires and pulling fuses until we found what did what. He as missing two 10 amp ones, which solved 3 of the 6 problems straight away. Now he thinks I'm the Saab whisperer. I wish my wife impressed so easily. 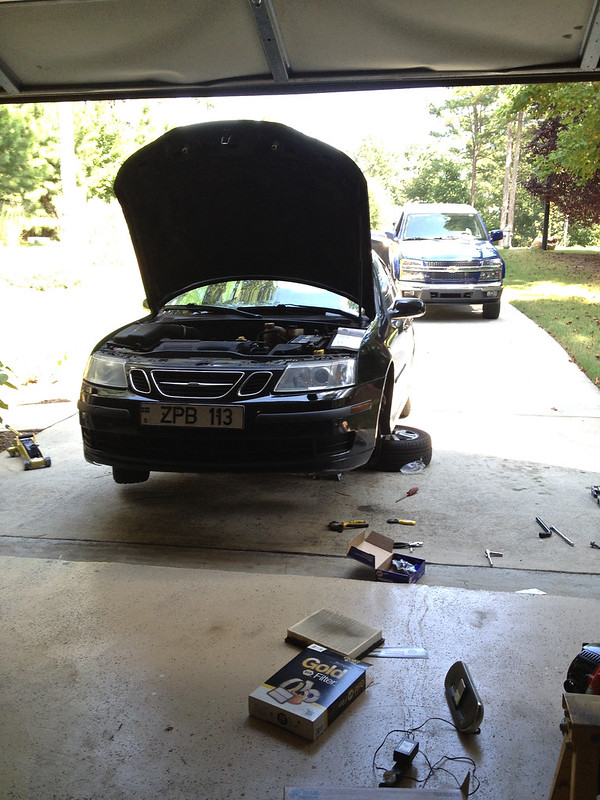 All that made me miss the 9-3 Aero convertible we had in Dubai when she was the brand manager. 2.8l V6 turbo.....it was a sweet ride.  A few false starts and a youtube video later, the fronts were done. It turns out the rears were the issue, with no meat being left on the pads, just metal grinding. We got that sorted the following morning. All bedded in and safely stopping The Pig. I'm not sure how you go that long with out noticing your brakes are crap, but he did. I also aired his tires up properly. Combined it was like an all new car. All he needs now is an AC controller, which I'll have to drive back down for. If only Gabby was as easy. 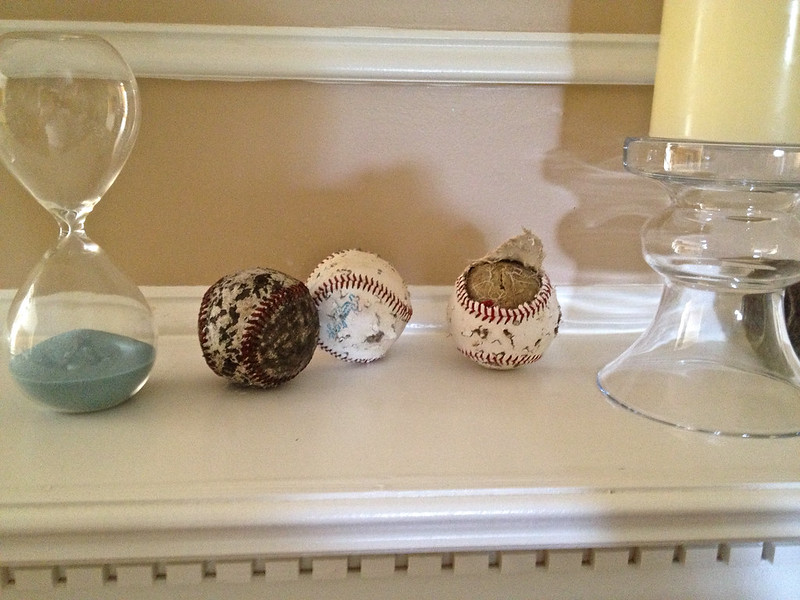 The Dachshund of War kept busy, discovering 3 baseballs and 2 tennis balls in 24 hours, all in the neighbors yard. Truly talented, that one; since they don't have any kids.  All 3 of us loaded up again, and headed home to get back in time for the new Simon Pegg movie launch. We invited a few of my wife's employees over for a pre launch marathon. Obviously, hot smoked ribs were needed along with other goodies. 4 hours in the smoke at 250 leaves them juicy and falling off the bone. Turns out the new movie sucks, but the ribs were awesome. Corporate spouse win. 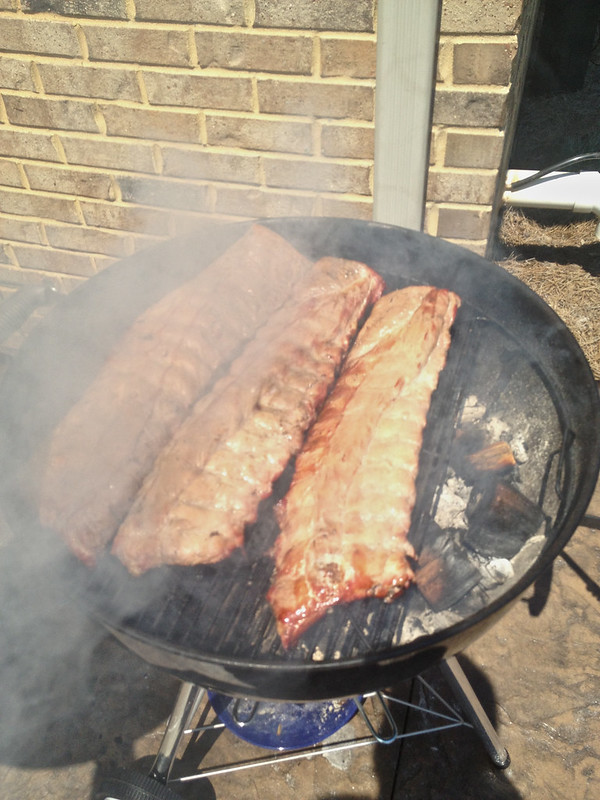 Party went off with out a hitch. There were Hot Fuzz quips all night long. Mrs. Marie was pleased. It's hard to see, but this is her happy face. I think at 16 she's starting to like having company over. No one was harmed.  Labor day plans to jet off to DC were canceled due to timing being poor with my wife's job, so we zipped up the road to Louisville instead. 2 hours vs 10 makes a difference in the relaxation level. We got to see the Slugger museum and the Woodford Reserve distillery. Both very cool and well worth the time. Louisville has a nice little beer scene and the people watching was a great change to rural Kentucky. I miss being able to sit on a sidewalk and just watch a big slice of life walk by. Good car watching too. 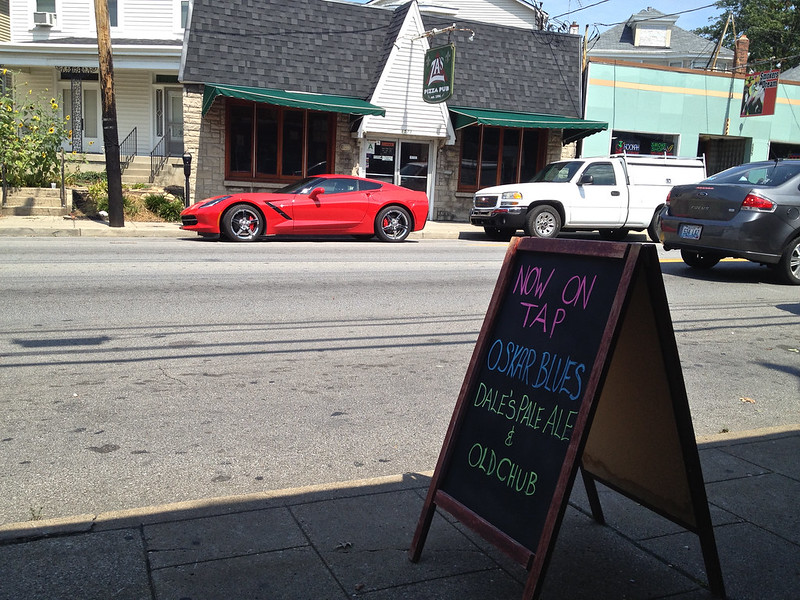 And today, I took apart the old anvil stand. I built it in South Africa to hold a Japanese style knife anvil I made. But when we moved to Atlanta, I found a local 360 pound one in a more traditional English pattern. Way better rebound and efficiency in striking. 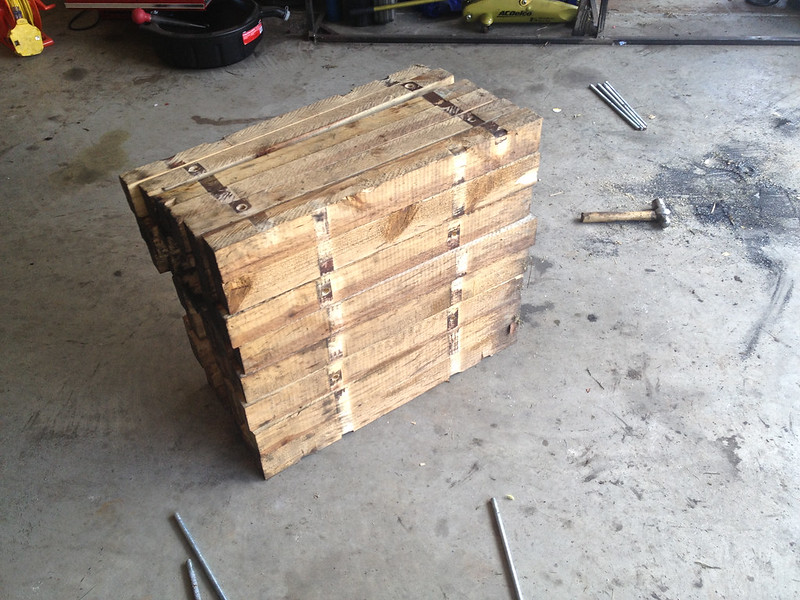 I cut it down so that the new 360#er could be in full time service. 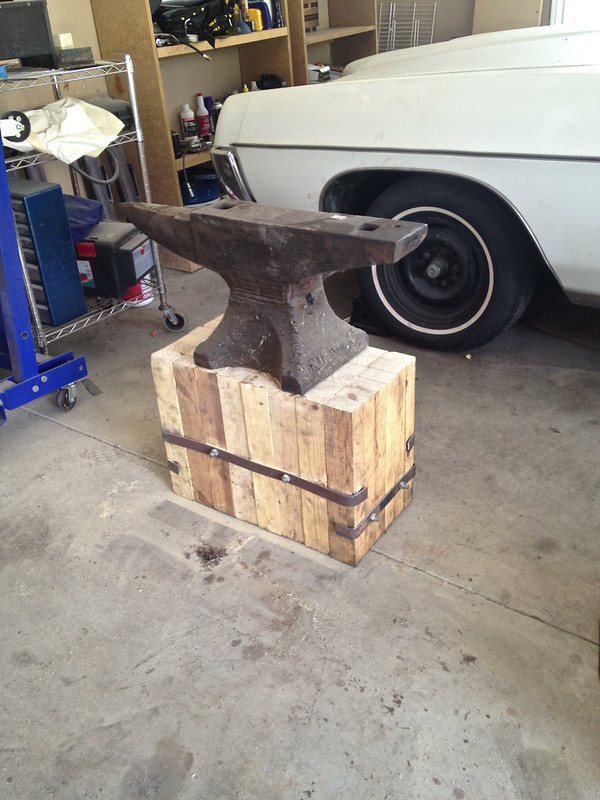 Wednesday I'll get the forge set up and a new work bench built to finalize the organization. I've sort of let it go during the heat of the summer and with the car being worked on. But with the summer heat fading and the humidity dropping, forging season is almost here. Also, my wife needs a stress outlet and banging on hot steel has a way of taking it right out of you.
__________________
Slumbering Death|Dachshund of War|TerrierX|1967 Pontiac Catalina|360# Anvil|2 Burner Gas Forge
|
|
#90
09-05-2013, 11:53 AM
|
||||
|
||||
|
You shipped that all the way from South Africa? What, you didn't know we had trees here?
|
|
#91
09-05-2013, 06:42 PM
|
|||
|
|||
|
Quote:
 Untitled by jumeira_johnny, on Flickr Turns out I was wrong and they moved it twice; from SA->Atlanta->Bowling Green. Since I had it, why waste it? All joking aside, I did actually ship some South African Peppertree wood. And some olive wood as well.
__________________
Slumbering Death|Dachshund of War|TerrierX|1967 Pontiac Catalina|360# Anvil|2 Burner Gas Forge
|
|
#92
09-05-2013, 09:56 PM
|
||||
|
||||

|
|
#93
09-11-2013, 01:28 PM
|
|||
|
|||
|
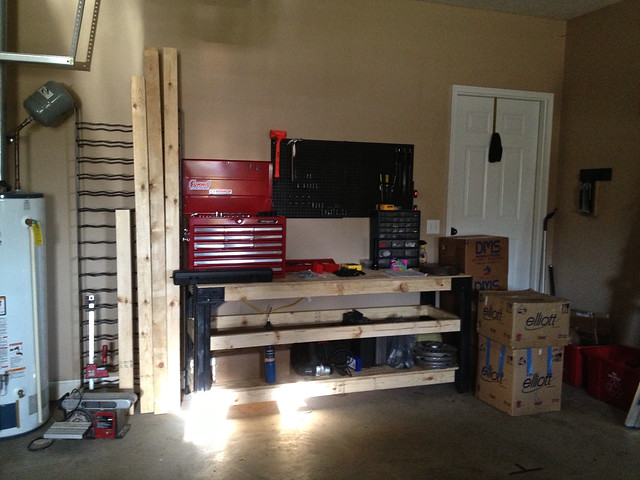
I finally made tidying the garage up a priority. I got the workbench built, which got all my tools off the floor and in one place. I still have the pedestals for the belt sander and drill press, but the heat index is well into the triple digits so that will have to wait.
 I got the bushings out of the rear control arms, by drilling out the rubber 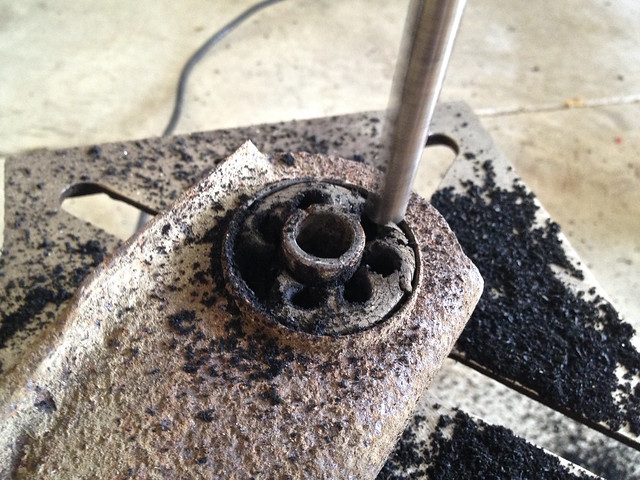 then working out the ferules 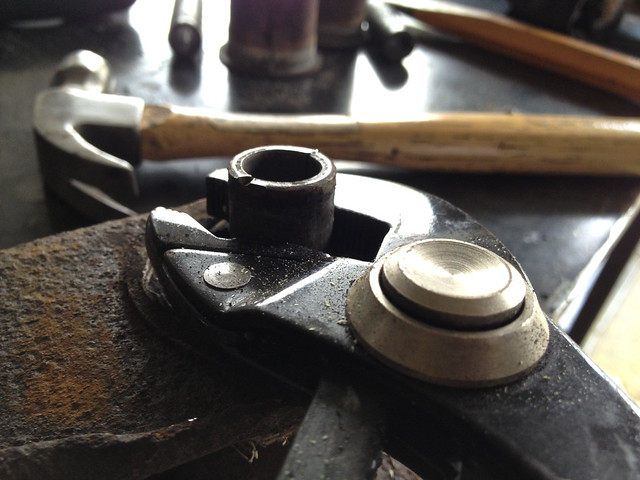 Then carefully cutting through the bushing shell 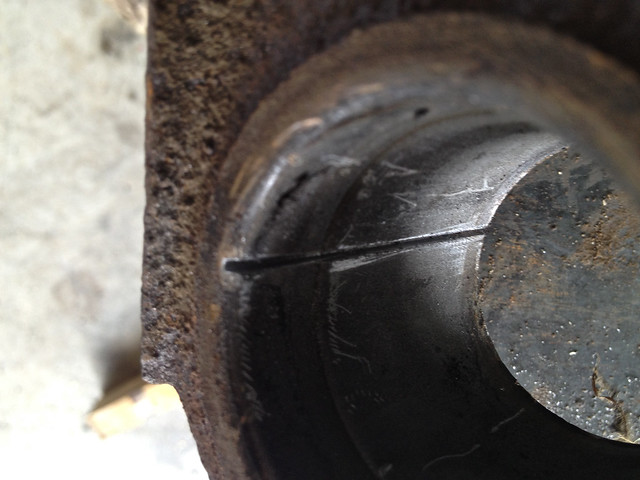 And then crushing them out with a cold chisel and 3# hammer. 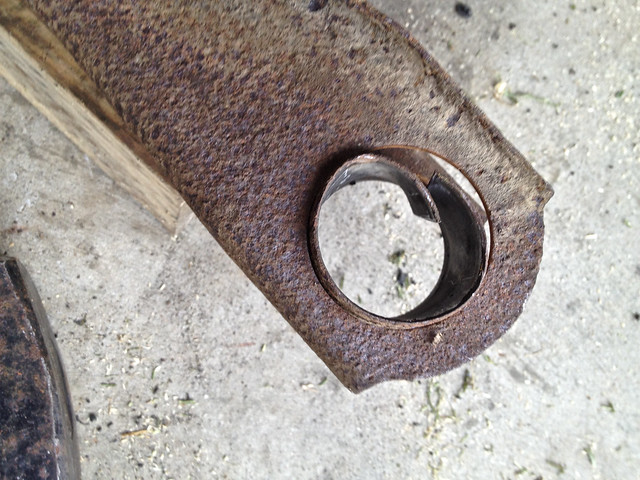 All four, curled up.  I did get some advise from 2 GM engineers on the lower crushed control arm. Both were of the opinion to heat it up and bend it back, brace it internally, and then box them in. So I tried a propane torch, which was sort of a joke. So I went out and got a propane tank for the forge, which I needed to anyway. The arm wouldn't actually fit in the forge, since I bought a knife making one, not a blacksmithing one. But I cranked the PSI up to 10 and the resulting "dragon breath" was more then enough to get the control arm glowing a dull orange. That's short of forging temps but enough to make it slightly more pliable. It's slow going, since I don't want to thin the metal or move more then the damaged areas. I have the crushed zone opened up more. the down side is the bushing end has now moved as well. 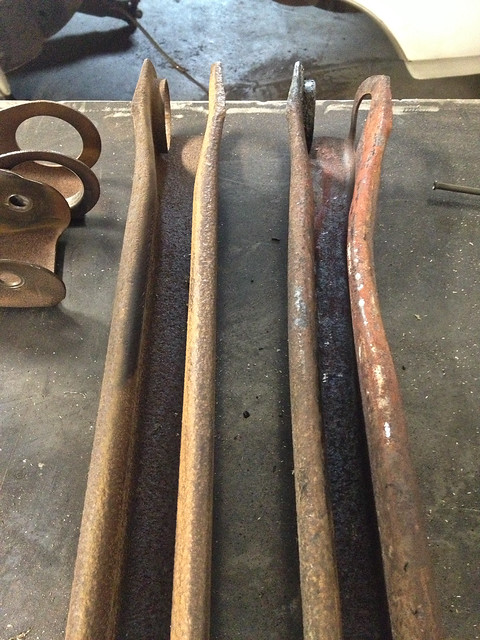 Which has moved the bushing holes. 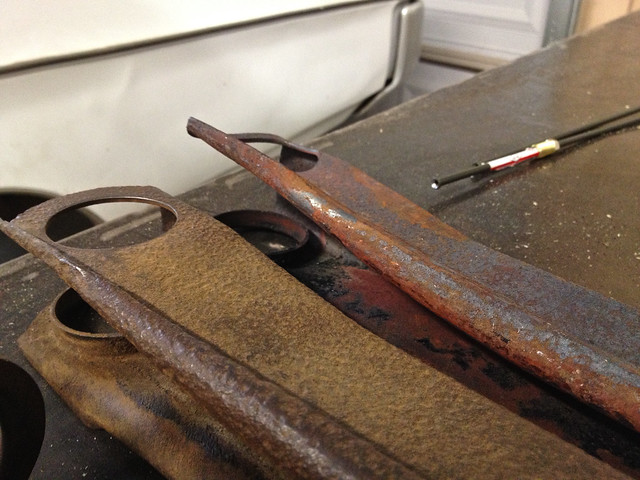 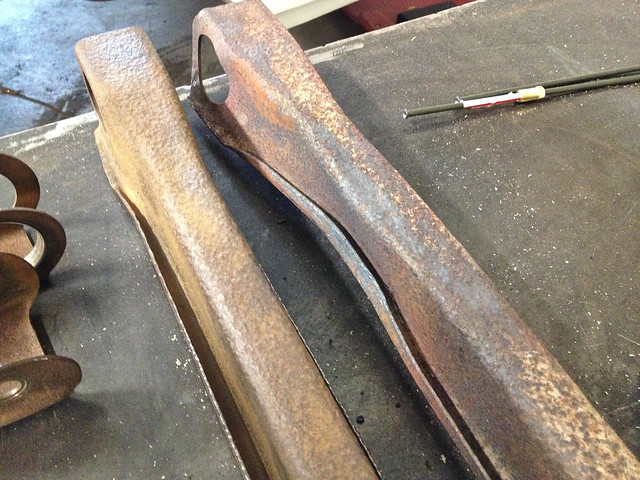 I was able to remove 'most' of the torsional mess, but that will need to be tweeked as I get it straightened more. Twisted metal is all ways tricky though.  It's slow going. The metal is fairly thin and doesn't hold heat long, plus I can't beat the living day lights out of it. Little taps here, heat, little taps there, heat, and so on. I'm working on getting the main straight part good, then I'll figure out the bushing end since that will more finessing. If you can call what I'm doing that, lol. I'm going to give a good go, though. My wife likes the idea of making ones we have work. Her feeling is that this is what Gabby came with, we owe it to her to try and make her whole before resorting to more drastic surgery. I like my wife, she keeps me grounded to the plan.
__________________
Slumbering Death|Dachshund of War|TerrierX|1967 Pontiac Catalina|360# Anvil|2 Burner Gas Forge
|
|
#94
09-29-2013, 07:16 PM
|
|||
|
|||
|
Hi. I love your car. I purchased a 67 the same as yours in vancouver washinton recently. Mine also is a 400 with a 400 trans and a 4 barrel. The 67 are a very very kool car. i intend to drive it around you country next year and then bring it back to new zealand. i already have a 1960 tri power 4 speed manual bonneville, a 57 347 pontiac pwered gmc and a canadian assembled 1939 1/2 ton pick up. not trying to hijack your post. I wanted to ask this question tho. Keith, i was interested in your comment re the rear sway bar. i found an original one off a station wagon when i was over in your country last time for my 60 bonneville. It bolted straight onto my car to the holes already in the frame and differtial. the handling of this car now 10 times the car it was. It is like driving a whole different car. my friend has a 63 catalina and in his words, "i cant get round any of these corners in the way your car does. anyway just curious keith if the 67 pontiacs perhaps have a different setup making the bar ineffectual. I was going to install a bar on my 67 while i was over there but now im not quite sure. anyway, i will watch this post with interest. There are a number of small things i need to do on my car to make it reliable and this post will be most informative for parts procurement etc. congrats on your very cool car.
|
| The Following User Says Thank You to pontiacpark For This Useful Post: | ||
|
#95
09-30-2013, 05:24 AM
|
||||
|
||||
|
love them 67's
Top thread ,thanks mate  John L.
__________________

|
| The Following User Says Thank You to OZZIEVILLE 67 2 door For This Useful Post: | ||
|
#96
10-16-2013, 05:15 PM
|
|||
|
|||
|
Aaaaaannnnnndd we're back!
We left off where I was trying to heat and beat the one lower control arm into some thing usable. But first: The stripe guys needed some practice so we offered up ours as a victim. 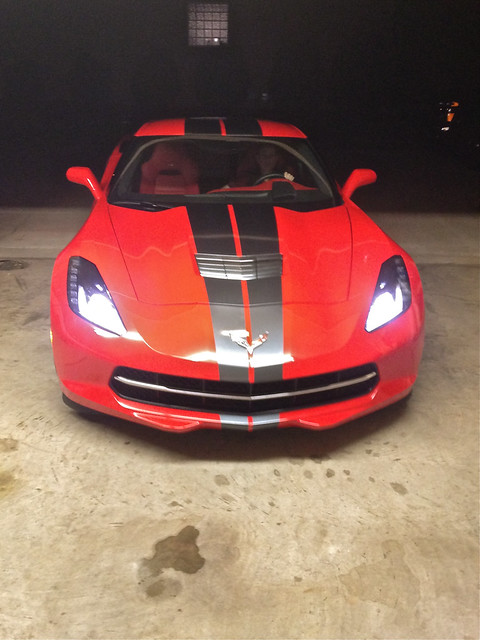 We love it and when we decide to buy one, it will have full length stripes. because race car. Now the brake lines that run from the T junction on top of the differential to the wheel cylinders are roughly 34-35 inches long. I could have bought a length of brake line and a flaring tool, but I was a little concerned about getting the double flare right and having a catastrophic failure. So, the closest pre cut and flared straight line was 40". I had ordered a very nice brake line bending tool along with a few bits and bobs from Summit. It was supposed to be here in time for a friend to sort of show me how to bend lines to match the existing rusty ones. It turns out the line bender shipped from the manufacturer and wasn't here in time. Thanks Summit. So I ran out and grabbed a $9 one from a local auto parts store. 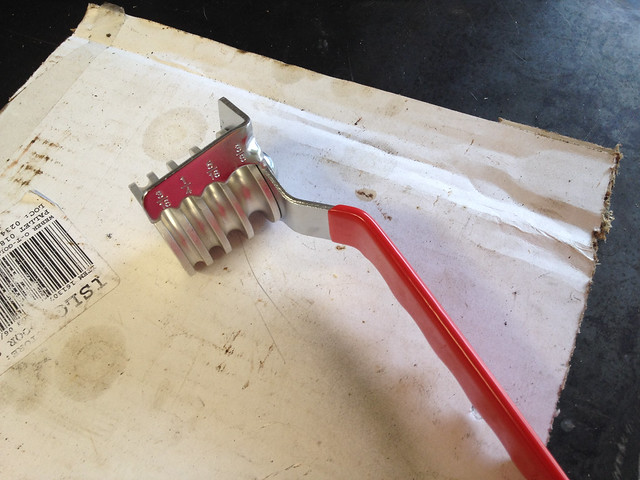 total junk. And, I thought we would be bending it to match the ones I removed. My mentor thought it best to sort of bend them in place. ") Results? Results? 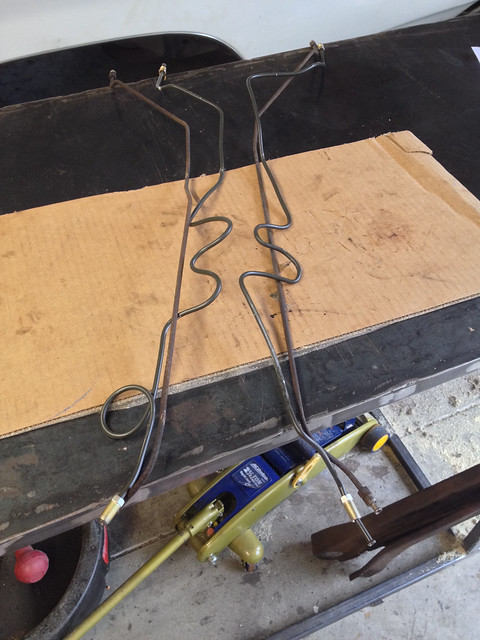 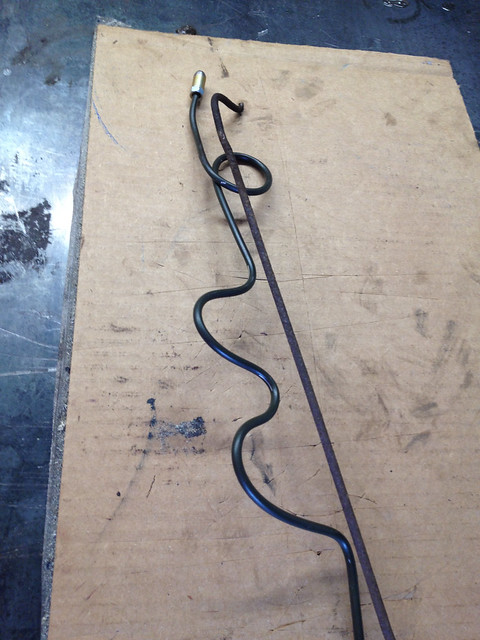  My thoughts had been to just make up the extra length with an S bend. But the curly cue was creative. And right about now my selective OCD was kicking into over load. I said thank you, served beers and dinner. And vowed to re do it myself. Just the idea of driving this awesome car with a mess like that underneath made me twitch. THIS is the proper tool. 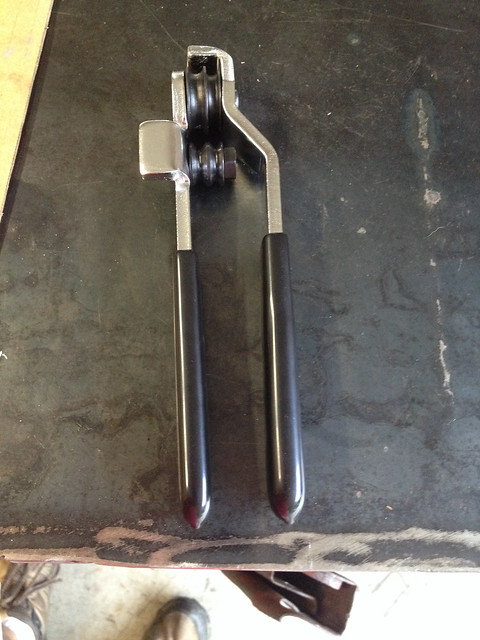 With which you can make proper tight and precise bends. Like this. 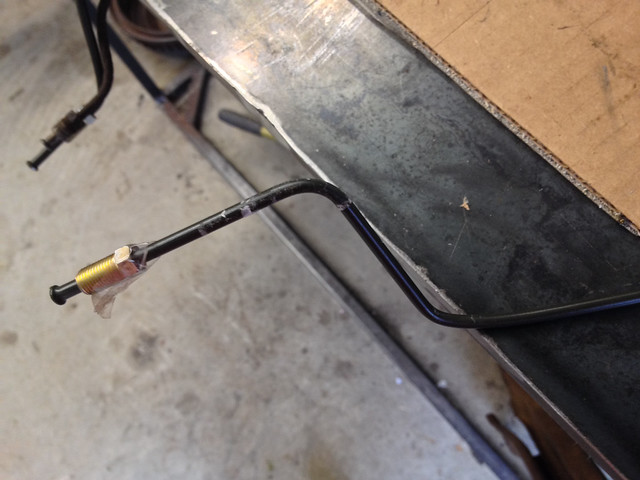  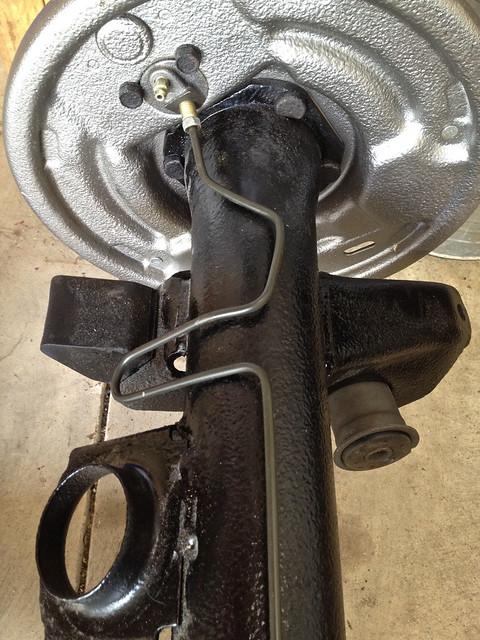 Much, much, much better. The one big U bend takes up the extra length and with a little tapping of a rubber mallet, fits the profile of the axle. And, no, the spring and bump stop are not in the way. With that all done, it was time to get back to the control arms. The uppers were wire brushed, degreased and primed. Then painted with the ceramic chassis paint. 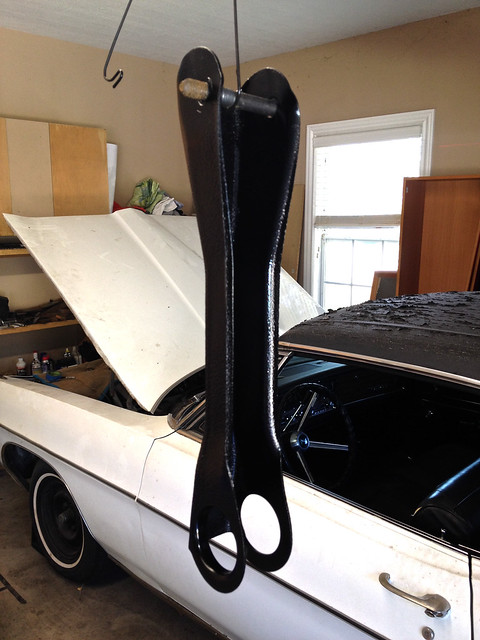 These are the "ears" that the frame side bushing has to seat into. And there is the danger that as the bushing is gently seated with repeated blows from a mallet, that one or the other will deform or crush. In the Pontiac shop manual, it even lists a special tool needed to get it right. Using my engineering degree that I down loaded from the internet, I devised a similar high tech device. 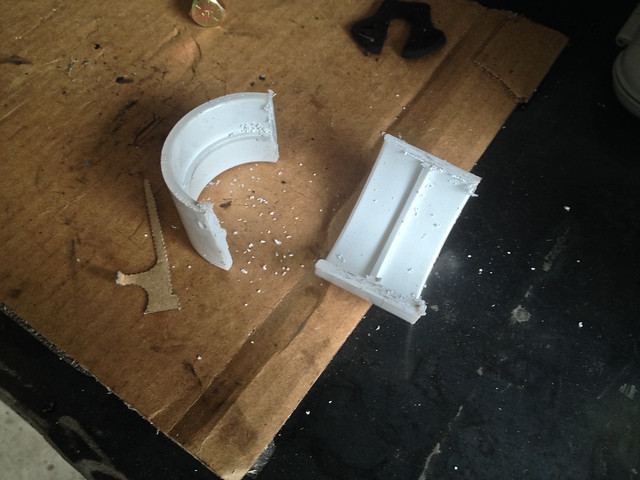 That would sit in the space and keep things equally spaced.  And after 8 or 9 solid blows and some swearing because they like to not drive in straight: 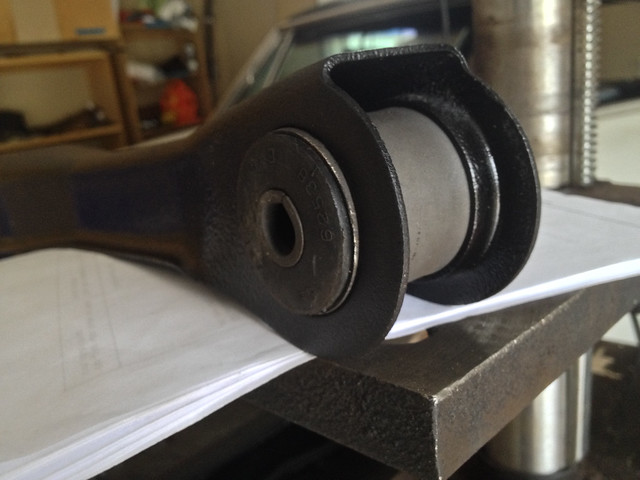 Add some grade 8 bolts, additional bushings being seated in the axle, the new dampers, springs and we are here. 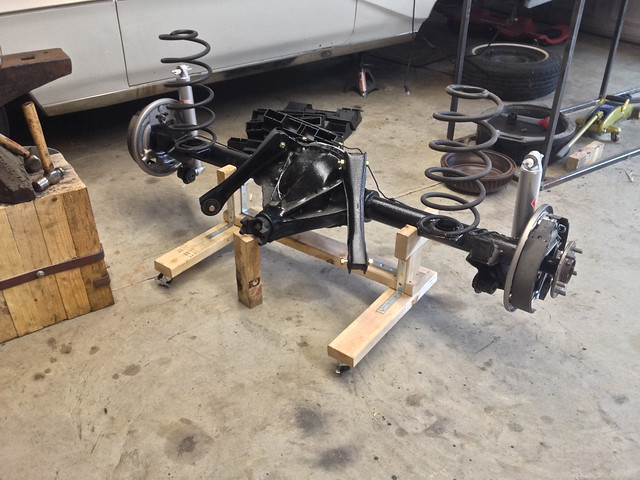 so close. What's that? What about the lower control arms? Ahh, yes. Well, the heating and re forming was....not a success in the end. I did a lot of calling around the southwest of the US to see if anyone had any. All out or on parts cars that you needed to buy complete. Tempting, but buying another car just for one or two parts is courting divorce at this time. It's a matter of space really. The insanity has little or nothing to do with it. Then I went to a machined shop to see if they could make me one. Sure, for $600. Yeah right. For that much I could simply get this. Which I really wanted to all along. So, I asked myself; "Self, if you were the guy selling those, the real cost would be in the set up. So, if I were to wait until the guy had the jigs out and was making some anyway, why couldn't he just make one set of lowers extra?" Turns out, I totally over thought that. I called Ram Air Restorations and talked to Paul. Awesome guy that Paul. It seems you can just order the lower control arm as a replacement, separate from the kit. AND at an insanely reasonable cost, even after shipping. I think I freaked him out a little with my enthusiasm. After I hung up, a small light bulb lit up. So I called back and asked if the lowers were drilled and ready for the rear sway bar, thinking I would add one later. No, but I could have 2 that were for only $10 more. DONE. So they are on the way. When they get here, all I have to do is seat the bushings and install the rear end. Hook up the break lines, the Ebrake and torque everything down. I'm pumped. and a little disappointed that I lost some momentum in the last 30 days. C'est la vie.
__________________
Slumbering Death|Dachshund of War|TerrierX|1967 Pontiac Catalina|360# Anvil|2 Burner Gas Forge
|
|
#97
10-29-2013, 11:02 AM
|
|||
|
|||
|
This post covers about a weeks time, since I have actually been driving the car for the last 5 days.
First, I want to apologise for the lack of assembly pics. I had my phone on an iPod dock and was under the car. At that point I valued the music over the pictures. These are the sexy lower trailing arms which arrived on Sunday evening. Even my wife wanted to fondle them for a bit, which should tell you about the quality of the product. I will definitely be using Ram Air Restorations again. 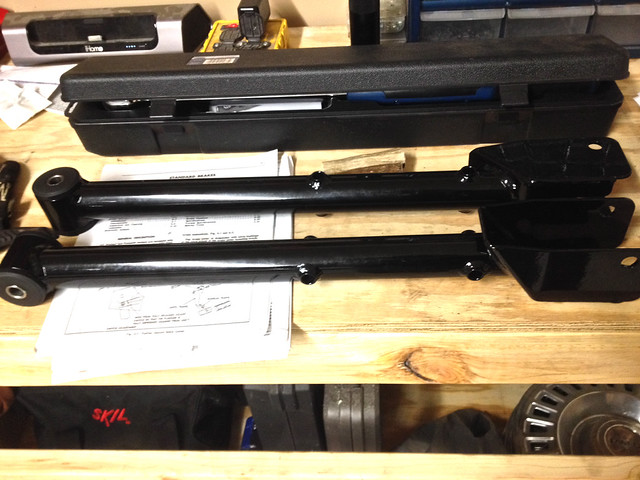 I had the rear axle all set up and rolled under the car in preparation, so when I woke up all I had to do was make coffee, breakfast, hand my lady her lunch and push her out the door. With my coffee in hand, I grabbed the goods and made a beeline for the garage.....at 3:30am. She gets up early, what can I say. In a nut shell: there was a lot of pushing, pulling, bolt fitting and rolling around on the floor. It seems the fitment was less precise then I remember and it took a bit of jacking the axle up and down to get all the bushings in and seated with bolts. Then it was the driveshaft yoke, brake lines and the Ebrake. That last one as a pain in the rear as the wire splitter had shifted leaving one side longer then the other. I was bleeding the brakes at 10am and by 11 I had the car on 4 tires. Again, sorry about the lack of pictures. I was cold and sunny, so I grabbed the dogs and a coat. She started after a few cranks and I backed her out of the garage. I let the motor run to warm up and generally get the oil flowing. I took that time to air up the tires and check the turn indicators. 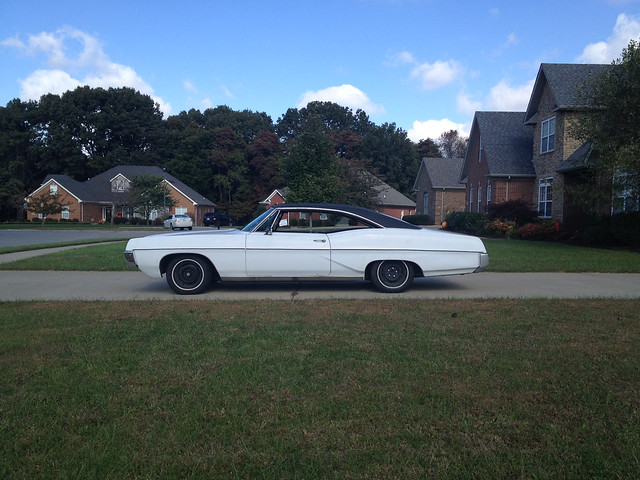 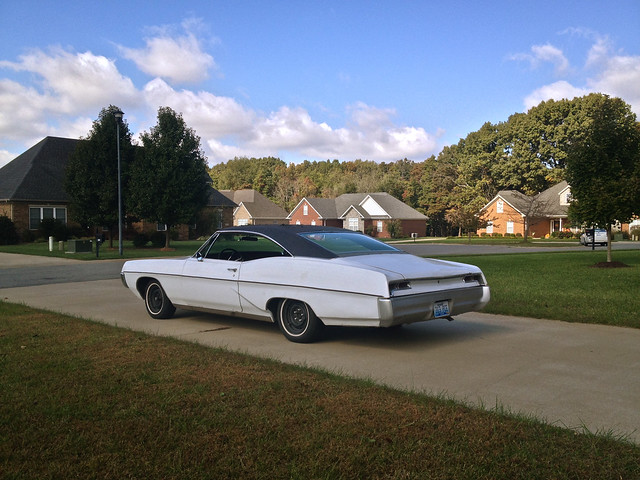 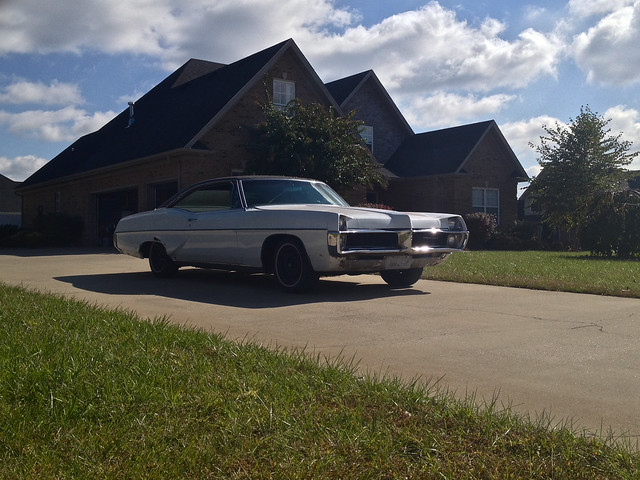 This is how she sits now. How does she handle? Like silk. I mean WOW. Just to recap, when I got the car, she had massive steering slop, no shocks, brakes that pulled heavily to the left. She also had suspension that popped, ground, and abruptly shifted her weight around. Now? It's sooooo sweet. She just carves corners with a ease. The steering is true and enters the corners easily in a predictable manner and exits like a RWD big car should. Braking is soft but even and with no pulling. The new brakes work well and I have yet to see a leak (whew). I took her out on the highway and hit 70mph with ease and a well earned lack of concern. With all that sorted, I really notice how dirty the car is and how ratty the roof is. I really can't wait to start on the body work.
__________________
Slumbering Death|Dachshund of War|TerrierX|1967 Pontiac Catalina|360# Anvil|2 Burner Gas Forge
|
|
#98
10-29-2013, 11:46 AM
|
|||
|
|||
|
But first: The AC never really worked. It turns out the heat doesn't either. Good thing I put the jerseys on the dogs for the test drive. We are looking to get the car ready for the motor to be pulled after the Thanksgiving Holiday. My in laws are coming to visit and are looking forward to a ride, so we thought we'd keep her in running condition until then. But the AC compressor is something I could remove and get out of the way, since it was blocking the motor.
Now, the gentleman I bought it from told me the AC was fine. That means, in my mind, that the AC has freon in it and need to be emptied before I can disconnect it. It's built for R12 and that can't simply be vented; at least not in good conscience. Besides, that stuff is like gold now. NAPA won't reclaim it, and sent me on a wild goose chase to various AC places around town to find out who would. After 3 more attempts, I accidentally pull into a garage of the sketchiest sort. lol, really. But asking never hurts. The guy was brutally honest. No one in town was set up to reclaim R12. If they took my money, he would bet they were simply going to vent it. In fact, he doubted anyone in Kentucky could reclaim it. SO, I might as well just vent it. "This is Kentucky, there ain't no EPA here, 'specially not in your gay-rage." <- Direct quote, I swear. This is the best part though; "Besides, I bet there ain't no gas in the damn thing." After which he pressed the valve and promptly released the last little 'pffffttt' of freon. So, good news? It's empty. Bad news? You may want to stock up on SPF 5000. Sorry about that. 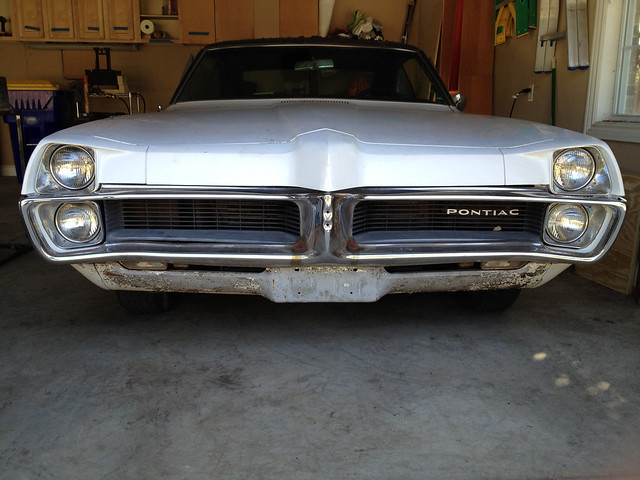 I got home and backed her in with that classy beak filling the garage door. The it was really a matter of removing 2 cracked and brittle hoses and the bolts. 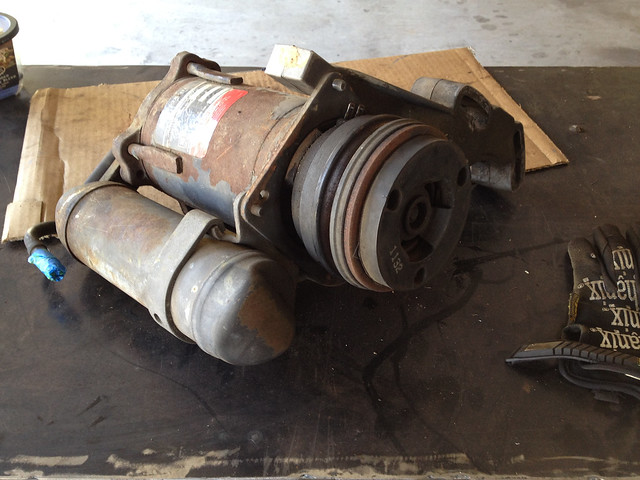 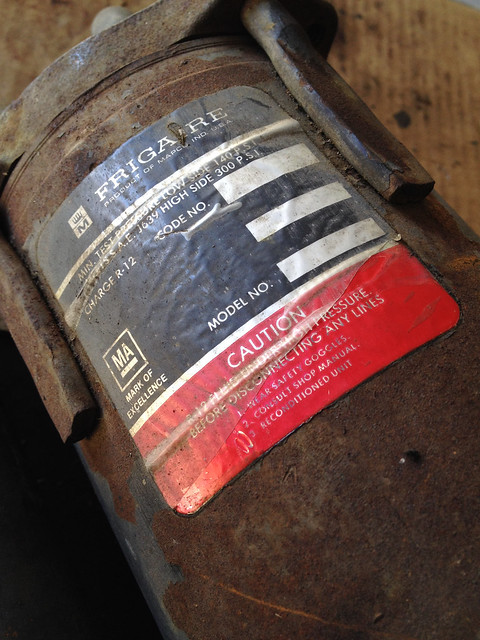 And that is 30 American pounds of vintage air conditioning compressor. With about 10 pounds of bracket. It left this massive void. 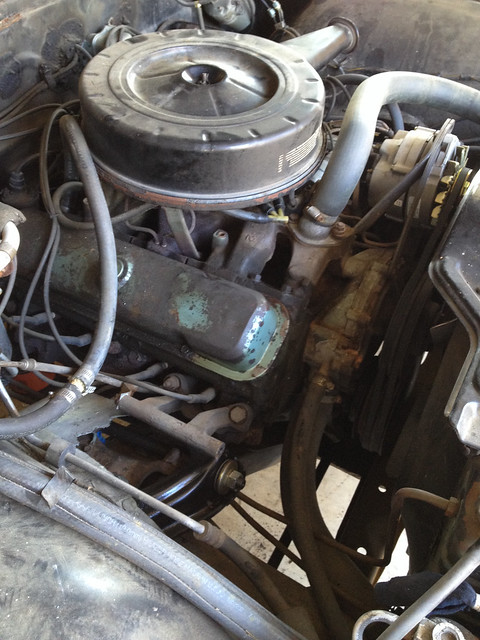 Which allowed me to get a better look at what is in my future. 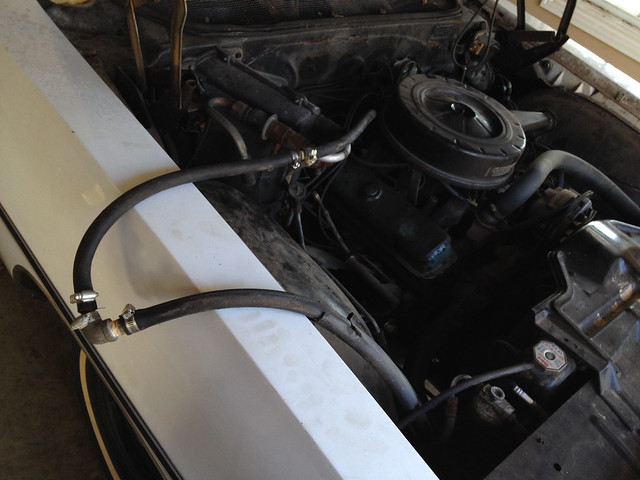 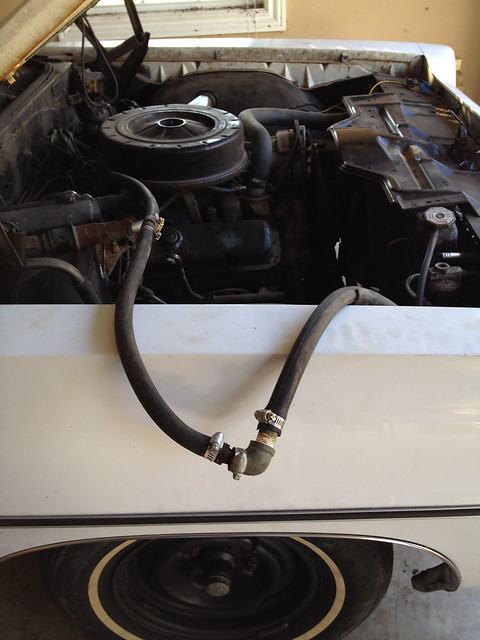 Yes. That is indeed a section of the cooling loop. No. I'm not sure where it goes. and Yes, I'm certain it didn't come from the factory with metal plumbing supplies spliced into it. It looks like her guts are hanging out. It's sort of disturbing really.  What you can see is that the valve covers have never been cleaned or painted. And it looks like both sides lack any pry marks. That's a good sign. You can see where I took a rag and cleaned off the end which resulted in paint flacking off. You can also barely make out where the water pump meets the block is basically filled with rust and debris. So it hasn't been removed lately, if at all. Also a good sign. What you can't see is the valley pan filled with 1/2 eaten acorns, mouse droppings and random loose bolts; all caked in grease/old oil. Nice. The tires. We had a warning from the alignment that they were cracking. Earlier in the thread we even discussed the plan for the future in regard to wheels and tire. Most of that all still holds true. But...the tires are cracking and it's cold out. So that is a matter to worry about. My father in law was fascinated by the fact that they are on 14" rims and spent some time finding me tires to fit them. There is a degree of pressure to validate his interest and to get some tires not about to blow out for their November joyride. We ordered some very inexpensive tires from Walmart of all places. They are Hankook Optimos. Same size as the ones we have. At least he found a brand I can trust to a degree. And at $50 a tire, it's an easy call to make the in laws happy. And not kill them. <-that part is sort of important to a successful marriage. 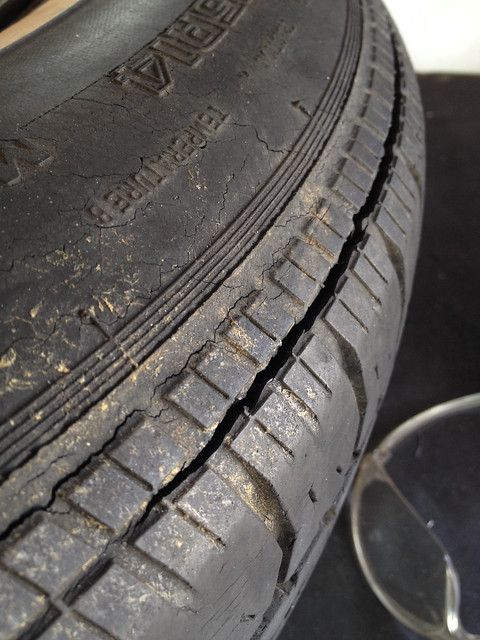 You can see the huge split starting around the rim, and the general cracking in the side wall. So while the wheels are off, my wife asked me if there was anything we could do to make the rims look less like crap. "Well, yes, I could paint them." At which point she tells me she wants them red. Like RED red. Now I need to strip them, prime them, paint them before they tires get here on Thursday. But they are just going to gouge them up while mounting them. So I have negotiated to strip them now, mount them, then get them painted. 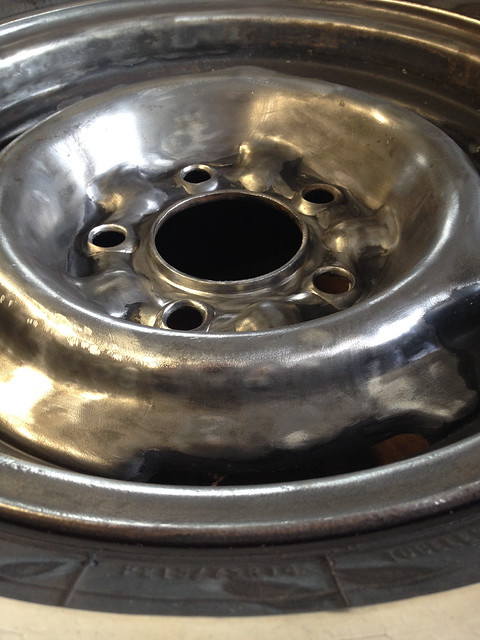 Out comes the angle grinder, wire wheel, and SAFETY equipment. No eye injuries this time. Oh no. not this time. 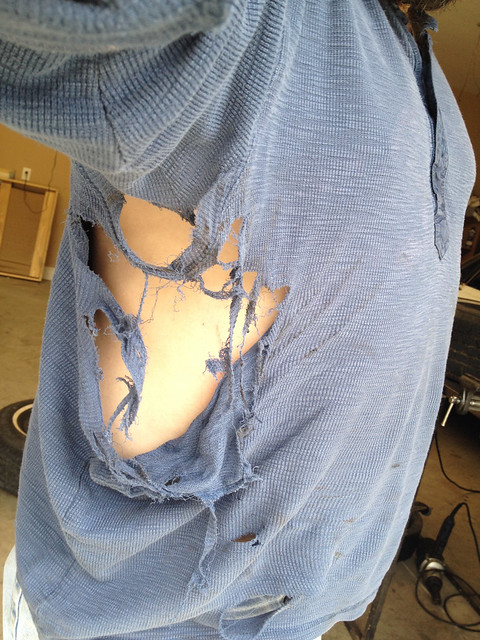 This time, the angle grinder kicks back on a wheel stud gap and bounces around into my rib cage. Bruised? why yes, I am. Ripped up a bit? yup. Ruined my most loved shirt? YES! and, man, was I ever pissed about that.
__________________
Slumbering Death|Dachshund of War|TerrierX|1967 Pontiac Catalina|360# Anvil|2 Burner Gas Forge
Last edited by Bliss_Street; 10-29-2013 at 11:55 AM. |
|
#99
10-29-2013, 12:50 PM
|
|||
|
|||
|
After a bit of reflection, it would seem that the 2 ends of the cooling splice might have originally connected there:
 Which would explain the lack of heat and the two shivering dogs.
__________________
Slumbering Death|Dachshund of War|TerrierX|1967 Pontiac Catalina|360# Anvil|2 Burner Gas Forge
|
|
#100
11-04-2013, 08:01 PM
|
|||
|
|||
|
We last saw the rims being stripped so that I could get new tires mounted.
The tires were ordered a week ago, and in the mean time we had some incidents around the home 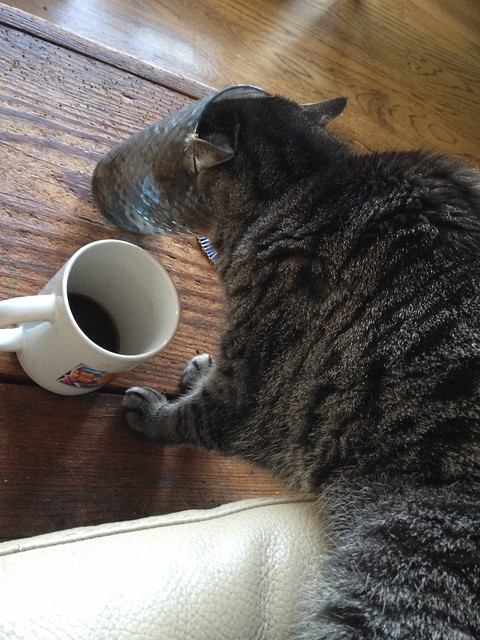 including The Slumbering Death getting her head stuck in a water glass and making a run for it. with the glass still on her head. 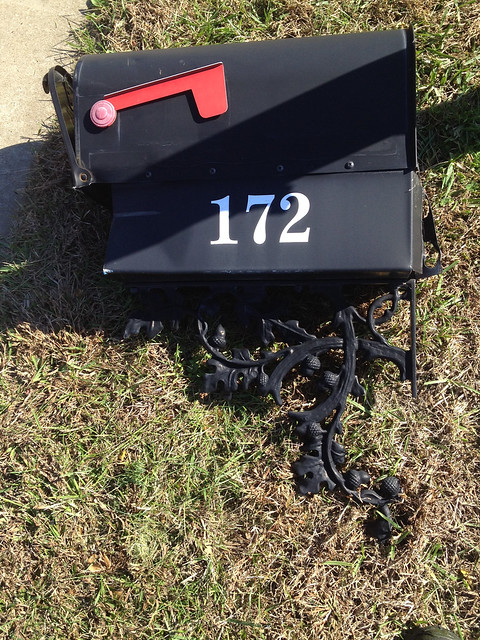 Also, the sheriff was serving papers to a neighbour, looked down and smacked my mailbox. So now I'm on a internet goose chase to find a new bracket in keeping with the rural aesthetic. But then the el cheapo Hankooks came in and we wheeled them out the truck to get shoed. 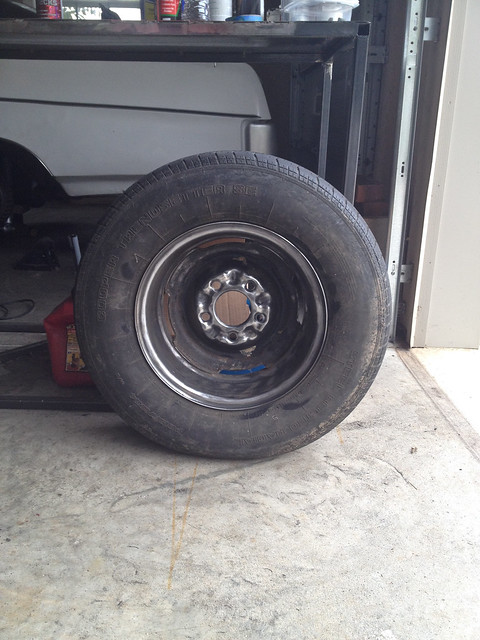 It went well, considering they were totally confused about the fact the I just brought the wheels. Go figure.  Coming home. 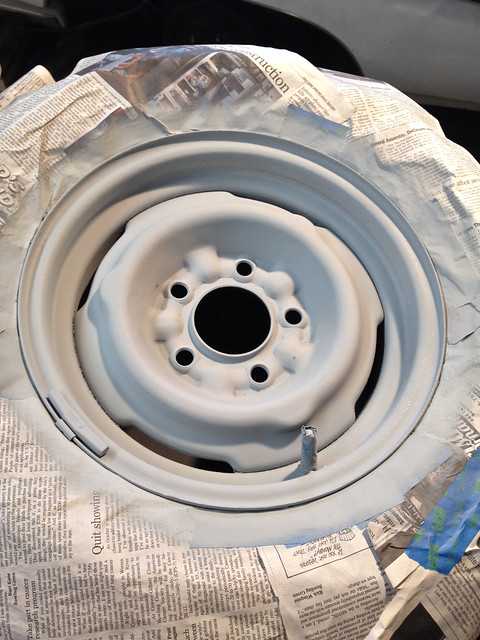 Straight into primer. 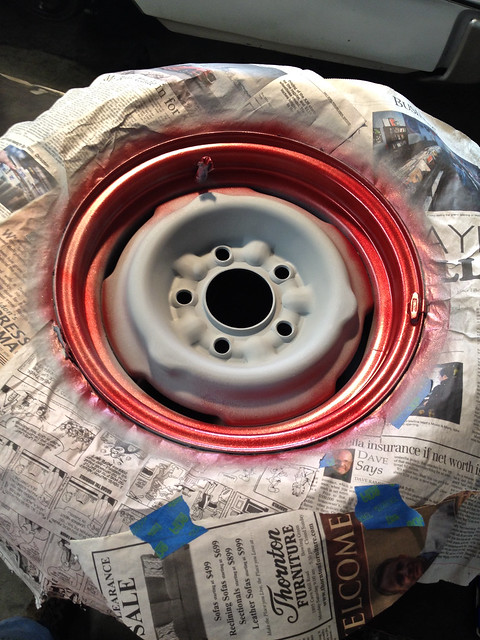 The first dustings of the red. 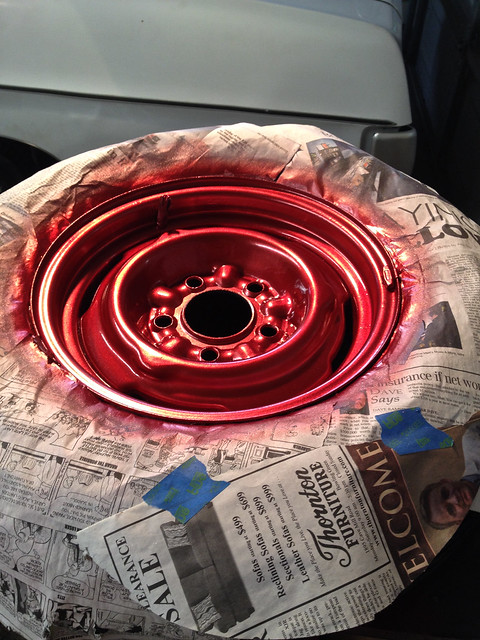 And full on metallic hot rod red. It will harden over night. Then I'll wet sand it and touch things up. Then comes a UV protectant clear coat. It should look pretty sweet, if not entirely original.
__________________
Slumbering Death|Dachshund of War|TerrierX|1967 Pontiac Catalina|360# Anvil|2 Burner Gas Forge
|
| Reply |
|
|
The PY Online Forums is the largest online gathering of Pontiac enthusiasts anywhere in the world. Founded in 1991, it was also the first online forum for people to gather and talk about their Pontiacs. Since then, it has become the mecca of Pontiac technical data and knowledge that no other place can surpass.


 Linear Mode

