


| FAQ |
| Members List |
| Social Groups |
| Calendar |
| Search |
| Today's Posts |
|
#481
 05-31-2018, 10:41 PM
|
||||
|
||||
|
This thing really is an eye catcher !!
|
|
#482
06-01-2018, 11:31 PM
|
||||
|
||||
|
Ah...what might have been!
__________________
1971 GTO 455 HO 4-speed - Cameo White, White Vinyl Top, Jade Green Interior, Ram Air Hood, AC, Honeycombs and 8-track 1974 Formula 455 I Owned in 1975-1976. Now Own Its Twin From Same Dealership 
|
|
#483
06-02-2018, 12:08 AM
|
|||
|
|||
|
Looks good!
__________________
Buzzards gotta eat... same as worms. |
|
#484
06-03-2018, 08:29 PM
|
||||
|
||||
|
Thanks guys!
And BTW, ol Pinion Head, that revised 80 amp alternator bracket is working just fine with not even a squeek since the install. http://forums.maxperformanceinc.com/...d.php?t=816873 |
|
#485
06-20-2018, 09:35 PM
|
||||
|
||||
|
I have the Gramma car back at the local shop. He had an opening for some quick work and told me I could bring her down after i pulled the fuel tank out. The original inner and outer rear valance panels were rusted at the bottom flange from winter use by Gramma back in the 1970's. It was a terrible design that just trapped the salt and mud from the tires and held it in place with no real access for a hose to flush it out.
When I had the car painted 25 years ago the repro panels were not available. So I had to wait a couple decades for parts availability to catch up. Happily, Santa brought me these two panels a couple Christmases ago. The shame is that we only needed the lower six inches or so of the tail panel so 75% of that $300 panel is going to waste. He was able to remove the inner panel at the factory welds and was installing that as of today. I am getting all the underside stuff done in advance of a future paint job. This way when it comes time for paint, it will just involve sanding, massaging, and painting and no rust repairs. (resulting in a briefer sentence in bodyshop prison I hope). Last edited by njsteve; 06-20-2018 at 09:43 PM. |
|
#486
06-21-2018, 05:37 PM
|
||||
|
||||
|
The body man has the new outer panel installed today. Working fast!
|
|
#487
06-22-2018, 11:57 AM
|
|||
|
|||
|
Looking good. I had to do the same with mine. I hated to only use the bottom part of the new tail panel but I hated the thought of cutting the entire thing out and replacing it even more!
|
|
#488
06-22-2018, 05:17 PM
|
||||
|
||||
|
Body work getting done to smooth out the installation.
|
|
#489
07-05-2018, 08:35 PM
|
||||
|
||||
|
Spent the weekend reassembling the back end of the car. I had pulled the new leaf springs I installed last spring in order to get them de-arched one inch to drop the back end down a little bit. The week before, I had swapped the original set of rusty leaf springs back in for the week it spent at the body shop getting the rear panels installed. That gave me time to bring the springs back to Stengel Brothers Springs in PA to get them worked on. They have a special press that can squash the leaf pack down to a specific measurement. Worked like a charm.
I then spent yesterday swapping in a new set of front coils since the one inch drop that I ordered for the custom springs was not enough. They built me a new set at half price that were 1-7/8" drop. (Heres the original info on the previous set I had ordered: http://forums.maxperformanceinc.com/...664082&page=17 ) New fender lip height is 27-1/2" front and 28-1/2" rear. Before these new modifications, it was an inch higher on both front and rear. Here is how she sits now. I think the stance is just right for this set of wheels now. They fill the wheelwells nicely. Though if I had it to do over again (again) I would get a slightly smaller set of front tires instead of running the 255/50x17s all around. Maybe a 235/55x17 front. 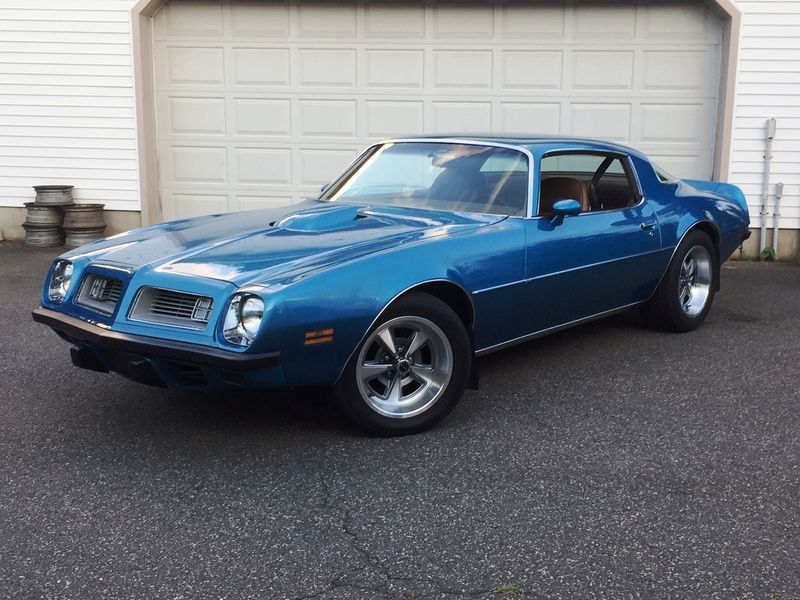 Here is before this week's modifications: 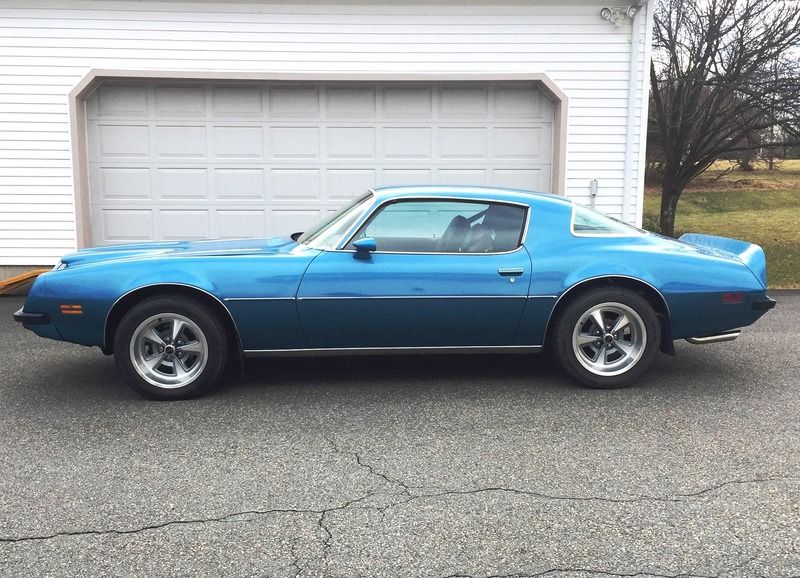 And as of today: 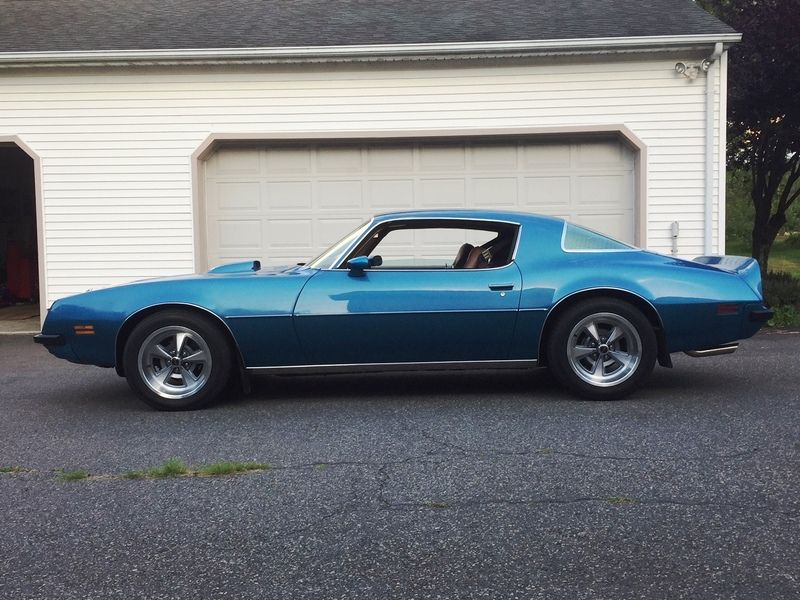
Last edited by njsteve; 07-05-2018 at 09:05 PM. |
|
#490
07-06-2018, 06:42 AM
|
||||
|
||||
|
Nice Steve!
__________________
Some guys they just give up living And start dying little by little, piece by piece, Some guys come home from work and wash up, And go racin' in the street. Bruce Springsteen - Racing In The Street - 1978 |
|
#491
07-06-2018, 08:09 AM
|
||||
|
||||
|
Well done!
__________________
1976 LeMans B09 Freeway Enforcer, 455/M40 Smokey 1977 Trans Am, 400/M21 Black/Gold Bandit. 44K actual miles 2017 Sierra SLT 1500 Z71 4X4  2019 Canyon SLT Crew 4X4  
|
|
#492
07-07-2018, 07:04 AM
|
||||
|
||||
|
Thank you!
I spent last night at my buddy's garage replacing the front to back, underbody fuel line. When putting the tank back in I noticed the last few inches at the tank end were seeping due to old salt corrosion. The hard part is finding the correct line. 1975 was a really weird year for Firebirds and Camaros. It was the first year of catalytic converters so the fuel, vent and return lines kept getting changed in production to route around that super hot contraption on the passenger side underbody. This car has the 3/8" fuel line running down the driver's side of the car and the 1/4" vent and return lines running down the passenger side. You'd think that would be simple to describe in the catalogs but everyone has them backwards. They also describe my setup as having the fuel line on the "B side" of the car. What the heck is the B-side? Wasn't that the other song on a 45 record? And why the heck do the manufacturers spend all that time making a correct replica of the original line to then go ahead and bend it into a pretzel to fit in a big box? They could at least mark the line to tell you the location and direction to bend it back into the correct position. But nooooo! Anyway we put the car on the lift and manhandled the new line into place while removing the old line. The fuel line runs alongside the brake line and uses the same retaining clamps. I noticed the wire protective coils on that line were a bit crusty as well. And in true "Give a mouse a cookie and he'll want a glass of milk..." fashion, I decided to order the underbody brake line section and the vent and return lines. Of course they only sell them in the big kits that have all the other sections that you don't need. (the vent and return lines have a second section that goes from the subframe to the front of the car.) These never rust and rarely need replacing but you can't just order the back halves of the set. Oh well, that will be next week's fun. Anyway, She sure rides nice now and sits right. I also ordered some carpet samples to replace the JC Whitney sewn-style carpet I installed back in the 1980's before anyone made molded carpet sets. The only problem is that Auto Custom Carpet lists a dozen possible colors for my interior: Beige, Doeskin, Buckskin, and Saddle with a light, medium, and dark version of each one! So for $1 apiece they will send you a sample swatch of each. At least I have the 1973 sitting next to Gramma's car with the same interior, so I can try to match the sample to an original carpet. The only difference is that the 73 has loop style and the 75 uses cut pile material. Oh well, we will see how that goes next. Stay tuned! |
|
#493
07-09-2018, 05:05 PM
|
||||
|
||||
|
When i was ready to replace my fuel lines I ordered them from Summit. Lines were from (the Right Stuff fuel lines) and they were sent direct from the factory not summit. Well, when I received them they were wrong. Long story short they kept sending the wrong part over and over again. I finally got Summit to give me a name (the right stuff) in their tech department. I had to explain to him over and over again the part was wrong. (it was even wrong on their website). He had me send my original to them so they could see for themselves. They finally agreed it was the wrong part. They used my original to retool the part. They sent my original back plus a complete new set of fuel lines at no cost to me. Cool...
Bub also, they did label where to make the bends and what direction... |
|
#494
07-10-2018, 03:41 PM
|
||||
|
||||
|
I know what you mean. I only stumbled across the correct Right Stuff fuel line part number after reading multiple reviews on Jegs or Summit's sites. One person mentioned that the line was the one for the driver's side despite being labeled as pass side.
|
|
#495
07-12-2018, 07:14 PM
|
||||
|
||||
|
I finally found a shaker decal I liked...and it is actually for a 1975! These came on the 455 powered Trans Ams that were available in 1975 with a low compression 7.6 to 1, 200-horsepower 455: the same one in the big family sedans.
But the decal looks cool in the three-dimensional, blue color that accents the car's color. And since the 1970 455 block in the car has parts from a real 1972 455HO inside it, I guess no one will really complain that it has twice the horsepower as an actual 1975 455-HO. :-) Now I'm wondering how the 1973-75 tri-color blue accent stripe would look on the car. They were available on the base Firebird, Esprit, and Formula. Anyone have any photos of the blue version of the stripe? All the decal venders have the same photo of the maroon car with orange stripes. 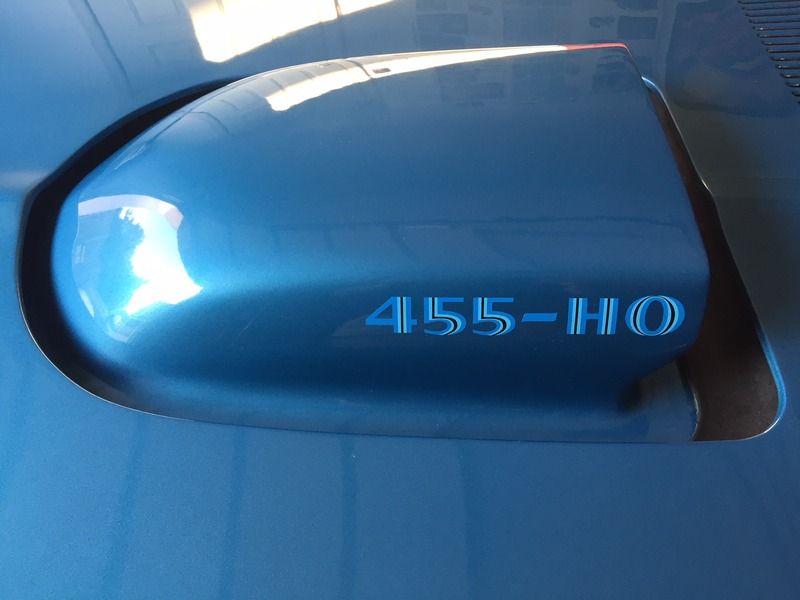 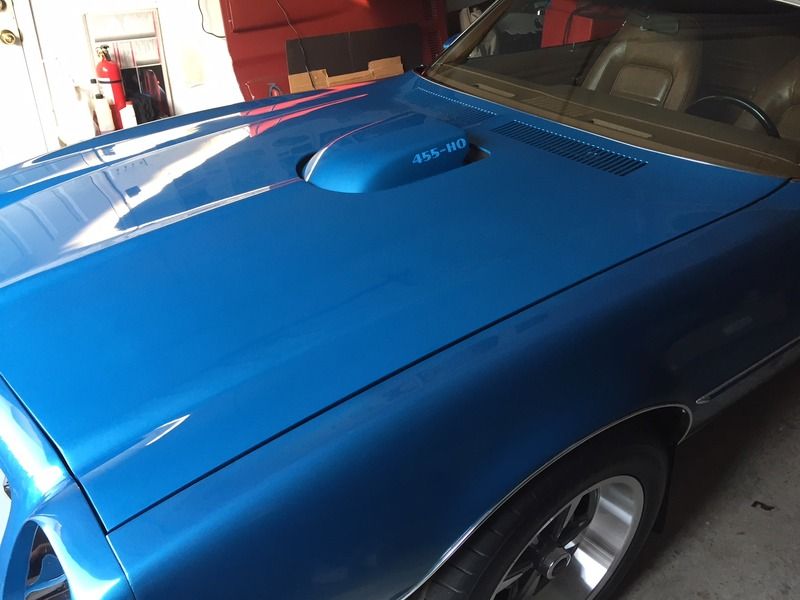
Last edited by njsteve; 07-12-2018 at 08:14 PM. |
|
#496
07-12-2018, 08:46 PM
|
||||
|
||||
|
Here is from booklet, on Blue.
|
|
#497
07-13-2018, 03:27 PM
|
||||
|
||||
|
Thanks. Looks like a good match for the shaker decal. I ordered a decal set. Can't wait to put them on.
|
|
#498
07-13-2018, 04:38 PM
|
||||
|
||||
 Here's a '73 with the stripes that was at MCACN's Fabulous Formula display.
__________________
So long, farewell. |
|
#499
07-13-2018, 05:09 PM
|
||||
|
||||
|
Sweet!
I just found this photo on the interweb: 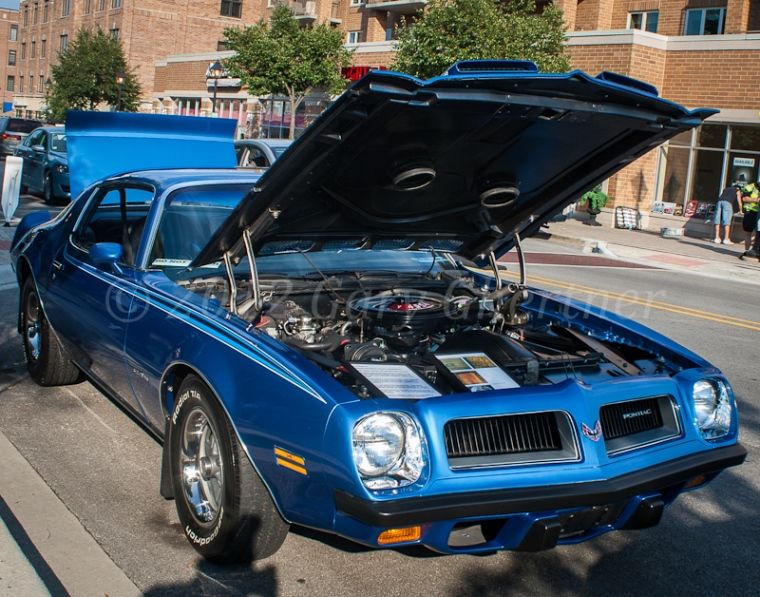
Last edited by njsteve; 07-13-2018 at 05:42 PM. |
|
#500
07-13-2018, 10:46 PM
|
||||
|
||||
|
That’s gonna be sweet looking Steve.
__________________
1971 GTO 455 HO 4-speed - Cameo White, White Vinyl Top, Jade Green Interior, Ram Air Hood, AC, Honeycombs and 8-track 1974 Formula 455 I Owned in 1975-1976. Now Own Its Twin From Same Dealership
|
| Reply |
|
|
The PY Online Forums is the largest online gathering of Pontiac enthusiasts anywhere in the world. Founded in 1991, it was also the first online forum for people to gather and talk about their Pontiacs. Since then, it has become the mecca of Pontiac technical data and knowledge that no other place can surpass.


 Linear Mode

