


| FAQ |
| Members List |
| Social Groups |
| Calendar |
| Search |
| Today's Posts |
|
#41
 03-23-2017, 09:18 PM
|
||||
|
||||
|
NOS Left 3062232:
http://www.ebay.com/itm/1974-1981-Fi...1Yv-Wu&vxp=mtr right side used 3062231: http://www.ebay.com/itm/1970-1981-FI...BYKyf~&vxp=mtr Pair used: http://www.ebay.com/itm/USED-WINDSHI...RYLQUd&vxp=mtr used right: http://www.ebay.com/itm/USED-WINDSHI...JYxE1b&vxp=mtr
__________________
1976 LeMans B09 Freeway Enforcer, 455/M40 Smokey 1977 Trans Am, 400/M21 Black/Gold Bandit. 44K actual miles 2017 Sierra SLT 1500 Z71 4X4  2019 Canyon SLT Crew 4X4  
|
|
#42
03-23-2017, 10:55 PM
|
||||
|
||||
|
Thanks Canamman! I just ordered the NOS Left one and the used right one (last one you posted). Appreciate the links!
BJ
__________________
1971 GTO 455 HO 4-speed - Cameo White, White Vinyl Top, Jade Green Interior, Ram Air Hood, AC, Honeycombs and 8-track 1974 Formula 455 I Owned in 1975-1976. Now Own Its Twin From Same Dealership 
|
|
#43
03-24-2017, 11:26 PM
|
||||
|
||||
|
Wish I had seen this thread earlier BJ. Love your new project; I owned a 73 Grand Am the same color combo in 74. I wish I had caught you before you did any sanding or cutting of the paint. There is a way to bring back the older single stage paints WITHOUT any abrasive materials, compounds, polishes, buffing, etc. We're using it on 36k mile original paint 79 Camaro right now.
I don't know where I would chance taking off the body side moldings. You could very well end up painting 80% of the entire car this way. Good luck and eagerly following.
__________________
LEAD, FOLLOW, OR GET THE HE!! OUT OF THE WAY!!! HONEST JERRY'S SPEED AND EQUIPMENT
|
|
#44
03-25-2017, 12:42 PM
|
||||
|
||||
|
Thanks Jerry! Would love to hear your process for restoring the older single stage paints. We did that test spot on the top of the driver side fender because we knew we had to do a rust repair there. We test polished a couple places with 3M #1 and #2 compound, followed by some glazing with wax and got some good results. What process are you using on that 79 Camaro?
BJ
__________________
1971 GTO 455 HO 4-speed - Cameo White, White Vinyl Top, Jade Green Interior, Ram Air Hood, AC, Honeycombs and 8-track 1974 Formula 455 I Owned in 1975-1976. Now Own Its Twin From Same Dealership
|
|
#45
03-25-2017, 01:24 PM
|
||||
|
||||
|
Some more progress pictures.
MPR got the hood removed and the inner fenders out, so now we have some more access to the engine compartment for detailing. 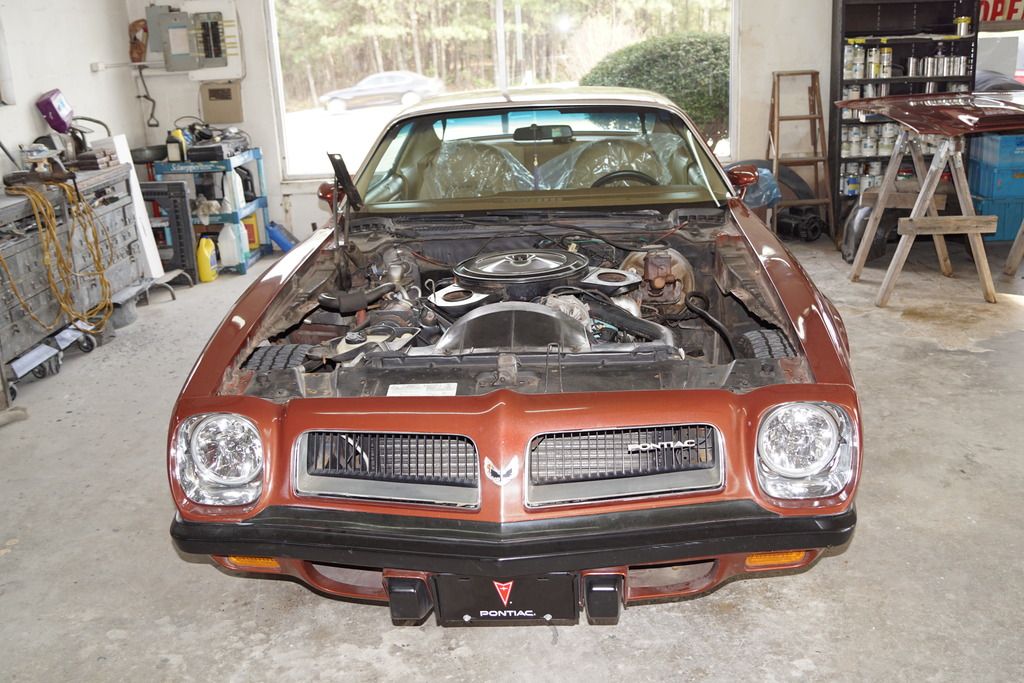  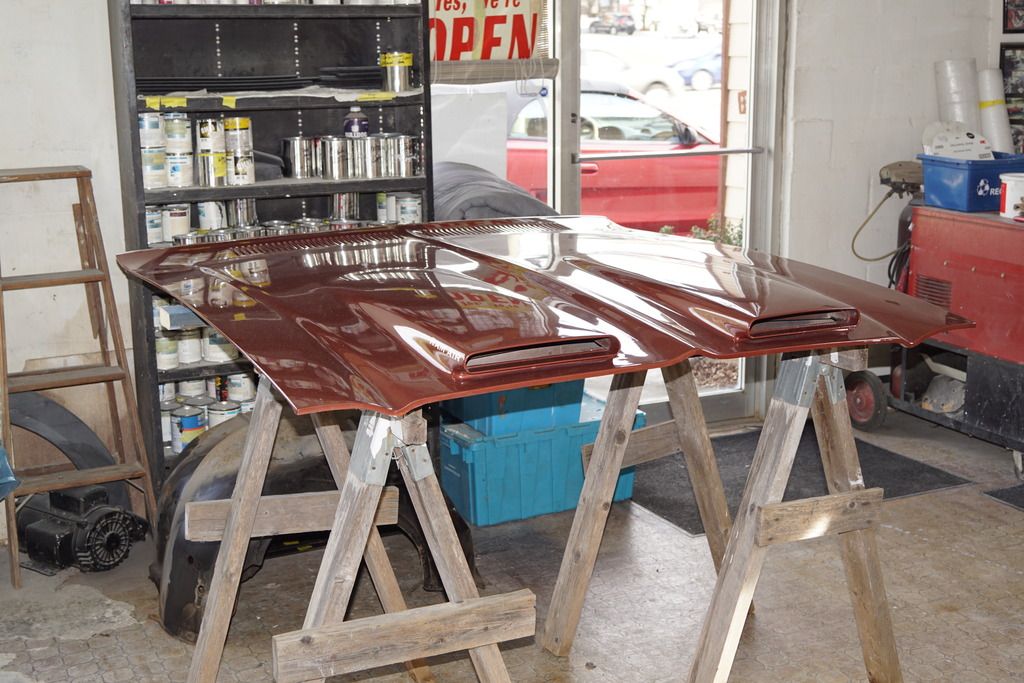 The inner fenders look good, 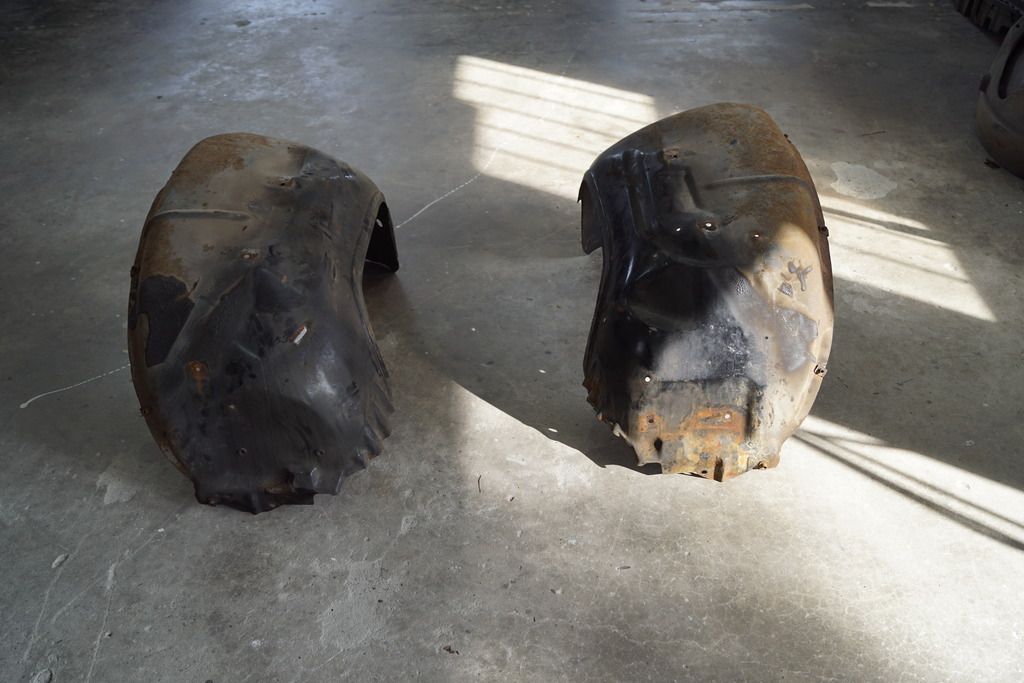 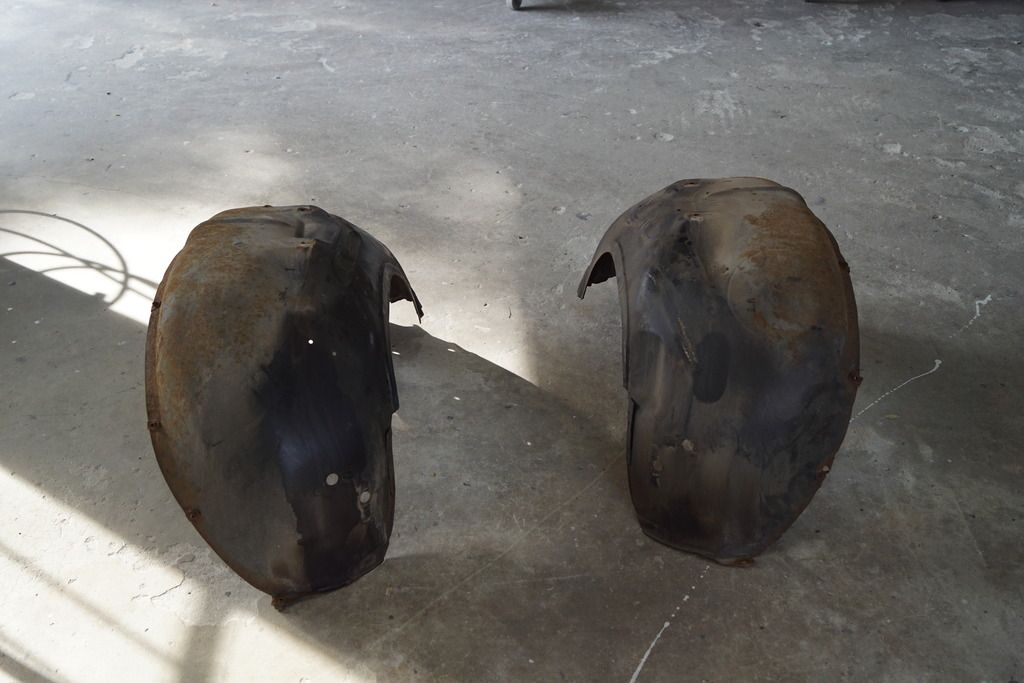 What was this - maybe some undercoating overspray? 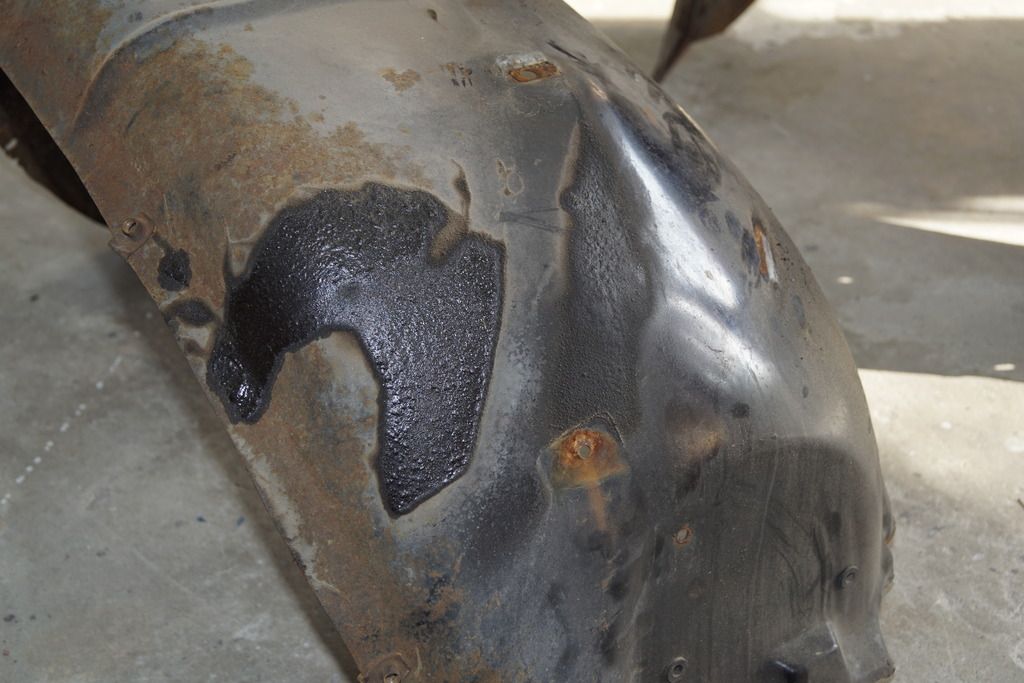 Here are some photos of various places in the engine compartment. We have some oxidation and surface rust - looks like some salt exposure from the Utah and Wisconsin roads over its lifetime, but overall, the subframe and core support look to be in good condition. I plan to use a Steam Jenny pressure washer to clean the underside and engine compartment, then use sponge brushes to touch up paint as and where needed. We'll replace some hoses and vacuum tubes, and do some general cleaning while we have good access. 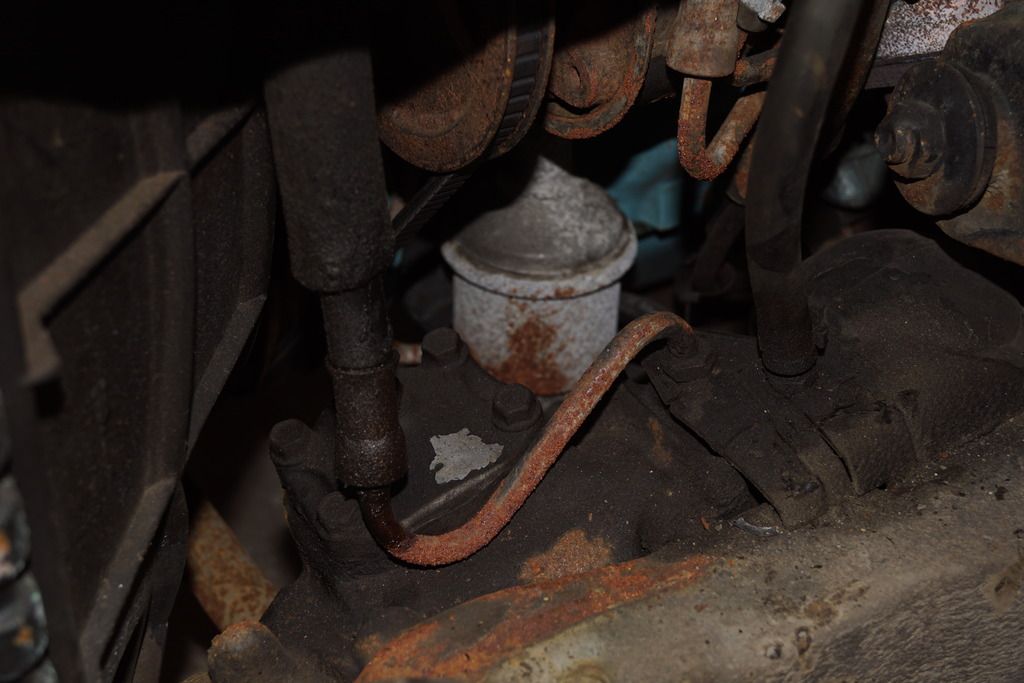 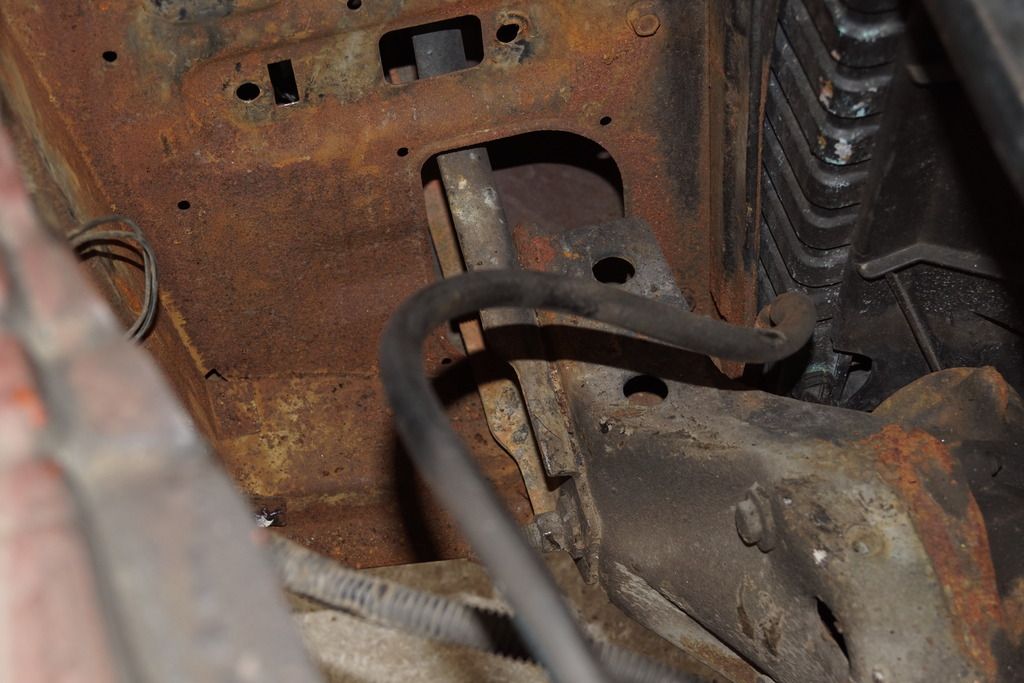 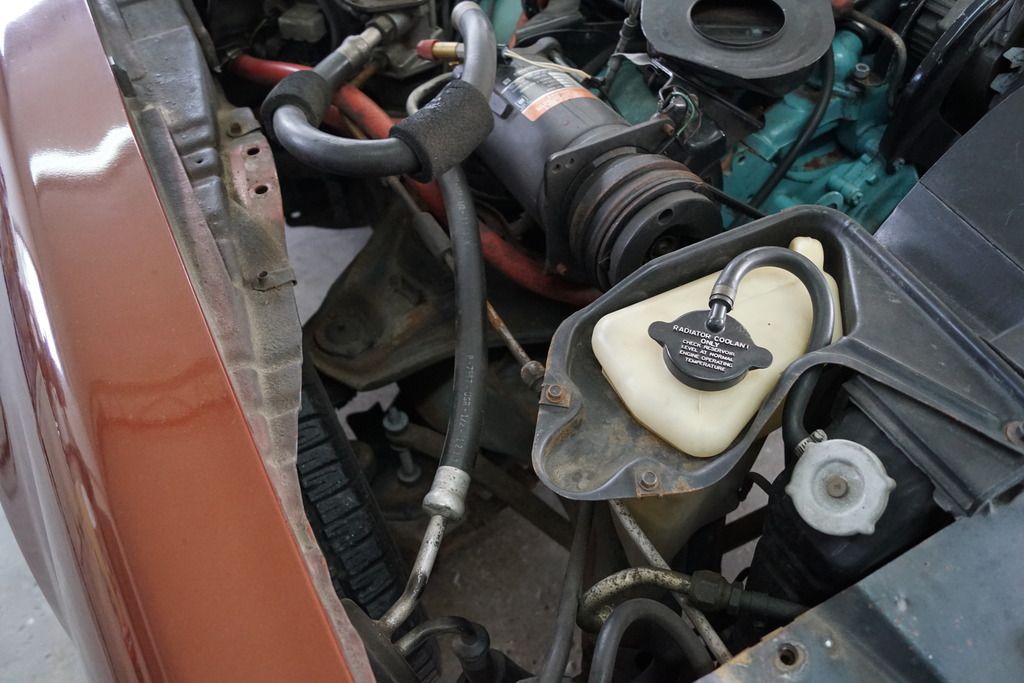 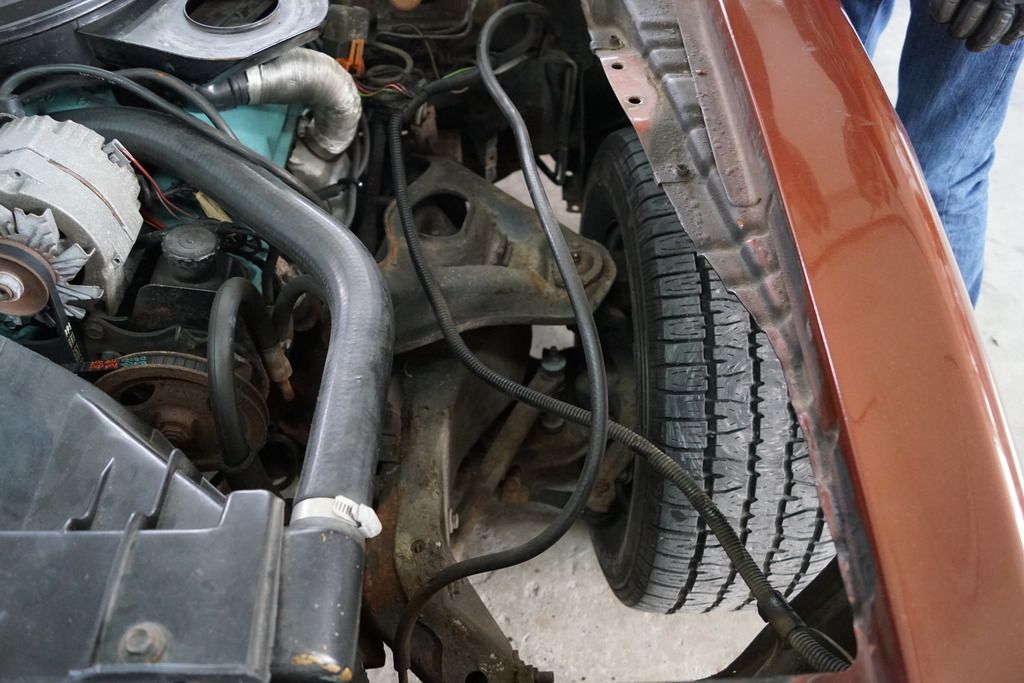 Found the wire that used to run the big Tach on the steering column seen in some of the older photos of the car. 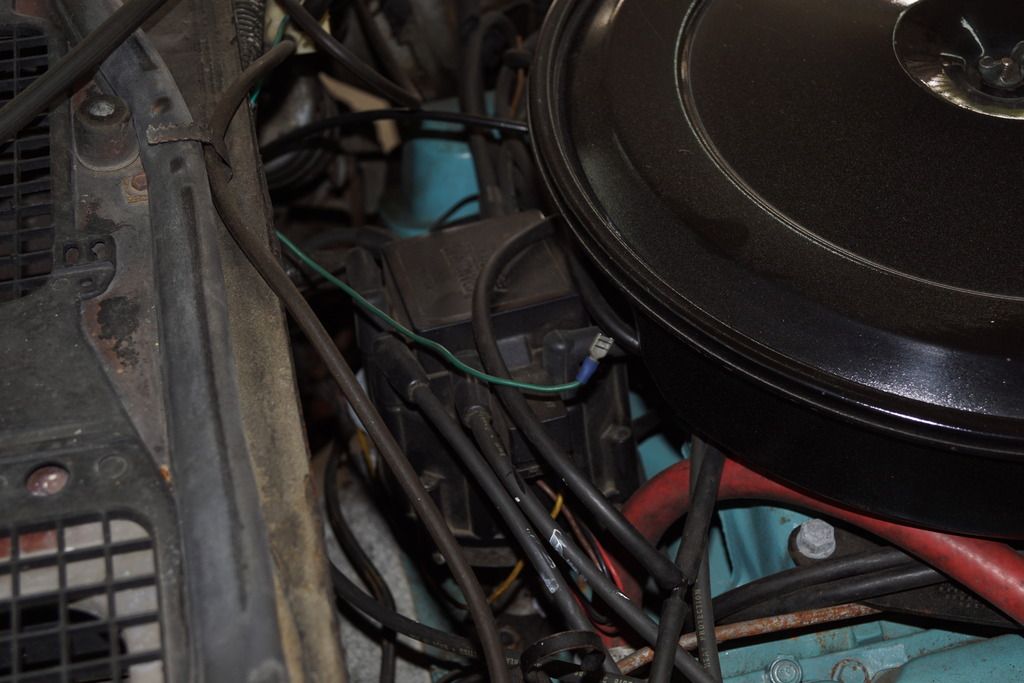 What is this - a filter in the vacuum line? Why does it go to such a small diameter? Looks like it disappears into the firewall. Any idea what this goes to? 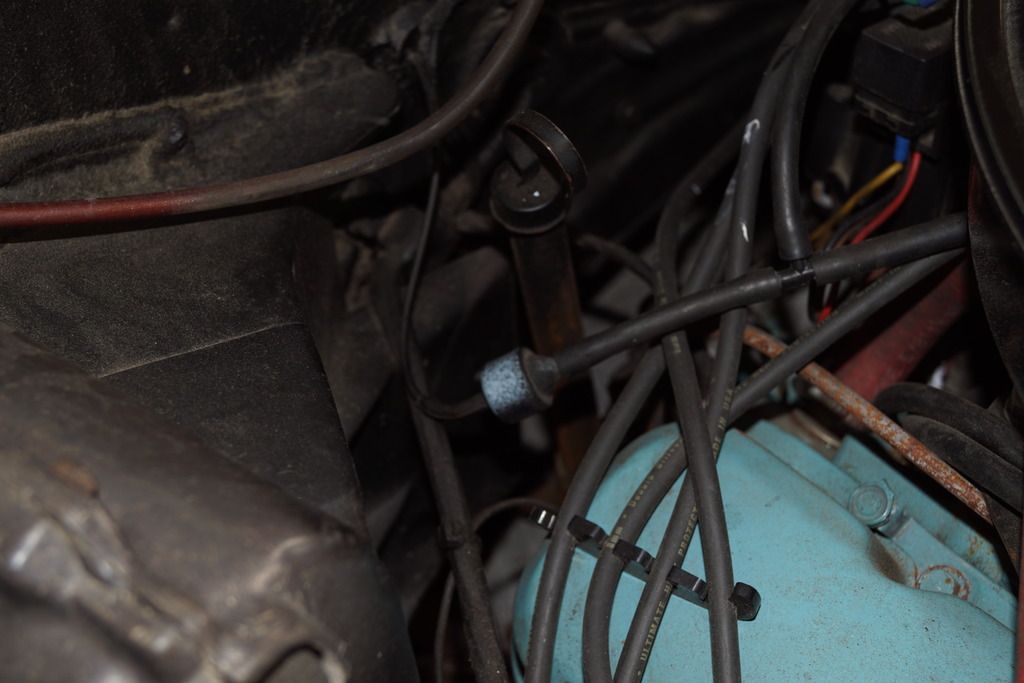 Got a much better photo of the Cowl Tag. Notice the light stamping of the paint codes. You can barely see what looks like two "66" stampings for upper and lower color. Pretty sure that 66 was the correct color stamp for Fire Coral Bronze according to the paint chart posted earlier. Was it common for the Norwood plant cars to have this faint stamping or is mine an exception? 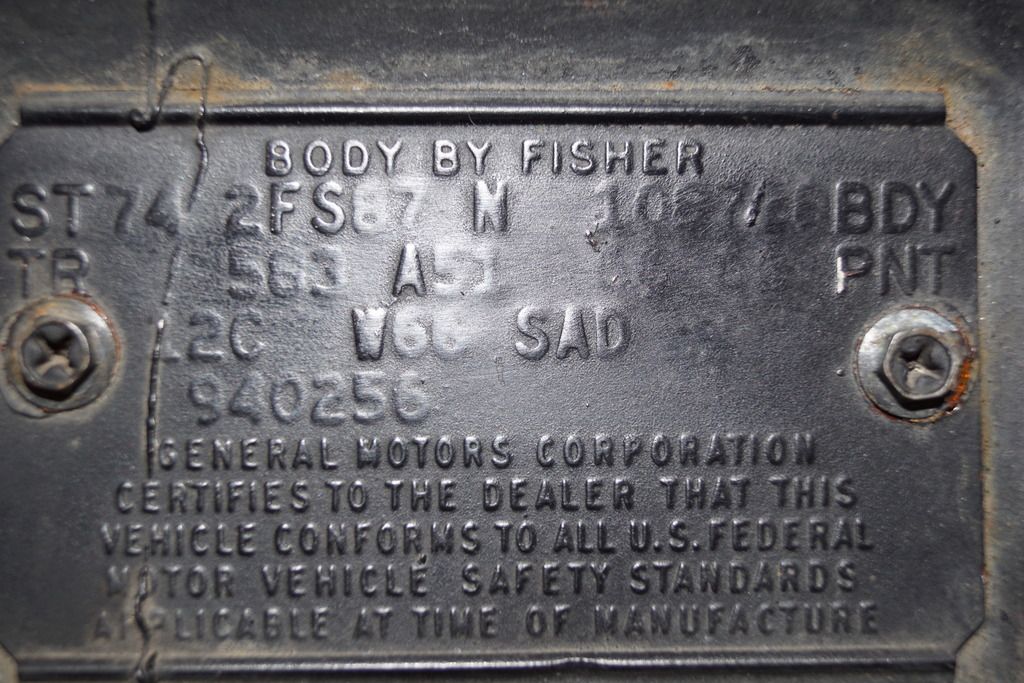 We've got some parts showing up now! Vinyl Stripes from Phoenix Graphics, Breather Elbow from Bob (Thanks again Bob!), new battery tray, new Stainless Drip Rail Molding, New front Bird emblem, cold beer. 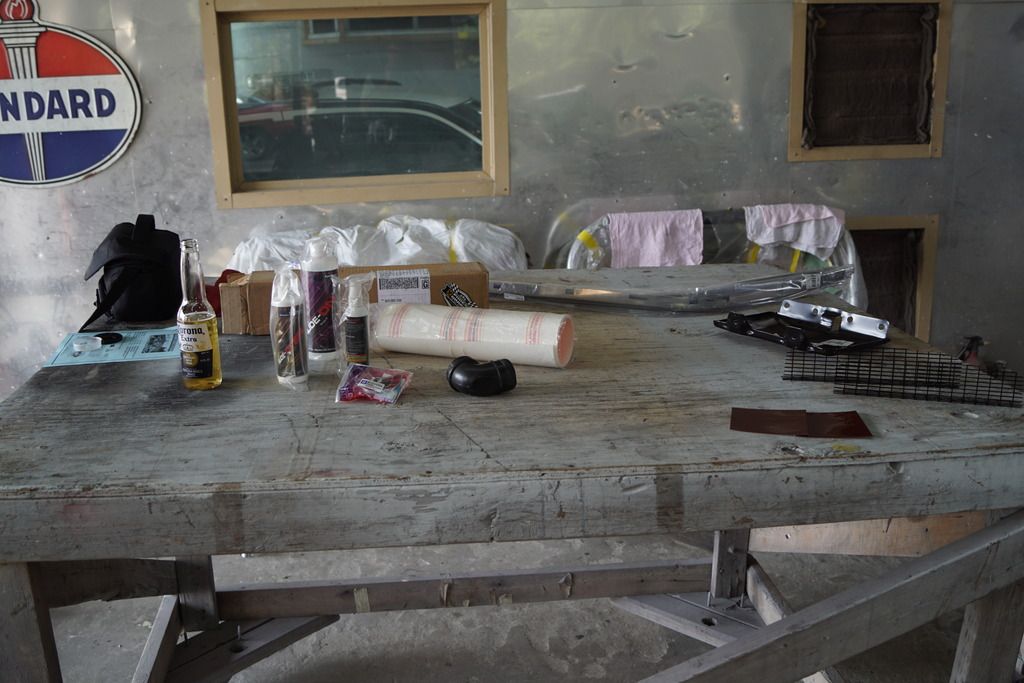 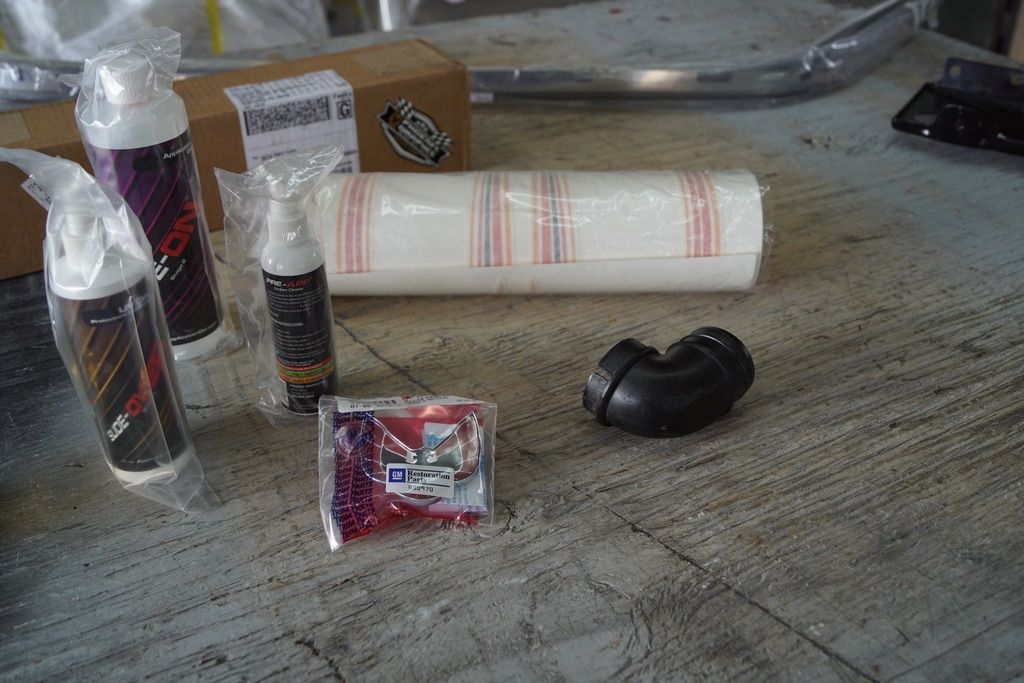  Some hardware and badging waiting clean-up 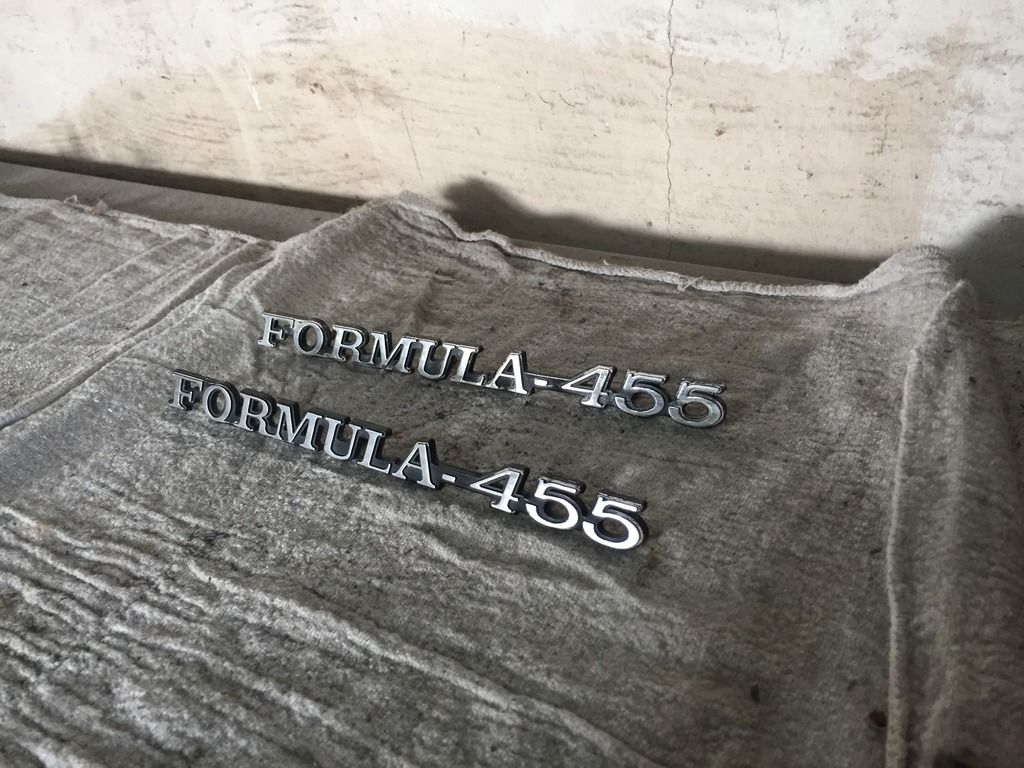 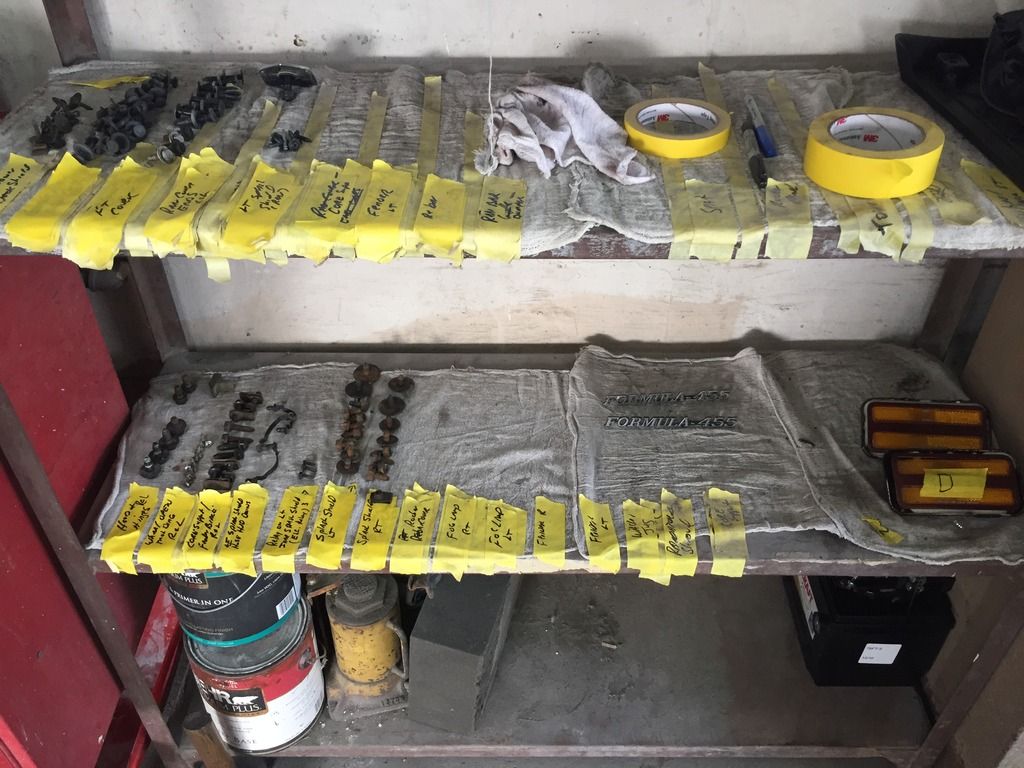 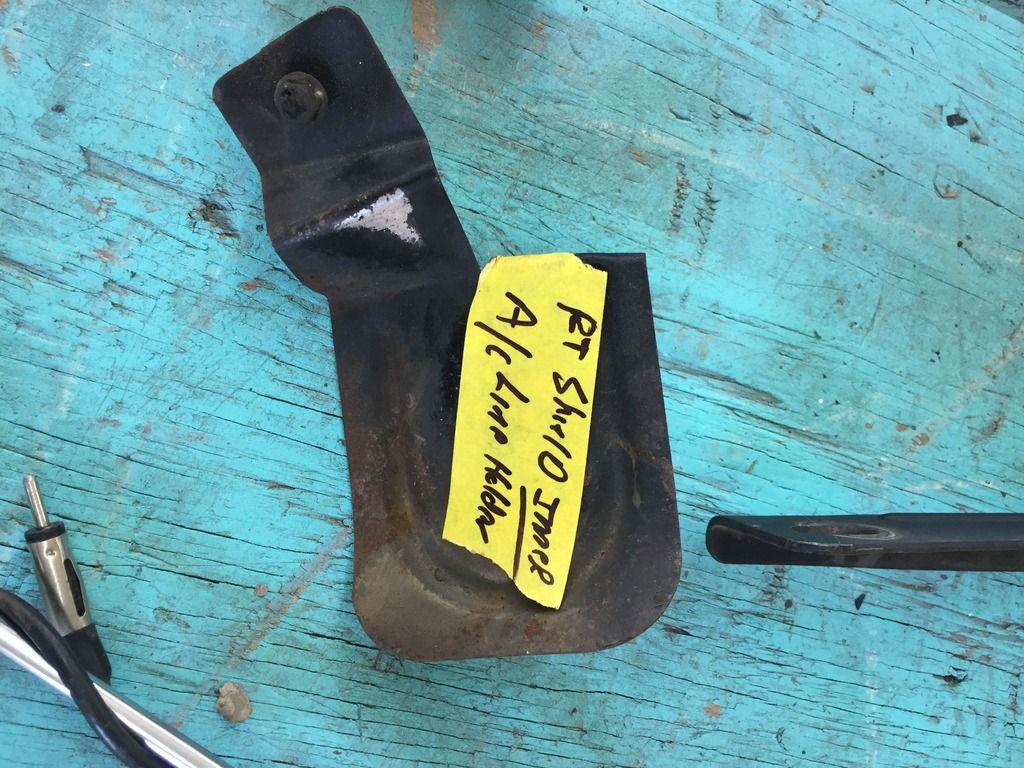 That pesky antenna is gone now! New windshield with built in antenna on the way! 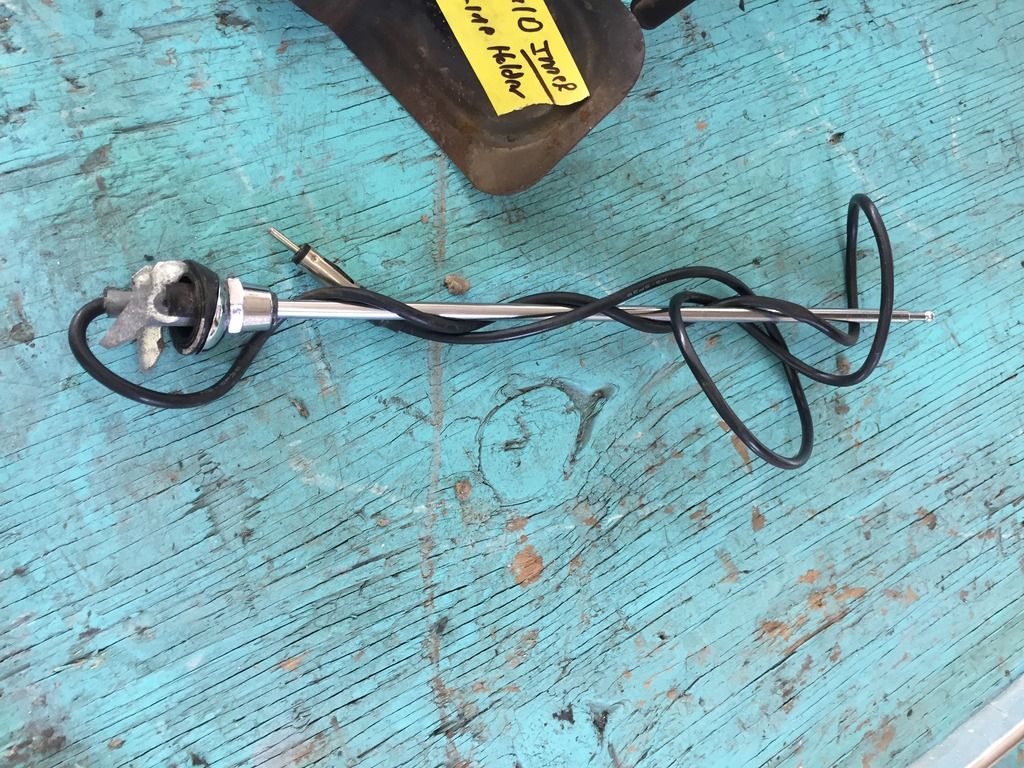 BJ
__________________
1971 GTO 455 HO 4-speed - Cameo White, White Vinyl Top, Jade Green Interior, Ram Air Hood, AC, Honeycombs and 8-track 1974 Formula 455 I Owned in 1975-1976. Now Own Its Twin From Same Dealership
|
|
#46
03-25-2017, 01:35 PM
|
||||
|
||||
|
I'll need some help with what color and finish on engine compartment paints for things like the inner fenders, master cylinder, core support, brackets, air breather, engine block, etc. Anyone have a good list?.
Also, we found the wiring connector for the transmission kick-down switch all nice and bundled up behind the dash. We've tested the switch and after several manual cycles, we were able to see it operating properly on a volt/ohm meter. We hooked up the wiring, and did a driving test (before we removed all the parts in the post above!) and did not feel it kicking down. So - what's next in the troubleshooting? Finally - how do you remove the dash on this generation F-body? I've had the dash out of my old GTOs a few times, but never done so on a Firebird, so looking for some help there so I can get the radio out for testing/reconditioning, and so I can replace some bulbs in in the instruments and gauge cluster. Thanks, BJ
__________________
1971 GTO 455 HO 4-speed - Cameo White, White Vinyl Top, Jade Green Interior, Ram Air Hood, AC, Honeycombs and 8-track 1974 Formula 455 I Owned in 1975-1976. Now Own Its Twin From Same Dealership
|
|
#47
03-25-2017, 02:53 PM
|
|||
|
|||
|
I see you took the Formula 455 badges off the Fenders . I have a set of GM NOS ones for a 72 -74 Formula if you are interested. I'm not going to be restoreing my car at anytime. Also whatta give me for the License Plate's. I wish I had some 74 Indiana plates to sell,but dont. I do have a set of NOS 74 Minnesota plates for mine as thats where it was from.Let me know. I may have Rally Wheels.The problem is the shipping cost.Thats why I never replied to you before.
|
|
#48
03-25-2017, 03:13 PM
|
||||
|
||||
|
Quote:
__________________
Peter 1974 Trans Am, 400 4-speed, 3.42 rear. 
|
|
#49
03-25-2017, 07:04 PM
|
||||
|
||||
|
Mission creep is setting in...you're just one or two rationalizations away from pulling the engine and stripping the car to the subframe. I think you should just go ahead and do it. Clean up the cowl and firewall, get the core support looking good, paint the subframe and suspension components....I did the Gold Car that way without pulling the front clip and it turned out great. If you ask MPR to use a sponge brush things might get ugly. BTW - your organization system looks great. Good idea.
On the underhood finishes, tell your powdercoating guy to do the inner fenders at 50% gloss, brackets and pulley's at 60% gloss, and air cleaner at 90 % gloss. You better get an AMK catalog so you can order a bunch of new tinnerman's and bolts.   
|
|
#50
03-25-2017, 08:06 PM
|
||||
|
||||
|
Quote:
http://www.ebay.com/itm/497853-GM-NO...BYTYBm&vxp=mtr 
__________________
1976 LeMans B09 Freeway Enforcer, 455/M40 Smokey 1977 Trans Am, 400/M21 Black/Gold Bandit. 44K actual miles 2017 Sierra SLT 1500 Z71 4X4 2019 Canyon SLT Crew 4X4
|
|
#51
03-25-2017, 10:13 PM
|
||||
|
||||
|
Quote:
Quote:
Quote:
BJ
__________________
1971 GTO 455 HO 4-speed - Cameo White, White Vinyl Top, Jade Green Interior, Ram Air Hood, AC, Honeycombs and 8-track 1974 Formula 455 I Owned in 1975-1976. Now Own Its Twin From Same Dealership
|
|
#52
03-25-2017, 11:13 PM
|
||||
|
||||
|
Quote:
__________________
LEAD, FOLLOW, OR GET THE HE!! OUT OF THE WAY!!! HONEST JERRY'S SPEED AND EQUIPMENT
|
|
#53
03-26-2017, 07:39 AM
|
||||
|
||||
|
A few more thoughts...
1) I do master cylinders in 50% gloss powder coat. Strip it down, send it out and then reassemble. 2) Norwood rebuilds and replated hood latches and they are beautiful. 3) AMK sells the little green clips that hold the cowl seal in place. 4) Be sure to send the filler panels when you send the inner fenders for powdercoating. Goodmark makes replacements that are very good. |
|
#54
03-26-2017, 08:25 AM
|
||||
|
||||
|
BJ, getting dirty on a resto-survivor project is cool. Having fun I bet!
__________________
Mike/Illinois |
|
#55
03-26-2017, 09:10 AM
|
||||
|
||||
|
Quote:
BTW - I sent my gauge set out to Pete Serio for a restore and re-calibrate and it was money well spent, if for no other reason that I now have accurate oil and temperature readings.
__________________
Peter 1974 Trans Am, 400 4-speed, 3.42 rear.
|
|
#56
03-26-2017, 09:22 AM
|
||||
|
||||
|
Ever read the children's book: "If You Give a Mouse a Cookie"?
That is the definition of mission creep. :-) The original master finish was a flat black just for shipping rust prevention. The paint usually disappeared after a few months, and turned to surface rust. I don't know if you are going for the survivor/preservation route or the regular restoration route. You have to have the master cylinder completely disassembled to have the body powder coated. If it is leaking, I'd send it off to Whitepost for a sleeve/rebuild job. I just had my inner fenders powder coated in semi glass black and they came out perfect - just like the original finish. |
|
#57
03-26-2017, 03:02 PM
|
||||
|
||||
|
Quote:
BJ
__________________
1971 GTO 455 HO 4-speed - Cameo White, White Vinyl Top, Jade Green Interior, Ram Air Hood, AC, Honeycombs and 8-track 1974 Formula 455 I Owned in 1975-1976. Now Own Its Twin From Same Dealership
|
|
#58
03-26-2017, 03:11 PM
|
||||
|
||||
|
Quote:
|
|
#59
03-26-2017, 03:25 PM
|
||||
|
||||
|
Check valve above was not the same as an original '74.
http://cgi.ebay.com/ws/eBayISAPI.dll...m=282100588318 Trim tag is normal. It will flatten out the more you rub it too. Master cylinder looks to have been replaced. Radio can be removed with console and A/C components in place, but it's a B****. |
|
#60
03-26-2017, 04:56 PM
|
||||
|
||||
|
Quote:
http://www.autogeekonline.net/forum/...ge-paints.html
__________________
LEAD, FOLLOW, OR GET THE HE!! OUT OF THE WAY!!! HONEST JERRY'S SPEED AND EQUIPMENT
|
| Reply |
|
|
The PY Online Forums is the largest online gathering of Pontiac enthusiasts anywhere in the world. Founded in 1991, it was also the first online forum for people to gather and talk about their Pontiacs. Since then, it has become the mecca of Pontiac technical data and knowledge that no other place can surpass.


 Linear Mode

