


| FAQ |
| Members List |
| Social Groups |
| Calendar |
| Search |
| Today's Posts |
|
#301
 03-26-2012, 08:44 AM
|
||||
|
||||
|
glad to see you didnt forget us
 what did you use to spray the Lizard Skin on? what did you use to spray the Lizard Skin on?
|
|
#302
03-27-2012, 01:11 AM
|
|||
|
|||
|
Quote:
I used a total of 6 gallons of Lizard Skin Ceramic. I covered the entire underside of the car. The entire inside of the passenger compartment and the entire inside of the trunk. Also covered were the inside and outside of the rear wheel wells. I have also used 2 boxes of Eastwood'sThermo-Coustic Sound Deadener Material and two boxes of Dynamat Extreme. I need at least one more box of Dynamat to finish the trunk and the underside of the hood. After prepping my bumper I used 4 coats of Kirker Epoxy Primer. 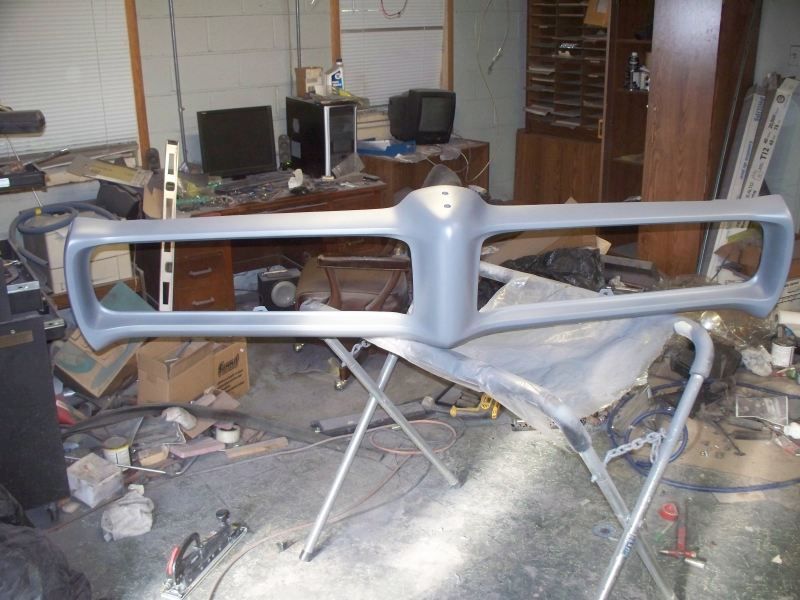 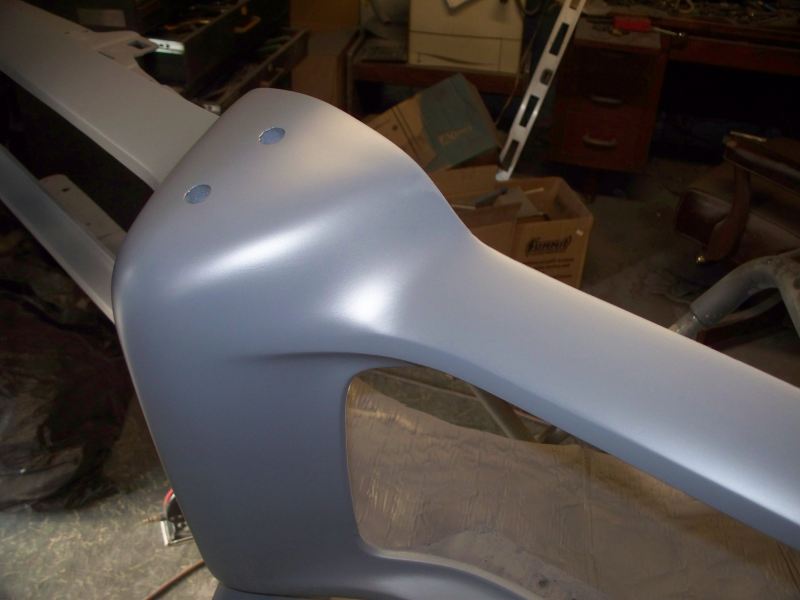 Since these photos were taken I have sanded the primer, found a few areas to fix, repaired the problems with 3M's flexible plastic repair. I'm ready to apply more primer and what I hope is final surface preparation. This is the result of blocking the hood. Several problem spots to deal with. 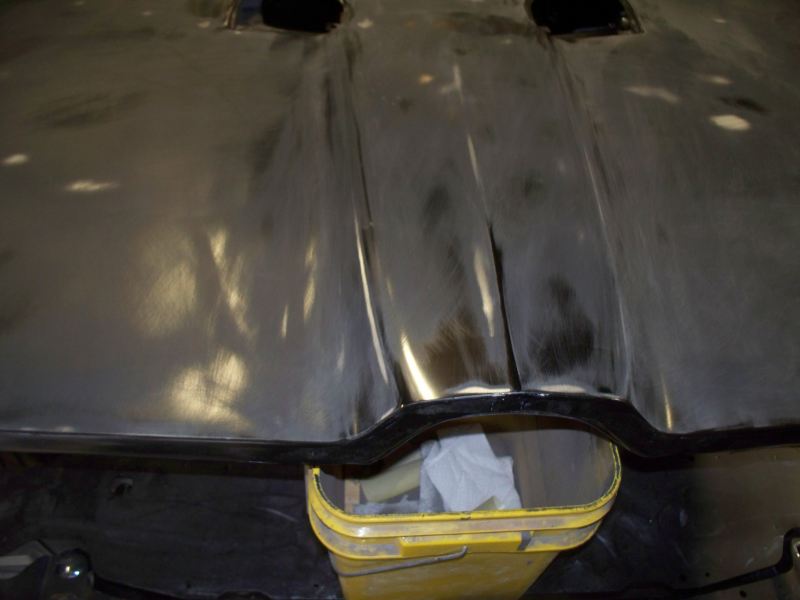 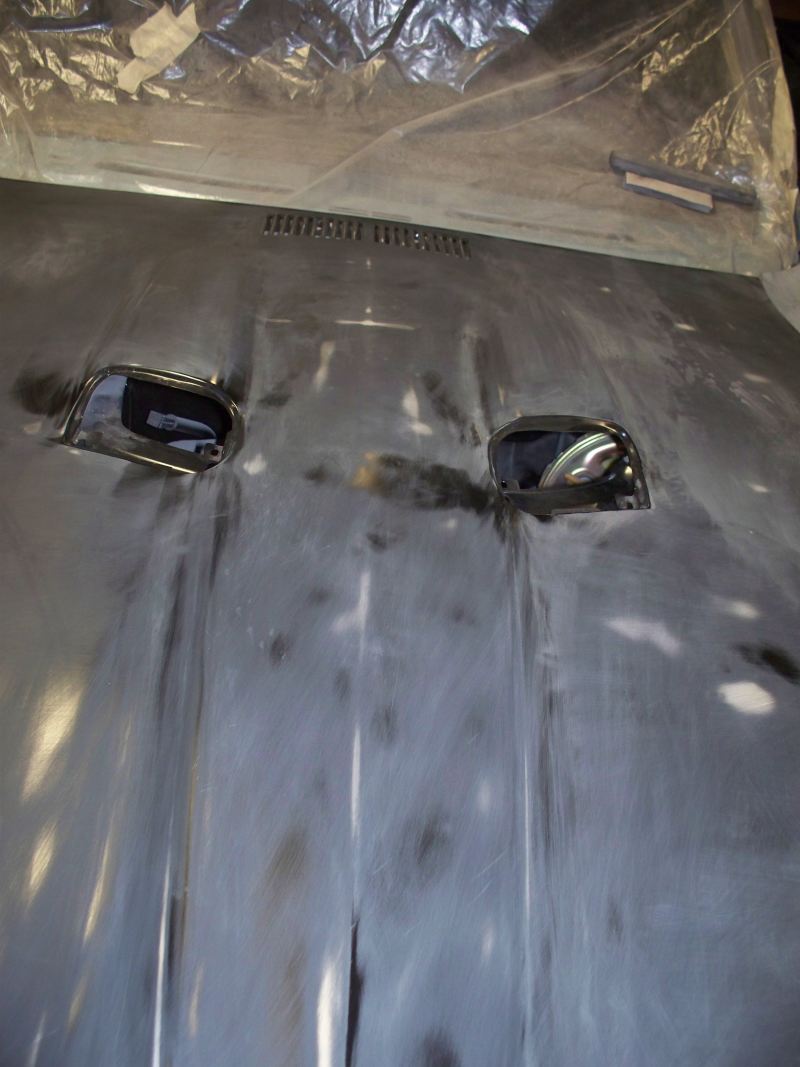
__________________
68 Lemans - GTO appearance LS3 68 Eldorado - waiting for restoration 96 Roadmaster Wagon 2014 Infiniti Q50S Hybrid Marietta GA |
|
#303
03-29-2012, 01:20 AM
|
|||
|
|||
|
Hood Work
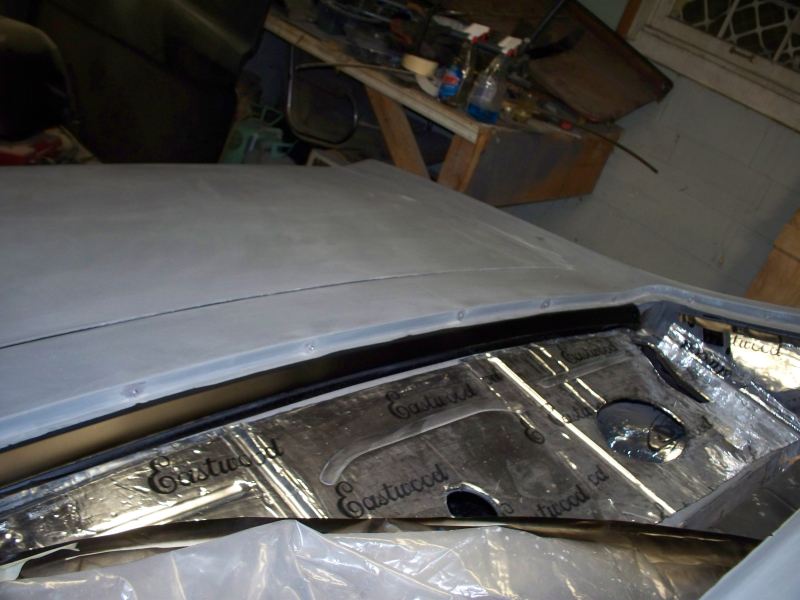
Dynacorn hood needed some work for a smooth surface. 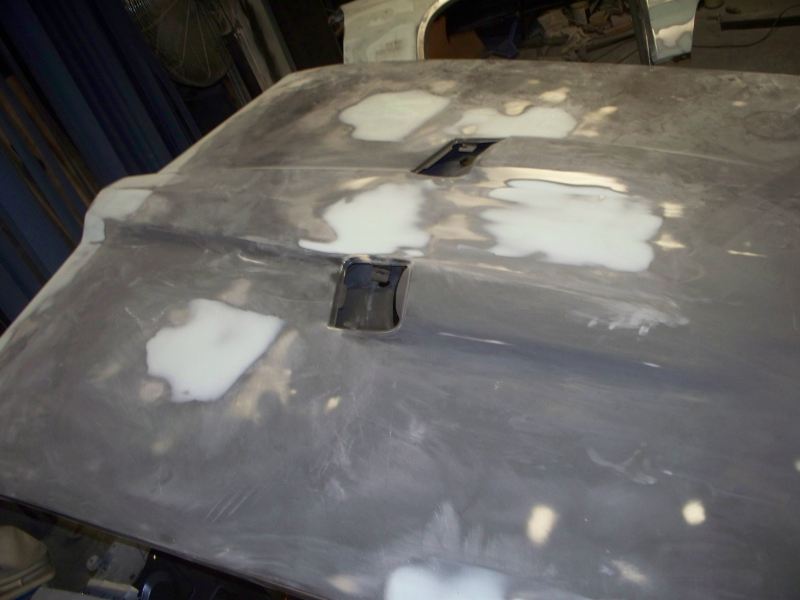 There was a low area around the front where the metal was folded over the frame. 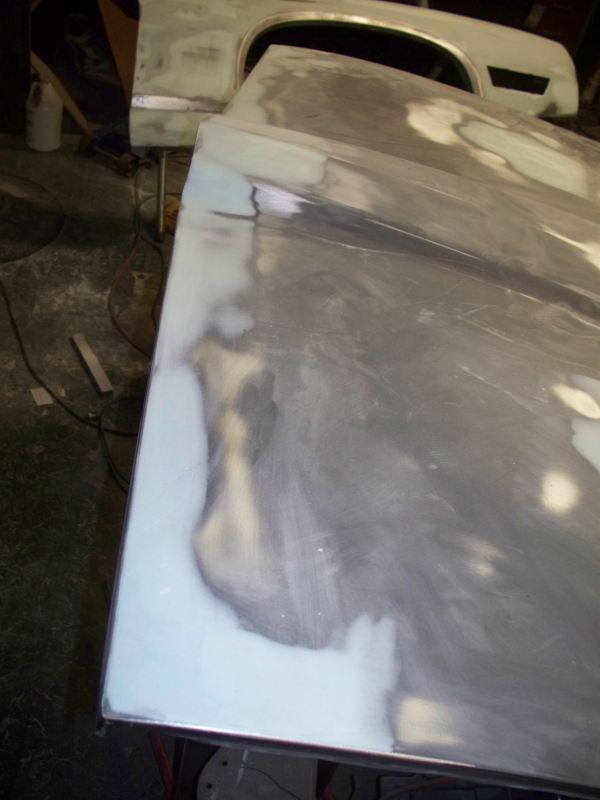 Vent window alignment. All panel alignment should be complete before installing and adjusting the vent window. That is the door to quarter, door to fender and door to hood gaps should be set before working on the vent window. 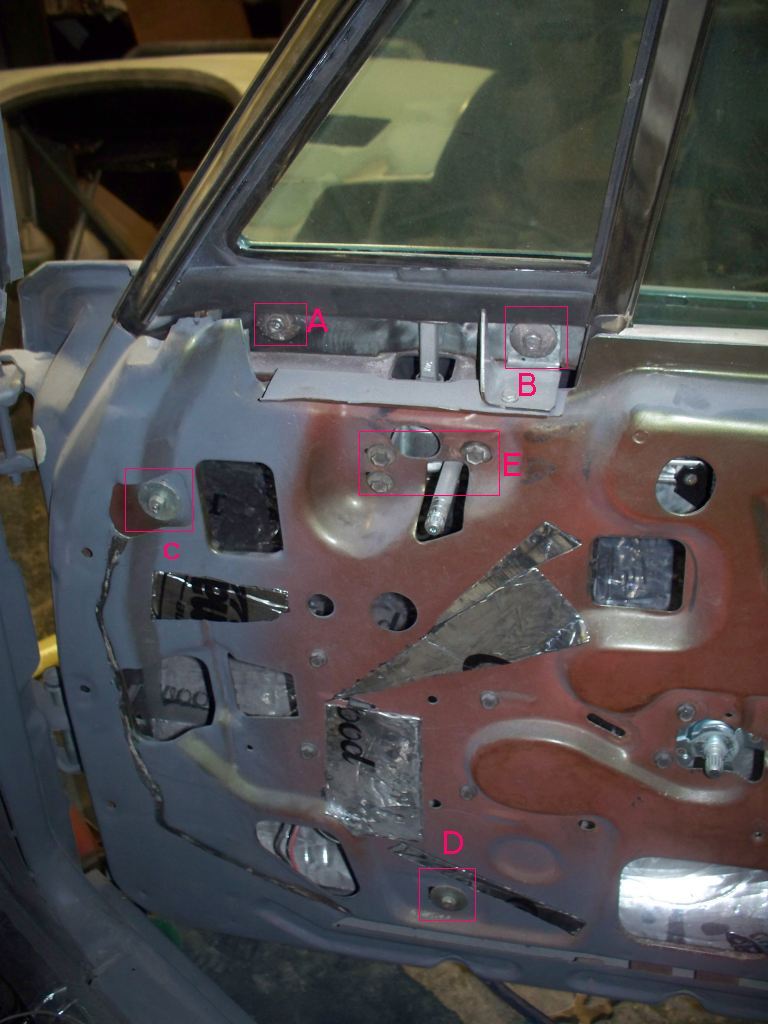 The vent unit is held in place by only four bolts. A,B,C,D If the vent regulator is installed, it will need to be loose to adjust the placement of the vent window. The regulator is held by three bolts shown in box E. Bolts A and B allow the vent unit to be slid front to back and rotated slightly so that it will be square in the Roof Rail Weather strip. The nuts installed in positions C and D allow the tilt to be set so the vent assembly can be set to have enough pressure against the Roof Rail weather strip to get a good seal and keep rain out. Removing the nuts on C and D allows the adjusters to control the tilt of the vent window assembly. There is a slot on the shaft of the adjuster that you can turn with a screwdriver. However I just reached in thought one of the holes on the door and twisted the adjuster with my fingers. First slide the vent window assembly into position leaving a small even gap between the vent window Assembly chrome and the Roof Rail weather strip. Slightly tighten Bolts A and B Next set the tilt. You should have the vent window assembly pressing against the Roof Rail Weatherstrip. Adjust the adjusters C and D so that you have a slight pressure of the vent Assembly against the weather strip. You may need a couple of tries to get it right. Too little pressure and you won't seal the window and too must will wear out the weatherstrip. You should open and close the door to make sure you have enough gap between the vent assembly and the chrome on the roof rail weatherstrip. Readjust as necessary. Install the nuts of C and D when you are done with your adjustment. Also tighten bolts A and B. Here is a close up of my adjustment. It's not perfect. The gap at the bottom is smaller than the top. Compare the red line at the top and bottom. Since my door will be removed at least one more time, I'm not going to worry about adjusting the vent window any better until I paint the car. Any questions feel free to ask. 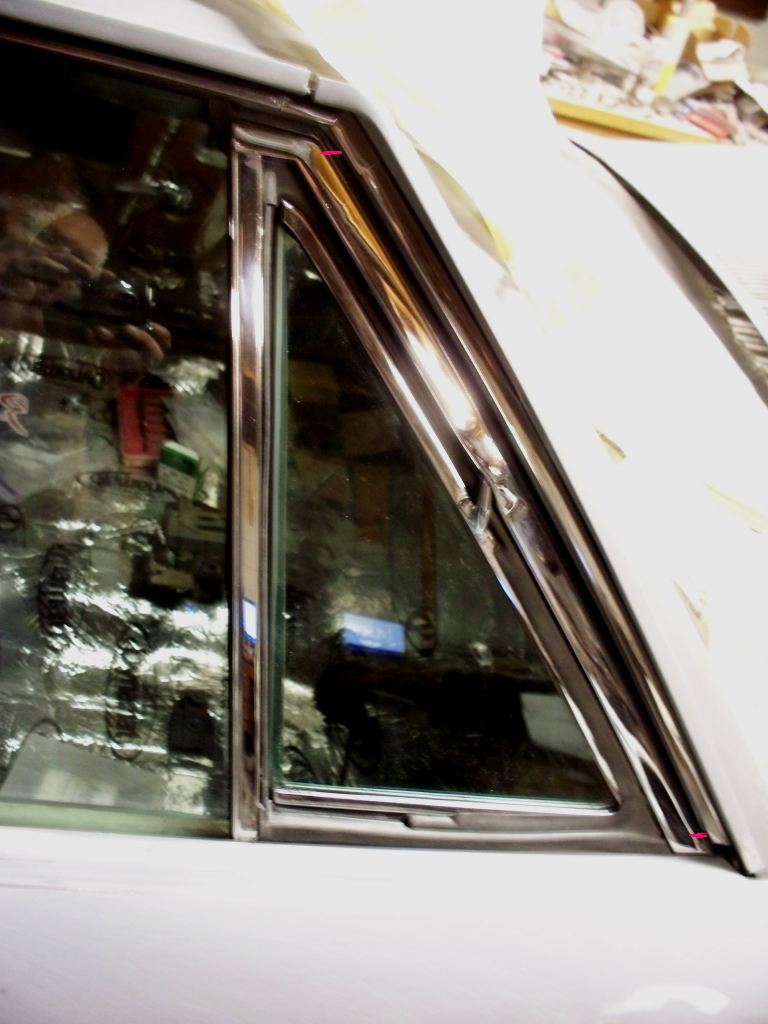
__________________
68 Lemans - GTO appearance LS3 68 Eldorado - waiting for restoration 96 Roadmaster Wagon 2014 Infiniti Q50S Hybrid Marietta GA |
|
#304
04-04-2012, 01:20 AM
|
|||
|
|||
|
I been mostly doing paint work. The last two panels to get a first coat of primer was the hood and passenger fender.
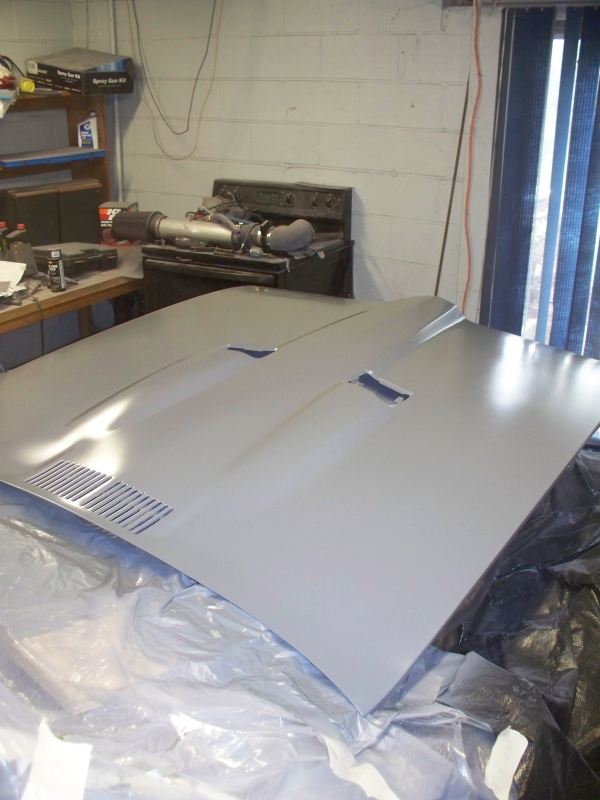 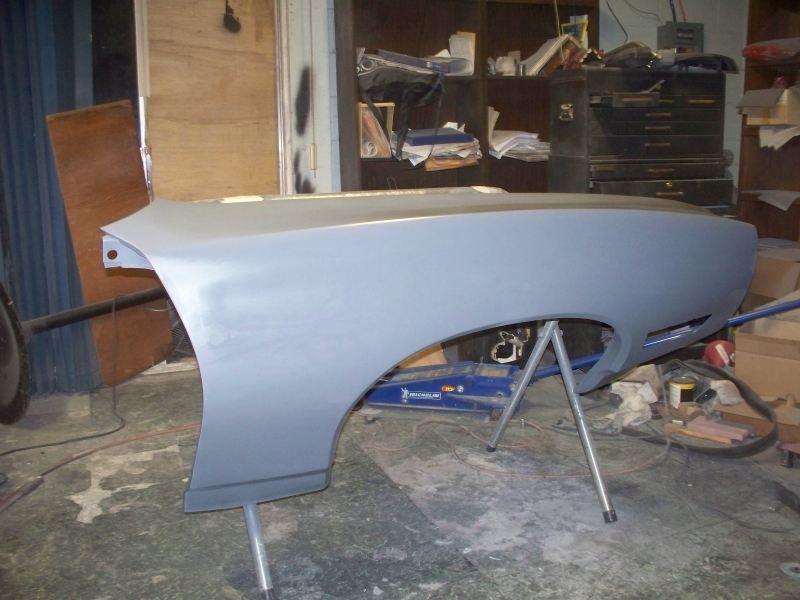 I put another coat of primer on the filler work I did to the passenger door to make it even with the fender. This type of filler work must be fairly common as I came across something similar today on a 71 Cutlass. Here's the picture of the Cutlass. It looks very similar to what I ended up doing to the Lemans. 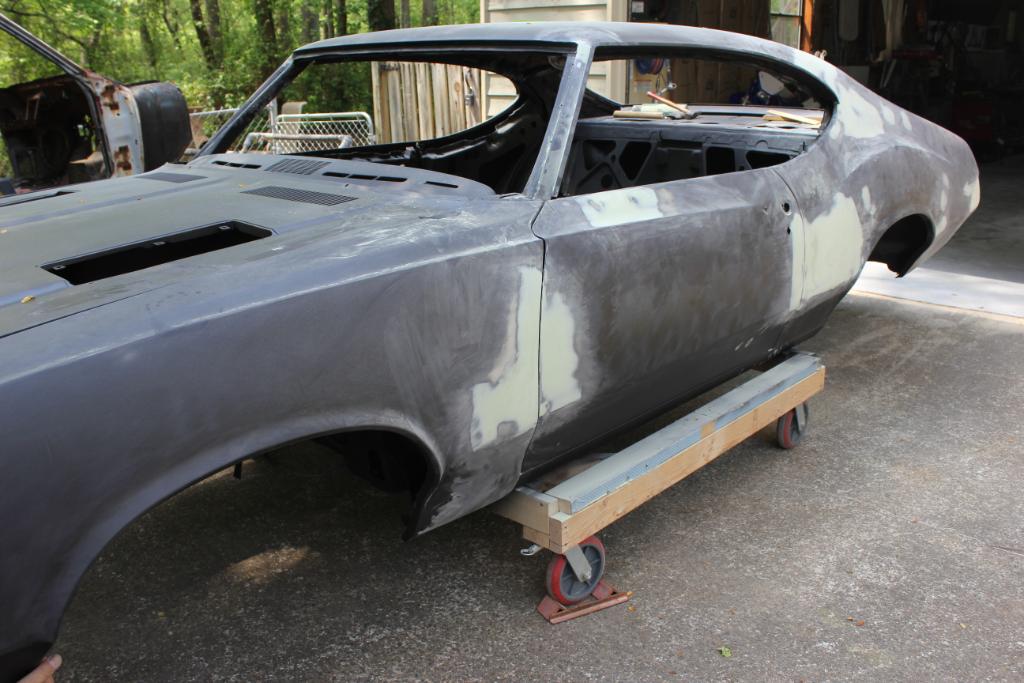 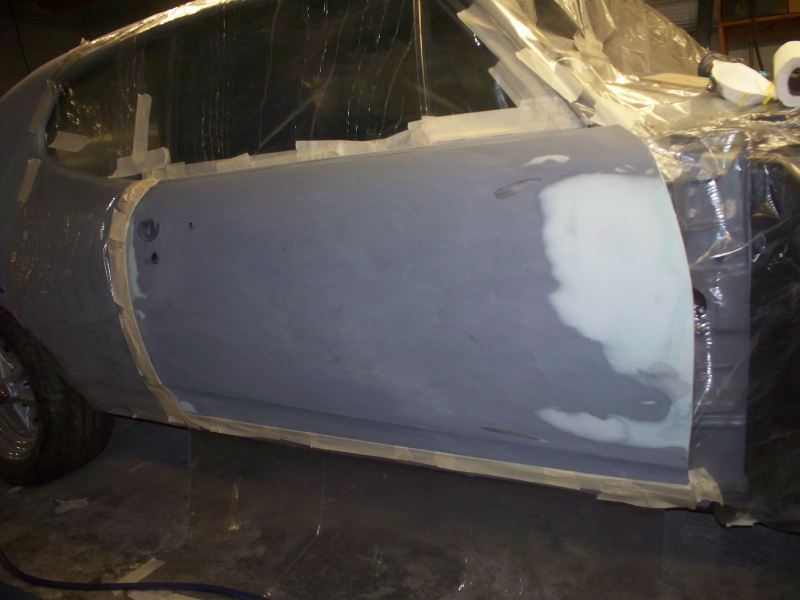 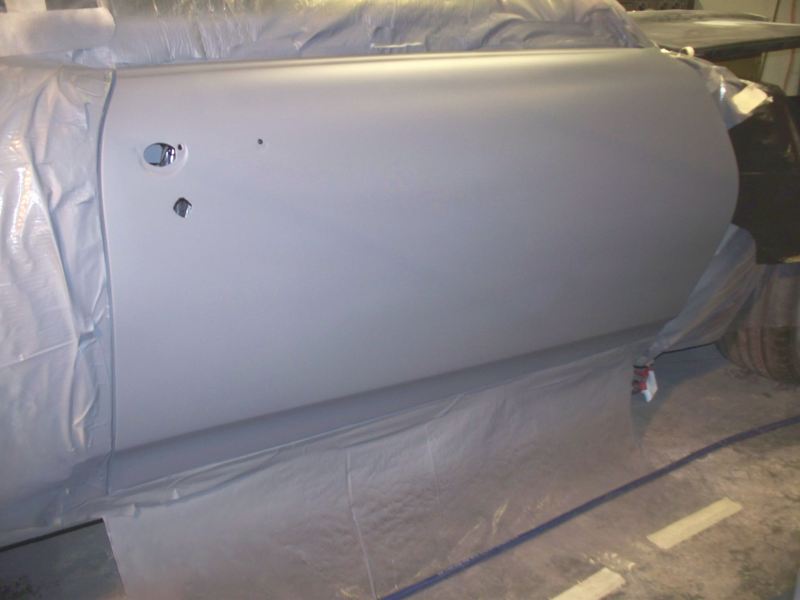 Sort of a milestone all of the panels are primed. (But not blocked) I got the rest of the car ready for what I hope is a final coat of primer. Of course I sanded through to metal in a few places so a final coat of primer is required. 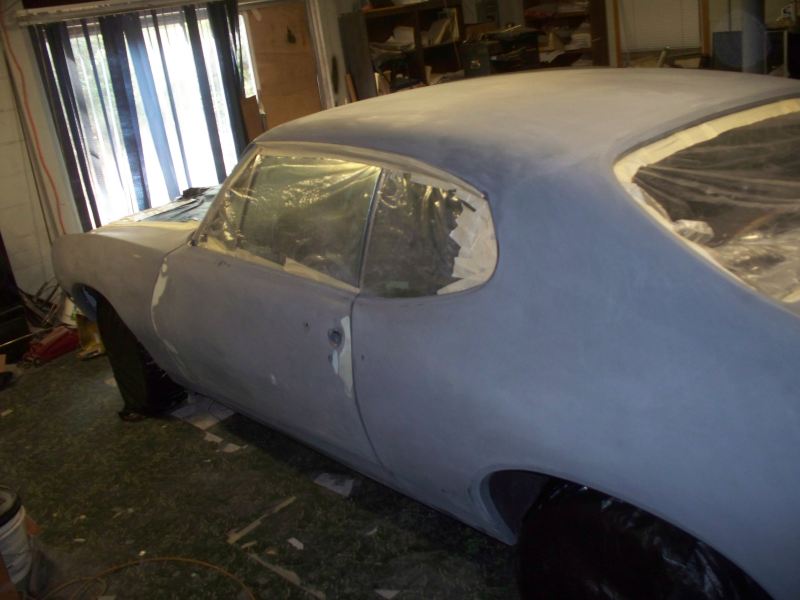 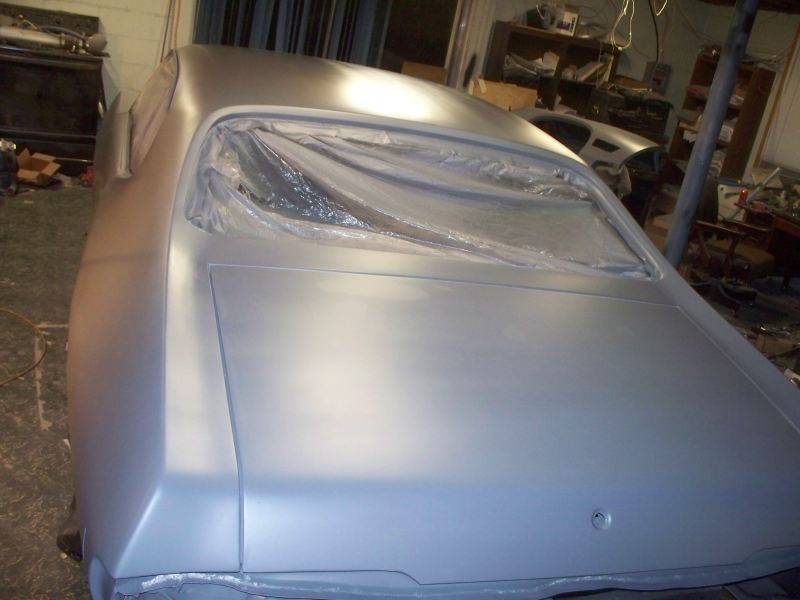 After a couple of days for the primer to dry, I can do my final blocking.
__________________
68 Lemans - GTO appearance LS3 68 Eldorado - waiting for restoration 96 Roadmaster Wagon 2014 Infiniti Q50S Hybrid Marietta GA |
|
#305
04-04-2012, 08:56 AM
|
||||
|
||||
|
Looking good
|
|
#306
04-09-2012, 12:19 AM
|
|||
|
|||
|
I wish I could say I spent the weekend blocking the car, but with jungle growth starting 2 months early, I have been busy cutting grass, weeds and trees. One strip of land on my property is about 60' x 300' and has hundreds of tiny trees that need cutting. (about 6' high) I have seen temperatures as high as 87 here. A normal high for this time of year is about 70.
Now on the the important stuff. I started on the back of the car. Dry guide coat. Initial Sandpaper P220. 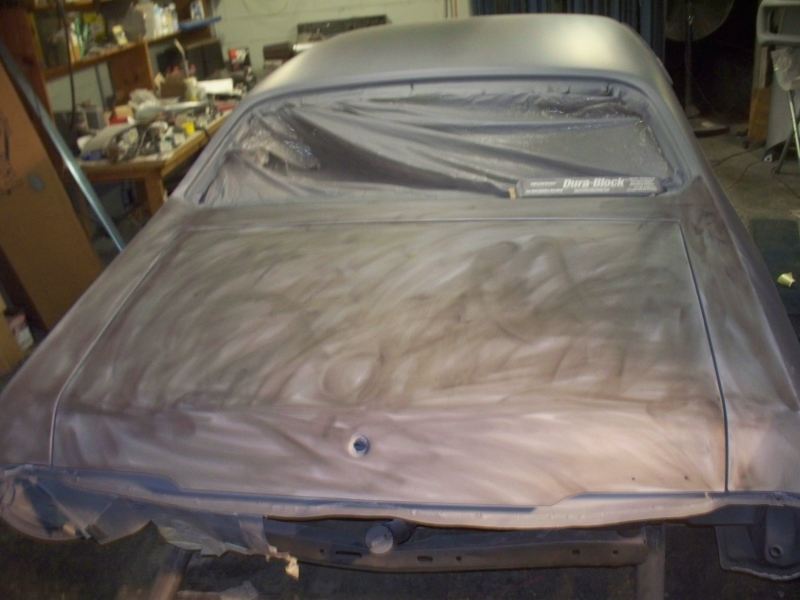 Starting out looking good. 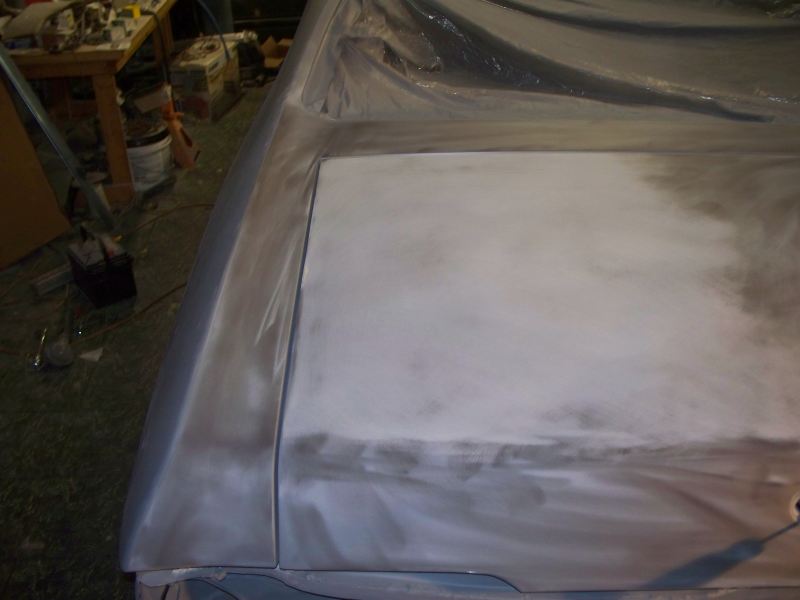 Oops sanded to bare metal 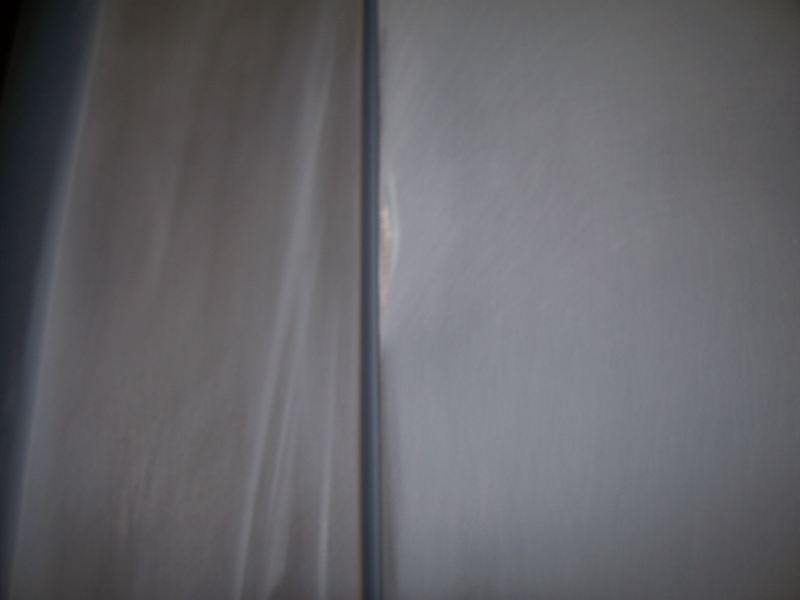 A low spot. 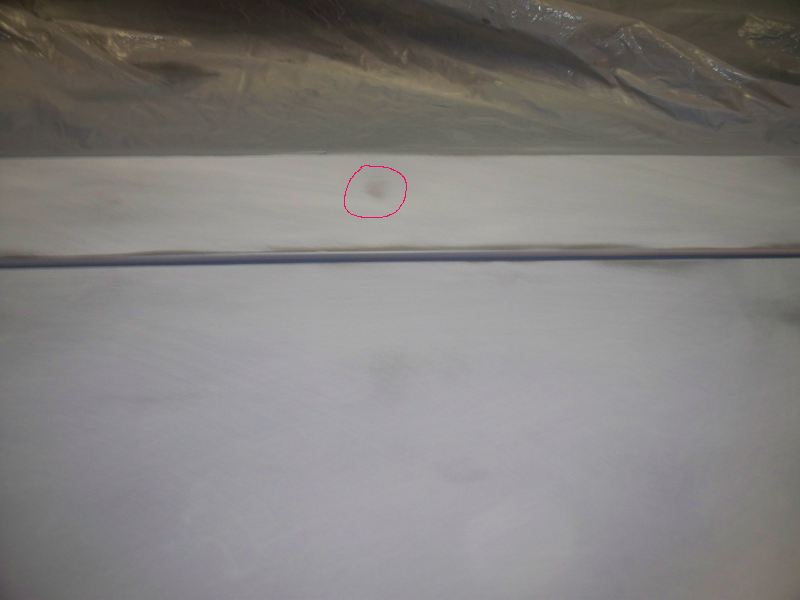 The low spot did sand out without going to bare metal. One additional spot at the bottom where I sanded through to filler. Not too bad for the trunk area, only a couple of spots to touch up. 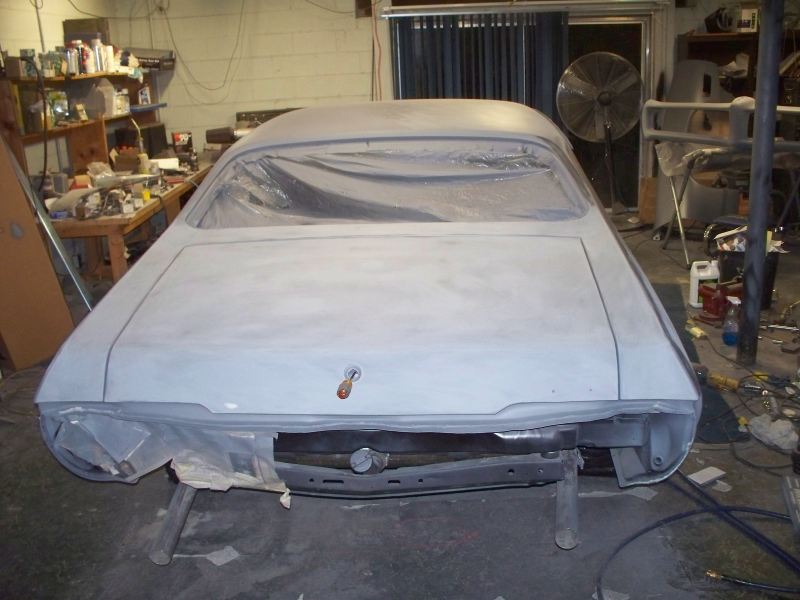 Next, passenger quarter. 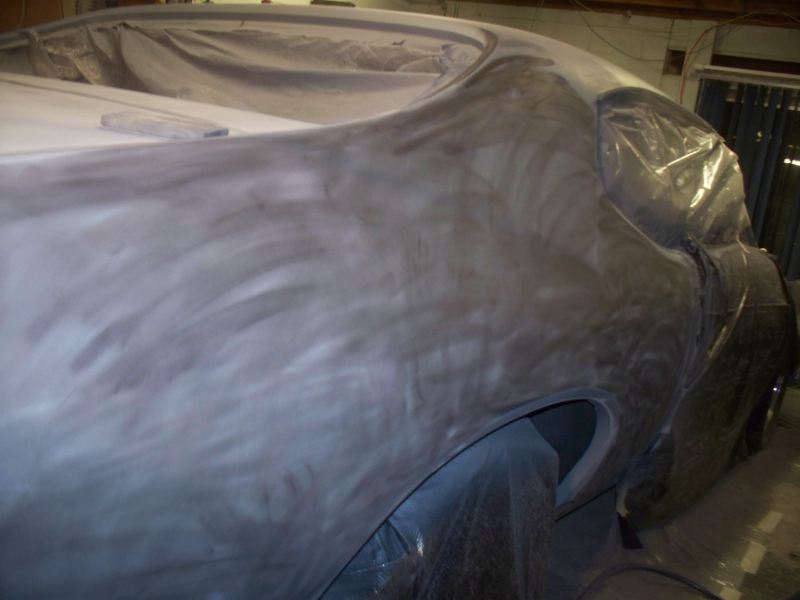 Looks like it's starting out good, but decided to call it a night. 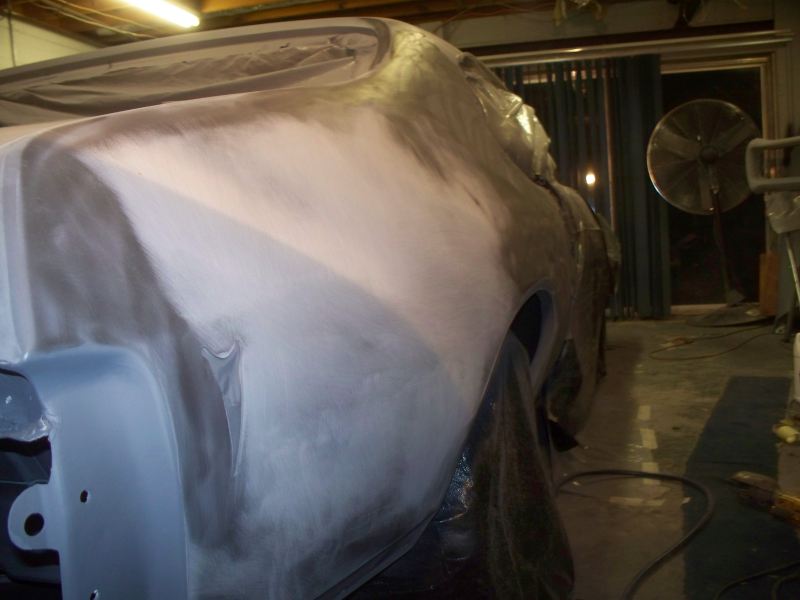
__________________
68 Lemans - GTO appearance LS3 68 Eldorado - waiting for restoration 96 Roadmaster Wagon 2014 Infiniti Q50S Hybrid Marietta GA |
|
#307
04-09-2012, 07:29 PM
|
|||
|
|||
|
Man, that is going to be one PERFECT car when you are done. Sure wish I had your patience. Nice job.
|
|
#308
04-27-2012, 07:10 PM
|
||||
|
||||
|
Fbrown: Thanks for this thread, I can't wait to see your final product, preferable in person as I am in Johns Creek and have an office in Smyrna.
I am in the planning stages of putting the LS3 with the "Hot Cam" in my 1970 Formula 400. The only thing wrong with your thread was the rude misinformation flaming from so called "goquick". His posts make me want to put up a phantom thread putting a 5.0 Coyote motor in a 1970 RA IV TA, or better yet in one of the eight rag top 69 TA's. Peace!
__________________
"Pride Precedes The Fall" 1968 Firebird Undergoing Transformation 1970 Formula 400 - Keylime Green, Stroked to 462 Cubes - Gone But Forever Remembered 2016 Mustang GT - GT with the Performance Pack, beats my former 12 Boss around the track. |
|
#309
04-28-2012, 06:23 AM
|
||||
|
||||
|
Still watching your progress- a whole lot more than what I would consider a restoration since you are "fixing" all of the factory imperfections that came on these cars. A 68 with a 2012 fit and finish and with a modern high perf drivetrain end-to-end.
Not sure what I would call it but its going to be an awesome car!
__________________
1969 Lemans vert, matador red, 462 CI, 3.07 12-bolt posi 1974 455 TA, admiralty blue/red interior HPP "cover car" - sold "The best way to show a car is to drive it" |
|
#310
04-28-2012, 12:38 PM
|
|||
|
|||
|
Quote:
I can see why some people call this part "Paint Jail", Paint Hell" and other colorful descriptions. I feel like I have barely scratched the surface (pun intended). A lot of the alignment gap problems etc are caused by aftermarket metal, both quarters the rear window panel are aftermarket. The trunk lid had been in a collision and covered with bondo. Some but not all of the damage was repaired when I replaced the rusted out strip along the bottom. The lid was slightly bent and twisted and I spent a few hours twisted and bending the lid to make it more closely match the quarters. The best I could do resulted in one of the quarters being about 3/16" more forward than the other. Of course this creates problems with the front end panel alignment. I spent a few weeks trying to align and set panel gaps before taking extensive measurements to determine where the problems were. For the best fit with what I had, all panels (doors, fenders, hood) were comprised in some aspect. The only solution at the point was custom work to deal with all the compromises. At one point I shifted the body about 3/16" on the frame to help with front end panel fitment. The core support was pushed all the way to one side and was out of adjustment. I was not expecting to spend so much time in the paint and body part of this build, but the panel gap and fitment would be bad even by 68 standards. I'm pleased with how the panel gap and alignment turned out, but I'm guessing I have another 80 hours of blocking left. The early stages of sand and block went OK but there were generally one or more flaws on every panel that needed additional work. I either had a sand through to bare metal or a low spot or two that would not sand out. The only panel that came out with no problems was the roof. I have gone applied spot putty to the flaws and re-primed the problem areas. Here are a few pictures of some of my work over the last three weeks. A number of these photos show the flaws that resulted after sanding off the guide coat. 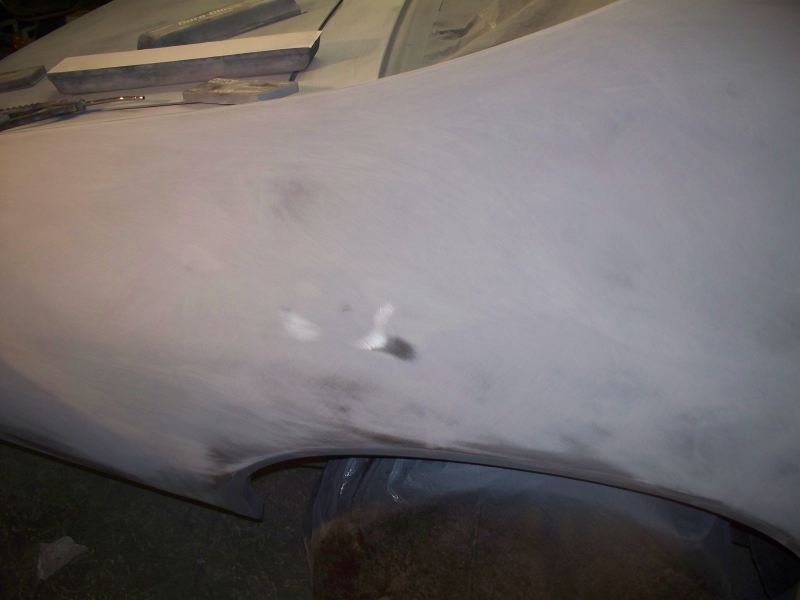 The circle is where I dinged the quarter during installation. I had already put a coating of filler here, but not enough. The guide coat still shows a problem 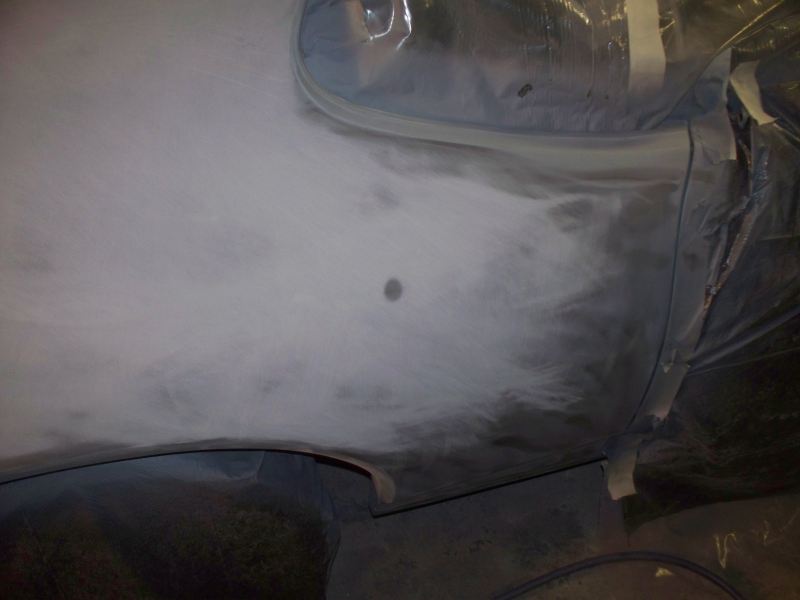 Some runs. 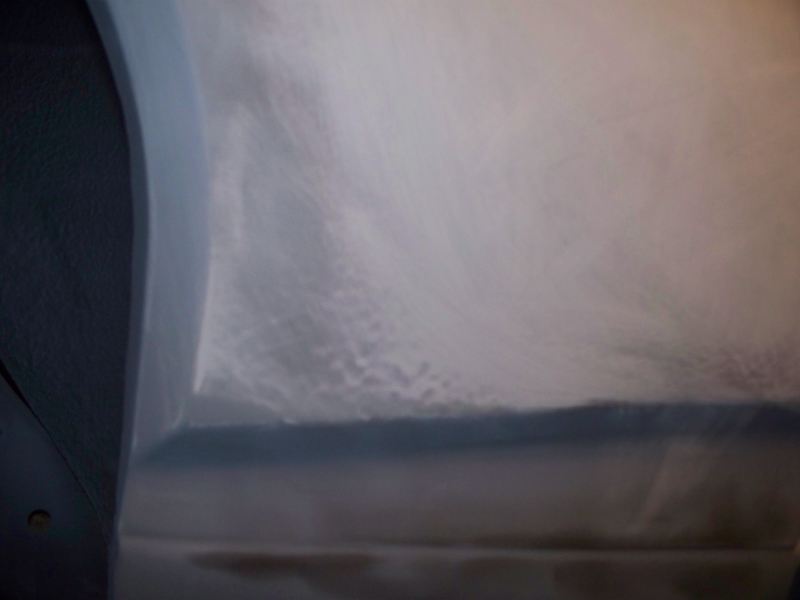 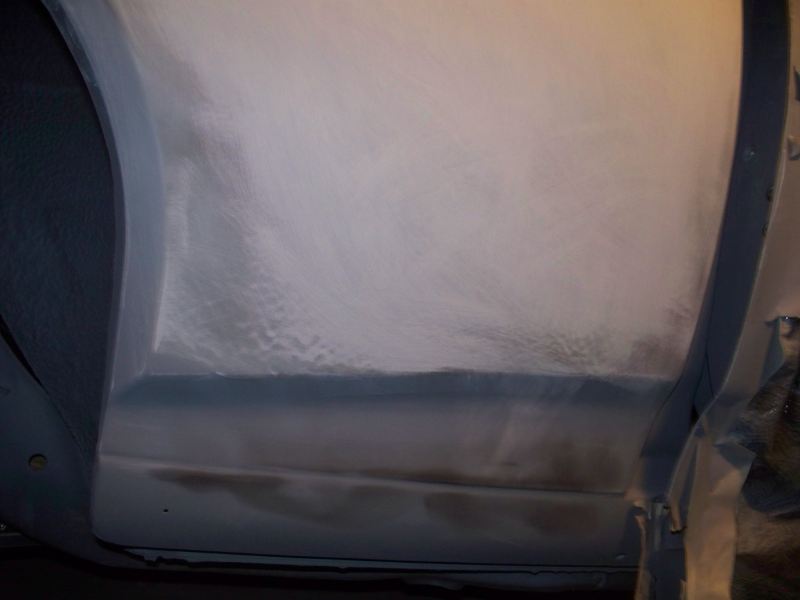 What looks like damage from the door swinging against a post. It did sand out 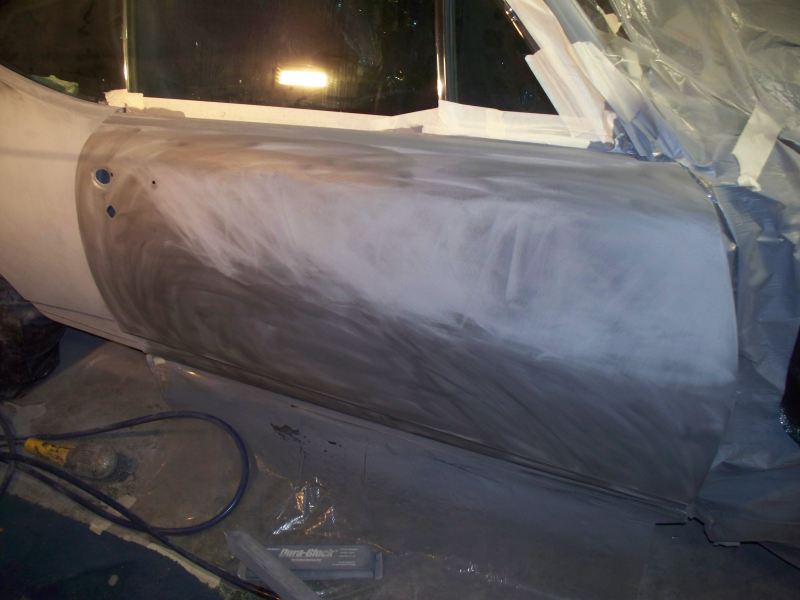 Interesting pattern in the quarter panel  It did sand out 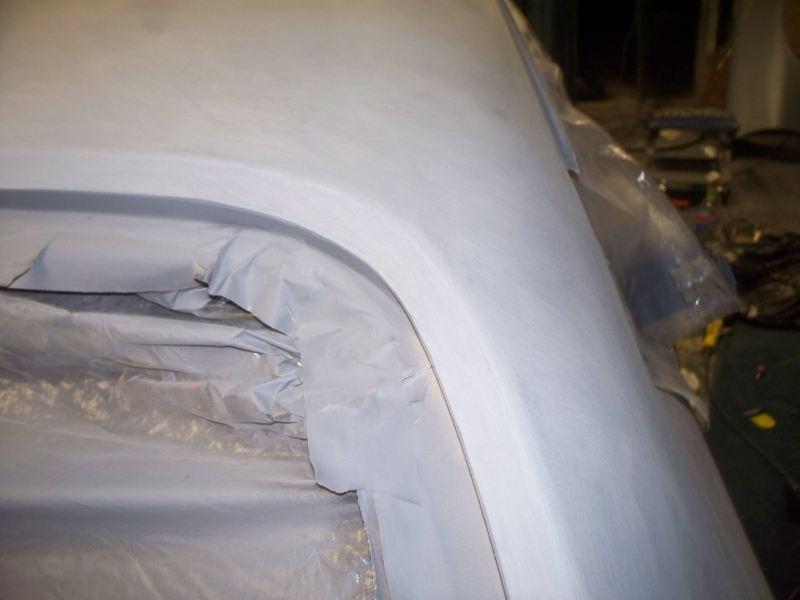 A run and a sand through. 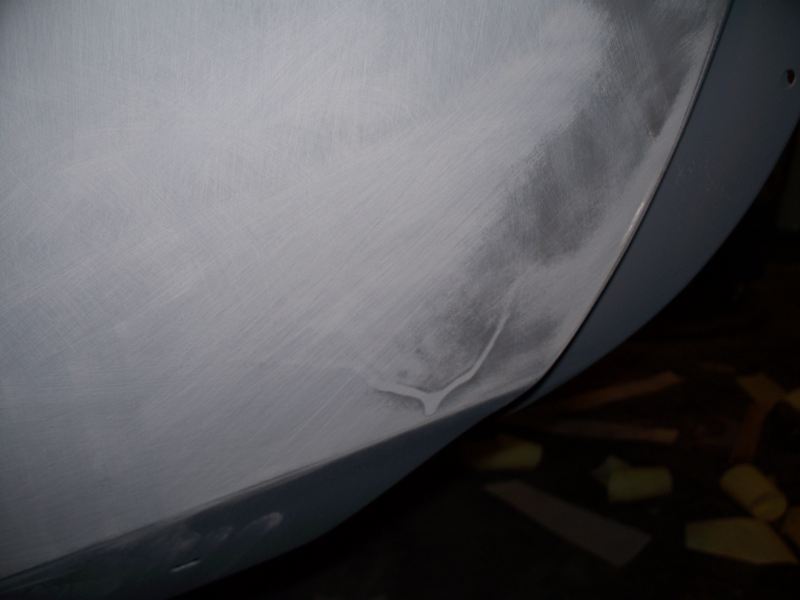 Driver door, generally good. 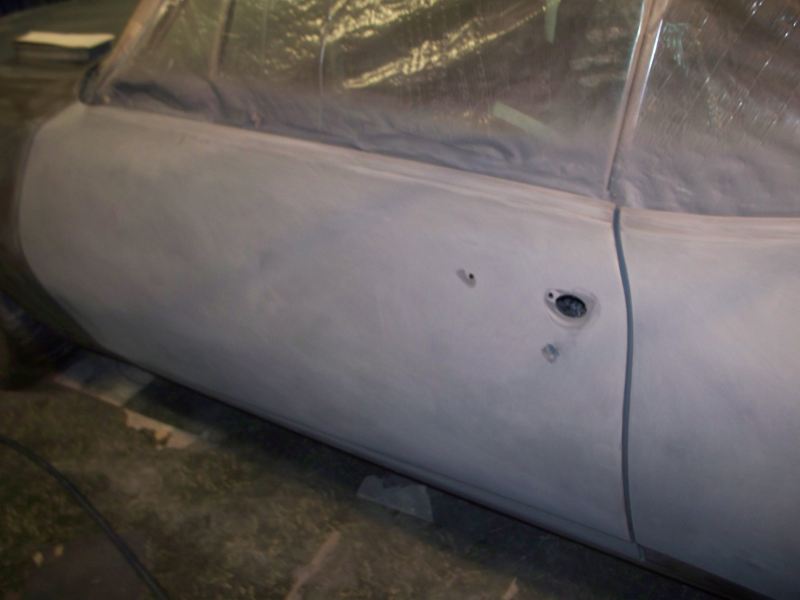 I did have a sand through. 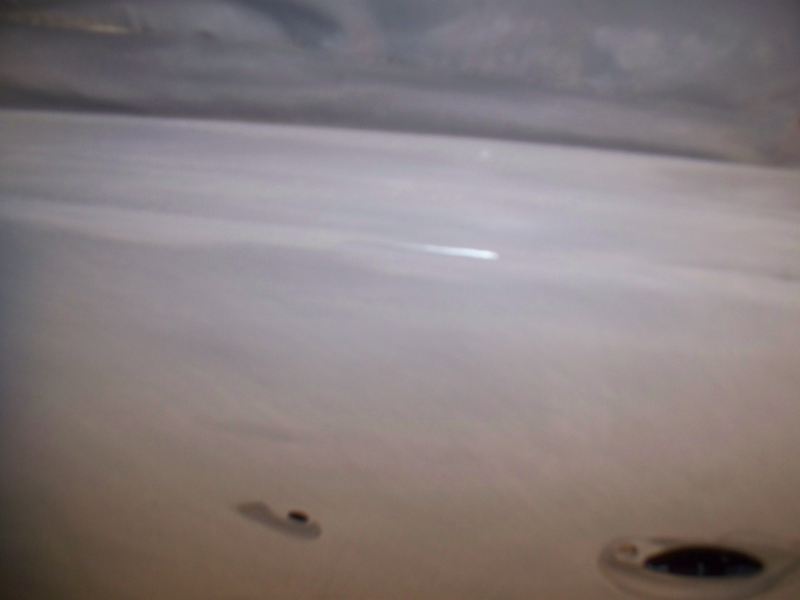 A screw up that made me sick. While opening and closing the trunk lid, my blow gun slipped under the edge and bent the corner up about an inch. I didn't take a photo of the original damage, this is after some straightening. 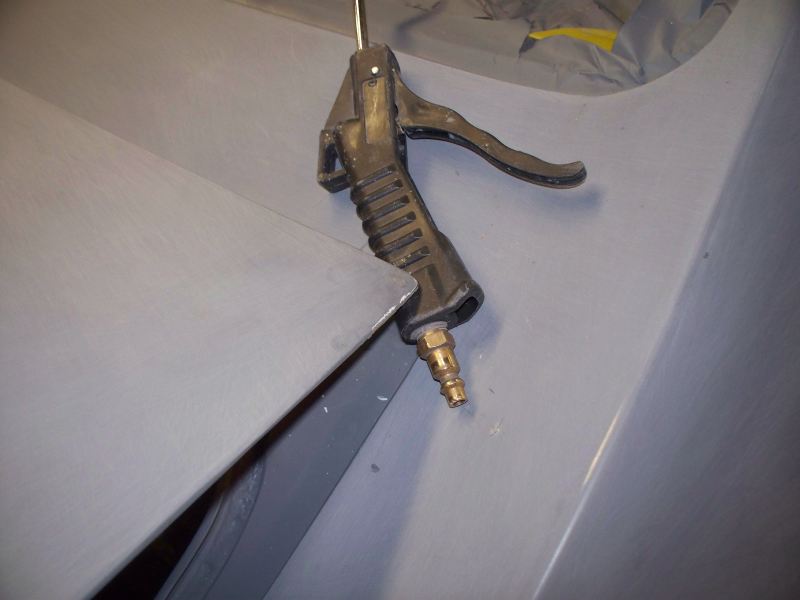 My attempts to bent it back 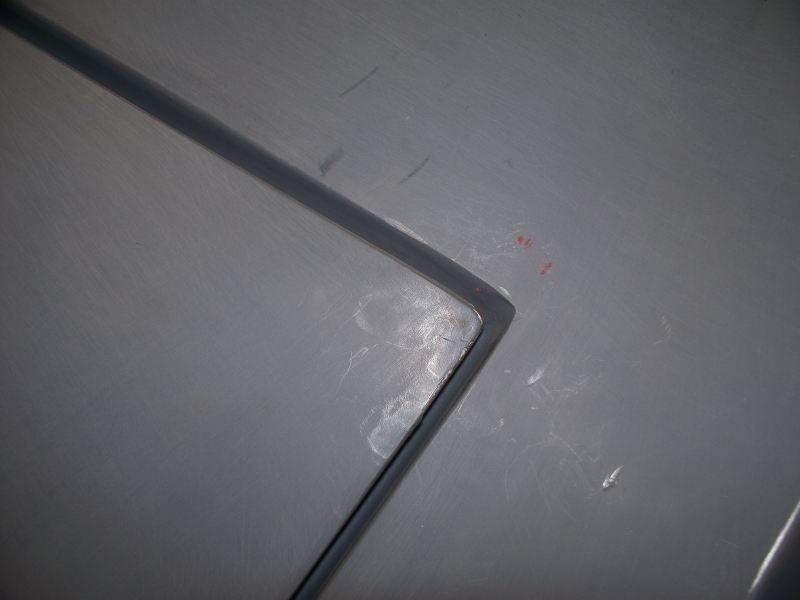 Now to see how good it is 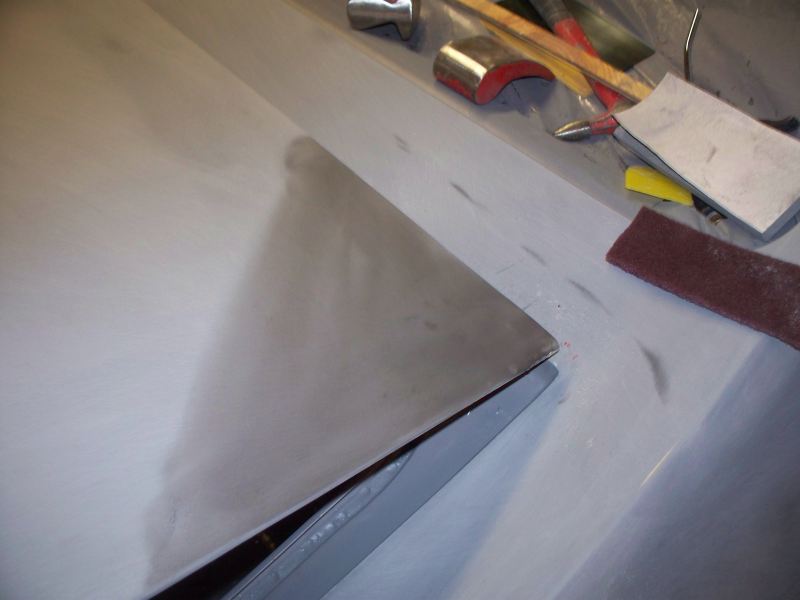 A low spot and the filler is also cracking where I worked the corner with a dolly and hammer. The corner will need to be sanded to bare metal. 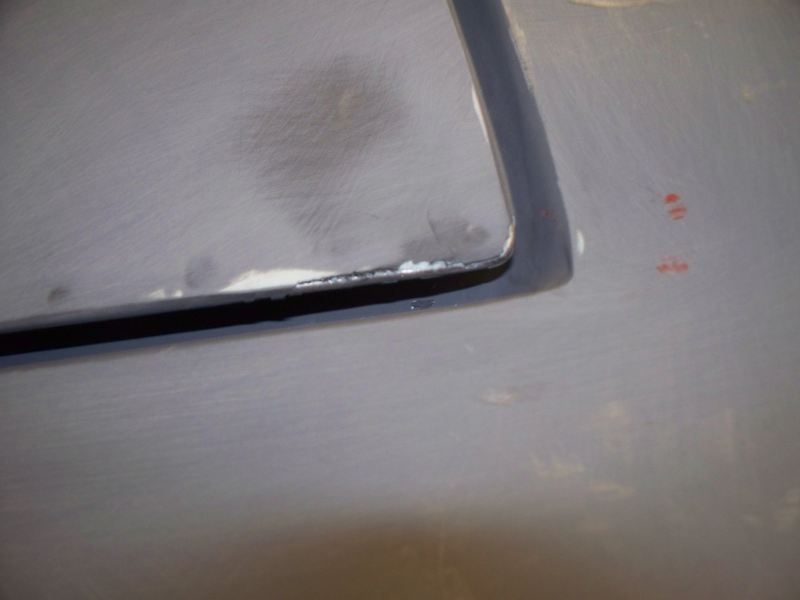 Sanded and filler applied 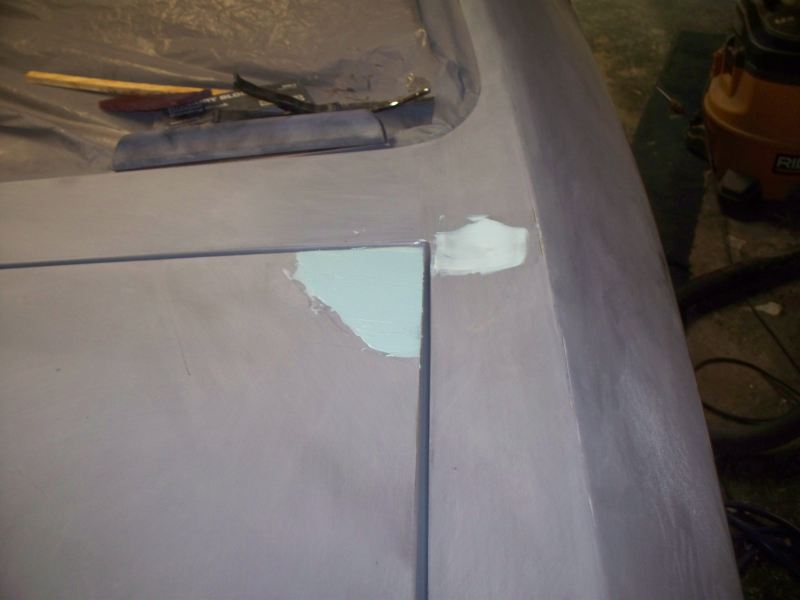 It took three filling/sanding sessions to get here. 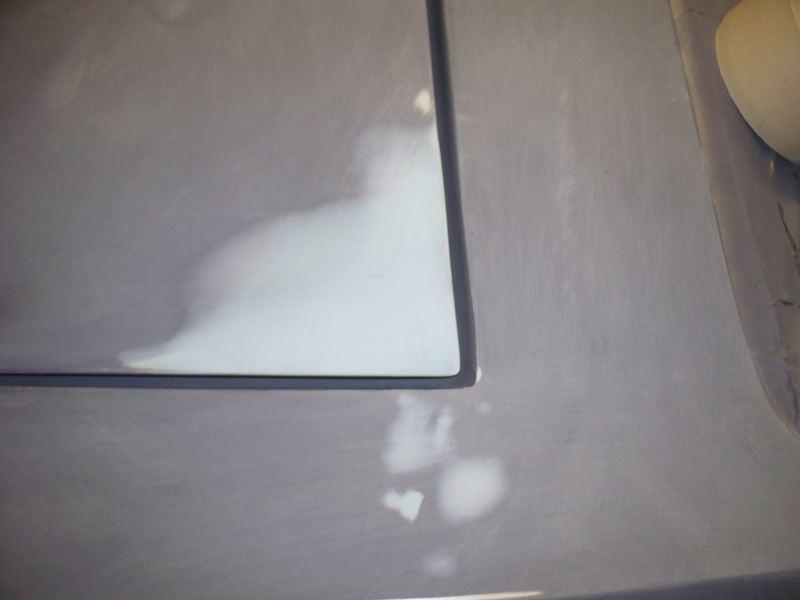
__________________
68 Lemans - GTO appearance LS3 68 Eldorado - waiting for restoration 96 Roadmaster Wagon 2014 Infiniti Q50S Hybrid Marietta GA |
|
#311
04-28-2012, 11:24 PM
|
||||
|
||||
|
Believe me, I know your pain. I've been hammering, dolly-ing welding, grinding, spraying, sanding and repeating on my '68 for 5 or 6 years now.....and I"m not nearly as anal about it as you appear to be. I KNOW my car has lots of high and low spots and I'm about ready to take it to Maaco and just tell 'em to spray it.
You're doing a great job on that thing.
__________________
Greg Reid Palmetto, Georgia |
|
#312
06-13-2012, 07:37 PM
|
||||
|
||||
|
It's been awhile since you've posted- Can you give us an update? I've been impressed the whole way through this thread, looking forward to seeing the next installment.
__________________
"You can observe a lot just by watching" Yogi Berra |
|
#313
06-14-2012, 07:29 PM
|
|||
|
|||
|
Quote:
What seems bad at the time can really amount to nothing. My cousin died about a month ago of a massive heart failure at age 55. He was single and never married. I have been very busy dealing with his estate, most of the work will fall to me, since his cousins on his fathers side are very old and are unable to do much. As far as the LeMans, I have perhaps only put in a few hours here and there. I will try and post some pictures later tonight.
__________________
68 Lemans - GTO appearance LS3 68 Eldorado - waiting for restoration 96 Roadmaster Wagon 2014 Infiniti Q50S Hybrid Marietta GA |
|
#314
06-14-2012, 07:51 PM
|
|||
|
|||
|
I do have a new addition to my fleet of cars for restoration/modification. This car was my daily driver before I sold it to my cousin about 3 years ago. I retreived it since it was about the be towed off as junk. When I owned the car it had a LT1 383 stroker and made 380 RWHP. This was one fast car. However it currenly has a stock 70K mile junkyard engine that I installed after the crank on the 383 broke.
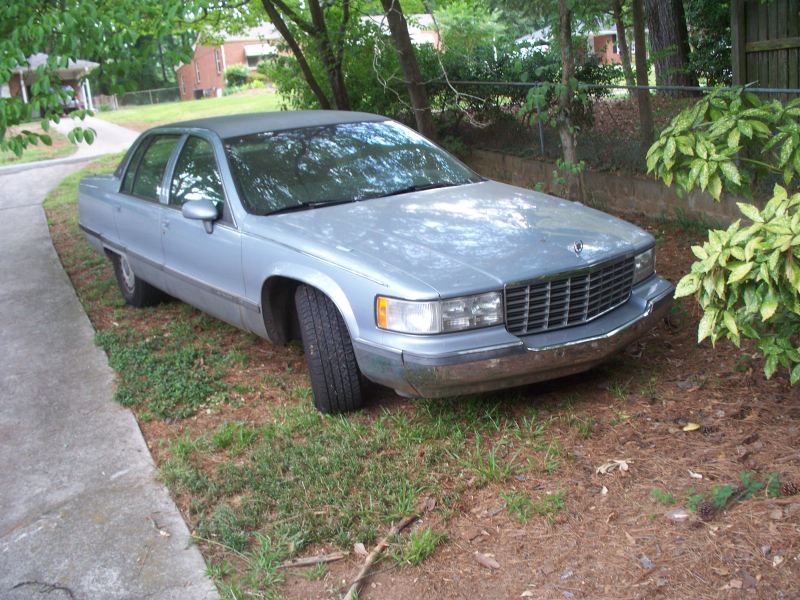 I don't think my cousin ever washed the car in the 3 years he owned the car 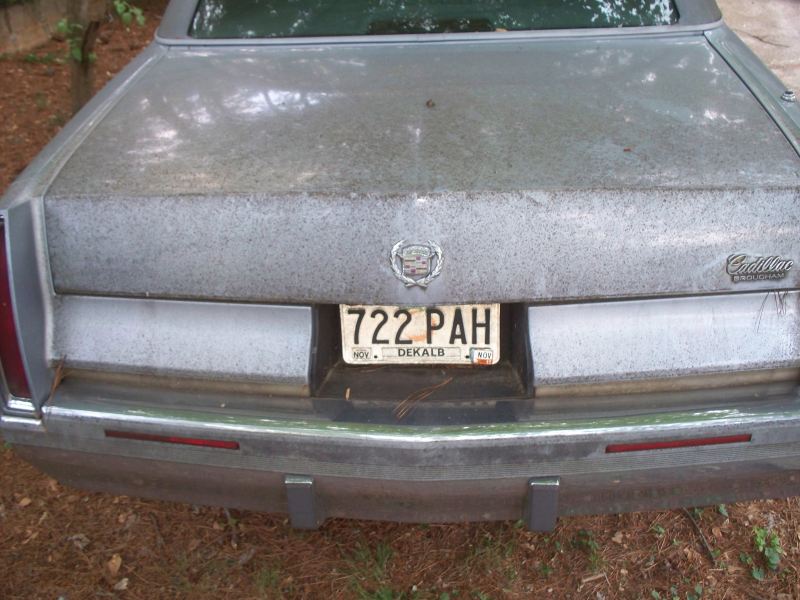 The car was sitting in a pool of oil in the car port. It has the typical intake manifold oil leak that LT1's are famous for.
__________________
68 Lemans - GTO appearance LS3 68 Eldorado - waiting for restoration 96 Roadmaster Wagon 2014 Infiniti Q50S Hybrid Marietta GA |
|
#315
06-15-2012, 12:52 AM
|
|||
|
|||
|
Back to the LeMans. After repairing the screw up with the trunk lid, I first attempted to just re-prime the damaged area with 3 coats of primer, spraying each coat a little farther out each. However after blocking the area, I didn't like what I saw, the primer was very thin in several places and I had slightly different shades of gray where I had blended threw several coats of primer. It looked like rings in a tree. I ended up re-painting the entire trunk lid in order to make sure I don't have problems down the road.
I elected to do a guide coat, however I elected to start 400 grit followed by 600 wet. 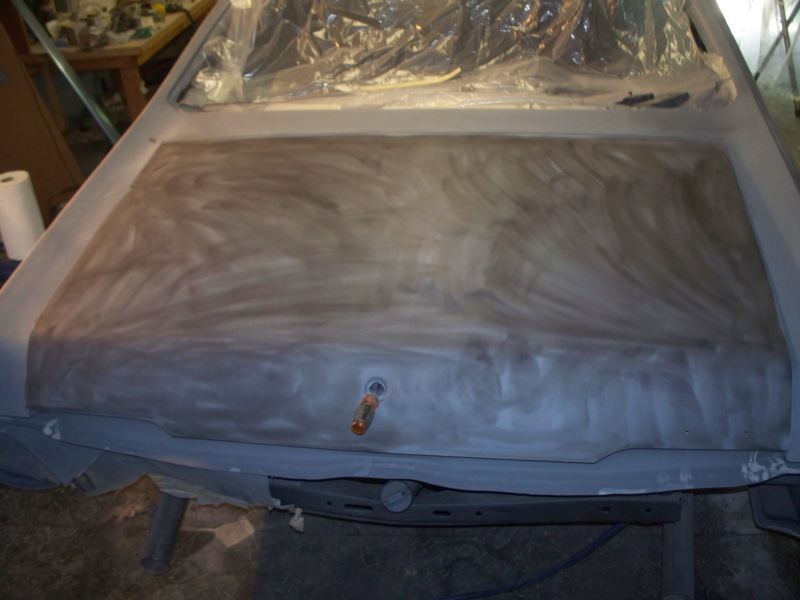  I hit bare metal and found several flaws that needed spot putty on most of the panels. I don't have any photos of this phase. I am close to finishing up with 600 wet sanding. Here are a couple of random photos of work in progress. 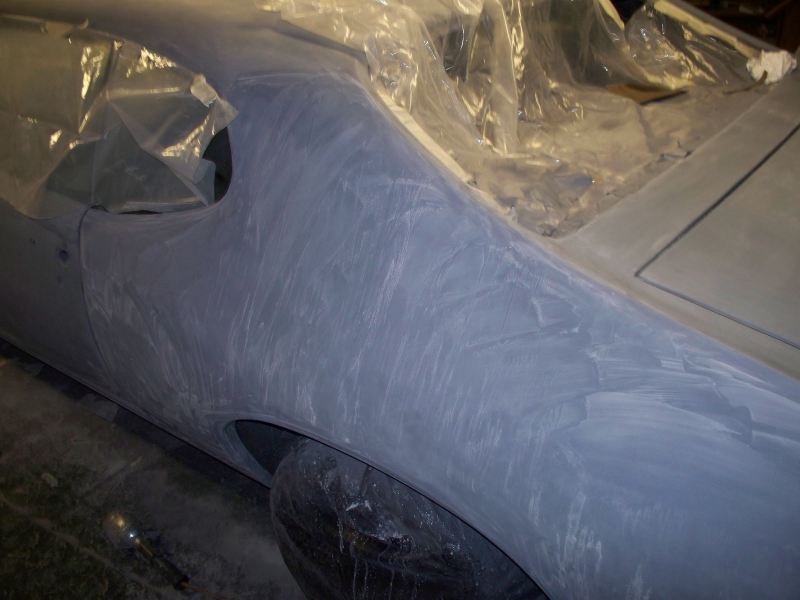 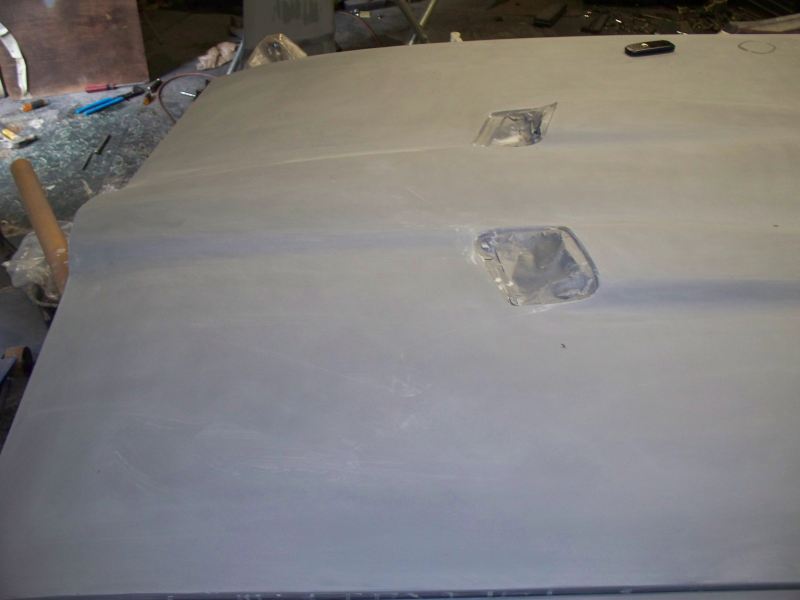 I installed trim mounting studs since only a few of the original remained. 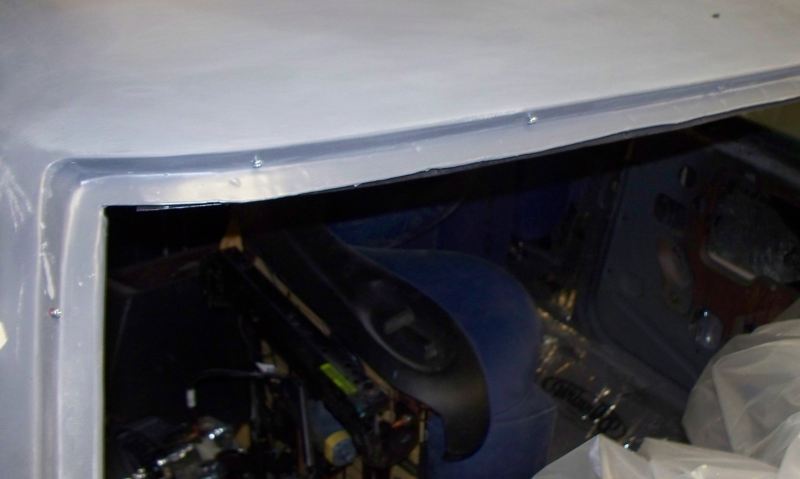 New items I purchased. I bought a Tekna Copper spray gun to do the important spray work. The Starting Line Gun I am currently using leaves a lot to be desired. The Starting Line Gun with become a primer only gun, however I never actually sprayed any color or clear with it. Other problems in the works. I selected 69 Warwick Blue as the color I wanted to paint the LeMans. Dupont can't supply this color in anything other than Acrylic Enamel. So this is a problem. As much work as I have in body work, the only paint system I will use is a BC/CC. I will have to see if PPG can supply this color. Another thing that occurred to me is I need to paint the metal at the rear window that the package tray cover slides under. I had thought this was covered by plastic molding, but was unable to find such a piece in the catalogs. After looking numerous photos I came to the conclusion that the metal was just painted. My car was missing molding and the package tray cover so I didn't know how it was put together. This would be hard to paint once the rear window is installed.
__________________
68 Lemans - GTO appearance LS3 68 Eldorado - waiting for restoration 96 Roadmaster Wagon 2014 Infiniti Q50S Hybrid Marietta GA |
|
#316
06-15-2012, 04:05 PM
|
||||
|
||||
|
As I recall, the only moulding in the back glass area is the window lacing and two plastic lower corner pieces. As you surmised, the piece across the lower center is just painted the interior color just like the dash, etc...
__________________
Greg Reid Palmetto, Georgia |
|
#317
06-18-2012, 12:43 AM
|
|||
|
|||
|
Painted the trim at the rear window. I thinking I might install the glass before painting the car.
 I spend time sanding the hidden areas, trunk gutters, below the rockers. door jams etc. They all have to be sanded or at least scuffed since I didn't paint within 3 days of spraying the primer. I still have a lot to do. I use sand paper in the visible areas, like the door jam area near the latch. Other wise I use a red 3M scuff pad. 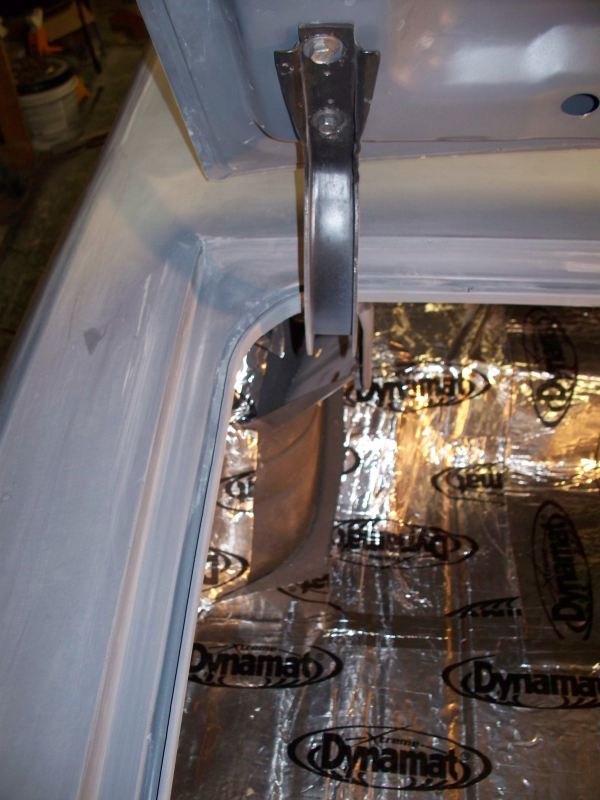 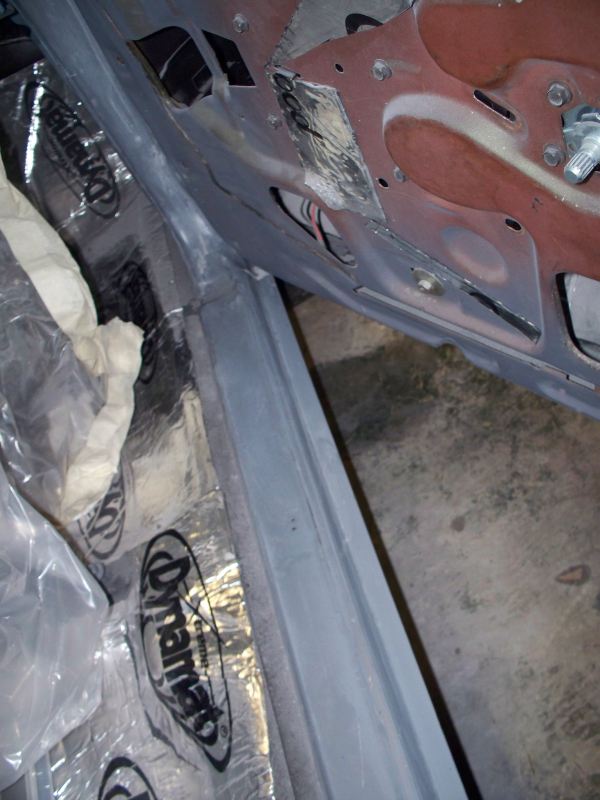 My local paint store can supply Alpine blue so I decided to paint a junk panel as a test. So far the only source I have found for Warwich Blue is PPG. I was quoted $780 for 1.25 gallons of base coat, reducer and activator. This would put the total cost for the paint in excess of $1000 and that includes using SPI for the clear coat. If I can't find a cheaper solution for Warwich Blue, I may settle for Alpine Blue. I used the touch up gun to spray this, 2 coats BC, 3 coats SPI clear, there is lots of orange peel and trash in the paint, but I only wanted to see what the color would look like. 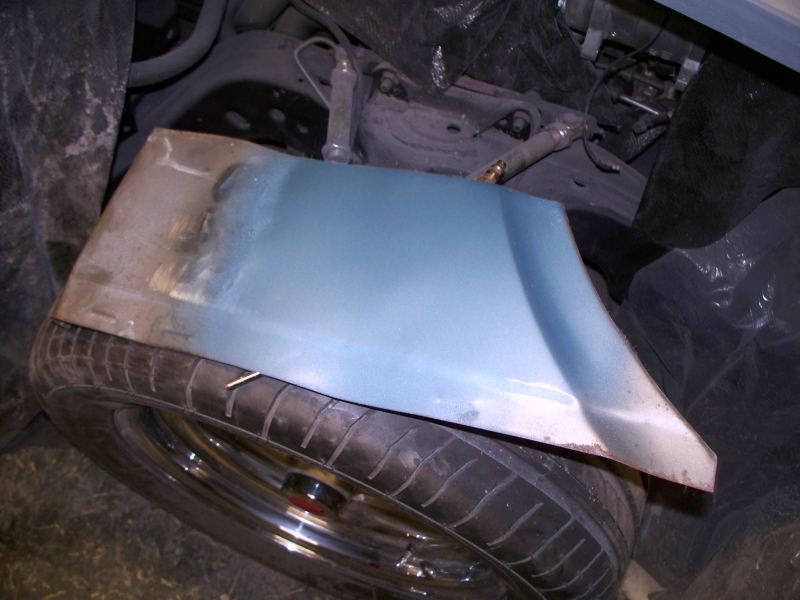 I found a few pin holes in my bumper so I ended up reworking the corner. I used a acid brush to dab paint in the pin holes, followed by spraying a couple of coats of primer, I sanded this smooth but by then the primer was very thin, so sprayed a couple of more coats. I need to sand the corner in a couple of days with 600 grit but the pin holes are gone. 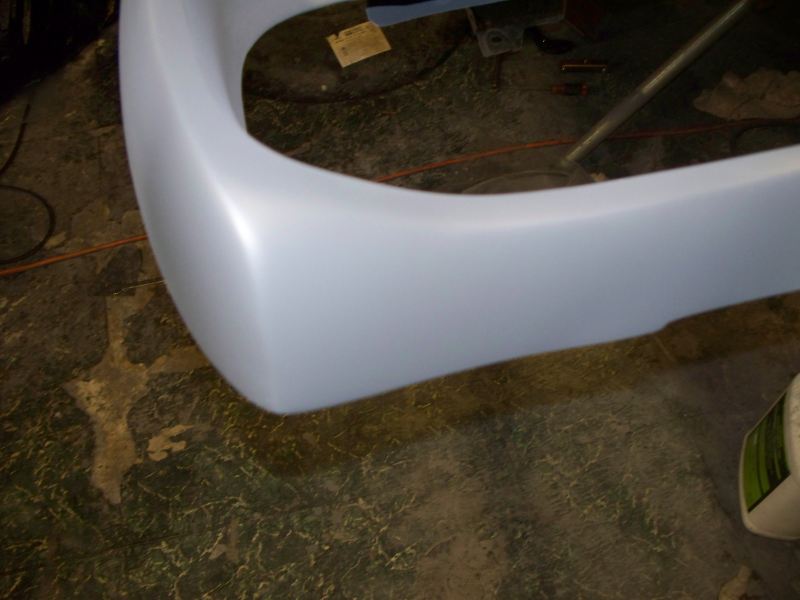
__________________
68 Lemans - GTO appearance LS3 68 Eldorado - waiting for restoration 96 Roadmaster Wagon 2014 Infiniti Q50S Hybrid Marietta GA |
|
#318
06-19-2012, 12:07 AM
|
|||
|
|||
|
I had somewhat of a set back tonight. While scuffing/sanding trunk gutters and rear end piece, I notice rust breaking through the primer in the bottom of the trunk gutter.
I had attempted to wire brush this area some time ago but my efforts were not good enough. I need to fabricate and replace about 16" of trunk gutter in a couple of places. 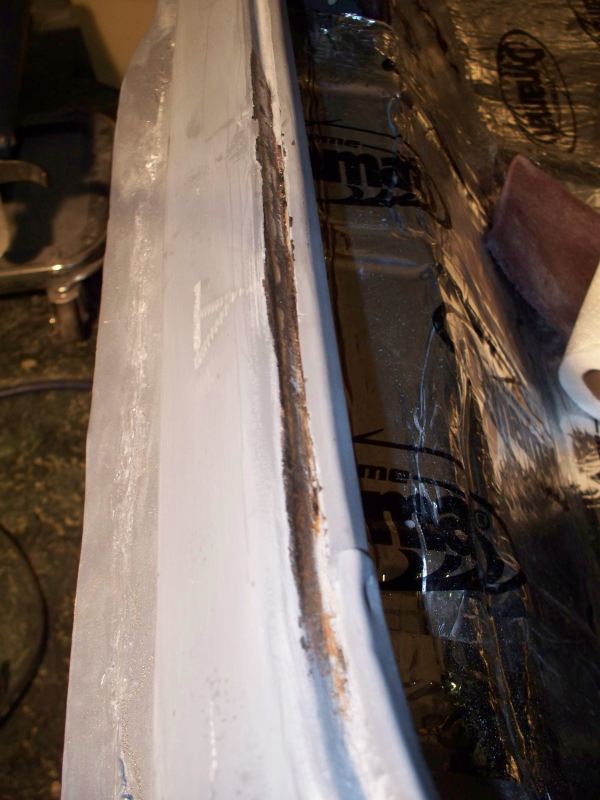 The actual damage is far worse than it appears in the photo, about 3/4 of the thickness has been lost in many places. 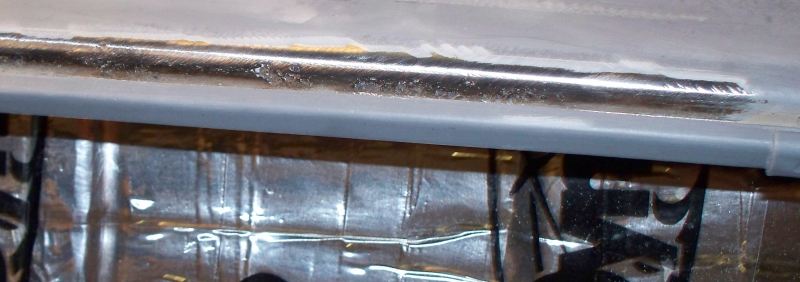 I had already replaced a piece of trunk gutter around the trunk latch. At the time I didn't think the parts that are now rusted were all that bad, but it's clear they continued to rust under the primer. I didn't use naval jelly on the gutter because I though it would too hard (read messy) to neutralize the naval jelly since the water would pour right into the trunk. What made the problem show up was water collecting in the gutter from wet sanding and siting there until it evaporated.
__________________
68 Lemans - GTO appearance LS3 68 Eldorado - waiting for restoration 96 Roadmaster Wagon 2014 Infiniti Q50S Hybrid Marietta GA |
|
#319
06-19-2012, 09:40 AM
|
||||
|
||||
|
Sorry to here that, but at least you caught it before paint.
Craig |
|
#320
07-06-2012, 01:40 AM
|
|||
|
|||
|
Well I finally got the trunk gutter sections made and welded in. I thought I was going to get a trunk gutter from a car being parted out but the deal fell through so I ended up making the sections.
Left hand section cut out. 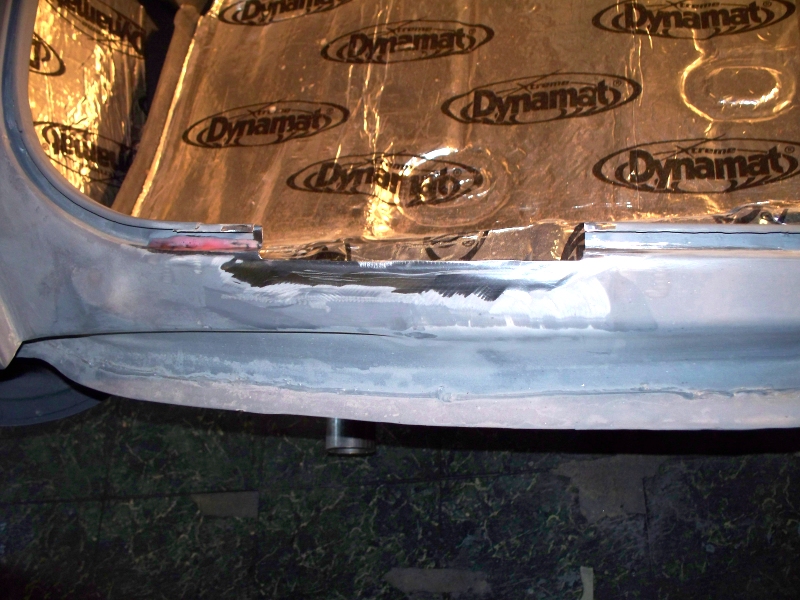 Hand formed section ready to be welded. 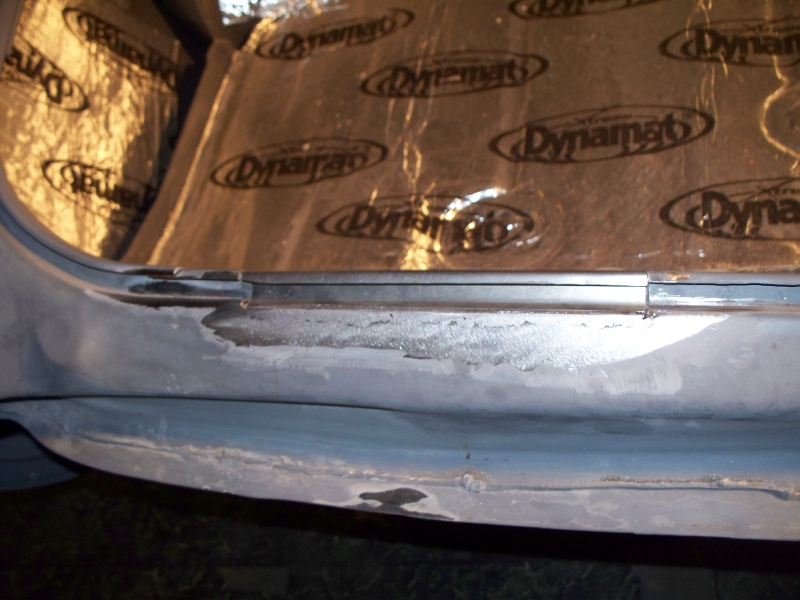 Section Welded in. 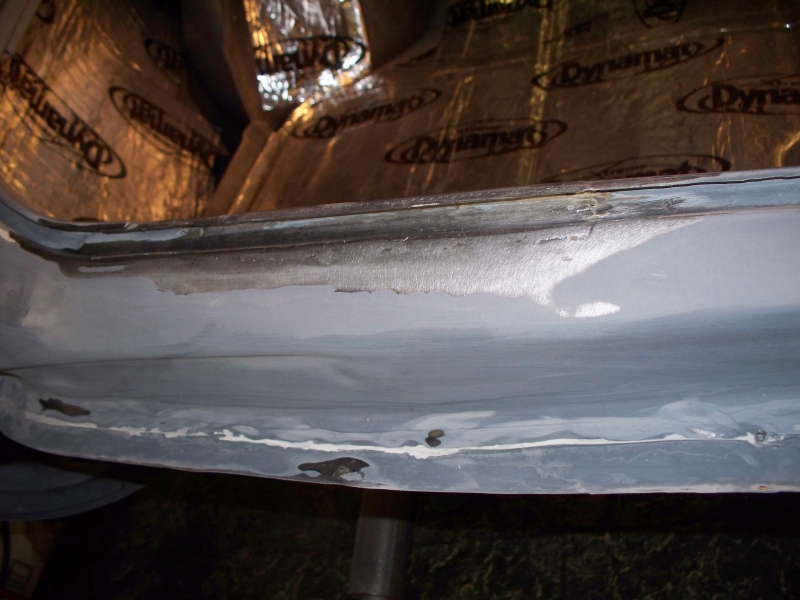 A shot from the back side 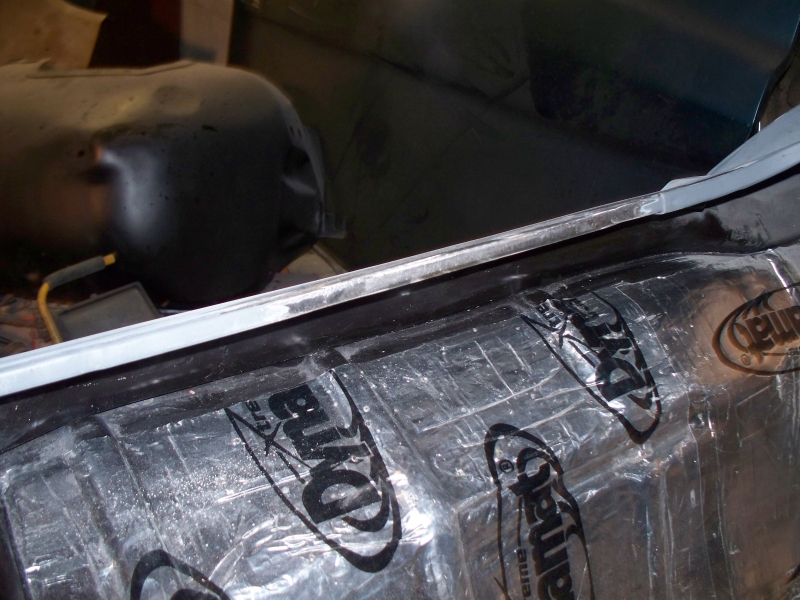 Now to cut the right side out. The area circled in green was filled with All Metal, it's too close to the welding and had to be removed.  Working on bending the new gutter section. I'm using 18 gauge metal and my brake is only rated for 22 gauge. It can be made to work since I am only bending a short piece, but tends to slip while being bent. It took two attempts before I got a good piece. 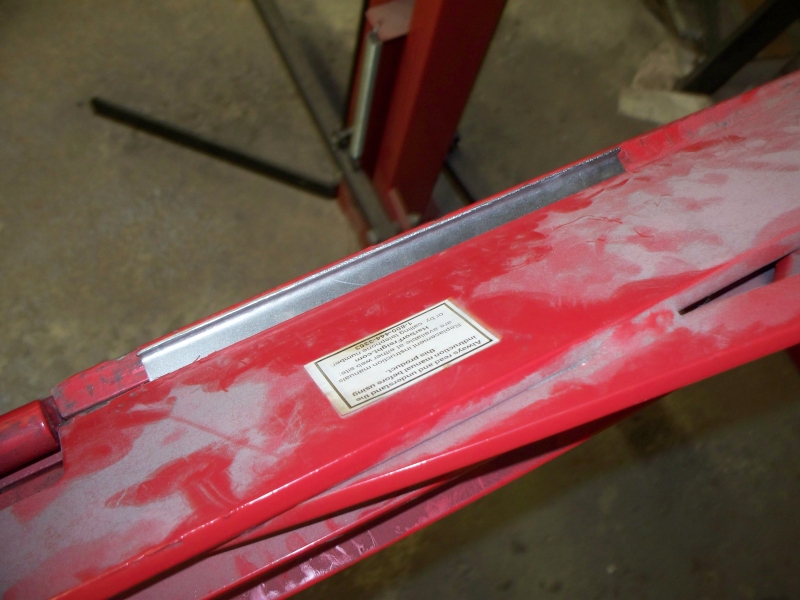 Completed gutter section. It's being held in place by a couple of welding magnets from below. 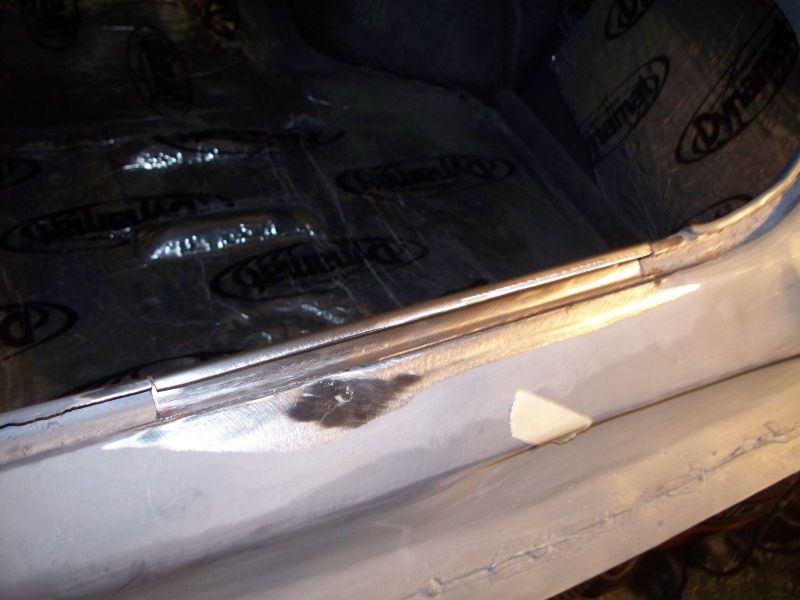 Welding compete 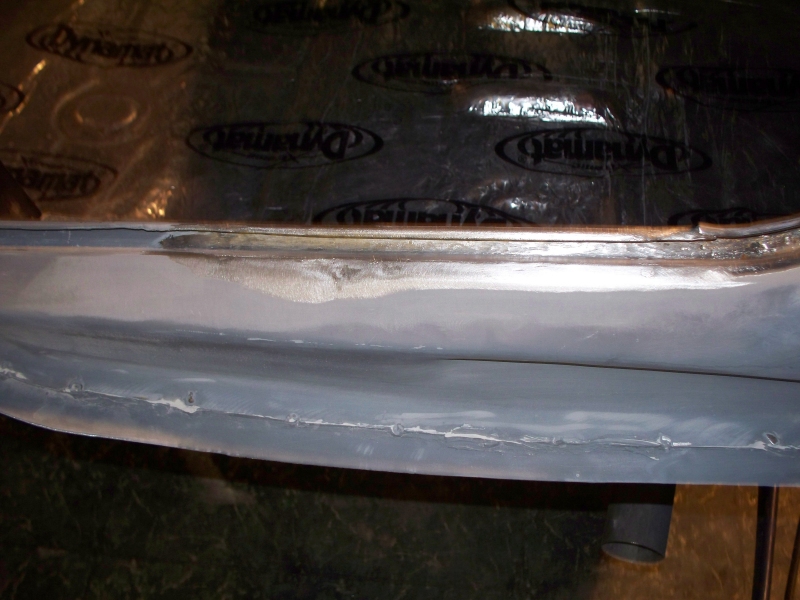 A view from the back side. Once primed there should be no sign of the repair. 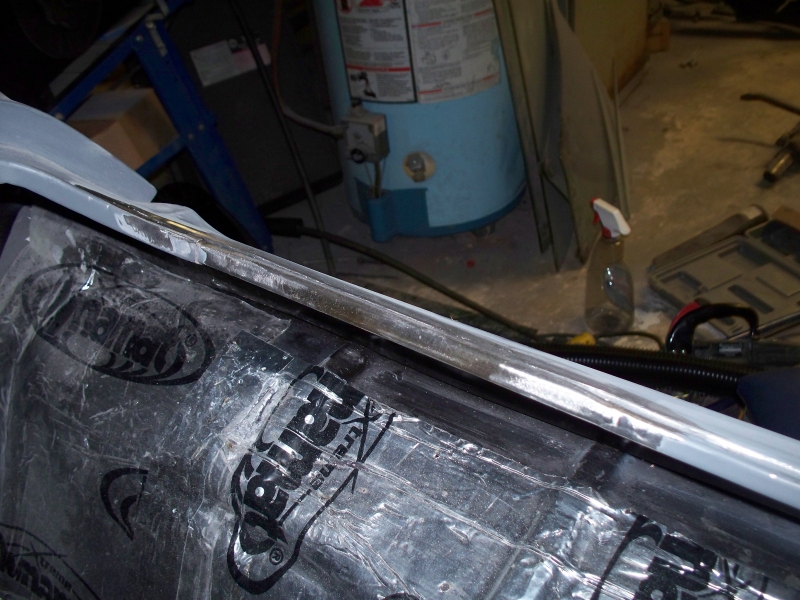 I found a place that can supply PPG DBC 2000 for $69/QT. I have ordered a quart so I can paint a test panel. The final two choices for color are Alpine blue or Warwich Blue.
__________________
68 Lemans - GTO appearance LS3 68 Eldorado - waiting for restoration 96 Roadmaster Wagon 2014 Infiniti Q50S Hybrid Marietta GA |
| Reply |
|
|
The PY Online Forums is the largest online gathering of Pontiac enthusiasts anywhere in the world. Founded in 1991, it was also the first online forum for people to gather and talk about their Pontiacs. Since then, it has become the mecca of Pontiac technical data and knowledge that no other place can surpass.


 Linear Mode

