


| FAQ |
| Members List |
| Social Groups |
| Calendar |
| Search |
| Today's Posts |
|
#1
 08-31-2015, 03:52 PM
|
||||
|
||||
|
I thought I'd share the results of my latest project; rear seat upholstery for the 72 GTO. It might help convince those who think its too much work, or should be done by professionals only. I have no experience whatsoever in upholstering. Never used a sewing machine, needles, hog rings and related tools in my entire life.
Anybody can do it if you have some basic hand skills. I asked for quotes, which ranged from 150$ per piece, to 500$ for both pieces. Most shops will not work with original covers, they want new covers. Same with materials, modern vinyl instead of burlap... My goal was to use original materials only. Do it myself would be the way to go then. I can only blame myself if its not to my liking. So I thought, what the hell. Why not give it a try. I did the bottom part first: - I started by disassembling the seats, sandblasted the frames, and give them a nice coat of primer and satin black paint. Not original, but I think it looks better than raw steel - I had a local fabric shop replace the edges of the original covers, along with new paper-wrapped listing wires - I studied how the seats were done. I hog-ringed the burlap, then used 1.5" thick foam for the bottom. - I used poly batting at the corners for extra protection. Cotton was used originaly but poly will not absorb moisture and last longer. - I hog-ringed the cover in place, starting at the middle bottom, then the middle top, working my way to the sides. The bottom uses foam, but the back rest uses cotton/poly batting only. I will do the back sometimes this week. Still waiting for the jute padding to complete the bottom. The bottom is an oddball; the frame doesnt have the notch at each corners for the retractors, but the cover yes... Not a big deal. Materials: - 10 yards of burlap: 25$ - 10' X 72" 1.5" thick upholstery foam: 30$ - 110" X 110" roll of poly batting: 25$ - 4 yards of 1/4" jute padding: 12$ - 500 hog rings: 11$ - Hog ring pliers: 15$ Total: 118$ plus one day's worth in labor and 45$ for the covers edges. I think it came out really good. Its firm and tight, I cant be happier with the results. Will post pictures of the back when its done.            
|
|
#2
08-31-2015, 04:30 PM
|
||||
|
||||
|
Nice post Mesca. For a quick sec though I thought you were putting on polka dot seat covers lol
__________________
1968 LeMans conv. 350 HO - 4 speed triple white (hear it idle here) https://www.youtube.com/watch?v=eVmq...ature=youtu.be 1968 LeMans conv. 350 - 4 speed Solar red/pearl |
|
#3
08-31-2015, 09:00 PM
|
|||
|
|||
|
Very nice! I think you're on your way to starting a business.
|
|
#4
08-31-2015, 10:21 PM
|
|||
|
|||
|
Looks good.
|
|
#5
09-01-2015, 01:04 AM
|
||||
|
||||
|
That turned out great! You are underselling your abilities!
I'm wondering what prompted you to do this, since the cover and springs look to be in really good shape? Did the shop that sewed on new edges/skirts also provide the material? Seems to me you really got a good deal on that. The ribs (pleats?) on your cover look stitched instead of heat-sealed. That really looks classy compared with heat-sealed covers. Caught my eye because I had some buckets recovered with a "closest match" to my 70 LeMans rear seat, which had deep heat-sealed ribs. Your stitched ribs look a lot better !! |
|
#6
09-01-2015, 10:57 AM
|
||||
|
||||
|
Quote:
Quote:
Quote:
|
|
#7
09-01-2015, 05:11 PM
|
|||
|
|||
|
You found your new calling in life.
|
|
#8
09-01-2015, 10:07 PM
|
||||
|
||||
|
Quick update. Completed the bottom tonite. Added the jute padding and piece of foam that goes in the center.
Back rest is done. I had a much harder with the back rest... The edges/skirts they replaced were shorter than original, so the top of the cover is too high on the frame. Not a big deal.. Looks good anyway. For 175$, I think it came out great. 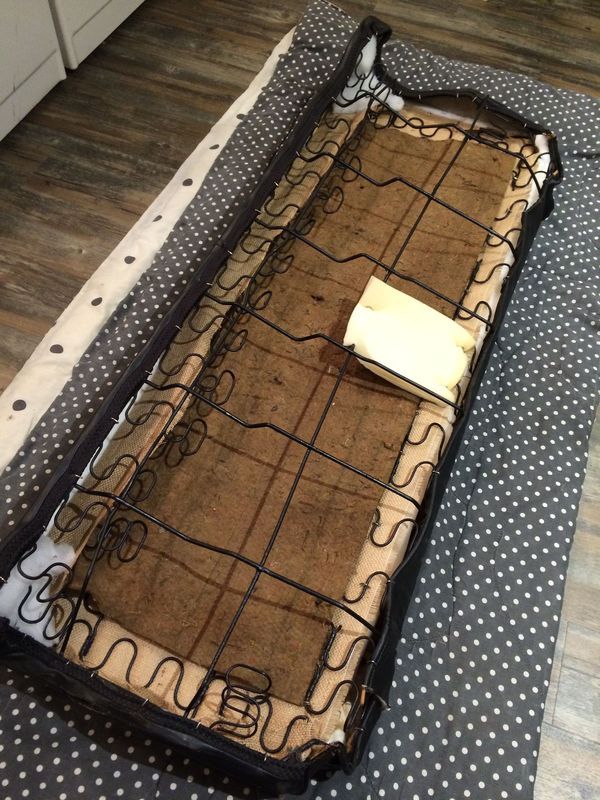 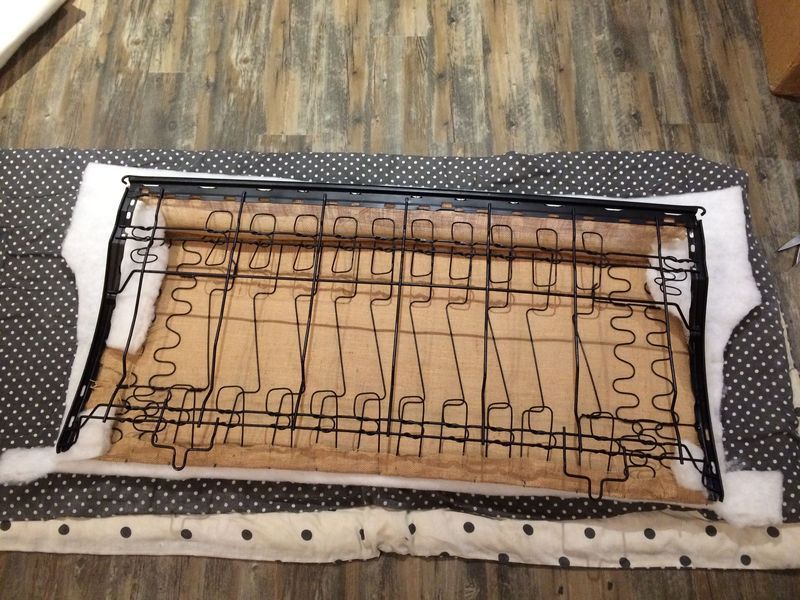 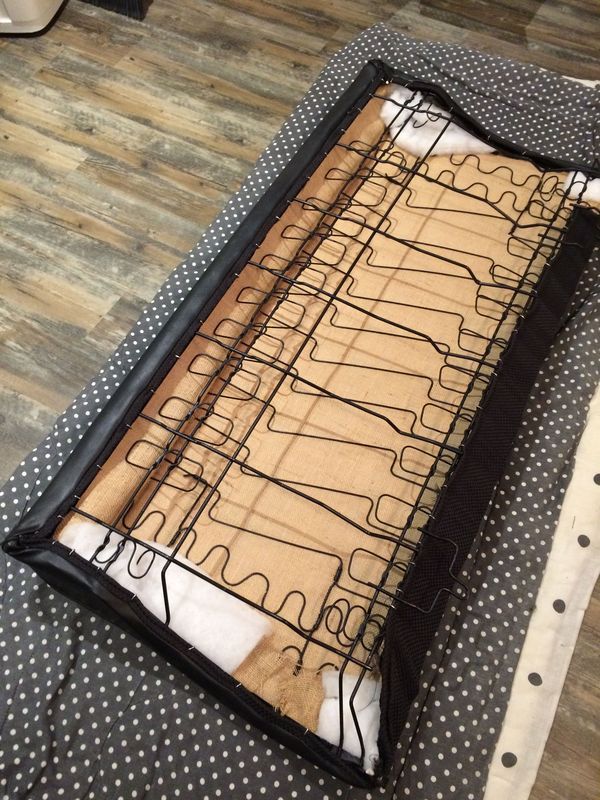 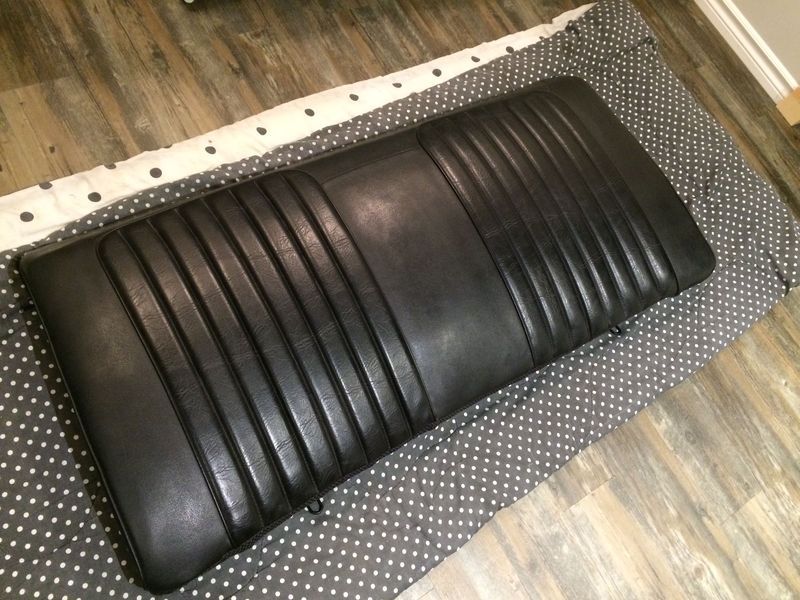 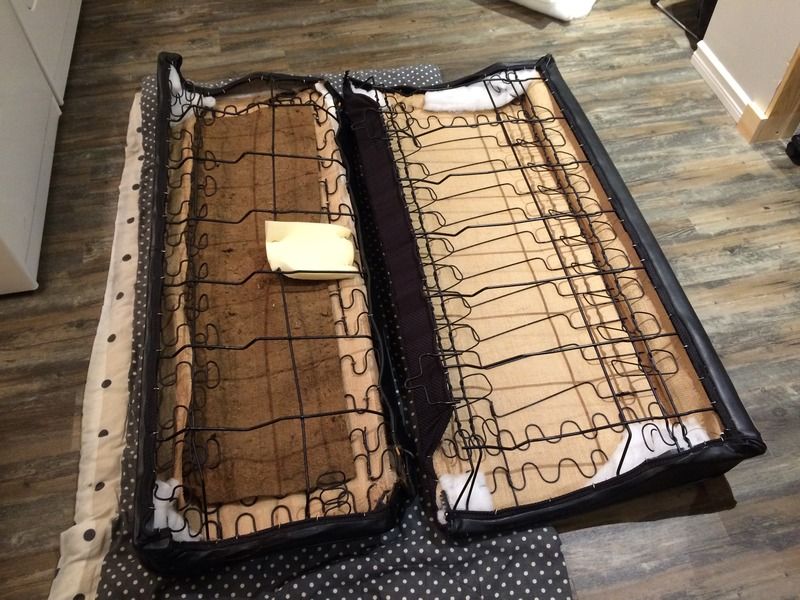
|
|
#9
09-02-2015, 01:26 AM
|
||||
|
||||
|
Excellent !!!
|
|
#10
09-02-2015, 08:04 AM
|
|||
|
|||
|
How did you clean the rust from the springs?
|
|
#11
09-02-2015, 10:34 AM
|
||||
|
||||
|
Quote:
__________________
It's hard to soar like an eagle, when you're surrounded by turkeys! My wife says she'd llike my car a lot more if it wasn't mine.   64 Grand Prix 389 .030, 1.65 Scorpion Rollers, Tripower, RARE Long Branch, Custom Stainless Exhaust and mufflers, 3.90 posi 200-4R. 068 cam. |
|
#12
09-02-2015, 11:02 AM
|
||||
|
||||
|
Quote:
|
|
#13
09-02-2015, 10:43 PM
|
|||
|
|||
|
Nicely done... will you be doing the front buckets next?
|
|
#14
09-04-2015, 10:53 AM
|
||||
|
||||
|
Quote:
Will keep updating this thread. Hopefully, it can help others do the same. |
|
#15
09-22-2015, 02:14 PM
|
|||
|
|||
|
I was in the same boat as you as far as what my abilities were. I had to get new covers though since the originals were ripped beyond repair. It looks like you did an outstanding job too!!!
I also had to replace some of the springs but I found a seat out of a Chevelle in a junk yard and used them for the parts I needed.
__________________
71 LeMans Sport Convertible 04 Pulse Red GTO A4 10 GMC Sierra 1500 |
|
#16
09-22-2015, 03:02 PM
|
||||
|
||||
|
I did not want to destroy expensive new covers, so paid to have my buckets installed. So far, this is one place I sacrificed the personal satisfaction to avoid the consequences of my inevitable mis-steps and do-overs.
You did a great job and I'm sure you feel good about it! My back seat is in decent shape and I chose to leave it original. For my buckets that replaced a bench, I tried electrolysis for removing rust from the springs, and it worked pretty well, but was a huge mess! After doing one seat's frame, I abandoned that concept and used Rustoleum aerosol Rust Reformer. It was cheap, worked great, and I read up on it, so feel it will really slow down more rust and I have confidence in it. My springs were actually pretty clean with surface rust only in a few areas, but if yours are really rusty, I'd be worried about them breaking. My cores did have some broken springs and the crimped fasteners that tie them together. I bought replacements pre-formed for the side supports, then fabricated some replacements for others. My upholstery guru has a roll of spring stock that is identical to the original, so it is available somewhere. |
|
#17
09-22-2015, 03:36 PM
|
||||
|
||||
|
Rear seats had no broken springs, and light surface rust. I had to replace a few 3-prong clips.
The bucket seats are something else... Lateral support springs are shot, will need replacing. And a few broked springs here and there. Buckets are a challenge. Rear seat is pretty much straight forward. You just wrap the padding and covers around the frames. Very happy with the results. Hopefully, I will be able to start the front seats in a few days. Will keep this thread alive! |
|
#18
09-22-2015, 07:52 PM
|
||||
|
||||
|
Nice job on the seats. Did buckets first on my '69. PITA!!! Had each apart at least 3 times before I was "satisfied". Installing hog rings through the cushion foam was not fun, (yours might be different). Saved headrests and locks for last on both, THEN I notice the upright upholstery wasn't centered perfectly, doh! At least the headrests hide it pretty well, lol, and they do look good.
The rears were a piece of cake after all that. Good luck and be patient. |
|
#19
09-30-2015, 05:52 PM
|
|||
|
|||
|
Quote:
Make sure you can touch the listing rod with your finger through the bun & burlap- THEN lineup the cover and hogring the cover listings down- use your fingers under the springs to push up on that rod to make sure the hogring catches it. You'll hook that wire on the first try almost every time doing it this way. 
__________________
Ben R. 2004 GTO - the daily 1966 Olds 442 - the toy 1953 Chevy 5-Window Truck - the heap |
|
#20
10-01-2015, 10:42 AM
|
||||
|
||||
|
Thanks for the tips! I heard bucket seats are a PITA compared to the rear.
I'll use your trick for sure. Might get one of your rebuild kits. |
| Reply |
|
|
The PY Online Forums is the largest online gathering of Pontiac enthusiasts anywhere in the world. Founded in 1991, it was also the first online forum for people to gather and talk about their Pontiacs. Since then, it has become the mecca of Pontiac technical data and knowledge that no other place can surpass.


 Linear Mode

