


| FAQ |
| Members List |
| Social Groups |
| Calendar |
| Search |
| Today's Posts |
|
#21
 11-10-2011, 11:27 PM
|
||||
|
||||
|
I started to strip the car last summer('10) then decided to move to Oak Ridge TN for a new job. Moved back to my house that didn't sell in Feb of '11 and basically settled in and in August decided to pick up where I left off. Before I moved I started to strip the car and I could see some sin lurking under the paint on the left rear quarter and decided to start there.....OMG, I can't remember grinding thru so much filler to get to steel! What I found (too my horror) was a low cost body shop cobble. A new repop quarter was over lapped on the old panel. Most of the panel was cut away yet where it was welded was overlayed, not flanged or butt-welded. OK, yet the real horror was the top of the panel where the trunk lid meets the quarter, the body line and down the side. A panel appears to have been bent over a bench top corner and hammered into shape to repair what I have no idea. See pic. I put the word out on PY and Larry from TOYSWEDO rescued me and sold me a partial, to my dimensions, CONVERT panel to cure what I needed. Thank you Larry, you are one stand up guy and I appreciate it! I trimmed it down to what I needed and let the fun begin!
|
|
#22
11-10-2011, 11:42 PM
|
||||
|
||||
|
A couple pics will show the issues with the gaps and horrid fitment I had to correct. The corner piece is a seperate piece I picked up from Frank's Pontiac parts in the desert and for $50 I couldn't complain and in the backround you see the partial quarters that are going on the car and the hardtop outter wheelhouses(these are another story altogether that I'll cover). Looking back I still feel NOS hardtop quarters would have been better as they are available(for a somewhat) of a fee yet they are around. I like the way the panel behind the wheel fits the trunk extention and the doo jam. I just couldn't bring myself to trim as much as I'd need to to get what I needed to make a NOS panel fit a 'vert. So, what you are seeing is a rust free corner(black) being fit and welded in and then the top cut off the panel to get a smooth contour back to the top of the quarter and the trunk jam stays original to the car. Then I cut the quarter panel off to get to the outter wheel house, rocker and what was left of the trunk extension. Yes, the rear quarter was three pieces that all came together and turned out better than I expected. Trust me, this required alot of thought. Whoever did the work to the car before I acquired it also cut/butchered into the door jam and created a unacceptable gab from the quarter and the door area towards the top 6-8" of the door. I'll cover this soon also. I have the new panel welded on and am putting the final touches on it, so I'll share in pics over the next coupla days. It was fun...Mike
|
|
#23
11-13-2011, 08:57 PM
|
||||
|
||||
|
Pics of the rocker panel and the outer wheel house 'piece' I had to cut off of a reproduction wheel house. Had to make slits in it to get the wheel lip right and also had to weld it up and smooth it out for when you check the rear quarters for filler, we all run our hands up and 'feel' for the filler and these feel virgin smooth now...Mike
|
|
#24
11-13-2011, 09:01 PM
|
||||
|
||||
|
In a few of the photo's you can see the inner wheel house patches I had to put in. This is where the floor pan meet the wheel houses. Fortunate people don't have to bother with these ares...I do..LOL. Also you can see the new section of trunk floor already in place. I just finished welding on this rear quarter are today and have a boatload of grinding to do and It's on to the pass side what it is interesting also. I'll bring ya along for that too with WAY more detail and step by step.... Mike
|
|
#25
11-17-2011, 09:18 PM
|
||||
|
||||
|
OK, here's where the work behind the quarter is buttoned up. Rattle canned some black paint over rattle can primer and finished off with some 3M undercoating on top of it all. Since this won't see the harsh types of weather or UV rays I figured it couldn't hurt to do so. Also shown is where the quarter skin was being finished up on being installed for the final time. I had the rear side glass out for mot of this and installed it before the panel went on. Was a great time to grease the tracks and get the window operating freely(which it never seemed to) at this time and covered it up with the panel. Mike
|
|
#26
11-17-2011, 09:32 PM
|
||||
|
||||
|
The first pic shows an area behind the rear seat divider that required patching. I had to actually cut out an area of the rear seat divider to get to this spot of the floor pan. Interesting are to rot out at. Must be because of the brace underneeth this panel hat was full of alot of crud. I also showed the front of the outer wheel house repaired with out all that rust that was there before. I still have alot of welds to grind down before I start the passenger side... Stay tuned, Mike
|
|
#27
11-18-2011, 02:18 AM
|
||||
|
||||
|
Wow lots of work you've put in, nice progress and great pics.
|
|
#28
01-02-2012, 09:09 PM
|
||||
|
||||
|
Well, I took a little time and worked on a fender for my buddy's 68 charger in getting it ready for primer/paint(ALOT of blocking) and a little on the hood tops for a '34 Ford truck and with the long new years weekend, I decided to make some real progress on my 'vert. Here's some pics to show what I had to work with... I started to restore the car a few years ago and did some metal work and sprayed some urethane primer at that time, then the car sat and then I started working on it and then decided to move to Tennessee and the gray rattle can primer to slow down the rusting process for the car hauler trip and then did a rebound back to Michigan after 5 months or so... Here's some pics as of a few days ago...Mike
|
|
#29
01-02-2012, 09:24 PM
|
||||
|
||||
|
Now here's some pics after a date with a cut-off disc. I first did some D/A sanding to see what I could and then had to decide where to make the cuts. I could have just did some simple rust area repairs and called it good being the original quarter panel and all yet since one side got replaced, might as well do the other the same way. The door gap and alignment was perfect, so I made the cut away from the jam about a quarter of an inch or so and the original quarter to rocker seam was filled in so I stayed a little ways away from that. Please note the fine use of roofing flashing used previously that now becomes visiable. This type of repair was done through-out the wheel well lip also. Mike
|
|
#30
01-02-2012, 09:44 PM
|
||||
|
||||
|
Now, I'll post a pic of the outter wheel house patch panel. As far as I know, this is the only panel available for this body style and is for a hard topand since I need only the outter edge and the lower corners, cutting and splicing in a new repaird section is the only option we have right now. Has anyone else used these panels and struggled imensly with the poor fitment? These panels are simply punishment and in some cases make the repair, yet the wheel well fit/contour is horrible, to say the least. Now the strip I cut out from the new outter wheel house panel I used the old piece I cut off as a template and added 3/8-1/2" to the new panel. Ill get into more of this later as to why...Mike
|
|
#31
01-02-2012, 10:00 PM
|
||||
|
||||
|
Here come the fun part. Well, at least I think so...LOL. I like to do a trial fit of the new outter skin panel after I trimmed a little off it. I left around a 1/2" or so to use the cleko pins on. These are a metal/fabricator's best friend. The finish panel as all my patches are flush/butt welded in. The is no overlap on the patches I create or trim to fit. Yeah, it takes a bunch of time but the end result is worth it. That quarter skin will come off and back on 20-30 times to get it right and from inside the trunk you'll never see it anywhere. At the time I bought the panels I was doing not as well $ wise as I am now and do very much so regret not buying NOS hard top panels and trimming them down 'cause the bottom of the quarter behind the wheel just drives me nuts since it no way looks factory. It bothers me that much that I may cut off the lower section and cut and weld in the three seperate strips to make it appear factory. Time will tell on this move...Mike
|
|
#32
01-02-2012, 10:09 PM
|
||||
|
||||
|
The slits in the inner and outer panels in the wheel well area are for improvements in the fitment of the wheel well trim. Both the inner and outer have very poor draw conditions when they are made that there is no possible way for the wheel well trim to fit properly. Once again, factory panels would have been so nice in this situation. I weld up the inners in a few spots and finish them off the car and grind them smoot and you don't notice them ever being there. We all check this spot when we are looking at a car to buy and check it for excessive filler or rot. Then I put the outter 'lip' back on and re attatch the quarter and then clamp the outter lip to the quarter and scribe a line, remove the quarter skin and 'lip' and cut and grind to the line. Deburr and re install both and tack the lip in a few places, pull the outter wheel well off again and finish welding the 'lip' in and grinding it flush both on top and in the wheel well. This panel is also butt welded in. Mike
|
|
#33
05-29-2012, 07:41 PM
|
||||
|
||||
|
Well, here's some more progress in the last few month's. I have the pass quarter completely welded on and will need a pic for this. I'm getting all those little rust holes from the seams(consider yourself pretty lucky if you have a car not exposed to the snow belt or one that hasn't sat outside for long periods of neglect) that reside under the rear seat. Good news on the lower winshield, mine appears pretty solid(whew) yet the drivers side lower cowl seems to need alot(pics coming on these too. I also got the shaker fit and welded in a 3/16" flange around the opening that has little to no wave from the heat or lack there of... Getting there...
|
|
#34
05-30-2012, 12:20 AM
|
||||
|
||||
|
Now there's a view you never see... a shaker from behind the wheel of a '71 'vert! Nicely done, and uniquely yours...
I'm watching with great interest on your rebuild here as I will be starting my own '71 'vert resto this year. I too will have to do quarters, as well as floor pans, and Lord only knows what else. But I don't mind... it's so worth it! Keep up the good work, and thanks for posting all of the pics! 
__________________
Eric "Todd" Mitten '74 Bonneville 4dr Sedan (455/TH400/2.93 open) '72 LeMans GT (455/M-13/3.23 [8.5"] posi) '71 GTO Hardtop (400/TH400/3.07 12 bolt posi) 71 GTO Convertible (455HO/TH400/3.23 posi) '67 GTO Coupe (455/ST-10/2.93 posi) '67 Tempest Wagon (428/TH400/2.56 posi) Deuteronomy 8:3 
|
|
#35
05-30-2012, 12:55 PM
|
||||
|
||||
|
Keep the photos and your comments along the way coming.

__________________
1971 Pontiac GT-37 Car is a junk yard dog and maybe one day will be restored. 
|
|
#36
09-05-2012, 06:10 PM
|
||||
|
||||
|
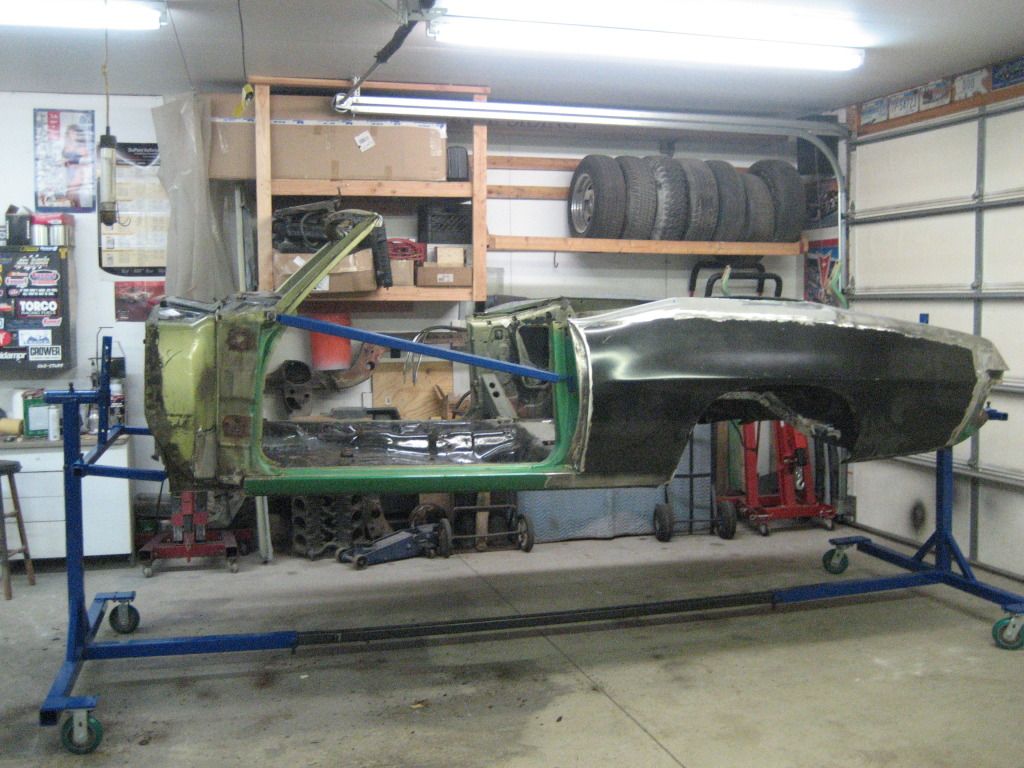
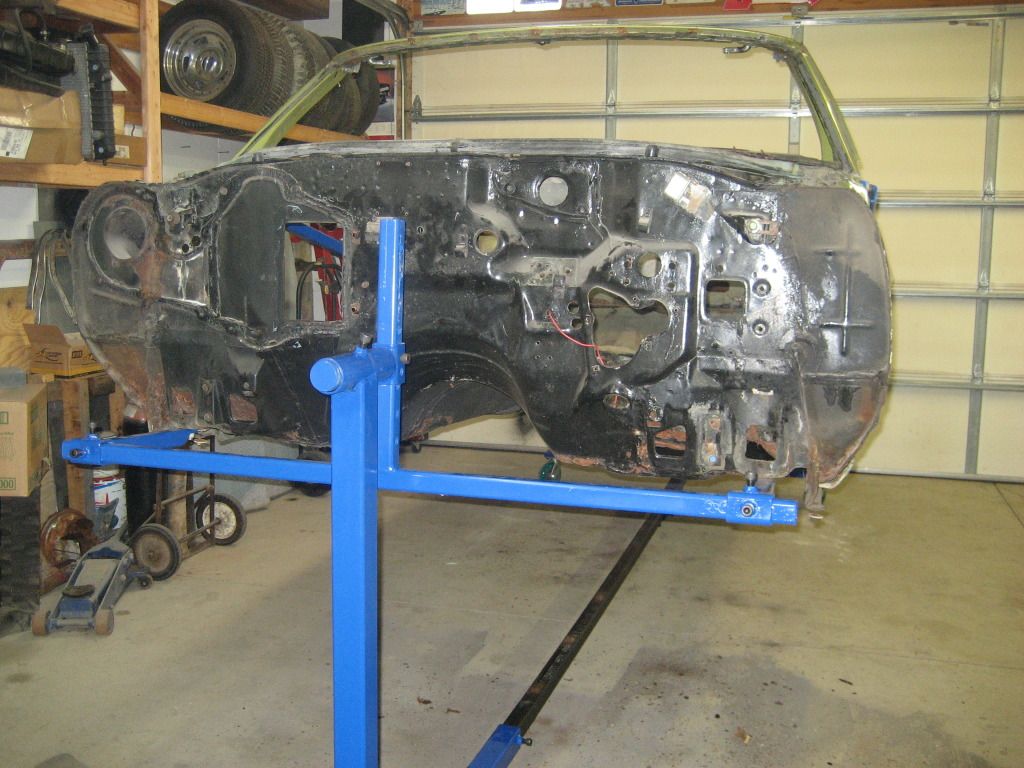
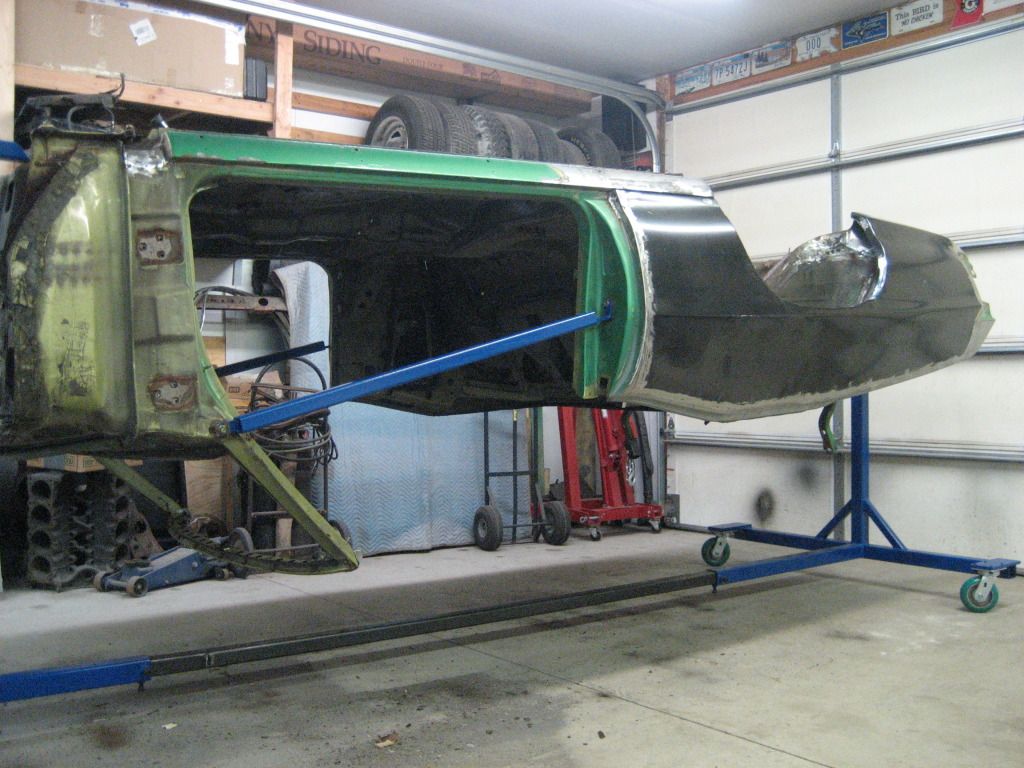
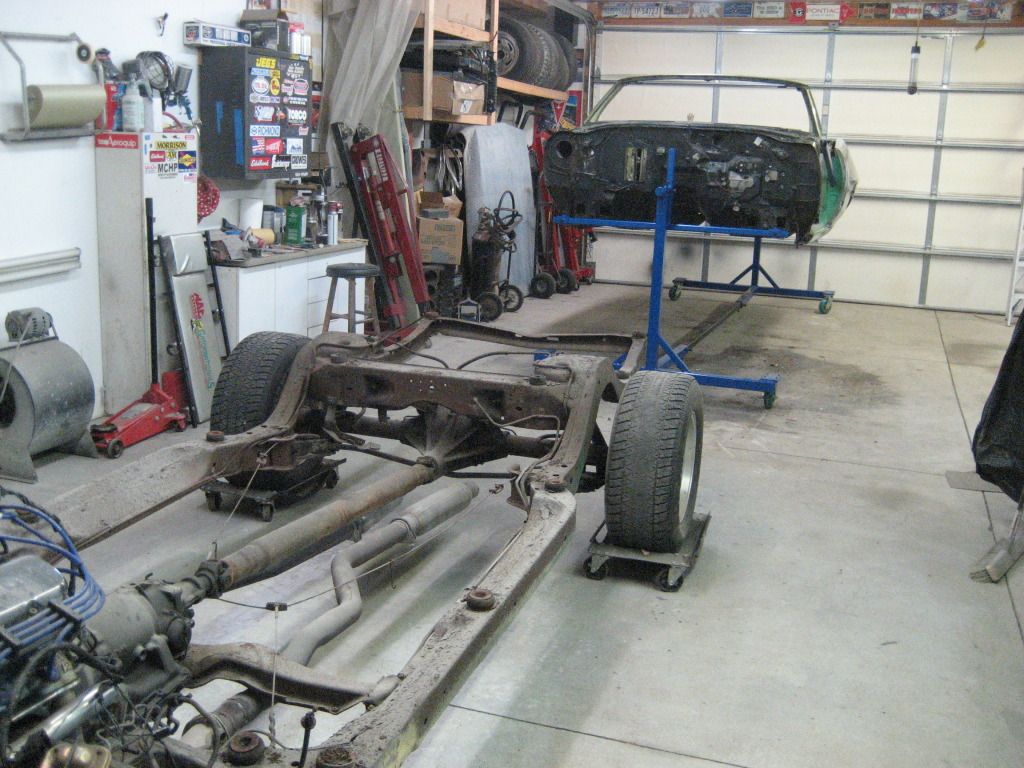
Well, after a few month's and ALOT going on, I'm back at it. I got engaged on St Patricks day and married in the end of August with a perfect honeymoon on the island of Kauai. While on my travels I put some thought on what direction I want this car to go. Anyone else do this sorta stuff? Be in the perfect place and your mind wonders on what you're going to do to your car next? Well, since I always wanted to give a frame off resto a toss, I remember saying I wasn't going to do it to this car... Well, Guess again. I surprised myself and pulled the trigger. Once back in the states, the 'tub' was completely stripped, pulled the front windshield and I thought I was in the clear and found some pretty good rot under the base of the windshield. Espen, I (along with quite a few other's) followed your thread and was in awe with your outcome and persistance to move forward. Well done and thanks for the tips! I built a rotisserie last week and finally got the body on and centered up. Spins like a dream. Not to bad considering I have UNDER $300 into this plus my time... Pics to follow... Mike
|
|
#37
09-05-2012, 06:24 PM
|
||||
|
||||
|
some pics:
|
|
#38
09-05-2012, 08:22 PM
|
||||
|
||||
|
Coming along nicely!!! Your about a 2.5 hrs from me. I have friends in GR. Maybe we could check out your progress one day?
__________________
1971 Pontiac GT-37 Car is a junk yard dog and maybe one day will be restored.
|
|
#39
09-09-2012, 08:19 PM
|
||||
|
||||
|
Sounds great! Next time your in the area, let me know before hand with a PM and I'd love to take some time and do some Ponti- yacking with another fellow enthusiest
Mike |
|
#40
09-09-2012, 08:33 PM
|
||||
|
||||
|
Anyone use that new repair panel offered to fix this area?
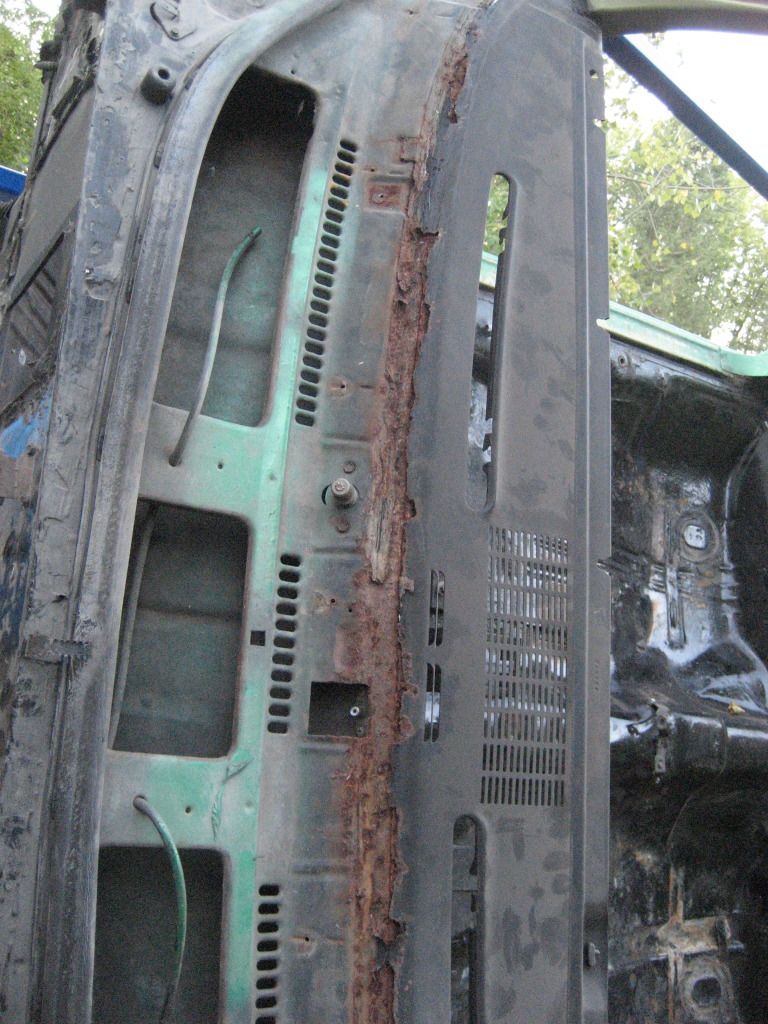  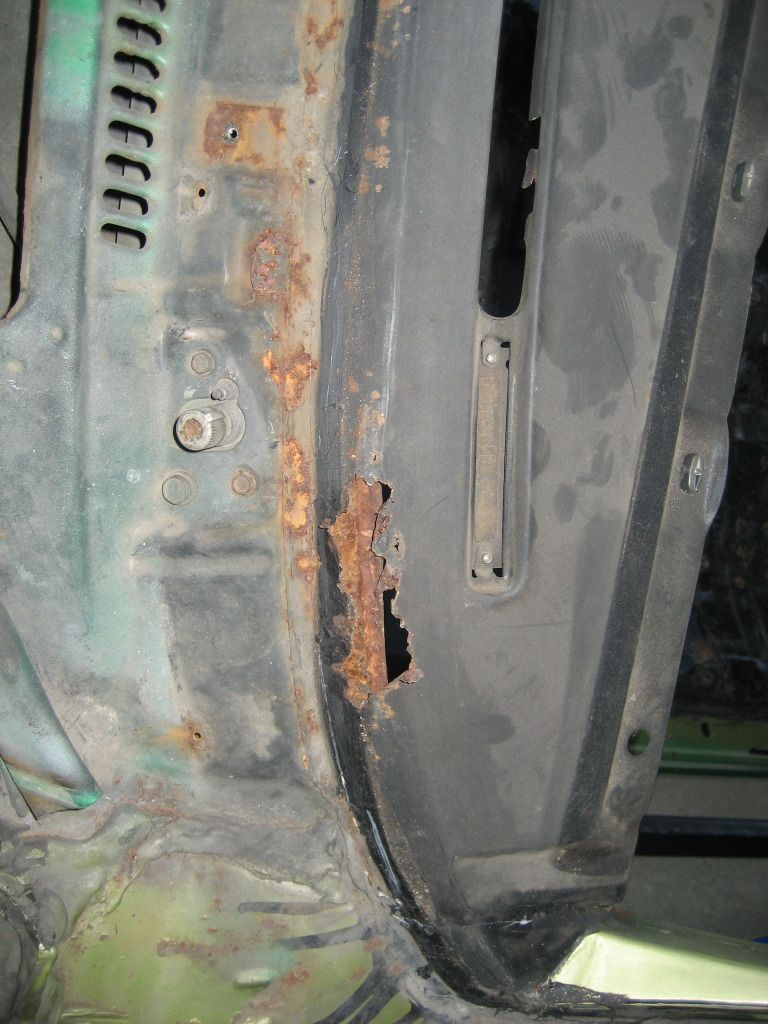 If it was just in one spot maybe under 10" long I'd simply patch it by welding in new metal yet this will take awhile...Mike |
| Reply |
| Thread Tools | |
| Display Modes | |
|
|
The PY Online Forums is the largest online gathering of Pontiac enthusiasts anywhere in the world. Founded in 1991, it was also the first online forum for people to gather and talk about their Pontiacs. Since then, it has become the mecca of Pontiac technical data and knowledge that no other place can surpass.


 Linear Mode

