


| FAQ |
| Members List |
| Social Groups |
| Calendar |
| Search |
| Today's Posts |
|
#101
 12-05-2020, 02:10 PM
|
||||
|
||||
|
Quote:
I have the big Eastwood unit too. It's a nice machine.
__________________
'69 GTO Convertible - Acquired October 2020. An all original project car. Restomod is underway PROJECT THREAD '83 Chevy Choo Choo SS El Camino - LT1 350/4L60e, Owned for 30 Years, completed 2nd restomod in 2018 PHOTO 2019 BMW 440ix - Twin turbo I6, 8spd auto. PHOTO '55 Chevy Bel Air Sport Coupe - Ram Jet 350 / T56 Magnum 6spd, Restomod Completed Sept. 2012, Sold Sept. 2021 PHOTO |
|
#102
12-17-2020, 01:15 AM
|
||||
|
||||
|
Quote:
I peck away at the car when the day is done. Today was hang and set the fenders day. A few years back Philip Borris wrote a book about the Norwood Assembly plant. I was kind of disappointed as it could have been a superb resource for how things were done, like how the fenders were hung etc. Accord to Keith the front clip could either go on in one piece or piecemeal - depending on the plant and sometimes which assembly line. It makes me grimace to think that guys half in the bag would hang and adjust a fender under 2 minutes. I did hang it with the inner liner though. Driver's side set - passenger tomorrow - maybe. I did also receive the U109 Bandits and had 235-55-17 Vogue V's installed. The US Mag center cap had the center turned flat and a 64-65 wire wheel hubcap decal installed. |
|
#103
01-14-2021, 02:16 AM
|
||||
|
||||
|
Work is eating up most of my day currently, but make time to peck away at the Lemans. Painter brought it back all finished, hopefully last time it makes that trip. First thing was to hang fuel tank with new pump.
Finally got around to testing it - was initially concerned but smoothed out and held a steady 58 PSI according to rail gauge and no leaks. I still give those quik-connect fitting a hard look. Quieter than my TA pump. Rewiring is taking a lot of time - I never can leave things stock. I am running a pair of relays for the headlights and grounding the hell out of everything. One issue are the horns - I was going to mount them up but thought I should test them first - pitiful sound from both. I will need to research and see if I can rebuild or clean them to sound correct - I want that nice Driver's Ed movie sound from the mid 70's. |
|
#104
01-14-2021, 07:11 AM
|
||||
|
||||
|
Yes, rewiring does take considerable time, but will patience, it pays in the long run. There were areas/sub-harnesses that I actually had to redo, in order to get the runs right with connectors in right areas.
I remember in the 90s I tried to go thru some horns. As I found, once you touch the adjustment screw, it never really gets back to what they sounded like originally. I finally bought some repop replacements, but they too don't sound like the originals. They sound much better than what I had, but still not like the OE ones. I just ended up living with it. Am curious what your experience will be bill, when you get to that point, please update. .
__________________
. 1970 GTO Judge Tribute Pro-Tour Project 535 IA2 http://forums.maxperformanceinc.com/...d.php?t=760624 1971 Trans Am 463, 315cfm E-head Sniper XFlow EFI, TKO600 extreme, 9", GW suspension, Baer brakes, pro tour car https://forums.maxperformanceinc.com...ght=procharger Theme Song: http://www.youtube.com/watch?v=7zKAS...ature=youtu.be |
|
#105
01-14-2021, 10:43 PM
|
||||
|
||||
|
I really enjoyed reading thru your thread and following your progress. It looks like your vert will be awesome when all finished up, congrats on your patience and attention to details.
|
|
#106
01-14-2021, 11:41 PM
|
||||
|
||||
|
Thank you - sadly shipping took up the whole damn day, no time for the Lemans. I plan on reinstalling the convt. top pump and then the whole top assembly - I need the space back for our shipping totes.
|
|
#107
01-17-2021, 06:38 PM
|
||||
|
||||
|
I got to work on mounting the top motor. I noted before that only 2 of those rubber mounts were used - the reason was the mount plate was welded pretty squirrely on the pan and one hole was only 0.100" deep - 3 cheers for 70's GM build quality!
I took a transfer punch and deepened the hole but there was no way the rubber was going to fit. Those things are a royal pain to install anyway. So I welded in a set of 1/4-20 x 1" pan head bolts as studs and used some grommets and nylocs with washers to mount. I figure the pump is almost 50 years old and don't feel like messing with those plugs when it does die. Once that was accomplished it was time to drop in the top assembly. I used the 2-pole lift, a piece of dunnage and a pair of temp brackets to raise the top. The trim stick on 68-72's floats unlike earlier years - my guess is GM sorted out it was far easier to fit a top in a fixture and drop it in as a unit. I found you need to tilt the top backwards and slide the trim stick under the body lip, then use a pinch bar to pop in to place. Once that is done line up the mounts holes and secure. It would have been interesting to see how the factory did this task (ie. folded top?). |
|
#108
01-21-2021, 09:10 PM
|
||||
|
||||
|
hanging some tin...
Blacked out the grilles and use 1970, 72 tail lights as the 71's are a royal pain to clean. Bought a set of Fiamm horns - the harness and sound leave a lot to be desired. The old horns now work for some reason, so them were blasted, painted and mounted - making sure they are well grounded! |
|
#109
01-21-2021, 09:45 PM
|
||||
|
||||
|
Not sure why but I can't see your photos on just this last post.
__________________
'69 GTO Convertible - Acquired October 2020. An all original project car. Restomod is underway PROJECT THREAD '83 Chevy Choo Choo SS El Camino - LT1 350/4L60e, Owned for 30 Years, completed 2nd restomod in 2018 PHOTO 2019 BMW 440ix - Twin turbo I6, 8spd auto. PHOTO '55 Chevy Bel Air Sport Coupe - Ram Jet 350 / T56 Magnum 6spd, Restomod Completed Sept. 2012, Sold Sept. 2021 PHOTO |
|
#110
01-21-2021, 09:45 PM
|
||||
|
||||
|
Nice. Yes, I ran an extra ground on my horns too. Made a post on the core for the grounds, and ran a dedicated wire to a common ground that is directly grounded to the batt. Used thread-serts all over the place too.
I remember my one marker light up front (pass side) was dimmer than the other side, now, that's no longer an issue. .
__________________
. 1970 GTO Judge Tribute Pro-Tour Project 535 IA2 http://forums.maxperformanceinc.com/...d.php?t=760624 1971 Trans Am 463, 315cfm E-head Sniper XFlow EFI, TKO600 extreme, 9", GW suspension, Baer brakes, pro tour car https://forums.maxperformanceinc.com...ght=procharger Theme Song: http://www.youtube.com/watch?v=7zKAS...ature=youtu.be |
|
#111
02-06-2021, 12:55 AM
|
||||
|
||||
|
I was able to get some done the past few days. Motor is now running, will need to pull out of shop and let PCM dial in the engine - it needs to warm up to 165° to do this, maybe tomorrow. Not sure if IAC is working...
Convertible motor lines hooked up and ready for fill - I have the "official GM" bleed kit (a tupperware box and hose) so I will do this before hooking up the rams to the top. Front tin hung - not happy at all with fitment. I am not sure if this is due to the wreck early in it's live or just crappy design. Note the side shot - bumper cannot go up any further. Perhaps the ends need to be pulled down some - this is outside of my current skill set. I do however like the mean-ass blacked out look of the grilles... I am mulling a small red arrowhead in the grille next to the letters ala 1972. edit: looks like the bumper is bent or more likely never straightened correctly by a shop as this and a few other online pix show  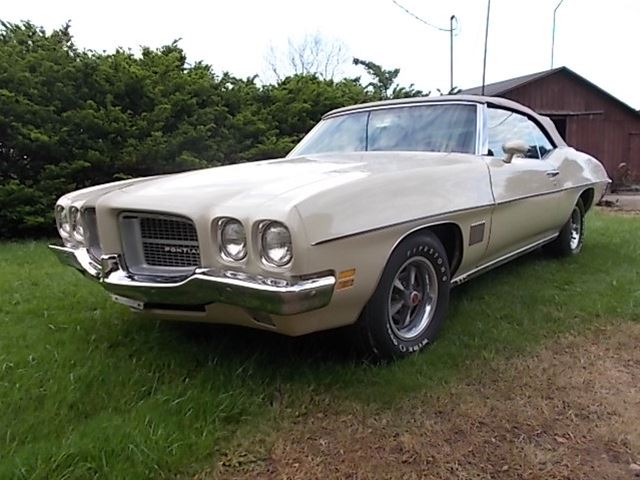 Last edited by Scarebird; 02-06-2021 at 01:09 AM. |
|
#112
02-06-2021, 10:21 AM
|
||||
|
||||
|
Mine was kind of like that, the bumper wasn't 'centered' in the fender recess. Some was due to the chrome shop and how they 'straightened' the bumper, and I was able to tweak it a little.
The rest was body bushings. I used a belt sander and made the core and forward frame bushings at the cowl about a 1/4" thinner, almost came right into line. Tightening some, loosening some, for final adjustments. Had to go back and shift the bumper a couple times, and adding washers too in order to adjust the 'tilt'. If it's a lot, you may also have to adjust the door & fender too. For me, it was time consuming, but worked. I think it was how the bushings were made but hard to say. My fenders and doors were OE too. That's one reason why I was confused why all the parts that came off didn't line up. That's what made me focus on the bushings. I contemplated elongating the frame/bracket holes, but got cold feet, and wasn't sure it would help. The 'straightening' I did helped with the fitment at the peak of the bumper to the 'nose', mine was touching the body piece, I had to 'twist' it outward some, among other things. When you 'twist' it, it effects the ends too, which way they 'point'. If you pull the top or the bumper 'beak' out, the end turn up, and visa-versa. .
__________________
. 1970 GTO Judge Tribute Pro-Tour Project 535 IA2 http://forums.maxperformanceinc.com/...d.php?t=760624 1971 Trans Am 463, 315cfm E-head Sniper XFlow EFI, TKO600 extreme, 9", GW suspension, Baer brakes, pro tour car https://forums.maxperformanceinc.com...ght=procharger Theme Song: http://www.youtube.com/watch?v=7zKAS...ature=youtu.be |
|
#113
02-06-2021, 10:23 AM
|
||||
|
||||
|
I think when I got the bumper rechromed, they swapped it for a different one too.
.
__________________
. 1970 GTO Judge Tribute Pro-Tour Project 535 IA2 http://forums.maxperformanceinc.com/...d.php?t=760624 1971 Trans Am 463, 315cfm E-head Sniper XFlow EFI, TKO600 extreme, 9", GW suspension, Baer brakes, pro tour car https://forums.maxperformanceinc.com...ght=procharger Theme Song: http://www.youtube.com/watch?v=7zKAS...ature=youtu.be |
|
#114
02-06-2021, 12:09 PM
|
||||
|
||||
|
After your post I examined it closer - it does have a bend upward in the middle. I have an extra bumper - I will see if it fits better at a later date and go from there.
|
|
#115
02-08-2021, 04:33 PM
|
|||
|
|||
|
Love the blacked out grilles. Made all the difference in the world on my 70 LeMans.
|
|
#116
02-12-2021, 10:53 PM
|
||||
|
||||
|
Red letter day: drove it around the block - no issues.
Edelbrock Fi works nicely, engine was slowly self tunings. Amazing that you can do this with a smart phone. Delphi steering box works excellent, will need to fully tighten lower control arm bolts. Rear with sphericals seem to work nice - will see how well once more is added. Shoulder belts will have to wait a few weeks; vendor is out of the GM buckled version. |
|
#117
02-14-2021, 12:16 PM
|
||||
|
||||
|
Nice; I imagine that was a good feeling after all the time you have invested over the past year or two.
|
|
#118
02-14-2021, 01:39 PM
|
||||
|
||||
|
It was - best part was not hearing any weird noises, clunks, etc.
|
|
#119
02-15-2021, 08:57 PM
|
||||
|
||||
|
I am curious on how the shoulder belts work out. Something I have considered lately...
__________________
'71 LeMans Sport convertible under going a frame off restoration |
|
#120
02-17-2021, 11:25 PM
|
||||
|
||||
|
Moving right along.
A week or so ago I noted a dent on the passenger fender - where the he!! it came from nary a clue. I had a paintless dent guy come in - excellent work. One thing that helped immensely was I drilled and rubber plugged a couple of access holes in the cowl opposite the vent attaching nuts - it paid off big. Much easier for Joe to do his thing! Working on the steering I buggered up the threads on the steering shaft. I ordered a 9/16-18 die from MSC and welded it to a beat up old pair of Vise-Grips. Cutting the die in half then allowed me to grab a section of good thread and work back, cleaning up the shaft. This allowed me to finish up the mounting of the custom steering wheel. I always liked the Custom Sport wheel, I personally think the Formula wheel is a bit much for a GTO/LeMans. I was told the quality of the repops was not that good - so I made a custom unit. The spokes were covered with a trapazoid stainless piece and tack welded from behind. Hardest part was mounting it - the supplied hub left a bit to be desired. Forever Sharp makes a damn good hub - same GM splines. I needed to mod it some in a lathe but once done looked good. Horn contact was held by a special shaft extension and horn electrical made with a soda straw, nail and ball point pen spring! horn is quite loud! Unfortunately the wiring harness does not use a provision for a key buzzer... Sitting outside with her little sister: |
| Reply |
| Thread Tools | |
| Display Modes | |
|
|
The PY Online Forums is the largest online gathering of Pontiac enthusiasts anywhere in the world. Founded in 1991, it was also the first online forum for people to gather and talk about their Pontiacs. Since then, it has become the mecca of Pontiac technical data and knowledge that no other place can surpass.


 Linear Mode

