


| FAQ |
| Members List |
| Social Groups |
| Calendar |
| Search |
| Today's Posts |
|
#61
 03-05-2008, 06:01 PM
|
|||
|
|||
|
OVERULD - the exhaust manifold shroud on the driver's side manifold is indeed painted black. The original one was black on the inside and after doing some research it seems that 99% of 1970 Ram Air III shrouds were black from the factory. Ram Air IV shrouds seem to be mostly siver cad plated.
Dr. Doug - the shift linkage is all correct and original to the car. I am posting up a picture of the linkage that runs to the swivel on the frame to actuate the steering column lock. The engine color is my own custom-mixed DuPont acrylic enamel. The Pontiac engine color in the spray cans just doesn't seem to have enough green in them as the original engine color did.....so I developed my own formula. I can give you the DuPont formula if you'd like it. |
|
#62
03-05-2008, 06:06 PM
|
|||
|
|||
|
Here is a picture of the original gas tank. It had all of it's stampings in blue paint. There was also a stamp on the top that I have not seen reproduced yet. It says "RMCO" with a big "V" underneath it. I basically had to create my own stencil for that to use on the new tank.
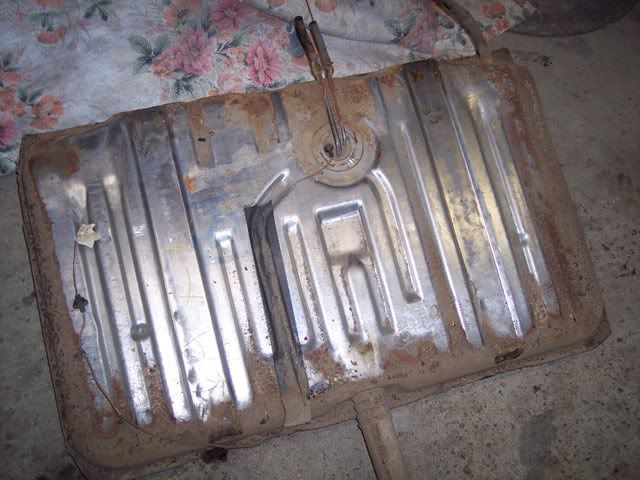 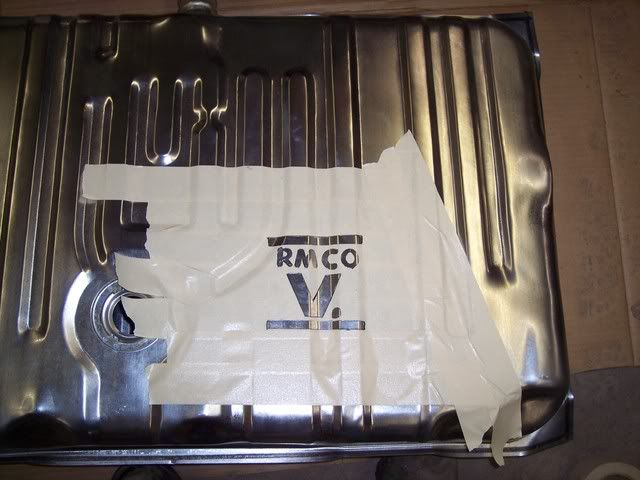 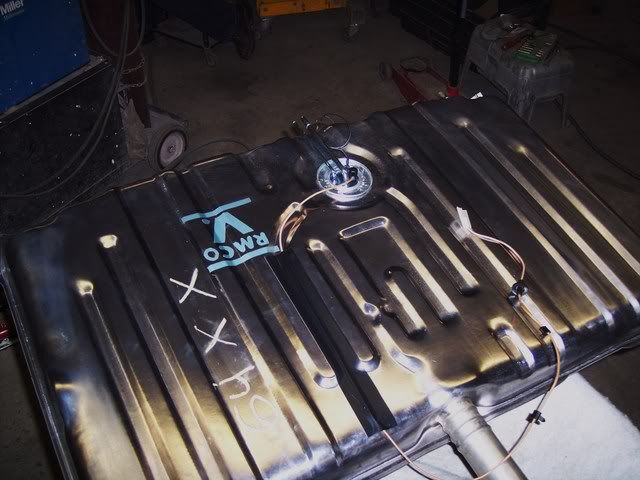 Beneath the "RMCO" stamp you can barely make out the "USS" stamp that we normally see......also done in light blue. I chose to put that one on the bottom of the tank.  Also.....a picture of the key lock linkage and the clutch Z-bar linkage installed. 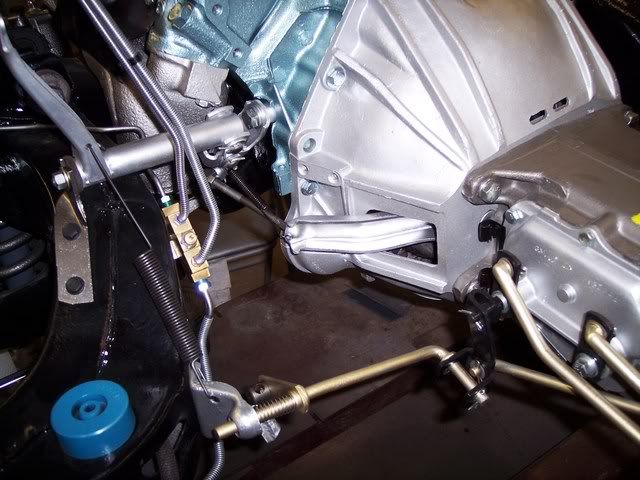
|
|
#63
03-06-2008, 01:13 AM
|
||||
|
||||
|
You are a very talented individual Jason. That car couldn't have landed in better hands.
__________________
Greg Reid Palmetto, Georgia |
|
#64
03-06-2008, 06:45 AM
|
|||
|
|||
|
Clutch fork boot missing ? Beautiful job none the less, very impressive and detailed orientied.
Tim john--- |
|
#65
03-06-2008, 06:07 PM
|
|||
|
|||
|
Thanks guys!
Tim - We have a new clutch fork boot on the way. I thought the original one was OK but I found a tear in it once I started cleaning it. Here is a picture of the restored original Ram Air flex fan: 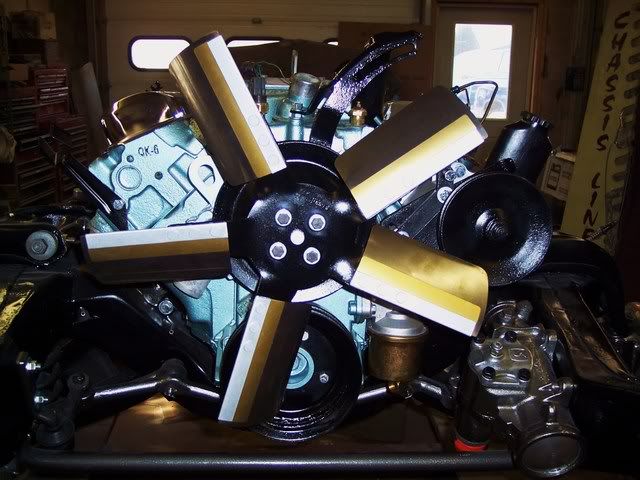 And a new set of reproduction G70-14 Firestone Wide Ovals 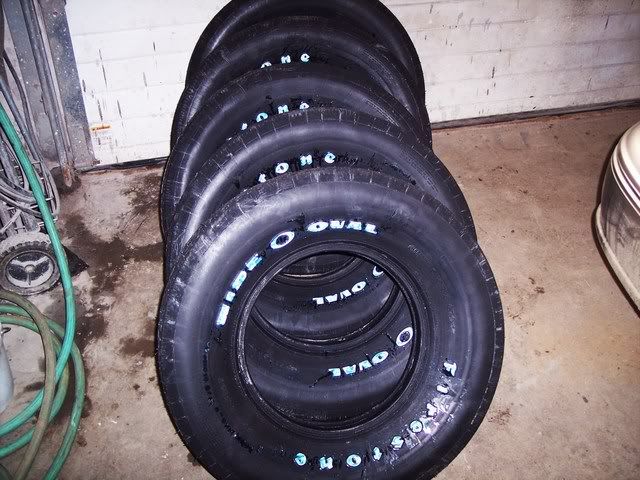 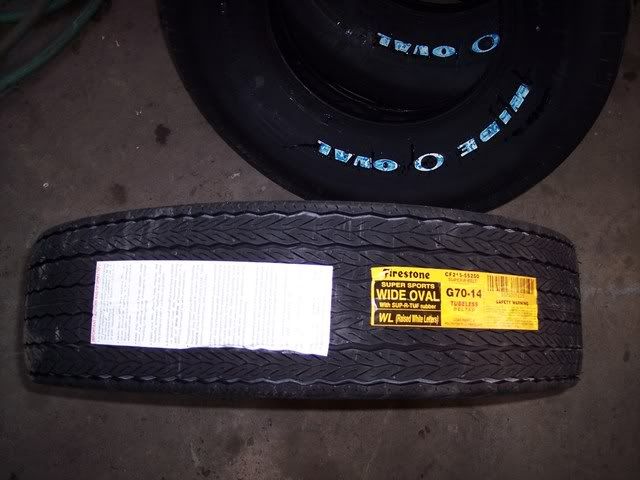
|
|
#66
03-06-2008, 06:45 PM
|
||||
|
||||
|
How long has this taken? I wish I had sent my car up there.
__________________
1965 TriPower GTO, 1967 GTO, 1969 GTO, 1969 Judge, 1972 GTO, 1977 Smokey and the Bandit, 1989 TA ProStreet, 1968 Firebird NHRA 10.90 racecar, 1963 Tempest S/Gas |
|
#67
03-06-2008, 08:26 PM
|
|||
|
|||
|
EVERYTHING YOU HAVE DONE ON THE JUDGE SO FAR IS GREAT. I WAS CURIOUS ON HOW YOU RESTORED THE FAN. KEEP UP THE GOOD WORK AND GREAT PICTURES.
|
|
#68
03-06-2008, 08:46 PM
|
|||
|
|||
|
Quote:
In regards to the fan, From the factory, the center hub was painted black, and the folded metal parts that hold the blades with rivets were bare metal. The flexible fan blades themselves are stainless steel. After a thourough cleaning and polishing of the blades, we masked off the stainless flex blades with duct tape and then sandblasted the surface rust off the rest of the metal parts. We then painted the "backbone" of each of the fan blades to look like bare metal. After that was dry, we then masked those areas off (including the back side of the rivets).........and then we painted the center hub black. Each fan blade has a thicker piece of stainless steel wrapped with it that acts as a stiffener to help keep the blades' form and also to give the rivets something stronger to clamp down on. Those pieces of metal had a golden look to them. Since we couldn't remove them and have them plated without destroying the fan, we decided to paint them with a light mist of gold to freshen them up. |
|
#69
03-06-2008, 09:17 PM
|
||||
|
||||
|
Jason, you are doing such an incredibly thorough job on this restoration with virtually nothing overlooked, that I have to ask...
Maybe it's just the reflection in the pictures, but it looks like many of the parts that were rusty/pitted (frame, engine pulleys, alternator bracket) that you have stripped them and just painted over the pits. Why are you not doing more to fill the pits in on these parts before you put the final paint coat on them? I know it may be more time consuming, but certainly within your ability. Pitted parts just seem to scream out on an otherwise so nicely done car. Or maybe I'm just the only one who notices stuff like that -- would it be considered "over restoring"...? Anyway, I admire the attention to the details you're putting into it, and enjoy watching your progress. This car was lucky to have been found by you.
__________________
keith k 70 Trans Am RA III / T400 / Lucerne Blue / Bright Blue 70 Trans Am RA III / M20 / Lucerne Blue / Sandalwood 70 Formula RA III / M21 / Lucerne Blue / Bright Blue |
|
#70
03-06-2008, 09:46 PM
|
|||
|
|||
|
Quote:
That being said, when you sandblast rusty parts......you're always gonna get some pits. That can't be avoided. As I said before, I did skim-coat the bottom and sides of the frame with filler to eliminate most of the pitting. I did not do that to the top of the frame because once the body is on, you can't see it anyways. As for the pitting you see on the alternator bracket, you can't fill in that area because that is where the alternator is tightened down. Filler would crack as soon as you tighten down the belt. I could locate a new one......but it's just not that noticable in real life. The flash on the camera just makes it stick out. Just today my dad was skim-coating the air cleaner assembly and Ram Air pan just to make them nice and smooth. 
|
|
#71
03-06-2008, 10:54 PM
|
||||
|
||||
|
Quote:
Quote:

__________________
keith k 70 Trans Am RA III / T400 / Lucerne Blue / Bright Blue 70 Trans Am RA III / M20 / Lucerne Blue / Sandalwood 70 Formula RA III / M21 / Lucerne Blue / Bright Blue |
|
#72
03-07-2008, 09:26 AM
|
||||
|
||||
|
Quote:
|
|
#73
03-07-2008, 10:48 AM
|
||||
|
||||
|
Jason,
Your work looks fantastic! It's that attention to detail that makes the difference once the car is assembled & finished. Did you replace the gas tank & where did you get the USS logo stencil? Keep the pics coming! |
|
#74
03-07-2008, 12:47 PM
|
|||
|
|||
|
Very impressive work, I'm sure you will have a long waiting list very soon, if not already. I was wondering about the process/plating used on the gas tank. I'm working on mine now. Really appreciate the time you have taken to divulge the info in this thread. Thanks Dave K.
|
|
#75
03-07-2008, 05:57 PM
|
|||
|
|||
|
Thanks for all the compliments, guys.
The gas tank and sending unit are brand new parts supplied by Inline Tube. They also supplied the US Steel stencil along with all the fluid lines and alot of other details. Here is a photo of the original 55 AMP alternator #1100700 with a 12/69 date code......completely rebuilt, restored and mounted on the engine: 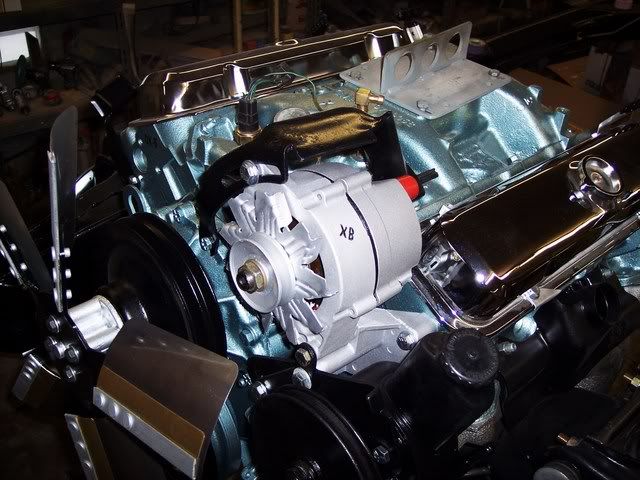 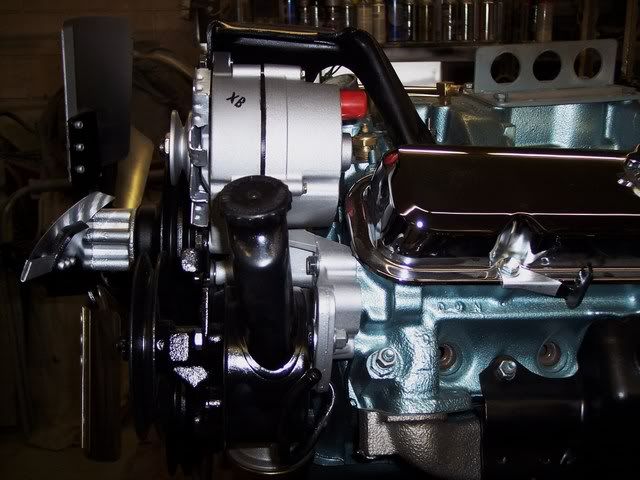 And a couple pictures of the restored Ram Air pans. The original ThermoVac flaps in the upper pan were rusty and not even able to move. I had to completely dissassemble them and sandblast the parts and rebuild them....and now they work perfectly. 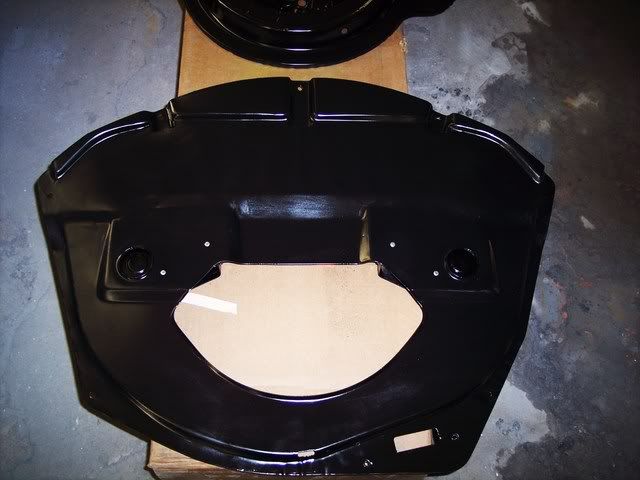 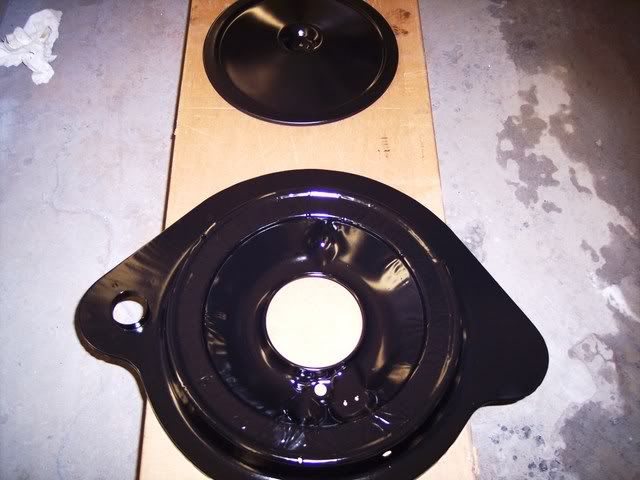
|
|
#76
03-10-2008, 10:46 PM
|
|||
|
|||
|
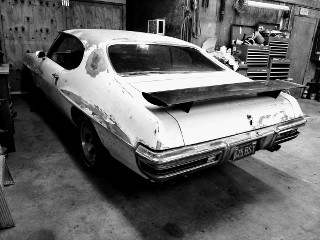
Here are some pictures of the body coming along. The bottom of the car was cleaned and sandblasted to bare metal.......and immediately coated with epoxy primer. The bottom of the car will be done in the correct black primer with white overspray. The body plugs will be re-installed after the painting is done, with the correct tan-colored sealer poking through.
 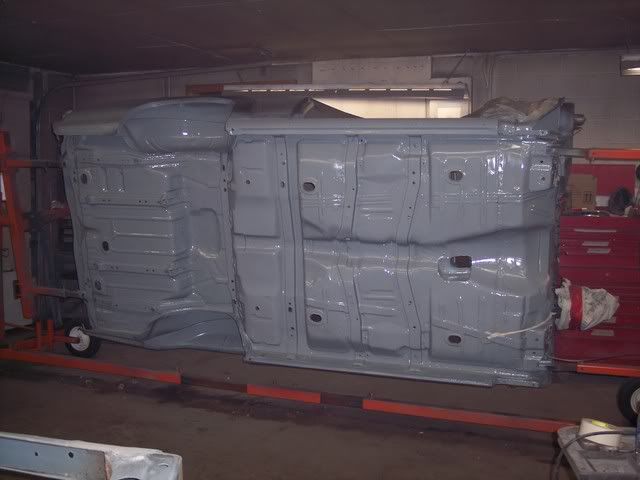 The only real rust-through on the body was around the rear quarter panel lips on both sides. We bought reproduction quarter panel skins and grafted in only the areas we needed. We also replaced the very outer lip of the outer wheelhosues so we could preserve the part number stamp on the original wheelhouses. 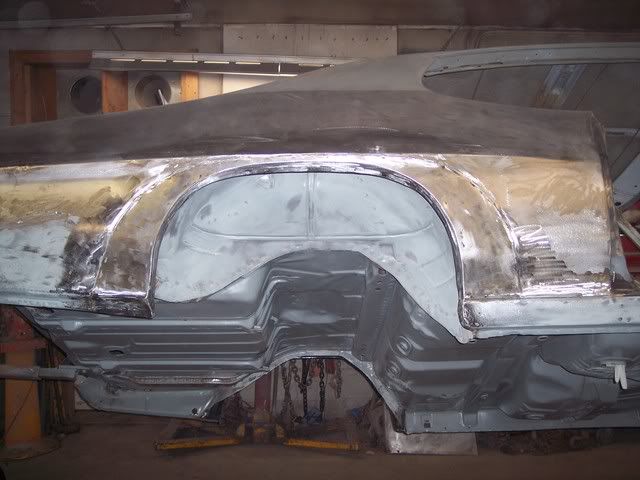 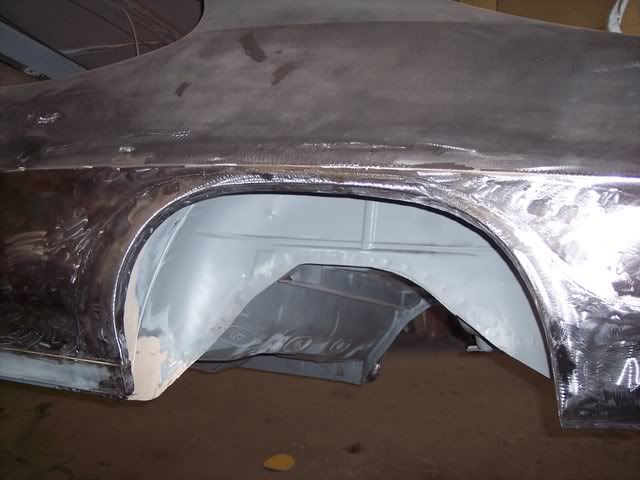
|
|
#77
03-10-2008, 11:11 PM
|
|||
|
|||
|
Wow, I wish I still had my 70 even after 22 years I still miss it. great documentation on the restore. Gives me ideas on the 70 Judge model I am working on.
Tim
__________________
A clone should NEVER bring more money that a true example. |
|
#78
03-11-2008, 12:24 PM
|
||||
|
||||
|
One word is all I can say Jason..... Wow!!!. I wish I lived closer to ya as I'd love to stop in and shake yer hand. You've done a spectacular job.

__________________
 Gary Get in, ShuT Up, Hang On! Member of the Baltimore Built Brotherhood MY GTO built 4th Week of March 1966 "Crusin' Is Not A Crime" Keep yer stick on the ice. |
|
#79
03-13-2008, 05:12 PM
|
|||
|
|||
|
Thanks again for the nice comments guys!
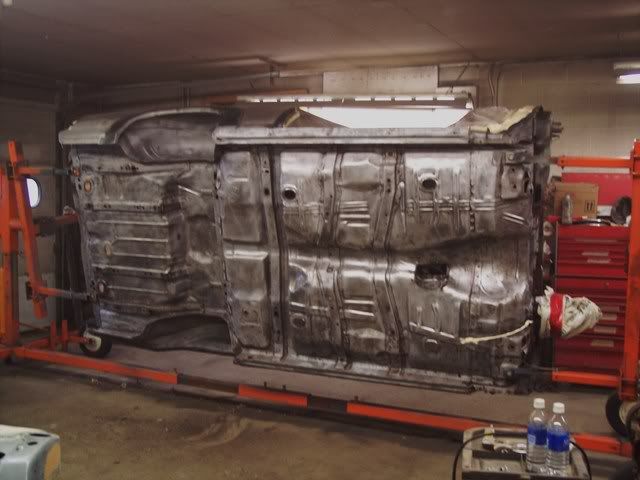
Here are the quarter panels all finished and in urethane filler primer, which will now be wet-blocked to perfection: 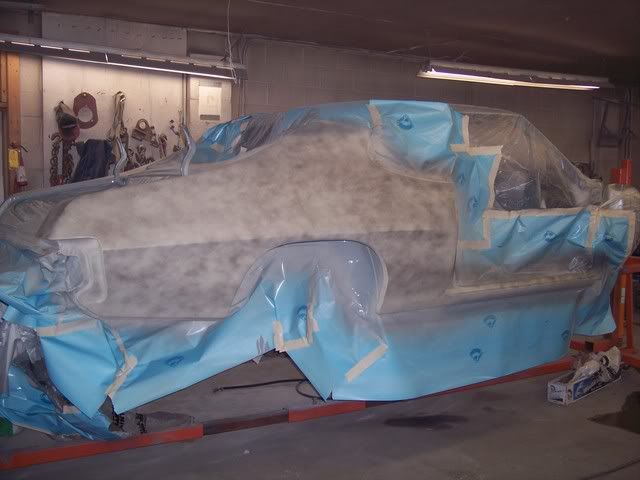 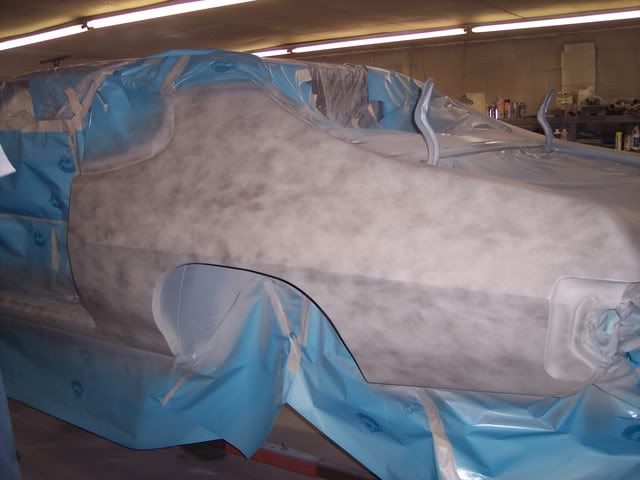 Here is the original 7040273 WC Ram Air Q-Jet that I rebuilt and restored. The date code is 295th day of 1969. Notice the large orange "R" stamp on the side of the carb that I found during disassembly: 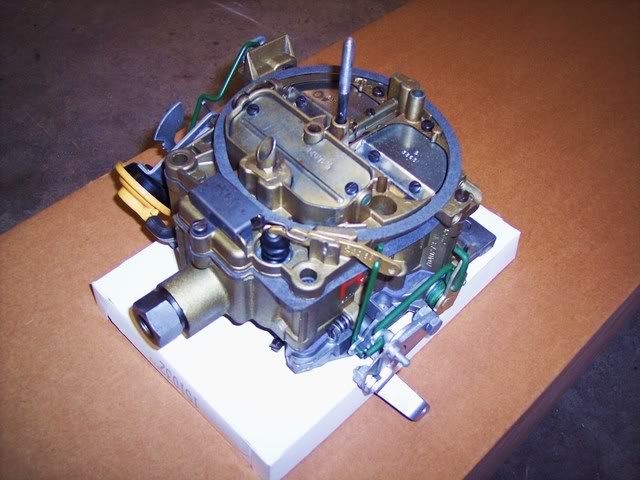 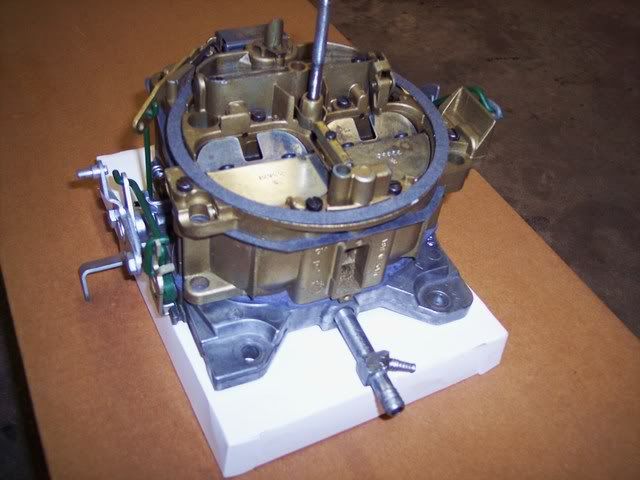 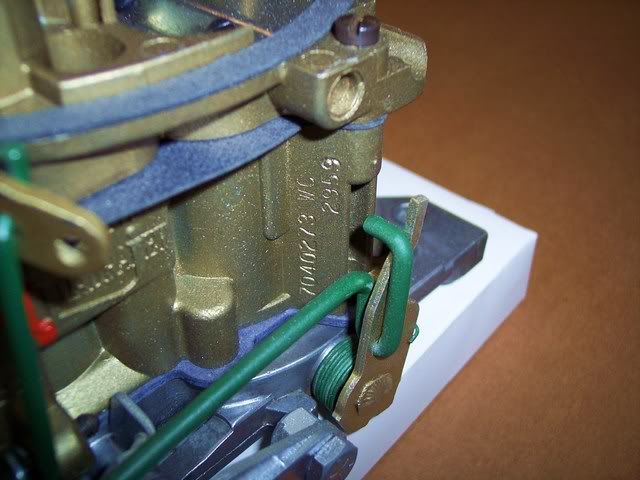 Here are the wheels all restored, including the backsides which are a light gray color with dark gray overspray through the holes in the rim: 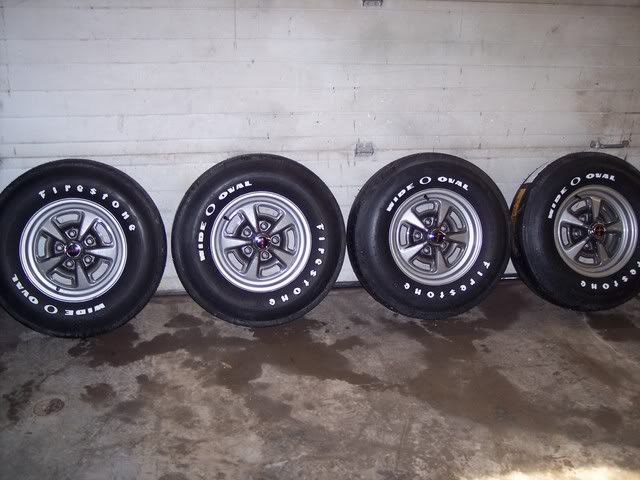 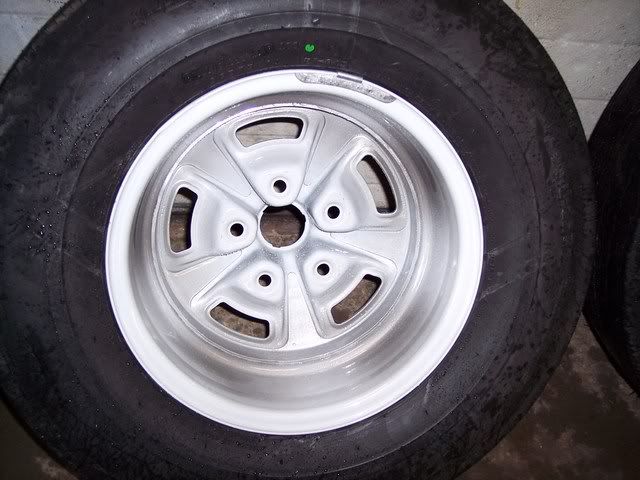 And the chassis......which is starting to look like a contender. 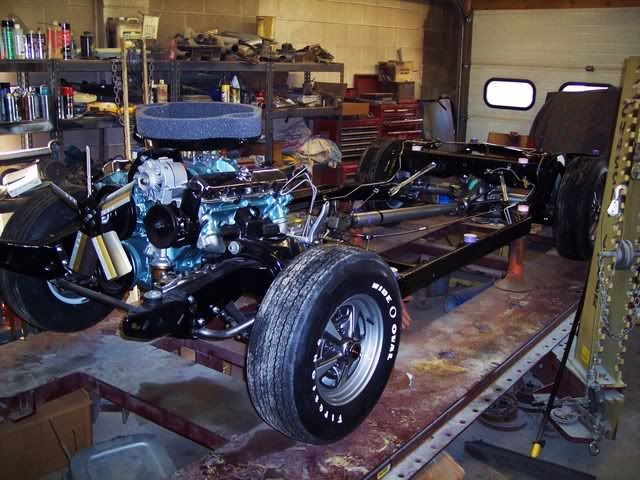
|
| The Following User Says Thank You to JasonD For This Useful Post: | ||
|
#80
03-13-2008, 05:46 PM
|
||||
|
||||
|
Jason:
I think Scott Tieman has some competition - your work and attention to detail is amazing. I'm not knocking Scott's work at all - I've seen his work and your's looks to be in the same class. Keep it up! BJ
__________________
1971 GTO 455 HO 4-speed - Cameo White, White Vinyl Top, Jade Green Interior, Ram Air Hood, AC, Honeycombs and 8-track 1974 Formula 455 I Owned in 1975-1976. Now Own Its Twin From Same Dealership 
|
| Reply |
| Thread Tools | |
| Display Modes | |
|
|
The PY Online Forums is the largest online gathering of Pontiac enthusiasts anywhere in the world. Founded in 1991, it was also the first online forum for people to gather and talk about their Pontiacs. Since then, it has become the mecca of Pontiac technical data and knowledge that no other place can surpass.


 Linear Mode

