


| FAQ |
| Members List |
| Social Groups |
| Calendar |
| Search |
| Today's Posts |
|
#221
 12-02-2013, 11:25 PM
|
|||
|
|||
|
Quote:
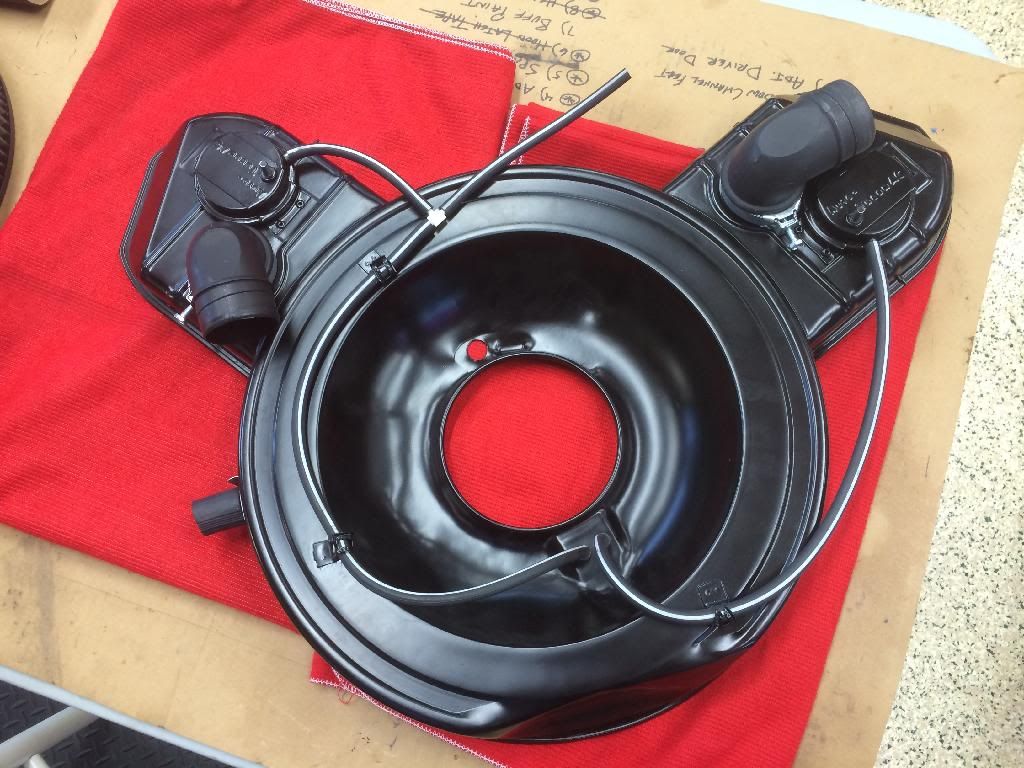
This is how I think the vacuum hoses ran: 1st Thermo Switch Port:vacuum directly from intake to one port of thermo switch 2nd Thermo Switch Port: other port of the thermo switch to the "t" Both Flappers: "T" to each flapper. That is the only way the thermo regulates both flappers. |
|
#222
12-02-2013, 11:34 PM
|
||||
|
||||
|
I have to agree
|
|
#223
12-02-2013, 11:49 PM
|
||||
|
||||
|
Quote:
|
|
#224
12-03-2013, 12:10 AM
|
|||
|
|||
|
Quote:
|
|
#225
12-03-2013, 12:33 AM
|
||||
|
||||
|
Quote:
I am open to being wrong - it happens a lot and I may very well be wrong here. However, spend a little time first with a vacuum pump and a heat gun and see if you don't come to a different viewpoint than you currently have. I've got two NOS sensors coming in the mail that I will also check. I'll be interested in hearing the results of your effort. BTW - the part about doing it a certain way just so it was nice and neat was an unnecessary cheap shot. I may have thick skin, but that suggestion added nothing to your post that was pertinent in determining the correct technical way to do something. I may not have 10,000 posts, but there should be enough for the reasonable person to ascertain that I am not lazy and looking for the easy way out. |
|
#226
12-03-2013, 12:51 AM
|
||||
|
||||
|
On the master cyl. I posted this earlier, take it for what it is.
Quote>"You are right, it wasnt phosphate, but it was semi gloss (60% roughly) when new. It was cheap black Alkyd enamel paint which fades fast ( like all cheap alkyd enamels do). The durability of that original crap paint is slightly better than horrible. After 2 years they looked nearly flat. Only "masters" shipped bulk in crates for sub assembly got the paint, brand new ones over the counter in 72 were unpainted like they are today." < End Quote pic was taken with a flash ( hence the booster look) on a very very low mileage F body. Car was around 37 years old at time of picture
__________________
"The Future Belongs to those who are STILL Willing to get their Hands Dirty" .. my Grandfather Last edited by Formulabruce; 12-03-2013 at 01:06 AM. |
|
#227
12-03-2013, 01:22 AM
|
|||
|
|||
|
Bob.. no cheap shot meant, not at all. If I only had enough space to list all the ,what I now know as, stupid sh!t I have done in attempts to make my engine bay's look nice and neat..well it is a long list. I think we have all done things like this. And yes that comment did add to my post. Often we all try and have things look nice and neat when in fact original design often didn't care about nice and neat. I am guilty ..without a doubt.. You know.. I started adding a disclaimer"this is just my opinion" to many of my posts because readers get bent sideways at some of my comments. Guess I will start adding a new one" please do not take my comments personally, they are not meant that way".. for the love of God.... good 'nite bob
|
| The Following User Says Thank You to 70RAlll For This Useful Post: | ||
|
#228
12-03-2013, 11:35 AM
|
||||
|
||||
|
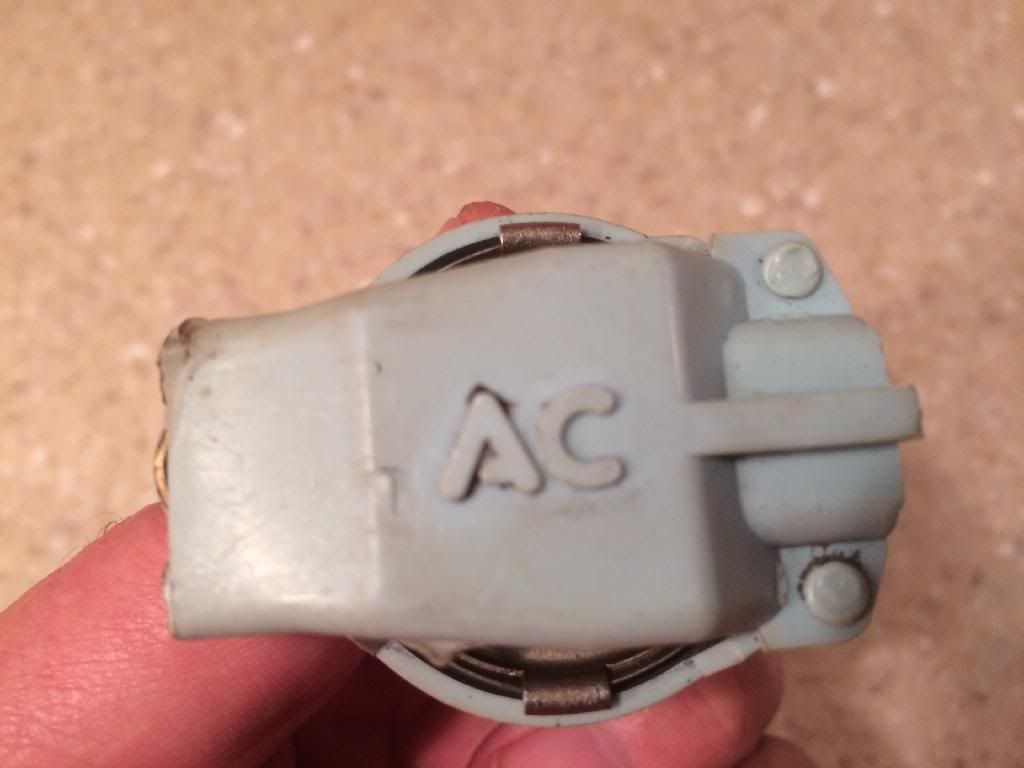
Quote:
 Is the Black one anyone has seen before? The one Bob has "AC" faces opposite of the black one too?
__________________
Mike/Illinois |
|
#229
12-03-2013, 02:27 PM
|
||||
|
||||
|
...they also come in green, Mike
 Is that a "Trans Am" pen being used to prop them up? |
|
#230
12-04-2013, 10:24 PM
|
|||
|
|||
|
Bob...I see you have a bracket that mounts to the water neck outlet on the intake manifold...it looks as though it helps the upper radiator hose stay in place...I have never had this...is this a part the 455 H.O.s all had?... or a Formula only item?...am I missing mine?...thanks!!
Last edited by transam1972; 12-04-2013 at 10:29 PM. |
|
#231
12-04-2013, 10:50 PM
|
|||
|
|||
|
Quote:
|
| The Following User Says Thank You to 70RAlll For This Useful Post: | ||
|
#232
12-05-2013, 01:46 AM
|
||||
|
||||
|
Quote:
Do you mean the rear alternator bracket?
__________________
1970 Formula 400 Carousel Red paint on Black standard interior A no-engine, no-transmission, no-wheel option car. Quite likely one of few '70 Muncie three speed Formula 400's left. 1991 Grand Am: 14.4 @ 93.7mph (DA corrected) (retired DD, stock appearing) 2009 Cobalt SS: 13.9 @ 103mph (current DD; makes something north of 300hp & 350ft/lbs) |
|
#233
12-05-2013, 03:37 PM
|
|||
|
|||
|
yes...is that not an 80 amp. alt.?..my T/A has 80 amp. but no rear bracket? thanks
|
|
#234
12-05-2013, 04:12 PM
|
||||
|
||||
|
I know the early cars got them, I have one;
 (old pic)
__________________
1970 Formula 400 Carousel Red paint on Black standard interior A no-engine, no-transmission, no-wheel option car. Quite likely one of few '70 Muncie three speed Formula 400's left. 1991 Grand Am: 14.4 @ 93.7mph (DA corrected) (retired DD, stock appearing) 2009 Cobalt SS: 13.9 @ 103mph (current DD; makes something north of 300hp & 350ft/lbs) |
|
#235
12-05-2013, 04:16 PM
|
||||
|
||||
|
__________________
Mike/Illinois |
|
#236
12-05-2013, 05:31 PM
|
|||
|
|||
|
the one threaded hole on the back of my alt. appears never have to been used...certainly does not need it...I will have to check other 72 T/As....thanks
|
|
#237
12-05-2013, 09:53 PM
|
||||
|
||||
|
Quote:
__________________
"The Future Belongs to those who are STILL Willing to get their Hands Dirty" .. my Grandfather |
|
#238
12-05-2013, 09:54 PM
|
||||
|
||||
|
Quote:
To illustrate, the picture below the bracket on left is the more common one for the 55 amp alt. The one on the right is for the fixed position 80 amp Alternator. Its like a mirror image of the other one. Sorry for the short hijack...
__________________
"The Future Belongs to those who are STILL Willing to get their Hands Dirty" .. my Grandfather Last edited by Formulabruce; 12-05-2013 at 10:01 PM. |
|
#239
12-07-2013, 01:29 PM
|
|||
|
|||
|
I am confused..did 80 amp get a rear holding bracket or not...sorry about this
|
|
#240
12-07-2013, 02:44 PM
|
||||
|
||||
|
The 80 Amp alternator, which is the one that is mounted in a non-adjustable position (the idler pulley sets the adjustment) has a large bracket in the rear with a spacer. If you ordered A/C and the rear defogger - the glass with the electric grid, you got the 80 Amp alternator. Here is a shot of the bracket and spacer and bolt from my 73 SD. Both of my 72's had the same set up as well.
BTW, the bracket is actually grey phosphate and not painted. |
| The Following 3 Users Say Thank You to njsteve For This Useful Post: | ||
| Reply |
|
|
The PY Online Forums is the largest online gathering of Pontiac enthusiasts anywhere in the world. Founded in 1991, it was also the first online forum for people to gather and talk about their Pontiacs. Since then, it has become the mecca of Pontiac technical data and knowledge that no other place can surpass.


 Linear Mode

