


| FAQ |
| Members List |
| Social Groups |
| Calendar |
| Search |
| Today's Posts |
|
#241
 08-17-2011, 10:58 PM
|
|||
|
|||
|
Quote:
I have also used about $30 worth of wire wheel brushes. I generally get them from Northern tool for $1.49 or $1.99 depending on the size. However Northern Tool is out of stock, so I end up buying the same made in China brush from Home Depot, but packaged in a plastic card pack for $3.87. I have also used around $25 worth of DA sanding pads and 3" reloc disc pads. This is not even cheap when you do it yourself! Here is the bracing with full cleaning. It's actually looks a little better than I thought it did last night when I called it a night. 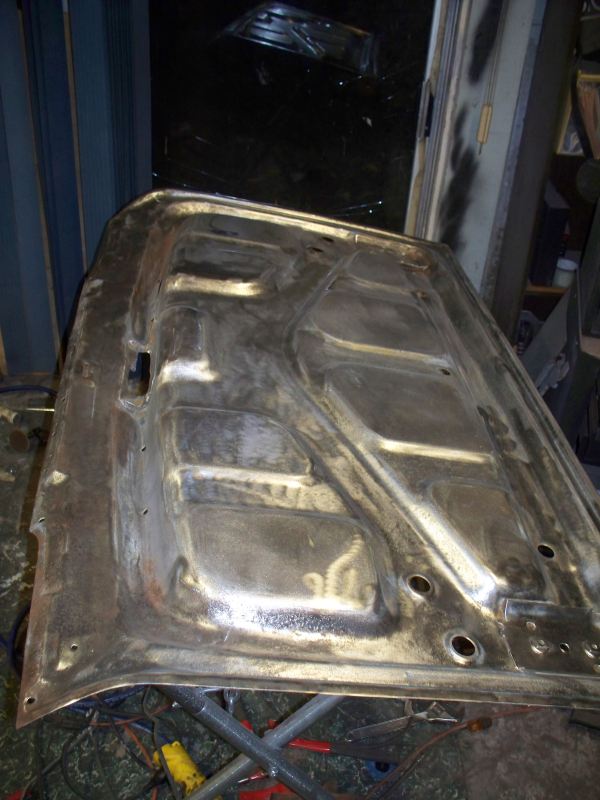 Now for some close ups of various areas. I don't know what flash is picking up to create the yellow reflection, the metal is not yellow. In this closeup you can see most of the rust has been removed but there is still a few pits with black.  A shot showing the front part of the bracing, this is looking pretty good. 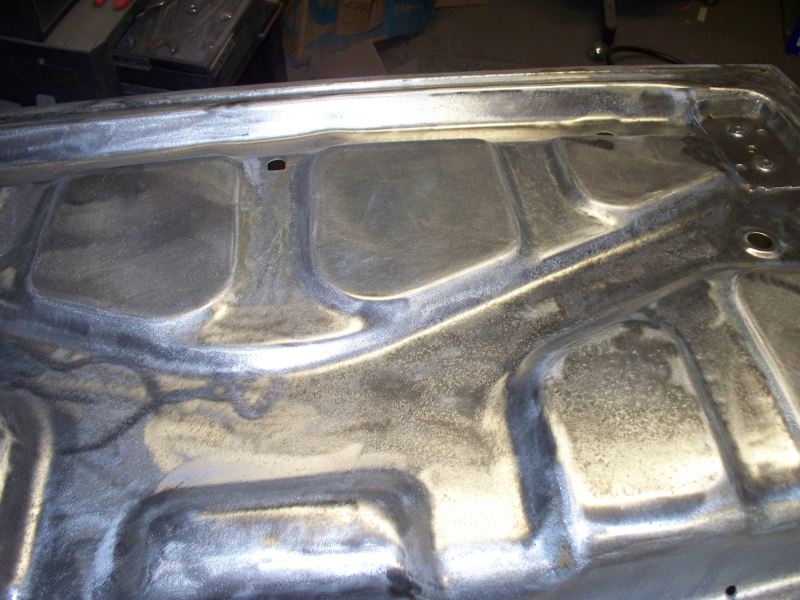 The lip that the skin folds over is clear of rust for about half of the edge. 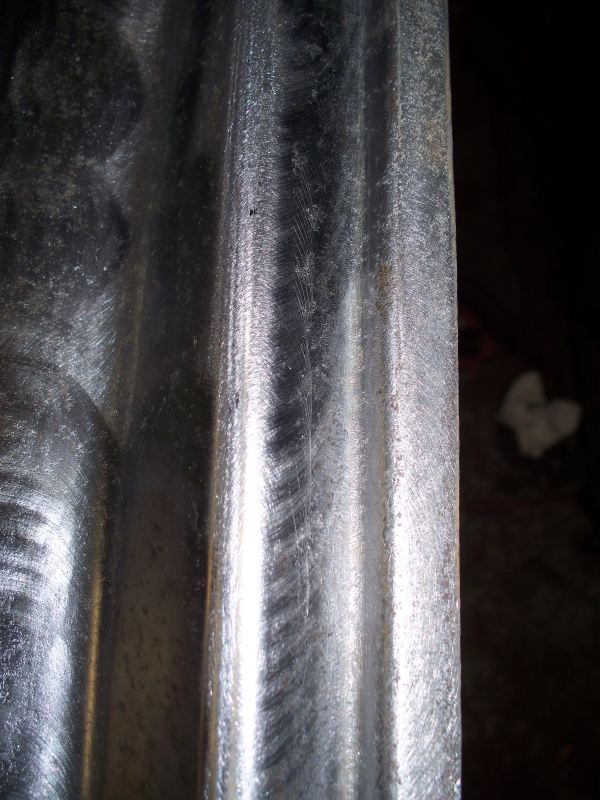 Some parts still have a lot of rust remaining. 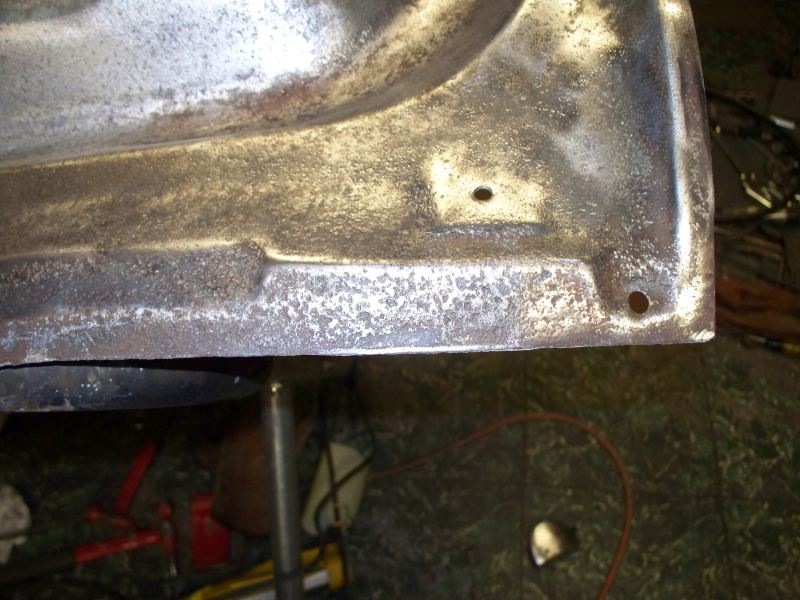 This corner is mostly clear of rust, only a small amount of black specs left.  And of course painting it will Naval Jelly again. I have quit coating some of the areas that are clear of rust. Some of the problem areas may require another 3 or 4 treatments. 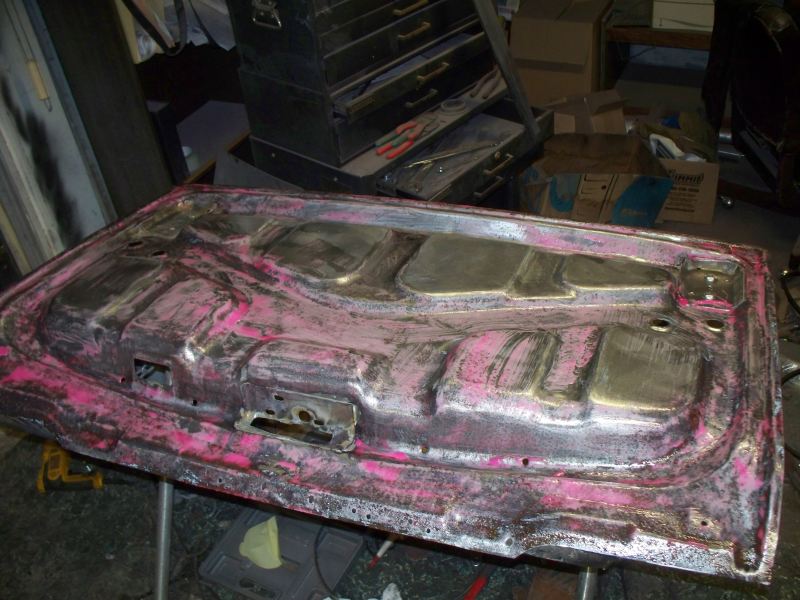 I'm probably going to take a break from the rust treatment and work on something else for a day or two, this rust removal gets old in a hurry.
__________________
68 Lemans - GTO appearance LS3 68 Eldorado - waiting for restoration 96 Roadmaster Wagon 2014 Infiniti Q50S Hybrid Marietta GA Last edited by fbrown; 08-18-2011 at 12:00 AM. Reason: typo |
|
#242
08-19-2011, 12:00 AM
|
|||
|
|||
|
Rust treatment continued:
This is the result from last night after washing and scrubbing with a brush. 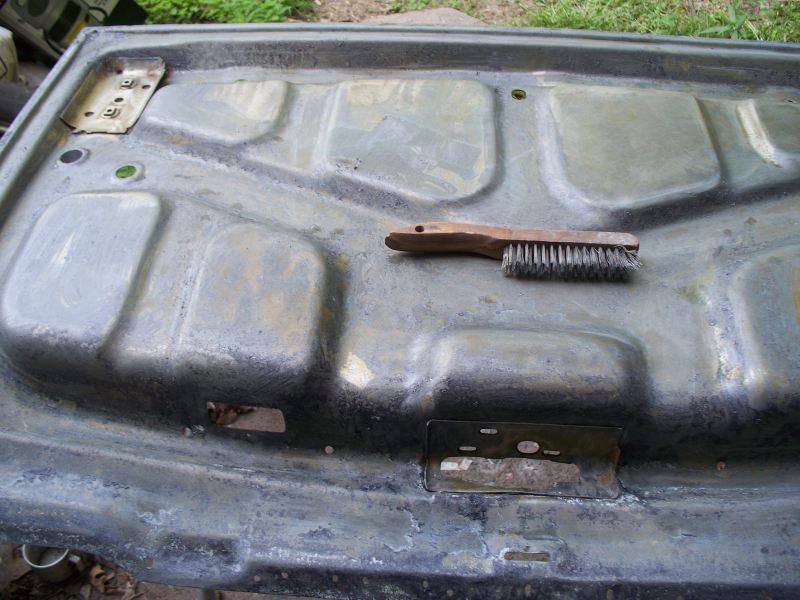 And DA'ing and wire wheel brushing the problem area. This area is getting a lot better but still has numerous bits of rust remaining. 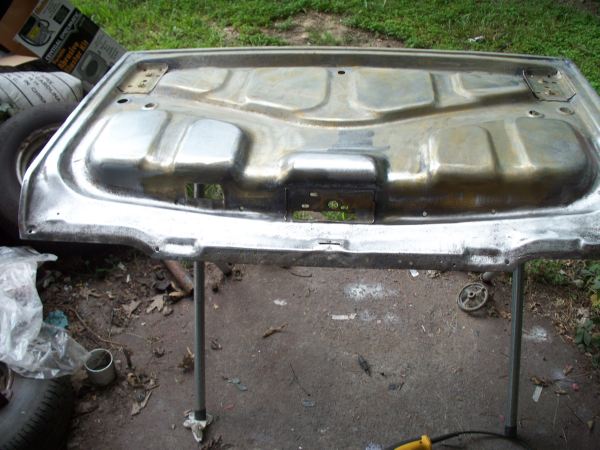 I decided I would treat only the problem area since it's clear it will need a few more treatments of NJ to remove the rust. 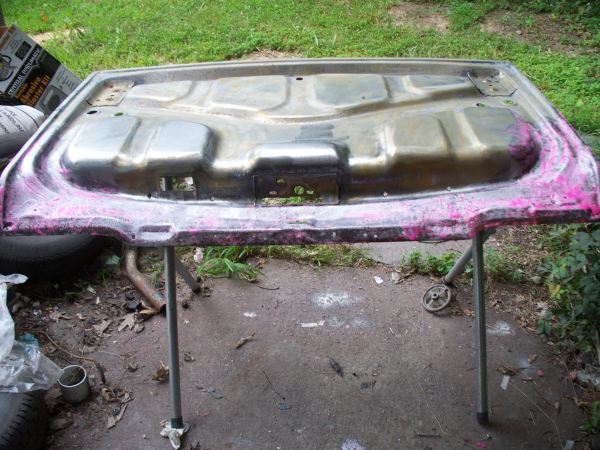 After washing, DA'ing and wire wheel brushing most of the rust is gone. I probably need one more treatment of Naval Jelly for the entire bracing and I can call it done. 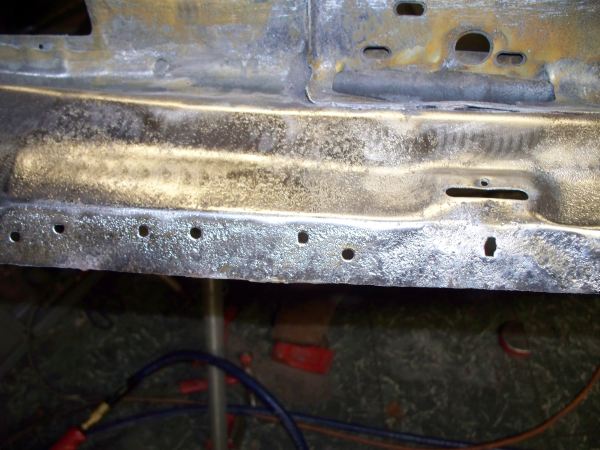 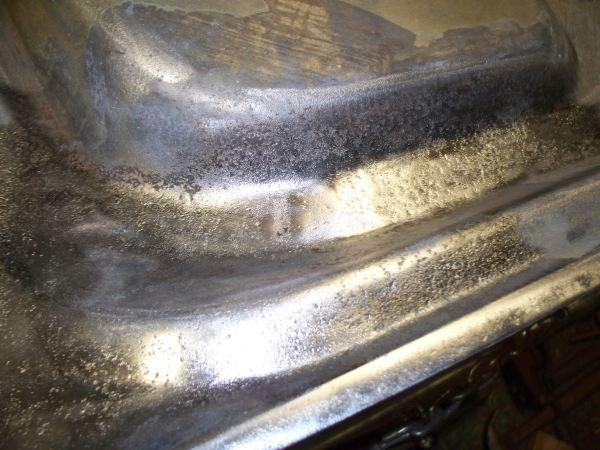 I worked on a few other things today. I installed headliner mounting strips. 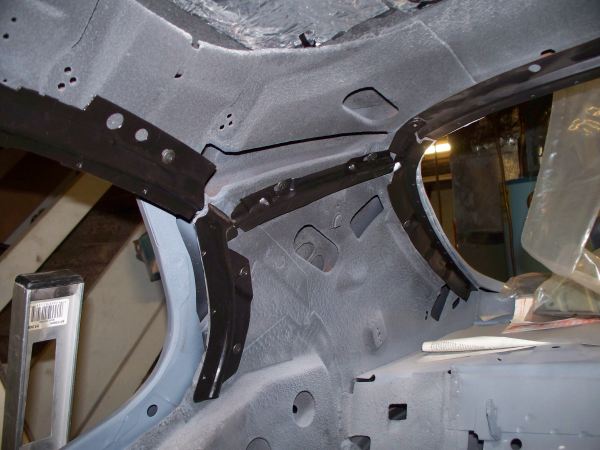 I cleaned headliner wires today, they were really rusty. 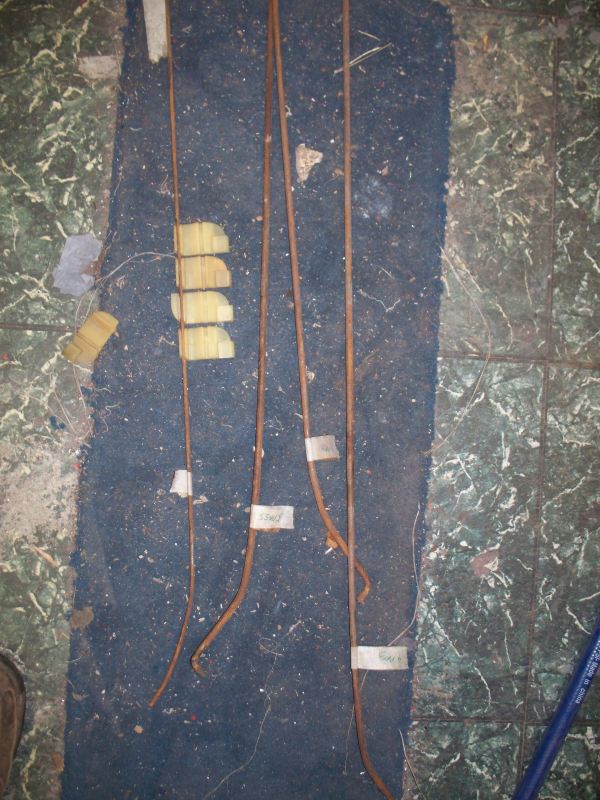 Sanded smooth with 3" reloc conditioning pad and coated with a clear coat.  I had already restored two of the wires so I only had 4 to do today.
__________________
68 Lemans - GTO appearance LS3 68 Eldorado - waiting for restoration 96 Roadmaster Wagon 2014 Infiniti Q50S Hybrid Marietta GA |
|
#243
08-19-2011, 06:46 AM
|
||||
|
||||
|
Watching you with all this rust removal is bringing back painful memories! Here was my trunk floor two years ago. I spent a couple of months cleaning it all up and welding in the new pans.
I hate rust!!! I hate the way it looks, feels, and even tastes! And it made a real mess of my garage, the "dust" got everywhere and coated everything. Keep it up, you are doing a really great job with it. Probably will be less remaining than at the factory before priming and painting 43 years ago! Walt
__________________
1969 Lemans vert, matador red, 462 CI, 3.07 12-bolt posi 1974 455 TA, admiralty blue/red interior HPP "cover car" - sold "The best way to show a car is to drive it" |
|
#244
08-22-2011, 12:28 AM
|
|||
|
|||
|
Quote:
I'm planning use an epoxy primer on the inside. Don't plan on any top coat, since it will not be visible or exposed to sunlight. With all of the rust removed from the seam and a good coat of epoxy primer there should be no more rusting from the inside out. I spend most of the weekend treating the lip on the other side of the lid, that is the side that is visible with the trunk open. If took several sessions with naval jelly but finally all of the rust of the lip came off. 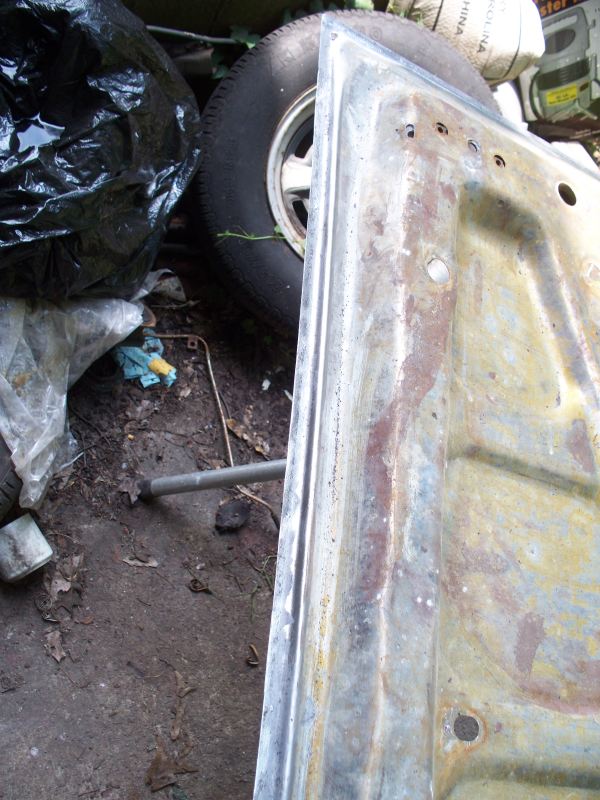 Near the end of the day today I re-cleaned the inner side of the bracing in preparation for one more treatment of naval jelly. After this it should be ready for primmer. 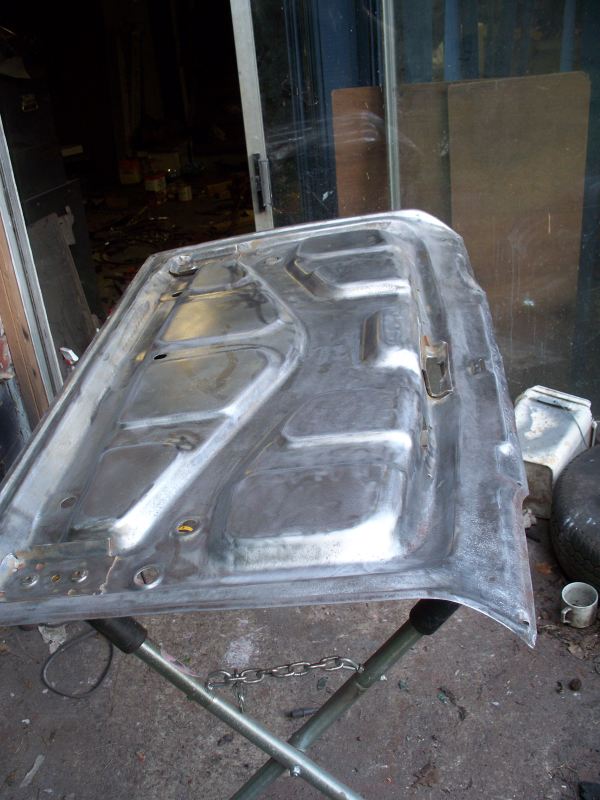 I got around to putting the rest of the insulation in the roof today. The roof is covered with a coating of Lizardskin Ceramic, followed by Eastwood's version of dynamat, then covered with a jute like substance with metal foil on one side. Bang on the outside of the roof and you don't hear anything inside. 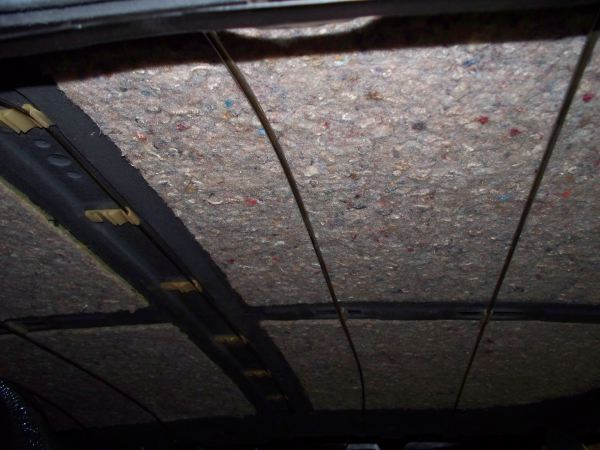 I crossed over to the dark side today  Welding door edges ! ! ! Welding door edges ! ! !There is no way to make this gap at the top of the door better without screwing up something else. If you make the gap go away, the crease at the lower part of the door and fender don't align. This gap at the top is 5/16". The rest of the door is set to 3/16" gap. 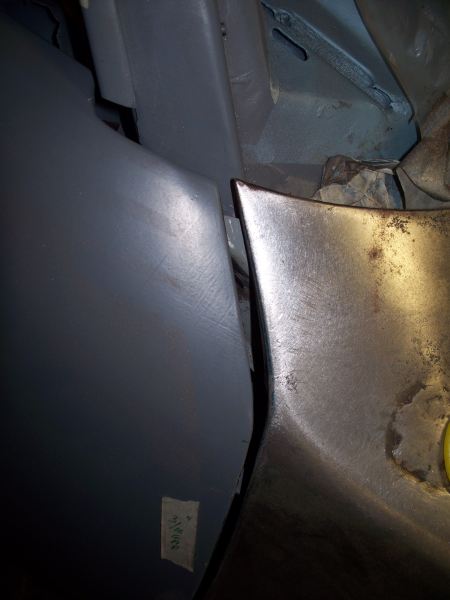 So I started welding the edge to take the gap out. I still have some work to do on the welded edge. But this is the stopping point for today. The welded edge is flush with the fender, which raised the edge slightly. There will be a little filler needed to bridge the new edge with the rest of the door. This area of the door is slightly low and curves down. I had about 1/16" of filler to fill the factory flaws in this area before working on the edge. 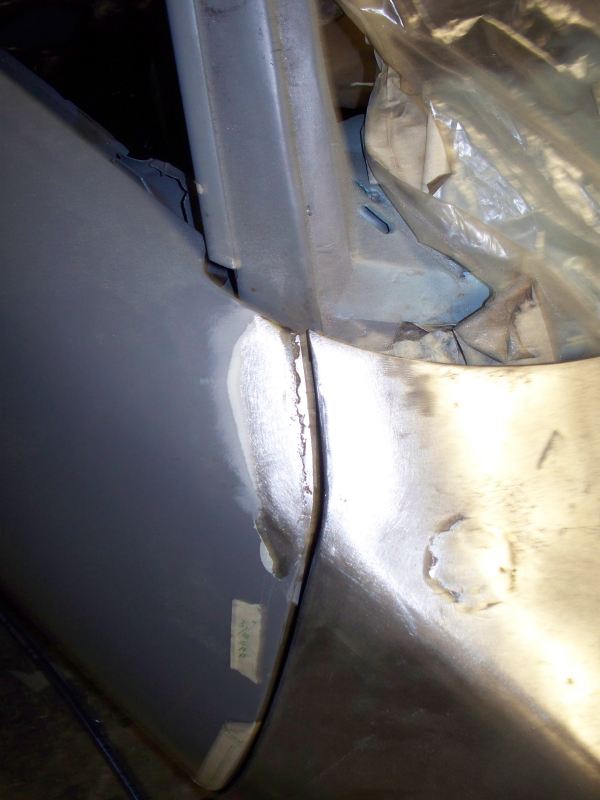
__________________
68 Lemans - GTO appearance LS3 68 Eldorado - waiting for restoration 96 Roadmaster Wagon 2014 Infiniti Q50S Hybrid Marietta GA |
|
#245
08-23-2011, 10:45 PM
|
|||
|
|||
|
I finished prepping the inner trunk lid. It's now ready for primer.
The before: 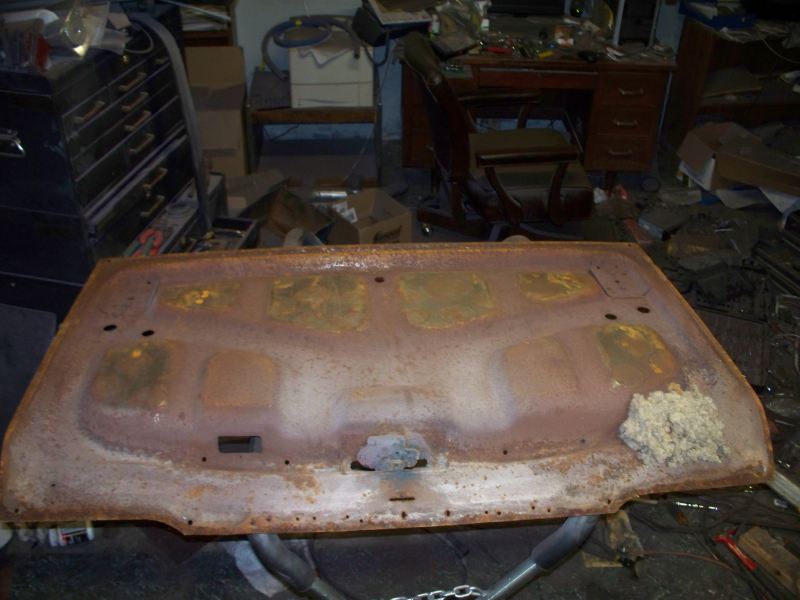 And the finished. 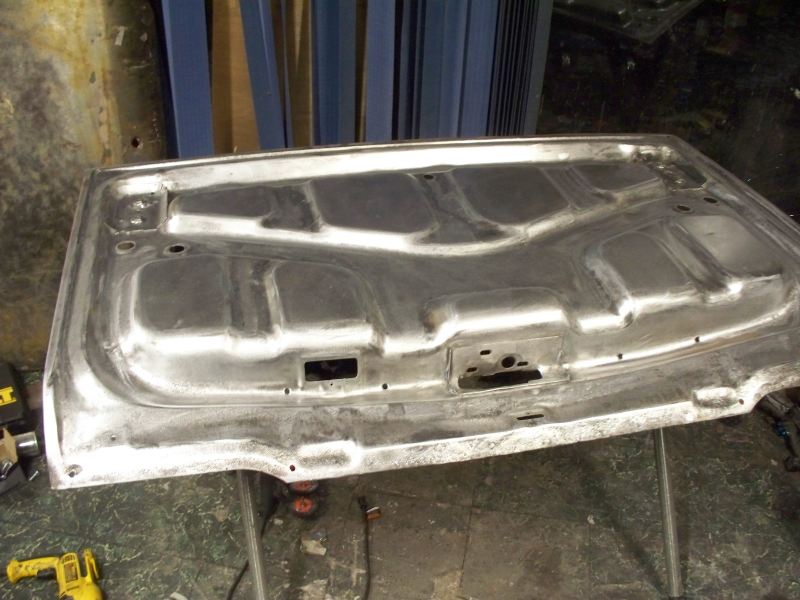 UPS was good to me. More parts came. Re-chromed vent window frames. These frames look great. Photo doesn't do it justice, chrome is very difficult to photograph. As chrome goes not to bad $69 each. 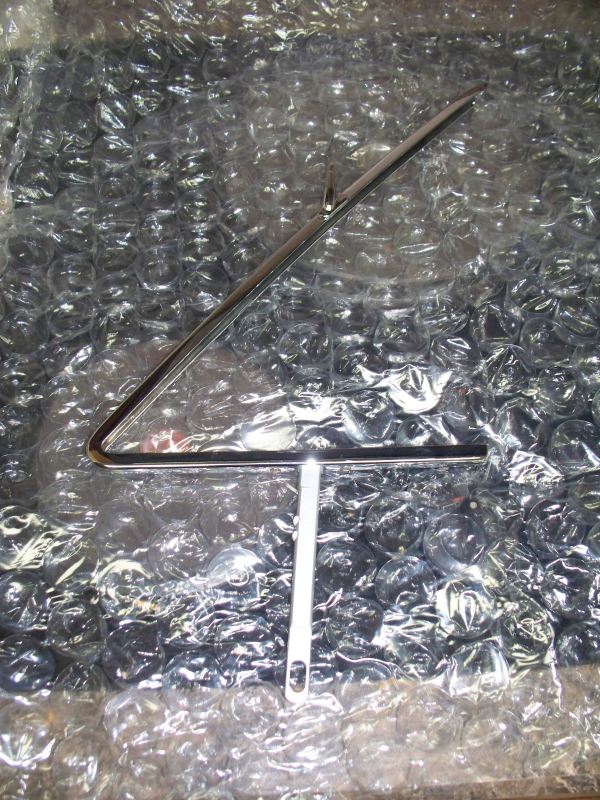 Because of the difficulty in working on the vent window assembly, I decided to order new vent glass. I would rather install new glass now, rather than wish I had replaced the glass later after the car is all back together.
__________________
68 Lemans - GTO appearance LS3 68 Eldorado - waiting for restoration 96 Roadmaster Wagon 2014 Infiniti Q50S Hybrid Marietta GA |
|
#246
08-24-2011, 09:27 AM
|
||||
|
||||
|
Hey fbrown, You going to reinstall the insulation in the right lower corner of the deck lid.
 nice job! hope to get mine to look that clean |
|
#247
08-24-2011, 11:39 PM
|
|||
|
|||
|
Quote:
I got primer on the inner side tonight. Now to find out if I wasted my time, will I be able to fabricate a patch for the outer skin. 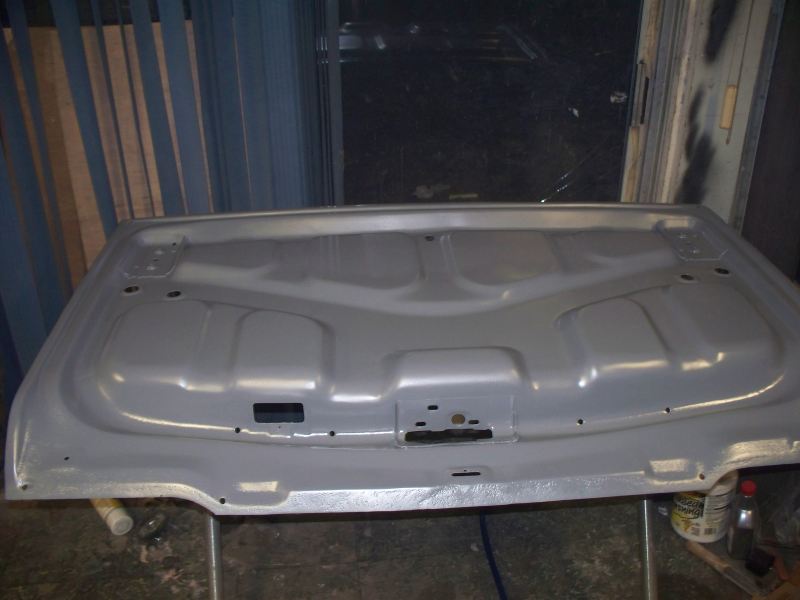
__________________
68 Lemans - GTO appearance LS3 68 Eldorado - waiting for restoration 96 Roadmaster Wagon 2014 Infiniti Q50S Hybrid Marietta GA |
|
#248
08-25-2011, 10:45 AM
|
||||
|
||||
|
it looks good. from what I've seen in your pics you should have no or little problem doing it.
good luck & dont forget alot of pics |
|
#249
08-28-2011, 01:03 AM
|
|||
|
|||
|
Got my vent glass in this week. The new glass that seems to sold by most of the vendors is drop shipped is from Auto Metal Direct. For me that is good news since they are only 60 miles away and I need a windshield.
It is very hard to get the vent window seated using the setting tape. I sure glad I have only one more to do. I sure wouldn't want to do this often. 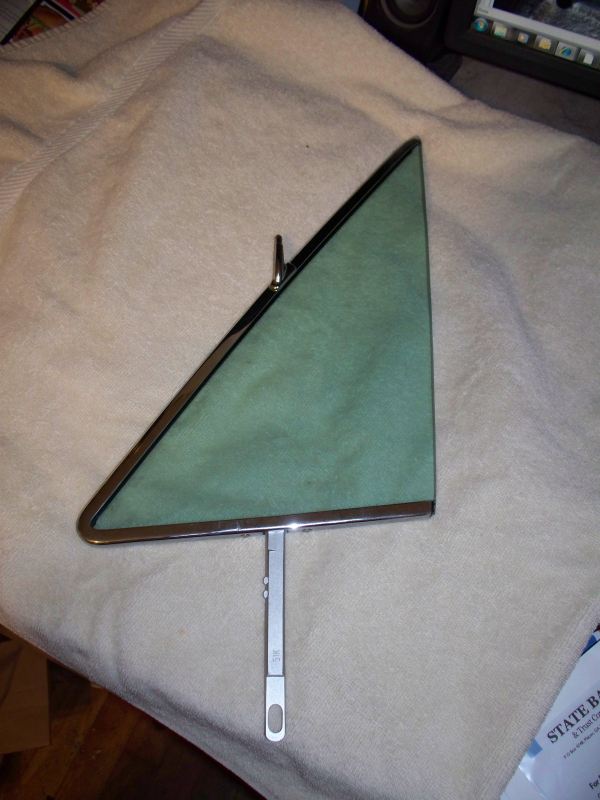 Back to the trunk lid. I spent some time repairing the collision damage. I did this since I want the shape to be correct before I start cutting metal. I would be harder to determine what is pushed in and what is not, once you cut part of the lid off. The sad thing is, it would be good enough to reinstall if it wasn't for the rust. 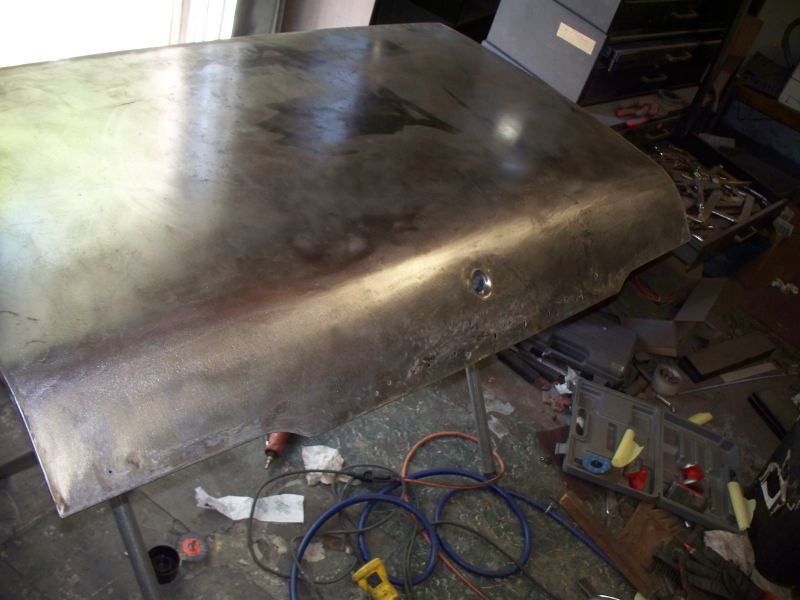 I decided to make the patch in two pieces. This will give me the other half to help with alignment. 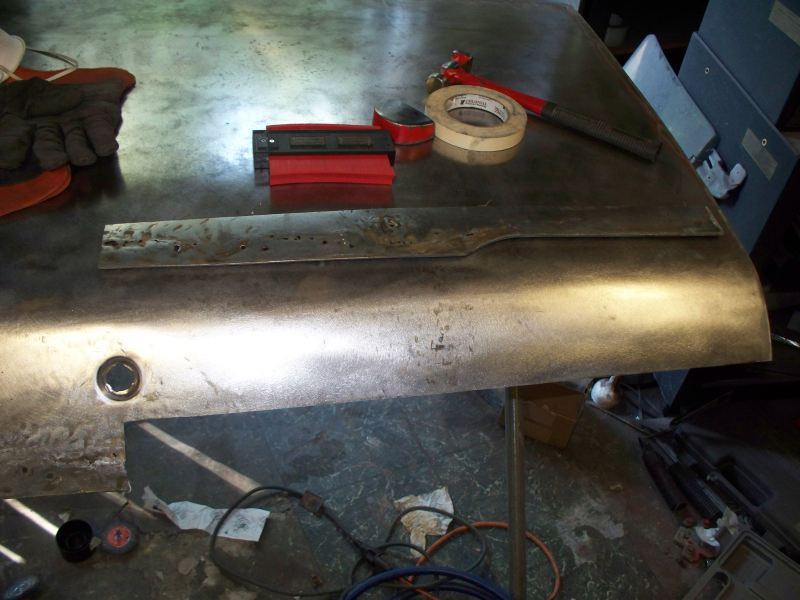 Here is my patch formed and marked where the bend for the lip will be. 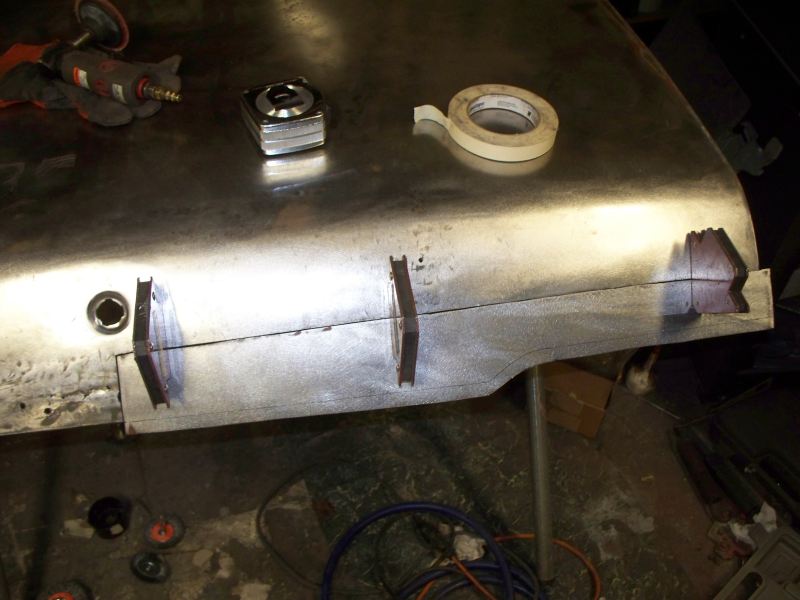 The contour is perfect. I do wish I have a better contour gauge. It would help if if was longer also. 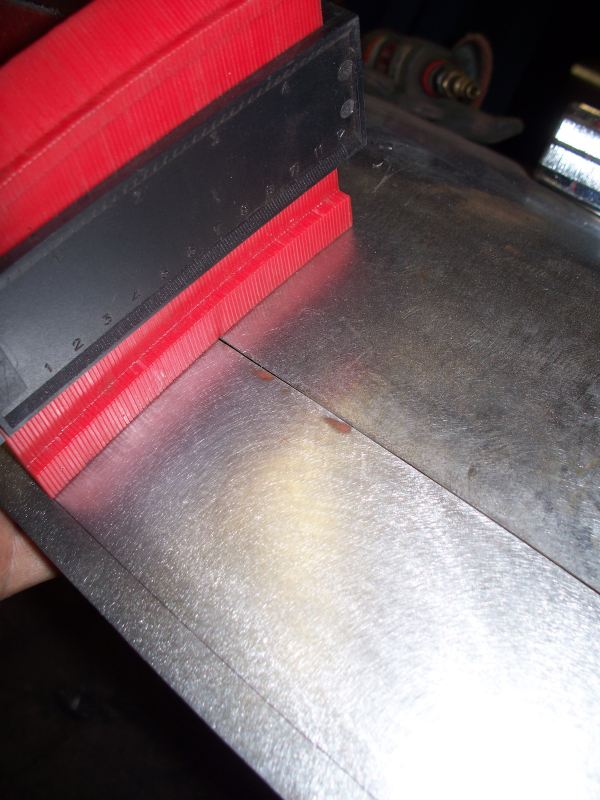 Now the hard part remains. Getting a good bend for the lip that folds over the inner bracing. I tried a small test using a scrape of metal but I can't match GM's crisp fold lines. I'm close but this is probably as good as I can get with the equipment I have. It remains to be seen if I can match the bend on the test piece along the entire length of the patch. My first attempt. Test piece on left. 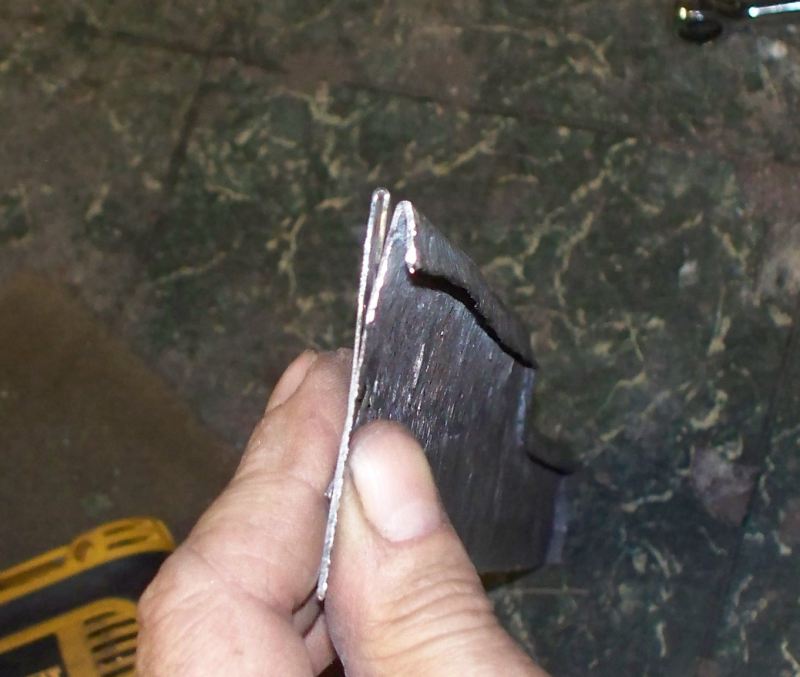 Second attempt. I used a press to sharpen the fold. The bottom is the part I cut from the lid. 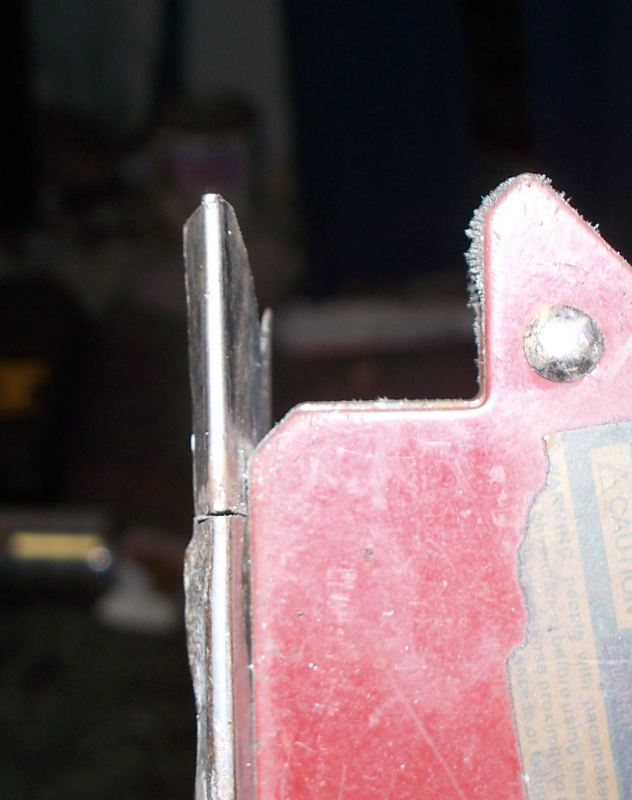 I may not find out this weekend how this repair is going to turn out. A customer dropped off 7 virus infected computers for me to clean up. He needs them by Monday. Unless I get real lucky I won't get any more time to work on the trunk lid this weekend.
__________________
68 Lemans - GTO appearance LS3 68 Eldorado - waiting for restoration 96 Roadmaster Wagon 2014 Infiniti Q50S Hybrid Marietta GA |
|
#250
08-28-2011, 11:40 PM
|
|||
|
|||
|
I got in a couple of hours tonight. As I suspected the fold over portion is big trouble. When creating the fold, the patch was distorted. There was about 5 inches of mis-alignment by the outer edge of the panel. I did limited correction by using a metal stretcher, but the stretcher really only works on flat surfaces, not curved ones. I eventually made relief cuts to help out. I think the metal will become distorted again when the fold in pushed over. I had to rework the patch to restore it's basic shape after making the bend to only 90 degrees.
This is what I ended up doing to correct the bending of the patch. 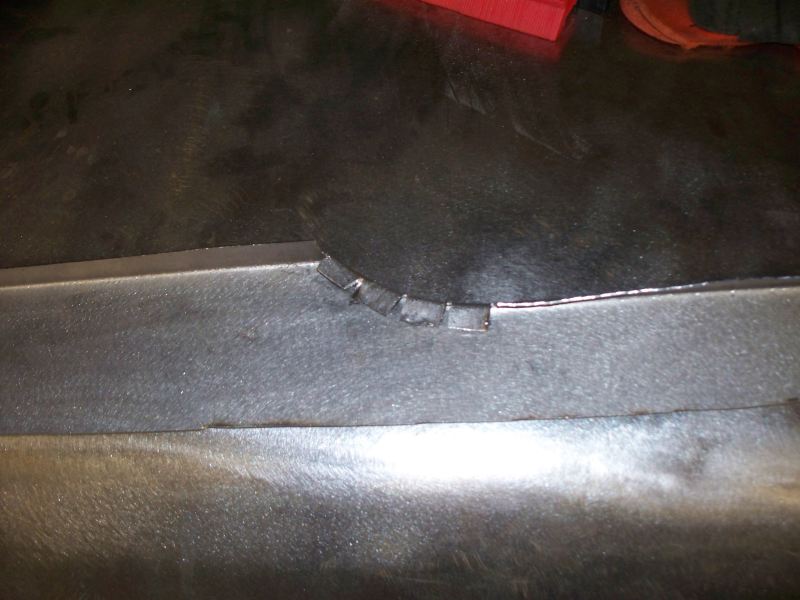 My work in progress. 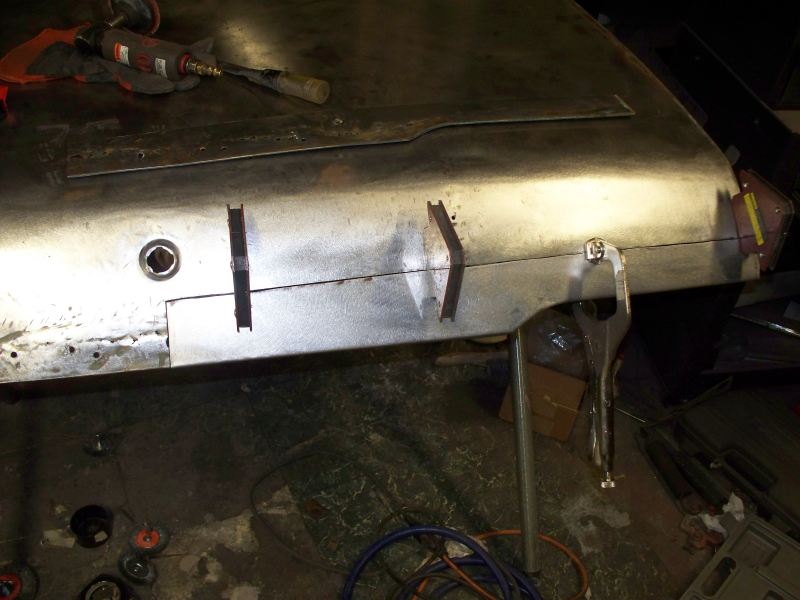
__________________
68 Lemans - GTO appearance LS3 68 Eldorado - waiting for restoration 96 Roadmaster Wagon 2014 Infiniti Q50S Hybrid Marietta GA |
|
#251
08-29-2011, 11:43 PM
|
|||
|
|||
|
As I suspected the patch distorted when I folded the lip most of the way over.
 Desperate problems call for desperate solutions. I can't really recommend trying for several reasons, even though it worked for me. Reasons to avoid this: 1) I have done very little heat shrinking and have almost no experience. 2) Mapp torch is probably not the best for heating metal. 3) I got lucky but still remember #1 and #2. My solution was the heat metal where I though it was high/stretched until red and then put a wet rag over the red hot spot. 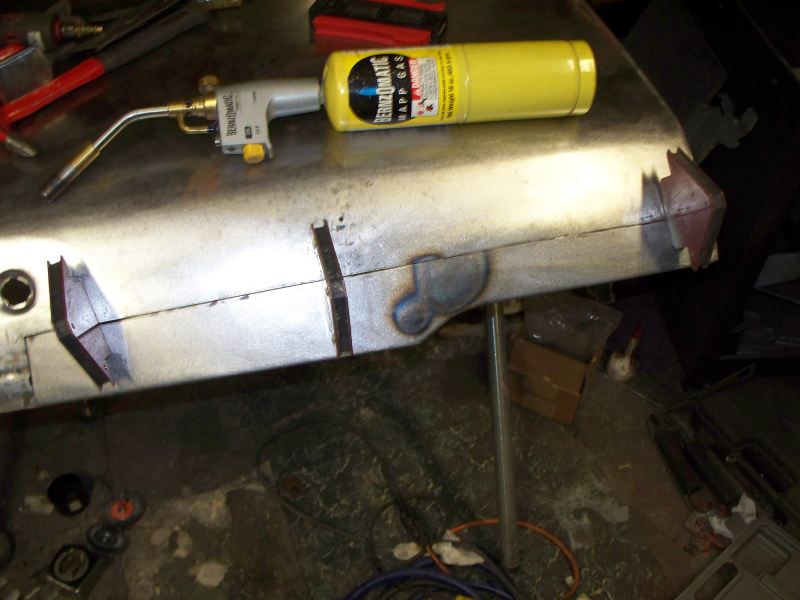 The shape has almost been restored. A little more work and the patch should be ready to weld in. You can see that I have the lip mostly folded over here. 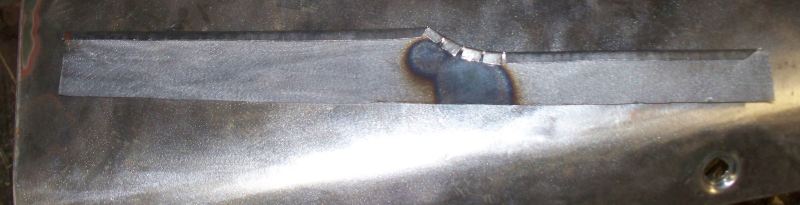 Although still far from complete, it's beginning to look like I may be able to repair the trunk lid. I was not sure I had sufficient skills to make a patch this large and complex. While I am aware of many techniques for metal fabrication, I lack experience for making something this complex. BTW if you are wondering what I going to do with the relief cuts, I plan to stick a sheet of copper under the cuts and weld them solid.
__________________
68 Lemans - GTO appearance LS3 68 Eldorado - waiting for restoration 96 Roadmaster Wagon 2014 Infiniti Q50S Hybrid Marietta GA |
|
#252
09-08-2011, 01:22 AM
|
|||
|
|||
|
For those of you wondering what happened, why no updates. My AC went out Friday night, 5 minutes later I discovered a 50 amp contactor melted. The type of part you can't buy on a weekend, especially a holiday weekend. It got too hot for me to do much, so not a lot got done during the long weekend.
These pictures span about a week. 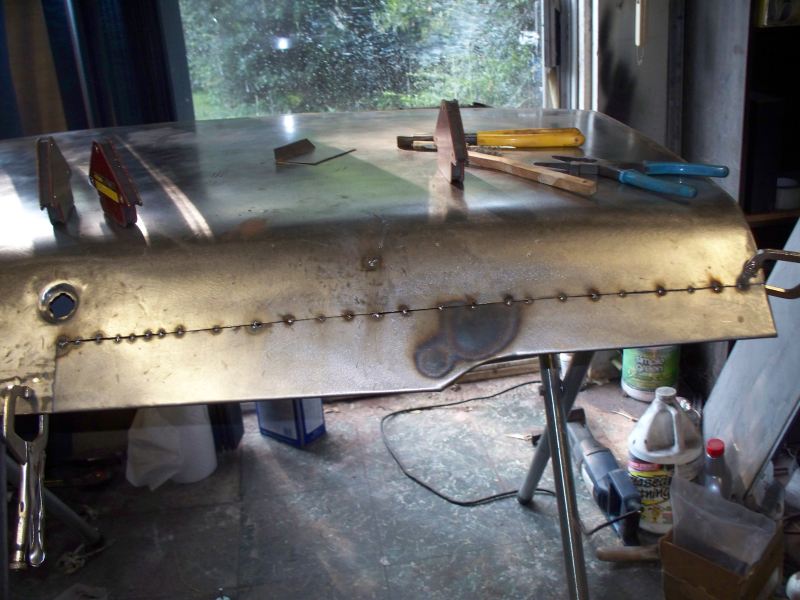  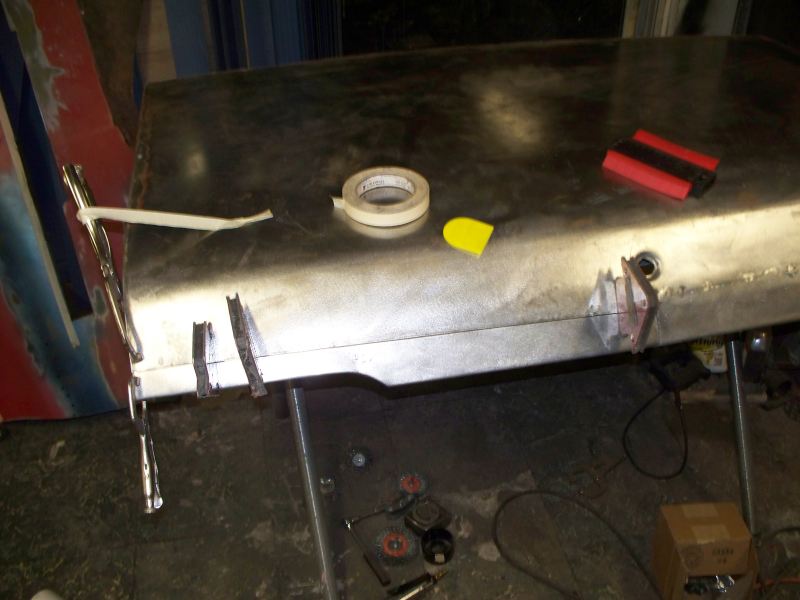 Epoxy Primer should keep the inside rust free. 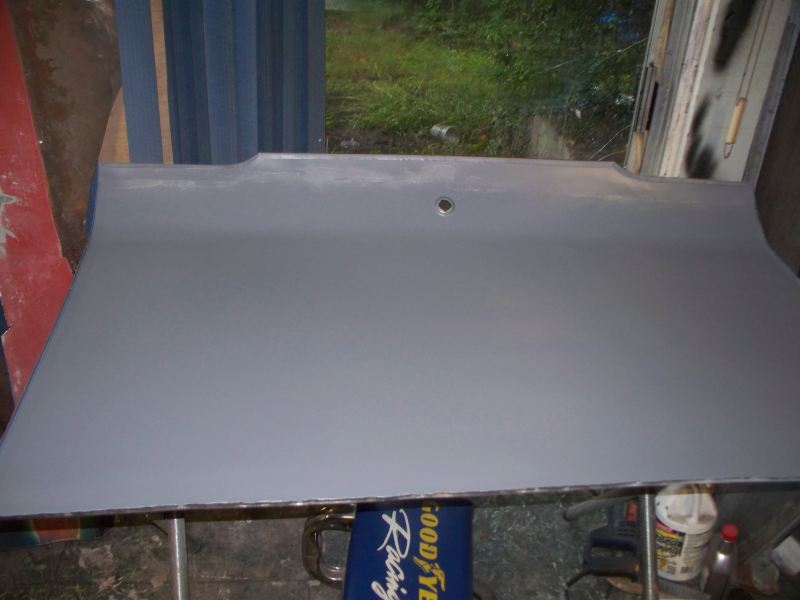 I primed the edge where the skin folds over the inner bracing.  A couple of shots of the lid installed on the car. 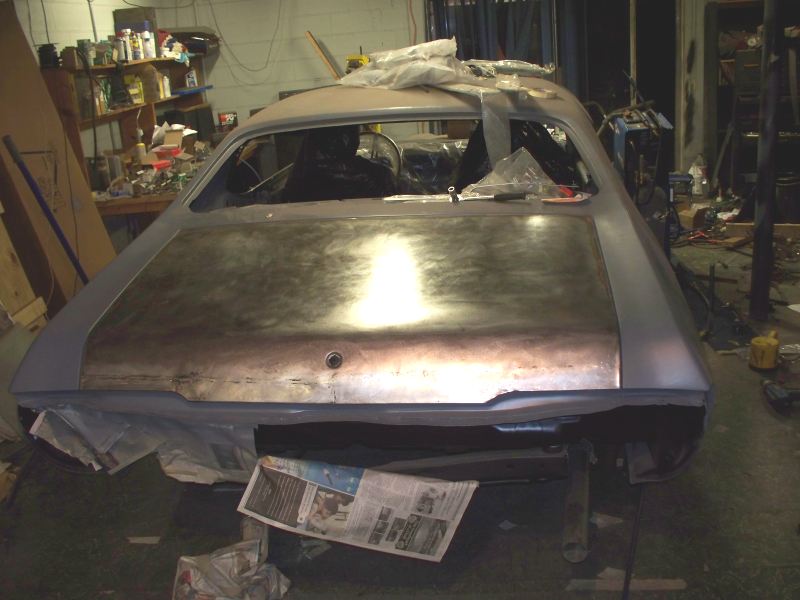 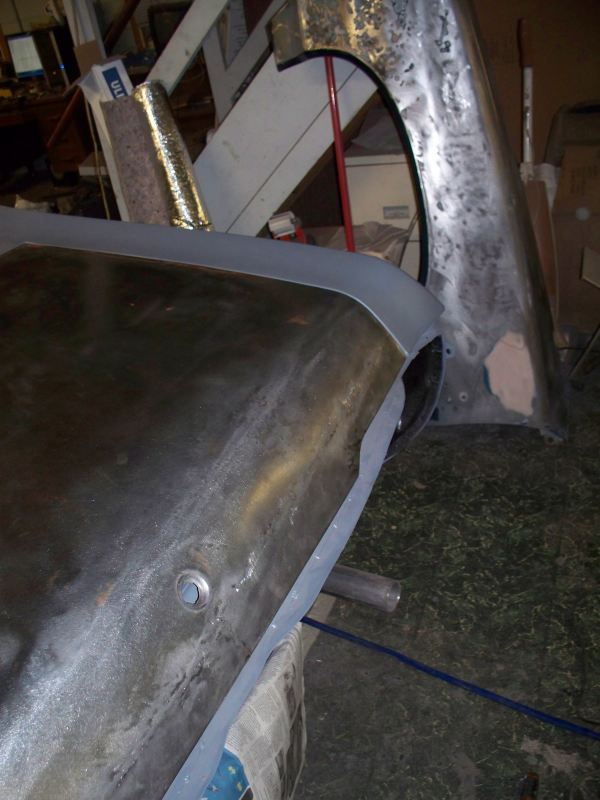 What's left. I have 3/16" of shims on the right side. I think I need 5/32" of shims for better alignment. No shims were needed on the left side. This was because the hinge support had busted loose and I moved it higher before welding it back. Things remaining on the rust repair/installation. 1. Fabricate a 5/32" shim. 2. Tack weld the skin to the inner bracing. 3. I still need to tweak the lid slightly for better alignment. What did I learn and what would I do different next time. 1. I would make the patch in three pieces instead of two. I think I could have better handled the distortion caused by folding the edge over. 2. I should have pulled out my TIG welder for this job. While the patch was perfect before welding, the long seam has some distortion/warping. This really is not a big issue, since I need filler anyway to take care of the collision damage. While you can seen the seam in the picture, the amount of distortion is no more than the thickness of card stock.
__________________
68 Lemans - GTO appearance LS3 68 Eldorado - waiting for restoration 96 Roadmaster Wagon 2014 Infiniti Q50S Hybrid Marietta GA |
|
#253
09-11-2011, 01:53 PM
|
|||
|
|||
|
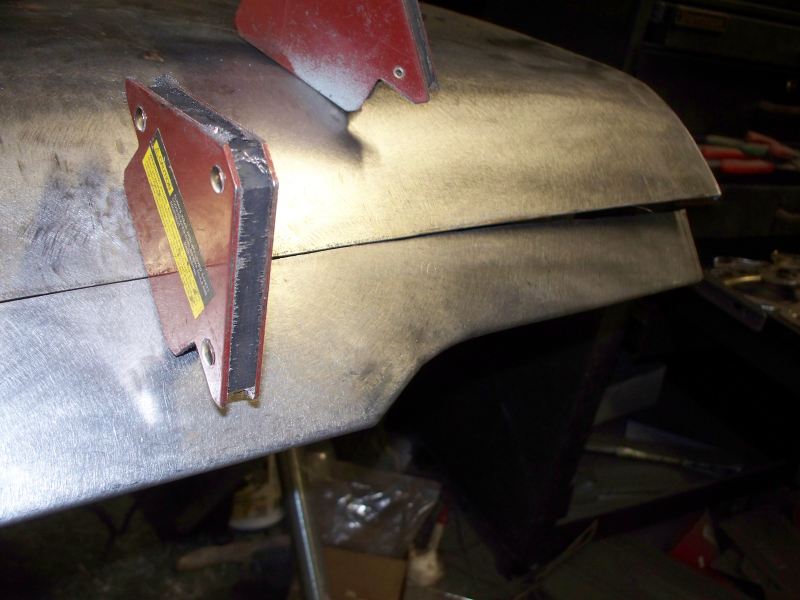
Metal work is complete on the trunk lid. Outer shell is spot/tack welded to inner frame and holes drilled for emblem. The trunk lid has some fitment issues caused aftermarket quarters. All problems at this stage will have to be corrected with filler.
I have the front to back placement as good as it can get. At this position everything is slightly off but any change from this placement makes other parts of the alignment worse. The side to side is not perfect but since the lid is coming off again, I'm not going to worry about getting the side to side perfect right now. Holes drilled for emblem. 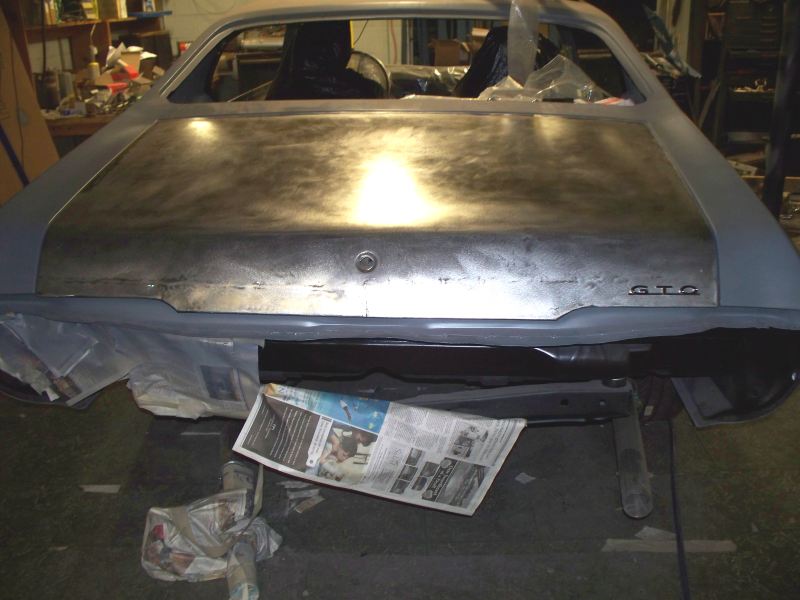 The quarters are not the same length. This is giving some fitment issues. The left quarter is about 3/16" longer from corner to corner compared to the right. 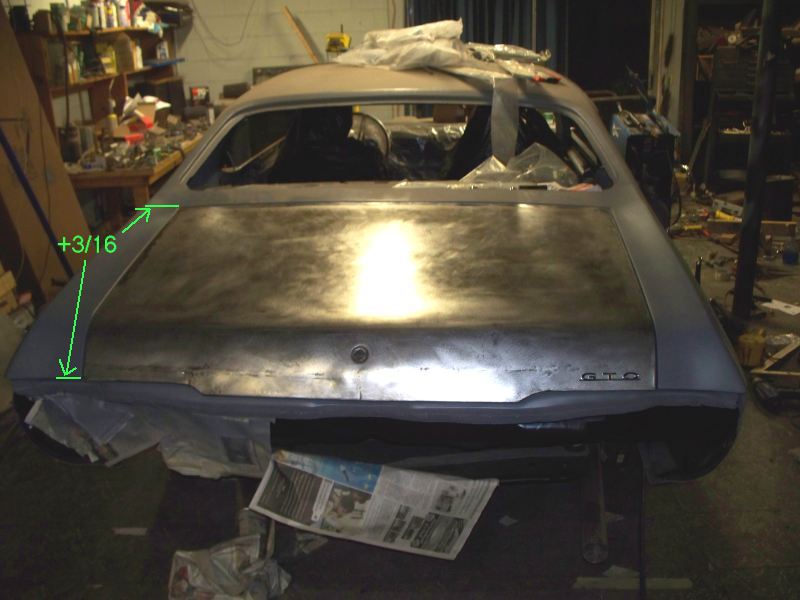 And some shots of the corner gaps.  Looks like I need to address this. Slightly over 1/8". I have seen numerous photos of GTO's with the left side trunk lid hanging below the quarter. I wonder if they were all aftermarket quarters? 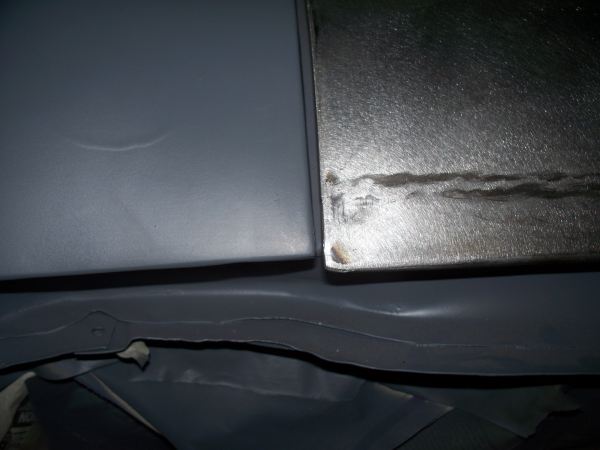 Passenger side front 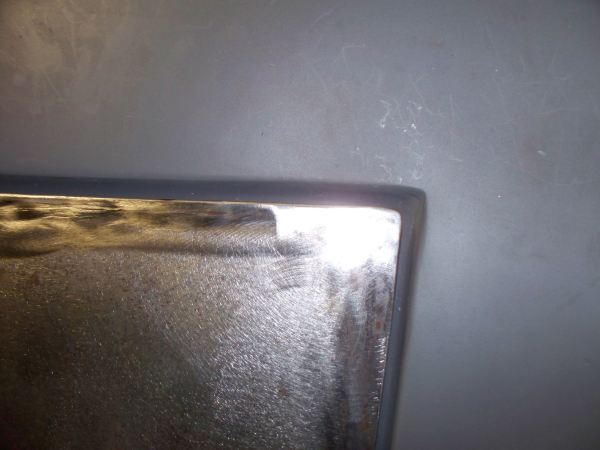 Driver side front. Gap is too large. I need to address this. 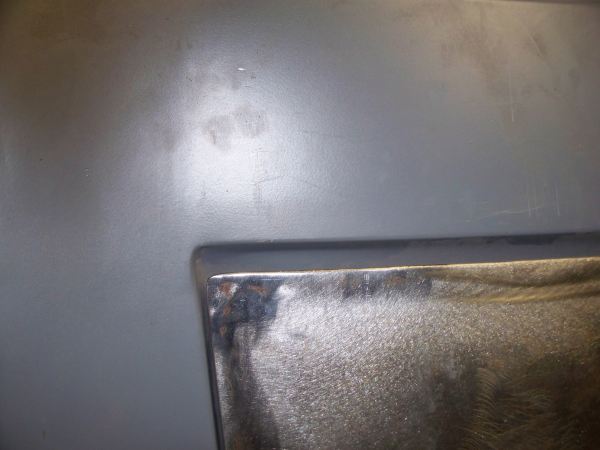
__________________
68 Lemans - GTO appearance LS3 68 Eldorado - waiting for restoration 96 Roadmaster Wagon 2014 Infiniti Q50S Hybrid Marietta GA |
|
#254
09-12-2011, 10:18 PM
|
|||
|
|||
|
I'm taking a break from the trunk lid fitment for a few days. I have been working on the vent window assembly on and off. I got one side back together tonight. The vent post and vent window chrome (the part that holds the glass) are re-chromed pieces. Since this thing is so hard to remove and work on, I installed new glass. I polished the stainless and cleaned up the galvanized part of the frame.
Here is the before. Note the purple tint. 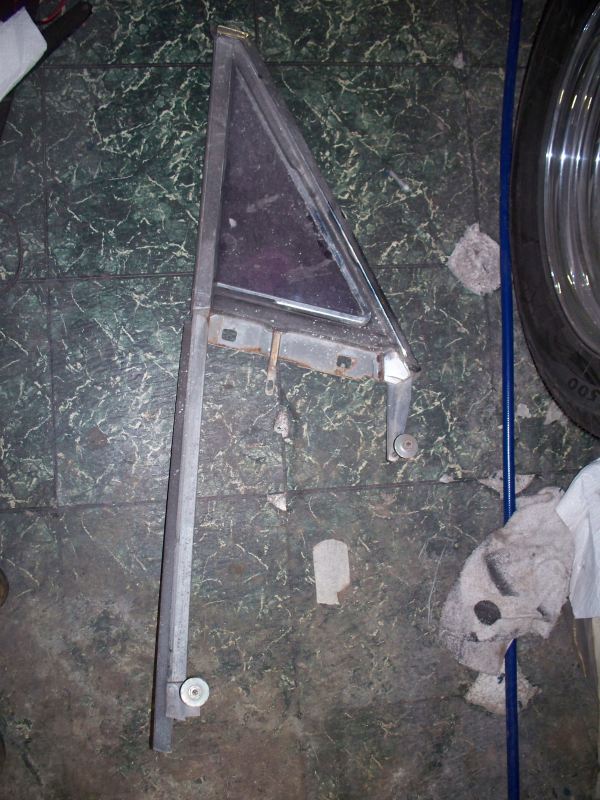 Here is the restored and assembled vent frame. 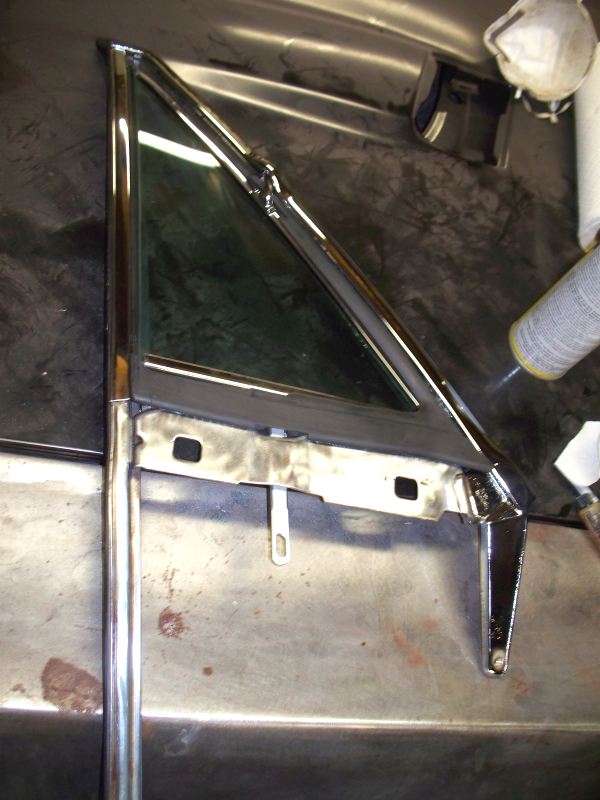 Unfortunately I still have the other vent window to do. Before someone points out I have a before shot of the other side. I don't have a similar photo for the side I assembled. The original left and right vent frames were similar in condition.
__________________
68 Lemans - GTO appearance LS3 68 Eldorado - waiting for restoration 96 Roadmaster Wagon 2014 Infiniti Q50S Hybrid Marietta GA |
|
#255
09-14-2011, 01:16 AM
|
|||
|
|||
|
Tonight I removed the door so I could work more on the edge I was building up.
This was where I left off a few weeks ago. The basic shape had been formed but it still needed a little work. So I filled in some of the low spots with additional weld to better blend in the edge. 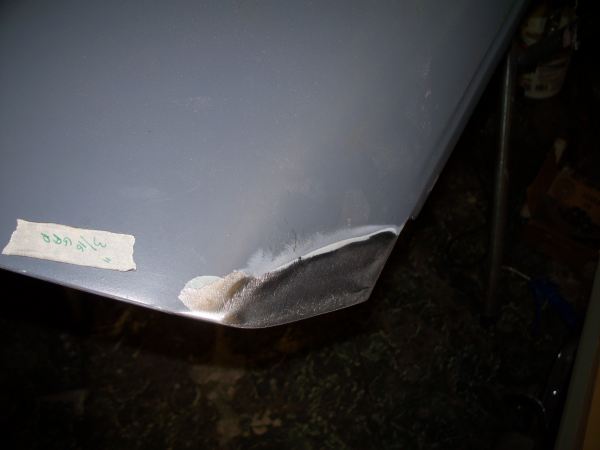 The back side wasn't accessible until I removed the door, the back edge needed grinding and smoothing also. 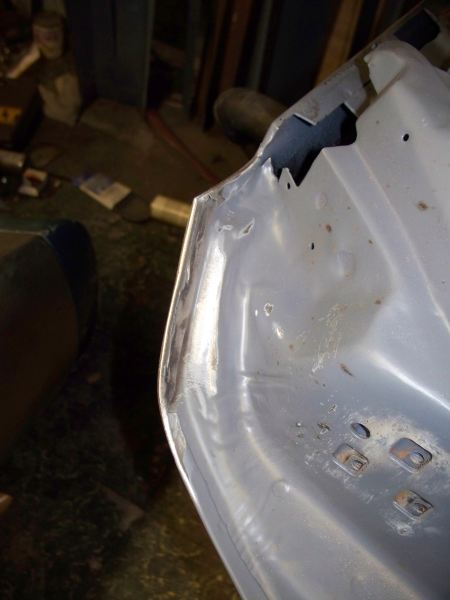 Since I should be finished welding I can start on re-assembling the door. The first step was to add some Eastwood Thermo-Coustic Sound Deadener Material. These inner door shots were made by sticking the camera in the door, shooting several shots and hoping some of them would be OK. The sound deadener made a big difference. The door makes a dull thud when you hit it. Before adding the deadener, hitting the door made a loud ringing sound.  I ordered new clips and the cloth cover. The cloth cover is newly released and is available from Inline tube. 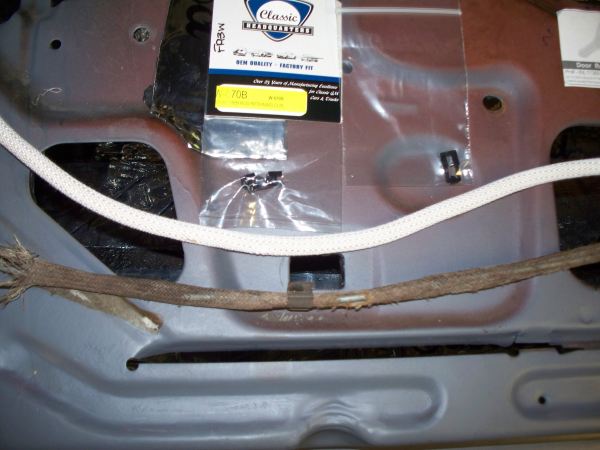  The white cord at the back is where the second cloth cover fell part way through an open hole. 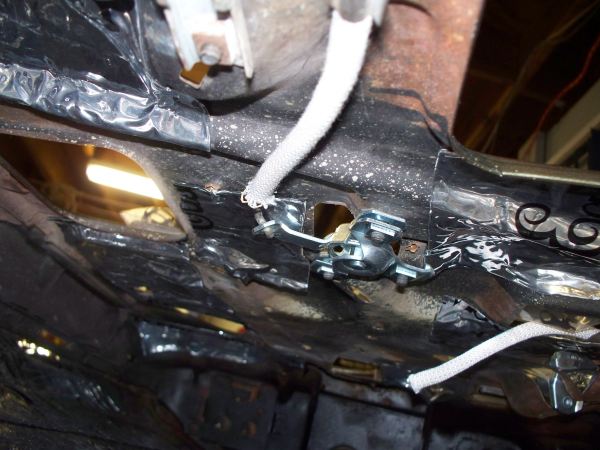 My next challenge will be to re-install the vent window assembly.
__________________
68 Lemans - GTO appearance LS3 68 Eldorado - waiting for restoration 96 Roadmaster Wagon 2014 Infiniti Q50S Hybrid Marietta GA |
|
#256
09-15-2011, 01:29 PM
|
||||
|
||||
|
Great work !!! I am shocked you put that much effort in the under structure of the trunk. I am bummed out you are so far away. Would love to see it in person when done. Keep up the great work.
__________________
Send it! Its going home on a trailer. |
|
#257
09-15-2011, 11:49 PM
|
|||
|
|||
|
Quote:
 I don't plan on selling the car as long as I am able to drive, which hopefully will be a very long time. I don't plan on selling the car as long as I am able to drive, which hopefully will be a very long time.BTW for all of you following my project, business has me working this weekend so there won't be any more updates for several days.
__________________
68 Lemans - GTO appearance LS3 68 Eldorado - waiting for restoration 96 Roadmaster Wagon 2014 Infiniti Q50S Hybrid Marietta GA |
|
#258
09-30-2011, 12:19 AM
|
|||
|
|||
|
Other things keep getting in the way of my Lemans restoration. I ended up spending some time getting my Roadmaster wagon in running order. It seems my girl friend wants to bring her new dog with her and the dog wants to stand on his hind legs and put his front legs on the wood trim on my M45. Well this isn't going to happen so I need my old beat up Wagon to run. Changed the steering box and had to replace the steering shaft with a Borgeson custom made shaft since parts are no longer available from GM. I had about 3 inches of play in the steering wheel due to a failed rag joint and worn out steering box.
 I have been trying to get everything I need to install the door and window glass. After stripping the purple tint and cleaning the door glass, I'm not happy with the amount of scratches on the glass. So new glass is in order. I picked up new door glass and quarter window glass from AMD. I also ordered new rollers after finding one of them was cracked. So I'm waiting on parts to be delivered. Door Assembly. I got the power window installed. The glass is the old. The window works fine. The aftermarket power conversion moves the glass quite fast. Much faster than I remember power windows working on 60's cars.  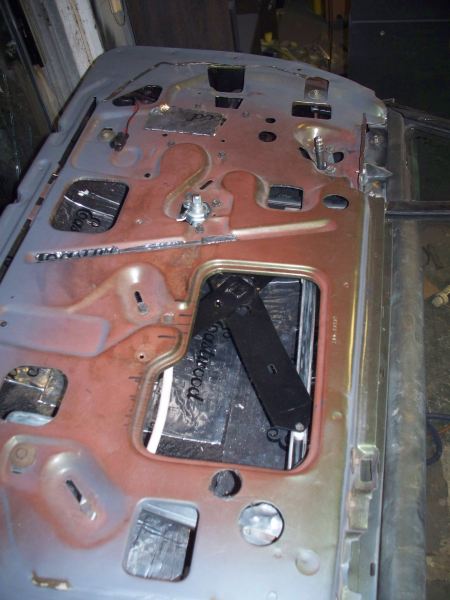 Quarter window. Cleaned up the frame. 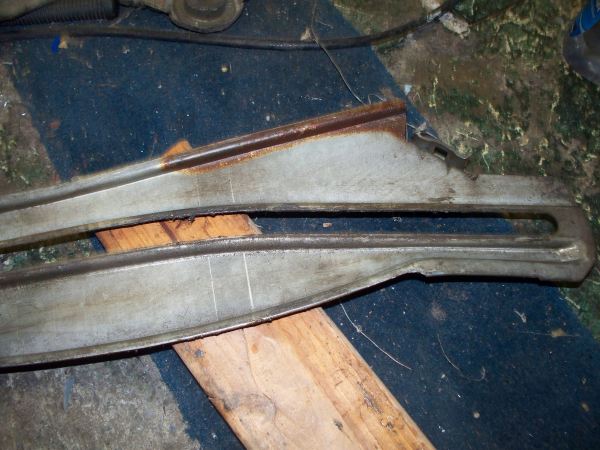 This is lightly cleaned with a conditioning pad and clear coated. 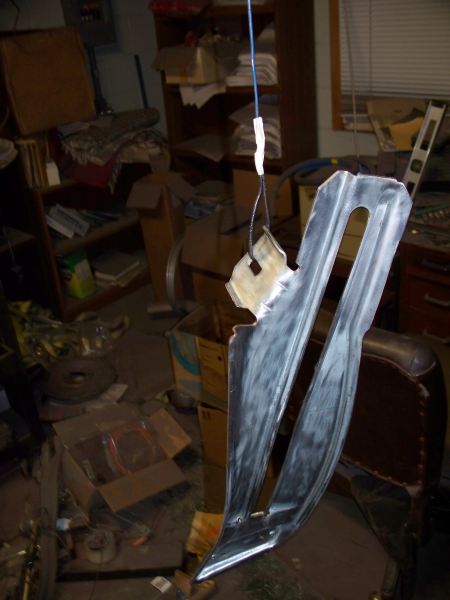 Stripped the inner fenders. They cleaned up nicely but I ended up doing some straighting on one of the inner fenders. One of the attachment points looks to have been torn off. 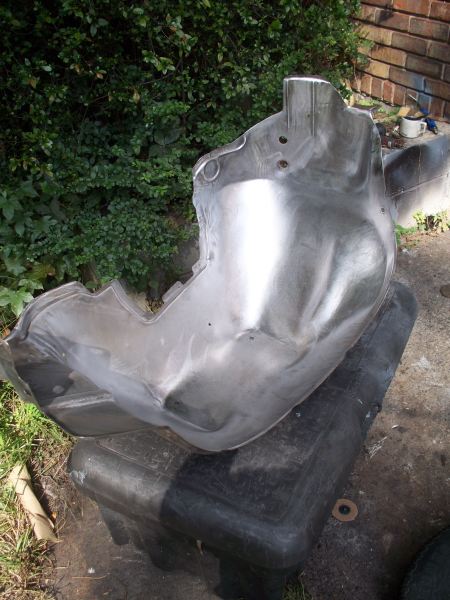 Missing attachment point. 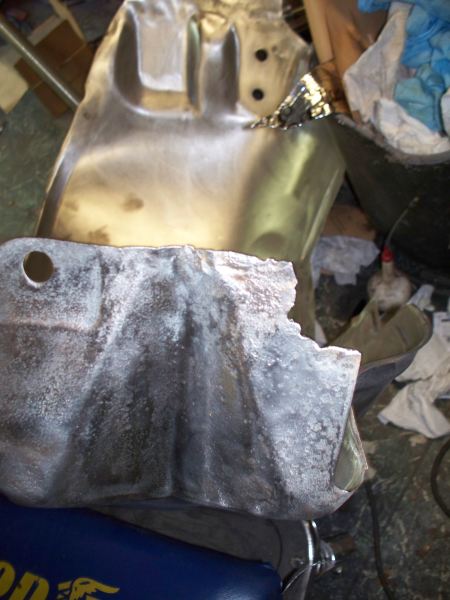 Made a clean cut and a pattern.  transfer pattern to scrap metal. 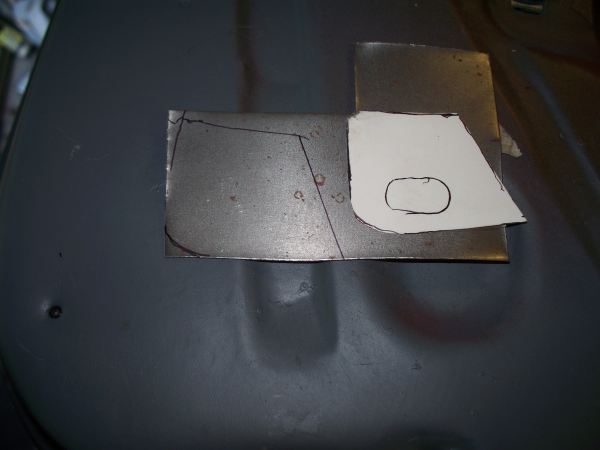 Cut the patch. You don't need a cutter like this to make the patch. The yellow handle cutter is more than adequate to cut the patch. 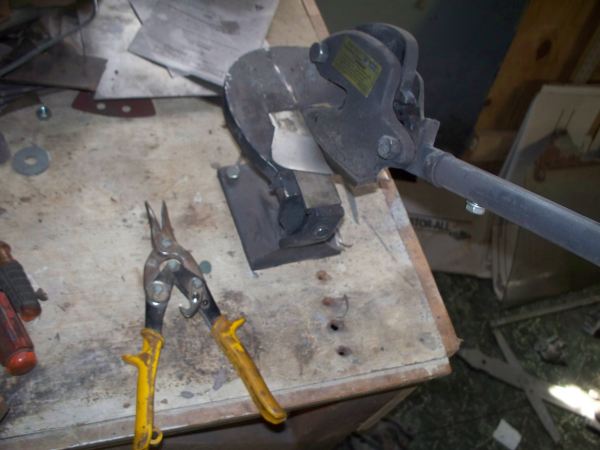 Patch in place. I used a copper backing plate for this weld since the metal seems to be pitted and thin. 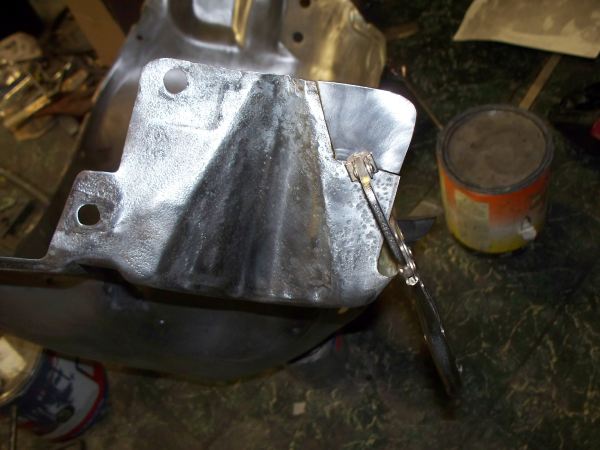 The patch was difficult to weld even with the copper backing plate. The other weld beads are where I repaired cracks in the metal. 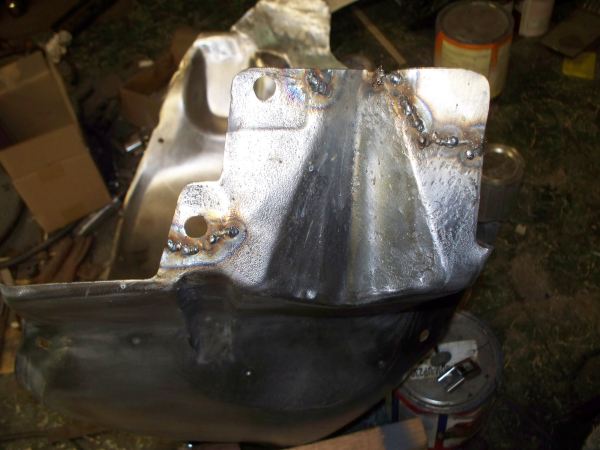 Inner fenders degreased, hung and ready for paint.  Painted with Epoxy Chassis Shield. 
__________________
68 Lemans - GTO appearance LS3 68 Eldorado - waiting for restoration 96 Roadmaster Wagon 2014 Infiniti Q50S Hybrid Marietta GA |
|
#259
09-30-2011, 12:52 AM
|
|||
|
|||
|
Amazing work!
|
|
#260
09-30-2011, 05:45 PM
|
|||
|
|||
|
I've gotta say keep up the good work! The detailed photos and information are nice to read. I wish I knew how to do metal repair like this, mine needs lots of work.
__________________
William (BJ) 1966 Pontiac GTO 
|
| Reply |
|
|
The PY Online Forums is the largest online gathering of Pontiac enthusiasts anywhere in the world. Founded in 1991, it was also the first online forum for people to gather and talk about their Pontiacs. Since then, it has become the mecca of Pontiac technical data and knowledge that no other place can surpass.


 Linear Mode

