B.) Viper T56 Installation
1. Viper T56 Basics:
Here is the Viper T56 below with a 0.700” spacer attached up front.


You’ll notice a much beefier and longer CSC up front, where the engineers brilliantly put the bleeder outside the case so you can actually get to the valve. The F-body T56 bleeder valve is buried in the case, needing 12 swivel sockets and a double joints in arm and hands to get to. Also notice the thicker/more heavy duty and 0.750” longer input shaft up front and the larger output shaft and 1350 style yoke in back. The Viper unit has a unique tail housing and shifter location relative to the F-body T56. The Viper shifter design is shared with the 2003-2004 Mustang Cobra, giving many shifter options to play with.
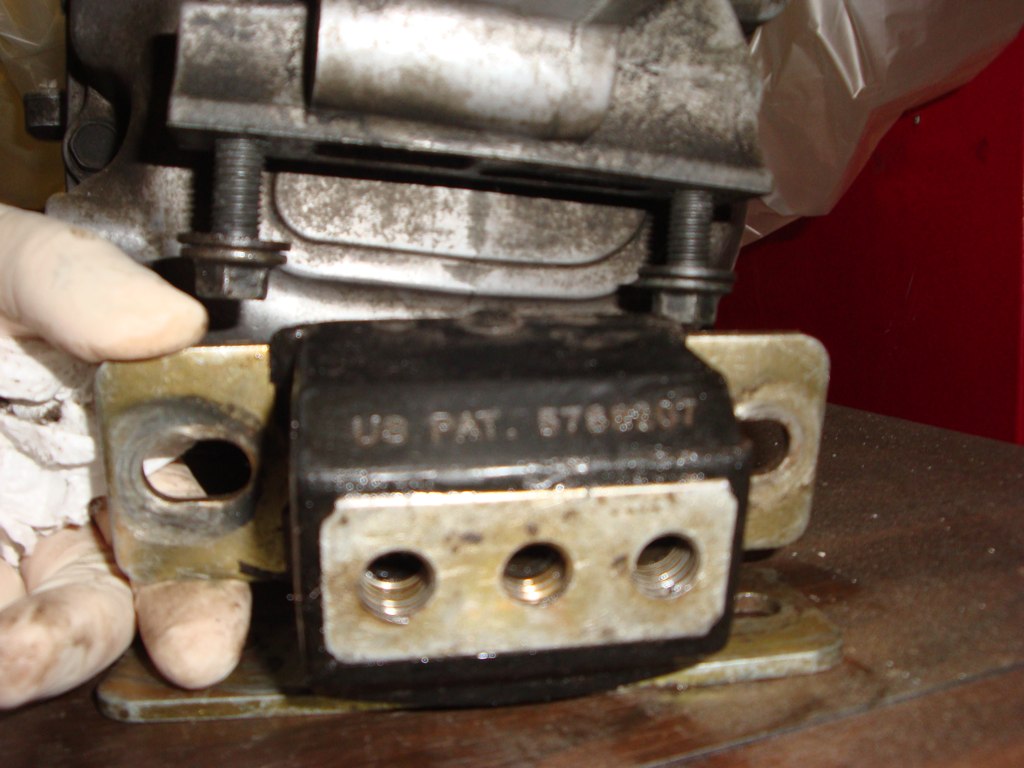
The factory x-member mount shown is a polyU bushing, and is exactly identical to the TH400 x-member mount bushing, so you can reuse your original mount or one that comes with the trans, if so equipped. The TH400 trans mount fits the F-body T56 perfectly as well, as shown below, although the OEM F-body mount is quite different and won’t directly work with the old GM x-members.
As for the electrical connectors seen on the trans, on the drivers side of the case you’ll see the large reverse lockout solenoid by the shifter hole, and the skip shift solenoid by the top inspection cover. I cut the skip shift solenoid down to the hex nub only and filled it with epoxy to seal it off. The solenoid is in the way of the floor pans and serves no purpose in a 66 GTO. Jumping ahead, I’ve elected to leave the reverse lockout in place but not wired up, as it can be pushed through with just a bit of muscle. Removing the solenoid completely is a no-no, as it has a spring in it required to keep you out of the rev gate when shifting 4-5, that is, unless you think you’d enjoy shifting into R on a 100mph+ 4-5 shift! On the passengers side of the case is the wiring for the reverse lights. There is no neutral safety switch (NSS) or speedo connection on this case. NSS can be wired at the clutch pedal if desired, and speedo signal will come from a simple and inexpensive magnetic pickup to feed a set of custom electrical gauges. The 1st and second gen Viper T56’s have speedo connections, either mechanical or VSS, the 3rd and 4th gen do not. Just FYI! There is some good generic T56 data here, though note this info is generic and most only applies to a LT1/LS1 T56 with a chevy clutch, etc.
http://www.pro-touring.com/forum/showthread.php?t=22621
2. Hole in the Floor
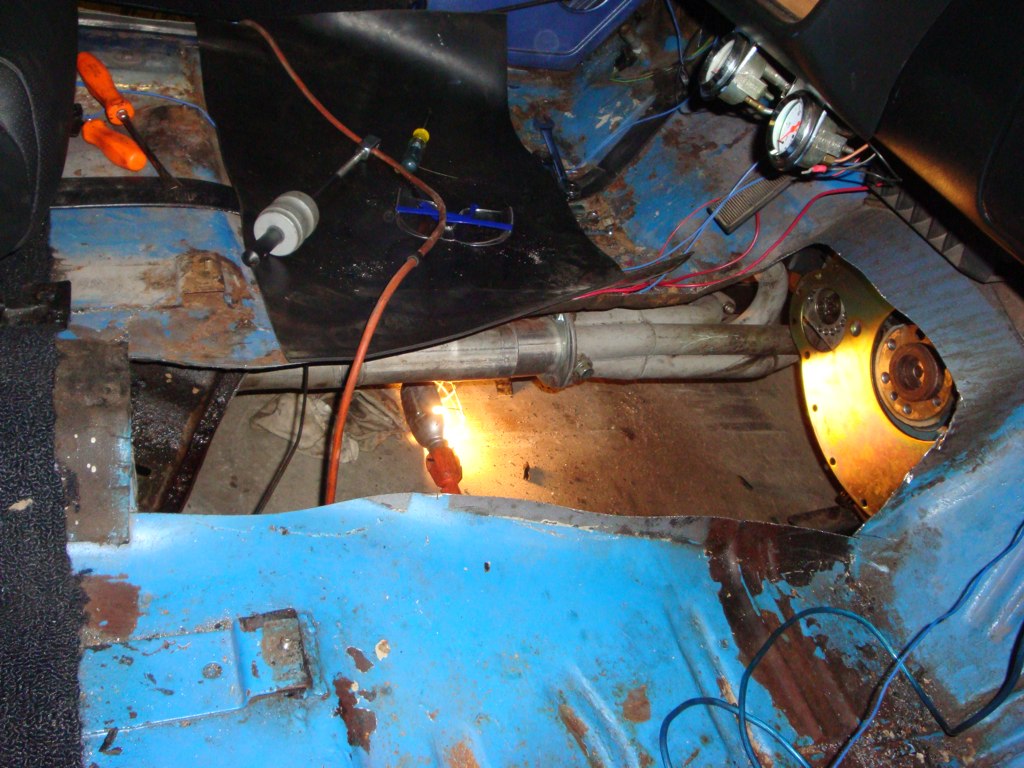
No beating around the bush, you need to cut a BFHole in your floor to fit the massive T56 in an A-body. You might get away with a slit up to rather then removing the whole tunnel, although I found having the tunnel removed an absolute delight, making work on the car 1,000X easier and making the actual trans install a snap, as you’ll see shortly. A saw-zall, cutoff wheel or, should you be so lucky, a plasma cutter makes quick work of the floor pan. Make sure there is nothing under the tunnel while you are cutting away!:
3. Pilot Bushing, Flywheel, Clutch and Bell Housing Install
To begin the manual trans install, first order of business is the pilot bearing or bushing. Unlike lesser GM brethren, Pontiac used a pilot bearing rather then bushing in its V8 engines. After much searching, I couldn’t find a custom bearing to fit the viper pilot shaft and the Pontiac crank ID, so made my own bushing from a factory brass piece. I took the common brass bearing sold for the Pontiac, and drilled out the ID of the bearing on my drill press to 0.750”. The ¾” is conveniently the diameter of the Viper input shaft front nub, and also the last size on a #3 stepped drill bit, making cutting the soft brass extra easy.
Here is the original RAM (BU75) bushing for the Pontiac V8 (lower left) next to the bushing McLeod sells and said would work (upper right), which was completely the wrong size in every possible way:

I should mention that I custom made my own alignment tool, as the tool supplied with the clutch is for the smaller diameter input (perfect for a LS1/LT1 T56), and a Viper guide tool isn’t exactly a common part at your local autozone, or even easily found anywhere online, for that matter. To make the pilot tool work, my local hardware store happened to have a brass bushing with a 0.750” OD . I drilled out the center of this bushing to tightly slide over the original pilot tool nose, which now perfectly fit the larger bushing and of course properly engaged the clutch disc splines. Here are the mods to the stock size bushing and the custom guide tool:


Here’s a pic with the custom bushing installed:

Next up is installing the McLeod block plate. Easy enough, right? Uh, no…The factory dowels are too short to properly hold and center both the block plate and the new bell, so longer dowels are needed as seen:

Pontiac dowel pins rarely come out without a fight. This dowel was a royal PITA to remove, breaking off a drill bit, not responding to vice grips, ultimately requiring a slit cut into it with an angle grinder for a pry bar and lots of carefully timed cursing to wedge it out.

Here are the longer dowel pins needed for the McLeod bell. They tap right in.

With the block plate installed, the next step is to install and torque on the flywheel to 95ftlbs, installed with loctite and bolts torqued in stages in a star/cross pattern to evenly clamp the plate down. The flywheel only install in one direction, as the mounting hole are “keyed”:

Next up the flywheel and pressure plate are installed. Wipe down the flywheel, clutch disk and PP with mineral spirits or the like to clean every last trace of great and dirt off. This is crucial, don’t skip this step! The flywheel bolts are particular to the Pontiac flyweel/clutch. I used these:

The pressure plate bolts also need to be precisely torque’d in stages to 35 ft lbs in a triangular/criss-cross pattern, as described in the instruction sheet.

Now the bell housing can finally bolt on. A piece of advice: Don’t attach all the block plate bolts until you’re ready to drive the car out of your garage, as reaching, tightening and loosening all the bolts is a real nightmare!

