This is another fast forward point in the documentation of the rebuild procedure. I am skipping a very important step, which is the temporary installation of the piston/rod assemblies for the purpose of checking rod bearing clearance. Plasti-gage can be used to check clearance for the rod bearings just as it's used for the main bearings. We checked for proper clearance for all 8 rods.
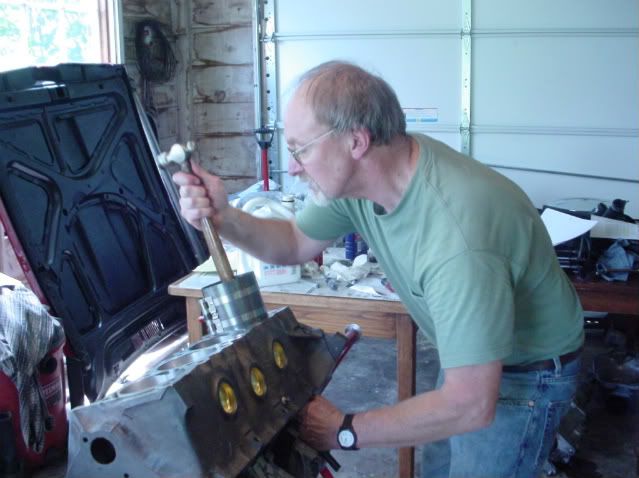
This is the process by which the piston/rod assemblies are installed into the block. You can see the ring compressor which allows the rings to be compressed enough to fit into the cylinder. To tap in the piston, you need to use something soft (such as the wooden hammer handle that I'm using) so you don't damage the top of the piston. It's equally important that you install some sort of protective rubber sleeve over the rod bolts so they don't scratch the crank during the installation process.
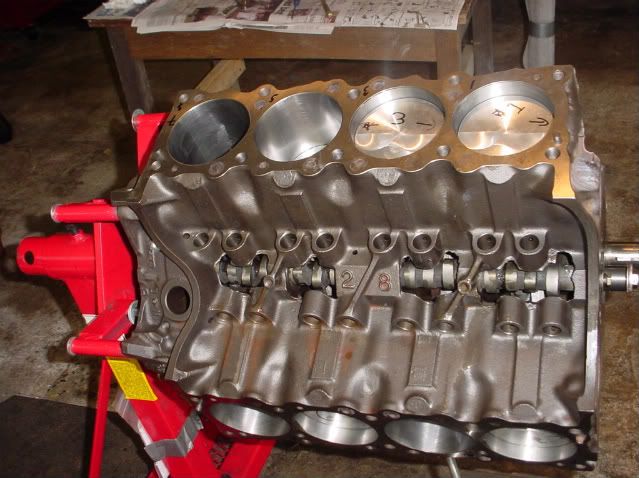
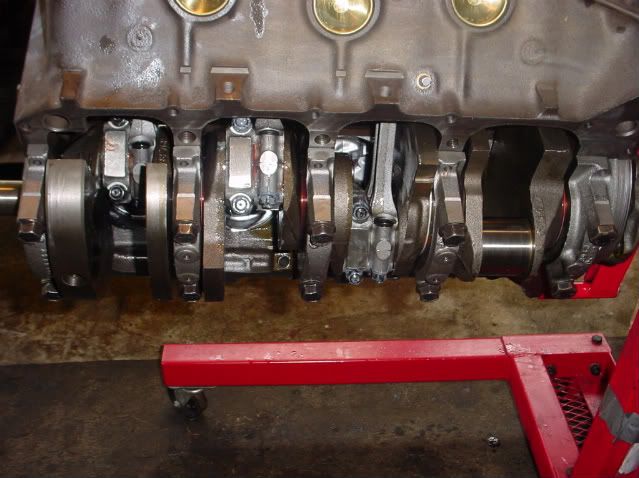
This is how the block will look as you add the piston/rod assemblies. As you rotate the crank after the installation of each piston, you should notice a steady increase in amount of effort it takes to turn the crank. Everything should turn smoothly, with no binding. If binding occurs, or it things just don’t feel right, stop! Better to backtrack and correct any trouble spots now, because it won’t get any easier later on.
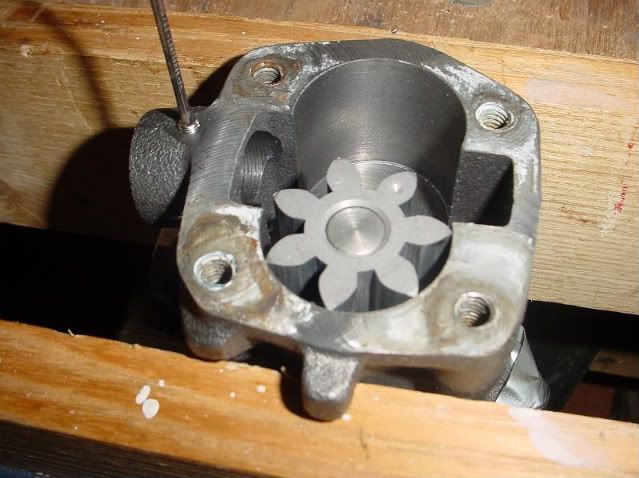
Even though it may be brand-new, don't forget to check the oil pump. I had read about cases where the oil pickup had separated. In order to prevent this from happening, I drilled and tapped for an 11/32 allan screw that provides an interference fit between the oil pump and the oil pickup. I also disassembled the pump to make sure there were no metal shavings or anything else that might interfere with the pump's performance.
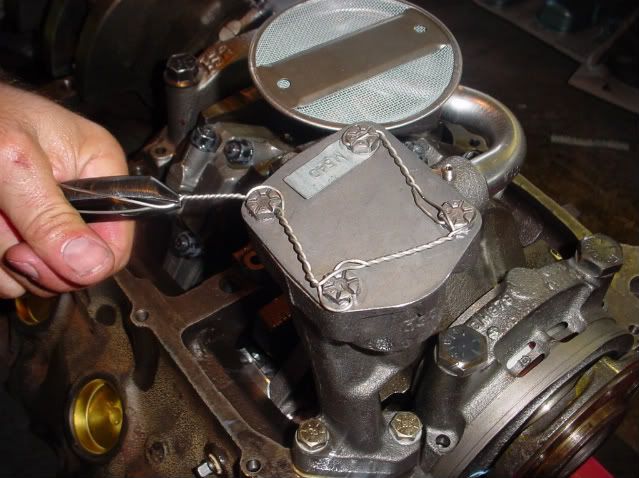
Here is the pump as installed in the block. The allen screw received a health dose of red loctite. As an additional margin of safety we wired the bolts to make sure nothing would come loose during operation. Some of you may feel this is overkill but, if you are building the motor, you get to satisfy your own comfort level.
You will also need to adjust the oil pump pickup so it sits at the right height in the oil pan. A clearance of 1/4" to 3/8" from the bottom of the pan is about right, checked with pan gasket in place.
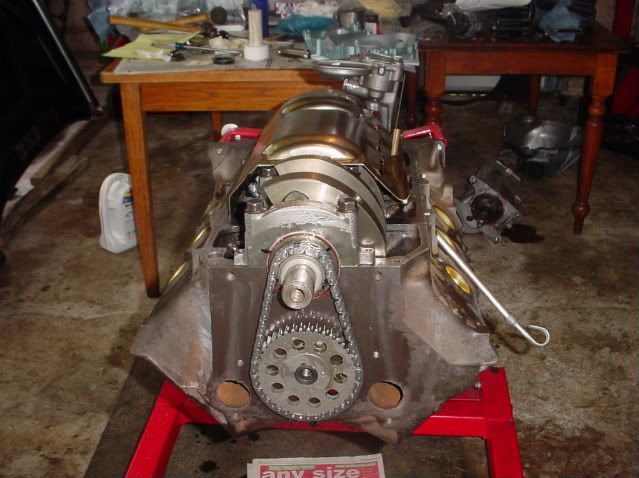
Here is the almost complete short block. All pistons are installed as are the windage tray, timing gears and timing chain.
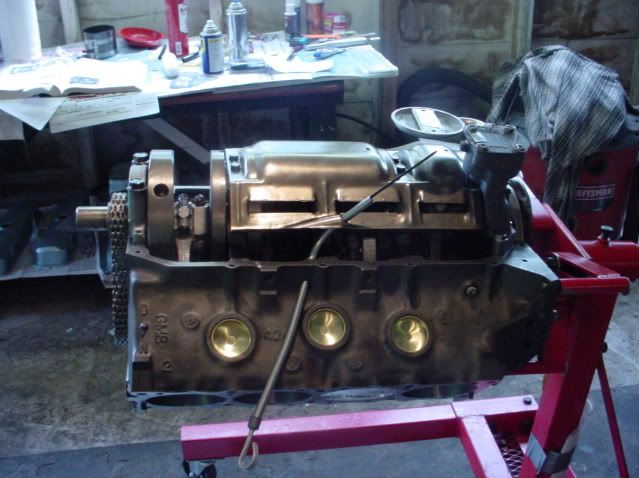
Another view of the short block. When rebuilding a Pontiac V-8, make sure you get the correct dipstick assembly as they do vary depending on year and the presence or absence of a windage tray.
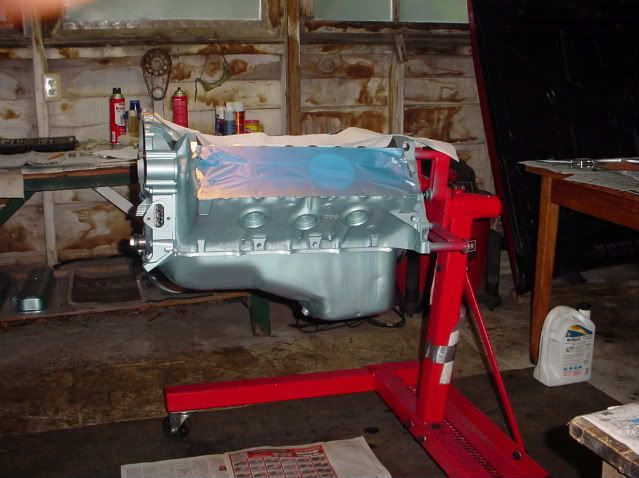
Here is a result of our first day of engine building -- a complete short block, less water pump.
We started at seven in the morning and called it quits at five. After making sure the exterior of the block was clean and dry, I painted it later in the evening.
So far, the time spent planning and organizing was time well spent. Almost every part we needed was ready to install and within easy reach. The same was true for tools and assembly supplies.
The only things unaccounted for were the oil pump bolts, but after a quick trip to the hardware store we were back in business.
In the next post we’ll move on to the top half of the motor.