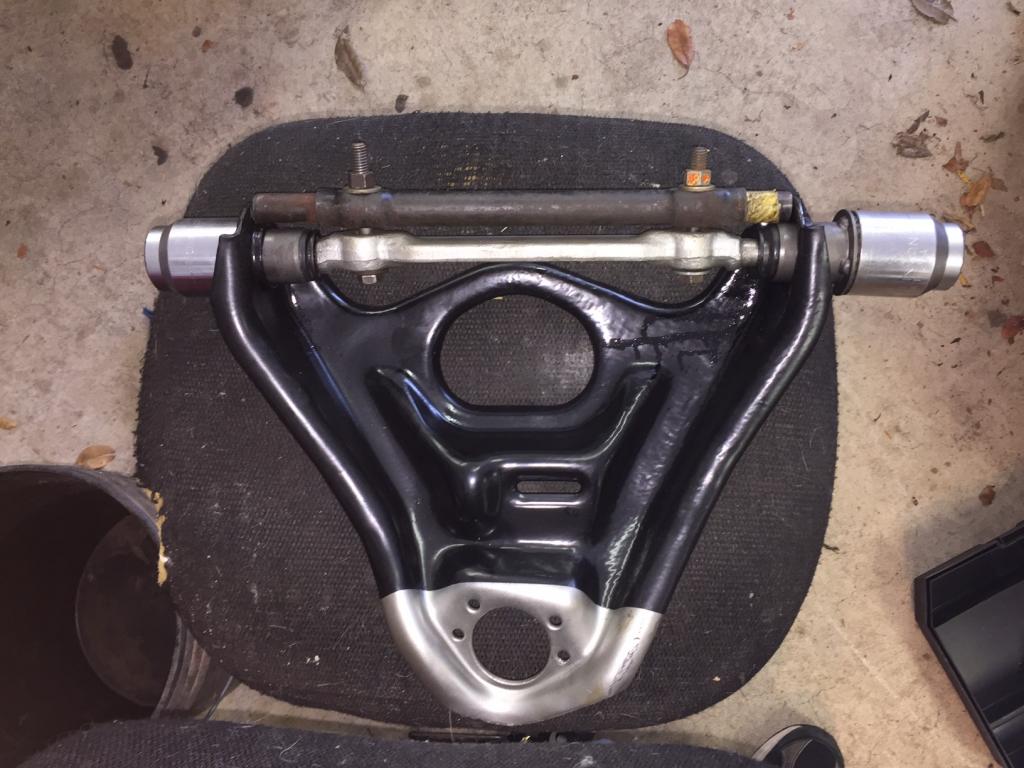
The upper control arms are a little more involved. If you try to press both bushings in without supporting the inner arms where the flanges are, it will bend the entire arm in half and destroy it. Originally there was a dealer issued tool (no longer available) that supported the area between the two arms while using a press. So I built my own...
First, I used the vice to press in the smaller bushing (1975 used a large and a small bushing, while earlier models used the same small bushing on both sides). I then set the pivot bar in place, passing it through the larger bushing hole and set the large bushing in place. I then set up the spacer bar I fabricated from the old central pivot bar that I had to cut off due to the factory welded-on nut. I cut it to the exact length that could run parallel to the new bar. This way I could use a couple long bolts to pin them together to hold the spacer bar from flying outward under pressure. It worked great!
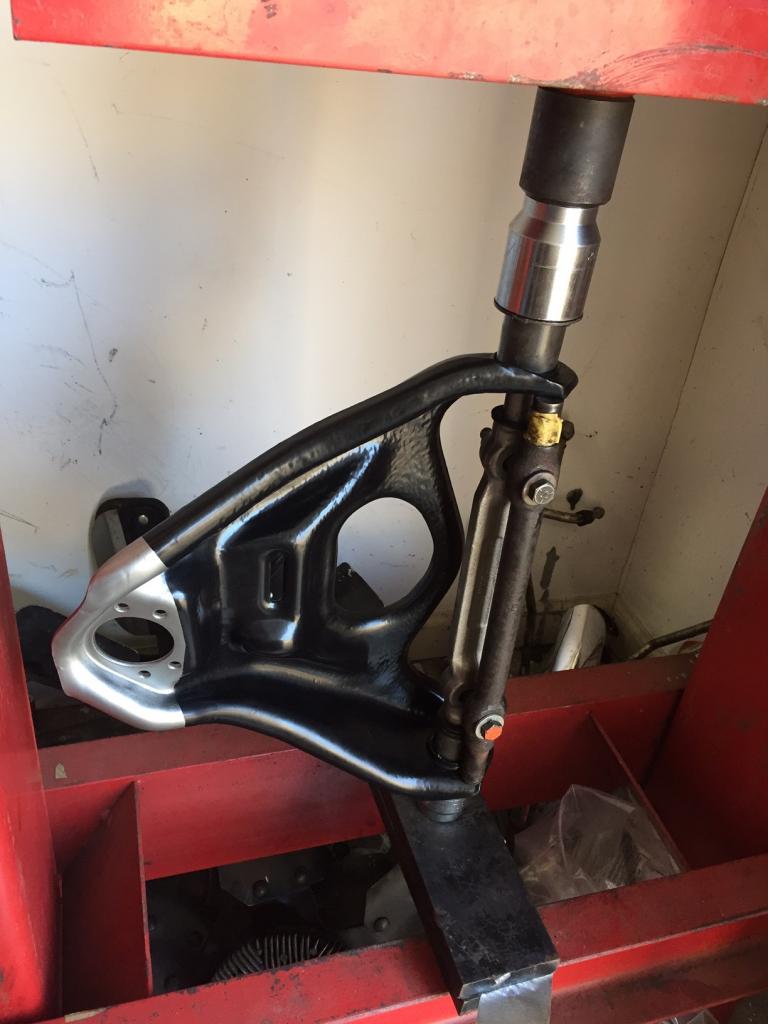
As for the powder coating holding up, it survived the process relatively unscathed. The silver paint did scratch off when I pressed the lower ball joints in but that was easily resprayed, and it didn't hurt the underlying black powder coating either. (although I had to buy another Moog ball joint after I neglected to account for how far the balljoint stud would protrude through the large sockets when pressed, and it bound up against the press'es floorplate and ruined the internal parts. So I had to go out and buy another one at the local auto parts store. They actually had the same Moog part in stock (at twice the price I paid for the first one).