


| FAQ |
| Members List |
| Social Groups |
| Calendar |
| Search |
| Today's Posts |
|
#321
 02-12-2010, 09:16 PM
|
||||
|
||||
|
..heres an example I found on YOU TUBE..>>>http://www.youtube.com/watch?v=Q-dtb...rom=PL&index=2
|
|
#322
02-13-2010, 01:53 AM
|
||||
|
||||
|
try using fine glass bead on low pressure in a blasting cabinet.
|
|
#323
02-13-2010, 12:45 PM
|
|||
|
|||
|
Quote:
__________________
1973 T/A Buccaneer Red L-75 A3,83k mi. #'s match 1979 T/A Atlantis Blue W-72 WS6 23k mi.survivor#'s match 1999 T/A Navy Blue 60k mi....babied  1968 442-gone but not forgotten "Oh,you can think about it,.....but don't do it!" Sheriff Bufford T.Justice |
|
#324
02-13-2010, 01:27 PM
|
|||
|
|||
|
Pat and anyone else,
I believe your '72 has the black rear view mirror. I just disassembled one of my 70 gray/stainless (see pic). Do you know of a source for replacement glass, or where I can have the reflective replaced? |
|
#325
02-13-2010, 02:29 PM
|
||||
|
||||
|
|
|
#326
02-13-2010, 02:34 PM
|
||||
|
||||
|
Quote:
Pat |
|
#327
02-13-2010, 06:21 PM
|
|||
|
|||
|
Is there some kind of visor mirror that goes on the passenger side? My '72 has a metal plate with two screws attached to the visor that looks like a mirror may have been attached. If so, any idea where I could get one or the dimensions so I can have one made. The again, maybe it was from Strauss Stores and I can leave it off. Thanks
|
|
#328
02-15-2010, 09:30 PM
|
||||
|
||||
|
After reading the service manual on installing the door glass which wasn’t very helpful. I thought I would post some step by step directions & pictures to help the next guy that has disassembled his car years ago and can’t remember how it go back together.
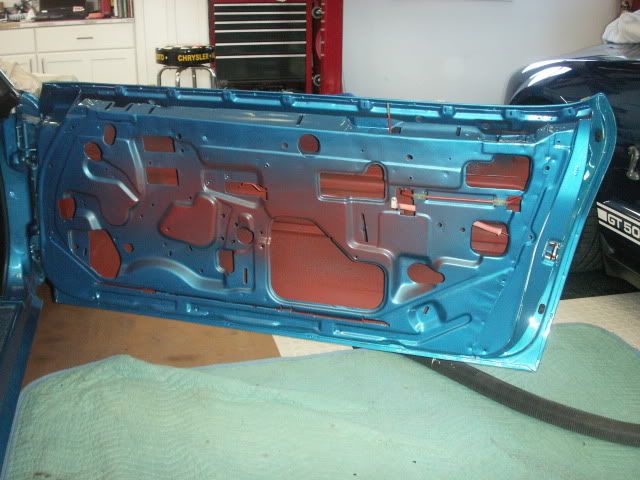 Starting with a properly align door, install the outside door handle, lock, latch assembly, and both the inside latch rod & the lock latch rod. 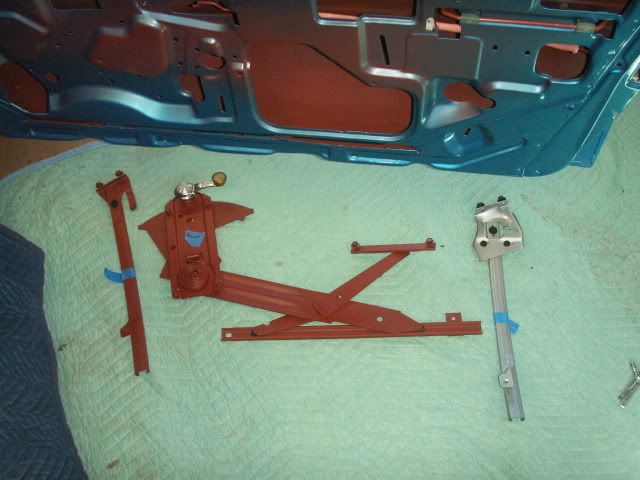 Most of the window track & crank mechanism are installed before the car is dipped in red oxide. The back track which is silver was installed after the glass at the factory as to leave room for the window guide bolted to the glass. 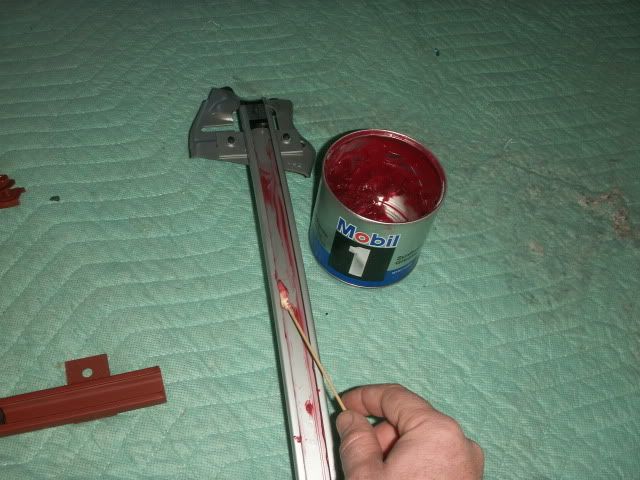 I greased up all the tracks & gears on the crank. I’m not sure what the factory used so I used wheel bearing grease. 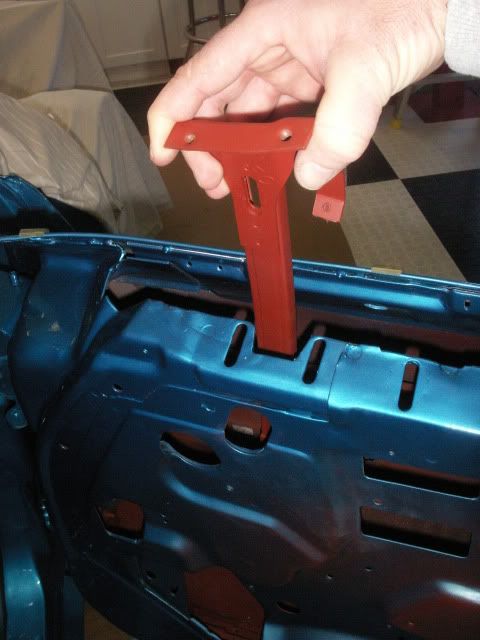 The 1st part to get installed was the front track. Note temporary bolt it in as to leave as much room for the glass & guide to fit. 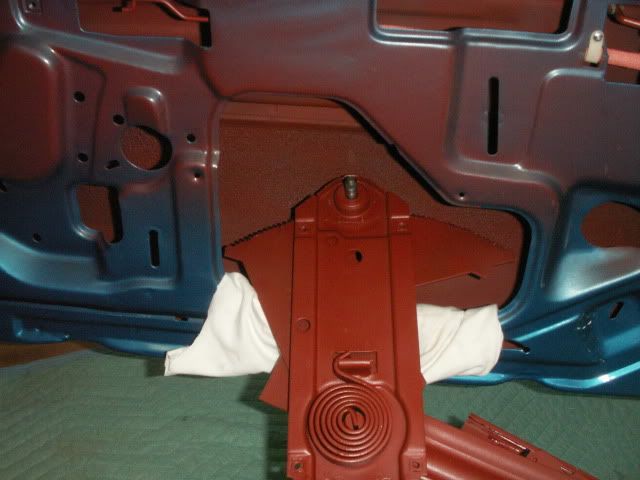 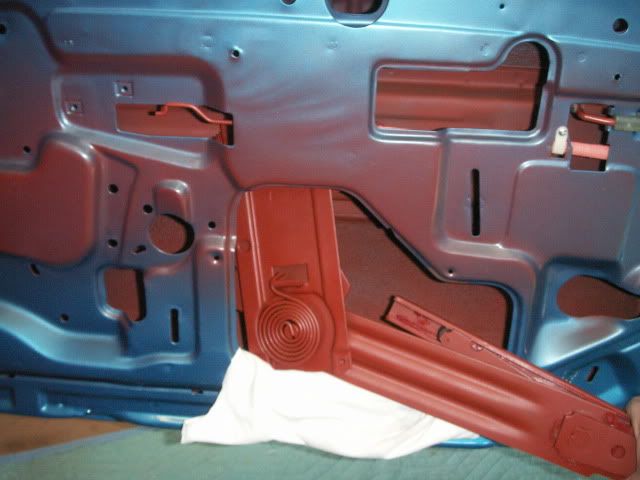 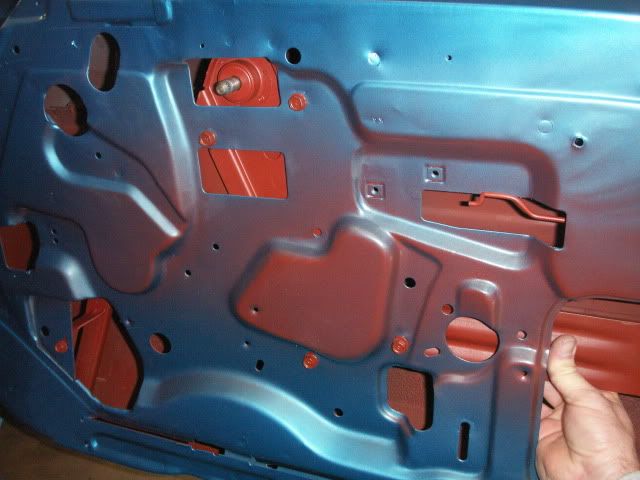 Then the crank mechanism is installed through the large hole in the center of the door. Note wheel the crank to about the center of the gear. 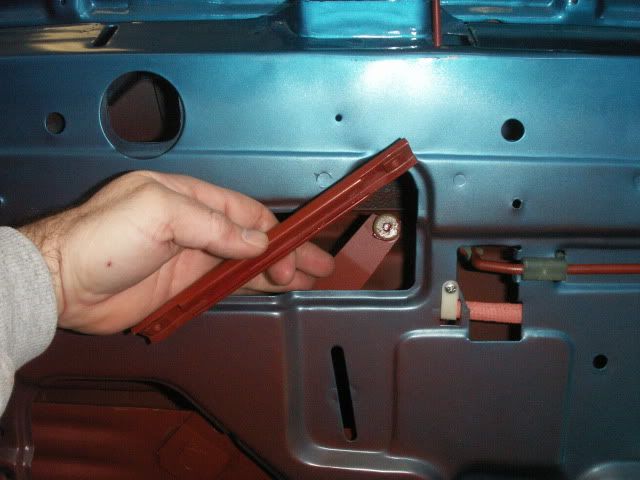 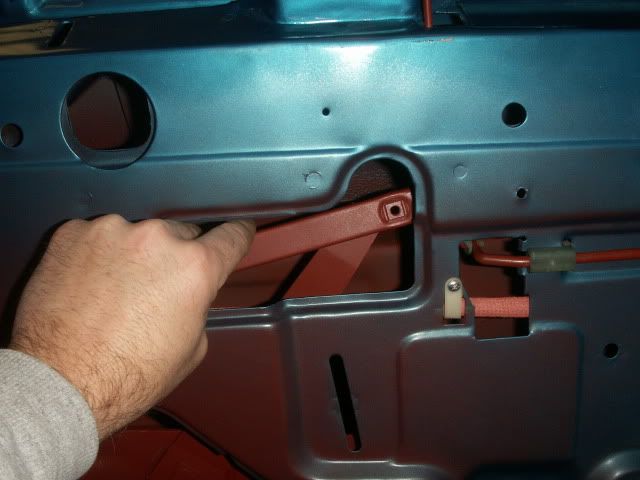 Next swing the small inward pointing roller up to the opening just above the large hole and slide the short track over the small roller and into position. The aft end has a small hole for a bolt. 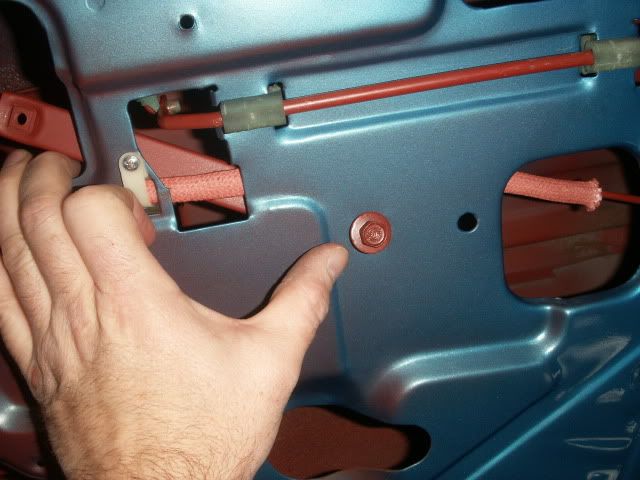  The front of the track has a vertical slot for adjustment. Note you should see marks from the original bolt position that will help get the adjustment close. 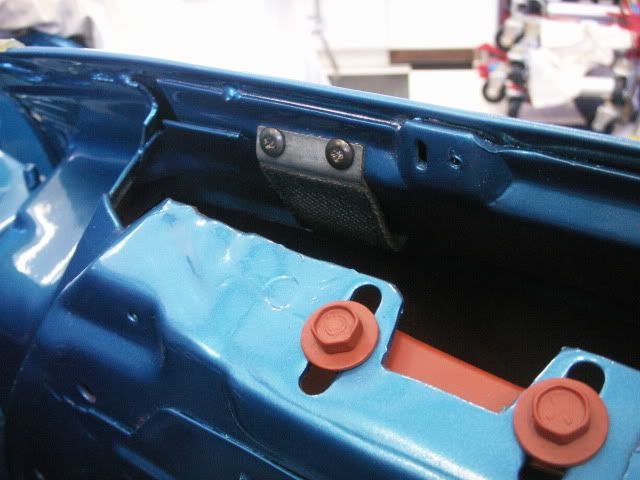 Next I installed the small felt covered window pad at top front end of the door. 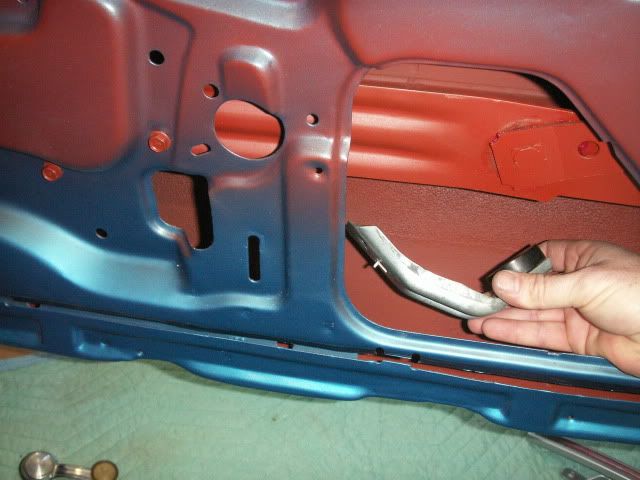  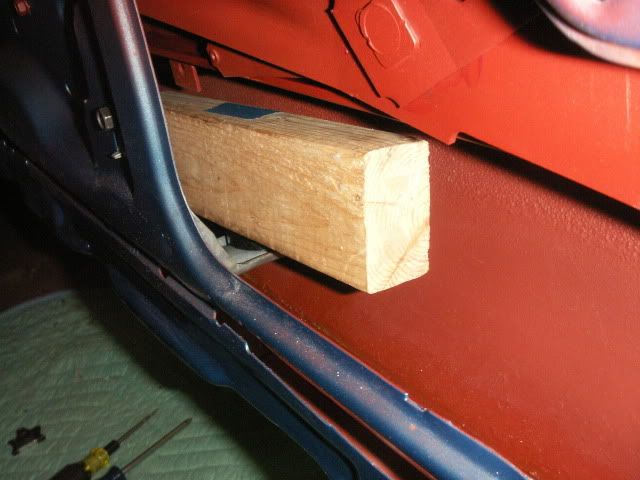 Then bolt on the glass stop at the lowest position and put a piece of wood about the size of a 2x3 on top of the glass stop. This help hole the glass at the right height to bolt the window crank track on. 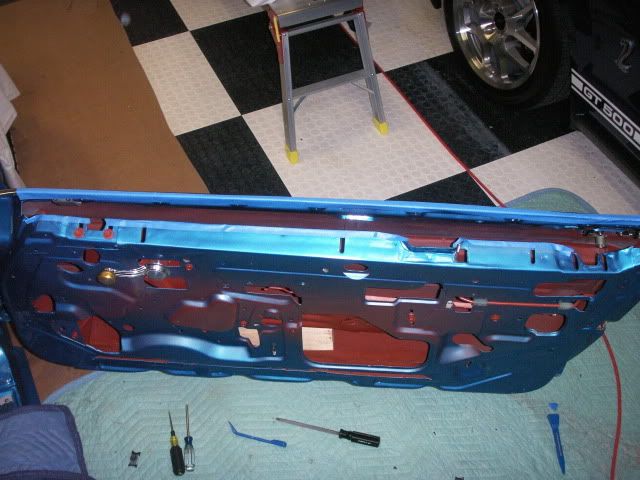 Now’s the time to tape the inside & outside top edges of the door to protect the Paint & glass. 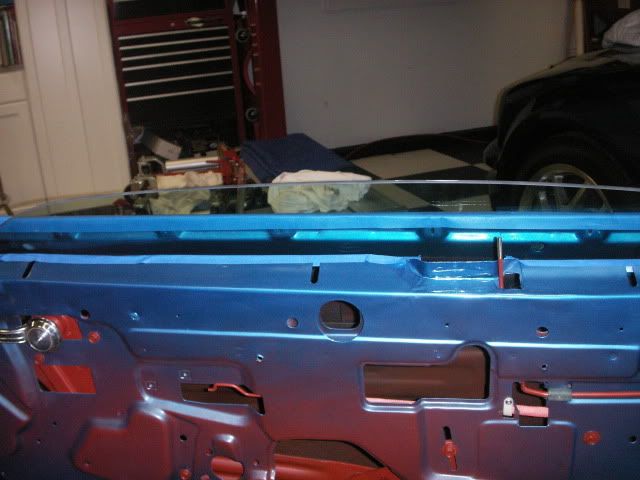 Align the front window guide with the front track and carefully slide the window down to the 2x3 piece of wood on the glass stop. 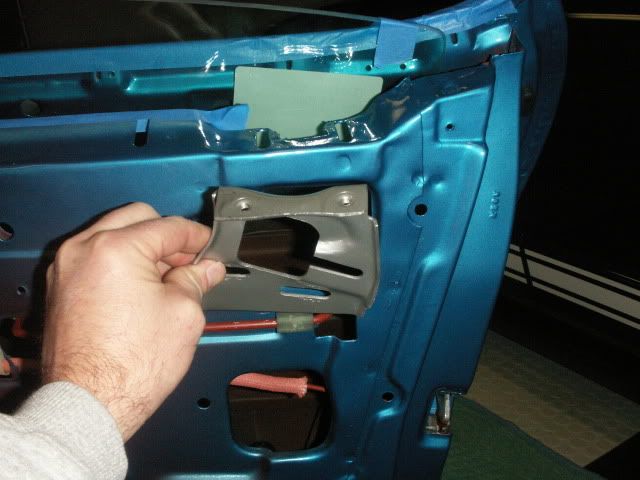 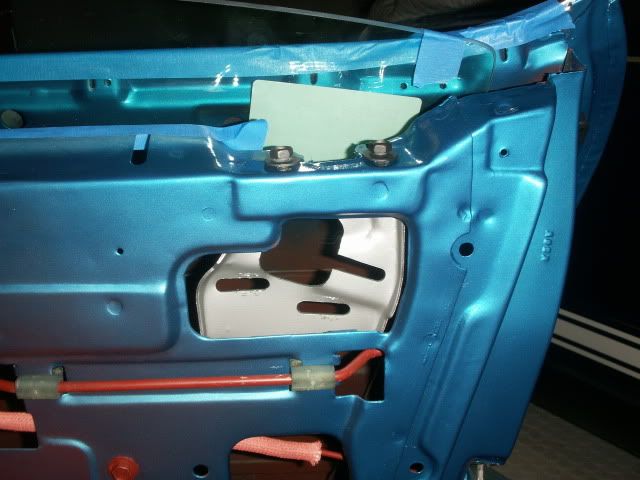 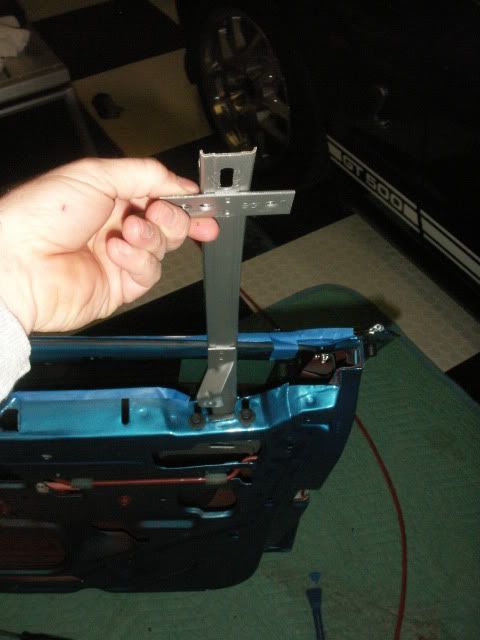 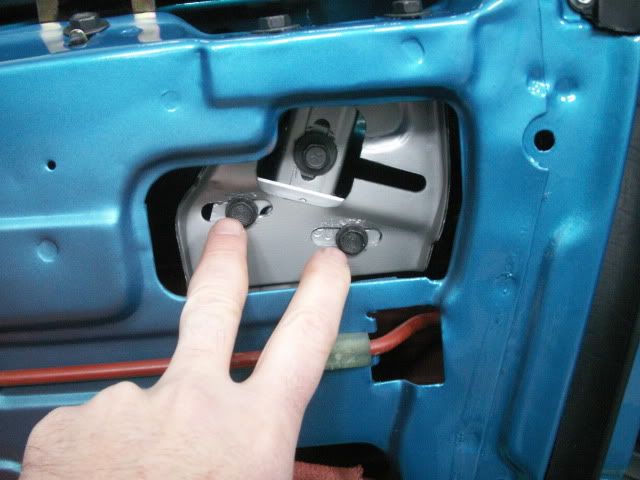 Next install the mounting bracket for the aft track, Just start the bolt as to leave room to put the track in. now slide the aft track down and over the aft window guide and bolt it up. Note the marks again to help get the fit closes. 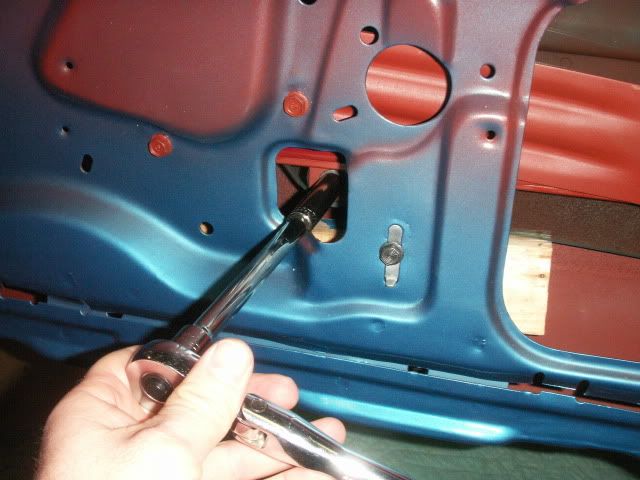 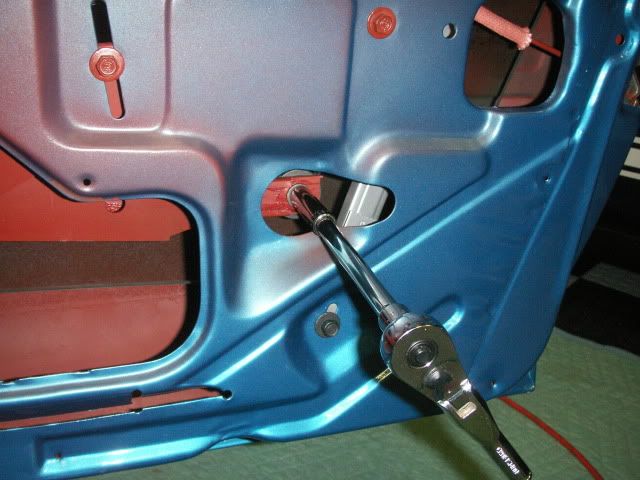 With both tracks in but loose, install the long horizontal track to the bottom of the glass. The 2x3 wood should hold the glass at just at the right height to access the track mounts and install the nuts. Note the end with the tab welded on, mounts forward with the tab down. 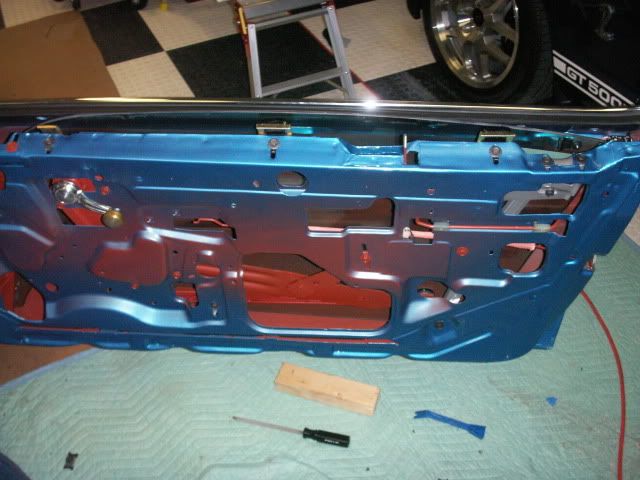 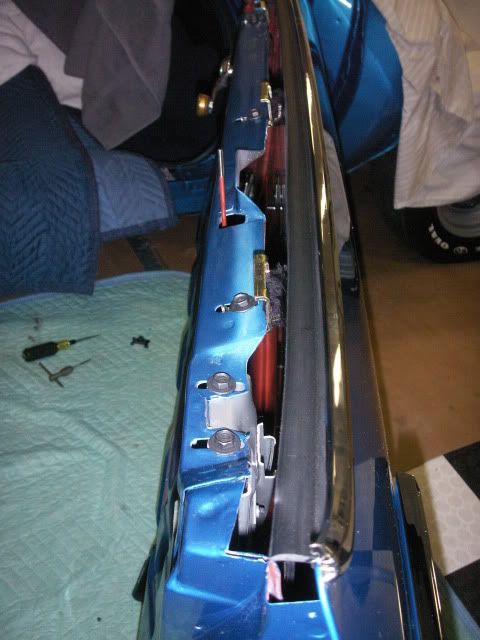 Roll the window up about a 1” or 2” and remove both the wood and the glass stop. Roll the window down until the guide is about to come out of the bottom of the track. Note hold the glass at the top as to not scratch the paint or glass even with the tape emplace. Now you can install the outer glass channel weather-strip. (1st clip on belt trim if so equipped) With the window extra low you can install the screws for the weather-striping. Then roll window up and reinstall the glass stop so the window is just under the outer weather-striping. Next with the window down install the 3 door panel retainers (2 are felt padded & the forward 1 is not) Also install the door gasket at this time, you will need it installed to help adjust the window fit. To help get a start on fitting the glass to the opening tighten the top of the tracks at the old marks. Note this controls the top of the window in & out. The two bolts at the back track control the glass front to back. 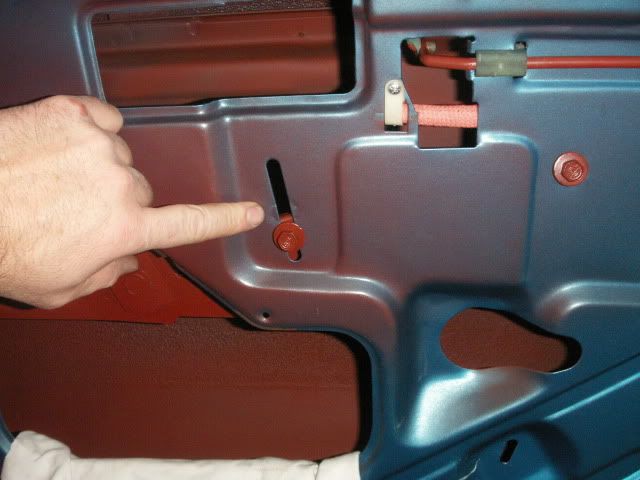 The short track helps control the angle of the window front to back. 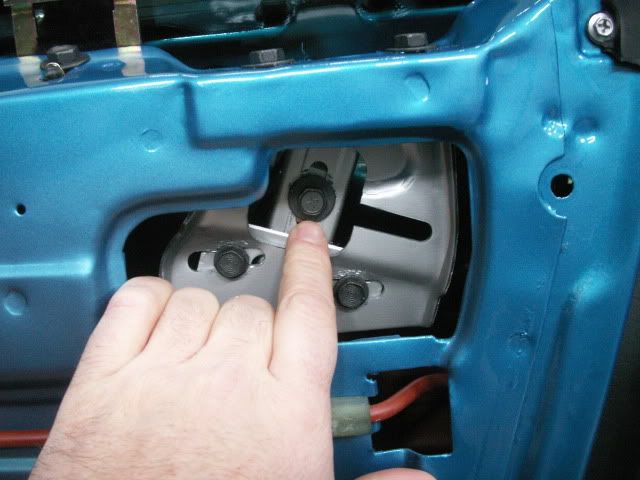 And at the top of both tracks there are guide stops that need to be installed & adjusted to set the height of the window in the up position. 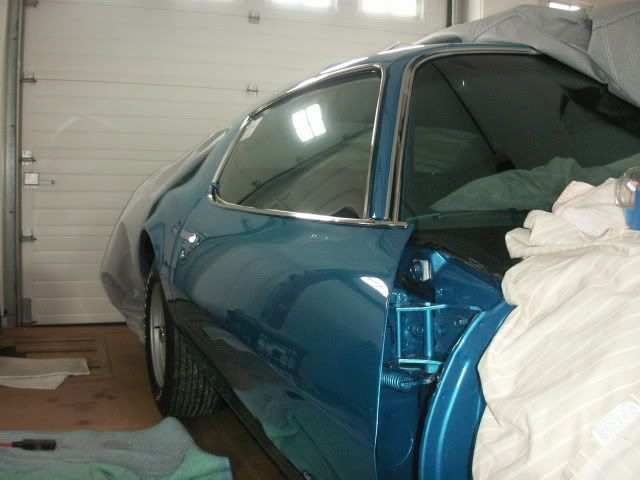 As for getting the window adjusted take your time and close the door slow! I’m sure there are other ways but this worked for me and I hope it helps others! Pat Last edited by keepat; 02-15-2010 at 10:20 PM. |
|
#329
02-15-2010, 10:07 PM
|
||||
|
||||
|
great tutorial Pat! This will help me a lot when it comes time to finally reinstall the glass and tracks of mine for good. Mine is a power window car but the basic steps should be the same. Thanks for posting this in such well laid out detail.
__________________
'72 Formula 455HO TH400, Revere Silver, black deluxe '74 Trans Am SD 4 speed, Admiralty Blue, blue deluxe |
|
#330
02-15-2010, 11:59 PM
|
|||
|
|||
|
Hey Pat,
Getting along nicely. Strange that they would install the tracks, dip the car, then take them out again. It appears that only Norwood did this, because Van Nuys built cars don't have the primer on them -- they're clean galvanized. |
|
#331
02-16-2010, 12:40 AM
|
||||
|
||||
|
Quote:
__________________
1968 Firebird 400HO convertible 1971 Trans Am 4-speed, white/blue |
|
#332
02-16-2010, 01:44 AM
|
|||
|
|||
|
Yeah, they used gray. Odd about no dipping, because I've seen upside down runs on them and primer where you couldn't get it there by spraying.
|
|
#333
02-16-2010, 09:21 PM
|
||||
|
||||
|
Pat, great posts on the door handle and window install! Thanks!
__________________
http://www.starspangledbannerchallenge.com/ |
|
#334
02-16-2010, 09:30 PM
|
||||
|
||||
|
I order a drives door decal with my Vin# and the weight of the car. As there was no decal on the door when I bought the car I had no reference for the weight. What the seller used for the weight seems high? Anyone know if this is the correct weight?
Thanks! Pat 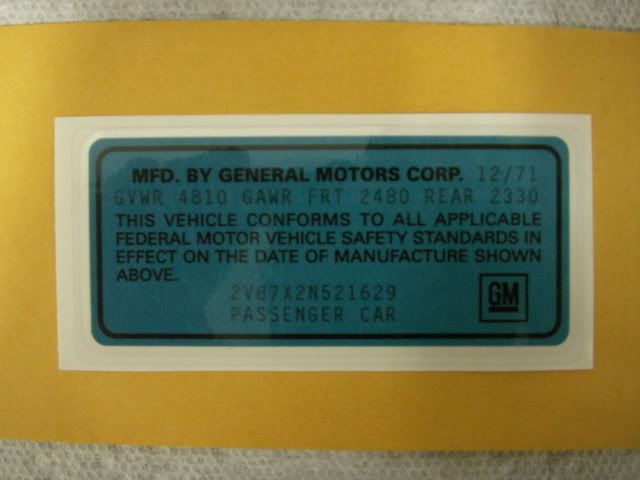 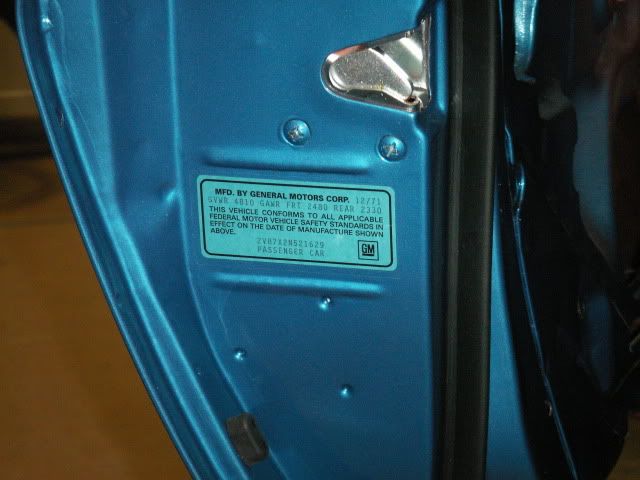
|
|
#335
02-16-2010, 11:18 PM
|
||||
|
||||
|
my original '72 door sticker (what was left of it) had no weights on it. The 12/71 date was in the position of your stickers "2330" and it just had the VIN in the lower area with no wording of passenger car.
__________________
'72 Formula 455HO TH400, Revere Silver, black deluxe '74 Trans Am SD 4 speed, Admiralty Blue, blue deluxe |
|
#336
02-16-2010, 11:45 PM
|
|||
|
|||
|
Quote:
|
|
#337
02-16-2010, 11:48 PM
|
|||
|
|||
|
Quote:
|
|
#338
02-16-2010, 11:48 PM
|
||||
|
||||
|
Bill you forgot to say LOOSE very large rivets....
|
|
#339
02-17-2010, 01:12 AM
|
|||
|
|||
|
Quote:
Oops..wait, we are talking about GM of the early '70's... quality was a 4 letter word back then.. Pretty darn good now, but many stupid engineering decisions like riveting side view mirrors to probably the heavest door ever made( a lot of mass when slammed shut) b gave GM a sloppy rep for quality.. Still love their styling on just about any of their product lines( yes, I like Buick GS's, Olds 442's etc as well as a few Chevy products) back then...but durability was bad.. hence LOOSE riveted side view mirrors... |
|
#340
02-17-2010, 09:14 AM
|
||||
|
||||
|
Sounds like I'll need to order another decal.
Thanks! Pat |
| Reply |
|
|
The PY Online Forums is the largest online gathering of Pontiac enthusiasts anywhere in the world. Founded in 1991, it was also the first online forum for people to gather and talk about their Pontiacs. Since then, it has become the mecca of Pontiac technical data and knowledge that no other place can surpass.


 Linear Mode

