


| FAQ |
| Members List |
| Social Groups |
| Calendar |
| Search |
| Today's Posts |
|
#1
 11-26-2011, 11:42 PM
|
||||
|
||||
 dash resto started
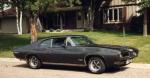
so while sitting around in the garage in the drivers seat a few weeks ago, i was imagining what my 68 lemans was gonna look like with the new aftermarket dash bezel with the new autometer american muscle gauges. all of a sudden, i said, "this dash (upper and lower metal sections) is gonna look like crap with the new goodies. there were sections where the dash ignition keys had scraped paint off and i screwed it up worse with a rattle can. so i decided to go out and buy a compressor, some rattle can primer, some 80 grit hook and loop for my multi-tool, and a el-cheepo spray gun for 15 bucks from harbor freight. finished sanding down the lower metal section and primed it and painted it and i'm am totally dissappointed in the quality of either the paint(dupli-color off the shelf at o'reilly) or the spray guy. the paint ended up having that orange peel effect. coulda been the pressure from the compressor. so tomorrow im gonna get to acetone it and start all over again....OH JOY!!! While having the seats and steering wheel out, i had a chance to sand the brackets and column down an paint them. fortunately they came out great. last year i let a guy put new floor pans and carpet in and he didnt pull the carpet up far enough towards the firewall, so theres about 2 or 3 inches of old dusty looking material that can be seen at the right angle. I took a rattle can of gloss black plastic paint to the kick panels and other miscellaneous parts. although halfway through painting the kickers, i started wondering if they were originally low gloss black! more pics coming.
|
|
#2
11-26-2011, 11:50 PM
|
||||
|
||||
|
more photos of dash and column
|
|
#3
11-27-2011, 09:38 AM
|
||||
|
||||
|
At least your car was not finished when you painted this. Clean rags and thinner and it will be ready for paint again. You may actually get a decent finish from a rattle can if you overlap the paint.

__________________
1971 Pontiac GT-37 Car is a junk yard dog and maybe one day will be restored. 
|
|
#4
11-27-2011, 10:26 AM
|
|||
|
|||
|
Just went through the same thing on my 68 lemans!
Started doing an auto to 4-sp swap-one thing led to another. The first shot at painting the dash fisheyed big time everywhere. Had to resand ,prime and paint again.Ah the fun |
|
#5
11-27-2011, 11:49 AM
|
||||
|
||||
|
Quote:

__________________
'68 GTO 4-spd Hardtop (11) '68 GTO Convertible AT (1) '70 LeMans Sport Land of Lakes Muscle Car Classic Facebook Event Facebook Wall (Kurt Smith,Minneapolis) |
|
#6
11-27-2011, 12:11 PM
|
||||
|
||||
|
Quote:
|
|
#7
11-27-2011, 04:18 PM
|
||||
|
||||
|
test fitting the dash bezel. not looking good so far. first off, I had to shave off 1/2" from the right end to clear the glove box. then I had to shave about 1/4" x 1" from the far right top corner to clear the hinge(top right of the radio) thats for the dash pad. next step is to mount 3 mount tabs for the top mounts that go under the dash pad. and some type of receptacle for the lower mounting tabs. theres 2 need to be placed. too much work for something that supposedly "fit just like the original"

|
|
#8
11-29-2011, 01:05 AM
|
||||
|
||||
|
sooooo, after an hour of running between harbor freight, lowes, and advance auto, about 30 bucks for more hook and loop pads, acetone, t-shirt rags, another head for my multitool (that didnt fit BTW),and about 3 hours of sanding with the multi-tool and 80 grit, I finally realized that my handy dandy 18v dewalt and a wire bristle attachment works muuuuuccchhhh better than the multitool at stripping big chunks of paint at a time. another hour with the drill, 20 min ace scrubbing, 20 more minutes finishing with 80 grit and 220 grit. finally ready for primer. GOOD GOOGLY MOOGLY!! DID EVERY ONE HAVE TO LEARN THE HARD WAY OR JUST ME.
|
|
#9
11-29-2011, 01:46 AM
|
||||
|
||||
|
btw, i decided to try some dupli color acrylic laquer gloss black for the bottom section of the dash. has anyone tried this? whats been your experience. any other paint suggestions to get the factory look?
|
|
#10
11-29-2011, 08:53 PM
|
|||
|
|||
|
I think pretty much everything I have learned has been the hard way,so with you on that one.
The original black was low gloss.I went with high gloss,i just like the look better. After the second try I still had a couple of craters(you can see one in the closeup)SCREW IT!IT'S A DRIVER!I was not sanding the thing down again.Move on! |
|
#11
11-29-2011, 09:29 PM
|
||||
|
||||
|
The dash looks terrific - well done! If this is your driver and not a show car, I would never consider redoing the work. Only YOU are likely to ever know any imperfections exist. People will be impressed.
__________________
'68 GTO 4-spd Hardtop (11) '68 GTO Convertible AT (1) '70 LeMans Sport Land of Lakes Muscle Car Classic Facebook Event Facebook Wall (Kurt Smith,Minneapolis) |
|
#12
11-30-2011, 12:38 PM
|
||||
|
||||
|
Nice work!
__________________
-Jeremy 1968 GTO 4-spd convertible, console, factory gauges, hidden headlights, 3.90:1 posi, AM/FM radio. 1962 Catalina convertible, Starlight black w maroon interior & white top. |
|
#13
11-30-2011, 03:55 PM
|
||||
|
||||
|
Thanks guys. It s definitely not an original show car, custom if anything. I started stripping a couple of days ago. It was totally wearing on me and I had a ton of free time. It's getting primed today since it's finally above 45 degrees and I'm rattle canning the primer and paint so as to not put my inexperience behind a pneumatic air gun again. IMO, if it turns out halfway decent it'll be a massive improvement to how it look before I stripped it. One thing I surely figured out is to take slow. Light swipes barely overlapping the last. I had runs, and heavy spots in it last time
|
|
#14
11-30-2011, 09:58 PM
|
|||
|
|||
|
where did you get that custom dash bezel ?Looks pretty cool.
I've never seen one of those |
|
#15
12-01-2011, 01:50 AM
|
||||
|
||||
|
making progress
i decided to take a break from cleaning and prepping the lower dash and do a lil fab work and test fitting of the new bezel. I thought the headlight switch was gonna be a problem. the switch and harness together was causing a clearance issue with the gauges, so i decided to just get some 1/4" male connectors and some female 1/4" RIGHT ANGLE connectors and 14 gauge auto wire and extend the harness with individual connections. and after looking at these pics, i noticed i'll need a larger gauge wire for the hot wire, but the problem was that with the harness attached to the HL switch, the clearence was over 3", with the extended connections, its right at 2". having to worry about this along with the actual placement HL bezel and knob. there werent predrilled provisions for the HL and cigar lighter. the space between the wall and the lower left gauge didnt allow much room for error in placement. it seems to be a little off but only noticeable when i point it out. the new panel, the old woodgrain from the glove box door, and the woodgrain from the corner piece will be finished in a brown carbon fiber finish once i get finished test fitting and any other fab work to the panel. I.... CANT..... WAIT..... now on to the confusing stuff, like actually wiring up the gauges, harnesses, sending units, and all the techie stuff

|
|
#16
12-01-2011, 01:59 AM
|
||||
|
||||
|
more pics
here are more pics
|
|
#17
12-03-2011, 12:42 PM
|
||||
|
||||
|
got the dash stripped again, primed with a filler/primer, then sanded with 220,400,600, and 1000 grit. then a good wash job and painted with rattle canned it with acrylic laquer gloss black, the acrylic lacquer clear. GOOD NEWS- no feathering, or orange peel effect. im really impressed with my work on this section. i dont know how the ash tray came, seeing as mine was pretty rusted. so i blasted it and finished the outside the same as the dash, but the inside, i just sprayed some stainless steel paint to it, looks great. dropped the bezel off this morning to be finished in the brown carbon fiber after i had to mount 2 bottom studs to hold it around the steering column. just used some putty and jb weld then sanded and painted black. now just waiting on the new original style dash nobs and bezels.
|
|
#18
12-04-2011, 06:56 PM
|
||||
|
||||
|
just about there. I just finished wiring up most of the wiring for the dash. however , now im stuck as to what to do with the oil sending unit. the guy that put in my motor set up my temporary mechanical oil gauge sending unit on the rear of block by the oil filter. now im going with electric gauges and it looks like i can place the new sender in the same location. the thing is that ive read where people say they can vibrate to the point of malfunction in high torque motors. is this the location from the factory, what are some other options that can be explored?
|
|
#19
12-06-2011, 08:37 PM
|
||||
|
||||
|
|
|
#20
12-07-2011, 10:13 PM
|
||||
|
||||
|
really starting to come together now. more test fitting, more wire organizing and still have to have the dash panel finished in carbon fiber. i put in the old dash knobs and bezels for test fitting.
|
| Reply |
|
|
The PY Online Forums is the largest online gathering of Pontiac enthusiasts anywhere in the world. Founded in 1991, it was also the first online forum for people to gather and talk about their Pontiacs. Since then, it has become the mecca of Pontiac technical data and knowledge that no other place can surpass.






 Linear Mode

