


| FAQ |
| Members List |
| Social Groups |
| Calendar |
| Search |
| Today's Posts |
|
#801
 01-26-2013, 05:34 PM
|
||||
|
||||

Quote:
|
|
#802
01-26-2013, 06:27 PM
|
||||
|
||||
|
here's link page where he showed the details on it.
http://forums.maxperformanceinc.com/...552306&page=31 It was more of a pertronix conversion now that I go back and look at it. He ended up using the coil in the cap if I'm reading his last post correctly.
__________________
'72 Formula 455HO TH400, Revere Silver, black deluxe '74 Trans Am SD 4 speed, Admiralty Blue, blue deluxe |
|
#803
01-26-2013, 06:39 PM
|
||||
|
||||
|
Yes, it looks like he replaced the module with the Pertronix unit but kept the original coil pack on top? I wonder how it has held up three years later.
|
|
#804
01-27-2013, 03:32 PM
|
||||
|
||||
|
Steve,
Over 3000 miles and the setup is working great! As long as you have a new or good set of wires and working coil it will work better then the original unitized module. Finding a new set of wires is the real problem! Pat PS your new project looks great! |
|
#805
01-27-2013, 04:12 PM
|
||||
|
||||
|
I drove a 72 formula 455 as my first car for over 50k miles. The only problem I ever had with that system was the wires, which cost me about $75.00 from a dealer in highstown NJ back in about 1980, and the pick up coil failed because the vac advance used to bend the wires. After working the wires back and forth enough, they would break. I couldn't find a pick up coil at the time so I used a later model HEI pick up as took just the coil out of it.
I thought it was a very reliable system. It ran flawlessly otherwise, no point wear,( which retards timing) great at high rpm, etc. Dave |
|
#806
01-27-2013, 05:13 PM
|
||||
|
||||
|
Performed an autopsy on the chopped up spark plug octopus (calimari?)
I initially tried using a hot knife but then just switched to a razor blade. I sliced the seam and then used a combination of Angry Old Man Strength and the razor to peel the top section away. It looks like the factory assembled these units with some type of weatherstrip adhesive/rubber cement. Definitely some tough stuff.  After slicing and fileting the top off, here is what appeared:  It is a pretty simple design. The wires have a terminal end with a tip that resembles a Chevy bowtie. The Bowtie inserts through the eight rectangular slots and is preset into the correct position around the circle.  Here is a close up of the "Bowtie". It can rotate 360 degrees to any position. There are two styles, 6 of the end-mounted tips and 2 of the side mounted tips. Each wire is stenciled with the number of the cylinder it goes to: 1,3,5, and 7 on one side and 2,4,6 and 8 on the other, preset in the 1-8-4-3-6-5-7-2 firing order.  And here is the base with all 8 wires withdrawn. Looks like a reasonably easy swap of the terminal ends onto another set of wires and then reseal the top with a suitable adhesive.  I will update once the replacement donor wires arrive. Last edited by njsteve; 01-27-2013 at 05:23 PM. |
|
#807
01-27-2013, 05:51 PM
|
||||
|
||||
|
I spent some time last night soaking the intact set of wires in some purple stuff and them scrubbed them in soapy hot water. They looked pretty good. No cuts or slices anywhere. I was able to pull the spark plug wire boots back to see the spark plug terminals. Now I see why they tossed this wire set. Almost all of the spark plug leads were broken and/or replaced. The original end is a 135 degree bent end. I ordered some replacement terminals from Taylor Wire and will replace them all.
The funny thing was that all I could find was 45 degree terminals...that was until I figured out that one manufacturer's 45 degrees is another manufacturer's 135 degrees. Add 135 and 45 and you get 180. :-)    You can see the silk screened numbers and "Packard TVR Suppression 1Q-73" 
|
|
#808
01-27-2013, 06:07 PM
|
|||
|
|||
|
Thank you Steve for detailing the unitized wiring harness surgery!
__________________
Buzzards gotta eat... same as worms. |
|
#809
01-29-2013, 04:58 PM
|
||||
|
||||
|
Steve,
I took one of mine apart today too, and that Bow tie is aluminum. I ended up pulling a connection off the bow tie and the wire. The wire is crimped on the connection similar to modern wires. How do you think you'll mate the Bow tie connector to the new wires? Looking at an old wire I pulled the dist. boot off of, I'd almost clip the end off the new connector and solder on the old connection to the remaining new connector. That way you keep the original connection on the new wire. I dunno, just thinking out loud here...vs completely removing both end connectors, hoping the original clamps on the new wire ok. I wonder how sd455hota did his connections? http://forums.maxperformanceinc.com/...d.php?t=705565
__________________
Pat Brown |
|
#810
01-29-2013, 05:44 PM
|
||||
|
||||
|
Alright, I jacked around with this a bit, and put the old connector on a new wire. I completely removed the connection on the new wire, lined up the crimp indention and squeezed on the connection. Seems to be snugged up pretty well. Just wondering how well the connection b/n the folded over wire and the old connector with my re-crimp. Looks like this should work. Just need to be careful removing and un bending the old wire connector from the old wire as to not booger it up much.
__________________
Pat Brown |
|
#811
01-29-2013, 05:48 PM
|
||||
|
||||
|
Another shot....is there a crimping tool one could use to get the crimp on the wire where it pushes it on the wire more like the factory?
__________________
Pat Brown |
|
#812
01-29-2013, 06:02 PM
|
||||
|
||||
|
It looks like your ends are broken. The bowtie is supposed to be permanently peened over, attached to the collar that goes onto the cable.
|
|
#813
01-29-2013, 06:13 PM
|
||||
|
||||
|
Yeah, the one I pulled out stripped out, so I was using that one as my test subject.
__________________
Pat Brown |
|
#814
01-29-2013, 07:33 PM
|
||||
|
||||
|
MSD makes a ratcheting tool for crimping Ignition wire ends.
http://www.msdignition.com/Products/...et_Action.aspx
__________________
Tod Hoffmann 1966 GTO Montero Red Hardtop - Holley EFI'd 462, KRE DPorts/Muncie 4spd 1990 Chevy 454SS pickup - Accel DFI/T56 6spd - Hot Rod Power Tour Long Hauler 1996 Chevy K2500 ECSB 'Poopy' 2002 Honda VTX1800C 2016 Cadillac CTS Premium My project thread: http://forums.maxperformanceinc.com/...d.php?t=516826 
|
|
#815
01-29-2013, 10:40 PM
|
||||
|
||||
|
I ordered the 135 degree spark plug terminals for the intact wire set and also the specialized crimping tool. They shuold get here by the end of the week. The replacement dated coded plug wires should be here tomorrow.
|
|
#816
01-29-2013, 11:30 PM
|
||||
|
||||
|
Just got back from my Tuesday night body shop class at the local polytech high school. My ongoing project is the Formula.
As you may know from following this thread, the car had NOS GM quarters put on it back in the 1980s, when they were still available. Unfortunately, at the time, the trunk drop offs were not available and the body guy did an amazing (though completely incorrect) hand-made version of drop offs. He used the existing trunk portion and then hand-made a flat panel and brazed it to the edges of the inner quarter. Now that the aftermarket has finally come out with the reproduction trunk drop offs, I decided to replace the hand-made ones myself. (after I got an crazy estimate of several thousand dollars per side to replace them at resto shop). The wonderful thing about this polytech adult education course is that you pay $400 for 12 weeks (every Tuesday night) and you get to use all their tools and expertise of a professional body man who is teaching the course. It is an amazing time! Here is the before shot of the handmade boilerplate inner quarter: 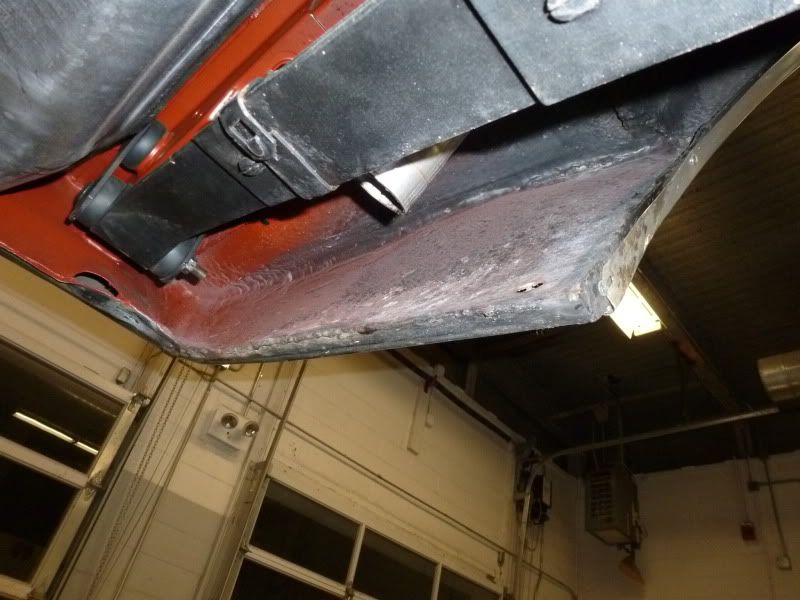 And after I used a cutting wheel to remove the major section and then a grinder to grind the edge of the brazing off, where it mated to the outer edge of the quarter panel.  Since the far end of the hand made panel was properly welded and mated to the inner quarter structure and matched the flat section of the new repro dropoff exactly, I left that in place and then made mounting flanges from a two-inch section of the prior hand-made drop off. 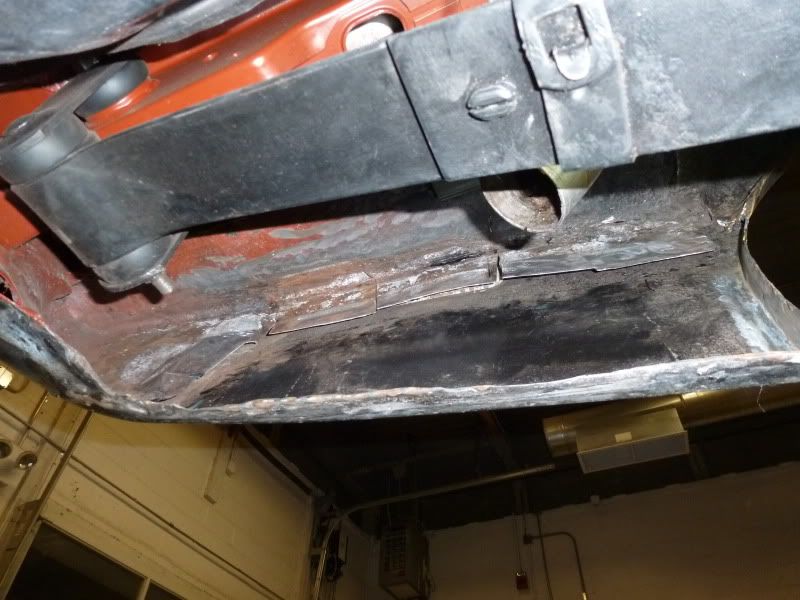 Instead of drilling and welding the dropoff in, we decided to use what a lot of modern body shops are using these days: structural panel adhesive. This stuff is amazing. It seals the bare metal and provides corrosion protection between the panels as it bonds them together with adhesive that is stronger than the steel itself. 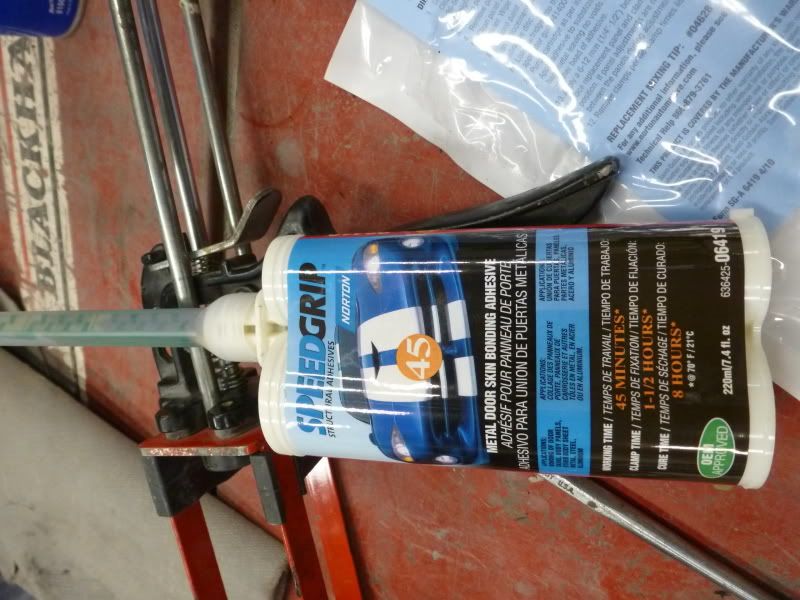
Last edited by njsteve; 01-29-2013 at 11:49 PM. |
|
#817
01-29-2013, 11:38 PM
|
||||
|
||||
|
I made a template out of a couple of manila file folders and then placed it on the the repro dropoff and marked off for cutting. I used a plasma cutter (a really fun tool) and trimmed it down to size until the panel just popped in exactly. These repros fit very well, right out of the box when it comes to aligning with the edges of the GM quarter.
Here's the repro panel being trial fit: 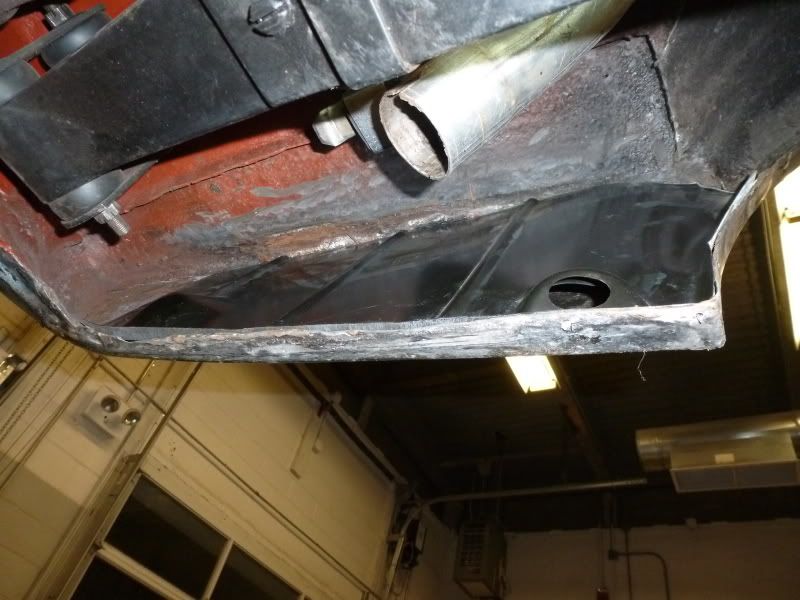 The adhesive it premixed in the funnel that attaches to the dual cannister and is first applied to the mounting areas and brushed over any bare metal area, as well as any area that is to be a bonding point. Then a liberal amount is squeezed out onto the panel and the panel is put into place. A bunch of vise grips are then used to clamp it in place, but not too tight. You dont want to squeeze out all the adhesive. 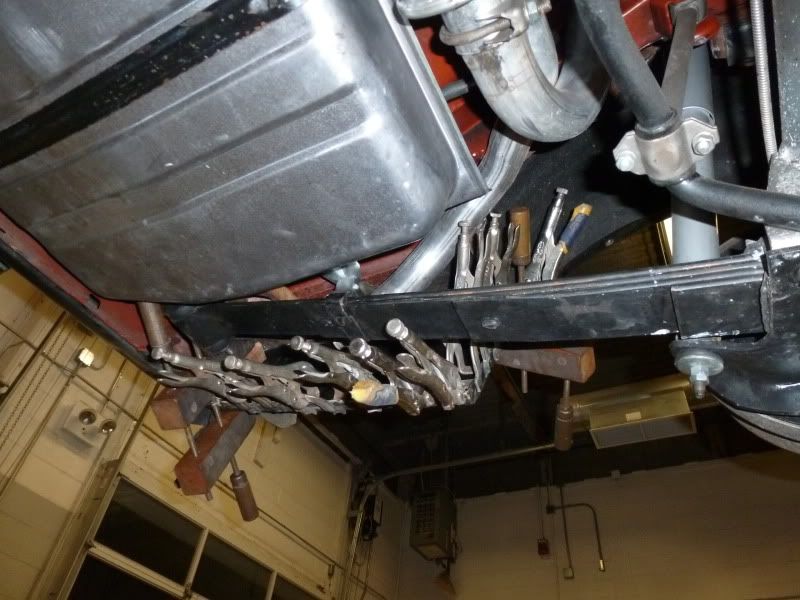 Yeah, I know that's sacriligious to use that clamp on the paint...but the paint is old and bad and I have a piece of cloth under it. This was the only way to get the upper portion held in place. The clamp is pressing on a section of wood across the upper bonding seam. Plus, they are my Grandfather's woodworking clamps from three quarters of a century, ago. 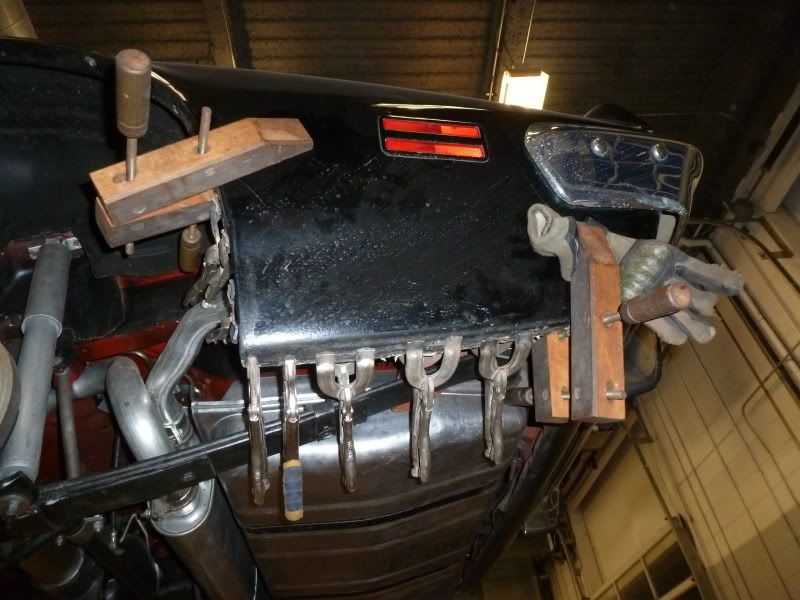
Last edited by njsteve; 01-30-2013 at 12:04 AM. |
|
#818
01-29-2013, 11:43 PM
|
||||
|
||||
|
It takes 45 minutes for the adhesive to set up. It turns from grey to green when it is cured. I used a heat gun to warm up the panel and that speeded up the process, since I only had three hours for the evening class and there was only an hour left when we started clamping. After several hours it is harder than the steel.
And here is the semi-final result until we do the cosmetic body filler to get rid of any visible seams. 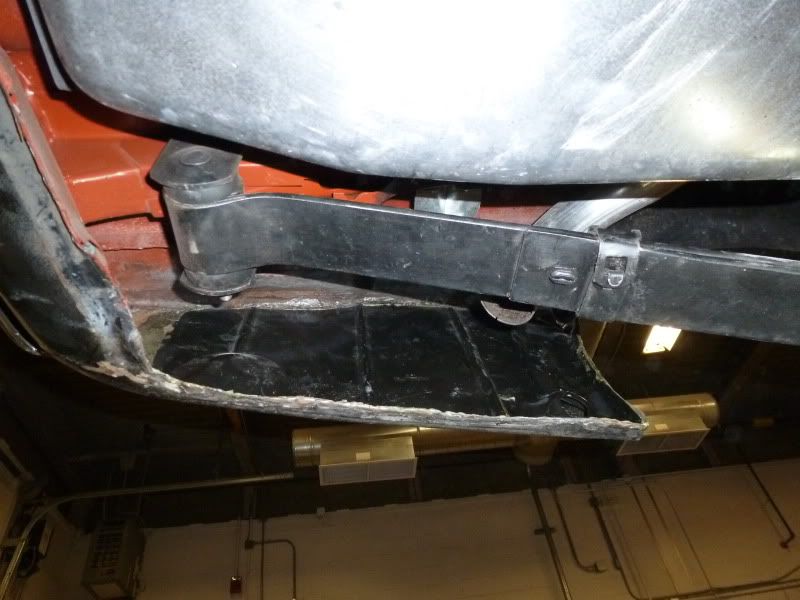 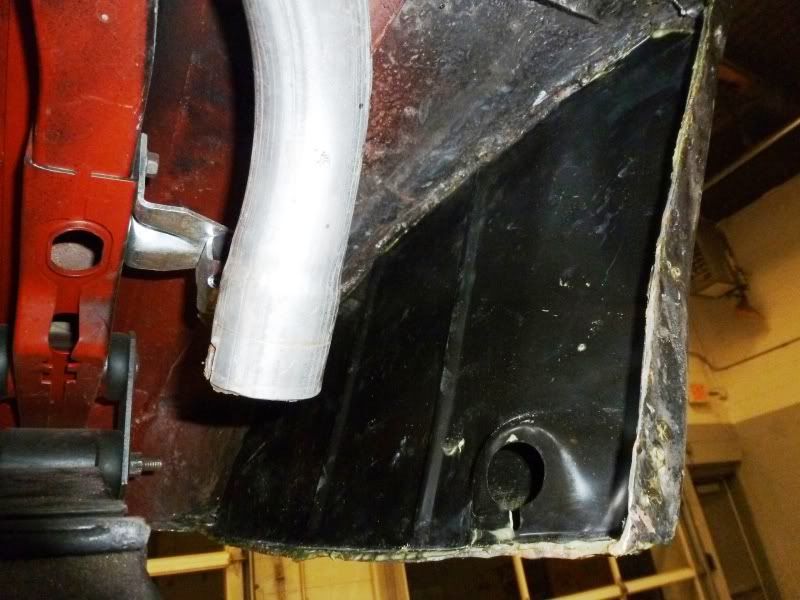 Oh, and in case you thought I did this all in one three hour class...I didn't. It took two classes, one to remove the old dropoff and the other to trim and install the new one. So, six hours total. Last edited by njsteve; 01-29-2013 at 11:53 PM. |
|
#819
01-30-2013, 12:23 PM
|
||||
|
||||
|
Nice work Steve!
How bad of shape were the old ones you cut out?
__________________
************************************************** ******************* 73 TA 4 spd #'s match red/white - "STOLEN" AT TERRY SPEAR's SHOP IN Columbia TN ~mid 2014 Last offical pic of the car can been seen here: http://clubs.hemmings.com/pontiactn/...%20-%20rev.pdf People have seen it posted FS on Craigs List back in late 2013 early 2014.... ^^^^^^^^^^^^^^^^^^^^^^^^^^^^^ IF YOU HAVE ANY INFO ABOUT IT PLEASE CONTACT ME!!! |
|
#820
01-30-2013, 01:47 PM
|
||||
|
||||
|
As you can see from the first photo, they were in perfect condition for an incorrect, flat piece of 18 gauge steel, that is. :-)
They were prepped properly when the guy handcrafted them 25 years ago. They were just wrong and it bugged me to look at them. They were also missing any type of drainage hole. I used a hole saw and cut a 1" hole in the bottom when I power washed the trunk floor, so the water could run out. |
| Reply |
|
|
The PY Online Forums is the largest online gathering of Pontiac enthusiasts anywhere in the world. Founded in 1991, it was also the first online forum for people to gather and talk about their Pontiacs. Since then, it has become the mecca of Pontiac technical data and knowledge that no other place can surpass.







 Linear Mode

