


| FAQ |
| Members List |
| Social Groups |
| Calendar |
| Search |
| Today's Posts |
|
#281
 10-29-2013, 03:05 AM
|
||||
|
||||

Steve, if you sell or trade that car we will all officially declare you insane
 Really I just wanted to post my new white plain body bird avatar in your white plain body bird with a shaker stuck on it thread. oh yours being a vastly cooler engine I should concede....
__________________
72 Bird |
|
#282
10-29-2013, 08:56 AM
|
||||
|
||||
|
Quote:
Quote:

|
|
#283
10-31-2013, 08:22 PM
|
||||
|
||||
|
Well, It took a few days or wrenching but I managed to replace the heater core. I had to remove all the lower A/C ductwork, the radio, the console, both front seats, the lower section of the passenger fender and inner fender, the rocker panel trim and bracket and several other things I am probably forgetting. None of the stuff showed any evidence of ever having been removed before. I was rather neat to see what the actual hardware was supposed to be rather than someone's version of what screw fits what hole.
I found some interesting things along the way...like this: 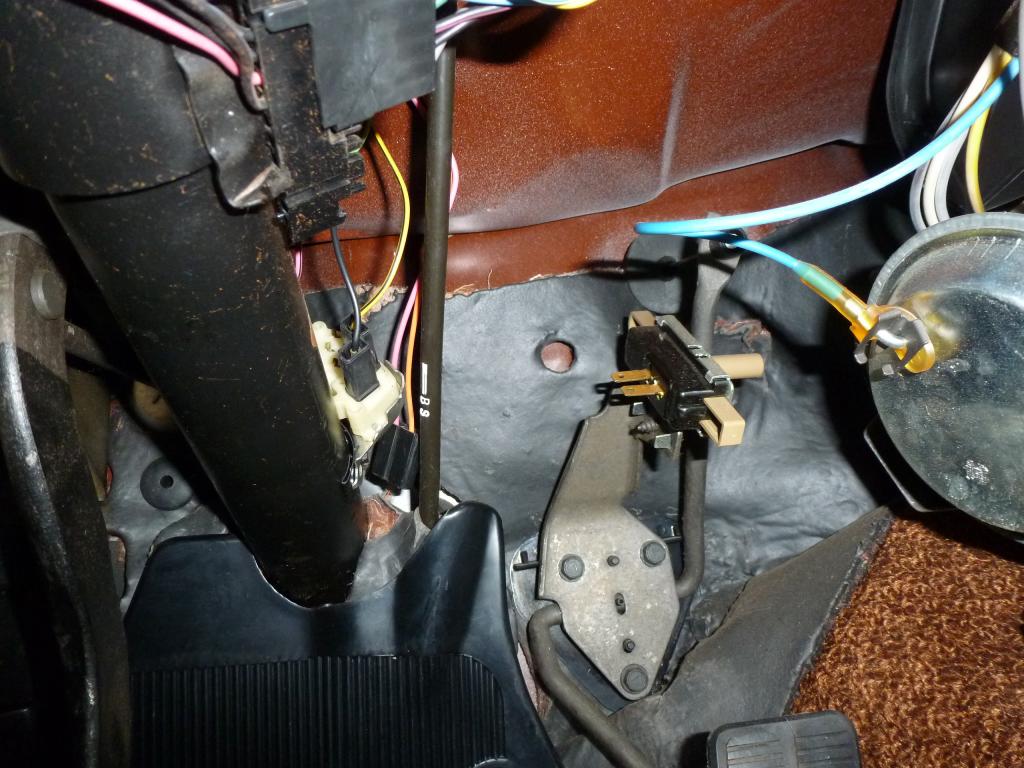 Notice anything odd about the Turbo 400 kickdown switch on the throttle cable bracket? Yeah, the portion of the harness was never connected to it. It is still dangling behind the steering column. (The orange and pink wires) There are no marks or scratches on either of the two terminals on the switch. So I hooked it up for future use. |
| The Following User Says Thank You to njsteve For This Useful Post: | ||
|
#284
10-31-2013, 08:40 PM
|
||||
|
||||
|
After hooking up the kickdown switch I took some before shots so I knew where things were and what hardware held it in. Note the giant gap between the heater box and the defroster duct.
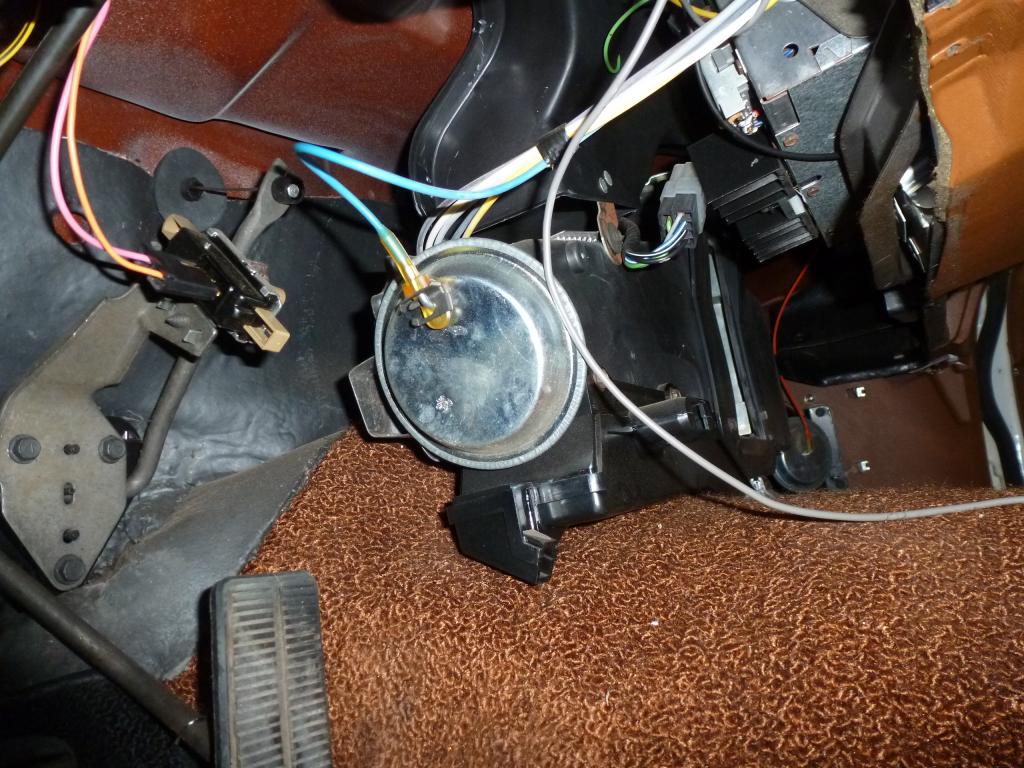 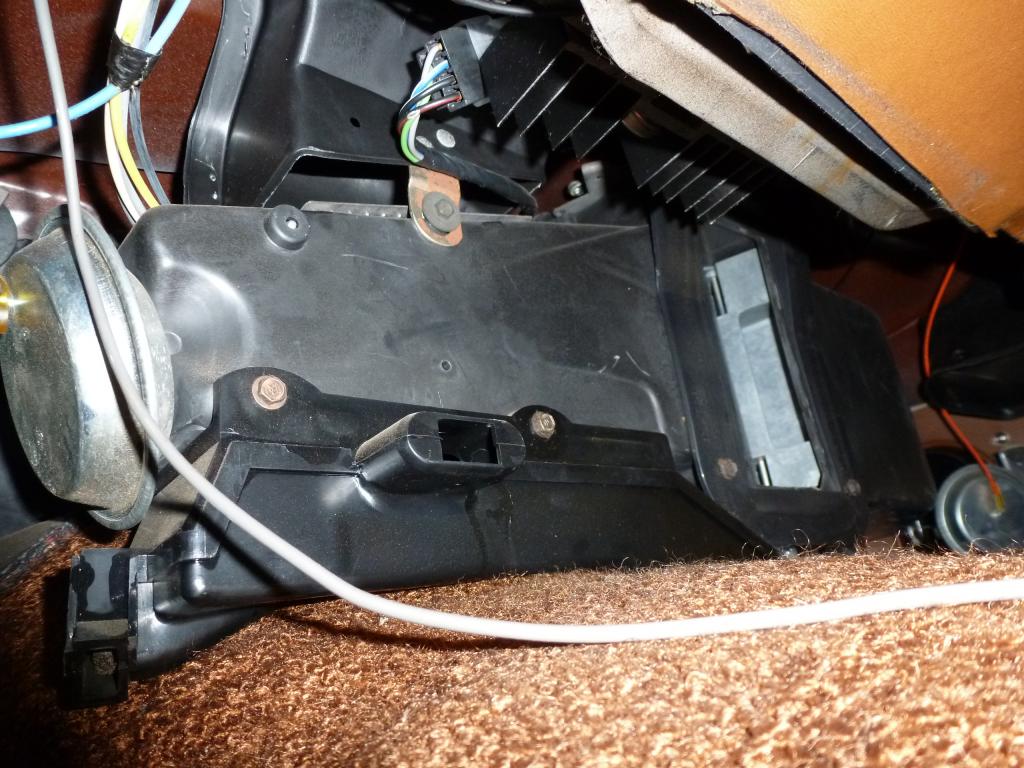 And the heater core housing pulled free of the dash. There are two bolts from the inside going through firewall and three studs coming from the housing and into in the engine compartment. Two of the studs are behind the passenger side cylinder head and the third is under the heater blower motor which requires the lower mounting points of the fender to be unbolted, in addition to the entire inner fender. You then put a small block of wood to hold the fender far enough out so that you can properly slit your wrists on the sharp metal while quarter turning the ratchet to remove the single nut from the stud...and the remove the lower heater core hose from the core outlet. It then promptly wedges itself into the kick panel tranny hump and lower portion of the dash.  This is something like solving one of those twisted nail puzzles where there is only one way to get the two metal pieces to unhook from each other. I found the secret: You have to first push the housing toward the driver's side (the radio removal was critical to this move), then you have to rotate the housing so the heater core outlets face the floor while pulling the housing diagonally toward the passenger door. It takes around 10 steps of pulling one inch, rotating one inch...lather, rinse, repeat, until the whole assembly can come out of the car. 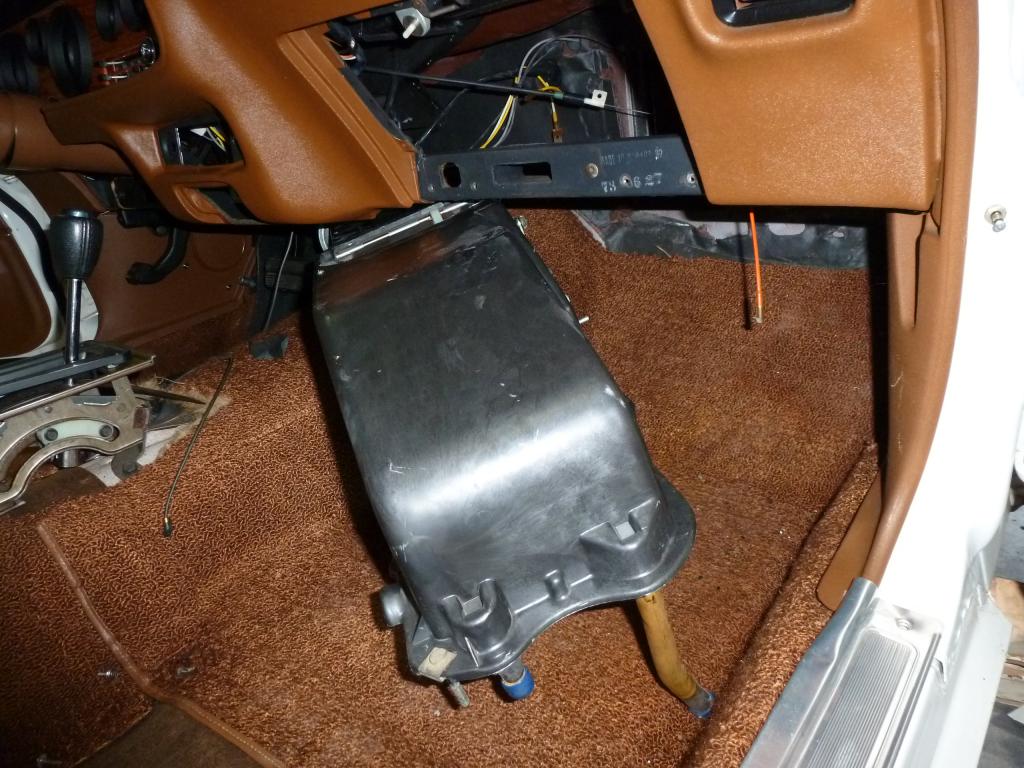
|
| The Following 2 Users Say Thank You to njsteve For This Useful Post: | ||
|
#285
10-31-2013, 08:46 PM
|
||||
|
||||
|
Here's the offending heater core. Still had the original foam seals intact.
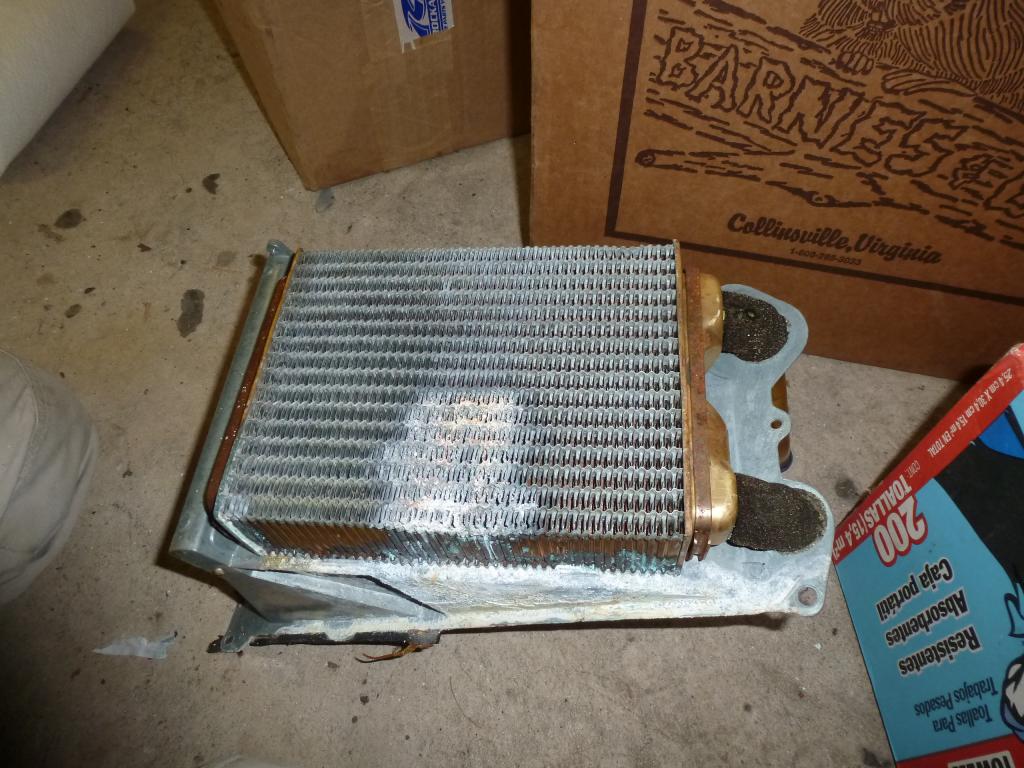 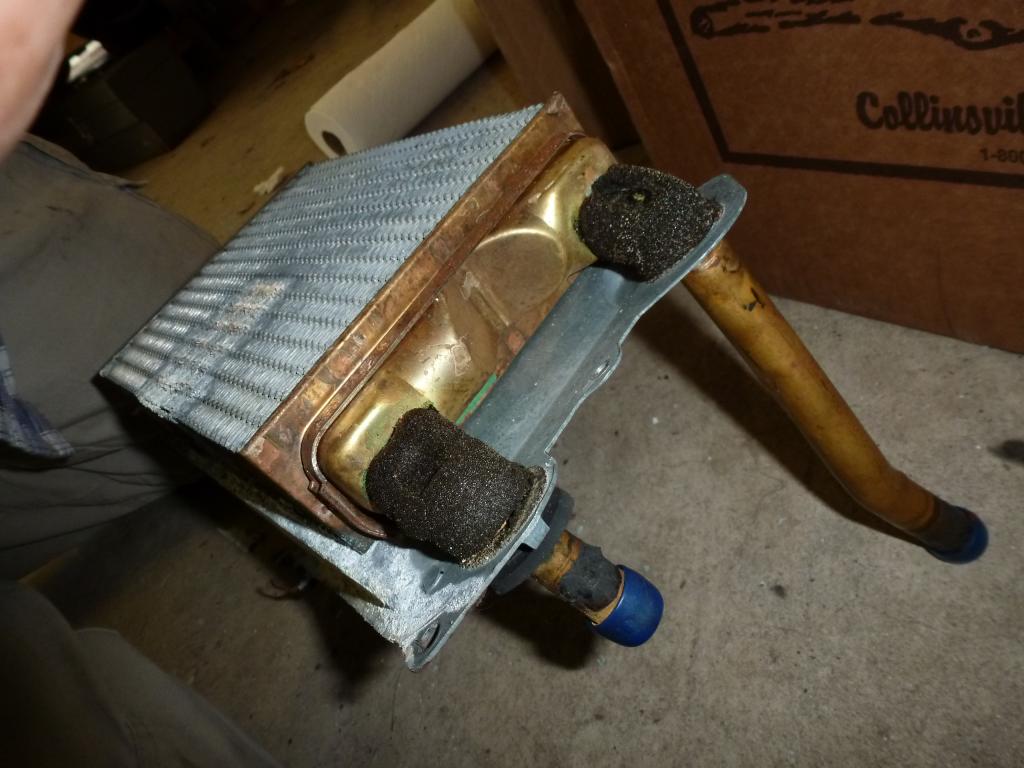 And the empty work area: 
|
| The Following 2 Users Say Thank You to njsteve For This Useful Post: | ||
|
#286
10-31-2013, 08:52 PM
|
||||
|
||||
|
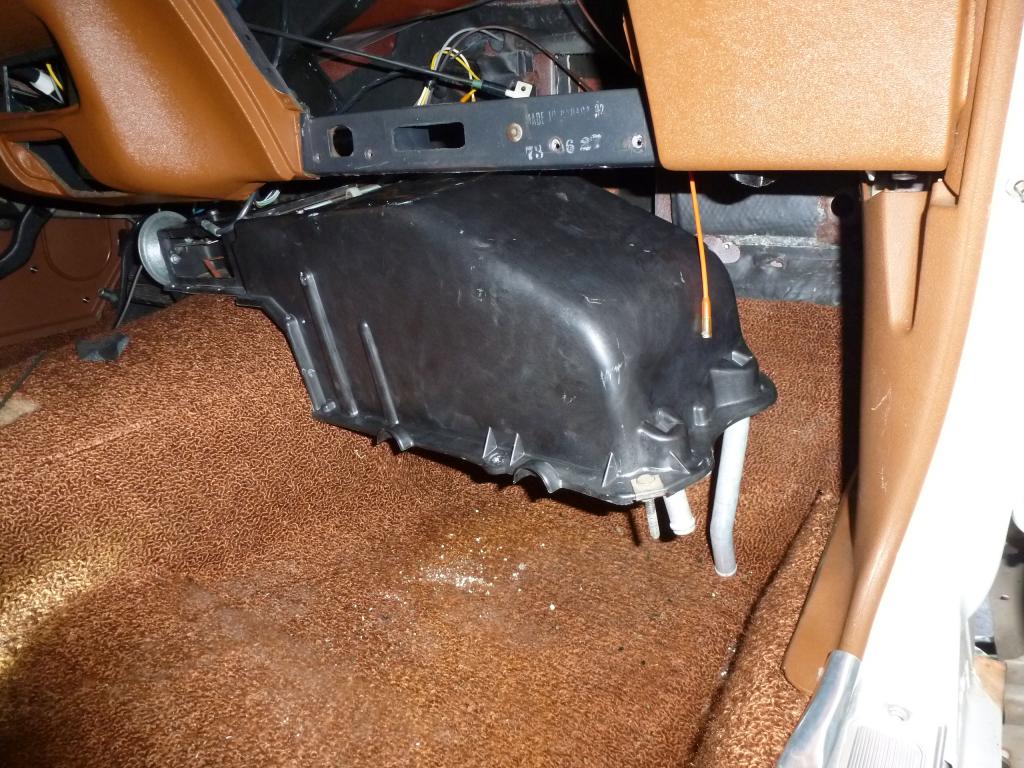
Once the new core was installed I prestaged the heater housing in the diagonal position and did the reverse move of push one inch, rotate one inch until the whole contraption just locked right into place. You do of course, have to remember to hook up the vacuum lines to the opposite side of the housing when you are halfway through the push and rotate process otherwise you will never be able to attach them once it is installed back in it's final position.
|
| The Following 2 Users Say Thank You to njsteve For This Useful Post: | ||
|
#287
10-31-2013, 08:58 PM
|
||||
|
||||
|
Since I had half the interior out already, I decided to pull the back seat and look for a broadcast sheet. No such luck in the search - not in the front or rear seats or behind the cardboard, or in the side panels (which I could look down into via the ashtray holes). The seats had never been out before. I did find the original cardboard trunk separator though. It is a two piece unit consisting of a large U-shaped piece and a smaller square that slots into it and covers the vapor separator unit. Very interesting.

|
|
#288
10-31-2013, 09:01 PM
|
||||
|
||||
|
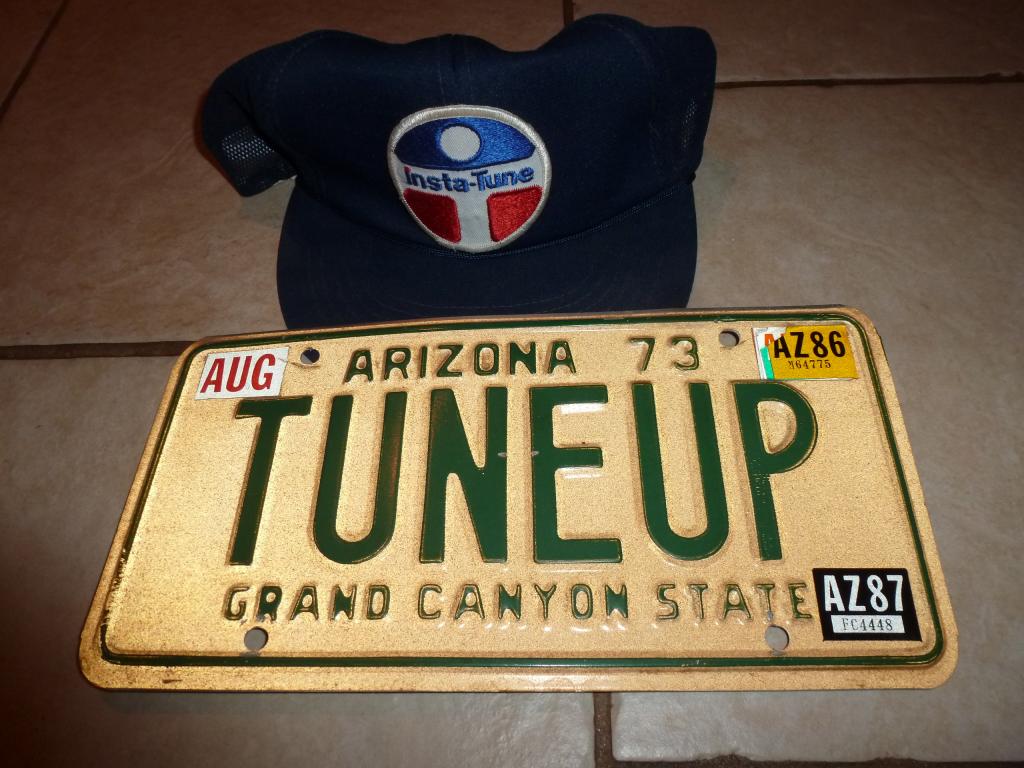
And another present from Rick arrived today: An original hat from "INSTA-TUNE", his dyno-tuning business and the original vanity plate he had on the car when he moved to Arizona with it in 1975.
|
| The Following 2 Users Say Thank You to njsteve For This Useful Post: | ||
|
#289
10-31-2013, 09:03 PM
|
||||
|
||||
|
that's sacrilegious.....a Pontiac with all that torque and no violent downshifts is against some kind of law I think!!
That's great you were able to replace the core without too much grief, what a time capsule that car is, seems like every square inch of it is pretty much untouched from the factory! Now get out there and punch it from a 30mph roll and make sure that never been used downshift switch is still functional, of course watching carefully for any trick or treaters.
__________________
'72 Formula 455HO TH400, Revere Silver, black deluxe '74 Trans Am SD 4 speed, Admiralty Blue, blue deluxe |
|
#290
10-31-2013, 09:11 PM
|
||||
|
||||
|
During my prior cruising I did notice there was a lack of downshifting ability. Hopefully this cures that issue.
I was really neat to be the first person to ever remove all those nuts and bolts. I felt like Neil Armstrong stepping on to the lunar surface for the first time. :-) Luckily, when he disconnected the leaky heater back in the 1980's, the second owner left the original hoses on the core and just added a bypass from the water pump to the cylinder head. So I was able to reinstall the original dated coded/marked hoses and reuse the factory tower clamps. |
| The Following User Says Thank You to njsteve For This Useful Post: | ||
|
#291
11-01-2013, 12:39 AM
|
||||
|
||||
|
I'm glad to see that gap between the heater box and defrost duct is factory. When I was putting my 70 TA back together I could not remember if that gap was correct or a gasket went there.
|
| The Following User Says Thank You to 1970TA For This Useful Post: | ||
|
#292
11-01-2013, 05:42 AM
|
|||
|
|||
|
rear seat seperator
the design of the cardboard separator is what should be repod, nice to see how it should look, I also like those seat belt retractors
|
|
#293
11-02-2013, 04:18 PM
|
||||
|
||||
|
I did a bit of cleaning today. I covered the front end and the engine compartment with a giant plastic sheet and then cleaned the underside of the hood where 40 years of the A/C compressor had been spraying oil. I guess after all those years of emulsifying, the A/C oil residue actually dissolved some of the original overspray from the underside of the hood. I also pulled out the washer fluid and antifreeze overflow reservoirs and soaked them in hot water and detergent. They cleaned up nicely. Both of them had gunky residue layered at the bottom.
I then went for a ride to my buddy's garage and checked and see if the A/C worked. I wanted him to be looking at the sight glass when I turned the A/C on to make sure there was actually R12 in there. (I didn't want to just turn it on, just in case it was empty, and possibly burn up the overheat switch). Miraculously he said that it was only slightly low on the fill. Looks like it has been holding pressure for all these years!   
Last edited by njsteve; 11-02-2013 at 04:39 PM. |
| The Following 2 Users Say Thank You to njsteve For This Useful Post: | ||
|
#294
11-02-2013, 04:35 PM
|
||||
|
||||
|
I also adjusted the rear brakes. I had noticed that the pedal, while firm wouldn't do anything until halfway down and then the front discs would grab very hard. I carefully removed the original Tinnerman star clips that hold the rear drums in place and pulled the drums. It was all untouched and original in there. The brakes really needed to be adjusted. It took two full turns of the adjusters to get the shoes out to where they would actually contact the drums. I then reinstalled the drums and the Tinnerman clips and went for a test run. It worked like a charm. Now it stops like a normal car.
When I got back from the test drive I pulled the Radial T/As and installed the set of 40-year-old, Firestone Steel Radial 500s (three NOS tires and one of the original tires from the car). She looks a lot different with the GR70x15 Firestones versus the 255/60x15 T/As.    
Last edited by njsteve; 11-02-2013 at 04:42 PM. |
| The Following User Says Thank You to njsteve For This Useful Post: | ||
|
#295
11-02-2013, 04:45 PM
|
||||
|
||||
|
Man, that looks perfect Steve! Looks like she's ready for the MCACN class of '73 display!
|
|
#296
11-02-2013, 08:25 PM
|
||||
|
||||
|
Thanks!
Oh, and by the way, now that the kickdown switch is connected, boy does that make a difference! |
|
#297
11-02-2013, 08:57 PM
|
||||
|
||||
|
Quote:
|
| The Following User Says Thank You to njsteve For This Useful Post: | ||
|
#298
11-02-2013, 11:51 PM
|
|||
|
|||
|
Quote:
I know I am not alone in my opinions on survivor cars.. still lost why you would overclean this car.. for the 73 SD Formulas, must be one of a couple that were still original with its well earned patina.. oh.. I have a set of TA mud flaps if you need them.would help protect your car from rock chips real well.lol.. |
|
#299
11-03-2013, 09:51 AM
|
||||
|
||||
|
Bill, I respect your opinion but we tend to disagree on what constitutes patina: “a surface appearance of something grown beautiful especially with age or use”. I consider it to be the original finish of the car that has been weathered with the advance of time but not the sum total of the contaminants that accumulated upon it, over that period of time.
When a hoard of gold treasure is brought up from a sunken ship, the salvagers spend years removing the concretions to get to the actual coin and then stop at that point to preserve its patina. They don’t keep the coral on the coins. More importantly, they also don’t go buffing out the coin once the coral is removed. They reach the point of the original finish and stop. That is what I have done – no repainting, no touching up of flaws or chips. The process of what I have been doing is following the Hippocratic Oath of “Above All, Do No Harm”. The master cylinder rebuild was done because the internal contamination was so bad it actually destroyed the insides of the unit and dissolved the piston. It was leaking fluid down the inner fender and onto the frame rail. That had to be addressed. The black fluid inside was progressively destroying the remainder of the system. I kept the original remnants of the factory paint on the master cylinder body. As for the rear drums, I spent an hour carefully unscrewing those little copper clips that hold the drums on to the studs. I replaced them at the exact spots they were, originally. I adjusted the adjusters so the brakes functioned. Yes it was interesting that the assembly line never adjusted the brakes to contact the drums, but their inattention, while noted, had to be addressed to prevent the car from being destroyed in an accident. The original carburetor was reinstalled after replacing two main gaskets and a modern accelerator pump. No alteration to the finish – not a drop of carb cleaner touched that carb. The replacement carb that was on there was put on in the 1990s and I wanted to return the original patina’d unit to its throne. The coolant overflow and the washer bottle were both filled with this rusty, goopy, silt at the bottom that was not good for the continued operation of the car. Their overall color/finish did not change – just the garbage inside was removed. The radiator had 40-year-old antifreeze that had turned bad and had to be replaced before anything more was damaged internally. The heater core was replaced and the original clamps were reinstalled in their exact positions. The later, rerouted bypass hose was removed (it had a 1987 date code on the auto parts store, heater hose). The original thermostat was sticking and corroding from the old coolant, and had to be replaced. Any removed parts have been retained, of course. The engine and transmission still have all their oil and grease covering underneath. I have tightened the valve covers to stop the leaks but didn’t replace any gaskets. The distributor cap that was on there was a dime store, generic replacement and an NOS original was found to replace it. And the NOS cap was from 1973-4. The compressor oil leak pattern on the underside of the hood was gently cleaned away because it was an overall accumulation, most of it in recent years. (Remember, you said these A-6 compressors didn’t leak oil when they were new!). The original oil filter was saved and will be reinstalled for shows. I have been letting it drain for the past month or two. That was 30-35 year old oil in there and it was black and contaminated with fuel. The kickdown switch had to be connected for the transmission to work properly. And once again, like the unadjusted rear brakes, the assembly line inattention, while anecdotally significant, had to be addressed to prevent transmission damage. The hood release cable grommet had to replaced since the cable was sawing its way through the brace with every activation of the hood release, and could have snapped the cable at any moment. The saw mark groove is still there but the cable now rides in its correct grommet. The original steering wheel was returned to its original position. You have to admit it was some kind of Divine intervention that lead to its return after 40 years...in the desert (Arizona, not Egypt). The poly valance replacement was the only "alteration" I have done to the car, finish-wise, but that was to return the look of the car to the way the original owner, Rick bought it. He had the dealer replace the broken valance at his cost, when the car was new. He was informed that the warranty didn't cover "body work". BTW, Rick fully approves of everything I have done to his car. That’s why he keeps rewarding me with more parts and artifacts as the process moves along. :-) I did keep a sample of every foul-smelling, corroded fluid I removed from the car, and I will gladly trade them to you for those mudflaps! ;-) Last edited by njsteve; 11-03-2013 at 10:22 AM. |
|
#300
11-03-2013, 10:14 AM
|
|||
|
|||
|
patina
NJSTEVE I think your car looks better now, clean away!..really why would someone not clean there car?..lets take the fun out of owning a Firebird
|
| Reply |
|
|
The PY Online Forums is the largest online gathering of Pontiac enthusiasts anywhere in the world. Founded in 1991, it was also the first online forum for people to gather and talk about their Pontiacs. Since then, it has become the mecca of Pontiac technical data and knowledge that no other place can surpass.





 Linear Mode

