


| FAQ |
| Members List |
| Social Groups |
| Calendar |
| Search |
| Today's Posts |
|
#441
 04-03-2014, 09:10 PM
|
||||
|
||||

Quote:
Before: 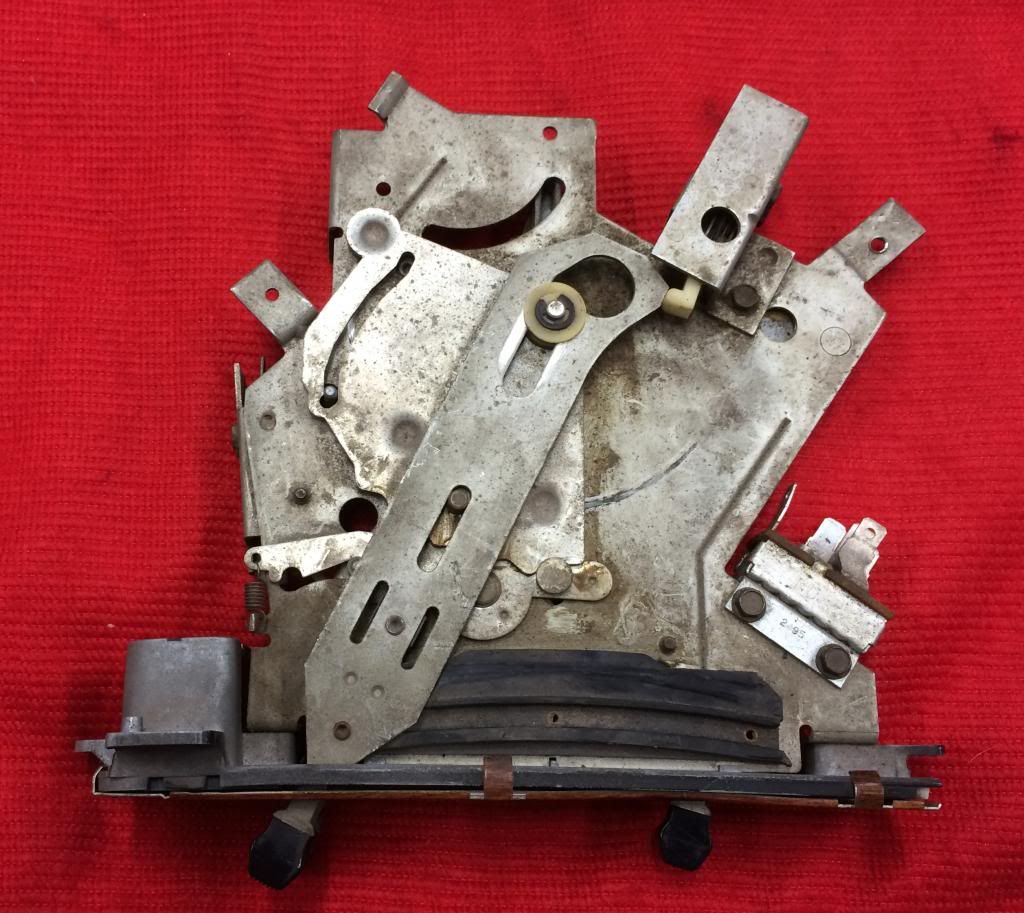 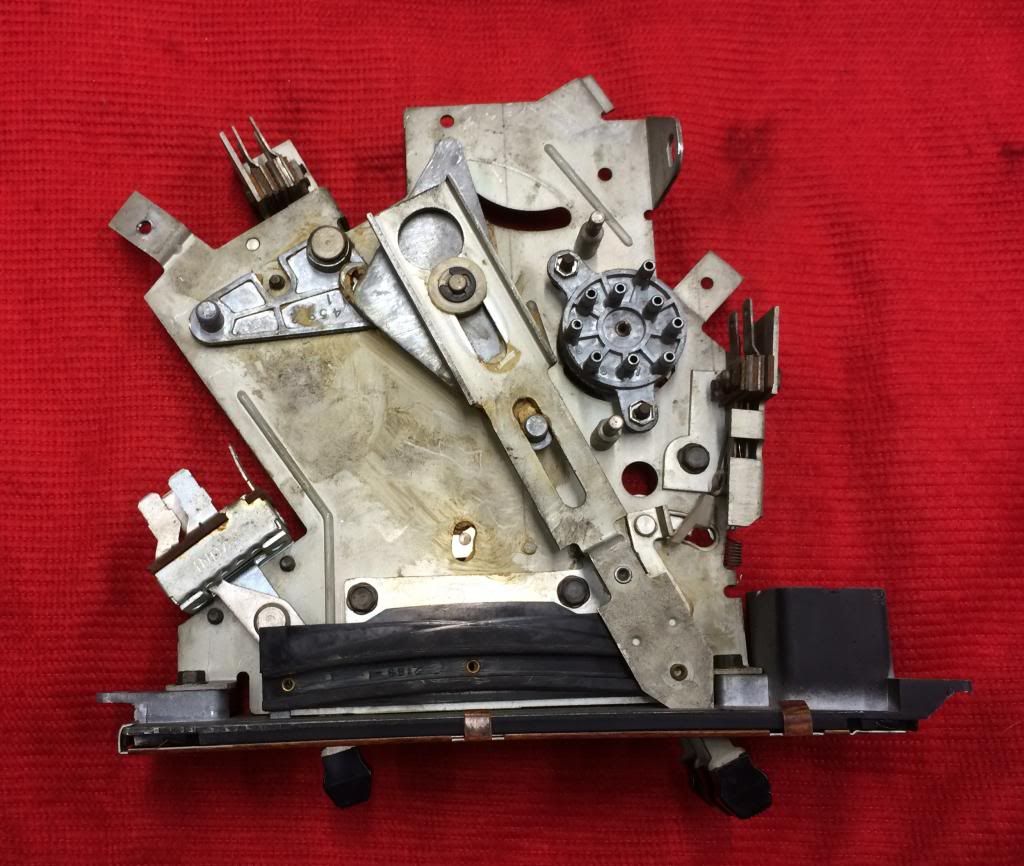 After: 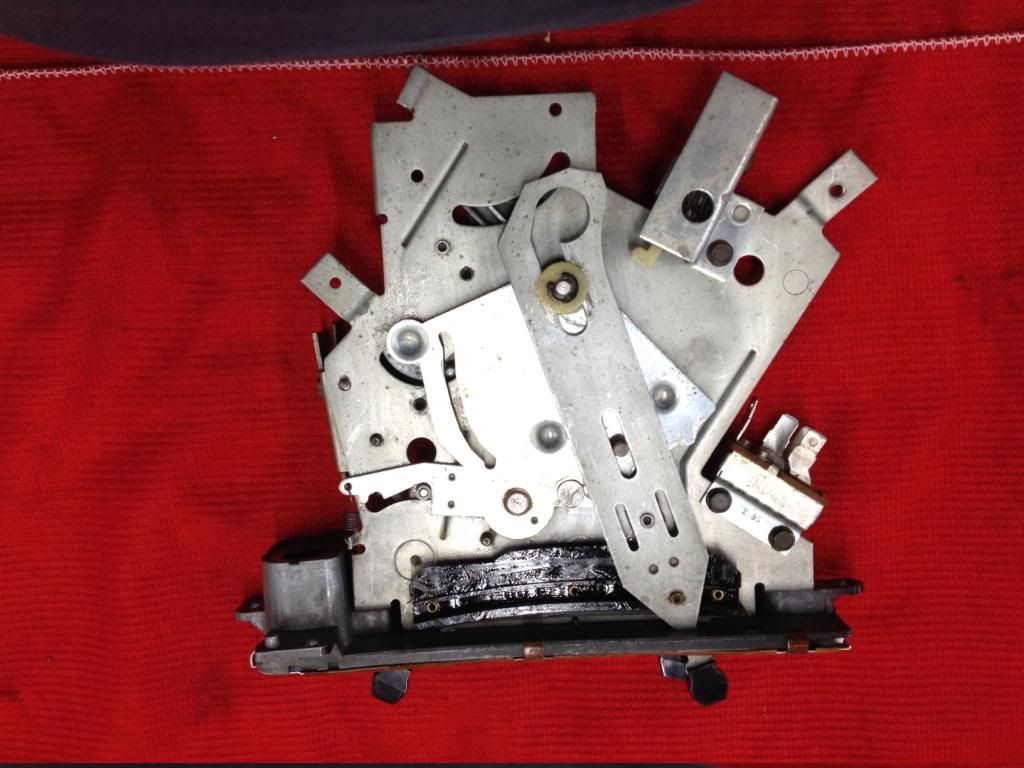 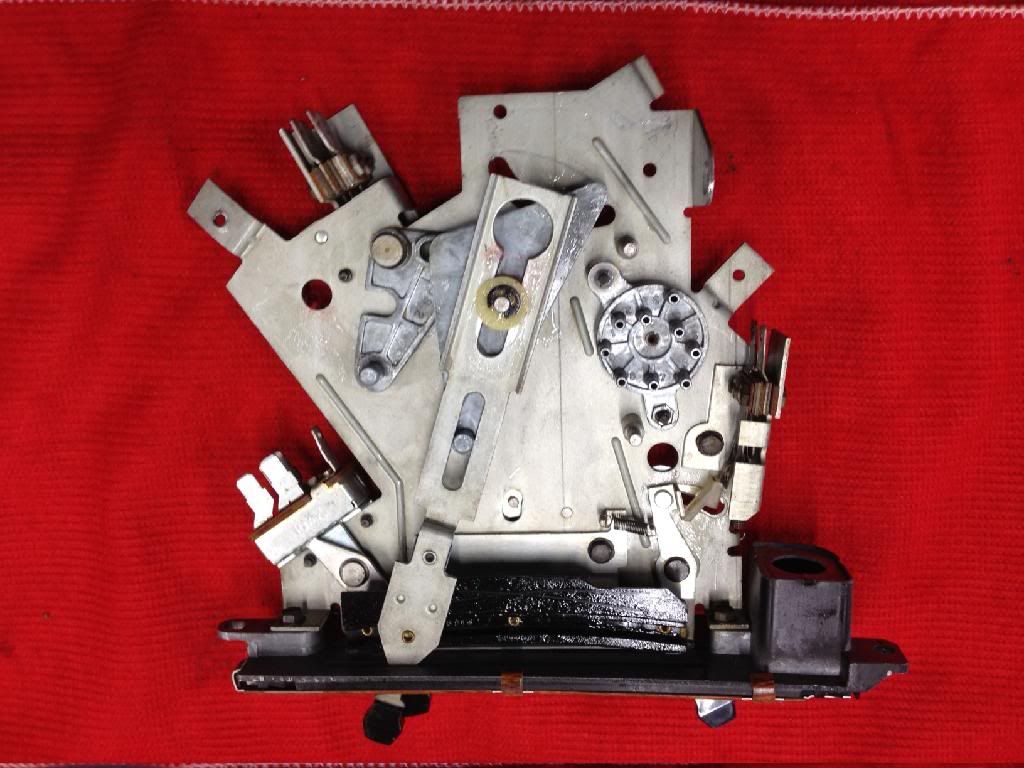 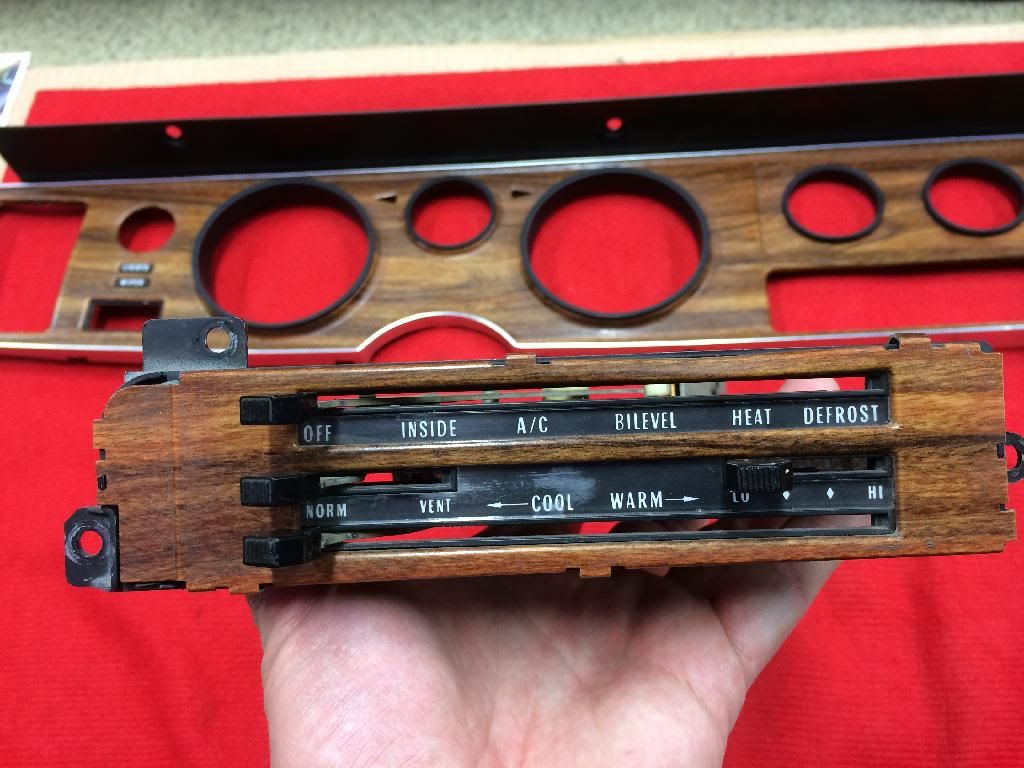
|
|
#442
04-03-2014, 11:50 PM
|
|||
|
|||
|
Quote:
1.was 1972 the first year defrost was used??I thought 1973 was?? if yours has been replaced, I have an extra de-ice unit 2. I have 2 of the wood grain face plates for your HVAC controls. I think there were two different grain patterns or something like that. PM me if you want one. these are NOS in the old GM wrapping. for some reason always had a hard time finding anyone who wanted these.??. I guess my "it's easy" comment now makes sense?? That is one item many overlook when doing a clean up/body on restoration. Easy to get out and is a part that always is dirty and needs grease.. glad I could help with the list.. If you'll let me.. I will keep you busy until Christmas lol.. |
|
#443
04-03-2014, 11:56 PM
|
|||
|
|||
|
Hey Bob.. just checked the HVAC faceplates I have.. One is part number 1223318,which my books show as 1972 only F ex TA w/AC.. sounds like it is a 72 only part?? The otherone I have,the wraping is torn up,but I had in a zip lock baggie and had written 70-71 Formula at some point.. Maybe the 72 guys can chime in on what the difference was? If you want it, it is yours..
|
|
#444
04-04-2014, 12:53 AM
|
|||
|
|||
|
CONTROL
mine says DEFROST...the repop is totally wrong
|
|
#445
04-04-2014, 09:21 AM
|
||||
|
||||
|
HVAC Bezel
Well, I'm an idiot. I didn't even look at the faceplate after Dave cleaned the HVAC control up. The face plate photo was the pre-cleaning "file photo". After the generous offers and replies on the faceplate I looked at it this morning, and voila it is perfect. I spoke with MPD this morning and he acted insulted that I would think he would disassemble the control and not polish out the haze. He rocks.
Thanks for the offers. |
|
#446
04-04-2014, 09:33 PM
|
|||
|
|||
|
Bob.. the parts I have are the woodgrain front piece that attaches to the faceplate. Not the clear piece but the woodgrain metal part.. If you want the 72 only piece let me know..
|
|
#447
04-05-2014, 06:54 PM
|
||||
|
||||
|
Quote:
|
|
#448
04-05-2014, 07:08 PM
|
||||
|
||||
|
Big Day...
Big day at the Hot Rod Garage today. A lot got done. I'm getting ready for the new bumper (old one with new triple chrome) which should be delivered on Monday and wanted to get the bumper guards put together. I purchased a set of triple chromed guards with no bump strips and a set of NOS guards with crappy chrome and perfect bump strips. I switched things around and they look great. I sure hope the bumper looks this good. I sure hope the guards fit the bumper. Here's some pictures:
      
|
|
#449
04-05-2014, 07:20 PM
|
||||
|
||||
|
You do nice work!
__________________
Some guys they just give up living And start dying little by little, piece by piece, Some guys come home from work and wash up, And go racin' in the street. Bruce Springsteen - Racing In The Street - 1978 |
|
#450
04-05-2014, 07:52 PM
|
||||
|
||||
|
Polishing Park Light Lenses
We also got the amber park light lenses polished in anticipation of the valance work. I used the same 3M headlight restoration kit that was used on the taillights, but then I broke out the 3" R/O polisher and the Griot compounds to finish it up. They came out really good, but the right side lens has some rally deep rock chips that were not removed. Regardless, they look much better and I like the fact they appear to be original. These were the one piece units. Here's the before and after.
Boss-Go UConn. However, if they face KY your on your own.    
|
|
#451
04-05-2014, 08:05 PM
|
|||
|
|||
|
Bob.. those really look good. great job on polishing..
|
|
#452
04-05-2014, 10:45 PM
|
||||
|
||||
|
It's the little things, looking good Bob. Those are most likely the best bumper gaurds in the country......

|
|
#453
04-05-2014, 11:23 PM
|
||||
|
||||
|
Bob, why does one have a PN on the lens portion and the other does not?
My '73 unit has it. |
|
#454
04-06-2014, 12:05 AM
|
||||
|
||||
|
Quote:
|
|
#455
04-06-2014, 12:26 AM
|
||||
|
||||
|
Instrument Bezel
While I had the polishing stuff out, I also polished the clear plastic instrument bezel window. I did it much the same as the parking lights. On most of it I started with 500 grit, but on several areas (namely the turn signal indicator windows), I started with 220 grit and worked up. There were several really deep gouges on the turn signal windows that appear as though someone took a pick or punch and gouged out a deep trough. these were very laborious to get out.
Generally I am very happy with how it turned out. It's is far from perfect, but when you look at the before and after pictures the difference is very noticeable. Beyond removing the scratches, it just makes it look much sharper and brighter if that makes sense. While everything is pulled apart, I am trying to decide whether to replace the bulbs with LED's or 4 watt replacement bulbs. Any recommendations? We also cleaned most everything back in the inner dash area. MPD removed the wiper switch and prism diffuser and those look like new. He also wiped everything down back there, lubed the speedo cable, and replaced a vacuum line grommet that had come loose. The center stack gauges were also removed, cleaned and the lens polished Here's a few pictures as usual. Check out the turn signal windows.     
|
|
#456
04-06-2014, 01:50 AM
|
||||
|
||||
|
looks great Bob!! wow!
I have not been impressed with the dimming ability of the LED dash bulbs ( 194) and the hue of the color either..cant use them ( 194Led) on front side markers as they dont have enough resistance to make flasher work correctly
__________________
" Long may we DRIVE !" |
|
#457
04-06-2014, 02:55 AM
|
|||
|
|||
|
Bob.. I 2x staying with regular bulbs. Since you have everything out, If it was mine, I would have the clock converted to quartz movement. There is a place on the web that sells a DIY kit for something like $59 and if you send them yours they will do it for you for something like $125 all in. I have done 3-4 of these myself and they are not that difficult. The OEM clock is just a POS and after 45'ish years you will have problems down the road. may as well address this while everything is out?? I am sure others here have similar experience.. your polishing ability is bada$$.. remarkable how clear that gauge face is now.. I bet it never looked that clear when new..
I just looked the clock up.. Now they are $80 and complete deal for $140..Here is a link: http://www.clocks4cars.auctivacommer...-P3100689.aspx http://www.clocks4cars.auctivacommer...-P4191885.aspx If you do a search Rocky did an article in HPP on this very item.. |
|
#458
04-06-2014, 07:31 AM
|
||||
|
||||
|
There is really no need to convert the clock when it works fine in its original configuration. Especially after I went through all the trouble of getting it working again. :-)
The quartz conversions do not have the constant flow movement of the hands like the original points-style do. They "tick" off one second at a time instead of sweeping along smoothly. The vast majority of the original clocks do not need anything more than a filing of the points and some minor cleaning of the mechanism with WD-40. |
|
#459
04-06-2014, 07:33 AM
|
||||
|
||||
|
Quote:
No wonder I never could get a date for the prom.... |
|
#460
04-06-2014, 08:33 AM
|
||||
|
||||
|
That is an incredible outcome on that lens
|
| Reply |
|
|
The PY Online Forums is the largest online gathering of Pontiac enthusiasts anywhere in the world. Founded in 1991, it was also the first online forum for people to gather and talk about their Pontiacs. Since then, it has become the mecca of Pontiac technical data and knowledge that no other place can surpass.







 Linear Mode

