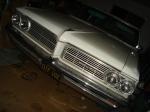
Non Pontiac Motors in Pontiacs includes factory 403,305,350 Chevy, Buick V6,
Also Pontiac Motors in non-Pontiacs!

          
Reply
 
Thread Tools Display Modes
  #1  
Old 06-15-2009, 09:40 AM
theYman's Avatar
theYman theYman is offline
Chief Ponti-yacker
 
Join Date: Dec 2002
Location: Shelby Ohio
Posts: 871
Default

I'm following this thread! GOOD STUFF! I am not up on the new stuff and someday I had thought about doing this swap.

__________________
The thick CLOUD of tire smoke ,the SMELL of burning rubber,and the CHEER of the crowd ....PRICELESS.
$90.00 fine for an awesome burn-out,worth every penny...
http://www.youtube.com/watch?v=iI7beXh7xW8
  #2  
Old 06-16-2009, 12:29 AM
b-man's Avatar
b-man b-man is offline
Moderator
 
Join Date: Sep 2002
Location: Sunny So Cal
Posts: 17,616
Default Started modifying.....

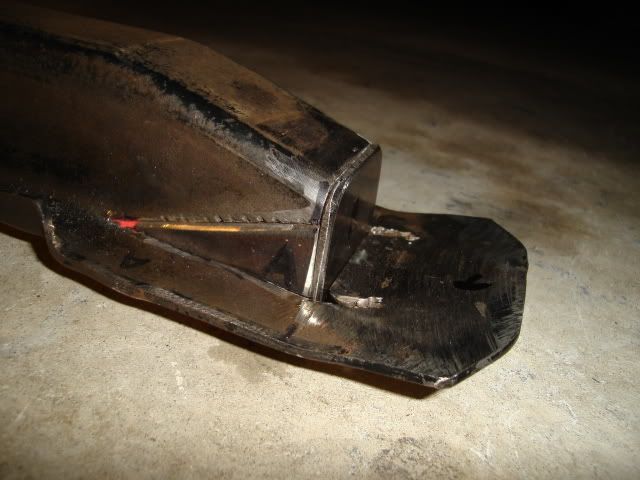
.....the trans crossmember tonight.

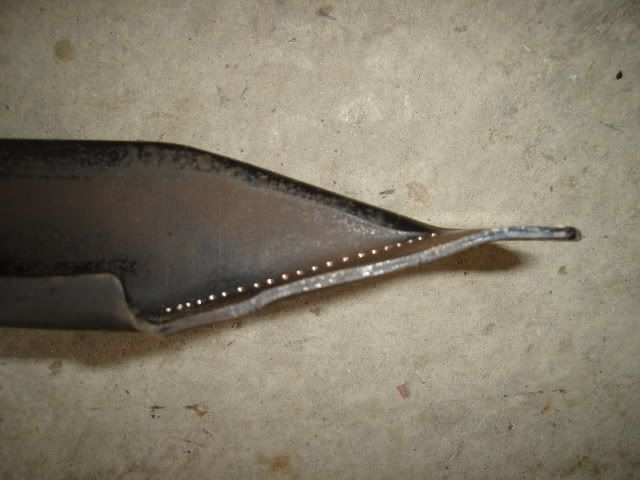
Before any mods.


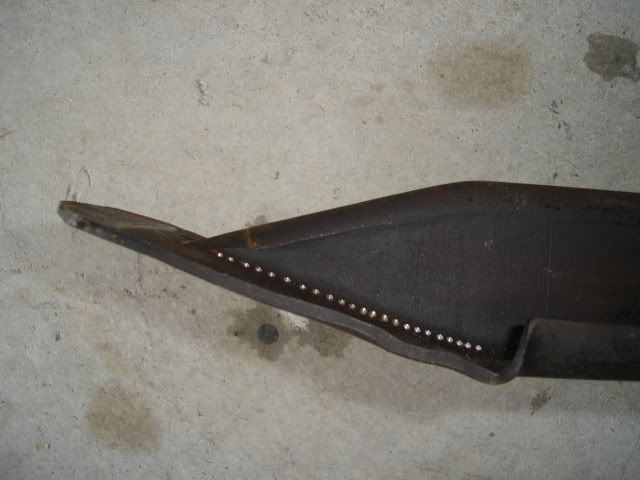
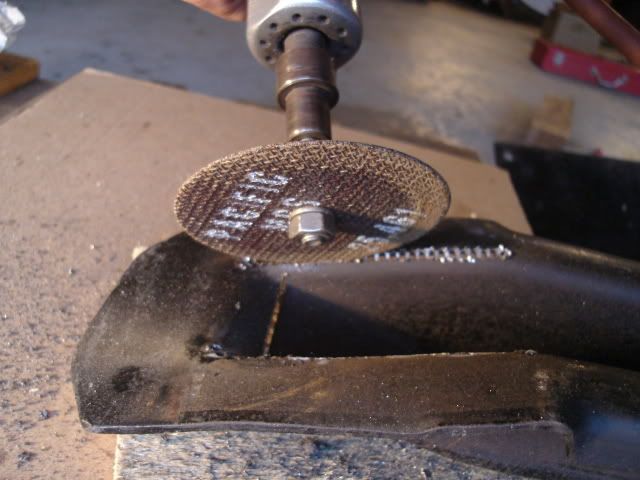
Before doing any cutting I stood the crossmember up in my 6" bench vise and straightened out the tips. Note the series of punch marks where I plan to start drilling some holes.


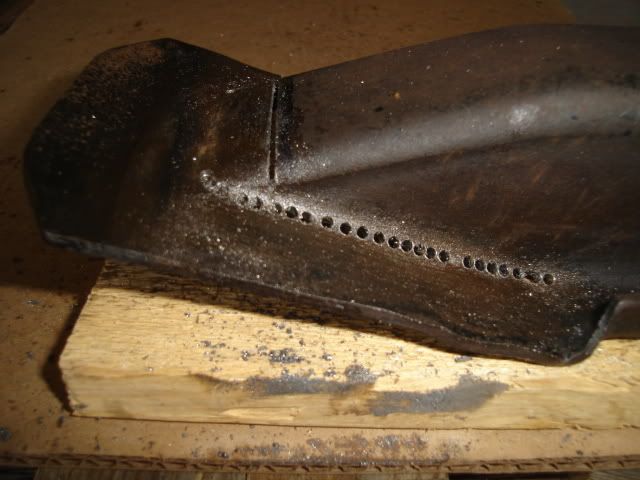
I used a drill that was about the same size as the width of my cutoff wheel to drill the holes. A quick slice with the Sawzall across the end and I'm ready to use the cutoff wheel.


The cutoff wheel work goes quickly and accurately since most of the material on my cut line has been removed by the drilled holes.


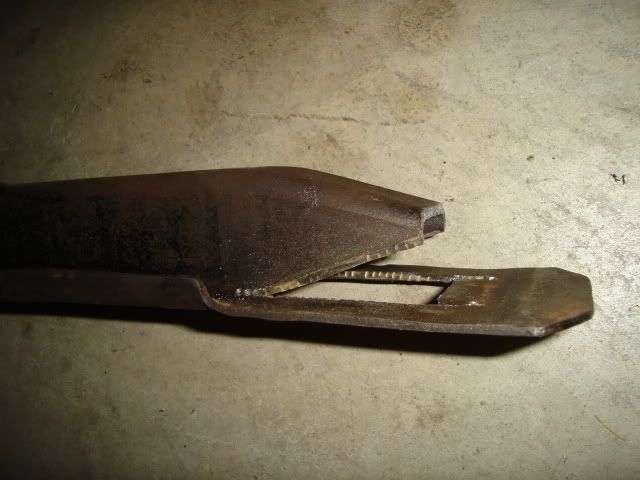
Next another trip through the bench vise to bend and straighten out the flanges and make them even with the bottom of the crossmember. Finally I used the vise like a press and flattened out the ends.


That's all for tonight, I'll fit it up under the car to check for fit and cut some filler pieces next.

  #3  
Old 06-17-2009, 12:25 AM
b-man's Avatar
b-man b-man is offline
Moderator
 
Join Date: Sep 2002
Location: Sunny So Cal
Posts: 17,616
Default Made a little more progress.....

.....on the crossmember tonight.

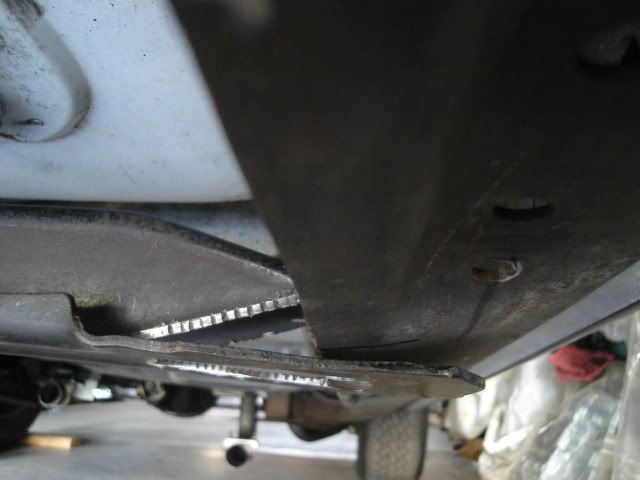
Fitted it up and found that the tips didn't match up to the frame.


A little bit of careful bending in the bench vise took care of that.


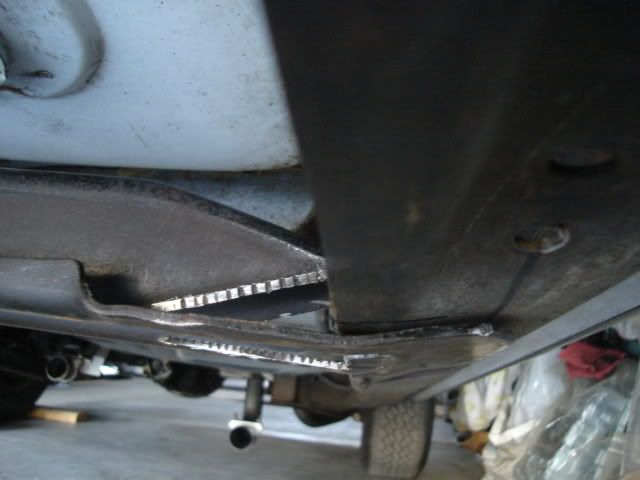
I scrounged up an old bracket made of flat steel plate that just happened to match up with the .135" material thickness of the crossmember to cut up for the filler pieces. After some work with a Sawzall and grinder it's now ready to weld.


Now to hit up my friend with the MIG welder for a favor.

  #4  
Old 06-17-2009, 10:54 AM
jime1 jime1 is offline
Member
 
Join Date: Jun 2001
Posts: 42
Default

This is my new all-time favorite PY forums thread. Go B-man! That is going to be one fine Tempest.

  #5  
Old 06-18-2009, 12:53 AM
b-man's Avatar
b-man b-man is offline
Moderator
 
Join Date: Sep 2002
Location: Sunny So Cal
Posts: 17,616
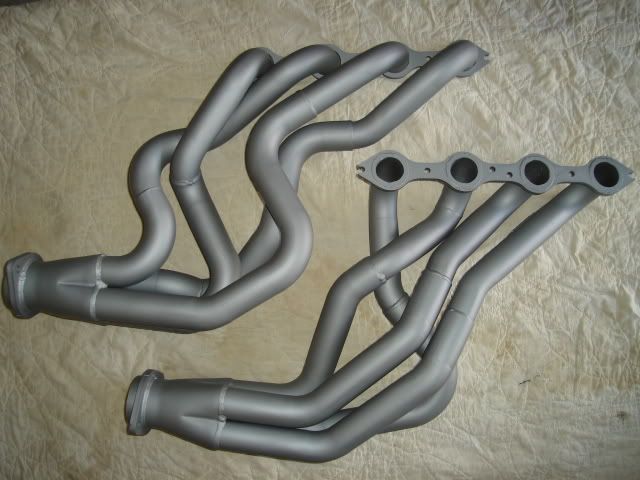
Default Tried to put the headers in.....

.....from the bottom of the car.

I knew there was probably a 1% chance of them going in, and of course they didn't. The next time the engine is out they'll have to be set in place in the engine bay and the LS3 will have to be carefully dropped down onto the mounts.

Well, at least I took a picture of them.


While I had the exhaust system on my mind I spent a little time modifying the muffler hangers, this pretty much consisted of making a couple brackets from 1-1/4" X 1/8" angle iron to bolt onto the hangers. I need to have a center to center distance of 26" for the muffler outlets and the hangers currently put them at 24".

That's all for tonight, gotta keep chipping away at it.

  #6  
Old 06-20-2009, 01:26 AM
b-man's Avatar
b-man b-man is offline
Moderator
 
Join Date: Sep 2002
Location: Sunny So Cal
Posts: 17,616
Default A new '71 -'72 Buick A-body rear.....

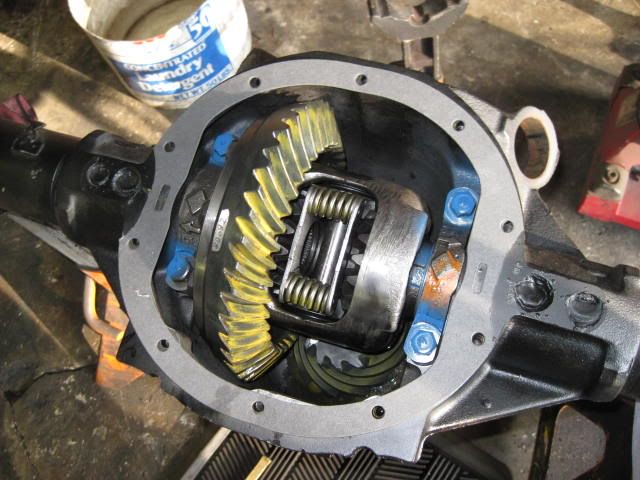
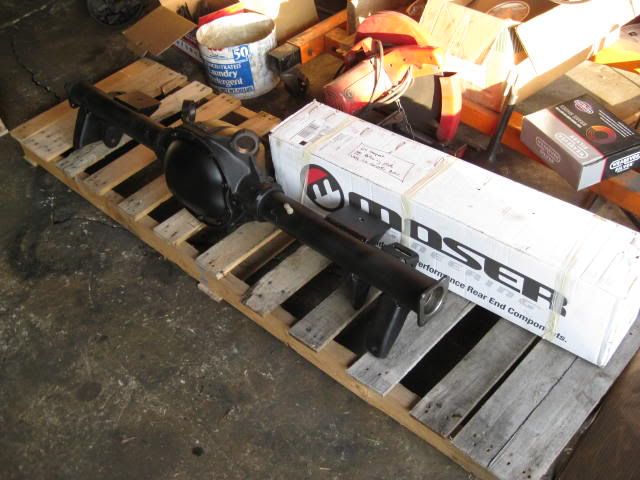
.....with Yukon Performance 3.42 gears has been custom-built for the Tempest by Jim Mitschke of JD Race & Restoration in Richfield Ohio (1 330 990 8155) and is now almost ready to ship.

I chose Jim Mitschke (monzaz on Performance Years) to build this rear end because I thought that his small shop that specializes in Muscle Car differentials would pay more attention to detail and build it like it was his own. I have seen Jim advertising and selling quite a few rear ends on PY over the past few years with many satisfied customers so I figured I would contact him.

I wanted the '71 -'72 Buick 8.5" rear mainly for its strength and for the tapered bearing bolt-in axles, not to mention it's a direct bolt-in on any '64 -'72 GM A-body. I asked Jim to modify the spring perches so I could use the earlier '64 -'66 springs that bolt onto the perch with a clamp plate. A pair of poly bushings will be pressed into the upper control arm mounts on the housing.

Upgrades include a new Eaton 30-spline clutch-type posi (replacing the stock 28-spline unit) that's known for its durability and long-wearing clutch packs. A new set of Moser 30-spline axles were added as well, not only for the added strength but it was the easiest way to get the 5 on 120mm bolt pattern I need to run my BMW-spec aftermarket 18X9" wheels. The axles will come with M12X1.5 studs that are about 1.75" to 2" long to better accomodate the C6 Z06 rotors that are .280" thick at the hub.

These are just a couple of the many pics that Jim sent me during the build, this unit will be shipped out to me next week. Thanks for the great communication, pics and fine customer service Jim!


This rearend is the last big expense on the Tempest build. I'll be able to take the Tempest to the dragstrip once or twice without fear of shelling the diff, and do a little bit of 'spirited' driving when I want to.

I'll still have to spend a couple of grand before it's all done on a new headliner, windshield, radiator hoses, serpentine belt, tranny dipstick tube, wiring, and all of the little things that nickle and dime you to death.

Coming along.

  #7  
Old 06-21-2009, 01:39 AM
b-man's Avatar
b-man b-man is offline
Moderator
 
Join Date: Sep 2002
Location: Sunny So Cal
Posts: 17,616
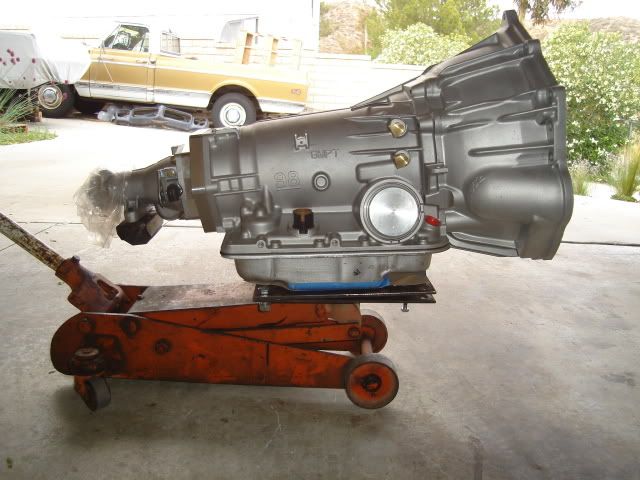
Default I need a transmission jack.....

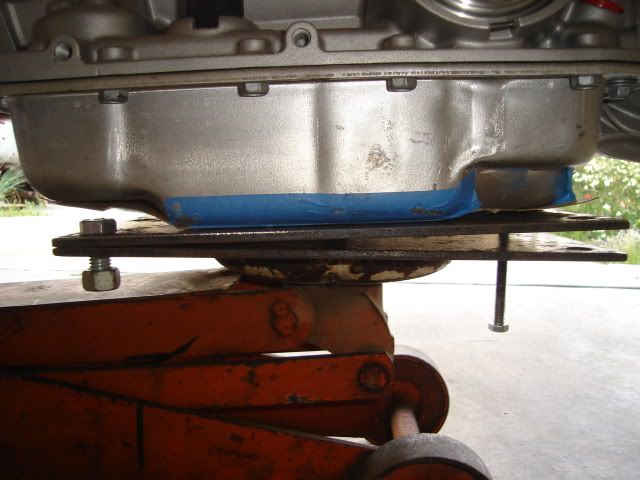
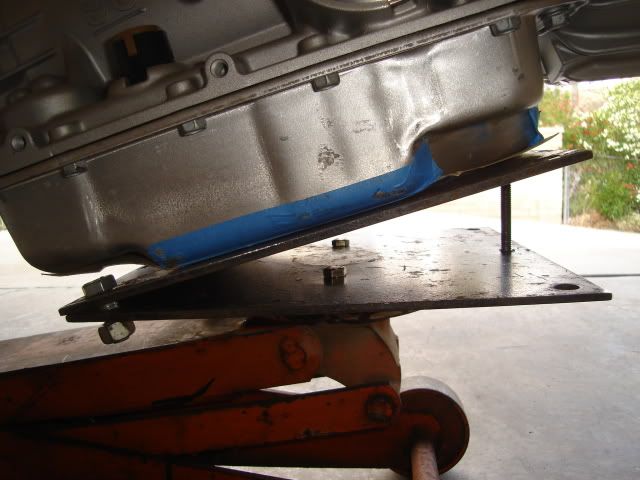
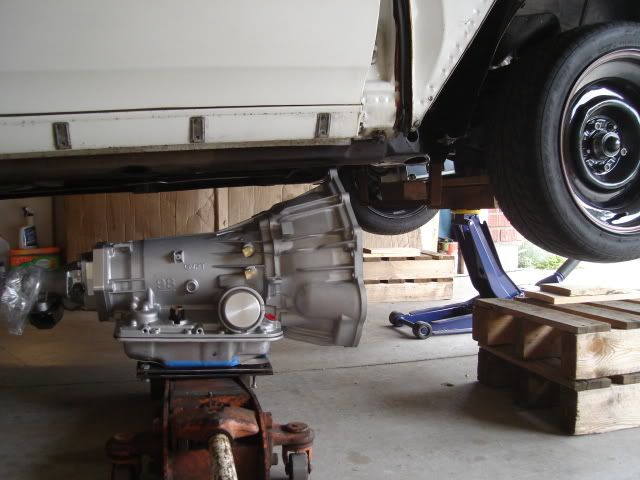
.....so I can move forward on fitting up the trans, so this morning I spent some time modifying my old floor jack. I had a couple of pieces of 12" X 12" X .200" plate that were already the perfect size and thickness to do the job.

First I drilled and tapped a couple of holes 3/8-16 coarse thread in the jack base and then drilled the bottom plate to match and bolted it down. Next I drilled and tapped another 3/8-16 hole in the center front of the bottom plate so I could use a jacking screw to change the angle of the top plate as needed. A couple of 1/2-13 bolts and nuts are loosely attached at the rear corners so the plates can hinge, some 1/2" clearance holes were already drilled in all 4 corners of the plates.


Nothing fancy but it's plenty stable and will do the job. The cost was right in my budget, zero dollars.


Now to grab my big 2-1/2 pound hammer and have at it.

Reply

Thread Tools
Display Modes

Posting Rules
You may not post new threads
You may not post replies
You may not post attachments
You may not edit your posts

BB code is On
Smilies are On
[IMG] code is On
HTML code is Off

Forum Jump


All times are GMT -4. The time now is 02:21 AM.


About Us

The PY Online Forums is the largest online gathering of Pontiac enthusiasts anywhere in the world. Founded in 1991, it was also the first online forum for people to gather and talk about their Pontiacs. Since then, it has become the mecca of Pontiac technical data and knowledge that no other place can surpass.


Copyright © 2017