


| FAQ |
| Members List |
| Social Groups |
| Calendar |
| Search |
| Today's Posts |
|
|
|
#1
 02-03-2010, 03:12 PM
|
||||
|
||||

I may have missed some things you wrote but, I see many things over looked pertaining specifically to a Pontiac build.
in no order- 1. you did not mention how important it is to remember to install the rear oil galley plug that hides next to the distributor. A first time Pontiac builder would easily overlook this. 2. you did not mention the importance of installing the dip stick tube prior to assembly. Perhaps, it was never removed but, many shops and builders remove them during the cleaning process. I do not know how many people over the years have told me they forgot this after they installed the pan. 3. Before installing the oil pump, I like to install the distributor so the drive shaft doesn't move around while you are turning the block over while on the stand. 4.I like to check to make sure the cam bearings are installed properly before I start assembly. that is done by looking up the main oil feed holes to see if the hole in the bearing is in the right place. 5. next, I always do a test fit of the cam prior to any assembly incase a cam bearing was put in at an angle. 6. it is easy for a novice to forget to install the small expansion plug on the back side next to the dist. 7. In the picture of the guy putting in a piston. I find it wise to use one hand to hold the ring compressor tight against the deck of the block. Otherwise, it is easy for a ring to pop out if the tool does not stay flat. It is important not to chip a ring. 8. You did not add the important cooling holes in the deck 9. did you check piston to wall clearance? I would never consider assembling an engine with aftermarket pistons and not do that. In adequate piston to wall can lead to overheating and black death. 10. I know different people like to do things different. I see nothing wrong with the way you check for valve clearance but, it is much easier, faster and less messy to not use the clay. With light duty helper springs, you can simply push down on the end of the rocker arm and feel how much room there is as you rotate the engine. 11. also, when installing pistons/rods, the bearing has a chamfer on one side. That is the side that goes toward the outside of the jounal. Also, the bevels/grooves on the rods always match the caps when installing. Best you with your build. Steve
__________________
Hundreds of Pontiacs in Az "Real Pontiacs only..no corporate nonsense!" Facebook- Pontiac Heaven Hosting- 23rd annual Pontiac Heaven weekend- Phoenix pending due to covid Pontiac Heaven Museum in process Phil 2:11 |
|
#2
02-03-2010, 03:27 PM
|
||||
|
||||
|
Maybe you haven't gotten to it yet, or maybe I'm a buffoon and missed it, but I like to always degree the cam........and make sure it's done BEFORE Steve Barcak's #10 listed above......
|
|
#3
02-03-2010, 03:40 PM
|
||||
|
||||
|
Here are some more things I noticed and wish to contribute here.
12.On your teardown pics and your comments. Just because there are some scratches on the skirts does not mean boring is required. Maybe, maybe not. 13. I see nothing about rear main installation? This is among the most important parts of assembly and youo pass over it. Curious as to why you would omit such an important part. I do not see where you even mention what type of seal you used? ??? There is the myth that all Pontiacs leak. 14. Your pic of the bearing show the dirt in them only shows they bearings did their job and contained the crud as they are designed to do. Nothing wrong there. This is normal in any engine with useage. 15.you also always want to inspect the ring lands when you do a tear down. This can show signs of detonation, etc. I would agree that most used cast pistons are junk after removing. However, if they were forgings, they could be used by someone else on a 421 build as it has the same stroke and pin height but, a slightly smaller bore. 16. You need to visably inspect the oil galleys that feed the lifters before any assembly. it is easy for crud to hide in there even after a thorough cleaning. 17. Align honing is rarely needed on a stock build. It does produce good profits for the machine shop but very rarely needed. Again, while doing a tear down, inspect for unusual main bearing wear and on the crank journals too. You could have saved some money there. 18. I would never have the machine shop put the oil plugs in the motor. that is the engine builders job and responsibility. That way you know for sure. 19. you do not mention or pay attention to what the machinst does in the rear main seal area. What did he do there? That is not normally a place that needs attention. Are you referring to the align hone? 20. when inspecting the machine shops work on the piston/rod assemblies, look close inside the piston in the pin area for dirt. It easily collects there and is about impossible to remove. Also make sure the pins are properly lubed or you will be in serious trouble. next, I like to use several plastic garbage bags to keep piston/rod assemblies, cranks, etc so they stay clean. it is a cheap way and works good. 21. always test fit the dip stick before final installation of the pan. If an a/c equipped car, be sure to include the extension in the test. This way you fill not be fighting your dip stick like others do. 22. You are always gambling when you have a shop assemble your heads. did they remember to install the o rings? how about installed height and tension? I like to assemble my own heads to make sure they are as i want them. 23. I agree with Cliff ( post #19 ), it is a smart idea to leave the valley off while setting the valves. Steve Hosting- Thur-Sun April 8-11, 2010 12th annual Pontiac Heaven Phoenix www.pontiacheaven.org Sunday April 11, 2010 8th annual Nostalgic Show & Go! Phoenix www.nostalgicshowandgo.org
__________________
Hundreds of Pontiacs in Az "Real Pontiacs only..no corporate nonsense!" Facebook- Pontiac Heaven Hosting- 23rd annual Pontiac Heaven weekend- Phoenix pending due to covid Pontiac Heaven Museum in process Phil 2:11 |
|
#4
02-03-2010, 08:22 PM
|
||||
|
||||
|
Quote:
Another bunch of excellent observations. Some of the rebuilt procedures are missing simply because I didn't take photos during the process. What example is the rear Main. As you point out this is critical to the avoidance of leaks. We used the BOP seal.
__________________
"Pay no attention to the planet Mopar. It is a strange and confusing place." ~Chiphead |
|
#5
02-04-2010, 09:53 AM
|
|||
|
|||
 Bump of the day. GREAT thread (from a newbie).
__________________
1969 LeMans vert, 400 1971 Corvette 1964 Cadillac Deville so far.... http://s233.photobucket.com/albums/e...1969%20LeMans/ |
|
#6
02-04-2010, 10:10 AM
|
|||
|
|||
|
Here's another
that often gets forgot about.
Before the final torque down of the main caps. Put a thin layer of sealer at the back edge, on both sides, of the rear main, between rear main cap and block. Without it you can have an oil leak that mimics a rear main seal leak.
__________________
All the federales say,they could've had him any day They only let him slip away, out of kindness...I suppose Poncho & Lefty |
|
#7
02-04-2010, 07:11 PM
|
||||
|
||||
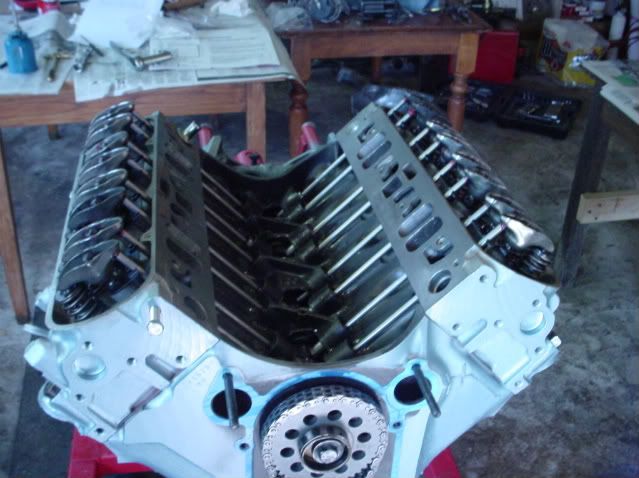 Here's the motor with both heads installed and the valve train completely adjusted. As Cliff noted, one benefit of adjusting a Pontiac valve train this way is that you can clearly see when the lifters are on the base circle of the cam. 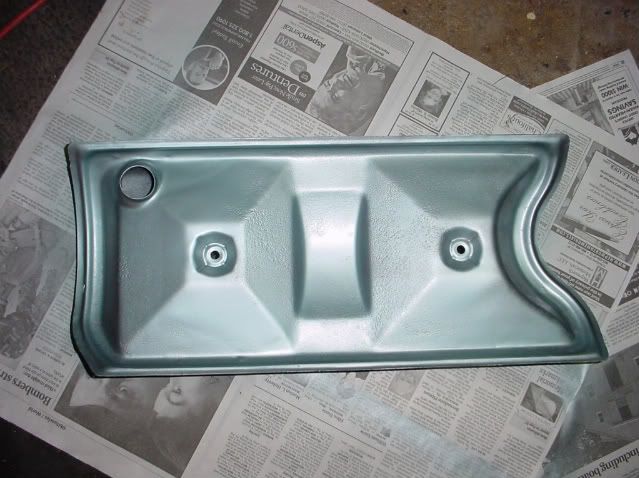 Another thing to watch when rebuilding a Pontiac is to make sure that that valley pan is absolutely clean. Over the life of the motor the valley pan collects all sorts of gunk and grit. If it’s not perfectly clean, whatever junk left in the valley pan will drop down inside your brand new motor. One way to make sure the pan is clean is to break the spot welds, clean the sheet metal, and re-weld. My machine shop used special brushes and water jets to make sure all of the grit was gone. Even so, I took the time to examine the pan with a flexible light just to make sure all was good. It's also important that the valley pan is clean and dry so that the sealant can do its job. Don’t over tighten the valley pan bolts. Fifteen foot-pounds all you need here. In order to avoid oil seeping around the valley pan bolts, we placed a little dab of sealant under the bolt heads. 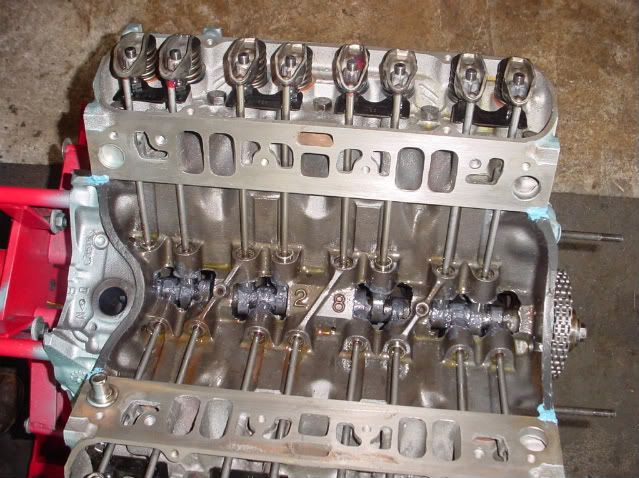 Here is the last look at the valve train before the valley pan goes on. I didn't talk much about installing the cam because I didn't get any good pictures. Like Steve says, the usual process is to remove and install the cam several times while checking fit and clearance. However, this cam required some effort to install. It was okay, meaning that we could rotate the cam by hand, but we didn't want to take the chance of removing the cam and installing it again with the additional chance for nicking cam bearings. This is also the last chance for adding cam break in lube and double checking that everything looks good. If you are the builder, you can spend as much or as little time as you feel comfortable. Given the stories I had heard about flat tappitt cams rounding lobes during break-in, we chose to use lots of cam lube. You can also see the silicon sealant that we applied to the sealing surfaces; again, these surfaces must be clean and dry if you don't want leaks. Final note about the installation of the valley pan - once this is bolted down, there is no more ability to add lube to the cam lobes. For this reason, you don't want to rotate the motor any more than is absolutely necessary between now and the time it’s fired. 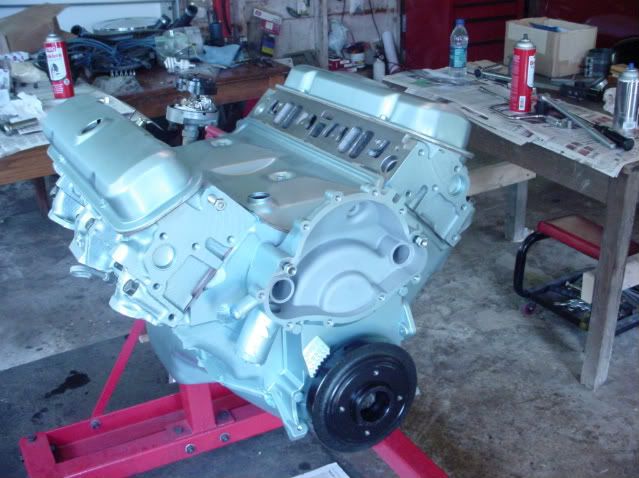 Here is the motor with the valley pan, balancer, and distributor installed. Is very important that the distributer is installed correctly so that the motor will fire right up. Incorrect timing is a common reason for a no start condition with rebuilt motors. (And remember that the more that motor spins without firing, the more cam lube is wiped off the lobes.) 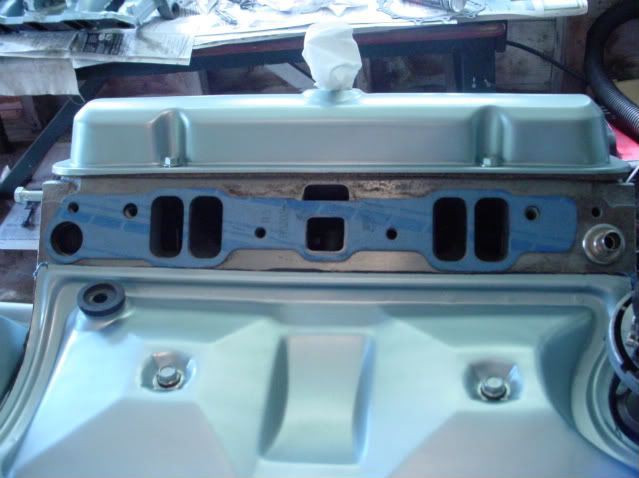 Here is another Pontiac issue to deal with. This problem happens when using 1967 - 1971 intakes with 1972 and up heads. The exhaust crossover on the right side of the manifold is taller than the matching opening in the head. The fix is to use the small opening gasket (pictured here) with a shim that covers the intake manifold opening. Jim Hand offers a good illustration of the fix http://www.dapa.org/jhpages/jhand9.htm. 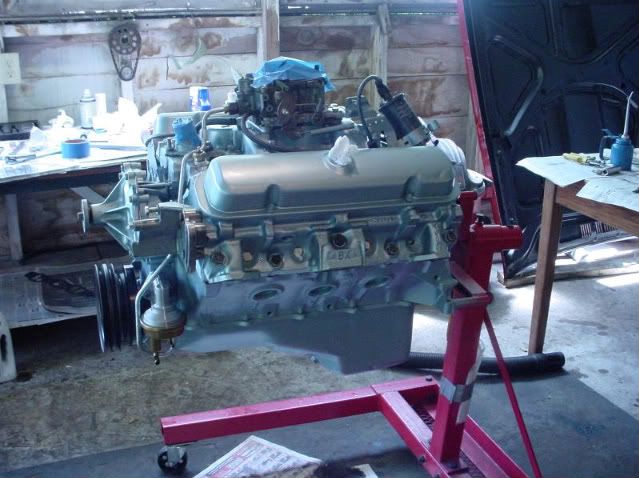 Here is the completed motor. The fuel pump has been added as well as the intake and carb. Compared to the work we had been doing, this all seemed pretty simple. Even so, we could not get all 8 manifold bolts to thread. We decided to pull the manifold and elongate the bolt holes rather than risk a cross-thread this late in the process. We used thread sealant on these bolts to avoid sucking oil under decell. 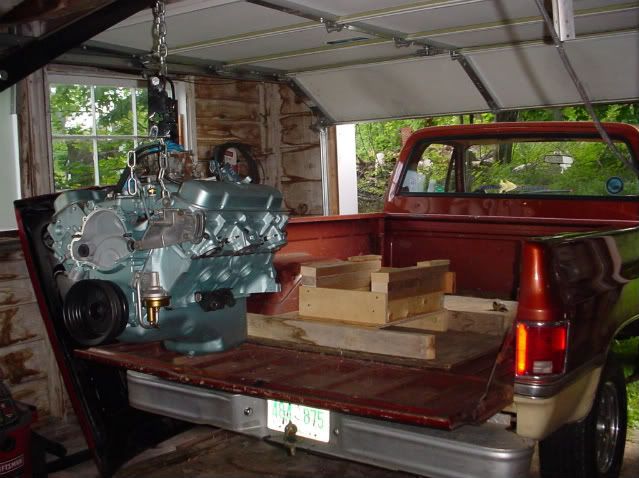 My machinist recommended breaking in the motor on an engine dyno. To me, that made sense because 1) if there were any problems in getting the motor to start, it would be easier to work on the motor out of the car, 2) fixing any leaks would be a lot easier on the stand, and 3) breaking the motor in on the dyno allows for tuning during break in. Here’s the motor ready to go to the engine dyno.
__________________
"Pay no attention to the planet Mopar. It is a strange and confusing place." ~Chiphead |
|
#8
02-04-2010, 08:29 PM
|
||||
|
||||

Thanks for this thread. Might give me enough confidence to take on the project of going through my 455 next winter. Everybody always talking about taking this measurement and that measurement (piston depth for example) but never say what to do if your measurements aren't in spec. That being said, us novices need to know from all of the experienced builders out there. Thanks again.
|
|
#9
02-03-2010, 08:14 PM
|
||||
|
||||
|
Quote:
To your point .2, the machine shop installed the dip stick in the block To your .4, we used a cigar and some flexible tubing to blow smoke all through the oil passages. This way we could observe and know for sure that all the passages that were supposed to move oil did move oil, and that the oil holes in the bearings were properly aligned.
__________________
"Pay no attention to the planet Mopar. It is a strange and confusing place." ~Chiphead |
|
#10
02-03-2010, 08:21 PM
|
||||
|
||||
|
I needed this! Best.....thread...ever...

__________________
'68 Firebird  -Before you press that thing to the floor, be sure you're right with God.... '68 hard blocked forged 463 (thanks Luhn Performance), SD prepped HO aluminum intake, SD Perf 290cfm KRE'S,'Ol Faithful cam, 2004r with a "Jim Hand special" converter to a 3.42 Trutrac 12 bolt hung from a 4 link. With a 120 shot of N2O for fun. |
|
#11
02-25-2010, 02:36 PM
|
||||
|
||||

Quote:
Anything I can do to keep the Poncho running cool, I'm down for it. Thanks, Gary
__________________
Currently in the stable: 1966 C20 - D.D. 1968 Lemans - street/strip machine 1999 CBR1100XX - long distance steed 2002 TL1000R - canyon carver 2006 GTO - weekend toy Live is good  
|
|
#12
02-26-2010, 02:24 PM
|
|||
|
|||
|
Quote:
 From what I could see through the coolant passage holes in the heads I used, drilling the extra hole in the block deck and head casting was a waste of time. The cylinder head coolant passage where I drilled the hole was already getting water from other, nearby holes. Perhaps not all heads are cast like that, though. |
| Reply |
| Thread Tools | |
| Display Modes | |
|
|
The PY Online Forums is the largest online gathering of Pontiac enthusiasts anywhere in the world. Founded in 1991, it was also the first online forum for people to gather and talk about their Pontiacs. Since then, it has become the mecca of Pontiac technical data and knowledge that no other place can surpass.






 Hybrid Mode
