


| FAQ |
| Members List |
| Social Groups |
| Calendar |
| Search |
| Today's Posts |
|
|
|
#1
 10-21-2013, 09:18 PM
|
||||
|
||||

Yes, i filled all the existing rad support mounting holes in the valance and drilled and slotted the new ones, which were lined up with the actual bolt locations. The new holes ranged from 1/2" to 1" away from the originals!
Your black car would have had the same valance but I think the front bumper was replaced with an NOS one 25+ years ago because there were no screw holes underneath where the valance would have mated with it. This may have occurred during the second owner's repainting, when the NOS quarters were installed. Additionally, the rubber nose material was very smooth and perfect on the underside, not something you see on an old bumper. |
|
#2
10-22-2013, 05:46 AM
|
|||
|
|||
|
At this point the repop valances have been available for a while. How can you determine that you are looking at a factory valance? Are there any markings?
Thanks,
__________________
1972 Formula 400 |
|
#3
10-22-2013, 07:17 AM
|
||||
|
||||
|
The Parts Place valance is made of thin, black ABS plastic of even thickness: 1/16". The upper mounting flanges are way too wide to fit in the locating notches in the underside of the bumper.
The factory polyethylene valances were molded in body colors and vary in thickness, from way too thin: 1/32" (on the sides where they mate with the lower front fenders, to thick on the bottom 1/8" where they attempted to mate with the rad support (but the holes were in the wrong places). Polyethylene is a waxy, easily scratched polymer material. They also have several molding seams on the inside. Here's a photo of the original white poly valance I repaired for my white 72 T/A next to the black Parts Place valance. It was completely shattered and burned but I got it repaired better then the blue one I just used, so I put it back on the white T/A.  Here's a portion of my old thread on repairing that one. It has a lot of detail shots of the poly valance: http://forums.maxperformanceinc.com/...ne#post3331725 Last edited by njsteve; 10-22-2013 at 07:31 AM. |
|
#4
10-22-2013, 08:25 AM
|
||||
|
||||
|
Quote:
__________________
http://www.starspangledbannerchallenge.com/ |
|
#5
10-22-2013, 11:37 AM
|
||||
|
||||
|
Quote:
  Raised parts on top of valence.  
__________________
Mike/Illinois |
|
#6
10-22-2013, 12:38 PM
|
||||
|
||||
|
Thanks for posting those detail shots. You can see that the mounting notch indentations in the underside of the Orange car's bumper are square and there is no way that the raised rectangular areas on the Parts Place black ABS valance would ever fit those indents. That is one of the major problems with the repro valance.
Sure, you can rework ABS with a heat gun, but for the $250 you pay for the part, you shouldn't have to. I should start my own polyethylene valance repair facility! |
|
#7
10-22-2013, 02:09 PM
|
||||
|
||||
|
I located an NOS Delco Remy distributor cap for the car. The second owner gave it a "tune-up" in the late 1980's and must have tossed the original AC spark plugs and cap.
 The correct cap should have the "Delco Remy Patent 2769047 R" embossed in a circle around the coil terminal. All the modern replacements (including the brand new AC Delco cap I bought), are blank on top. There is also a noticeable difference in the weight of the original caps versus a modern Delco cap. The old ones are glossy, heavy, and thick. The new ones feel almost like ABS plastic and are very flat and cheap looking.  
|
|
#8
10-22-2013, 02:15 PM
|
||||
|
||||
|
I was talking to the third owner, Mike, the other day. He mentioned that there is evidence of the exploding recalled Firestone 500 tires on the car. I recalled that the front of the driver's side rocker panel had a wire brushed look to it and that must have been where the separated tread flapped against it during the blow-out when the second owner bought it and drove it from AZ to CA. But he mentioned that on the driver's side of the hood there is a "cat-o'-nine tails" mark across it. And wouldn't you know it, I looked closely and there is a series of small chips in a flail pattern on the hood from the direction of the driver's side wheel well.
Here is the wide angle and the closeup of the battle damage:  
|
| The Following User Says Thank You to njsteve For This Useful Post: | ||
|
#9
10-22-2013, 02:46 PM
|
||||
|
||||
|
The next item on the To-Do list is replacing the heater core. The car has had its heater core bypassed since before the third owner bought it, which in car-guy language means it must have been leaking at some point, early on just from sitting. So stay tuned for that funfest.
Last edited by njsteve; 10-22-2013 at 02:54 PM. |
|
#10
10-22-2013, 03:35 PM
|
||||
|
||||
|
Quote:
__________________
" Long may we DRIVE !" |
|
#11
10-25-2013, 02:35 PM
|
||||
|
||||
|
BTW, NEVER store one of these valances in this bottom side up, position especially when the weather gets cold. If you are going to work on it in this position, make sure you have something under both signal lamp pods to support the outer ends. Otherwise that crack in the bottom will spread right up to the top, and the valance will break into two separate pieces. When I stored mine, I use a bunched up, old car cover with a higher area in the center, and I then placed the valance on it with the outside, facing up and the entire length of the valance fully supported by the soft cover.. You have a very rare example there that doesn't have one of the upper mounting bars broken. |
| The Following User Says Thank You to njsteve For This Useful Post: | ||
|
#12
10-29-2013, 08:56 AM
|
||||
|
||||
|
Quote:
Quote:

|
|
#13
10-31-2013, 08:22 PM
|
||||
|
||||
|
Well, It took a few days or wrenching but I managed to replace the heater core. I had to remove all the lower A/C ductwork, the radio, the console, both front seats, the lower section of the passenger fender and inner fender, the rocker panel trim and bracket and several other things I am probably forgetting. None of the stuff showed any evidence of ever having been removed before. I was rather neat to see what the actual hardware was supposed to be rather than someone's version of what screw fits what hole.
I found some interesting things along the way...like this: 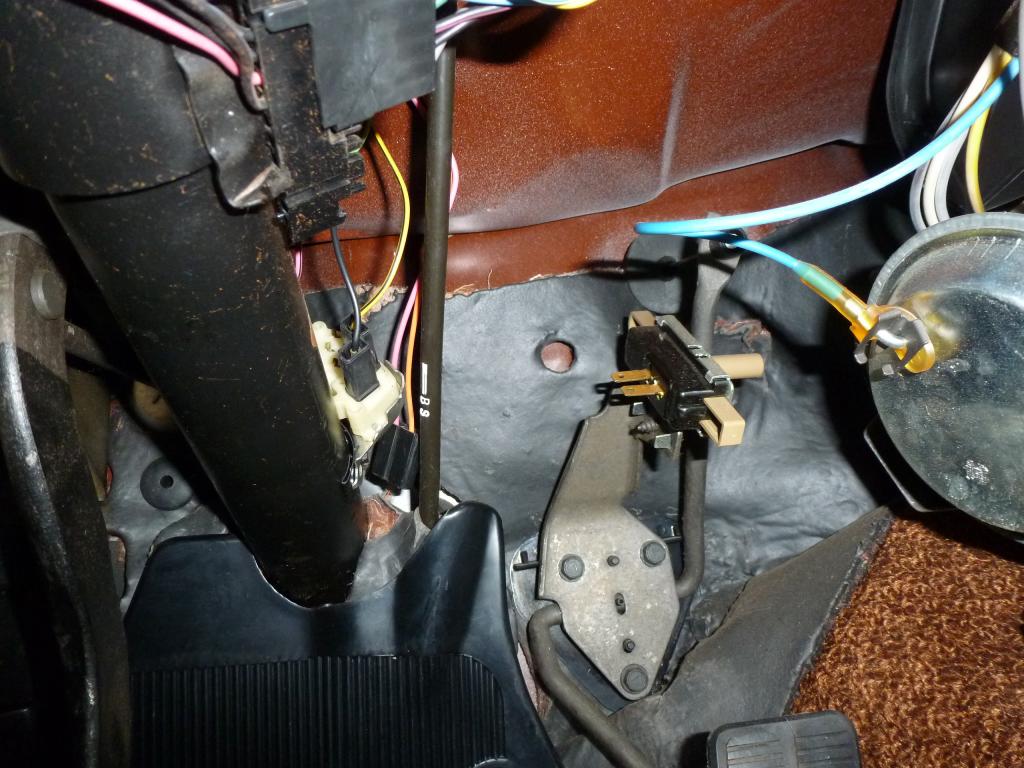 Notice anything odd about the Turbo 400 kickdown switch on the throttle cable bracket? Yeah, the portion of the harness was never connected to it. It is still dangling behind the steering column. (The orange and pink wires) There are no marks or scratches on either of the two terminals on the switch. So I hooked it up for future use. |
| The Following User Says Thank You to njsteve For This Useful Post: | ||
|
#14
10-31-2013, 08:40 PM
|
||||
|
||||
|
After hooking up the kickdown switch I took some before shots so I knew where things were and what hardware held it in. Note the giant gap between the heater box and the defroster duct.
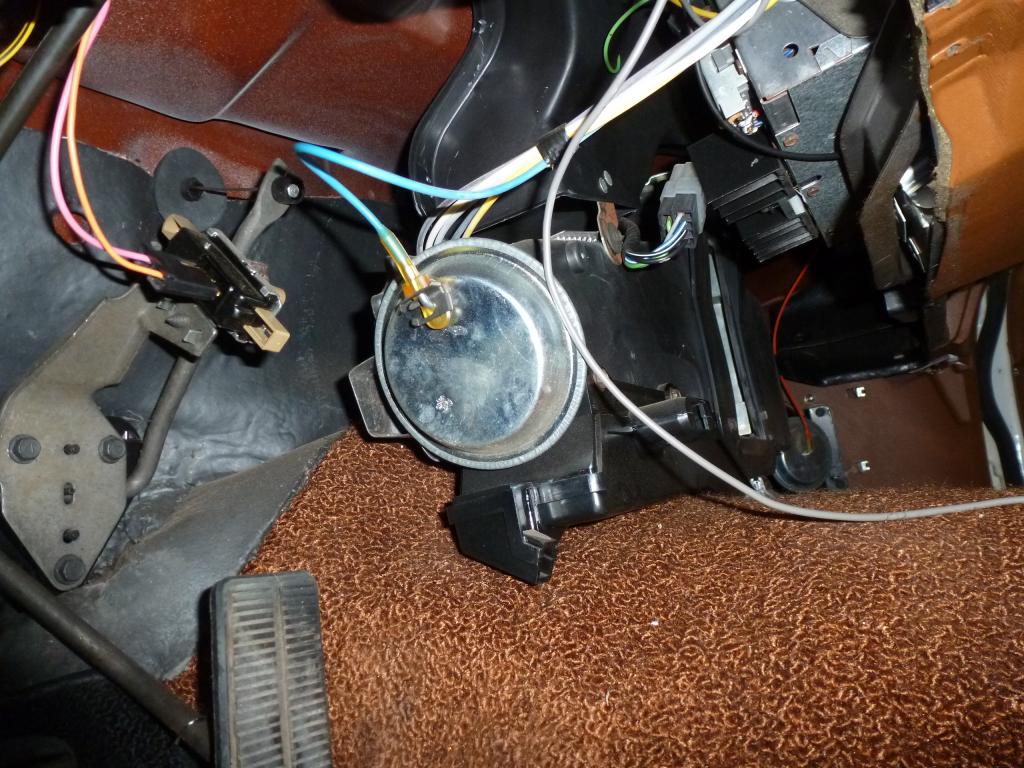 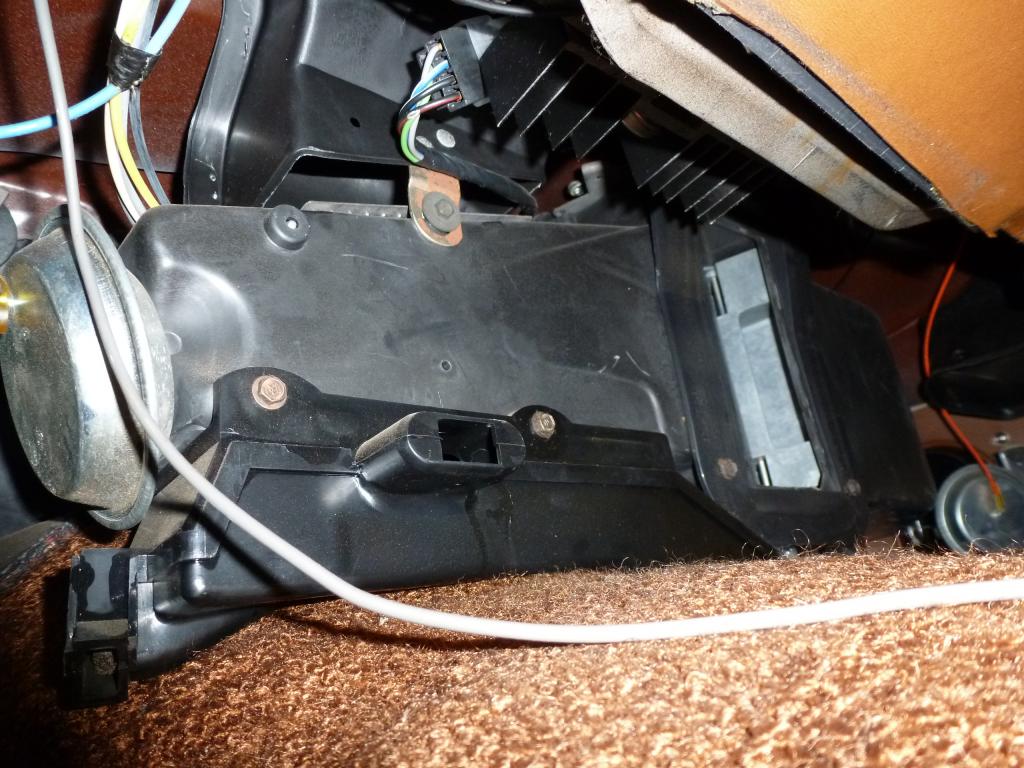 And the heater core housing pulled free of the dash. There are two bolts from the inside going through firewall and three studs coming from the housing and into in the engine compartment. Two of the studs are behind the passenger side cylinder head and the third is under the heater blower motor which requires the lower mounting points of the fender to be unbolted, in addition to the entire inner fender. You then put a small block of wood to hold the fender far enough out so that you can properly slit your wrists on the sharp metal while quarter turning the ratchet to remove the single nut from the stud...and the remove the lower heater core hose from the core outlet. It then promptly wedges itself into the kick panel tranny hump and lower portion of the dash.  This is something like solving one of those twisted nail puzzles where there is only one way to get the two metal pieces to unhook from each other. I found the secret: You have to first push the housing toward the driver's side (the radio removal was critical to this move), then you have to rotate the housing so the heater core outlets face the floor while pulling the housing diagonally toward the passenger door. It takes around 10 steps of pulling one inch, rotating one inch...lather, rinse, repeat, until the whole assembly can come out of the car. 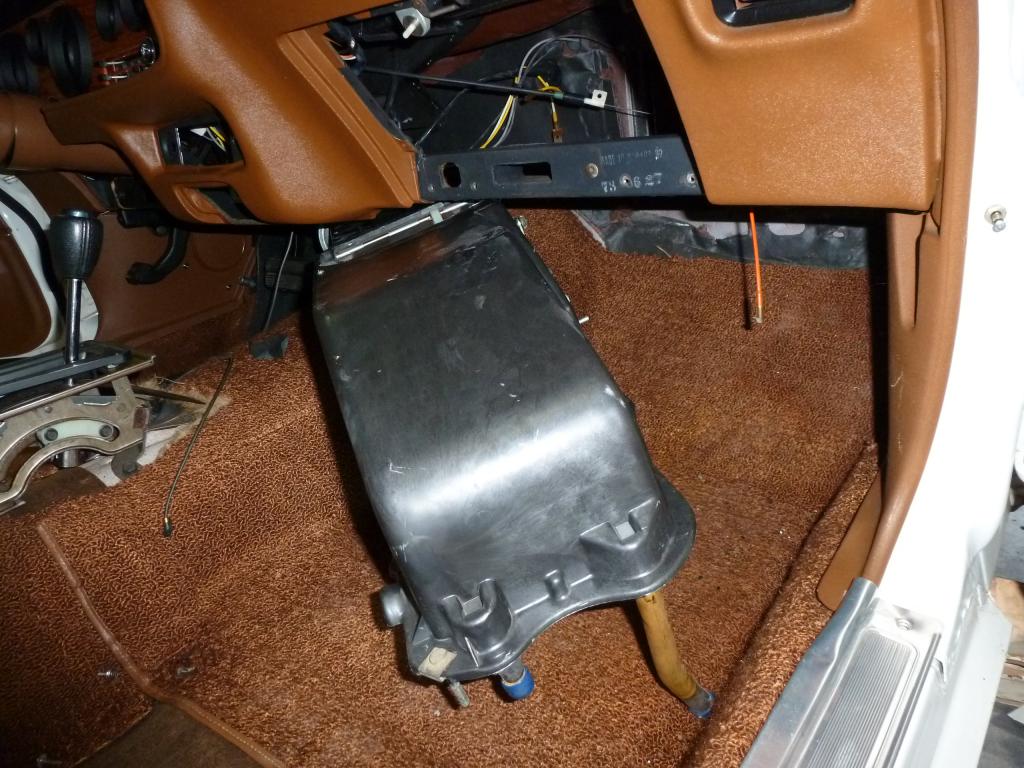
|
| The Following 2 Users Say Thank You to njsteve For This Useful Post: | ||
|
#15
10-31-2013, 08:46 PM
|
||||
|
||||
|
Here's the offending heater core. Still had the original foam seals intact.
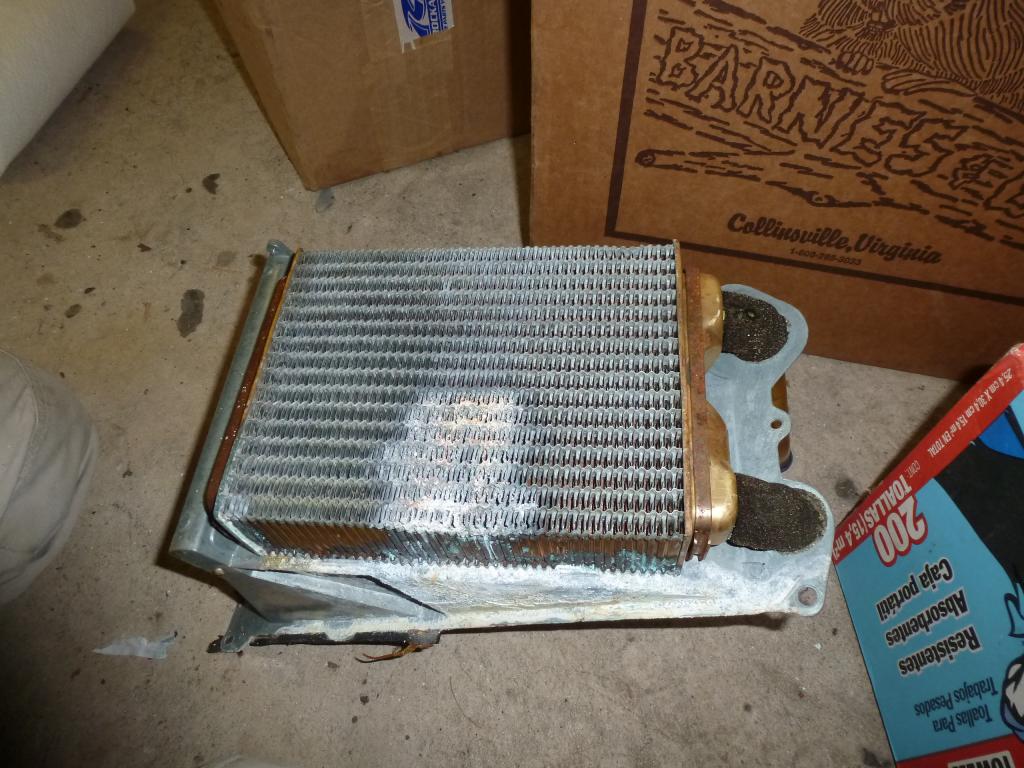 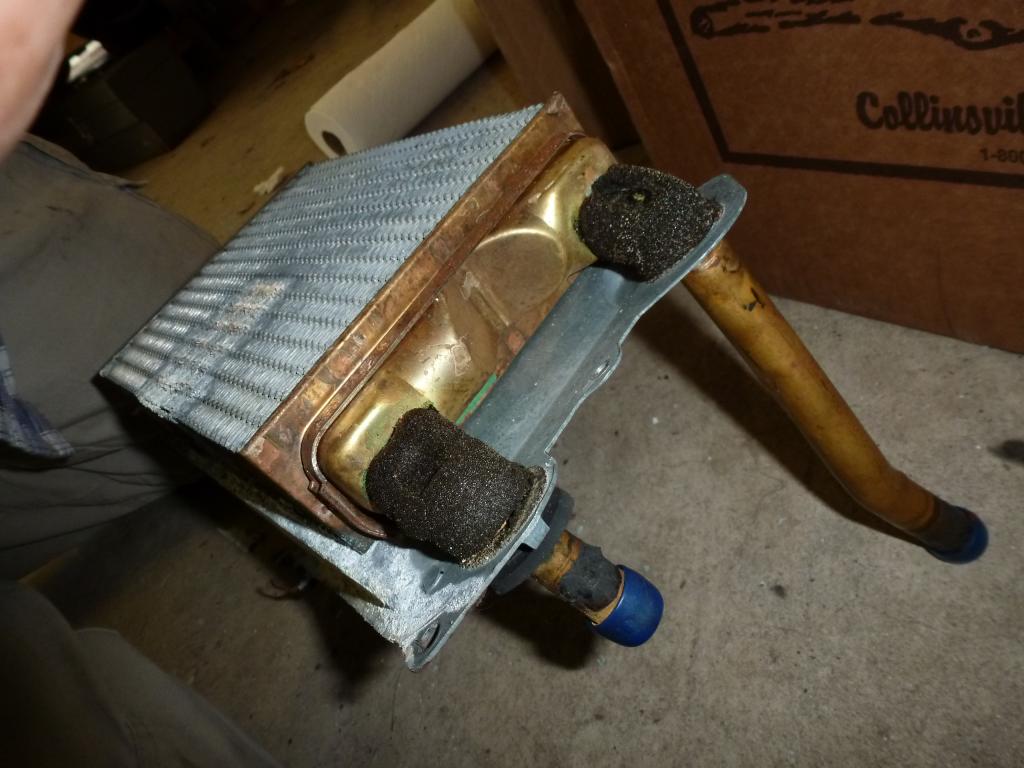 And the empty work area: 
|
| The Following 2 Users Say Thank You to njsteve For This Useful Post: | ||
|
#16
12-08-2013, 10:36 PM
|
||||
|
||||
|
Well, After sending the original radio out for rebuild and removing the center console and most of the ducting, I replaced the repaired radio ( just needed cleaning and lubrication / adjustment for AM and FM stereo operation), I took the car out for a little test drive. Very COLD here at 65 degrees( kidding) but with clears skies. Anyway, I noticed a gurgling coming from the heater core area. Sounds just like water running through pipes.
Did your heater core " make noises" before it started leaking? I will say that I don't relish replacing the core after reading the process you went through here and it is not leaking. Also, according to my PHS, my car did not come originally with an 8-track player even though there was one installed when I bought it. Is there any interest for what appears to be an original 8-track player and all brackets and wiring? Quote:
|
| The Following User Says Thank You to West Coast GTO For This Useful Post: | ||
| Reply |
| Thread Tools | |
| Display Modes | |
|
|
The PY Online Forums is the largest online gathering of Pontiac enthusiasts anywhere in the world. Founded in 1991, it was also the first online forum for people to gather and talk about their Pontiacs. Since then, it has become the mecca of Pontiac technical data and knowledge that no other place can surpass.




 Hybrid Mode
