#1  
Old 12-01-2013, 09:57 AM
Bentwheelbob's Avatar
Bentwheelbob Bentwheelbob is offline
Ultimate Warrior
 
Join Date: Mar 2012
Location: Charleston, WV
Posts: 2,502
Default Air Cleaner done and working

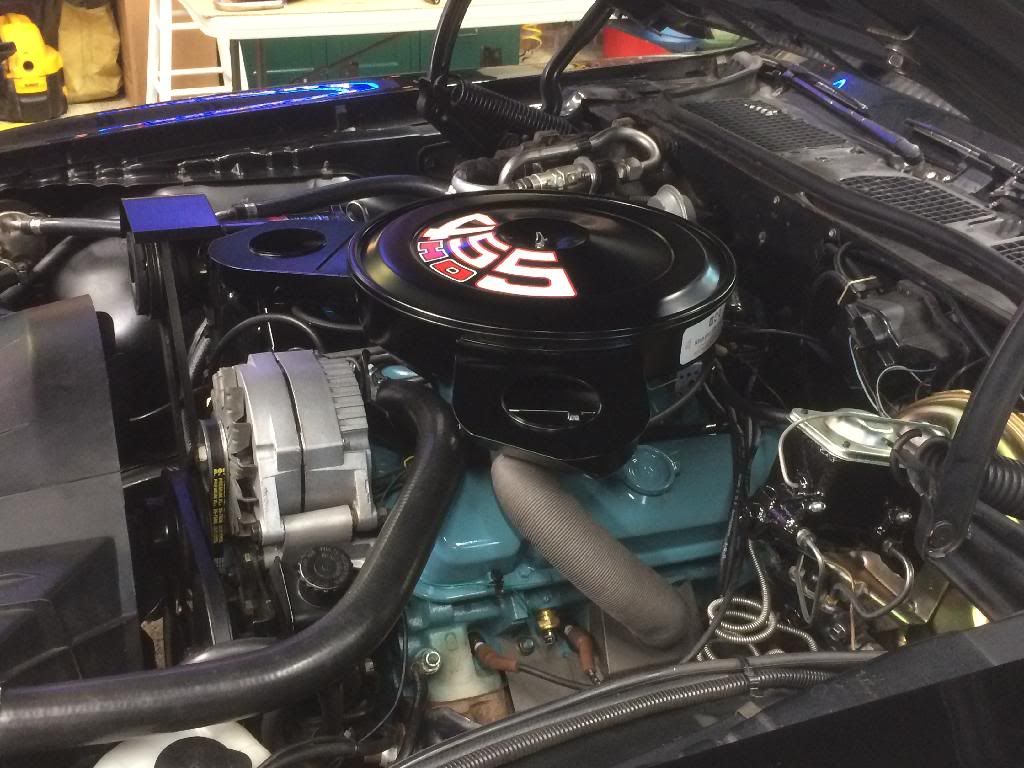
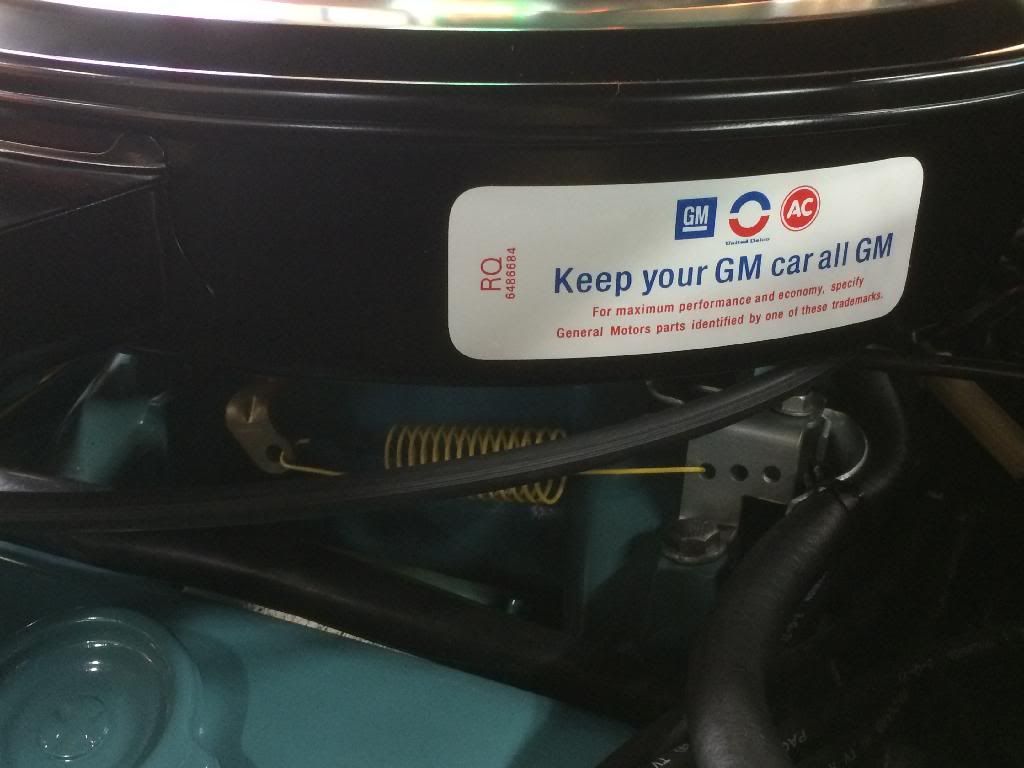
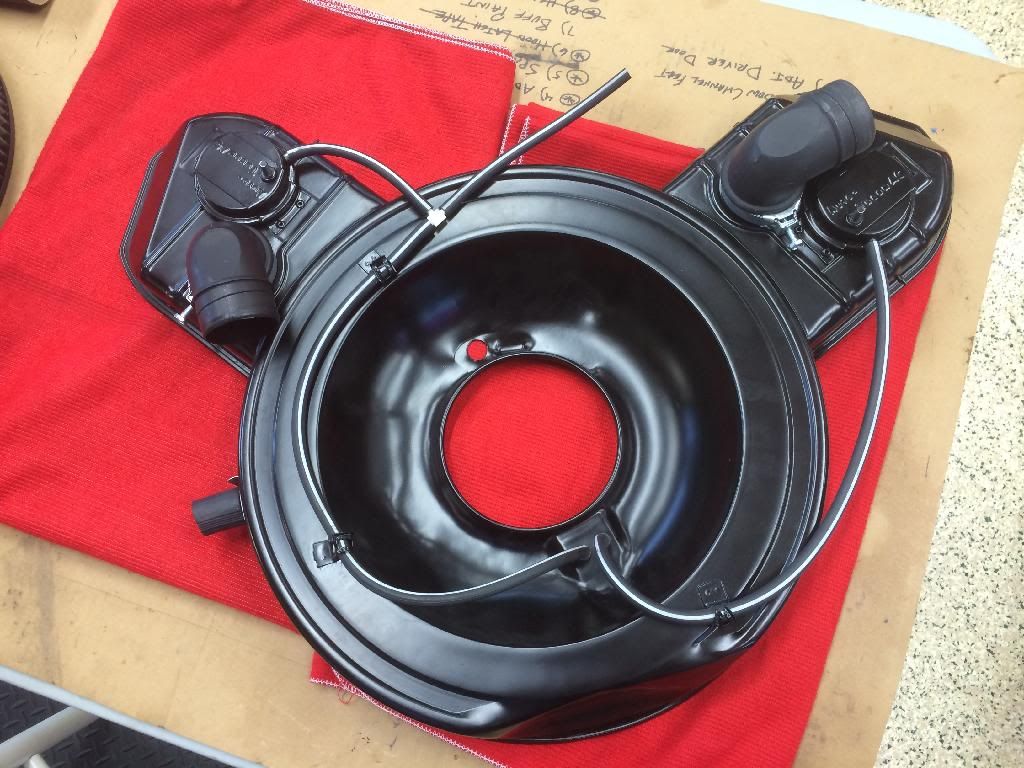
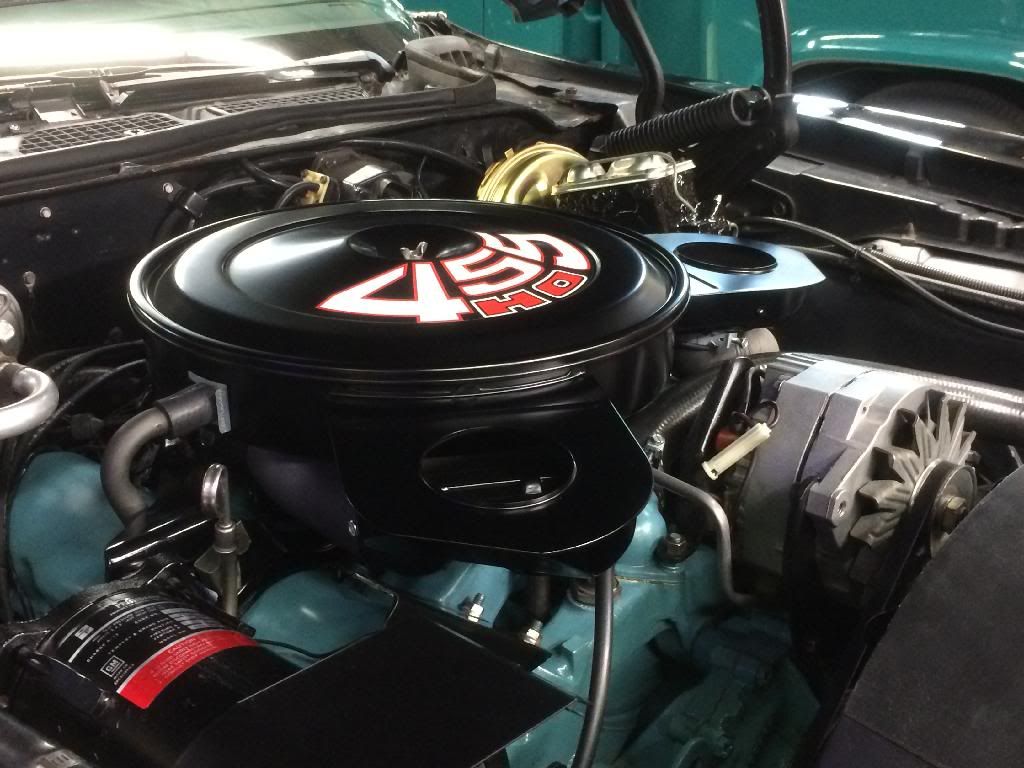
So the air cleaner project is finished. I switched out air cleaners and am using one I restored previously. I'll go through the one I removed and ultimately reunite it with the Black Car. Thanks to a lot of assistance from the forum, I think I have it plumbed correctly. I know that it is working correctly. It's pretty cool to watch the flappers close up and then several minutes later reopen. I also have the new correct air cleaner decal in place, and of course PB's correct lid decal. Thanks to everyone for your assistance.


The Following User Says Thank You to Bentwheelbob For This Useful Post:
  #2  
Old 12-01-2013, 10:26 AM
Bentwheelbob's Avatar
Bentwheelbob Bentwheelbob is offline
Ultimate Warrior
 
Join Date: Mar 2012
Location: Charleston, WV
Posts: 2,502
Default Engine detail

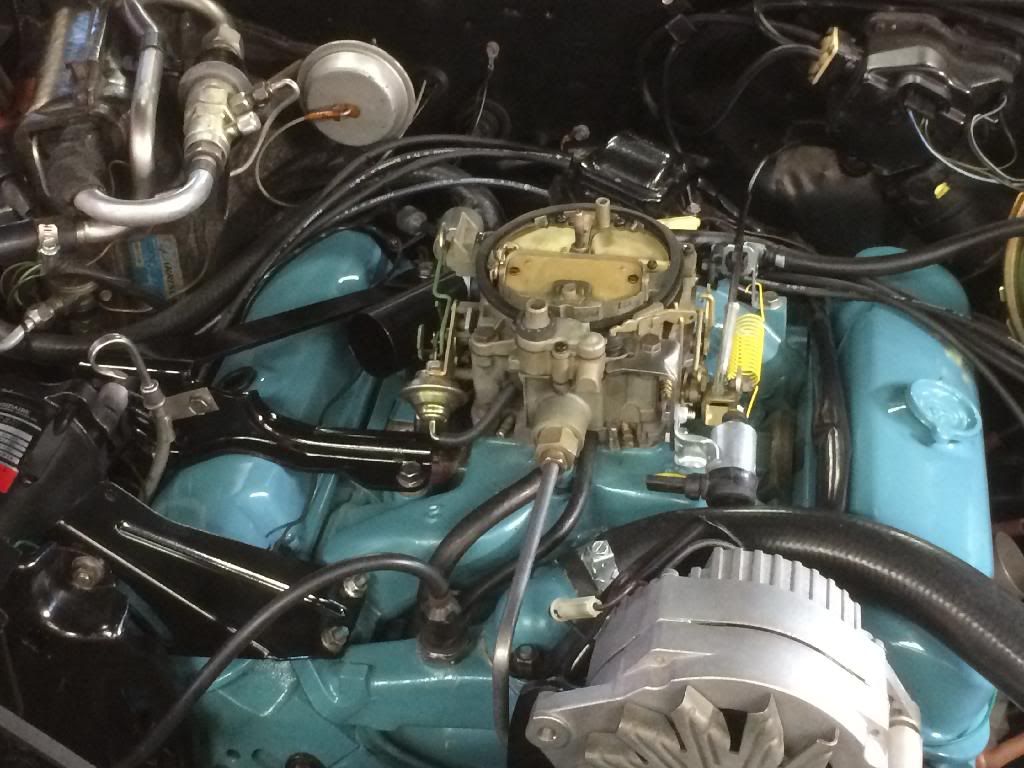
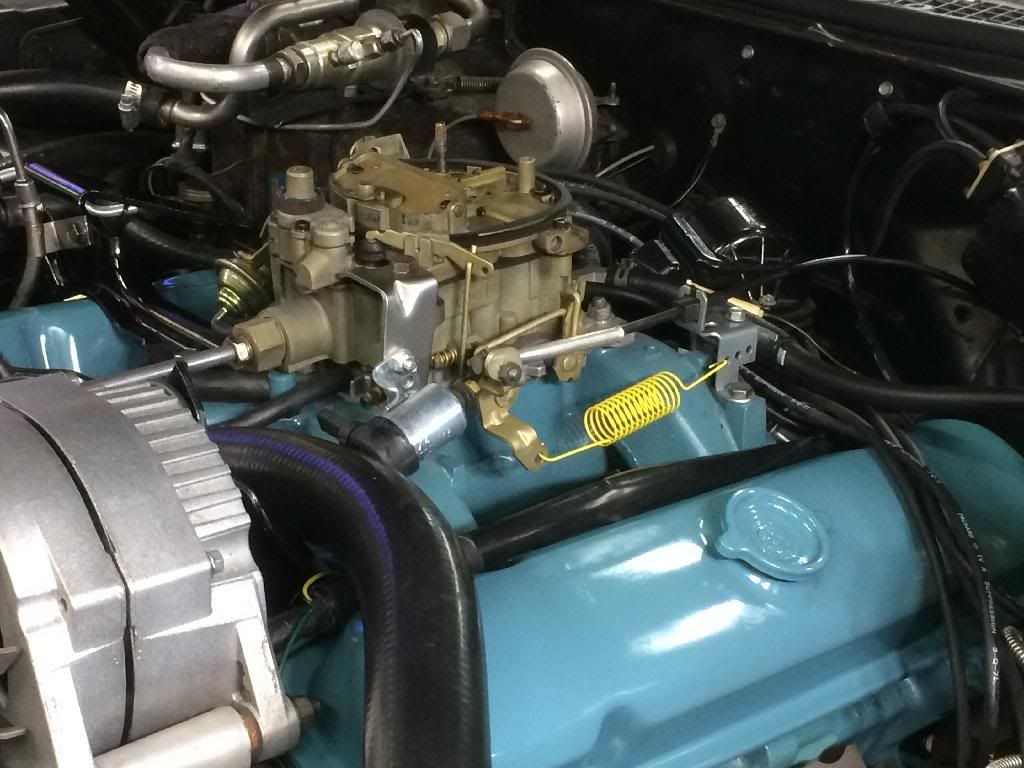
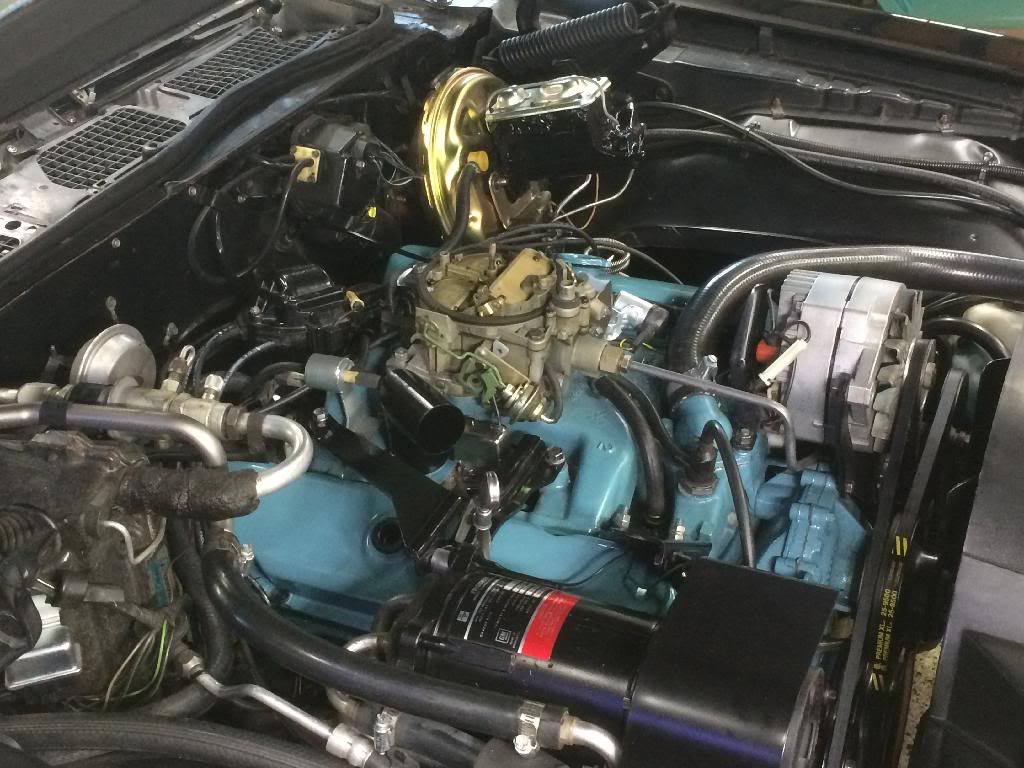
Mission creep....

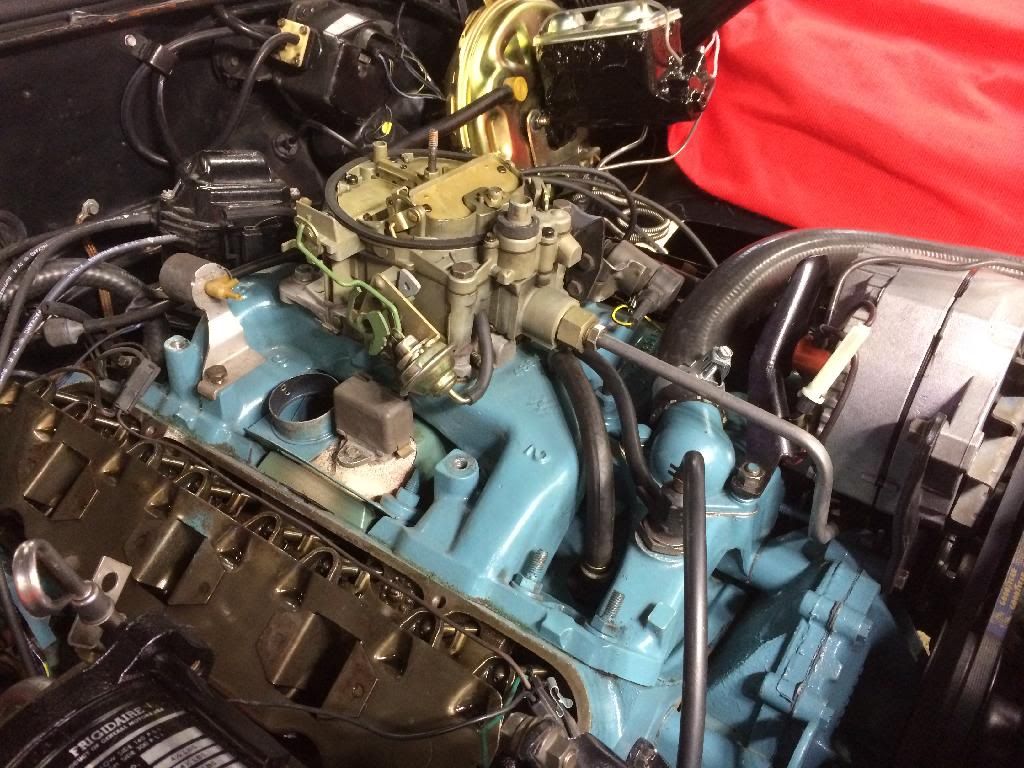
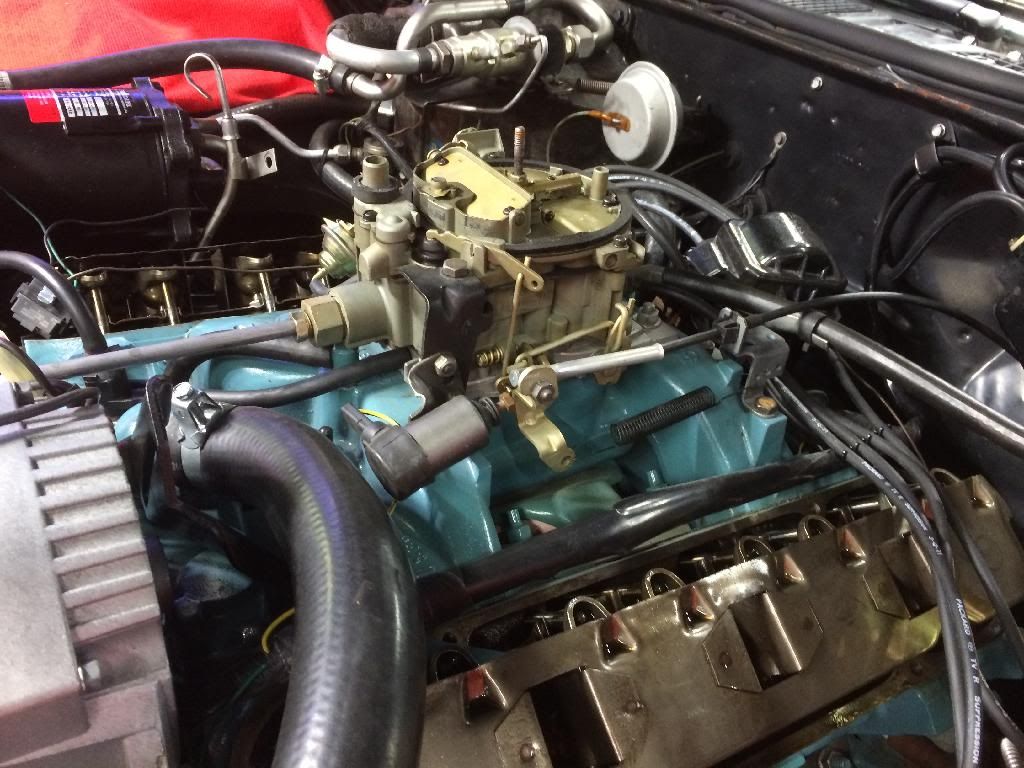
While I had the air cleaner off I decided to do a little engine clean up and detail. I have a lot of parts that were gathered for the stalled engine transplant on the Red Car, and these came in very handy. I switched out the TCS switch, installed Norwood's new repro heat riser parts, installed an NOS choke coil and cover, installed an NOS idle stop, switched out the throttle cable bracket, replaced the throttle return spring, installed a new brake booster vacuum hose, removed and repainted the valve covers, switched out the breather tube, and media blasted and repainted the a/c brackets. If I had planned better I could have added one of Greg's upper radiator hoses to the list, but I do have one coming from the next batch he makes. I had a very good starting point, but I am happy with the improvements. I'm sure I've missed a few things or have some items that are not correct and welcome all the help I can get. Here's a few before and after shots - regrettably I did not fire up the camera before removing the valve covers.


The Following User Says Thank You to Bentwheelbob For This Useful Post:
  #3  
Old 12-01-2013, 10:43 AM
RamAir's Avatar
RamAir RamAir is offline
Ultimate Warrior
 
Join Date: Jul 2011
Location: Columbus, OH
Posts: 1,037
Default

Looking awesome Bob, gives me inspiration to pull and detail my engine & compartment.

  #4  
Old 12-01-2013, 11:48 AM
blue71ta's Avatar
blue71ta blue71ta is offline
Ultimate Warrior
 
Join Date: Feb 2005
Location: America's Dairyland
Posts: 1,599
Default

Very nice work, Bob (as usual).

Just one thing I noticed, and maybe you have already added it since you took the picture, but it looks like you're missing the metal clip that goes on the bottom side of the air cleaner for the thermal switch. It is used to hold the switch to the air cleaner and also holds the 2 vacuum lines in place. Looks like this (see attached pic):

...just trying to help. Keep up the great work.

Oh, there is also a thin, paper-like gasket that goes between the switch and the air cleaner, but you may already know that.
Attached Thumbnails
Click image for larger version

Name:	hose clip.jpg
Views:	213
Size:	74.6 KB
ID:	345014  

  #5  
Old 12-01-2013, 01:05 PM
njsteve's Avatar
njsteve njsteve is offline
Ultimate Warrior
 
Join Date: Sep 2004
Location: New Jersey
Posts: 5,051
Default

Mission creep is right! Nice stockpile of parts you have sitting around. What did you end up doing to protect the flange area on the air cleaner form boot scuffing?

Also, you may want to flatten out the glossy finish on the master cylinder. They should be flat black. I don't think it was a black phosphate finish as it appears to be a flat black paint on my 73 (or what's left of it).

The Following User Says Thank You to njsteve For This Useful Post:
  #6  
Old 12-01-2013, 01:44 PM
Formulabruce's Avatar
Formulabruce Formulabruce is offline
Ultimate Warrior
 
Join Date: Nov 2004
Location: North East of AMES PERFORMANCE, in the "SHIRE"
Posts: 9,621
Default

Quote:
Originally Posted by njsteve View Post

Also, you may want to flatten out the glossy finish on the master cylinder. They should be flat black. I don't think it was a black phosphate finish as it appears to be a flat black paint on my 73 (or what's left of it).
You are right, it wasnt phosphate, but it was semi gloss (60% roughly) when new. It was cheap black Alkyd enamel paint which fades fast ( like all cheap alkyd enamels do). The durability of that original crap paint is slightly better than horrible. After 2 years they looked nearly flat. Only "masters" shipped bulk in crates for sub assembly got the paint, brand new ones over the counter in 72 were unpainted like they are today. Bob could use a semi flat clear on that master and would probably look good, but better than new..and more durable.
All IMHO...... love the car, and wish it was here, although its snowed now.

__________________
" Long may we DRIVE !"
  #7  
Old 12-01-2013, 01:46 PM
Bentwheelbob's Avatar
Bentwheelbob Bentwheelbob is offline
Ultimate Warrior
 
Join Date: Mar 2012
Location: Charleston, WV
Posts: 2,502
Default

Quote:
Originally Posted by blue71ta View Post
Very nice work, Bob (as usual).

Just one thing I noticed, and maybe you have already added it since you took the picture, but it looks like you're missing the metal clip that goes on the bottom side of the air cleaner for the thermal switch. It is used to hold the switch to the air cleaner and also holds the 2 vacuum lines in place. Looks like this (see attached pic):
Thanks. The thermal switch I installed was a cheap repop that did not include a clip. The one on the original air cleaner was an AC Delco part that did have that. I am going to try to track down the Delco piece. It looked much more original and robust.

Quote:
Originally Posted by njsteve View Post
Mission creep is right! Nice stockpile of parts you have sitting around. What did you end up doing to protect the flange area on the air cleaner form boot scuffing?

Also, you may want to flatten out the glossy finish on the master cylinder. They should be flat black. I don't think it was a black phosphate finish as it appears to be a flat black paint on my 73 (or what's left of it).
Thanks Steve. I am going to use the 3m Paint Defender Spray Film. I have never used it and will report back the results and effectiveness. Worst case once I get the original air cleaner straightened up I will know what not to use. On the master cylinder, what kind of paint did you use and any suggestions for flattening the sheen?

  #8  
Old 12-01-2013, 01:49 PM
njsteve's Avatar
njsteve njsteve is offline
Ultimate Warrior
 
Join Date: Sep 2004
Location: New Jersey
Posts: 5,051
Default

Generic Rustoleum flat black was the closest thing to the original finish...unless of course you want to start a new thread on comparing flat black paints....

;-)

The Following User Says Thank You to njsteve For This Useful Post:
  #9  
Old 12-14-2013, 09:07 PM
Bentwheelbob's Avatar
Bentwheelbob Bentwheelbob is offline
Ultimate Warrior
 
Join Date: Mar 2012
Location: Charleston, WV
Posts: 2,502
Default

Quote:
Originally Posted by njsteve View Post
Mission creep is right! Nice stockpile of parts you have sitting around. What did you end up doing to protect the flange area on the air cleaner form boot scuffing?

Also, you may want to flatten out the glossy finish on the master cylinder. They should be flat black. I don't think it was a black phosphate finish as it appears to be a flat black paint on my 73 (or what's left of it).
So as Steve points out I need something to keep the air intake boots from scuffing the top of the snorkles. I have decided to give 3M Paint Defender a try. It is basically a spray on clear latex like material that is intended to be used as a spray on rock guard/bra that can be peeled off. Today I tried it out on a test basis using the lid on the old air cleaner which I am planning to media blast anyway. It seems like a pretty cool product. It sprays on thick, milky and with a strong orange peel appearance. As it cures it flattens out and turns clear. I'm pretty impressed. The only bad thing is that it is definitely higher gloss than the paint I used on the air cleaner. Here's a few pictures.


  #10  
Old 12-02-2013, 11:25 PM
70RAlll 70RAlll is offline
Ultimate Warrior
 
Join Date: Sep 2005
Posts: 2,116
Default

Quote:
Originally Posted by Bentwheelbob View Post
So the air cleaner project is finished. I switched out air cleaners and am using one I restored previously. I'll go through the one I removed and ultimately reunite it with the Black Car. Thanks to a lot of assistance from the forum, I think I have it plumbed correctly. I know that it is working correctly. It's pretty cool to watch the flappers close up and then several minutes later reopen. I also have the new correct air cleaner decal in place, and of course PB's correct lid decal. Thanks to everyone for your assistance.


You still have me lost on your setup.. one of your flappers ,using this plumbing, will always be exposed to vacuum. The thermo switch only has a chance to regulate one of the flappers with this plumbing. everyone can shoot me down on this, but I still think you have it wrong. I think the clips on the underside of the snorkel only hold the hoses to the flappers, the vacuum hose went directly from the intake manifold vacuum source to one of the ports on the thermo switch. I think you have gotten tied up with trying to make everything sit nice and neat under the snorkel, when it didn't. How does the thermo switch regulate the flapper that is right next to your "t"?? when the engine warms up, what is going to interrupt the flow of vacuum to the 1st flapper??nothing as I see it..
This is how I think the vacuum hoses ran:
1st Thermo Switch Port:vacuum directly from intake to one port of thermo switch
2nd Thermo Switch Port: other port of the thermo switch to the "t"
Both Flappers: "T" to each flapper.

That is the only way the thermo regulates both flappers.

The Following 2 Users Say Thank You to 70RAlll For This Useful Post:
  #11  
Old 12-03-2013, 12:33 AM
Bentwheelbob's Avatar
Bentwheelbob Bentwheelbob is offline
Ultimate Warrior
 
Join Date: Mar 2012
Location: Charleston, WV
Posts: 2,502
Default

Quote:
Originally Posted by 70RAlll View Post
You still have me lost on your setup.. one of your flappers ,using this plumbing, will always be exposed to vacuum. The thermo switch only has a chance to regulate one of the flappers with this plumbing. everyone can shoot me down on this, but I still think you have it wrong. I think the clips on the underside of the snorkel only hold the hoses to the flappers, the vacuum hose went directly from the intake manifold vacuum source to one of the ports on the thermo switch. I think you have gotten tied up with trying to make everything sit nice and neat under the snorkel, when it didn't. How does the thermo switch regulate the flapper that is right next to your "t"?? when the engine warms up, what is going to interrupt the flow of vacuum to the 1st flapper??nothing as I see it..
This is how I think the vacuum hoses ran:
1st Thermo Switch Port:vacuum directly from intake to one port of thermo switch
2nd Thermo Switch Port: other port of the thermo switch to the "t"
Both Flappers: "T" to each flapper.

That is the only way the thermo regulates both flappers.
That's what I thought too until I broke out the vacuum pump and heat gun, and actually tried it. As it turns out, both nipples on the sensor are plumbed in series. Pull a vacuum on one nipple and it transfers to the other nipple. In other words, both nipples are on the same side of the switch - not on different sides. The switch is normally closed until it heats up. You have a closed system when the car is cold and the engine vacuum activates both vacuum actuators upon start up, thereby closing the flappers. Once the sensor reaches operating temperature (or the preset intake air temperature of the sensor/switch) it opens and creates a controlled vacuum leak on the internal air cleaner side of the switch. This controlled leak allows enough vacuum bleed off that the vacuum actuators return to their normal position and the flapper doors open, and enough of a leak to keep vacuum from forming as long as it is open. This was a surprise to me, but it functioned perfectly in this fashion both in bench testing and once installed on the car. My thermac sensor may be faulty, but I don't think so. Actually both the old AC logo sensor and the new Delco unit functioned exactly the same.

I am open to being wrong - it happens a lot and I may very well be wrong here. However, spend a little time first with a vacuum pump and a heat gun and see if you don't come to a different viewpoint than you currently have. I've got two NOS sensors coming in the mail that I will also check. I'll be interested in hearing the results of your effort.

BTW - the part about doing it a certain way just so it was nice and neat was an unnecessary cheap shot. I may have thick skin, but that suggestion added nothing to your post that was pertinent in determining the correct technical way to do something. I may not have 10,000 posts, but there should be enough for the reasonable person to ascertain that I am not lazy and looking for the easy way out.

Reply

Thread Tools
Display Modes

Posting Rules
You may not post new threads
You may not post replies
You may not post attachments
You may not edit your posts

BB code is On
Smilies are On
[IMG] code is On
HTML code is Off

Forum Jump


All times are GMT -4. The time now is 01:12 AM.


About Us

The PY Online Forums is the largest online gathering of Pontiac enthusiasts anywhere in the world. Founded in 1991, it was also the first online forum for people to gather and talk about their Pontiacs. Since then, it has become the mecca of Pontiac technical data and knowledge that no other place can surpass.




Copyright © 2017