


| FAQ |
| Members List |
| Social Groups |
| Calendar |
| Search |
| Today's Posts |
|
|
|
#1
 04-18-2014, 04:34 PM
|
||||
|
||||

What did you use on them Bob?
__________________
Some guys they just give up living And start dying little by little, piece by piece, Some guys come home from work and wash up, And go racin' in the street. Bruce Springsteen - Racing In The Street - 1978 |
|
#2
04-18-2014, 05:25 PM
|
||||
|
||||
|
Quote:
Well, the upholstery guy has called it a day. i guess I should have had steak for dinner and then maybe he might have stayed and finished. Actually, I don't blame him. He has been wallowing around in the interior all day since 8:00am. He is pretty much done with the exception of reinstalling the trim, sail panels, shoulder belts, et cetera. He wants to let the top sit overnight and dry out from all the steaming, let the wrinkles relax, and see what the adhesive is going to do. I think that is a wise decision. He'll be back in the morning to make adjustments as necessary and install all the trim pieces and parts. Here's the pic's...    
|
|
#3
04-19-2014, 01:34 PM
|
||||
|
||||
|
00
So the headliner is done and it looks great. He only charged $200, and I gave him a healthy tip. The cleaned up sun visors look fine. I switched out the visor hardware and put the new bracket on the drivers side since as NJSteve pointed out it is tighter. I have also ordered a new mirror for the passenger side, and a new dome light as the base on the existing one was pretty badly scorched inside.
Lots going on here today and I have some questions that I will post up separately. Here's the headliner.... 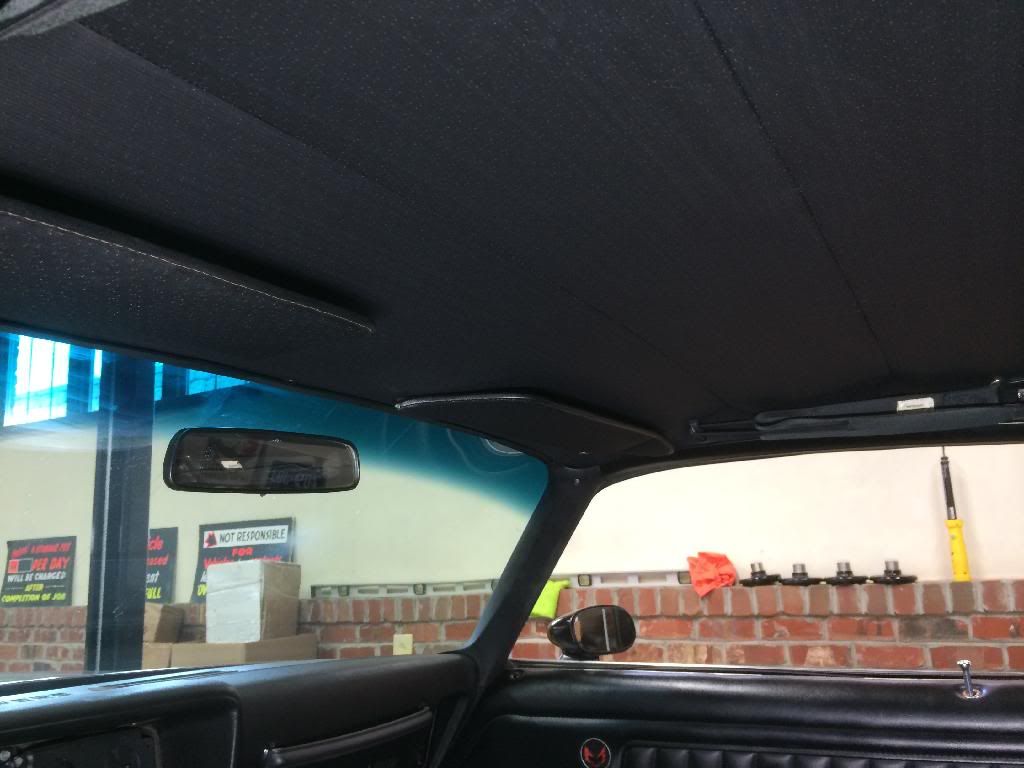  
|
|
#4
04-19-2014, 02:43 PM
|
||||
|
||||
|
Man o man, that's a nice upgrade!
__________________
Mike/Illinois |
|
#5
04-19-2014, 06:18 PM
|
||||
|
||||
|
Bumper and Guards
OK, where to start...
The bumper and the guards have been united. I was not looking forward to this. Too much shiny chrome, too much money, and too many previous threads talking about how the guards didn't fit the bumpers. Well, everything turned out well despite the worries. MPD was over today and his help was critical. No way one person could have done this. To protect the bumper while the guards were being aligned we wrapped it with stretch wrap. This worked really well. It was a bit of a pain to remove once everything was lined up and locked in, but the protection it offered was worth the extra effort. We also used a framing square to make sure the guards were plumb to the horizontal plane of the bumper. There were no real surprises. At first it seemed like there was no way the guards would suck down to the profile of the bumper, or vice versa, but we slowly tightened everything up and voila it ended up being a great fit. As we installed the rear bumper brackets we measured center distances on the mounting holes on the back of the Black Car and it looks like everything should line up. That's right - I don't know yet if it will line correctly when mounted, but that's another story. Here's more than a few bumper pictures.  My Pal Dave    Pretty cool the bumper was chromed on my daughters 6th birthday    
|
| Reply |
| Thread Tools | |
| Display Modes | |
|
|
The PY Online Forums is the largest online gathering of Pontiac enthusiasts anywhere in the world. Founded in 1991, it was also the first online forum for people to gather and talk about their Pontiacs. Since then, it has become the mecca of Pontiac technical data and knowledge that no other place can surpass.







 Hybrid Mode
