


| FAQ |
| Members List |
| Social Groups |
| Calendar |
| Search |
| Today's Posts |
|
|
|
#1
 02-20-2023, 02:10 AM
|
|||
|
|||

Haha I'm in Australia but feel free to have one! I picked up several junk heater boxes years ago, just for vacuum lines and retainer spares.
|
|
#2
02-20-2023, 08:35 AM
|
|||
|
|||
|
Quote:
|
|
#3
03-13-2023, 02:20 PM
|
|||
|
|||
|
Those are all engine and emissions diagrams, the simple vacuum for dash controls come off the rear intake runner port.
Start a new thread, that sounds really messed up. Whoever carried out the carb swap obviously didn't know what or why they were doing it, which is nearly every carb swap. 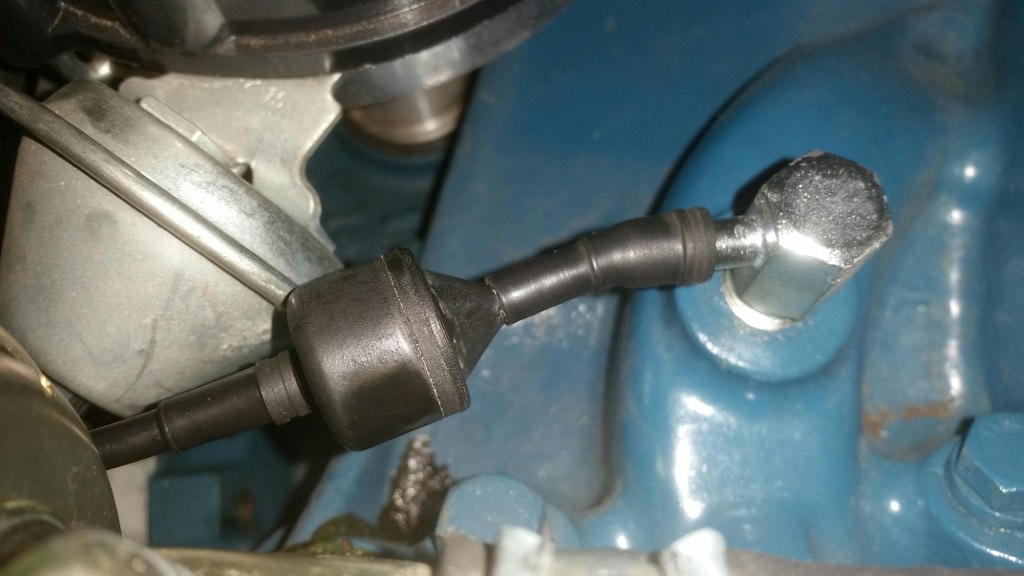 403 olds intake vacuum checkvalve (2) by Ben, on Flickr 403 olds intake vacuum checkvalve (2) by Ben, on Flickr 403 olds intake vacuum checkvalve (1) by Ben, on Flickr 403 olds intake vacuum checkvalve (1) by Ben, on Flickr
Last edited by Trevor78; 03-13-2023 at 02:42 PM. |
|
#4
03-13-2023, 02:40 PM
|
|||
|
|||
|
Quote:
Quote:
If you need info on the underhood system, you'll need to start a new thread in the Street Engine category of this forum |
|
#5
03-13-2023, 03:16 PM
|
||||
|
||||
|
Thanks guys, for your help.
I am not running any emissions either - 403 with better cam - headers - internals unknown but runs strong. Rear end has been upgraded to approx 3:25 gears. I just want to clean up the vacuum system so it is correct for what I have. I will start another thread in the street engine section. Thank you. |
|
#6
09-05-2023, 08:52 AM
|
|||
|
|||
|
Some of those studs were threaded into the plastic of the box but if you snapped it then along with the nut was probably half eaten away with corrosion at that location. If part remains you could create a tube-nut sleeve, thread it onto the portion, thread a new stud extension into it with loctite. Then when tightening it all up just don't swing off it too much!
|
| The Following User Says Thank You to Trevor78 For This Useful Post: | ||
| Reply |
| Thread Tools | |
| Display Modes | |
|
|
The PY Online Forums is the largest online gathering of Pontiac enthusiasts anywhere in the world. Founded in 1991, it was also the first online forum for people to gather and talk about their Pontiacs. Since then, it has become the mecca of Pontiac technical data and knowledge that no other place can surpass.




 Hybrid Mode
