


| FAQ |
| Members List |
| Social Groups |
| Calendar |
| Search |
| Today's Posts |
|
#1
 11-02-2025, 07:41 PM
|
||||
|
||||
 70 Amber Side Marker Lens Repair ?
I have this marker lens assembly that's in good shape except for some primer and a bite out of the top edge.
Do you know of a solvent that will remove the primer without eating the lens? My AI search recommended "Motsenbocker's Paint & Varnish Remover" but I'm hoping to avoid spending a bunch for not much... IPA, orange Goo Gone, and paint thinner did not touch it. I have a couple grease & wax removers and some reducers. I suspect acetone might eat the lens, as would lacquer thinner. Any ideas? I am going to try repairing the chip with UV-cured acrylic resin. Has anyone ever done this and if so, what dye did you use? This resin is reasonably priced and is acrylic, not epoxy, which I think will match the original material and be less likely to darken over time: https://www.totalboat.com/products/u...43161635520736 I am considering this dye (will probably get both amber and orange): https://douglasandsturgess.com/produ...ce=chatgpt.com With the popularity of UV-cured 3D printers, I assume there are lots of materials available that might work, but I'm not sure how to tap into that world. Anyone have experience or suggestions on finding budget materials? If I fail, I know there is at least one "left" lens listed on PY for sale. I do need a "right" if anyone wants to sell one... Mike |
|
#2
11-04-2025, 12:05 AM
|
||||
|
||||
|
I had to go out and look at mine. My LH is broken worse than yours.
My RH had all kinds of sludge inside. I had to boil off the lens to clean. Has cracks/scratches, though.
__________________
So long, farewell. |
|
#3
11-04-2025, 12:31 AM
|
||||
|
||||
|
HFR, send a pm if you're open to selling your right lens.
Thanks I am still toying with repair of the left, waiting on some resin and dye. I had ChatGPT measure the color, compare with an old SAE amber, and guess at dye colors and proportions to match. Worse thing I learned so far is UV-cured acrylic may continue to "cure" in the sun and get brittle, but since it's not mechanically loaded, I'm willing to give it a try just because. And if I can come close on the color, I can always use a thermally-cured acrylic or urethane. Epoxies have a rep of degrading/darkening so I'm trying to stick with acrylic. |
|
#4
11-04-2025, 06:49 AM
|
||||
|
||||
|
I love what Eric does...
https://www.youtube.com/watch?v=4jAlCAmROD8
__________________
So long, farewell. |
|
#5
11-04-2025, 10:17 AM
|
||||
|
||||
|
Me too!
|
|
#6
11-27-2025, 01:05 AM
|
||||
|
||||
|
I finally gave this a try. I should do it over but I won't.
I was a little too eager and got sloppy but it's good enough. Here's the chip after I sanded it and cleaned it: I used a UV-cured acrylic resin and some dye. I added too much orange but the color is at least in the same family. I just used packing tape for the mold so it was less than great. I also managed to trap some bubbles, which is even less than less than great. But the resin stuck and I was able to polish it. Close enough... If I decide it matters, I think I could grind it out and start over. Not a difficult process. Mike |
| The Following 2 Users Say Thank You to Shiny For This Useful Post: | ||
|
#7
11-27-2025, 10:51 AM
|
||||
|
||||
|
That looks pretty darn good!
__________________
Michael 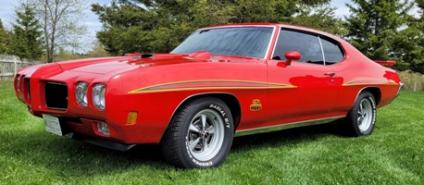 1970 Oshawa built 1 option Judge. 24 year restoration/upgrade project finally finished! 1979 Trans Am - low-buck drag car project for when I retire |
| The Following User Says Thank You to mrennie For This Useful Post: | ||
|
#8
11-27-2025, 01:23 PM
|
||||
|
||||
|
Good job.
__________________
So long, farewell. |
| The Following User Says Thank You to Held for Ransom For This Useful Post: | ||
| Reply |
| Thread Tools | |
| Display Modes | |
|
|
The PY Online Forums is the largest online gathering of Pontiac enthusiasts anywhere in the world. Founded in 1991, it was also the first online forum for people to gather and talk about their Pontiacs. Since then, it has become the mecca of Pontiac technical data and knowledge that no other place can surpass.




 Linear Mode

