


| FAQ |
| Members List |
| Social Groups |
| Calendar |
| Search |
| Today's Posts |
|
|
|
#1
 01-09-2006, 05:48 PM
|
||||
|
||||
 Hey, that looks like my frame!
Andre,
Jusr wanted to say your chasis is looking KILLER. Sorry about the comments I made, I realized a little while after that there are all walks of life in our hobby. Sure, mabye a car this is all done by someone else (unless it's totally out of your league) isn't what I would personally do, that doesn't mean it's that less of a car, and at least it's a Pontiac. In my GTOAA Chapter, there are probably a dozen or more guys like you. They're all my friends...but I realized I'd be shunning them all if I thought like I did before. P.S. this one guy's got this killer 70 judge covt. pretty neat. So my apologies, looking good but on your next project it might be fun to set aside some time off work and wrench around in the garage. I think it's fun and rewarding to me at least. Might not be to all but I think a Saturday when you walk in from the garage into the house covered in 40-year old who knows what is a good day spent to me. PS, if you check out the link in my sig...you can see how our frames look almost identical. I'm right about where you are now, chasis is all done and the body is at the bodyshop almost all done, but it's taken me about a year and a half to get what took the shop a few months. Bryan |
|
#2
01-09-2006, 06:14 PM
|
||||
|
||||

Quote:
That sucks! A gas fire would be bad! Maybe it's something easy like an incorrect or dried out gasket? Possibly a clog in the venturi cluster somewhere? |
|
#3
01-10-2006, 09:04 AM
|
||||
|
||||
|
Hey Bryan- Thanks for the kind words. We all say stuff that we don't really mean. Very often I have typed something here, and completely rewritten it.
I have actually turned a lot of wrenches on Pontiacs. Now granted, I was the king of disassembly, and not reassembly, but with strong air, I could tear a running GTO down to a body and frame in about 16 hours. As we speak, I am doing little upgrades on my driver '64 convertible, but it is nothing all encompassing like this project, though it may be in a few years. Last night I went to the shop to deliver the new vent window frames (chromed pot metal portion only), that I had gotten. I heard the fit was excellent, and the chrome on them was very nice. Previously we had gotten other sets replated out of the country, but for $210 retail, these beat going to Brazil significantly. I didn't notice my car sitting anywhere, so I headed over to the paint booth. Sure enough it was in there getting painted. I watched through the peep window for about what seemed like a half hour, but was probably only 10 minutes. I was amazed that the distance between the paint nozzle and the body never seemed to vary very much. The paint was applied in horizontal strokes, then vertical strokes, then diagonally one direction, then diagonally in the other direction over each panel before moving to the next panel. I didn't know too much about this, but when I asked about it later, it was explained that the horizontal motion laid the paint down, then the other applications were more of a dust coat. This is apparently important in metallics to get the metallic to lay down evenly. I also noted that the gun was equipped with a liner in the cup, I was told that not only does this make for easy clean up, but also it allows the gun to spray in any position including upside down without sucking air. There is more to this setup than I am explaining, but that is all I remember It was all very interesting, but somewhat tedious, as this just the third coat out of a possilbe 5, not counting the clear coat. I couldn't take any pictures very well from outside the booth, so there isn't much to show right now. |
|
#4
01-10-2006, 05:39 PM
|
||||
|
||||
|
Here are some pictures of the painted body. The color is not depicted quite right due to the lighting etc
|
|
#5
01-10-2006, 05:59 PM
|
||||
|
||||
|
That looks unbelievable Andre!
It's a great feeling when it get's to this point! |
|
#6
01-10-2006, 06:56 PM
|
||||
|
||||
|
WOW!!!
Andre, after 20 years of ownership, you must just be jumping up and down right about now! What a gorgeous goat!
|
|
#7
01-11-2006, 12:24 AM
|
||||
|
||||
|
Andre, the paint looks gorgeous! That car is going to sparkle when they get done wetsanding and get the chrome on there!
|
|
#8
01-11-2006, 12:37 AM
|
||||
|
||||
|
Believe it or not guys, I'm just a baby step away from where Andre his on his car....it's almost ready for paint at the bodyshop...but I keep forgetting ym camera when I go over there

|
|
#9
01-11-2006, 10:53 AM
|
||||
|
||||
|
Andre,
Looks great! Is the color what you expected it to be? I can't wait to see this thing put together.
__________________
http://community.webshots.com/user/65tiger |
|
#10
01-11-2006, 10:58 AM
|
||||
|
||||
|
Andre: The car is looking really good. I hated to read the part about where you said you could tear one down in about 16 hours, as that must mean the rebuilding part must be the real time consumer. I'm still in the taking-apart stage on my 64 and if it's taken me this long, it will be my heirs who likely finish the project.
Bryan: It's a major sign of maturity when a man can admit that he said things that he shouldn't have and an even bigger sign of growth when he has the ability to apologize for those words. Congratulations on moving up another step on life's long ladder.
__________________
Save yo Confederate money, boys, the South is gonna do it again! Pecosbill |
|
#11
01-11-2006, 02:56 PM
|
||||
|
||||
|
It is definitely the color that I expected it to be. This color shown in the picture does not look quite like it does in reality.
I can post the ratio by weight of STANDOX paint that the computer generated to mix this paint. As I mentioned earlier, it was derived using the special body shop camera and computer software. The software found a color, and then added tints to it to match Tiger Gold. |
|
#12
01-16-2006, 05:32 PM
|
||||
|
||||
|
It has been several days since I posted, so I just wanted to bring everyone up to date. Since the car was painted, it is now going through the tedious process of wet sanding and polishing. This will be accomplished before the body is reunited with the frame. There are no pictures to show of this nasty work.
|
|
#13
01-16-2006, 11:18 PM
|
|||
|
|||
|
andre,
you are truly a serious pontiac guy and a credit to the hobby. thanks for sharing your progress. karl it's the details that will give pause... |
|
#14
01-17-2006, 07:10 PM
|
||||
|
||||
|
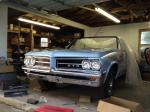
Some noticeable progress to report. Here is a picture of the painted, and polished body getting ready to be mated with the frame. The modified rotessiere has been rolled out of the way so the frame could be rolled under the body.
|
|
#15
01-17-2006, 07:12 PM
|
||||
|
||||
|
This view shows the frame in place with the body bushings lying in the mount spots ready to be mated with the body.
Last edited by Andre; 01-17-2006 at 09:25 PM. |
|
#16
01-17-2006, 07:15 PM
|
||||
|
||||
|
The detailing of the suspension components really adds to the overall appearance of the chassis
|
|
#17
01-17-2006, 07:31 PM
|
||||
|
||||
|
The paint on this car is really bright and shiny! As I have mentioned, I will be going with the Hurst wheels and redline tires. I'm still not sure if the red fender liners will be overkill or not. I don't really want to drill extra holes in this car to install them, but it sure would raise the pimp level on this car a couple of notches.
In the background, my friend Scott's Paladium Silver '69 GTO looks on in anticipation to it's upcoming paint work. It's a nice orignal and solid car, and not like what I started out with. If you attended the POCI convention in Greenville, you might remember seeing this car for sale in the parking lot. Scott bought it and promptly drove it home to Florida. You might remember in some earlier posts that I mentioned I had a '64 GTO driver quality convertible. These wheels and tires were on the car, (spoked), but the car had sat so long, the tires were flat spotted. As a result they became rollers for the resto shop. Last edited by Andre; 01-17-2006 at 07:47 PM. |
|
#18
01-17-2006, 07:43 PM
|
||||
|
||||
|
I sent my original shifter out to Precision Pontiac. Pete disassembled, cleaned and replated the body of the shifter, and also replated the arm. It is like a brand new piece. The flash makes the replated body look a little different than it actually does. This is a service that I highly recommend. You can see the date code on the shifter body.
|
|
#19
01-18-2006, 01:53 AM
|
||||
|
||||
|
Andre, You must be having a ton of fun! The car is sure coming together fast too! Looking GREAT!
__________________
1967 GTO http://www.pontiac-gto.net/members/1...ottholten.html 1965 Tempest Wagon http://groups.msn.com/GMStationWagonOwners/shoebox.msnw |
|
#20
01-19-2006, 07:30 PM
|
||||
|
||||
|
Well, after much consideration, I decided to bite the bullet and opt for new glass all around. I was already getting a windshield, and the driver and quarter glass had scratches. My thought was that I usually keep the windows down, so why worry about blowing more money on something that wasn't that important.
I spoke to one of my friends who has restored several GM "a" body cars. He said that he never thought glass made much of a difference until he saw a car with new glass. It set the paint and bright work off tremendously. So, I decided to go that route. I went with all tinted pieces. Unfortunately, the rear window has not gotten here yet as it was scheduled to be installed tomorrow. That means when the glass guy comes to do the windshield, he won't be able to do the rear window. You can't win them all. This resto has been smooth as silk, so I can't complain. I had purchased some of the "oil based" trunk speckle paint from the Parts Place. It was not really as advertised and is still water based. Tomorrow I am going to the GM dealer and get some of their trunk speckle paint if they have it in stock. |
| Reply |
|
|
The PY Online Forums is the largest online gathering of Pontiac enthusiasts anywhere in the world. Founded in 1991, it was also the first online forum for people to gather and talk about their Pontiacs. Since then, it has become the mecca of Pontiac technical data and knowledge that no other place can surpass.






 Hybrid Mode
