


| FAQ |
| Members List |
| Social Groups |
| Calendar |
| Search |
| Today's Posts |
|
|
|
#1
 02-26-2008, 06:15 PM
|
|||
|
|||

So the frame and suspension are almost finished.....just need to install all the fluid lines and the detail decals. We bought all new components for the front steering, control arm bushings, ball joints, etc etc. We'll hold onto all of the original stuff.
We did rebuild the original date-coded Delco brake calipers. I also shot a little video of the frame today. Click on this picture to start the movie:  We still need to install the front spiral shocks. I had to get new bushings for those. 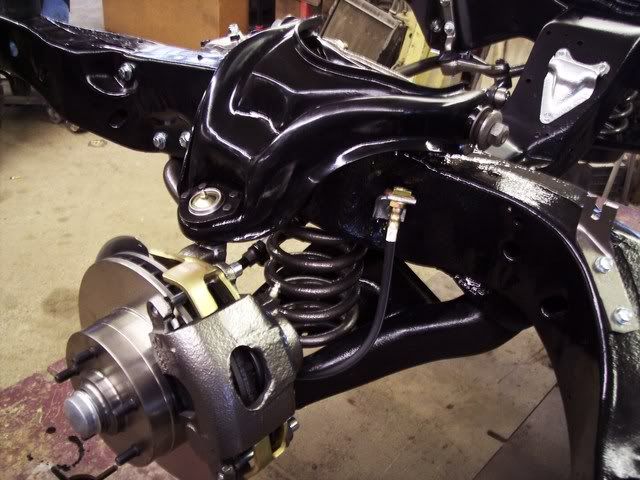 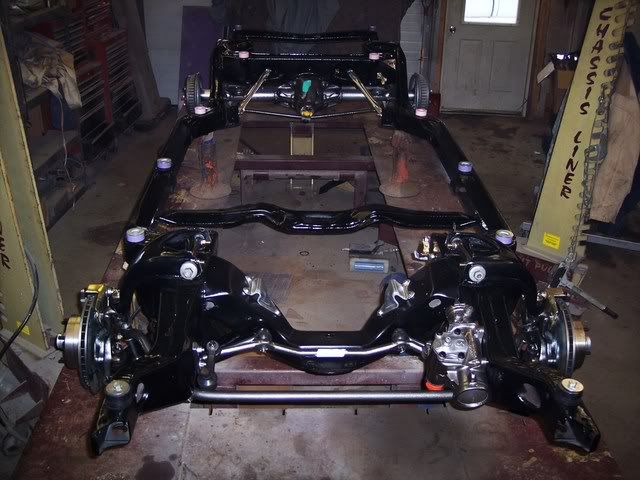
|
|
#2
12-20-2008, 01:52 PM
|
||||
|
||||
|
Quote:
__________________
http://ultimategto.com/cgi-bin/picse...=&comm=&page=1 |
|
#3
02-26-2008, 06:59 PM
|
||||
|
||||
|
Nice work Jason! This is going to be a nice car when done. Can't wait to see the body and engine!
BJ
__________________
1971 GTO 455 HO 4-speed - Cameo White, White Vinyl Top, Jade Green Interior, Ram Air Hood, AC, Honeycombs and 8-track 1974 Formula 455 I Owned in 1975-1976. Now Own Its Twin From Same Dealership 
|
|
#4
02-27-2008, 01:25 AM
|
||||
|
||||
|
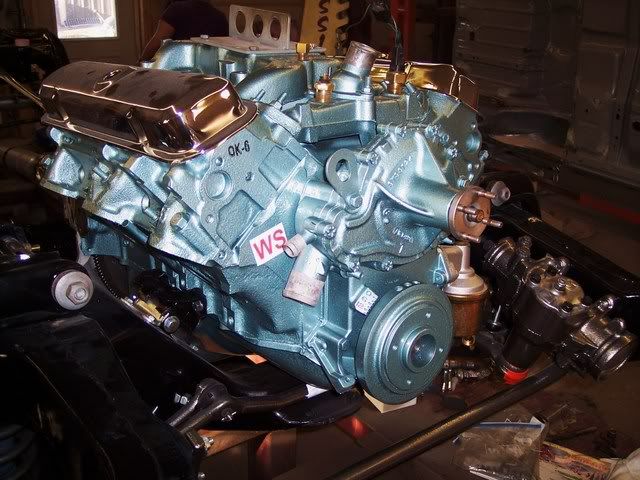
Man, that engine is unbelievable. Good job Jason. Looking forward to seeing it progress.
__________________
Greg Reid Palmetto, Georgia |
|
#5
02-27-2008, 10:02 AM
|
|||
|
|||
|
Jason, you are giving me inspiration!!!!!
|
|
#6
02-27-2008, 12:45 PM
|
||||
|
||||
|
Hey Jason,
Thanks for the great pics & the video to boot. I'm restoring a 70 GTO, so your pics and info are going to help me out with my restoration since I'm a novice. Keep up the great work and man I wish I could complete things as fast as you're doing things. I have a couple of questions I hope you don't mind answering. I'll be pulling my body off the frame soon for sandblasting and powdercoating and I've never done this. 1) What special instructions/ precautions do you recommend with unbolting the body bolts from the body? 2) When installing the body bushings and placing the body back on the frame how do you keep all of the bushings in the right place? thanks. Brian |
|
#7
02-27-2008, 01:49 PM
|
|||
|
|||
|
Thanks for all the nice comments guys!
Brian......about your body bolts......if you start to loosen a bolt and it feels like it's going to strip out the nut inside the body, stop right there. Use a torch to cut off the head of the bolt. That way when you lift the body up off the frame you can get underneath the body and warm up the nut with a torch and remove the bolt without tearing things up. It may seem like alot of work, but it's WAY easier than trying to fix a caged nut that ripped loose inside a body crossmember. Keeping the body bushings in while you lower the body down onto the frame is just a matter of being careful. The body bushings should fit tightly into the holes in the frame. Try to let the body straight down onto the frame. |
|
#8
02-28-2008, 05:46 PM
|
|||
|
|||
|
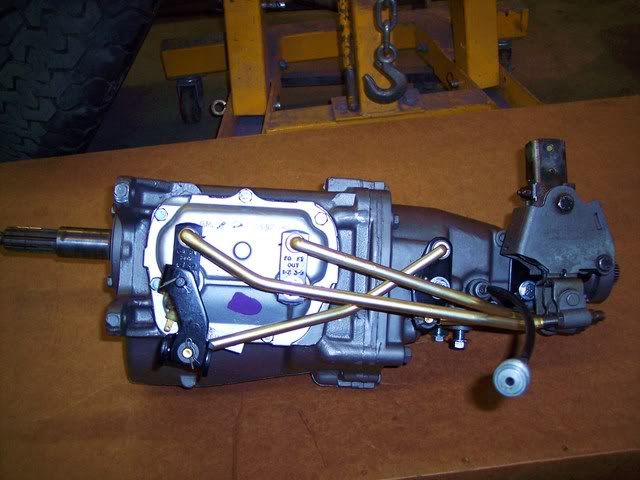
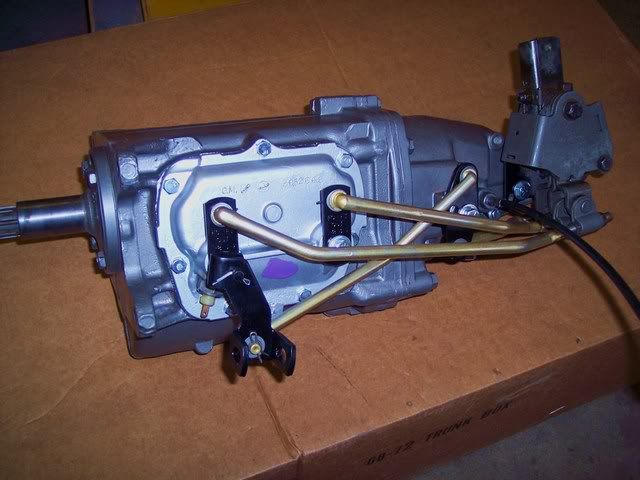
Here is the numbers-matching Muncie M20 4 speed back from the tranny shop.....nicely restored, including the purple inspection mark on the side cover.
|
|
#9
02-28-2008, 09:45 PM
|
||||
|
||||
|
Jason:
Man, you're killing me with all these great pictures. When can I put my bid in for this car? BJ
__________________
1971 GTO 455 HO 4-speed - Cameo White, White Vinyl Top, Jade Green Interior, Ram Air Hood, AC, Honeycombs and 8-track 1974 Formula 455 I Owned in 1975-1976. Now Own Its Twin From Same Dealership
|
|
#10
02-28-2008, 10:23 PM
|
|||
|
|||
|
Quote:
Just wait until you see this engine sitting in the frame. 
|
|
#11
02-28-2008, 11:33 PM
|
||||
|
||||
|
Great pictures super detail! I'll bet Even Krytas 69 Judge does not have those engine markings...LOL Looks like those ram air oil drippers really did their job.
|
|
#12
02-29-2008, 11:50 AM
|
||||
|
||||
|
Jason: Best Judge thread in a long time! Starting with the find, the history, the restoration...keep it coming! Looking good!!
__________________
Mike/Illinois |
|
#13
02-29-2008, 02:37 PM
|
||||
|
||||
|
Makes me want to get my driveshaft painted up like that too!
|
|
#14
02-29-2008, 05:58 PM
|
|||
|
|||
|
Thanks guys.
 Here is the rear bumper assembly, restored and ready to mount as soon as the new license plate light shows up. The tail lights are the original ones....they polished up very nicely and look like brand new. 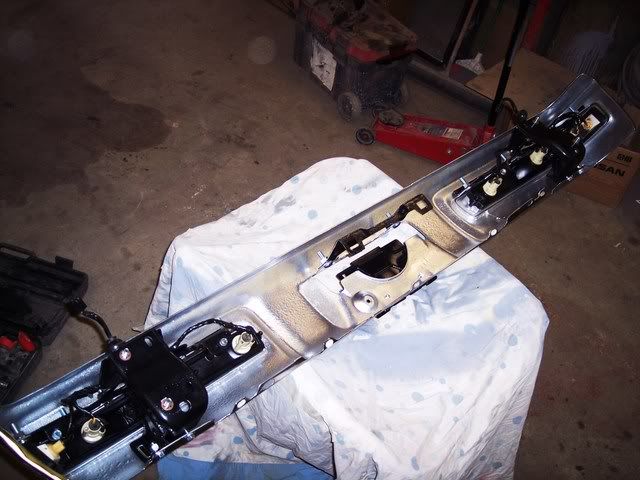 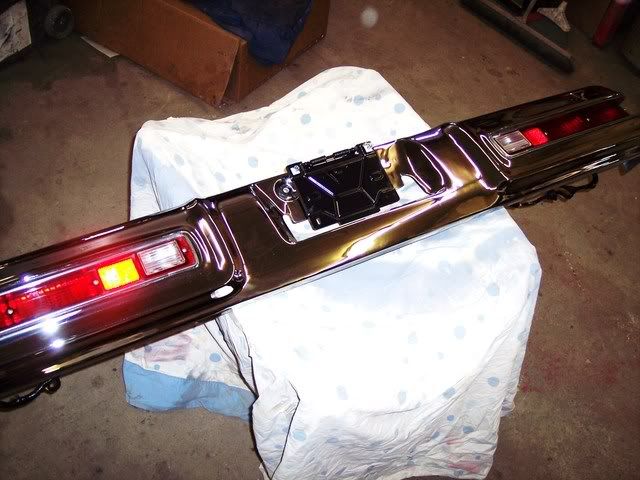
|
|
#15
02-29-2008, 08:01 PM
|
||||
|
||||
|
Jason, what is the date code of your rear bumper (behind license plate bracket, drivers side)?
|
|
#16
03-03-2008, 06:21 PM
|
|||
|
|||
|
Quote:
|
|
#17
03-03-2008, 06:22 PM
|
|||
|
|||
|
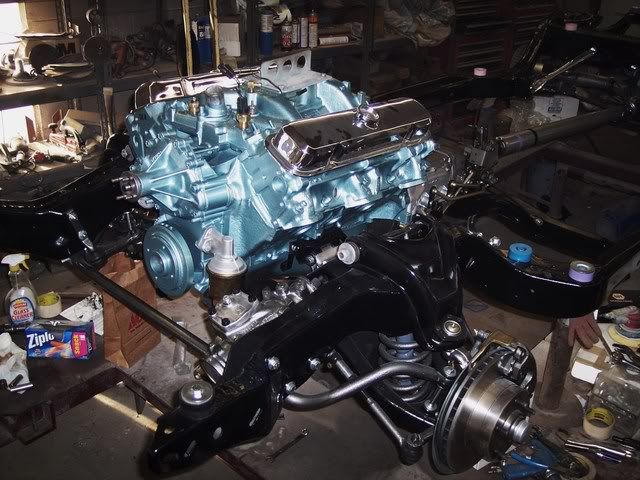
This is how I spent my Sunday afternoon yesterday......installing a nice, new engine and tranny into a nice, new chassis assembly.
|
| The Following User Says Thank You to JasonD For This Useful Post: | ||
|
#18
03-03-2008, 07:46 PM
|
||||
|
||||
|
Sweet! Man, you are blazing with the restoration. I feel like I'm crawling like a turtle with my restoration compared to you. But then again, I only get Saturdays to work on my GTO and realistically not every Saturday I can get to it. Well, you give me the "gung ho" to keep going.
Thanks for the updates and pics. How about a video of the engine running one day? Brian |
|
#19
03-03-2008, 08:21 PM
|
|||
|
|||
|
wow, that looks beautiful. What's the deal with the colored body bushings, are they urethane? or some kind of factory color coding thing?
|
|
#20
03-03-2008, 09:33 PM
|
|||
|
|||
|
Quote:
I think video is very important in today's restorations. Pictures are great, but video really helps to show what things really look like. |
| Reply |
|
|
The PY Online Forums is the largest online gathering of Pontiac enthusiasts anywhere in the world. Founded in 1991, it was also the first online forum for people to gather and talk about their Pontiacs. Since then, it has become the mecca of Pontiac technical data and knowledge that no other place can surpass.






 Hybrid Mode
