


| FAQ |
| Members List |
| Social Groups |
| Calendar |
| Search |
| Today's Posts |
|
|
|
#1
 07-15-2009, 10:09 PM
|
|||
|
|||

While I'm thinking about this I should warn you to test fit your trans-dipstick with the engine and transmission out of the car. After I got the right bellhouse for my transmission the dipstick tube I had would not work. I used a 2000 Camaro tube, but I had to cut part of the mounting bracket off and bend the tube slightly to clear the back of the engine block. This would be next to impossible to do with the engine/transmission installed in the car. Maybe a tube from a truck might fit with no mods, but I already had the Camaro tube.
__________________
68 Lemans - GTO appearance LS3 68 Eldorado - waiting for restoration 96 Roadmaster Wagon 2014 Infiniti Q50S Hybrid Marietta GA |
|
#2
07-16-2009, 12:42 AM
|
||||
|
||||
|
Eric,
Rack & pinion steering is definitely not going to be part of this build, I'm already tapped-out with all of the unplanned upgrades I've made to the brakes and suspension. I have a nice Lee 12.7:1 power steering box in the car that's 20 years old and still going strong. I was already having issues with the deep backspacing on the 18X9" front wheels, the rim was hitting the rearmost tube on the Hotchkis upper control arms near full steering lock. I bought the SPC adjustable uppers to gain some clearance there (straight adjuster vs outward curved tube) and it just sort of snowballed into a complete front end upgrade. The limited turning radius won't be any big deal. It was already reduced with the B-body spindles with their longer steering arms (I hardly noticed the reduced radius), the new ATS spindles will give me some turning radius back so it's probably a wash. Having the tierod end (grease zerk removed, a plug in there instead) touch the pan once in a while won't hurt it. If the new SPC upper arms don't have enough clearance to prevent the rim from rubbing, the limited travel of the centerlink will.  Bart |
|
#3
07-26-2009, 01:02 AM
|
||||
|
||||
|
Finally made my way back to the garage today.....
.....and took another step forward. The weather cooled down into the mid to low 90s today, last weekend it was close to 110 degrees
 and just too hot to do anything. and just too hot to do anything. I put the Tempest up high on small wooden pallets once again and removed the passenger side header. The headers need to be out of the way so I can remove the lower control arm bolts, a complete front suspension upgrade is my next task. While doing some fitting and checking I found that with the transmission bellhousing just barely touched one of the passenger side header tubes right where the starter goes. I knocked off the corner of the bellhousing with a large flat file to give the header tube some clearance. 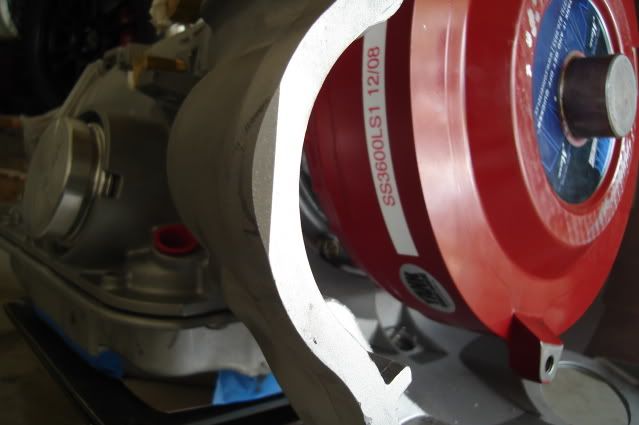 Next I bolted the trans up to the engine. I bolted the finished trans crossmember to the trans mount and jacked it up tight against the bottom of the frame. 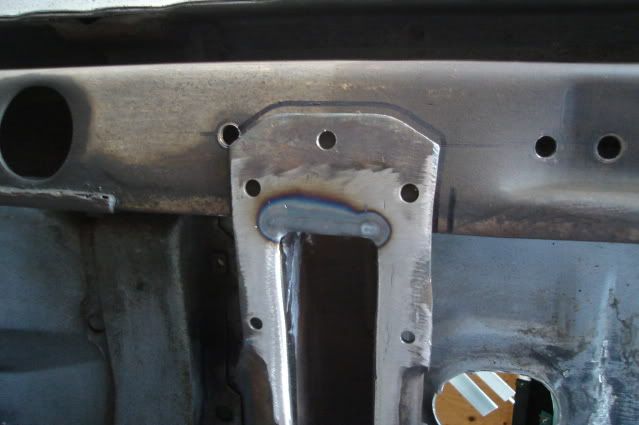 After drilling three 5/16" holes in each side of the frame using the crossmember holes as a guide I bolted the trans crossmember in place using the upper and lower reinforcement plates I made previously. 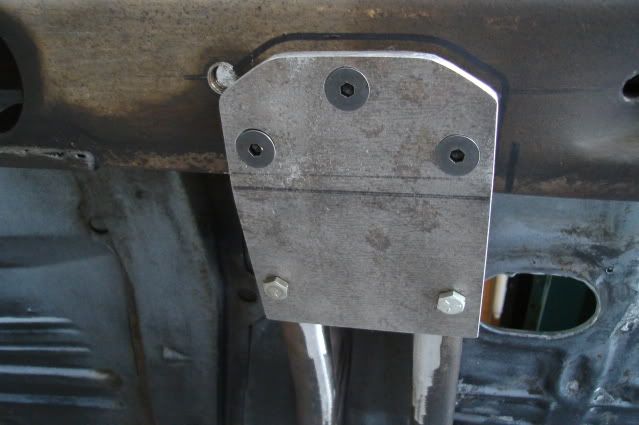 The crossmember and lower reinforcement plate hang a little over 5/16" below the bottom of the frame rail. 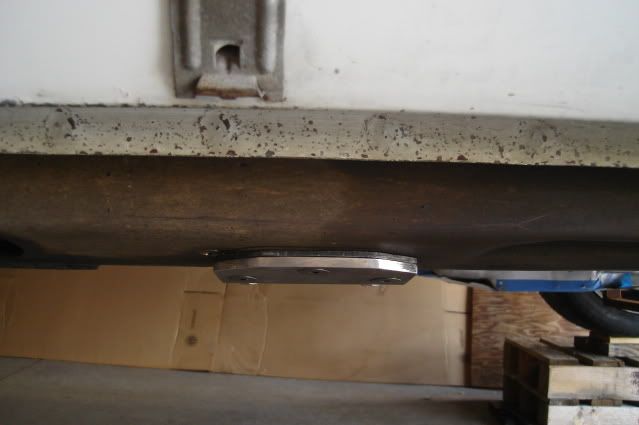 Right above the exhaust clearance hump you can just get your finger between the top of the crossmember and the floorpan, about 1/2" to 5/8" of clearance. 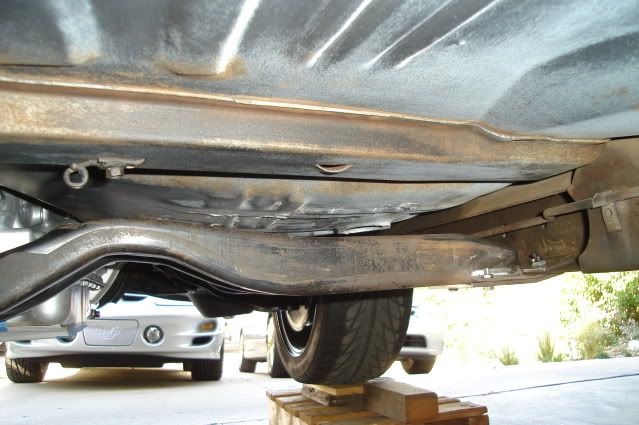 Finally, I would like to thank my two daily drivers for their patience, putting up with numerous cold starts when they're getting moved around and for braving the hot sun all day whenever the Tempest is getting attention.  They're both very spoiled and really hate sitting outside. They're both very spoiled and really hate sitting outside.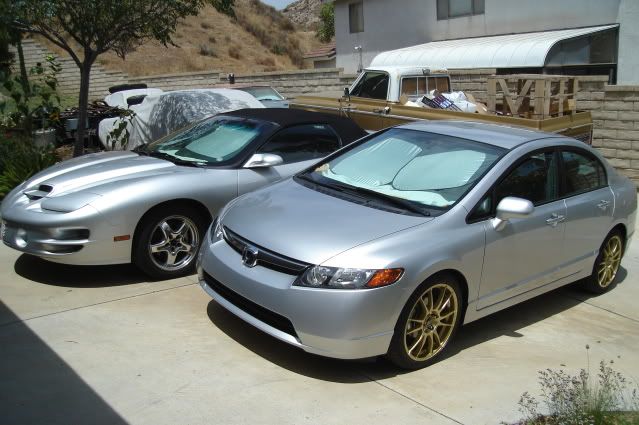 Now there is finally enough weight over the front end to start to compress the springs, the added weight of the 4L70E trans got the front suspension off of the upper bump stops. Next up is all of the front suspension and brake work, stay tuned. |
|
#4
07-27-2009, 01:01 AM
|
||||
|
||||
|
Started on the front suspension swap today.....
.....by removing all of the old front end components.
I put the Tempest up on two large 6-ton jackstands and removed the wheels, then removed both front shocks and the sway bar end links. Next I loosened up the tie rod adjusters, but left the tie rods attached for now so they would help keep the spindles from moving while loosening up all 4 of the ball joint castle nuts. After removing the cotter pins and loosening the ball joint castle nuts by a few turns I used a 12" long by 1" diameter brass bar as a drift to knock them loose from the tapered holes in the spindle. After only a couple of hard raps on the ball joint studs with a 2-pound hammer they popped right out of the spindle, against the loosened castle nut. The brass bar is long enough to do all of your hammering clear of the suspension parts, plus you can get a good swing with the hammer. 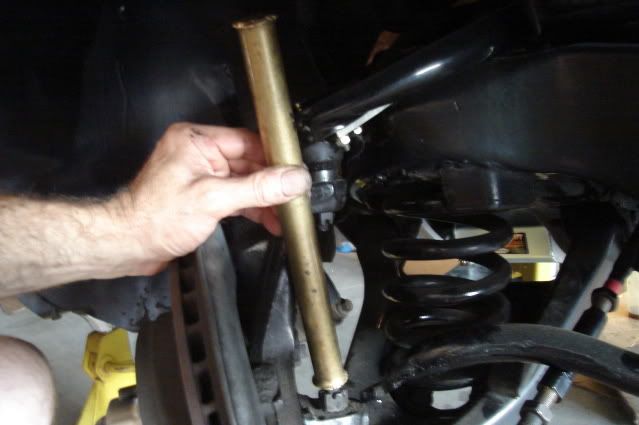 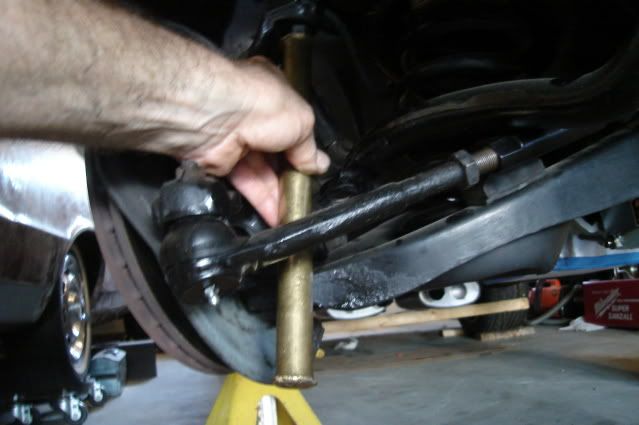 Next I put my floor jack with a 2X6 wood block underneath the control arm spring pocket and jacked it up enough to remove the tension against the castle nuts. After removing the castle nuts I let the jack down just enough to get the spindle assembly out, I disconnected the brake hose at the frame bracket beforehand. 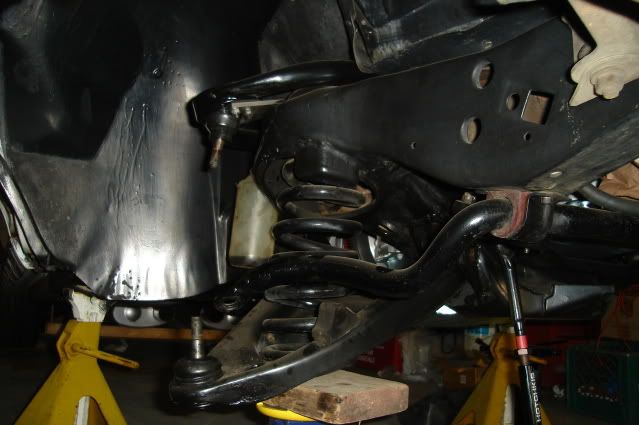 The H-O Racing front springs are fairly short and came out easily after letting the lower control arms all the way down with the jack, I didn't need to use a spring compressor. Having enough weight on the front end is the key to getting away without the need for a spring compressor, along with a short free-height spring. 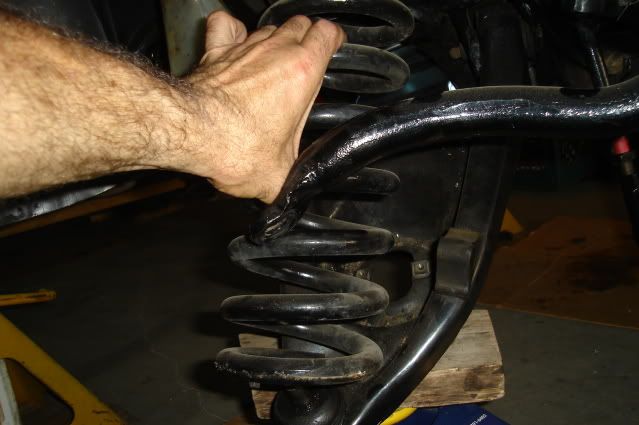 To get the upper control arms off I had to remove the rubber spash shields from the inner fenders to get enough room to manuever them out. I also had to take the steering shaft loose from the rag joint coupler on the driver's side and push the steering shaft over as far as possible to get the control arm shaft off the 2 mounting bolts that are pressed into the frame. Tear down is now complete, all I need to do now is a little cleaning of the suspension attachment points on the frame and I'll be ready to start installing the new parts. 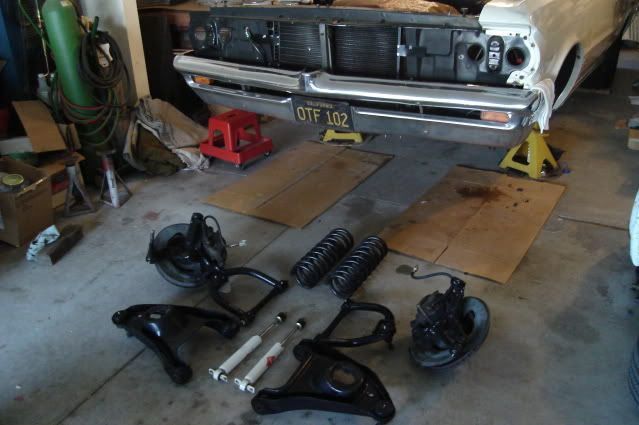 There's really nothing wrong with the old '78 B-body spindles with 12" rotors, reinforced stock lower A-arms and Hotchkis upper control arms with greasable poly bushings. They truly made a night and day difference in braking and handling over the original factory 9.5" drum brakes and rubber-bushed suspension pieces that had over 140K miles on them. 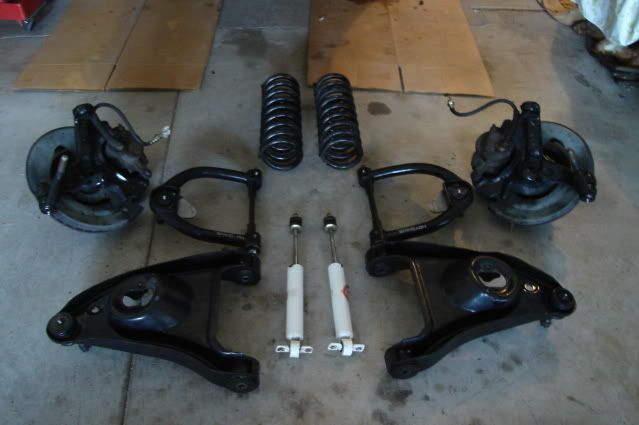 I'm replacing them all now with SPC adjustable upper control arms and tubular lowers, American Touring Specialties AFX forged aluminum spindles and C6 Z06 brakes with hopes that I'll see yet another night and day difference in braking and handling. This is really going to be a fun canyon carver. 
|
|
#5
07-28-2009, 11:39 AM
|
||||
|
||||
|
Awesome!
|
|
#6
07-28-2009, 03:09 PM
|
||||
|
||||
|
Jeez !
That thing's gonna be a helluva ride, handle like a corvette and get you great MPG like a chevette Nice work as usual B-MAN
__________________
Knock Knock Knockin' on 11's Door '70 Judge, Palladium Silver w/Red Interior Powered by SD Performance, Ported 6X Heads 501 HP, 554 ft lbs TQ 12.14 ET @ 114 MPH , Supercase Muncie M22, 3:55 Suspension: HO Racing, BMR< Sykorat, and Bilsteins Narrowed 12 bolt , 16x8 VintageWheel Works, Comp T/As on street, MT Drag Radials @ Strip http://www.sdperformance.com/custome...1.php?carID=42 |
|
#7
07-29-2009, 11:17 PM
|
||||
|
||||
|
very nice
I am so happy you took on this project so that I can watch all the great progress and see the amount of $$ and hard work, skill , product display. When you finish this badass, come up north and put a whoopin' on my ole chevelle and we will tear up some rubber, burn some fuel, then cool off at the beach drinkin a coupla road sodas and checking out the "poly Dollies" from SLO :>) lol bring that bad dog Poncho on!!!!
   
|
|
#8
07-30-2009, 10:20 PM
|
||||
|
||||
|
Quote:
Quote:
Quote:
Thanks for the kind words friend. It will be a while before the Tempest is ready, but I can oblige your ol' Chevelle with another partner to burn a little rubber with as a preview. My WS6 is always ready to go road trippin', hitting the beach and checking out wine country looks good to me. Bart 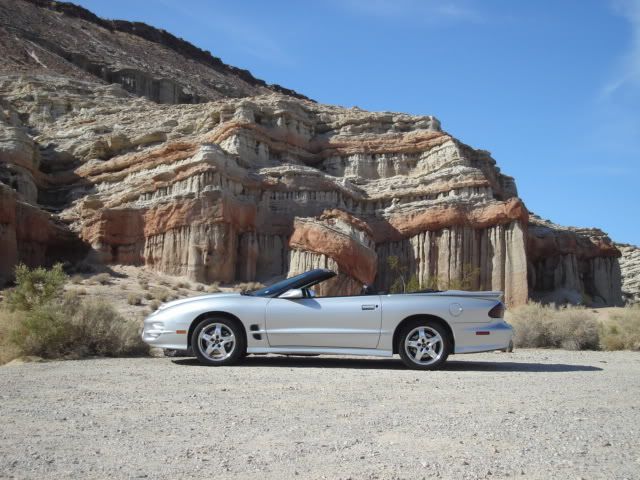
|
|
#9
07-30-2009, 11:21 PM
|
||||
|
||||
|
unfair chic magnet
Sure thing B-man, bring the vert ( chick magnet ) and I'll be invisable in the
Chevelle!!! How does that work? Like bringing a knife to a gun fight. NOT! LOL I'll take my chances with your ole A-body vrs my ole A-body when you get that Poncho on the road, but you are welcome anytime you need some fresh air and vino and a little SLO life!! 
|
|
#10
08-02-2009, 08:18 AM
|
|||
|
|||
|
Excellent work documenting this! I am hopefully a few months away from installing my own AFX spindles. And will look to your examples.
|
|
#11
08-02-2009, 12:06 PM
|
|||
|
|||
|
Bart, are those new 1/2" bolts an interference fit in the frame, or just slide in? I ask because I have the same arms yet to be installed. I currently have the Hotchkis arms in there, too, thus my inquiry.
Thanks.
__________________
How many of you have driven over 340?
|
|
#12
08-02-2009, 12:46 PM
|
||||
|
||||
|
Quote:
They don't have an interference fit like the factory bolts do with the splined portion just under the bolt head. With the rubber splash shields removed there's easy access to them. I did put some red Loctite under the bolt heads to help keep them in place. Since the SPC arms are fully adjustable you're not supposed to need any alignment shims so once they're tight you can forget about them. Just in case some shims were needed later I left the bolts a little long so a 1/2" tall stack of shims could be used if needed. Bart |
|
#13
08-02-2009, 04:23 PM
|
|||
|
|||
|
Thanks Bart. Next question, where did you get these bolts? From SC&C?
Thank you.
__________________
How many of you have driven over 340?
|
|
#14
08-02-2009, 11:52 PM
|
||||
|
||||
|
Quote:
|
|
#15
08-03-2009, 12:19 AM
|
||||
|
||||
|
Spent my day.....
.....in the garage finishing the front suspension mock-up.
First order of business was to get the SKF racing hubs prepared. For starters, the studs are too long. Since I'm using wheel adapters the studs need to be shortened to match the thickness of the adapters (1.063") plus the thickness of the front brake rotors (.300"). 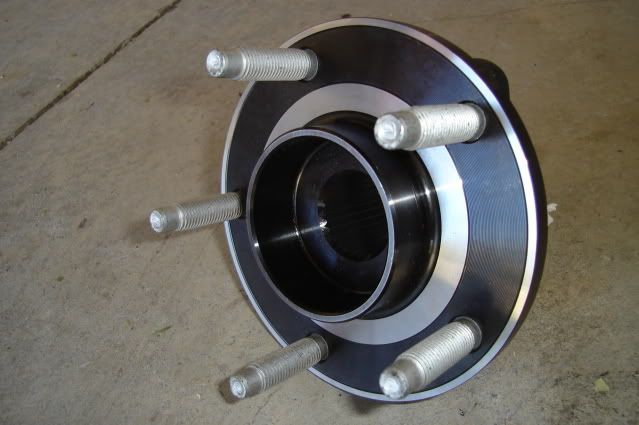 I ended up grinding about .400" off the ends of the studs. 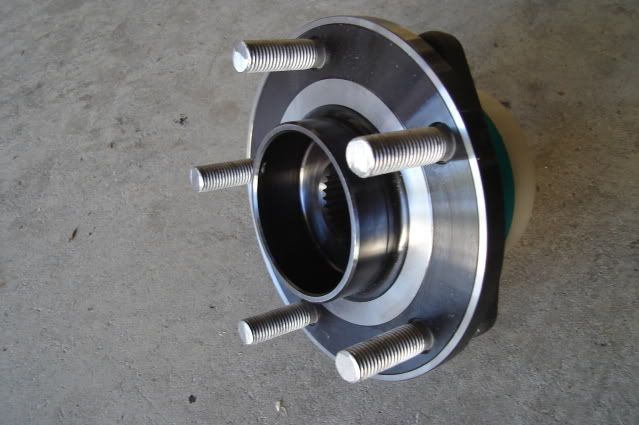 The AFX spindles use two bolts and one stud to mount the hubs. The hubs were designed to use 3 bolts so all three holes are threaded. In order to use the one bottom mounting stud on the AFX spindle I had to drill out the threads in one of the holes with a 1/2" drill bit. 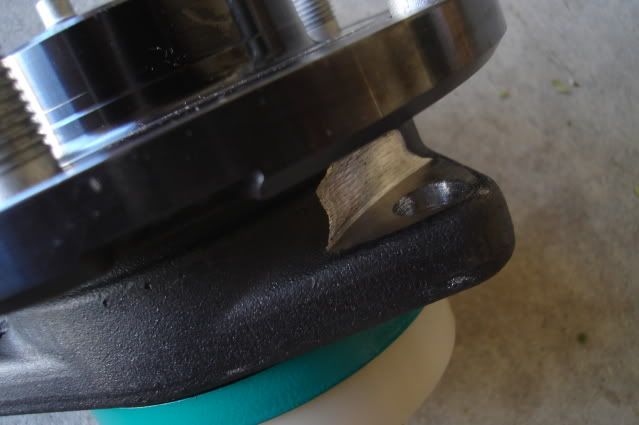 I had to use a die grinder with a cutting wheel to make some clearance for the nut to turn and to provide a flat area for it to tighten down onto. 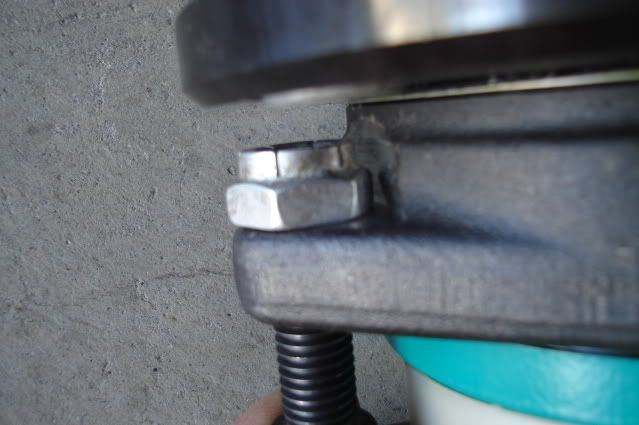 After having a lot of fun hacking on my new hubs they're now bolted in place. 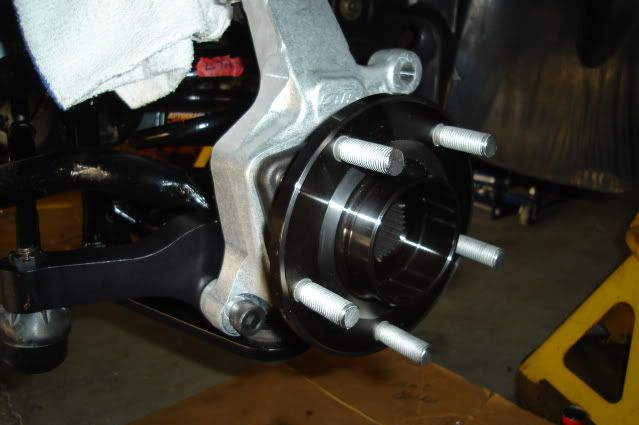 New 14" rotor and wheel adapter mounted up to the hub. The adapter solves two problems, converting the front bolt pattern from 5 on 4.75" (5 on 120.65mm) to 5 on 120mm and effectively reducing the backspacing on the wheel to 5.507" from 6.57". I had to grind about .060" off the ends of the lug nuts holding the adapter in place for clearance. 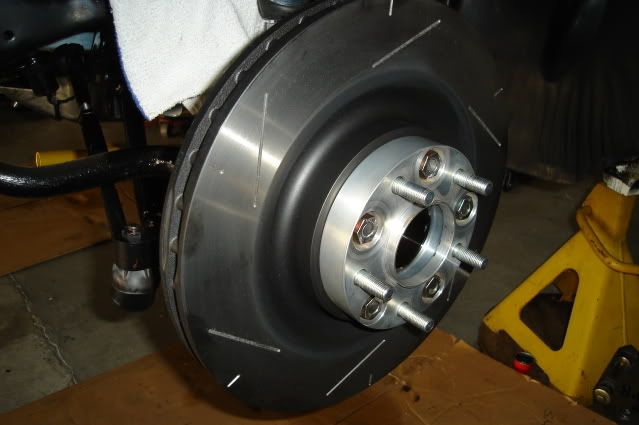 Bolted the wheel in place. No brake calipers yet, not enough time today with all the drilling and grinding going on. 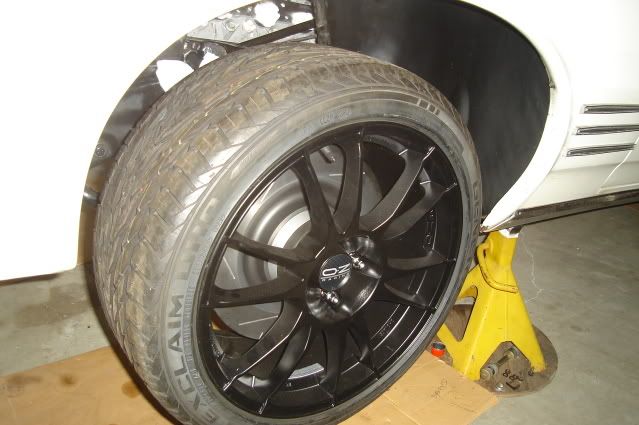 Looks like there's plenty of clearance between the upper A-arm and the inside of the rim with the wheel turned all the way to the left, the clearance here will increase with the car's full weight on the suspension. 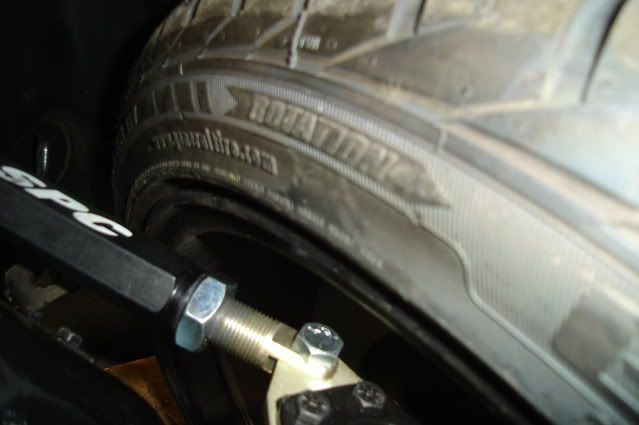 Set the car on the ground to see how it looks. I'm pretty happy with the ride height considering the amount of weight that still needs to be put back in the car. No seats, front or rear glass, most of the exhaust system out, no belt-driven accessories on the engine, no fluids in the engine or trans, no A/C compressor and no hood or right front fender. 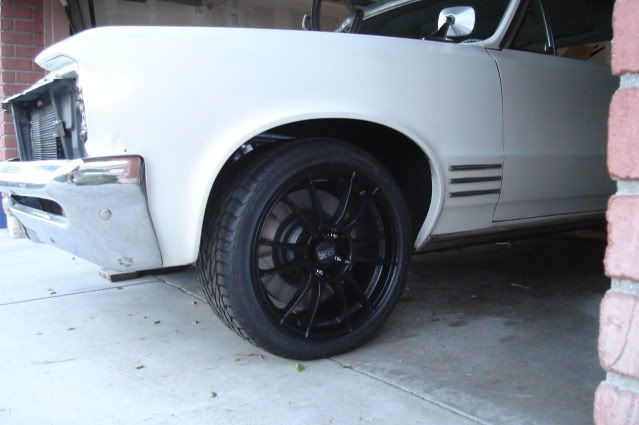 The AFX spindles have 1" of drop built in, combined with the 1" drop from the SPC lower control arms it's looking like I won't need to trim the front springs. 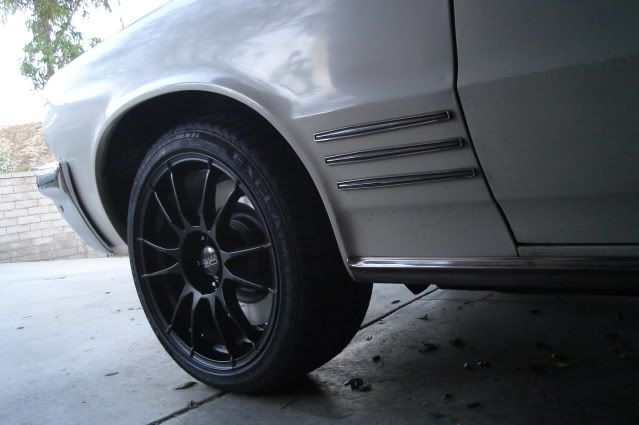 I reached my goal of getting the car sitting back down on the ground on all 4 wheels this weekend. I'm stoked.
|
|
#16
08-03-2009, 09:43 AM
|
||||
|
||||
|
I see that the hubs are splined in the inside. are they designed for a shaft to go through them?
That's some pretty looking stuff you are putting on that car. BTW how far over 'budget' are you so far. 
__________________
North Dakotas fastest REAL GTO 10.10 @ 131 MPH in the 1/4 Hoping to get it back together some year. www.jandjrepairandrestoration |
|
#17
08-03-2009, 06:38 PM
|
||||
|
||||
|
Quote:
I'm about 5K over my first 'hopeful' 12K estimate on the LSX-related swap parts with the aftermarket A/C included. That doesn't account for the 8.5" rear end, suspension and brakes or wheels and tires that I decided to add midstream in the project. These projects tend to snowball on you sometimes. Doing it once and doing it right does cost you, but it also saves you from spending more doing it over when you're not really satisfied with the first outcome. |
|
#18
08-05-2009, 01:15 PM
|
|||
|
|||
|
Bart: Send me your PH#. or gimme a call @ 909-980-1451
__________________
GOOD IDEAS ARE OFTEN FOUND ABANDONED IN THE DUST OF PROCRASTINATION |
|
#19
08-10-2009, 01:04 AM
|
||||
|
||||
|
Bart,
Looking gooder. I believe I would slice it, trim the small opening to fit main cable, silicone the slice and inside/outside real good and let it sit to harden then snap it in place. Charles |
|
#20
08-10-2009, 07:24 PM
|
||||
|
||||
|
I have sliced many grommets in my time. If done properly, you really don't need to silicone. If you do silicone it, I would do it after the grommet is installed in the firewall. Actually, I'd wait until the car is running & done.
Just my .02
__________________
Tod Hoffmann 1966 GTO Montero Red Hardtop - Holley EFI'd 462, KRE DPorts/Muncie 4spd 1990 Chevy 454SS pickup - Accel DFI/T56 6spd - Hot Rod Power Tour Long Hauler 1996 Chevy K2500 ECSB 'Poopy' 2002 Honda VTX1800C 2016 Cadillac CTS Premium My project thread: http://forums.maxperformanceinc.com/...d.php?t=516826 
|
| Reply |
|
|
The PY Online Forums is the largest online gathering of Pontiac enthusiasts anywhere in the world. Founded in 1991, it was also the first online forum for people to gather and talk about their Pontiacs. Since then, it has become the mecca of Pontiac technical data and knowledge that no other place can surpass.








 Hybrid Mode
