


| FAQ |
| Members List |
| Social Groups |
| Calendar |
| Search |
| Today's Posts |
|
#181
 01-17-2009, 07:12 AM
|
||||
|
||||

Bart- as I prepare for a similiar project sometime down the road. I looked into the cruise control requirements.
There are a lot of conditions that need to met. I began studying the wireing diagram for an escalade. I never came to a conclusion but did realize it was not simple, it can certainly be done. This guy does it all time, http://hccperformance.com/index.html , I contacted him. He told me it took them so long to figure it out he would not release the info. For whatever it's worth. |
|
#182
01-17-2009, 07:50 PM
|
||||
|
||||
|
that's funny i had to roll the back edges of the front fenders on my white '65 _exactly_ like that to fit 215/70-15's after installing tall spindles and short upper control arms, i guess the caster increase tilts the wheel back a little
seems to be coming along well b-man hope ur on the road soon 
|
|
#183
01-21-2009, 01:50 AM
|
||||
|
||||
|
New trans and converter!
Today the 4L70E trans and Yank SS3600 9.5" converter arrived from FLT. They were packaged together inside a nice plastic shipping container made especially for 2-way shipping of newly-built transmissions and trans core returns.
My old Chevy pickup always likes to be of service to my Pontiacs.  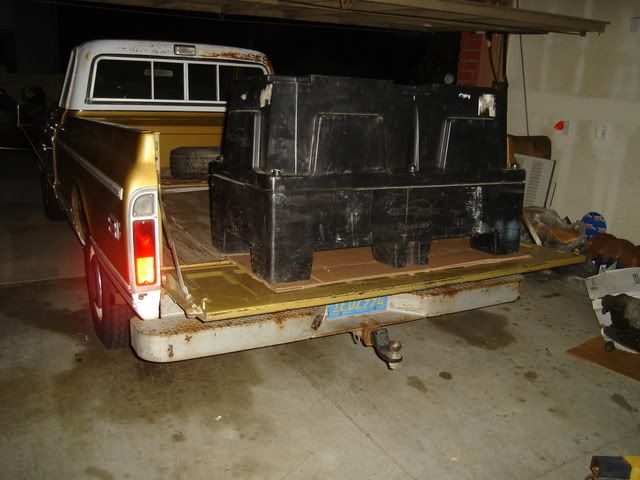 Looks just like I pictured it.  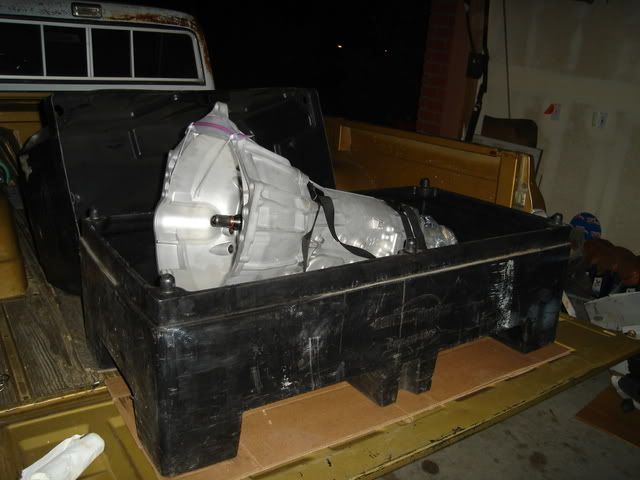 The always handy load leveler. It makes this kind of job so much easier, I'll never use anything else for engine and trans installation. 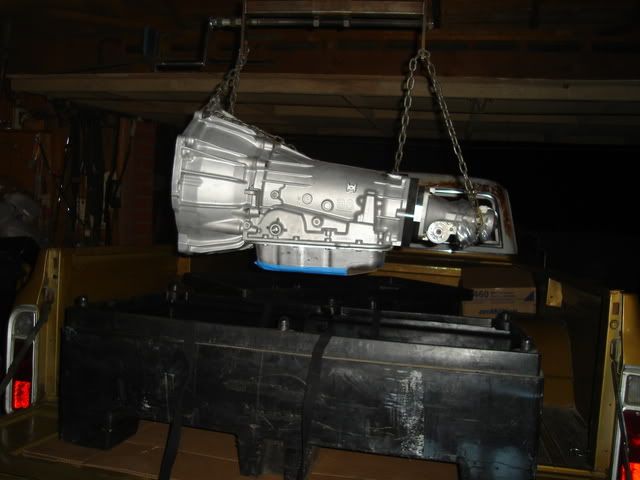 I made this one out of heavy-wall materials and had a friend at work TIG weld it all up for me. I won't use questionable Chinese stuff to hold up my new engine and trans, I've read about more than one of these things failing and injuring the user.   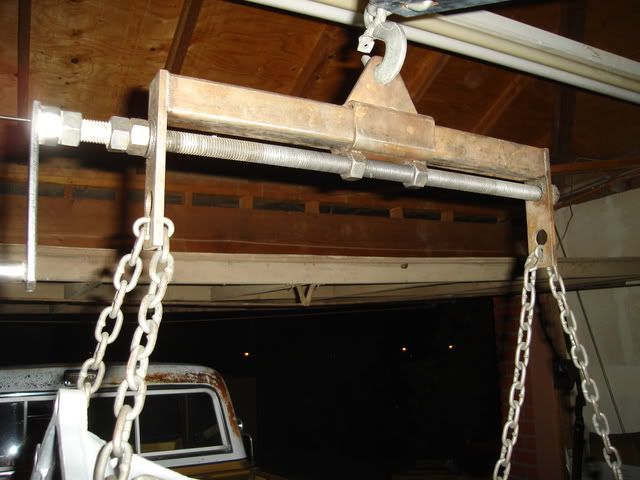 Nice attention to detail by FLT, a piece of cardboard taped to the bottom of the trans pan to keep it from getting scuffed-up during handling. I never knew they offered factory pans as deep as this one. 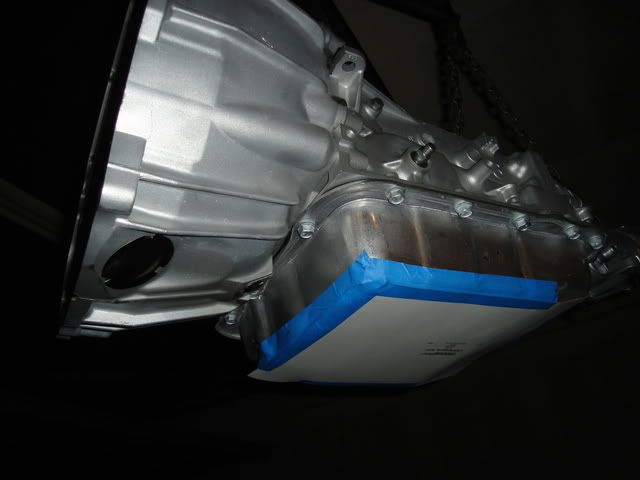 The old short-tail BOP Turbo 400 that I'm sending back to FLT for partial core credit. 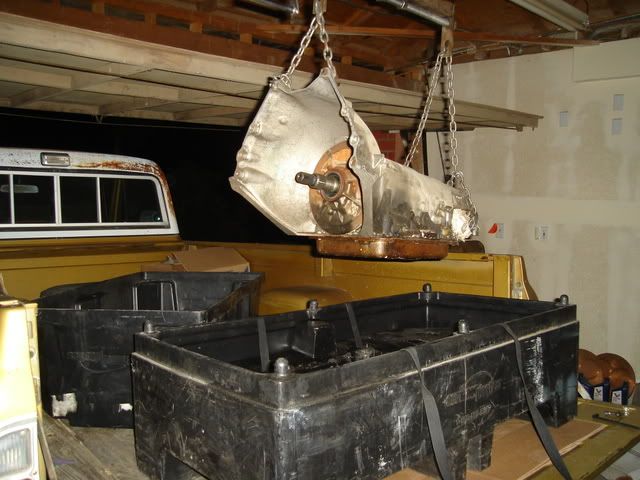 The Tempest approves.  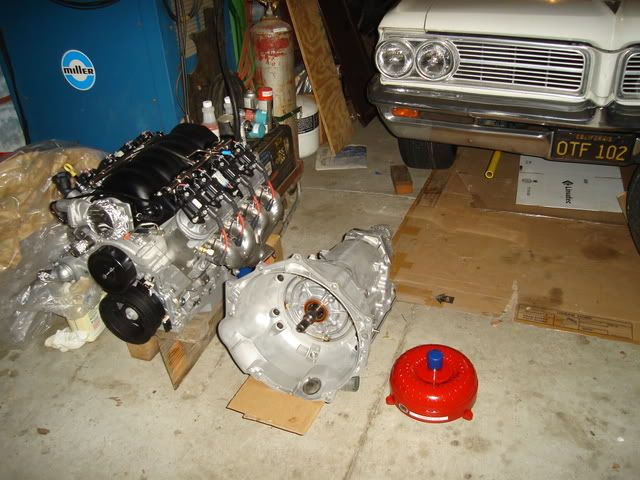 Thanks again to the folks at Finish Line Transmissions and Yank Performance Converters for delivering quality products exactly when they said they would.
|
|
#184
01-21-2009, 03:04 AM
|
|||
|
|||
|
I hear nothing but praise about both of those products. Great call.
__________________
How many of you have driven over 340? 
|
|
#185
01-22-2009, 08:13 PM
|
||||
|
||||
|
WOW---love the load leveler.
Can you post or pm me measurements...Tx. Coming along nicely. |
|
#186
01-30-2009, 03:24 AM
|
|||
|
|||
|
Bart/Others:
I stumbled across a sale that Katech is having, over at the LS1tech site. Here's the link: http://www.ls1tech.com/forums/sponso...-vehicles.html Katech is the one that builds the C5R/C6R Vettes and they are supposed to be a premier LS engine group.
__________________
How many of you have driven over 340?
|
|
#187
01-30-2009, 11:18 PM
|
||||
|
||||
|
Quote:
The main tube is 19" long (a few inches longer might be better) 3/16" wall thickness 1.50" square tubing. Slider tube is 4" long 3/16" wall 2" square tubing, the lifting tab welded to it is 3/16" thick plate 2.50" high with a 7/8" hole drilled in it (a 1" hole would be better). The 3/4-10 nuts welded to the bottom of the slider were welded using as little heat as was practical to keep from making them out of round, I probably cleaned-up the threads with tap anyway (it's been a lot of years ) Very important: You absolutely must have the threaded rod in place when you tack weld the two nuts onto the slider tube, if they are not 'in phase' the rod will never screw into them both. Remove the threaded rod before the final welding on the nuts, chase threads with tap if needed after final weld. End lifting plates welded to the main tube are 1.50" wide (to match the 1.50" main tube) 6" long and 5/16" thick (1/4" would be fine). Keyhole slots for the chain were made by drilling a 7/8" hole 1.50" from the bottom, a series of 5/16" holes were drilled as close together as practical and 'joined' together with a flat file to finish off the keyslot, leaving 1/4" of material at the bottom of the slot. The 3/4-10 threaded rod is welded to a nut at the back end, a flat washer (to act as a thrus washer) is used between the nuts and end plates front and rear. Some 'acme thread' like what's used in a C-clamp would be better than threaded rod, but I used what was sitting around the shop at the time. Hand crank was fabbed from a 1" wide 6" long piece of 1/4 thick stainless bar stock welded to a 3/4-10 nut. The crank handle is a 5" long piece of 1/2" round bar stock with a piece of 5/8" diameter .049" wall tubing slipped over it, retained by a 1/4" flat washer welded to the end of the bar stock. Nothing more than a drill press (a good 1/2" hand drill and a bench vise would work too), a cut off saw and a hand file were needed to fab up the pieces. I also had a belt sander handy to dress up the edges. Your results may vary. Bart  
|
|
#188
01-31-2009, 09:01 AM
|
||||
|
||||
|
Thank you.
|
|
#189
02-05-2009, 03:28 PM
|
|||
|
|||
|
Quote:
The old fashioned way, adapt the pontiac senders to the LS block = done deal. That takes care of oil pressure, water temp and voltage/amps Speedo is a adapted either through a customized tailshaft, or a black box adapter. 
|
|
#190
02-19-2009, 01:28 AM
|
|||
|
|||
|
Did your LS3 crate engine come with any documentation? Not one single piece of information came with mine.
I'm attempting to remove the thin metal plate that is attached to the flywheel with 3 bolts and pressed onto three pins. Short of using a plasma cutter or a cut off wheel, I can't figure out how to remove it. I tried a small pry bar but gave up because I was afraid of damaging the flywheel. |
|
#191
02-19-2009, 01:36 AM
|
||||
|
||||
|
Not a shred of paperwork or instructions came with my LS3.
 I also have to deal with that large diameter drive hub/plate riveted to the flexplate that must have been used to run-in the engine at the factory. 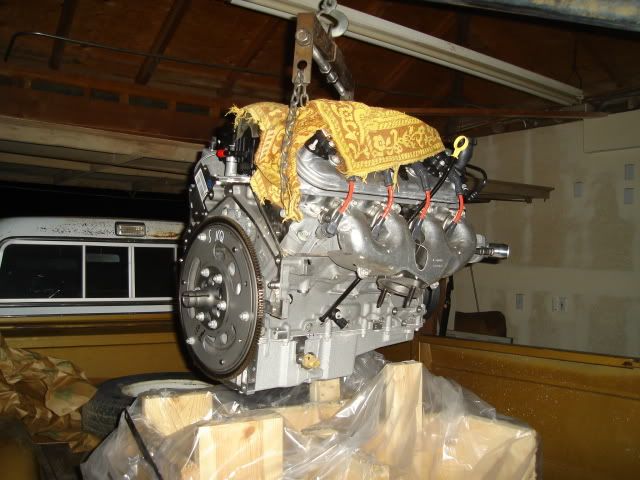 I guess I'll get out my die grinder and take the rivets down enough to get it to come off. |
|
#192
02-19-2009, 02:04 AM
|
||||
|
||||
|
I would have expected at least some harness connection info or fluid recommendations too... And just leaving something disposable attached to the motor is kinda bogus.. I guess they only planned to sell these to dealers doing warranty work?
Maybe it's addressed in the Shop Manual? Ditto on the Load Leveler. Way Cool. What is that round black plate on the oh so shiny tranny? Is that an inspection cover of some kind? That is so cool to have all that drivetrain gear in your garage finally.. Good for you Bart. Neat update
__________________
-- James Work '67 GTO Convertible "Koerner Built 413 500 hp with a Victor!.. I'll run a stock intake." '75 Formula 400 - Daily Driver - Running with my Home Built 455 and TH400 Details here: http://forums.maxperformanceinc.com/...d.php?t=588372 |
|
#193
03-05-2009, 11:36 PM
|
||||
|
||||
|
It's been quiet in the garage lately.....
.....as it's easy to get sidetracked on a build like this.
But that's a good thing. I have been hunting down the parts for a complete suspension and brake system upgrade, something I really hadn't planned on when I first began to tear into the Tempest. It makes a lot of sense to bring the handling and braking up to par with the anticipated power output of the LS3/4L70E engine and trans combo. I decided to take Andrew's advice and upgrade to the ATS front spindles along with some SPC adjustable upper control arms. The fully adjustable uppers add the ability to make whatever alignment changes that are needed, and also afford quite a bit more clearance for my deeply backspaced front wheels on tight lock-to-lock turning. I decided to use the SPC lower control arms as well. They are designed move the lower ball joint mounting point forward by about one inch. This will keep the front wheel from living at the rearmost part of the wheelwell opening in the body when a lot of caster is dialed-in for high-speed stability. A new set of C6 Z06 Corvette brakes (14" front, 13.4" rear) all around will also be here in a few days, I returned the Z51 rears I had purchased previously. The new wheels I bought swallow up these big binders with ease, plenty of caliper clearance. My car will outweigh the Corvette Z06 by a good 500 pounds (lotsa carbon fiber components in a Z06). I know I won't ever have the power or the handling of a Z06 but having those excellent OEM brakes on my car is money well-spent. Not a lot happening lately except gathering up more parts, and saving money for more. The new 8.5 10-bolt rear should be here soon, after that arrives the last major item I need to buy will be the air conditioning system, which I'd like to install first along with the Speartech controller and wiring harness. Pic of the SPC front suspension arms, the ATS spindles should be here any day. 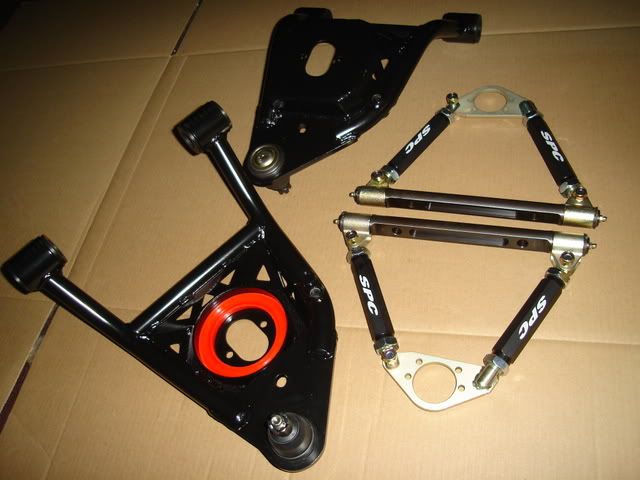 Currie Currectrac rear control arms, waiting for the new 3.42-geared 8.5" posi rear. 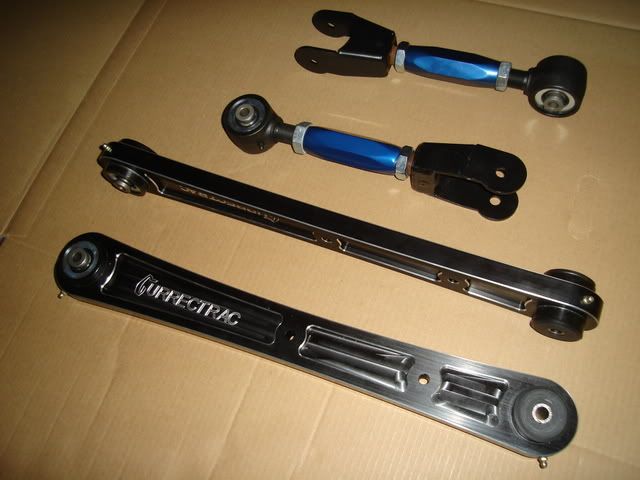 The made-to-order Speartech controller and harness arrived a couple of weeks ago. 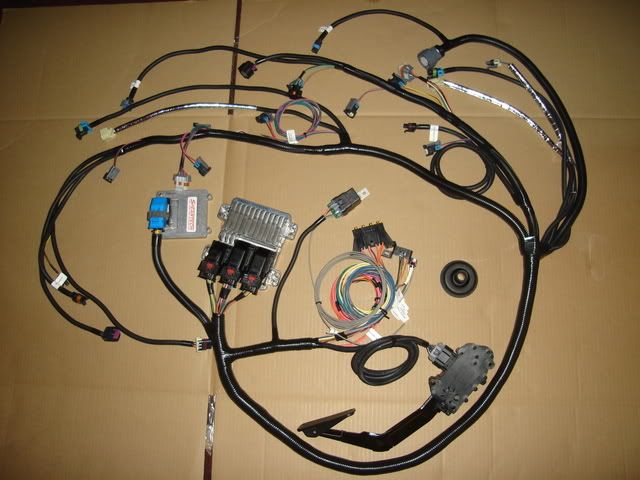 Soon I hope to dive in and start getting things put together.
|
|
#194
03-06-2009, 12:37 AM
|
|||
|
|||
|
WOW!
Bart, have you been talking with Marcus? Those are some very pretty suspension pieces. And the brakes....Tobin? This thing is going to be a great ride.
__________________
How many of you have driven over 340?
|
|
#195
03-06-2009, 12:46 AM
|
||||
|
||||

Yes, Marcus at SC&C has been bending my ear and taking my money.
Tobin at KORE3 has been doing the same thing. It's going to be a fun car built with a lot of nice aftermarket bolt-on stuff, no cutting or crazy fab work that I don't have the time or money to deal with. |
|
#196
03-06-2009, 03:22 AM
|
|||
|
|||
|
Nice stuff indeed.
You still planning on keeping the stock frame? Just kidding
__________________
How many of you have driven over 340?
|
|
#197
03-06-2009, 11:36 AM
|
||||
|
||||
|
Solid! Man your car is going to be alot of fun
|
|
#198
03-11-2009, 10:05 PM
|
||||
|
||||
|
More goodies arrived today!
My forged aluminum AFX spindles and billet aluminum A-body steering arms from ATS (American Touring Specialties http://www.t56kit.com/) arrived today.
They are made to accept 1997 and up Corvette hubs and bearings as well as hubs with bigger bearings for more race-oriented setups. These are some very nice parts. 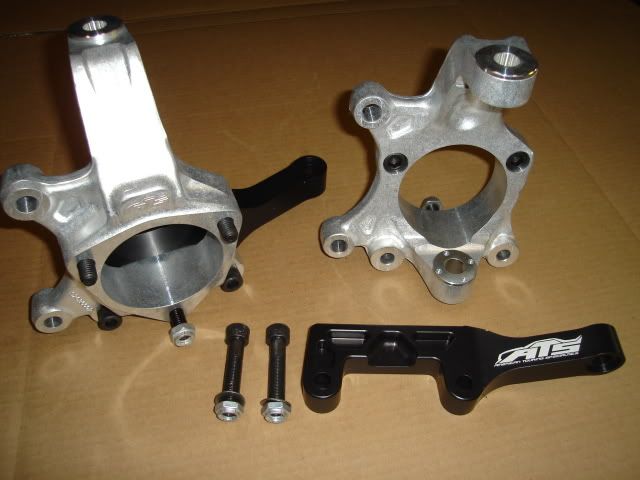 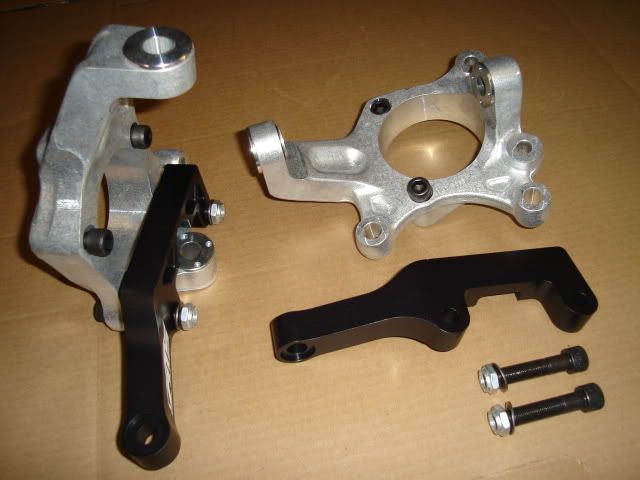 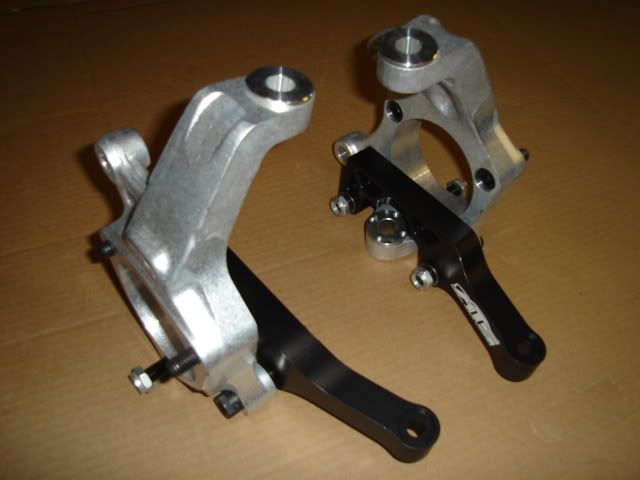 Yep, just some more pictures of parts.  But you know sooner or later something's gonna happen with 'em.
|
|
#199
03-20-2009, 01:05 AM
|
||||
|
||||
|
Sexy!
What hubs are you going with? Andrew |
|
#200
03-20-2009, 09:23 PM
|
||||
|
||||
 What to do.....
Quote:
I'm going back and forth between stock C6 hubs made by Timken ($175 each) and the SKF racing hubs ($380 each) http://www.pfadtracing.com/catalog/p...roducts_id/125 . Will the stock replacement parts wear out quickly if I engage in a little spirited weekend canyon carving from time to time? Am I better off buying the racing parts in the first place because I'll eventually need them anyway, after the stockers fail after a fairly short amount of time? Your opinion would be greatly appreciated on any pros and cons of either choice. Thanks, Bart |
| Reply |
|
|
The PY Online Forums is the largest online gathering of Pontiac enthusiasts anywhere in the world. Founded in 1991, it was also the first online forum for people to gather and talk about their Pontiacs. Since then, it has become the mecca of Pontiac technical data and knowledge that no other place can surpass.






 Linear Mode

