


| FAQ |
| Members List |
| Social Groups |
| Calendar |
| Search |
| Today's Posts |
|
|
|
#1
 02-21-2018, 09:08 PM
|
||||
|
||||

I test fitted the new hood today with the help of my daughter. The fit is too tight on the driver's side. I'm going to need to pull out the diver's side fender a little so the rear spear of the hood doesn't rub as it passes by during closing. I think there are lot of bolts that need loosening to do that. I tried removing the rear cowl top fender bolt and the loosening the door jamb bolt but the fender didn't budge at all.
|
|
#2
02-21-2018, 11:48 PM
|
||||
|
||||
|
Bruce to the Rescue! Love this forum - so much knowledge here.
BJ
__________________
1971 GTO 455 HO 4-speed - Cameo White, White Vinyl Top, Jade Green Interior, Ram Air Hood, AC, Honeycombs and 8-track 1974 Formula 455 I Owned in 1975-1976. Now Own Its Twin From Same Dealership 
|
|
#3
04-08-2018, 12:38 PM
|
||||
|
||||
|
I got the hood adjusted to where the gaps are semi even on both sides. I noticed it has a slight bow in the center similar to the way the Formula hood bowed. It looks like somewhere along the years, someone welded up a crack or two on both sides, in the middle area of the underhood reinforcement in a weak spot in the "crumple zone" of each side. They need to be rewelded properly since one has already re-cracked. Other than that it seems like a nice hood.
On a different front I found a cure for the always-squeeling alternator belt on the 80 amp alternator setup. I removed that dreaded idler pulley and found a belt that is the exact length to fit without having the pulley. A 15485 belt works perfectly. Outside Circumference (in) 49.125 Outside Circumference (mm) 1247 Top Width (in) .375 Top Width (mm) 10 I removed the idler pulley off its bracket and then unbolted the alternator and fit the new 15485 belt over the alternator pulley. I then reinstalled the alternator. It has just the right amount of tension - not too tight or too loose. There is no longer any way to adjust it but it seems to work perfectly, riding along the water pump pulley for a far larger contact area than the one inch or so that it would touch with the idler pulley in place. That is the reason for the squeel with the factory setup - at higher RPMs the alternator belt bounced off the pulley instead of riding tightly in the groove. I have performed repeated test procedures employing my patented shaker flapper door testing protocol (at 50 mph, slamming the pedal to the floor with a resulting high speed third to second gear downshift). No noises other than the angry 455 sound from the open shaker door and the gas gauge moving rapidly to the left. YAY! |
|
#4
04-08-2018, 06:36 PM
|
||||
|
||||
|
Cool On the belt, be interesting to see how long the belt goes and works.
The hood cracks on side. IF you decide to weld them, take off hood and block corners up 1/2 inch and press down on bowed section before you weld. Block under it to keep it from going to low, then weight on top to keep it still. Lube the hood hinges. I just welded one for a guy who insisted his was fine, just needed crack welded. He came back, with a bow he said he hadn't noticed before. Obviously hood 3was off and he just wanted it done.... |
|
#5
05-16-2018, 02:14 PM
|
||||
|
||||
|
The shaker hood is at a local body shop getting painted. The underside was blacked out yesterday. The metal was in very nice shape. Just needed scuffing and painting in semi glass black.
|
|
#6
05-21-2018, 08:10 PM
|
||||
|
||||
|
The hood is painted. Wet sanding and buffing today. Body man is blending the fenders (and fixing some paint chips from the bad hinges) tomorrow.

|
|
#7
05-25-2018, 09:22 PM
|
||||
|
||||
|
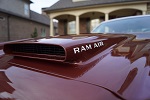
Hood and functional shaker scoop are now on the car. The paint match was close but it is noticeable in certain light when you look straight on. I think it is partially due to the way the metallic laid down. The car was painted Code 26 Lucerne Blue in 1993, 25 years ago. When you stand by the tires and look across the hood, it matches the fenders. When you stand in front of the car and look toward the windshield, it is a big difference. But what the heck, I am looking to repaint the entire car in the next year or two anyway so this was just a stop gap so I wasn't driving around with a primer hood anymore. It sure is fun to watch that functional shaker door slam open when you hit the gas.
What do you think?    
Last edited by njsteve; 05-25-2018 at 09:48 PM. |
|
#8
05-25-2018, 09:24 PM
|
||||
|
||||
|
The engine shot
 
|
|
#9
05-26-2018, 08:43 AM
|
||||
|
||||
|
Looks great
__________________
74 Formula Below motor destroyed fall of 2023 469, 6X-4's, 72 Intake, Ramair Manifolds. 3 inch exhaust with x-pipe Custom Roller Cam, 1.52 Roller Rockers Quadrajet done by Cliff 3:42 gears 12.061 @ 110.74 12.092 @ 112.43 12.128 @ 111.71 461 stroker Edelbrock 87 cc dport heads Performer RPM Same Ram Air manifolds, and quadrajet 75 Formula 400 / 4-SPD matching numbers 
|
|
#10
05-26-2018, 07:13 PM
|
||||
|
||||
|
looks great Steve!!
__________________
'72 Formula 455HO TH400, Revere Silver, black deluxe '74 Trans Am SD 4 speed, Admiralty Blue, blue deluxe |
|
#11
05-27-2018, 10:39 AM
|
||||
|
||||
|
The 75 Super Duty Formula look!

__________________
Some guys they just give up living And start dying little by little, piece by piece, Some guys come home from work and wash up, And go racin' in the street. Bruce Springsteen - Racing In The Street - 1978 |
|
#12
05-27-2018, 10:43 AM
|
||||
|
||||
|
I do have have some NOS "SD-455" decals but that would be too inaccurate for what's under the hood. :-)
|
|
#13
05-31-2018, 10:41 PM
|
||||
|
||||
|
This thing really is an eye catcher !!
|
|
#14
06-01-2018, 11:31 PM
|
||||
|
||||
|
Ah...what might have been!
__________________
1971 GTO 455 HO 4-speed - Cameo White, White Vinyl Top, Jade Green Interior, Ram Air Hood, AC, Honeycombs and 8-track 1974 Formula 455 I Owned in 1975-1976. Now Own Its Twin From Same Dealership
|
|
#15
06-02-2018, 12:08 AM
|
|||
|
|||
|
Looks good!
__________________
Buzzards gotta eat... same as worms. |
|
#16
06-03-2018, 08:29 PM
|
||||
|
||||
|
Thanks guys!
And BTW, ol Pinion Head, that revised 80 amp alternator bracket is working just fine with not even a squeek since the install. http://forums.maxperformanceinc.com/...d.php?t=816873 |
|
#17
06-20-2018, 09:35 PM
|
||||
|
||||
|
I have the Gramma car back at the local shop. He had an opening for some quick work and told me I could bring her down after i pulled the fuel tank out. The original inner and outer rear valance panels were rusted at the bottom flange from winter use by Gramma back in the 1970's. It was a terrible design that just trapped the salt and mud from the tires and held it in place with no real access for a hose to flush it out.
When I had the car painted 25 years ago the repro panels were not available. So I had to wait a couple decades for parts availability to catch up. Happily, Santa brought me these two panels a couple Christmases ago. The shame is that we only needed the lower six inches or so of the tail panel so 75% of that $300 panel is going to waste. He was able to remove the inner panel at the factory welds and was installing that as of today. I am getting all the underside stuff done in advance of a future paint job. This way when it comes time for paint, it will just involve sanding, massaging, and painting and no rust repairs. (resulting in a briefer sentence in bodyshop prison I hope). Last edited by njsteve; 06-20-2018 at 09:43 PM. |
|
#18
06-21-2018, 05:37 PM
|
||||
|
||||
|
The body man has the new outer panel installed today. Working fast!
|
|
#19
07-06-2018, 06:42 AM
|
||||
|
||||
|
Nice Steve!
__________________
Some guys they just give up living And start dying little by little, piece by piece, Some guys come home from work and wash up, And go racin' in the street. Bruce Springsteen - Racing In The Street - 1978 |
|
#20
07-06-2018, 08:09 AM
|
||||
|
||||
|
Well done!
__________________
1976 LeMans B09 Freeway Enforcer, 455/M40 Smokey 1977 Trans Am, 400/M21 Black/Gold Bandit. 44K actual miles 2017 Sierra SLT 1500 Z71 4X4  2019 Canyon SLT Crew 4X4  
|
| Reply |
|
|
The PY Online Forums is the largest online gathering of Pontiac enthusiasts anywhere in the world. Founded in 1991, it was also the first online forum for people to gather and talk about their Pontiacs. Since then, it has become the mecca of Pontiac technical data and knowledge that no other place can surpass.






 Hybrid Mode
