


| FAQ |
| Members List |
| Social Groups |
| Calendar |
| Search |
| Today's Posts |
|
|
|
#1
 01-29-2013, 07:33 PM
|
||||
|
||||

MSD makes a ratcheting tool for crimping Ignition wire ends.
http://www.msdignition.com/Products/...et_Action.aspx
__________________
Tod Hoffmann 1966 GTO Montero Red Hardtop - Holley EFI'd 462, KRE DPorts/Muncie 4spd 1990 Chevy 454SS pickup - Accel DFI/T56 6spd - Hot Rod Power Tour Long Hauler 1996 Chevy K2500 ECSB 'Poopy' 2002 Honda VTX1800C 2016 Cadillac CTS Premium My project thread: http://forums.maxperformanceinc.com/...d.php?t=516826 
|
|
#2
01-29-2013, 10:40 PM
|
||||
|
||||
|
I ordered the 135 degree spark plug terminals for the intact wire set and also the specialized crimping tool. They shuold get here by the end of the week. The replacement dated coded plug wires should be here tomorrow.
|
|
#3
01-29-2013, 11:30 PM
|
||||
|
||||
|
Just got back from my Tuesday night body shop class at the local polytech high school. My ongoing project is the Formula.
As you may know from following this thread, the car had NOS GM quarters put on it back in the 1980s, when they were still available. Unfortunately, at the time, the trunk drop offs were not available and the body guy did an amazing (though completely incorrect) hand-made version of drop offs. He used the existing trunk portion and then hand-made a flat panel and brazed it to the edges of the inner quarter. Now that the aftermarket has finally come out with the reproduction trunk drop offs, I decided to replace the hand-made ones myself. (after I got an crazy estimate of several thousand dollars per side to replace them at resto shop). The wonderful thing about this polytech adult education course is that you pay $400 for 12 weeks (every Tuesday night) and you get to use all their tools and expertise of a professional body man who is teaching the course. It is an amazing time! Here is the before shot of the handmade boilerplate inner quarter: 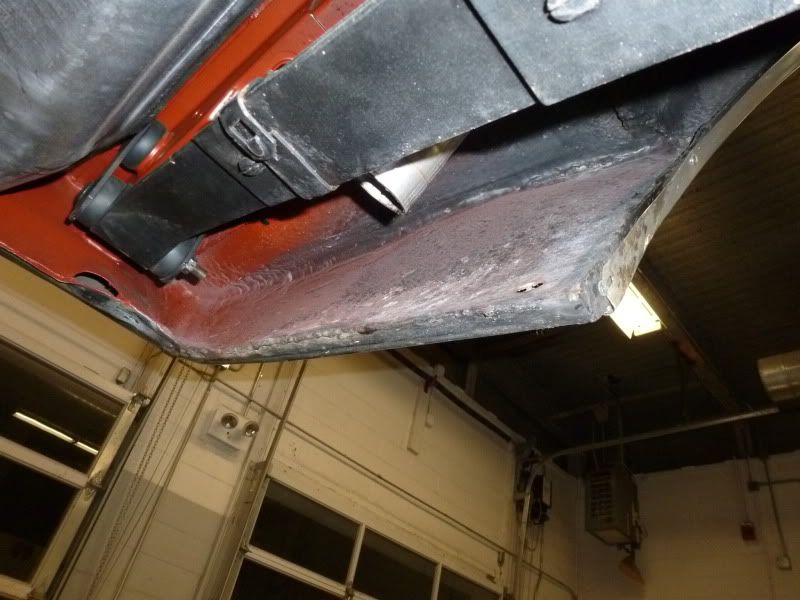 And after I used a cutting wheel to remove the major section and then a grinder to grind the edge of the brazing off, where it mated to the outer edge of the quarter panel.  Since the far end of the hand made panel was properly welded and mated to the inner quarter structure and matched the flat section of the new repro dropoff exactly, I left that in place and then made mounting flanges from a two-inch section of the prior hand-made drop off. 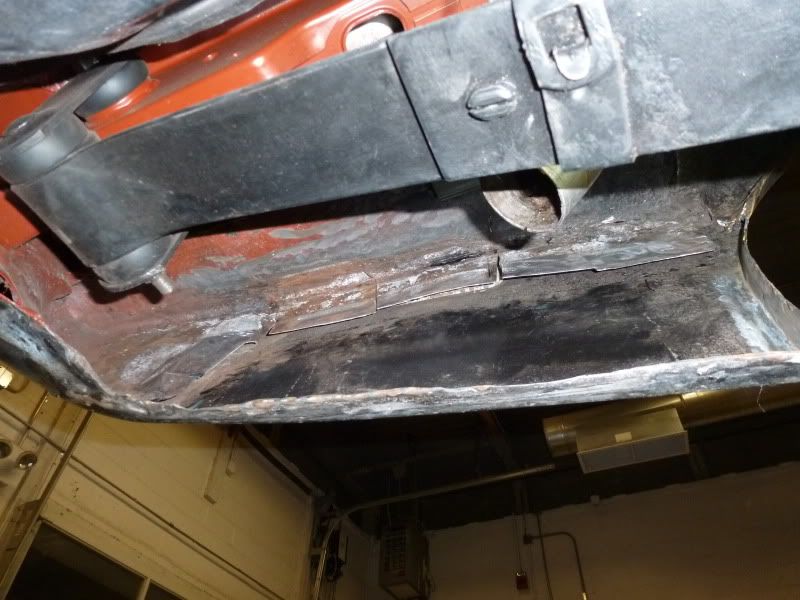 Instead of drilling and welding the dropoff in, we decided to use what a lot of modern body shops are using these days: structural panel adhesive. This stuff is amazing. It seals the bare metal and provides corrosion protection between the panels as it bonds them together with adhesive that is stronger than the steel itself. 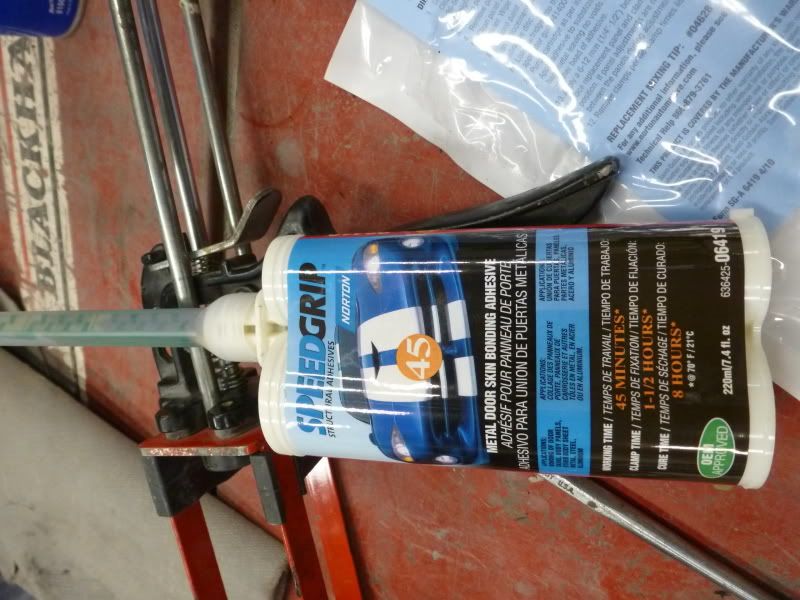
Last edited by njsteve; 01-29-2013 at 11:49 PM. |
|
#4
01-29-2013, 11:38 PM
|
||||
|
||||
|
I made a template out of a couple of manila file folders and then placed it on the the repro dropoff and marked off for cutting. I used a plasma cutter (a really fun tool) and trimmed it down to size until the panel just popped in exactly. These repros fit very well, right out of the box when it comes to aligning with the edges of the GM quarter.
Here's the repro panel being trial fit: 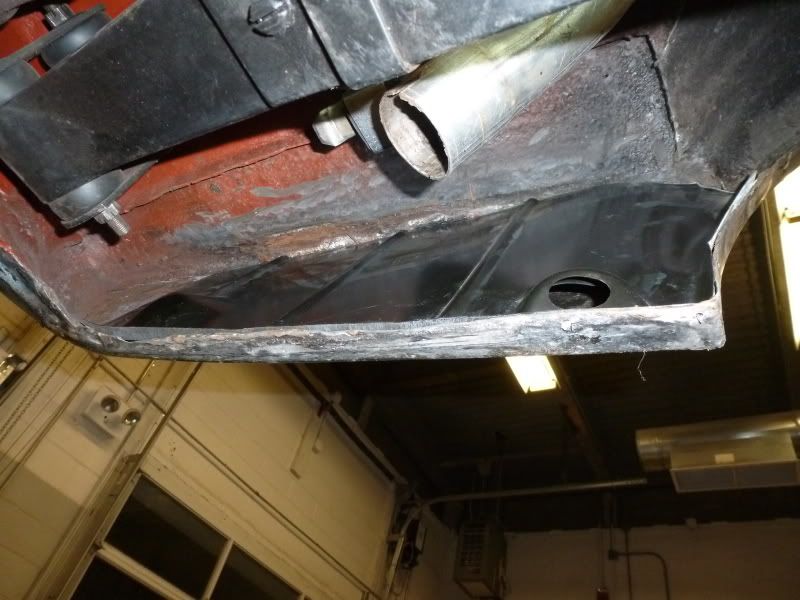 The adhesive it premixed in the funnel that attaches to the dual cannister and is first applied to the mounting areas and brushed over any bare metal area, as well as any area that is to be a bonding point. Then a liberal amount is squeezed out onto the panel and the panel is put into place. A bunch of vise grips are then used to clamp it in place, but not too tight. You dont want to squeeze out all the adhesive. 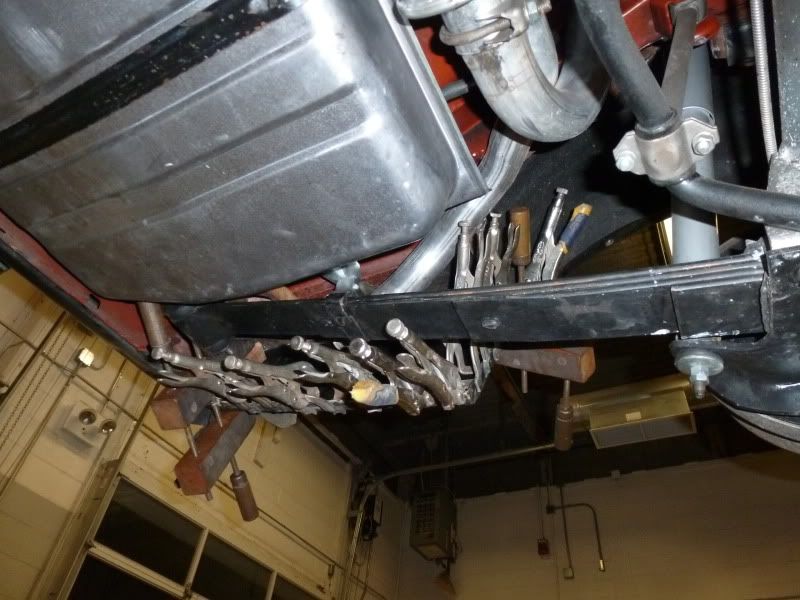 Yeah, I know that's sacriligious to use that clamp on the paint...but the paint is old and bad and I have a piece of cloth under it. This was the only way to get the upper portion held in place. The clamp is pressing on a section of wood across the upper bonding seam. Plus, they are my Grandfather's woodworking clamps from three quarters of a century, ago. 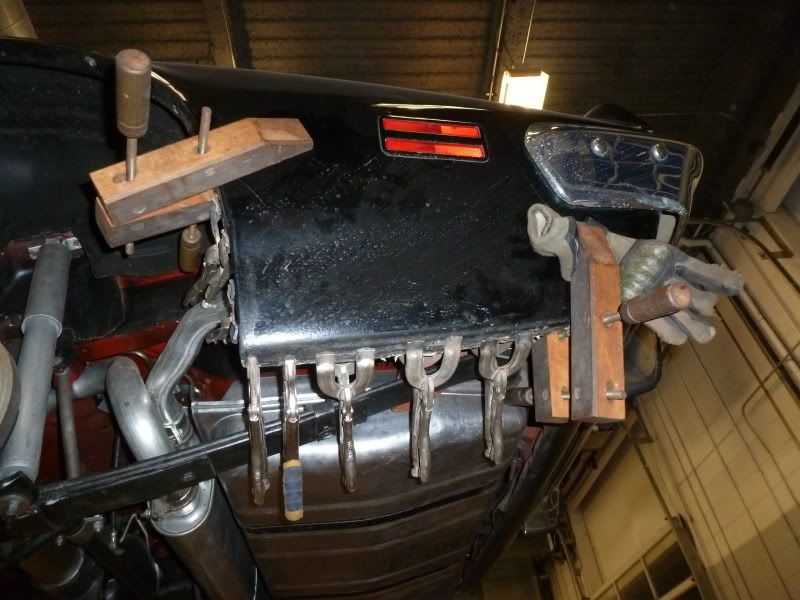
Last edited by njsteve; 01-30-2013 at 12:04 AM. |
|
#5
01-29-2013, 11:43 PM
|
||||
|
||||
|
It takes 45 minutes for the adhesive to set up. It turns from grey to green when it is cured. I used a heat gun to warm up the panel and that speeded up the process, since I only had three hours for the evening class and there was only an hour left when we started clamping. After several hours it is harder than the steel.
And here is the semi-final result until we do the cosmetic body filler to get rid of any visible seams. 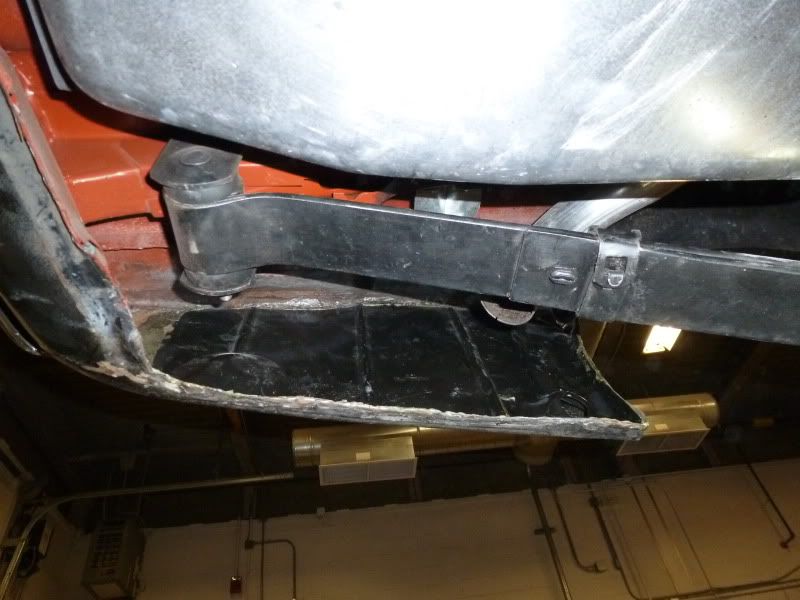 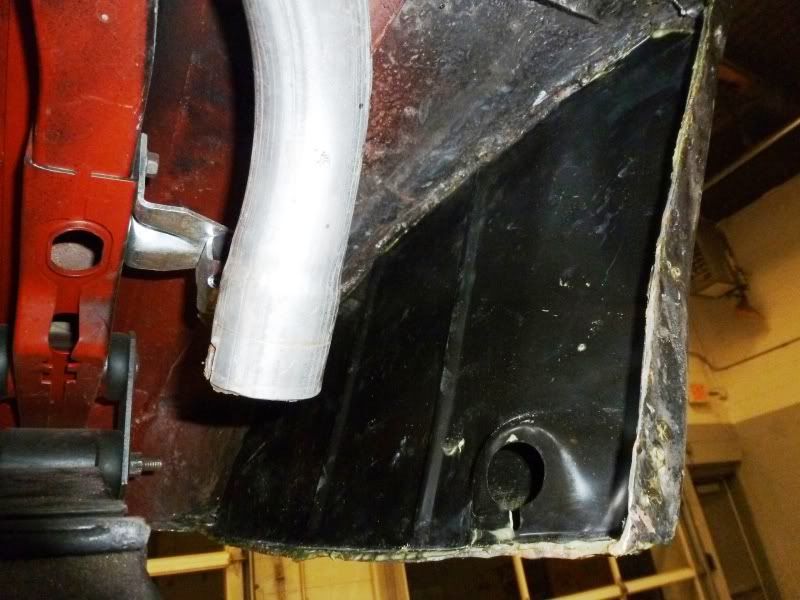 Oh, and in case you thought I did this all in one three hour class...I didn't. It took two classes, one to remove the old dropoff and the other to trim and install the new one. So, six hours total. Last edited by njsteve; 01-29-2013 at 11:53 PM. |
|
#6
01-31-2013, 09:34 PM
|
||||
|
||||
|
Outstanding Steve! Can you send me detailed info on where you got your wires, terminal ends and crimp tool? I'm inspired by your work and will do the same on a couple sets of wires I have.......much cheaper than the $800 bucks a guy on eBay is wanting for his NOS set of 4Q plugs.
__________________
Pat Brown |
|
#7
01-31-2013, 09:47 PM
|
||||
|
||||
|
http://www.taylorvertex.com/Products/
#44389 for the 135/45 degree terminal ends #44390 is the crimping tool It was around $40 including shipping, total for both. http://lectriclimited.com/ #2364-713 is the wire set date coded for 3rd quarter 1971. From Lectric Limited. $75 plus $10 shipping. Clothes pins: stolen from the wife's laundry room Binder clips: stolen from the kids' homework notebook. Last edited by njsteve; 01-31-2013 at 09:57 PM. |
|
#8
02-01-2013, 03:24 AM
|
||||
|
||||
|
Thanks Steve for taking the time to photograph and post your progress!! Looks good!
__________________
1966 GTO Vert automatic. 1969 CR Judge Ram Air III 4sp Pattern Car. 1969 GTO standard 350HP TH-400. 2006 GTO Phantom Black 6spd. 1972 Formula 455HO Ram Air. 1976 LE Trans Am 50th Anniversary Edition with T top. 1976 Formula 350. 1977 Grand Prix Model J 350. 1978 Trans am 400 Pontiac. 1979 Trans am 403 Olds. 1968 Olds 442. 1971 TR6. |
|
#9
02-01-2013, 05:49 PM
|
||||
|
||||
|
Here is the 1112203 (1973) distributor all back together with the new wires and octopus installed.
I checked the resistance of all the plug wires with an ohm meter and they are the same as when they were single wires with the old boot style terminals, so nothing was affected by the transplant.   Here's a question for any unitized experts out there: Both of my coils have this strange "hammertone" black finish on them. Is this how it should look? Or should it be gloss black like the NOS coil packs I have seen. 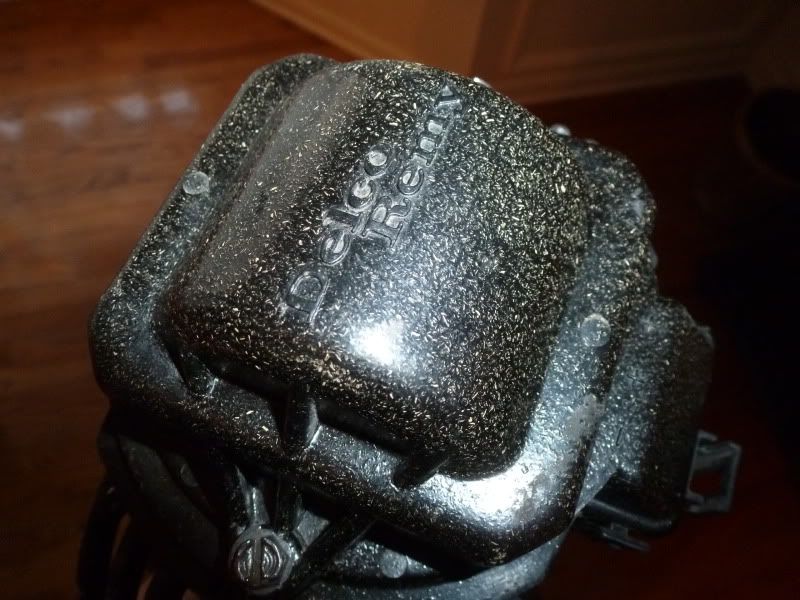
|
|
#10
02-10-2013, 12:25 PM
|
||||
|
||||
|
I got a Valentines Day gift from one of the Yenko.net members up in Ontario who was able to get the Ontario ownership search done through the DMV up there.
You have to have a Canadian driver's license to purchase the search. It costs $20. Also note how it shows the word "VOID" all over the document when you scan or copy it. The actual document has an intricate green watermark that covers the entire page. Neat stuff! It shows the attorney William Nursey being the listed owner as of January 4, 1973. So it looks like he put it in his own name after only one year and not after the three year lease expired, as I had thought before. Maybe a perk of his position as a partner in the law practice? I also shows the second owner James Robinson, having purchased it from WIlliam Nursey on July 4, 1985. As the prior research indicates, Robinson put on the NOS quarters and painted the car and then sold it to the late owner in British Columbia in the summer of 1986. That man's widow then sold it to Grant in 2011, who sold it to me in 2012. I have tried to locate both gentlemen but have come to a dead end. William Nursey is listed as a General Counsel for London Life Insurance Co. in London Ontario, although the date of that info is several years old. I called their General Counsel's Office and they did not have him listed as an employee. He may have passed on several years ago. James Robinson's Ontario phone numbers are disconnected from the old Hemmings ad listed previously in this thread as well as numbers from my old paperwork.  
Last edited by njsteve; 02-10-2013 at 12:54 PM. |
|
#11
02-14-2013, 12:08 PM
|
||||
|
||||
|
I've been talking with the guys at ECS Automotive and they gave me some good news yesterday about reproducing the correct air filter decal for the Ram Air air cleaner:
"Hello, Steve We will be making the RQ decal. They will be offered at regular price. It could take up to a few months until they are ready. I have you on a list to call once they are ready to sell. Thanks, Charlie ECS Automotive Concepts" If you are interested in one, feel free to drop them a line so they have an idea of the interest in this item. |
|
#12
02-14-2013, 07:53 PM
|
||||
|
||||
|
Do they have a sample for the reproduction?
|
|
#13
02-14-2013, 10:24 PM
|
||||
|
||||
|
They are doing it from the photos we have been posting of original decals, if someone has a perfect specimen, that would help, too.
|
|
#14
02-15-2013, 07:13 AM
|
||||
|
||||
|
They know the ones I send are always washed out. I've always had to gently clean them to remove old paint. I'm sure back in the day, when a trade in came in they got treated to rattle can clean up. They have this one I sent. And, they always say too, they can't do them from photos.
|
|
#15
02-17-2013, 12:48 PM
|
||||
|
||||
|
They seemed happy with these. I guess since they have the other 1972 decals, that the only difference is the part number for this application.
|
|
#16
02-17-2013, 12:54 PM
|
||||
|
||||
|
I guess they're just a little stubborn with me. Charlie did say a summer release.
|
|
#17
02-17-2013, 02:01 PM
|
||||
|
||||
|
I've been doing some more hunting and found some NOS stuff for the unitized project. I located an NOS ignition module, and NOS distributor cap housing and an NOS coil (which is on the way at the moment).
I also found another remanufactured unitized distributor at an online auto parts store and when I opened the box it turned out to actually be a 1972 1112127 (455 non-HO) with a 1K13 date code. So that is as close as I'm going to get to a 1112133 at the moment. And seeing that I only spent about 1/8 of the cost of a 1112133 for it, I was quite happy. 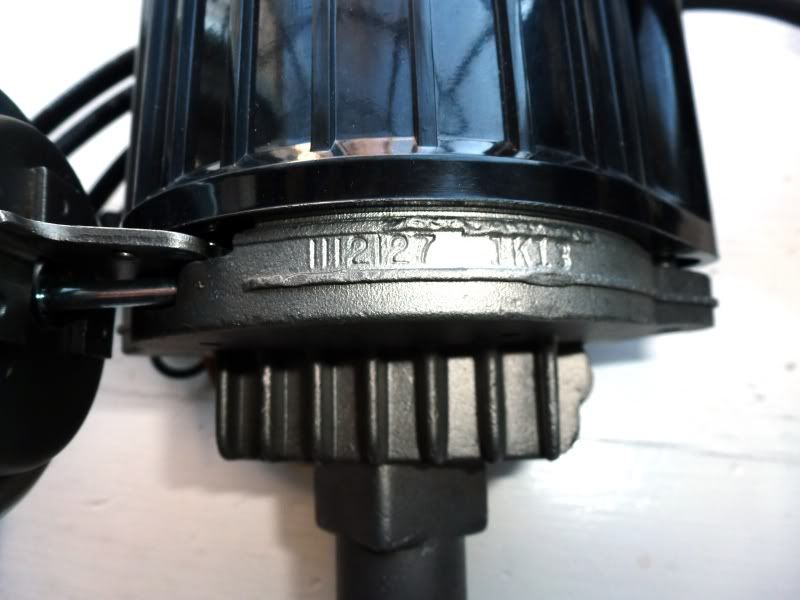 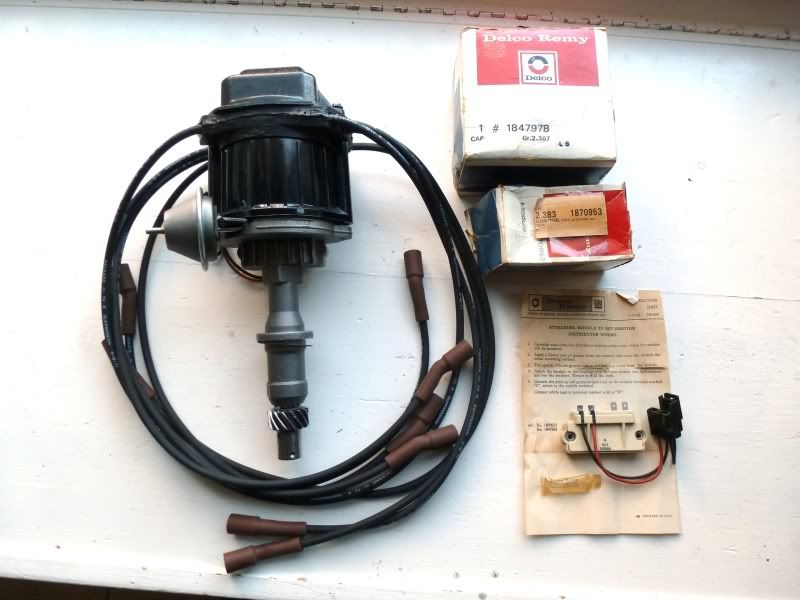 Here's the instructions with the NOS control module. It even had the little tube of heat-sync grease still in the box. 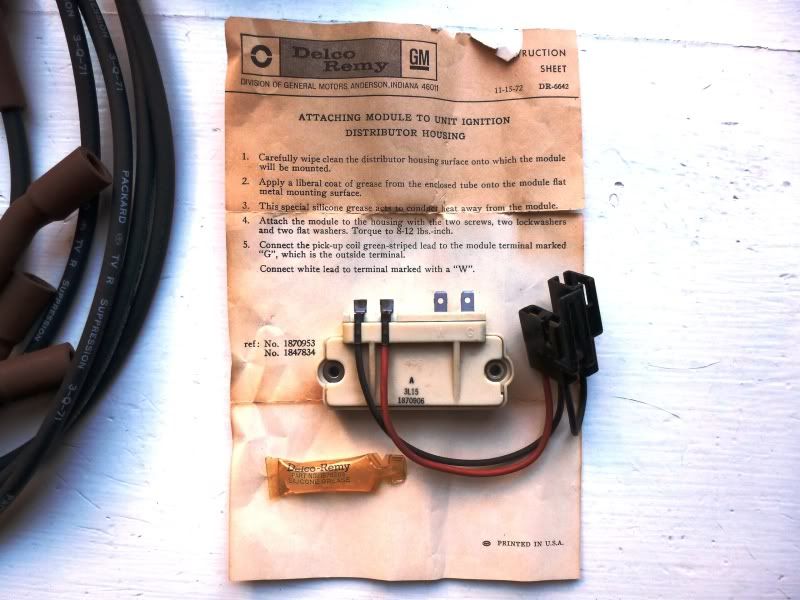
|
|
#18
02-22-2013, 09:56 AM
|
||||
|
||||
|
The NOS coil pack arrived yesterday. There is a slight difference in finish from the original which has a somewhat visible fiberglass grain texture and the slightly glossier NOS piece which is still dated from late 1971. So maybe the gloss gets worn away after the electrical heat from usage.
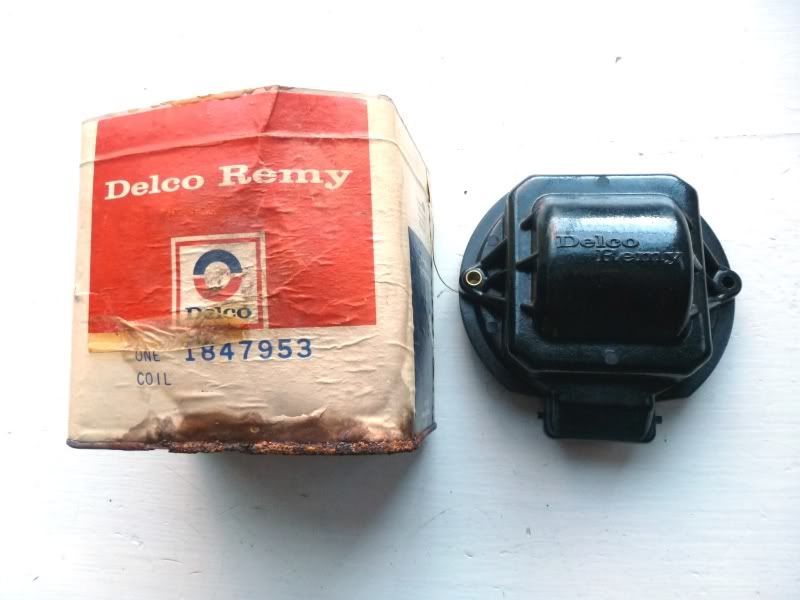 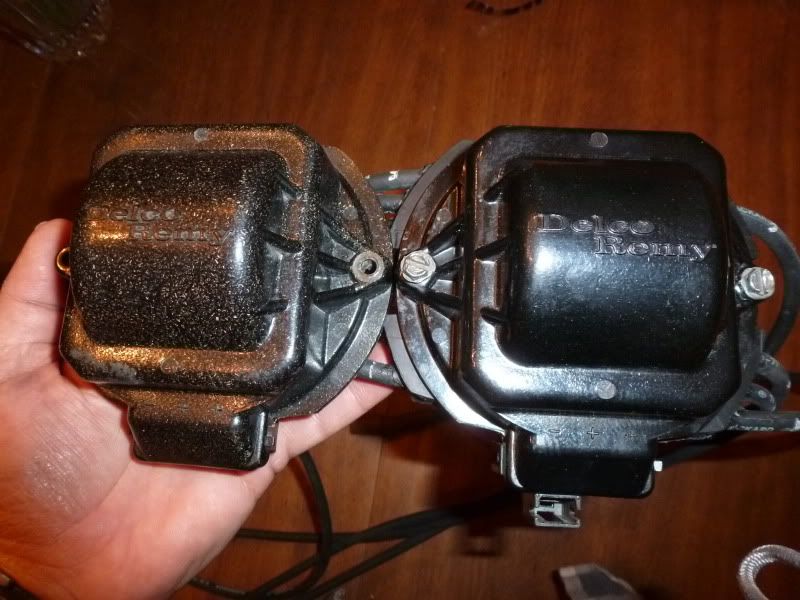
|
|
#19
03-02-2013, 03:22 PM
|
||||
|
||||
|
Steve, how did you get the Bowie terminals out of the harness without boogering them all up? I've pushed some out, but it marrs up the end some. I think a hair dryer may help losen the hard rubber enough to get them out easier. Then on installation, did you just push them back thru?
__________________
Pat Brown |
|
#20
03-02-2013, 03:40 PM
|
||||
|
||||
|
I used a small needlenosed pliers to grasp and gently push the bowties up while gently rocking the attached wire and terminal. Do all of this while the octopus is immersed in soapy, hot water. Dont use WD40 because it will prevent the adhesive from sticking later.
The bowties are soft aluminum and get scratched easily by the needlenose pliers. I gently sanded them smooth before attaching them to the new wires. |
| Reply |
|
|
The PY Online Forums is the largest online gathering of Pontiac enthusiasts anywhere in the world. Founded in 1991, it was also the first online forum for people to gather and talk about their Pontiacs. Since then, it has become the mecca of Pontiac technical data and knowledge that no other place can surpass.







 Hybrid Mode
