


| FAQ |
| Members List |
| Social Groups |
| Calendar |
| Search |
| Today's Posts |
|
#401
 08-15-2012, 09:51 PM
|
||||
|
||||

Finally got the car back today after the rear frame rail repairs which took a lot longer than expected. (surprise!). So at least the structural fix is done. I'll save the trunk drop offs and rear outer wheel house repairs for the winter when I pull the motor to regasket it.
Here are some shots of the frame repairs taken by the bodyman: The underside of the trunk floor once driver's side frame section was removed. Looks very clean. 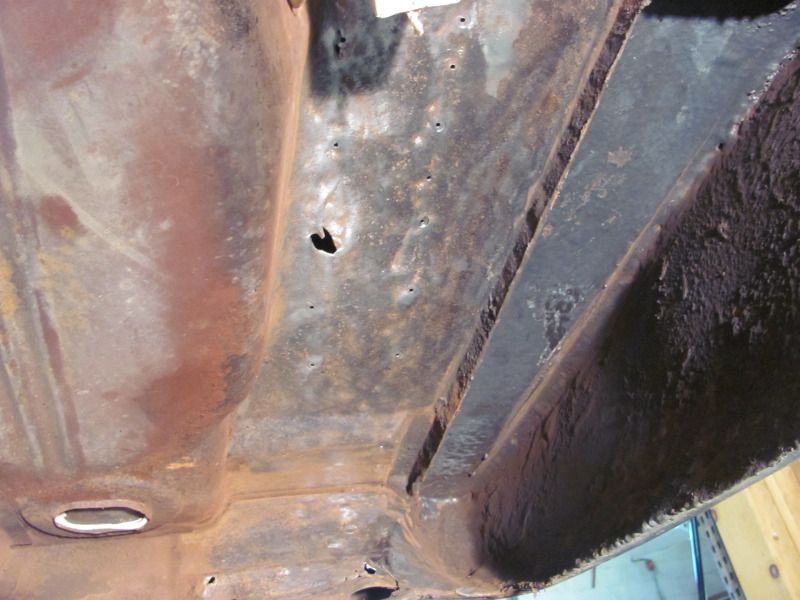 And the replacement driver's side rail section being trial fitted: 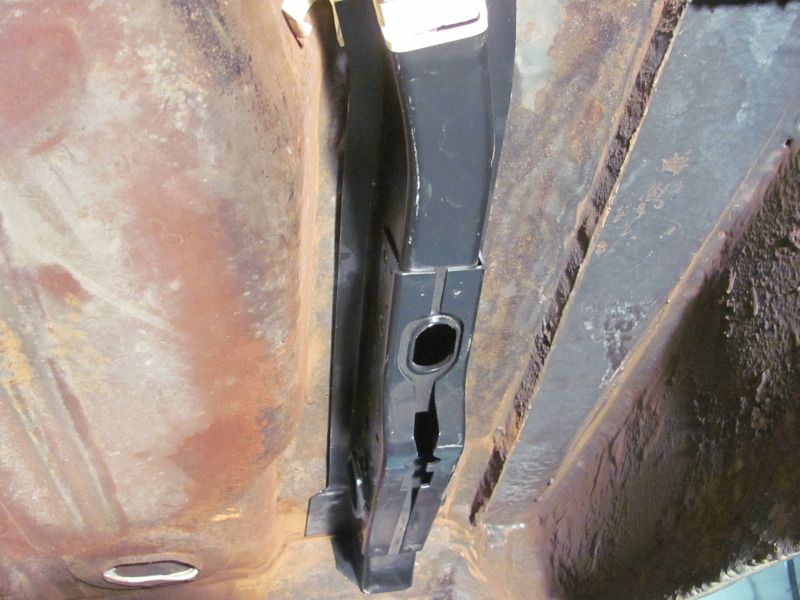 He used leftover sections of the new rail to form inner braces to weld through the rails, to. This way the rails arent just butt welded end to end. He did this for all the frame sections. 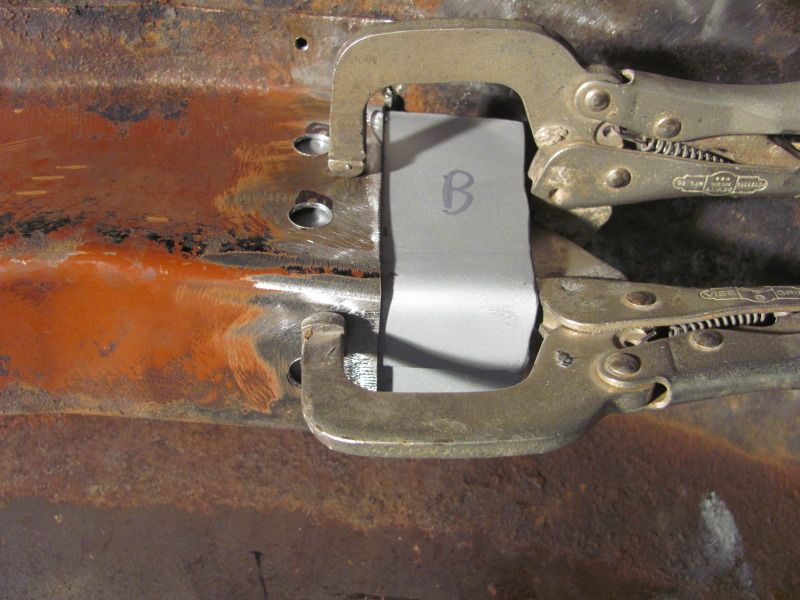 The pass front rail with the welds all ground down: 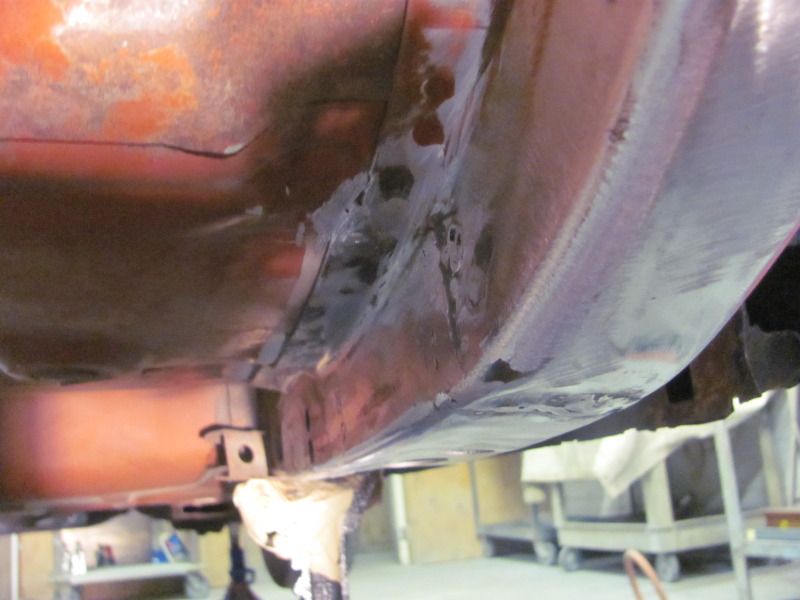 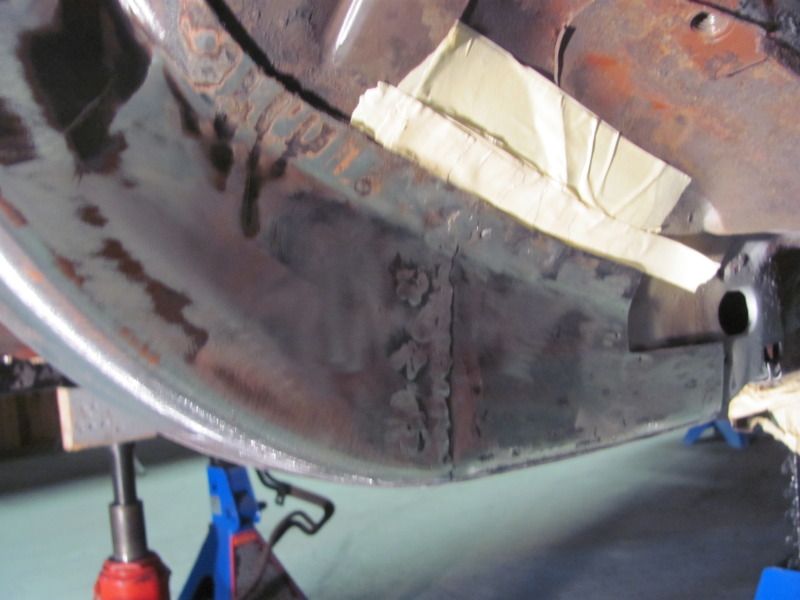 And after some body filler was applied:  Masking off for painting (actually the red oxide primer). 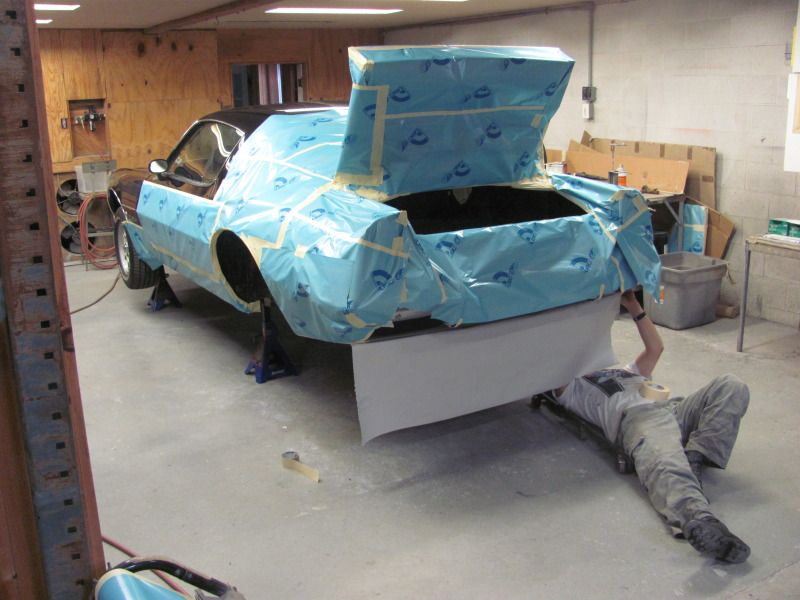
Last edited by njsteve; 08-15-2012 at 10:01 PM. |
|
#402
08-15-2012, 10:51 PM
|
||||
|
||||
|
Looks good, can't wait to see it primered
__________________
1973 Formula 400 4 spd 04C build date Norwood assembly plant. |
|
#403
08-16-2012, 11:31 AM
|
||||
|
||||
|
Looks great! going for the DPLF74 Steve?
|
|
#404
08-16-2012, 12:13 PM
|
||||
|
||||
|
Wow, some real surgery going on. Steve are you going to repaint the car, or leave it as is? Progress on the car looks great!
__________________
69 Judge RAIII 4SP 2ND OWNER 63 Catalina 421HO 4sp 66 GTO Conv 4sp 73 Trans Am 455 4sp http://www.sdperformance.com/ Drag racing. An adrenalin rush like no other. It felt like going into combat, tasting your first beer, and losing you virginity, all in about 8 seconds. |
|
#405
08-16-2012, 12:58 PM
|
||||
|
||||
|
Even nicely kept survivors need work. Well done as comprised structural work needs to be repaired.
__________________
Mike/Illinois |
|
#406
08-16-2012, 03:36 PM
|
||||
|
||||
|
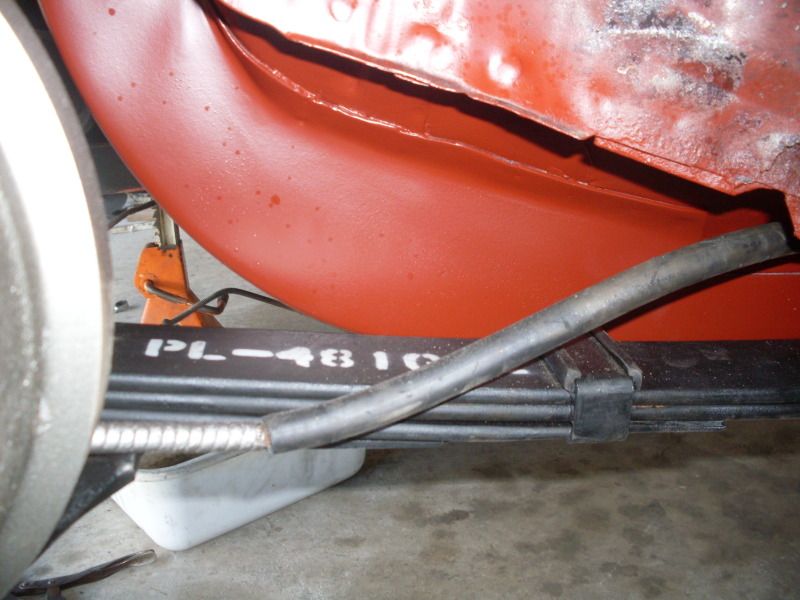
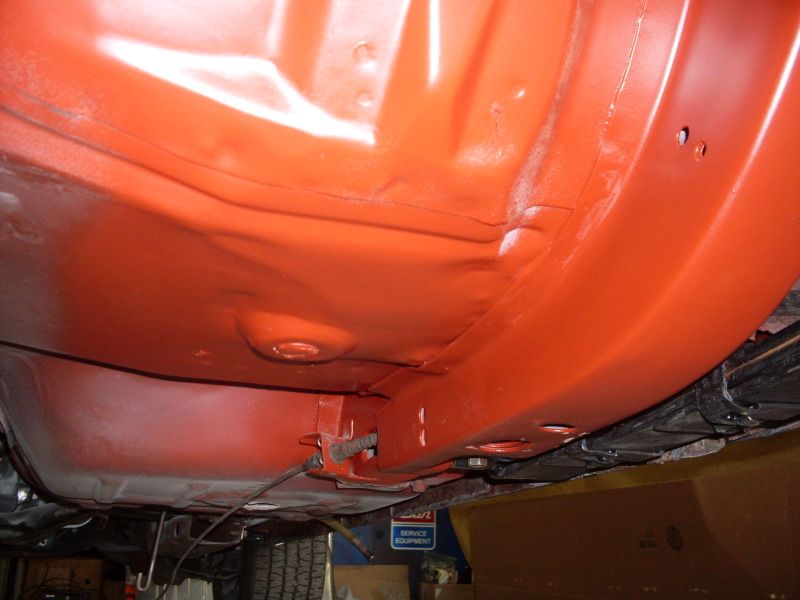
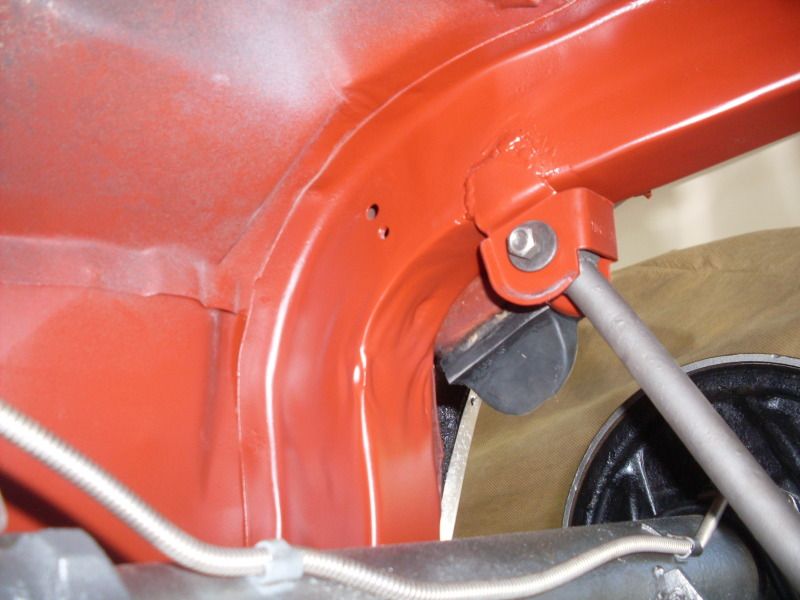
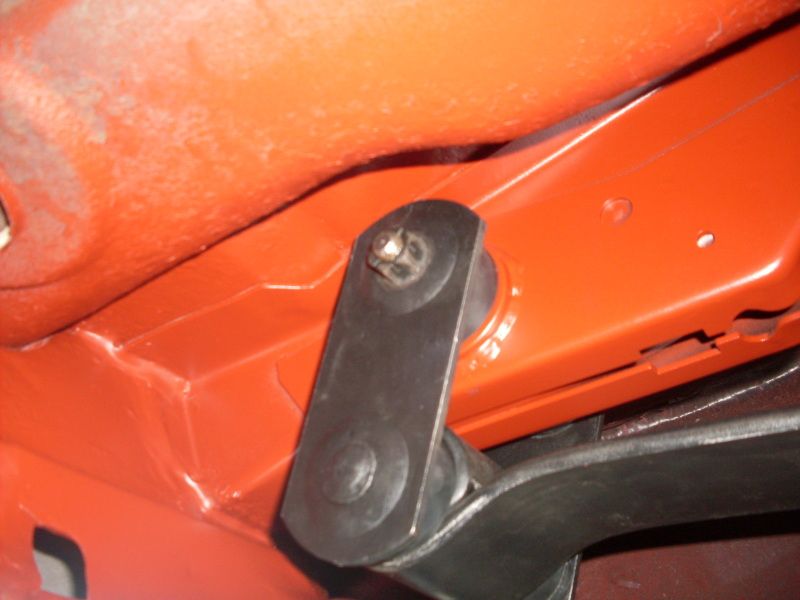
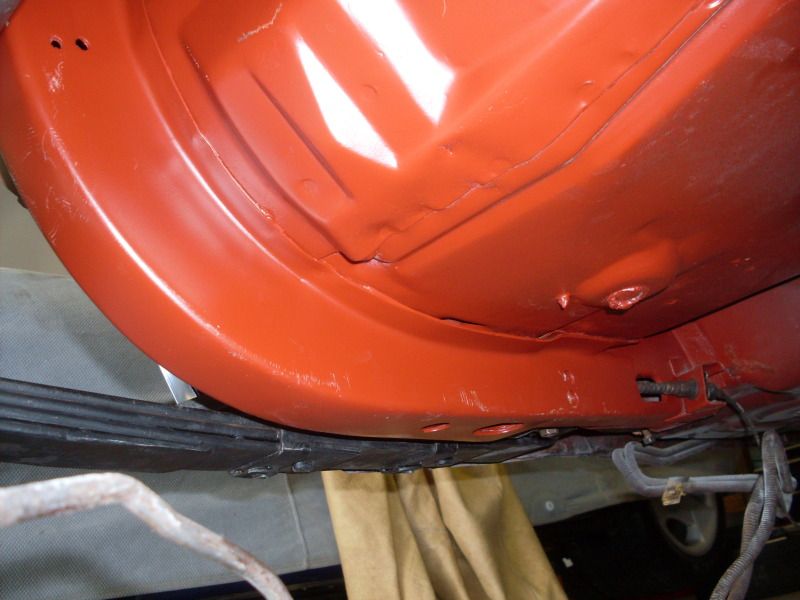
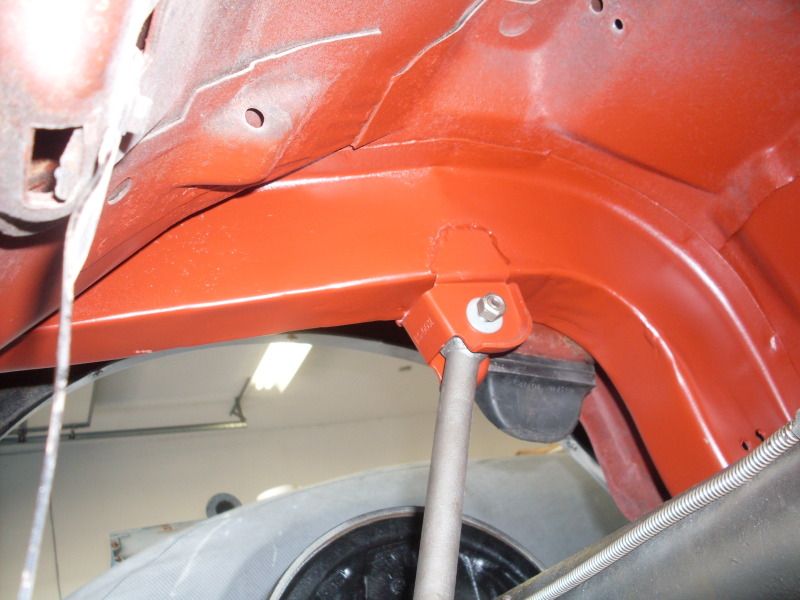
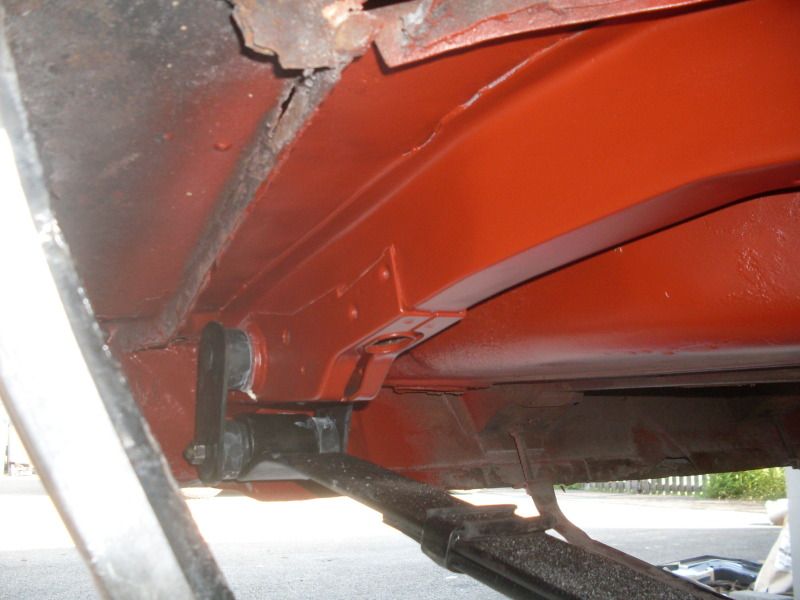
No plans for paint in the near future. Maybe next year. I'm just getting the needed structural repairs done. Can't do anything else until you have a solid foundation. Here are the finished repairs in red primer. After these baseline photos were taken I got out the black spray can and duplicated the original black overspray on the frame rails. I did it just as sloppy as the Norwood assembly plant guys did.
Last edited by njsteve; 08-16-2012 at 03:43 PM. |
|
#407
08-16-2012, 03:48 PM
|
||||
|
||||
|
looks great!!
|
|
#408
08-16-2012, 04:03 PM
|
||||
|
||||
|
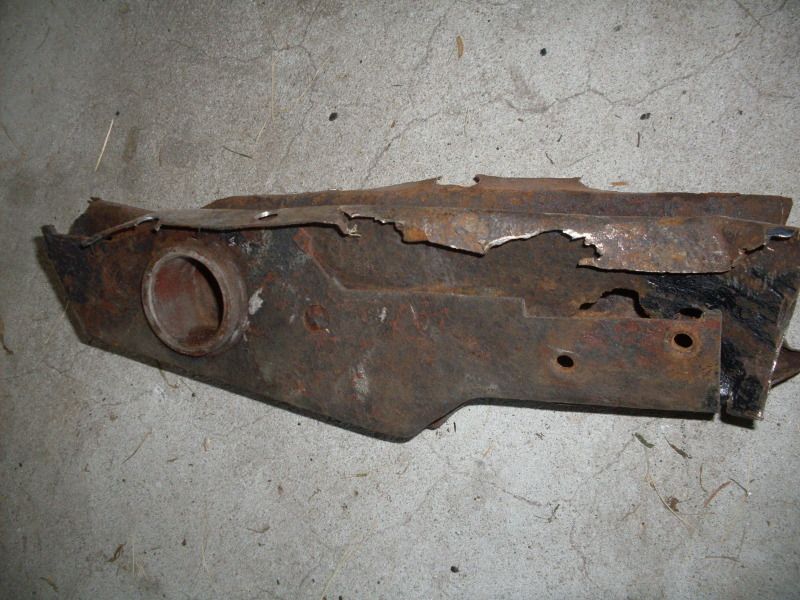
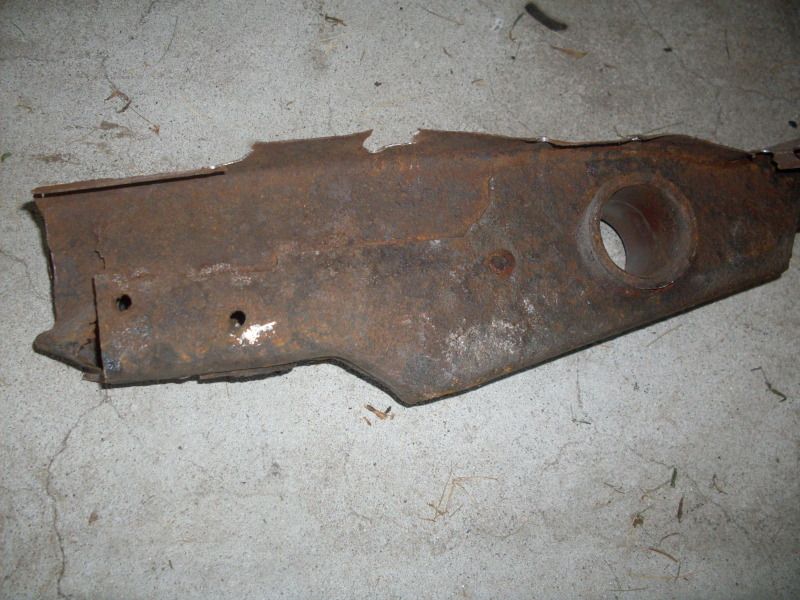
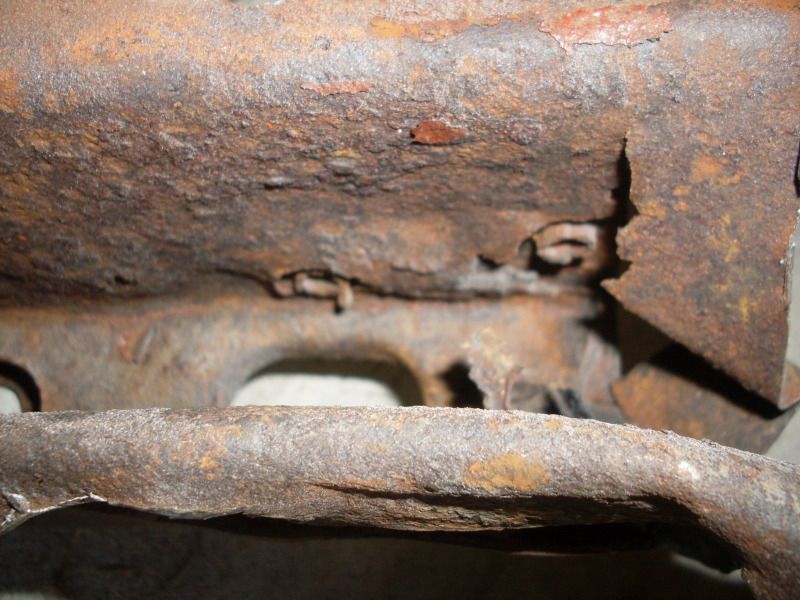
And in case you'r wondering what the old rail pieces looked like, here you go. Both sides were swollen and corroded where the two panels were welded together by the exhaust hangers. A real moisture trap, just like the lower sections of the rails by the front leaf spring perches.
   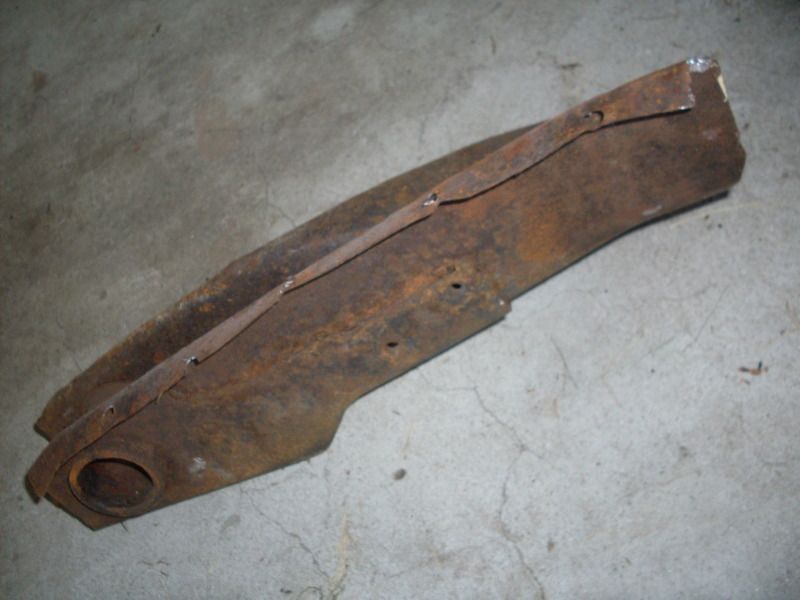 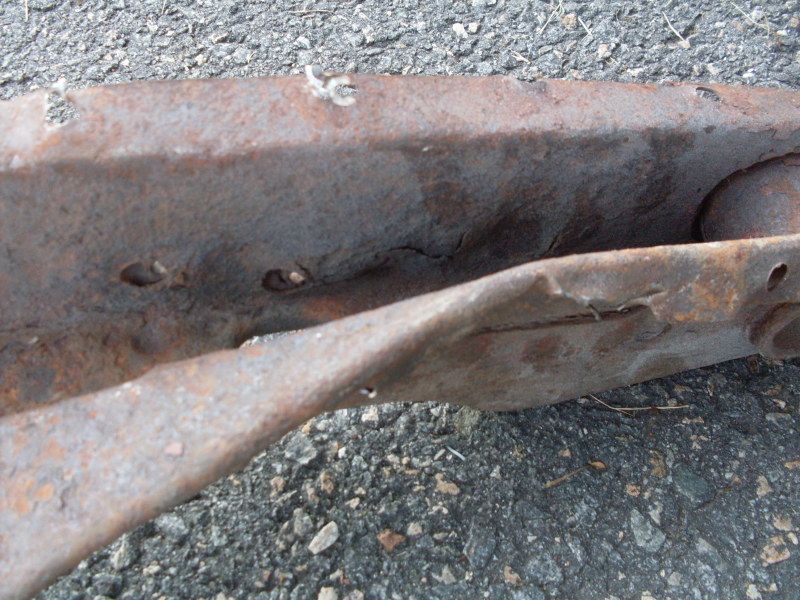 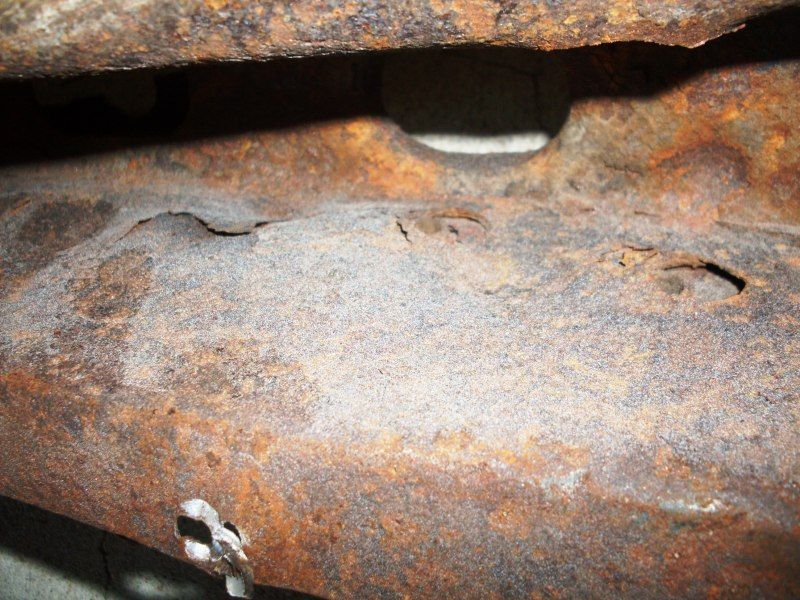 I'm glad I got the full rails. Here's what's left, and some of the rusty, mangled front lower rail remnants: 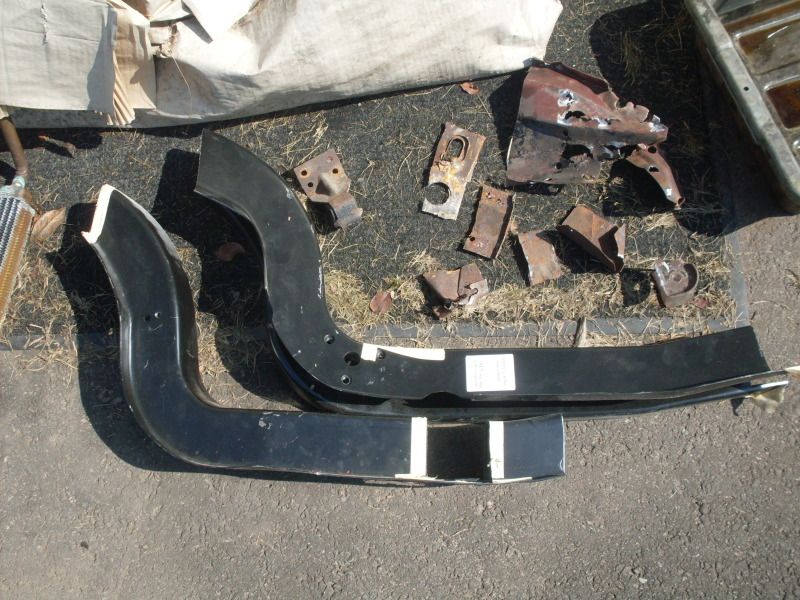
|
|
#409
08-16-2012, 04:23 PM
|
||||
|
||||
|
Gee, is it Gardner time??
|
|
#410
08-16-2012, 08:55 PM
|
||||
|
||||
|
Quote:
|
|
#411
08-16-2012, 10:33 PM
|
||||
|
||||
|
Nice work....looks very clean and original.
__________________
Regards, Leigh Pontiacs I’ve owned…. 1960 Laurentian 283 1963 Laurentian 283 1976 Trans Am 400 1977 Trans Am 400 1951 Chieftain Flat head 6 1967 Firebird 400 convertible 1967 Firebird 400 coupe 1979 Trans Am 403 1971 Formula 455 (clone) 1969 Firebird 350 1968 Firebird 428 manual. Sydney, Australia |
|
#412
08-16-2012, 10:36 PM
|
|||
|
|||
|
Looks good Steve. What's the setup with the two fans in the plywood, at the back of your garage?
|
|
#413
08-16-2012, 10:37 PM
|
||||
|
||||
|
Really nice work there Steve. I am about to go through a LOT of work on the rear of my '73. Might be replacing almost everything, new 1/4s with new inners, new dropoffs, new trunk pan is already welded in, might also have to replace the tail panel. After looking through your thread I think I am going to do something similiar with the frame rails. My '73 has almost identical damage to yours. Thanks for taking the time to post the detailed pics and walk us through the process.
__________________
Jimmy www.firebirdgallery.com 2002 WS6 M6 Trans Am - original owner 1973 Trans Am 455/4-speed 1971 Formula 400/400 1969 GTO 400/400 - 3rd owner 1968 Firebird Convertible 350/200R4 POCI - AAC |
|
#414
08-17-2012, 06:38 AM
|
||||
|
||||
|
Quote:
|
|
#415
08-19-2012, 10:08 PM
|
||||
|
||||
|
Got the Gardner exhaust in today, changed the oil and took her out for a 60 mile road test. She ran great and rides beautifully. Of course the rear main seal started dripping from all those years of sitting. Typical...
I would love to know what is inside the engine when it comes to pistons and head work since preignition was rearing its ugly head at part throttle even with good gas. I guess this winter I will find out when I pull the engine to reseal everything. Here are a couple shots of the exhaust and the repainted frame rails. The new KYB shocks came in a nice GM shade of vintage GM silver grey. 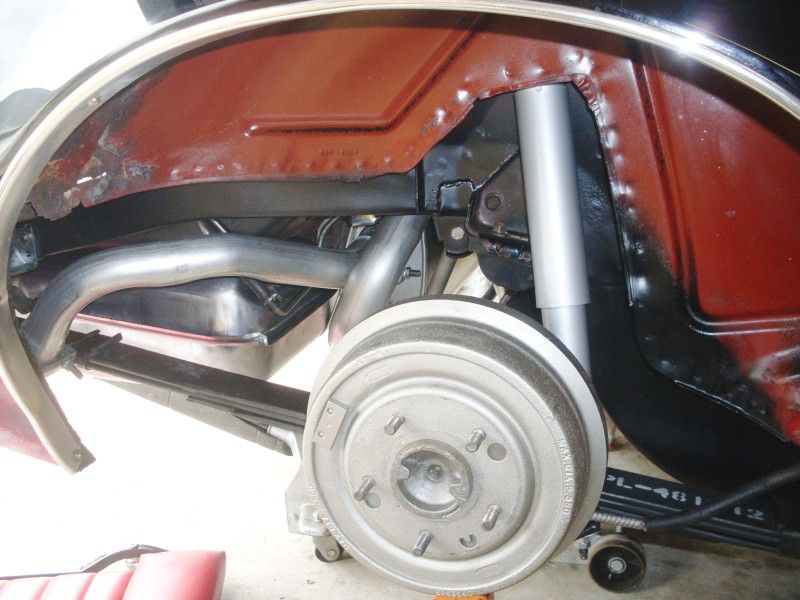 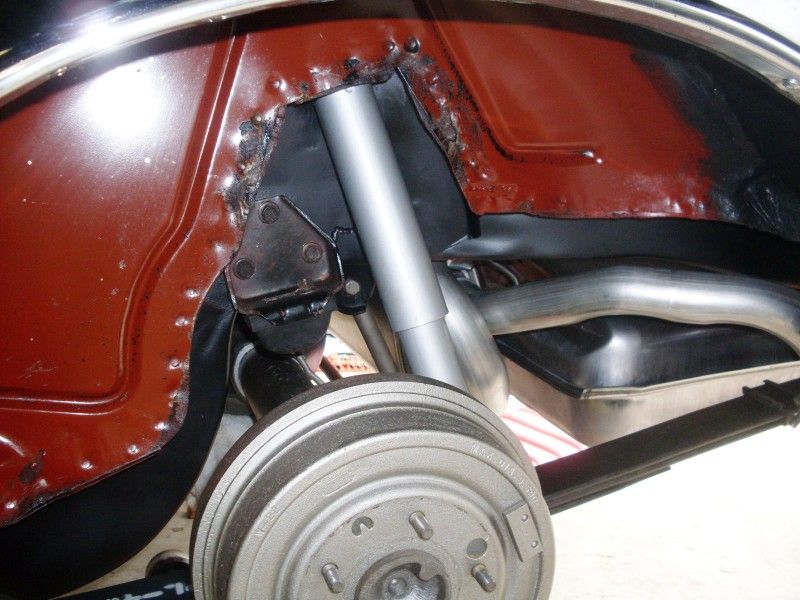 Oh, and the rear springs that I had de-arched one inch sit very nicely now on the 235/60x15s (the radial equivilent of the F60x15). They now match the ride height of the original springs in my T/A. The next project is installing the special front coil springs I had made with a one-inch drop from the stock spec. Right now the front is higher than the rear by about 3/4". 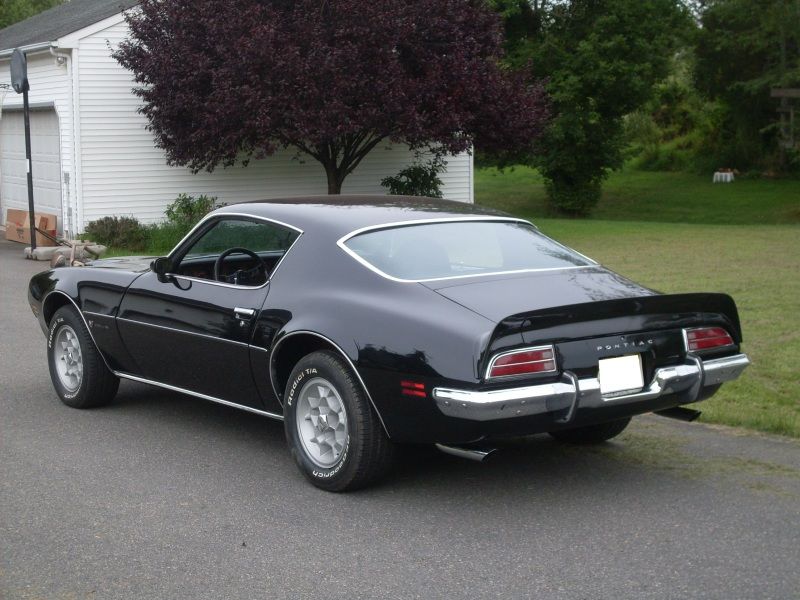 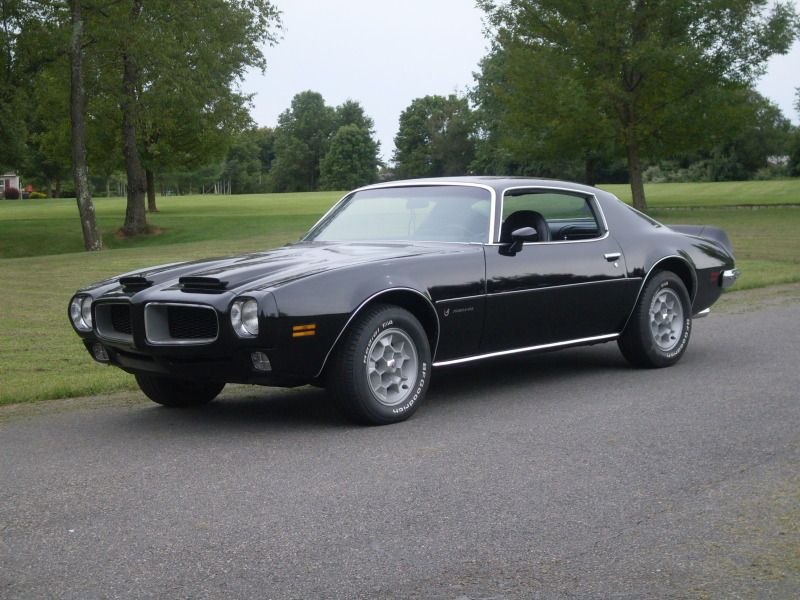
|
|
#416
08-19-2012, 10:22 PM
|
||||
|
||||
|
Ran into a dilemma yesterday. I was installing the new repro bleeder master cylinder and couldn't get the combination valve to reset in order to get fluid to the back brake circuit. Driving the car onto the trailer with the rear brake line unhooked (though plugged) set off the BRAKE indicator light.
I tried everything: cracking a front bleeder and keeping the rears shut, then stepping on the brakes only resulted in the dash light turning out, indicating that the valve reset, but it must be internally blocked since the reset pin was still sticking out and no fluid was moving the the rear. I then put a plug into the rear circuit port of the valve to provide something for the fluid to press against and build internal pressure - once again the ligh would reset but no valve movement. Finally I just said the heck with it and removed the valve and put in a spare that I luckily had sitting on the shelf. Anyone have any idea how to reset the valve? I tried removing the indicator plug with the electrical lead from the top, and manually moving the slider valve in the tiny port it engages with, but no luck there either - the slider wouldn't move. Pushing on the metal indicator stem doesn't budge it either. 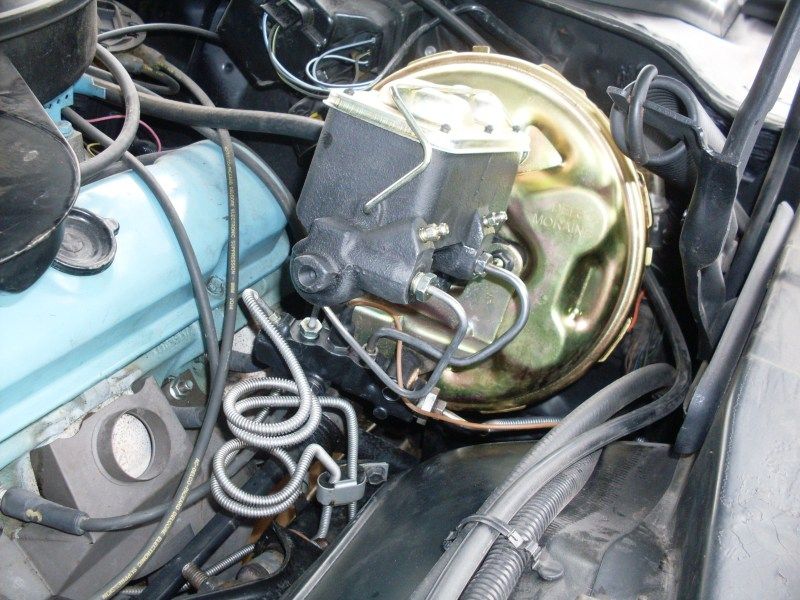 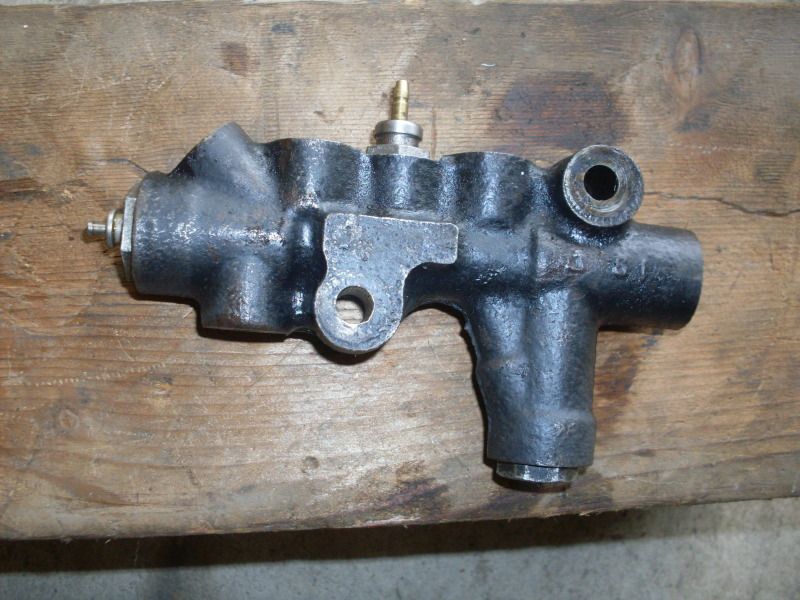 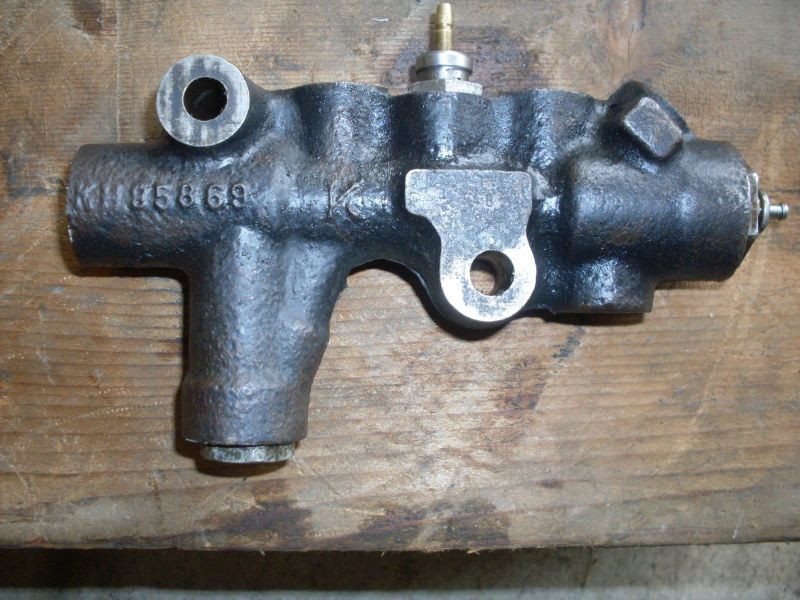
|
|
#417
08-19-2012, 11:34 PM
|
||||
|
||||
|
The prop valve has to "balance out" the pressure,( proportionally)The high pressure side will need to be "relieved" of some pressure to reset it..In your case, the front. Leave the back hooked up...
Open a bleeder on the furthest front caliper ( RF) on and push the pedal down until it gets to the floor, it may "click" at that point. THis usually works. These can get a ridge and get sticky If that doesnt work, close that bleeder and hit the brake pedal super fast. You may not feel it reset, youll have to keep checking. I have never been able to reset one on a bench, but have seen it done with equipment by a GM rep on a bench. PS found what I think are some nos short bleeders for your MC..pics soon..B |
|
#418
08-20-2012, 07:07 AM
|
||||
|
||||
|
Looking great Steve, thanks for the updates!
__________________
Some guys they just give up living And start dying little by little, piece by piece, Some guys come home from work and wash up, And go racin' in the street. Bruce Springsteen - Racing In The Street - 1978 |
|
#419
08-21-2012, 02:58 AM
|
||||
|
||||
|
Quote:
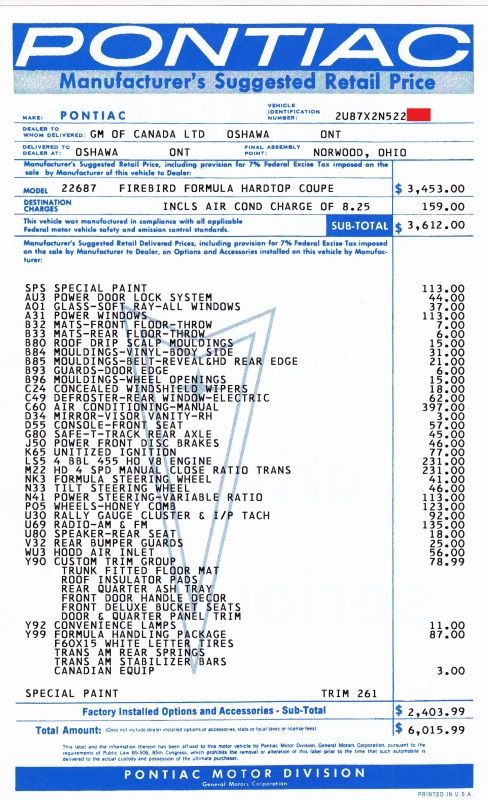
Example: I show the WU3 was $57.93 , yours is $56.00 ( even amount which is odd) V32 was $15.80 , yours is $ 25.00 (Even amount again) K65 was $78.99 , yours is $ 77.00 ( even again)( you are lower here) LS5 was $236.97, yours is $ 231.00 ( even again) Y99 was $ 89.52, yours is $ 87.00 Prices circa DEC 1971 Shouldn't the US sticker be just as all others, and the Canadian Sticker show how they screwed em on price?( ie higher prices) |
|
#420
08-21-2012, 09:49 AM
|
||||
|
||||
|
Very good point, Bruce. That was another of my problems with the repro - the prices were not correct. The one I posted above had some of my alterations, such as adding the $159.00 destination charge which was shown as $0.00 on the repro.
If you just happen to have a list of the correct prices for the US options I'd love to have them to revise this sticker. Also in 1972 Pontiac dropped the price of the Formula to $3,221 in the US but kept it at $3,453 in Canada, at the 71 price level, so I had to revise that as well. |
| Reply |
|
|
The PY Online Forums is the largest online gathering of Pontiac enthusiasts anywhere in the world. Founded in 1991, it was also the first online forum for people to gather and talk about their Pontiacs. Since then, it has become the mecca of Pontiac technical data and knowledge that no other place can surpass.




 Linear Mode

