


| FAQ |
| Members List |
| Social Groups |
| Calendar |
| Search |
| Today's Posts |
|
#841
 03-16-2013, 06:47 PM
|
||||
|
||||

I got the 1112127 unitized distributor back from Rocky, who set up the curve for me. (Thanks Rocky!). I installed it today and the car started right up. It actually sounds like its running smoother than with the HEI. The HEI had an old set of wires so it's probably the new wires helping things out.
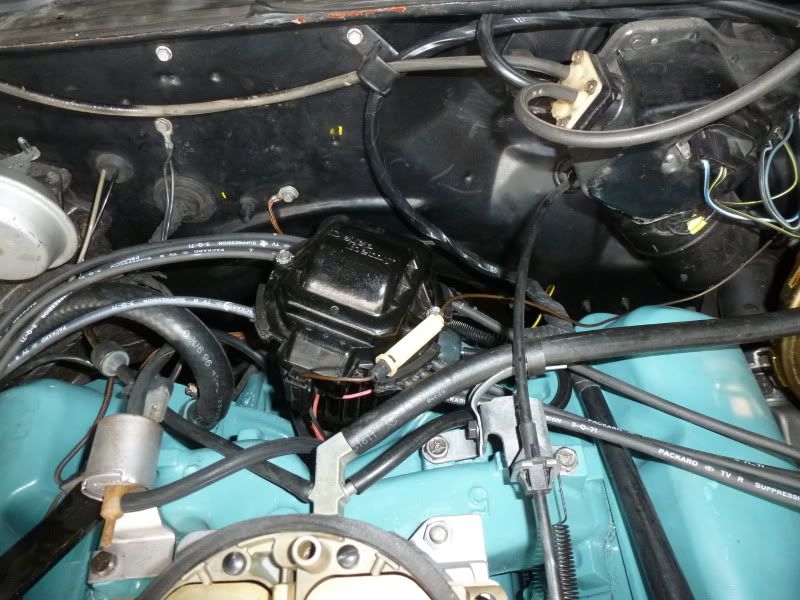 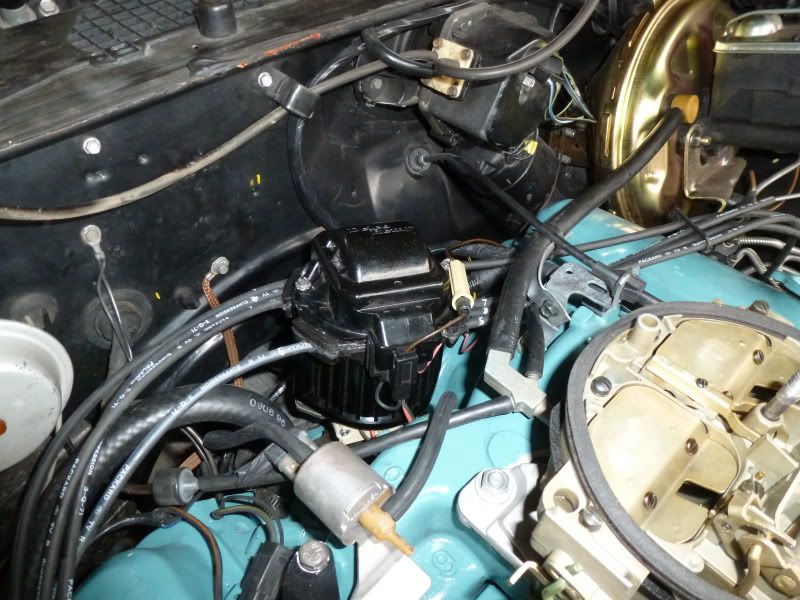 Unfortunately it is snowing outside at the moment so a test drive will have to wait a day or two... |
|
#842
03-24-2013, 12:06 PM
|
||||
|
||||
|
I've been playing at the Votech class and doing more cutting and welding. It's quite amazing what you can get done in three hours when you have a dropdead time to move it out of the shop and head home when the class is over. I spent one class cutting and trimming the bad section of the upper drop-off that mated up with the outer wheelhouse on the passenger's side. The seam between the two panels was soft so I elected to cut the seam out so I had an easier area to weld from (inside the trunk), instead of trying to recreate the mated area underneath the car which is blocked by the frame rail.
Here's the before shot: 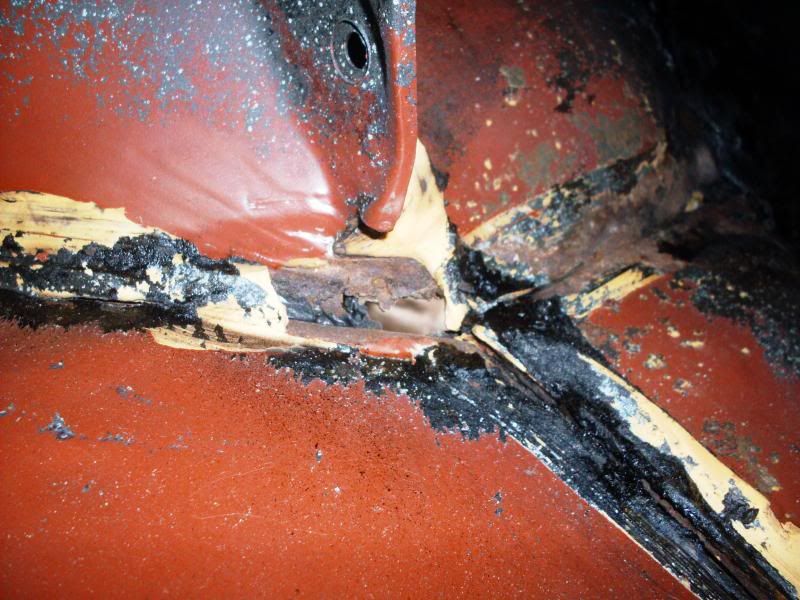 And after trimming: 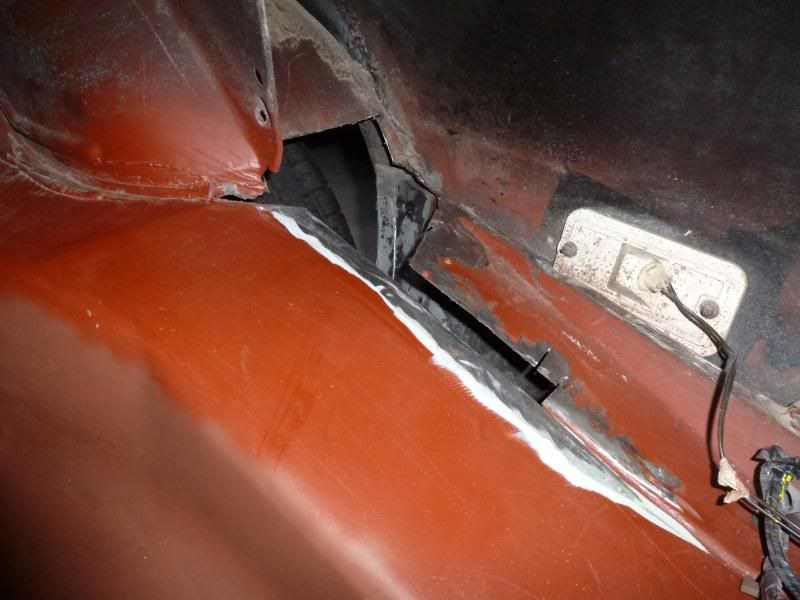 I used the upper portion of the drop off and an extra leftover section of flange and welded them together to pre-form the mated seam between the trunkfloor and the drop off: 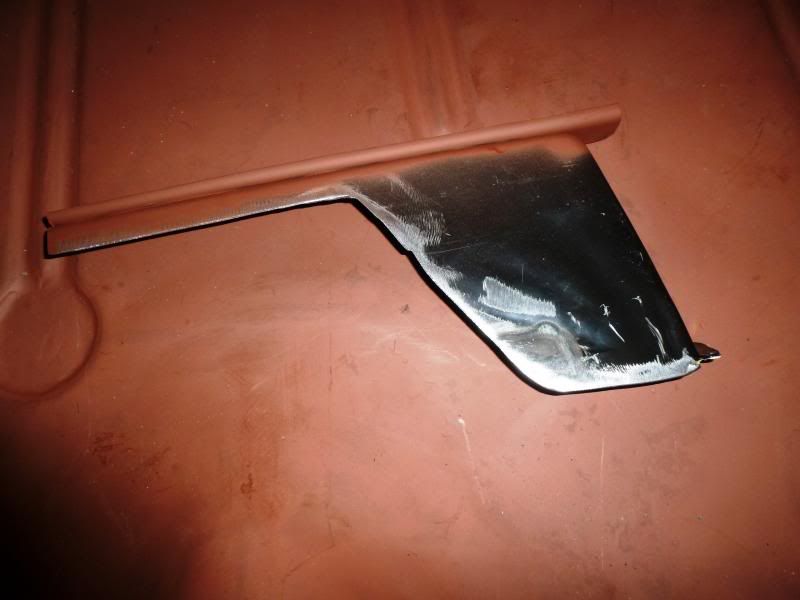 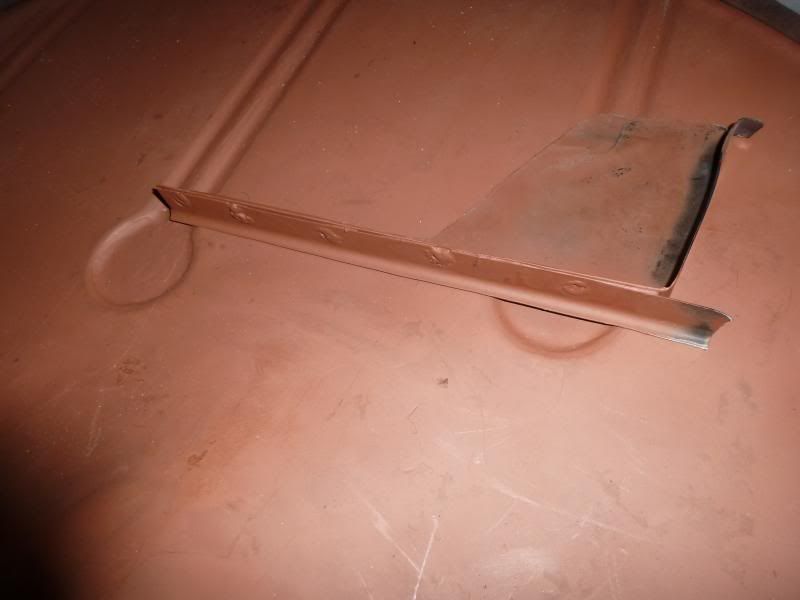 And here is how the replacement piece fits: 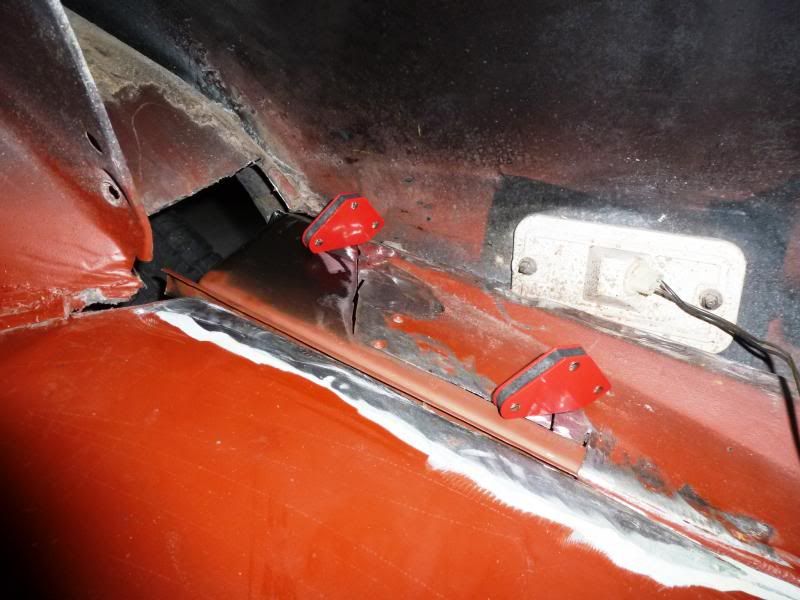
Last edited by njsteve; 03-24-2013 at 12:47 PM. |
|
#843
03-24-2013, 12:31 PM
|
||||
|
||||
|
The following week, I welded the replacement section in place and then grinded...a lot!
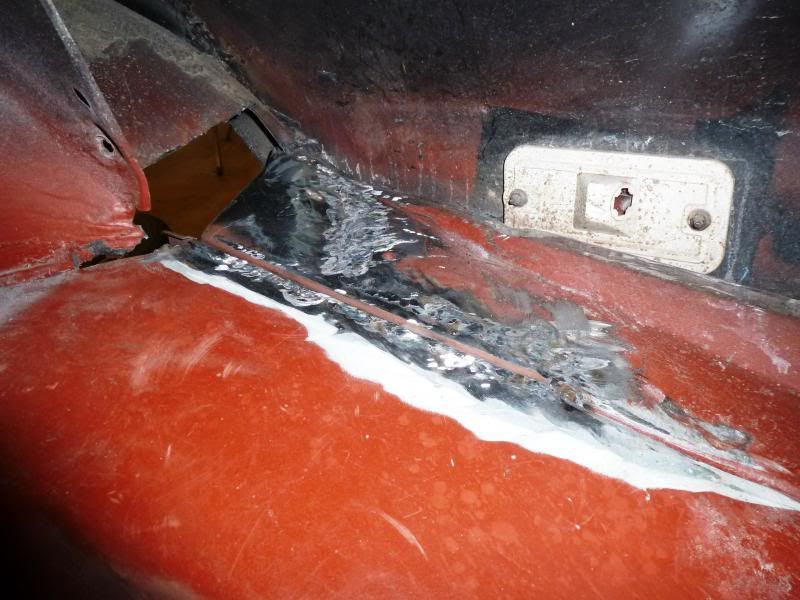 I also prepared the second replacement piece out of the aftermarket wheelhouse that I bought to serve as a donor supplier of repair sections. I also had to recreate a small section of the inner wheel house edge that the overlapping "flap" mates to. (All that crusty black stuff is old undercoating and will be scraped out of there soon). 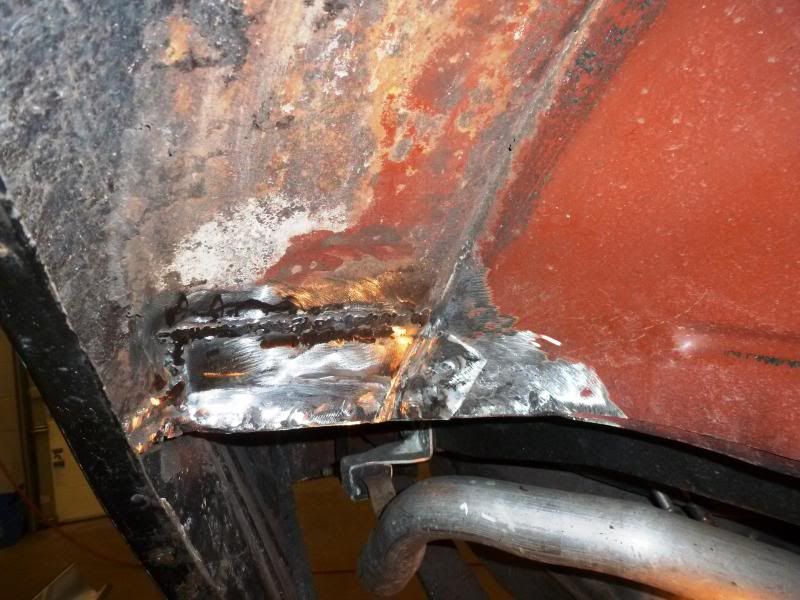 And here it is after some minor body work and filler: 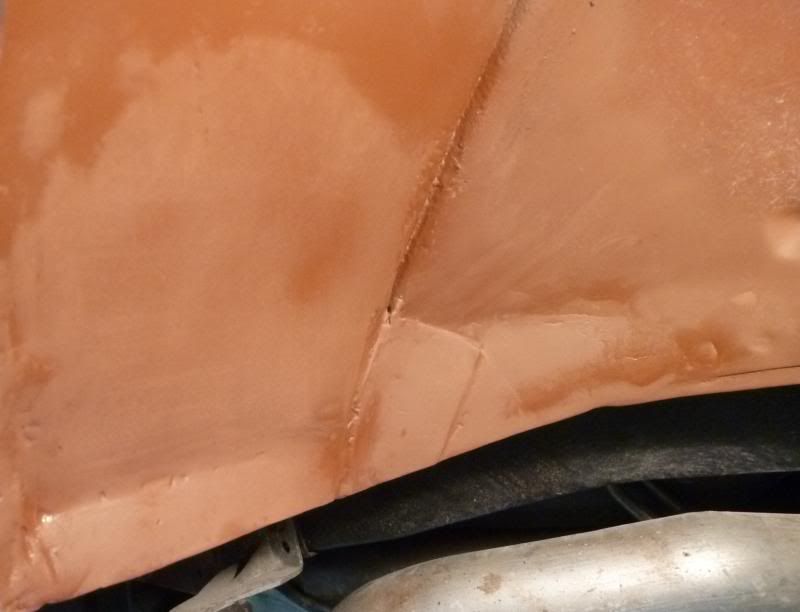 as compared to the opposite untouched side: 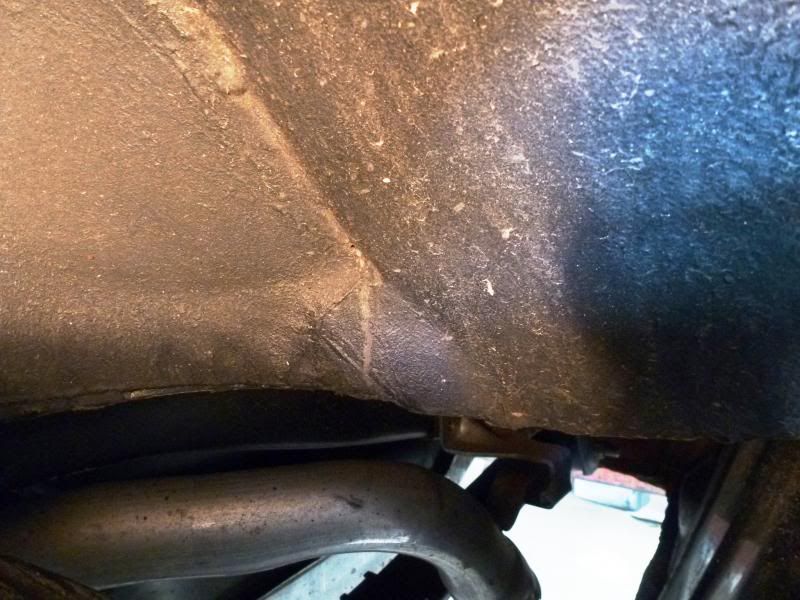
|
|
#844
03-24-2013, 12:41 PM
|
||||
|
||||
|
And after consulting my "before" photos and examining the trunk in my Grandma's '75 Firebird, I spent yesterday using two tubes of seam sealer to replicate the horribly gooped up application of the factory seam sealer. After letting it set overnight, I then used some MEK solvent and a brush and nitrile gloved fingers to replicate the original look as close as possible. No matter what I did, it still looked "too nice" to be factory applied.
Here's Grandma's '75 Firebird trunk: 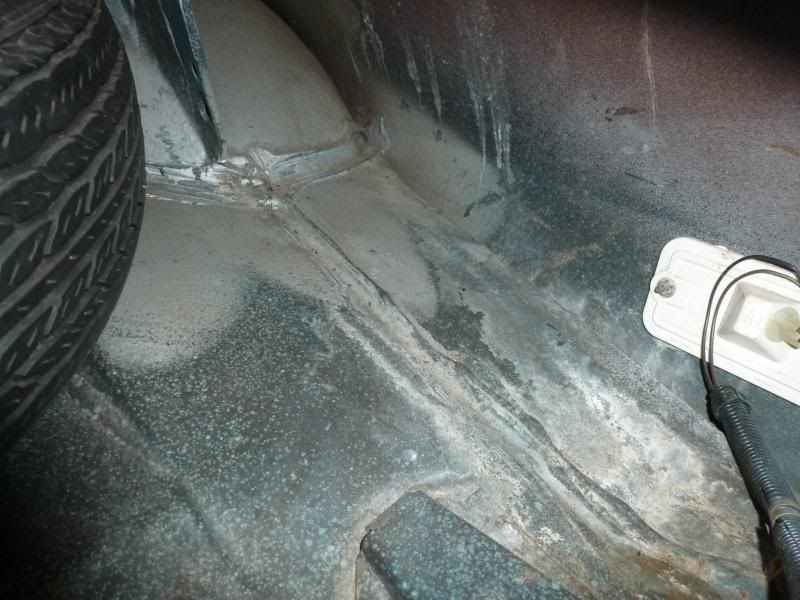 and the '72:  And the driver's side, too: 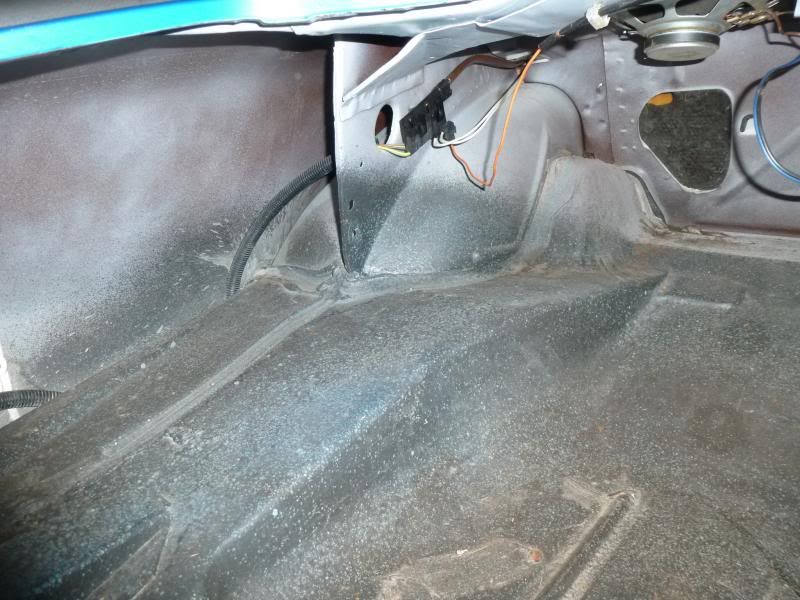 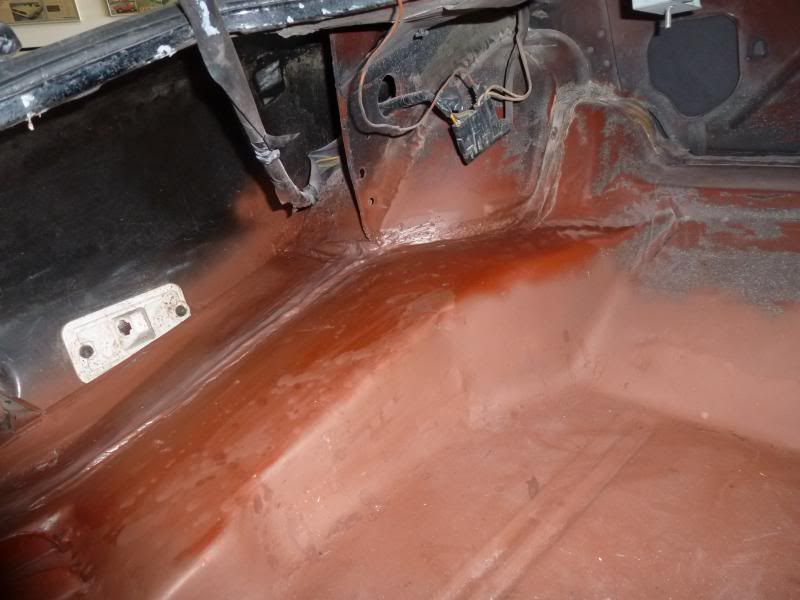
|
|
#845
03-24-2013, 02:27 PM
|
||||
|
||||
|
Steve I think you are doin a hell of a job man....Your attention to detail blows me away...love it....
__________________
 1973 Firebird Navajo Orange w/shaker,1973 400/461,1972 Intake SD CNC'd,1977 Q-Jet 800 CFM w/ Cliffs Kit,Tanks Inc PA4 255 Walbro intank pump ,-8an feed/return,RobbMc Regulator,RobbMc 40 micron filter,253 CFM 6x-8's w/H.S 1:5 Roller Rockers,SD Stump Puller H/R Cam 230/236 @.050 112 lobe separation 565/.570 lift,Crower Solid Rollers,28150 Hedman Headers,3" exhaust,full tailpipes,350 Turbo,9.5" 3200 Converter,3:42 gear,8.5 posi,C/E slide-alinks,Koni adj frt shocks,Best [email protected] Lookin for 11's 1973 Firebird Navajo Orange w/shaker,1973 400/461,1972 Intake SD CNC'd,1977 Q-Jet 800 CFM w/ Cliffs Kit,Tanks Inc PA4 255 Walbro intank pump ,-8an feed/return,RobbMc Regulator,RobbMc 40 micron filter,253 CFM 6x-8's w/H.S 1:5 Roller Rockers,SD Stump Puller H/R Cam 230/236 @.050 112 lobe separation 565/.570 lift,Crower Solid Rollers,28150 Hedman Headers,3" exhaust,full tailpipes,350 Turbo,9.5" 3200 Converter,3:42 gear,8.5 posi,C/E slide-alinks,Koni adj frt shocks,Best [email protected] Lookin for 11's
|
|
#846
03-24-2013, 08:30 PM
|
||||
|
||||
|
Looking good Steve. I think the factory helped these cars rust there by putting gobs and Gobs of sealer, and then the undercoating was thick underside, yours looking great!
|
|
#847
03-24-2013, 08:33 PM
|
||||
|
||||
|
Youre right, the rusty spots on the wheel house were all where the heaviest accumulation of sealer was - it holds water like a sponge.
|
|
#848
03-25-2013, 06:09 AM
|
||||
|
||||
|
That looks terrific!
__________________
Regards, Leigh Pontiacs I’ve owned…. 1960 Laurentian 283 1963 Laurentian 283 1976 Trans Am 400 1977 Trans Am 400 1951 Chieftain Flat head 6 1967 Firebird 400 convertible 1967 Firebird 400 coupe 1979 Trans Am 403 1971 Formula 455 (clone) 1969 Firebird 350 1968 Firebird 428 manual. Sydney, Australia |
|
#849
03-30-2013, 10:14 AM
|
||||
|
||||
|
I finished up the bodywork and prep on the driver's side trunk drop-off. In order to reproduce the original heavy body shutz sound deadener I used a couple cans of spray-on bedliner instead of undercoating. It worked very well as long as you spray it from at least a foot away to allow it to hit the panel in a dryer state. You don't want to spray it on wet. It will look too smooth at a minimum, and will all "landslide" off the panel if it is too wet.
Here is the original drop-off from my 1972 Trans Am that was built a week before the Formula at Norwood:  And the finished result:  It's a helluva lot better than the way it came: 
Last edited by njsteve; 03-30-2013 at 10:41 AM. |
|
#850
03-30-2013, 10:23 AM
|
||||
|
||||
|
Looks good Steve, great job as usual.
__________________
1973 Formula 400 4 spd 04C build date Norwood assembly plant. |
|
#851
03-30-2013, 10:48 AM
|
||||
|
||||
|
The way it came looks a lot more aerodynamic. Nice work. I looked at a green 73 in MI about a year ago that had the same drop offs.
|
|
#852
03-30-2013, 11:32 AM
|
||||
|
||||
|
Quote:
:-) |
|
#853
03-30-2013, 04:50 PM
|
||||
|
||||
|
I got the trunk finished today. I spent a couple hours soaking the plastic tail lamp housings in PurpleStuff degreaser to remove the fossilized remains of that roofing tar/rustproofing that encased them. I also pulled the tail lamp wiring harness out and masked off the trunk area.
I first used some red oxide primer to spray a small area at the inner, tops of both NOS quarters because they were still in their original black E-coat, instead of red oxide dip primer. I then sprayed the areas that were going to get the trunk speckle paint with dark grey sandable primer. This really helped with the speckle paint coverage. I was able to do the entire trunk with one can of the Eastwood Trunk Paint, since the background dark grayish color was already there. To get the right finish I really stood back a ways to get the spray as dry as possible when it landed. I was spraying from outside of the trunk opening most of the time and I used small one-second bursts with the can until I got enough coverage to resemble the original speckle finish that is still remaining in some areas of the trunk, such as the trunk latch bulkhead. I think it came out reasonably well for a spray can job. Here's the original post pressure washing photo:  And today's results:   
Last edited by njsteve; 03-30-2013 at 05:01 PM. |
|
#854
03-30-2013, 05:21 PM
|
|||
|
|||
|
I used the same truck paint on mine and it looked great, until I sprayed the clear coat over it that I got with the truck paint. The clear coat really changed the appearance, it looks too flat now. If I were to do it again, I would try the Eastwoods satin clear that they sell for the rally wheels.
|
|
#855
03-30-2013, 06:09 PM
|
||||
|
||||
|
I think I might have used an etcher on the "dark" areas before a dry primer. I hope it stays and holds up for you. Looks great, as expected!! Is that the type that has to be clear coated after?
|
|
#856
03-30-2013, 06:40 PM
|
||||
|
||||
|
Bruce, that "before" photo was from last summer after I pressure washed all the roofing tar off the trunk floor. I fixed the dark spots with phosphoratic acid and killed the rust, then applied POR-15 to the treated areas. I then did the minor body work last fall at the Poly-Tech class and primed the whole thing. The trunk floor has been in red oxide primer for the last few months.
Last edited by njsteve; 03-30-2013 at 07:17 PM. |
|
#857
03-30-2013, 09:03 PM
|
||||
|
||||
|
ah, ok Gotcha
 Yup acid... etch I forgot ya did all that.. Yup acid... etch I forgot ya did all that..
|
|
#858
04-01-2013, 11:04 AM
|
|||
|
|||
|
Good to see the Formula in your avatar, I was wondering if you were going to change that.
|
|
#859
04-01-2013, 03:09 PM
|
||||
|
||||
|
Yeah, I finally got around to it yesterday. This way the car won't get jealous of any photos of the "previous auto-wife" still posted around on the website.
|
|
#860
04-01-2013, 03:17 PM
|
||||
|
||||
|
Quote:
Since you are the man with the answers. How do you change your Avi? I've been wanting to ad a picture to mine for a while. |
| Reply |
|
|
The PY Online Forums is the largest online gathering of Pontiac enthusiasts anywhere in the world. Founded in 1991, it was also the first online forum for people to gather and talk about their Pontiacs. Since then, it has become the mecca of Pontiac technical data and knowledge that no other place can surpass.




 Linear Mode

