


| FAQ |
| Members List |
| Social Groups |
| Calendar |
| Search |
| Today's Posts |
|
#181
 05-19-2011, 09:51 PM
|
|||
|
|||

I thought I was about to make some good progress on getting the car back together. I painted and installed the core support and set the fenders in place. I thinking this looks pretty good for only two bolts holding it in place.
 I thinking I'm ready to do final prep work, skim filler over the weld and prime. Then disaster struck, when removing what little paint remained I found filler and then swiss cheese big time. 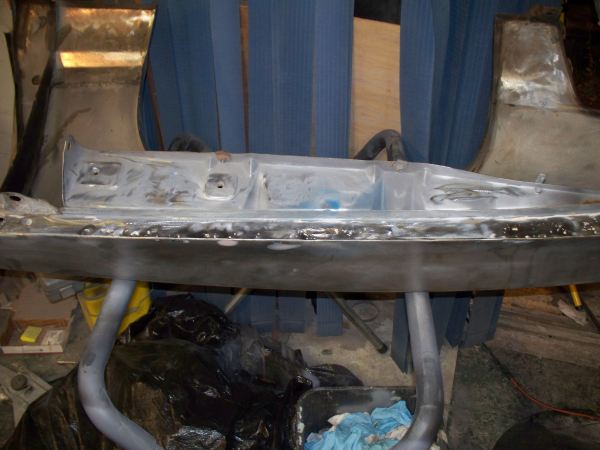 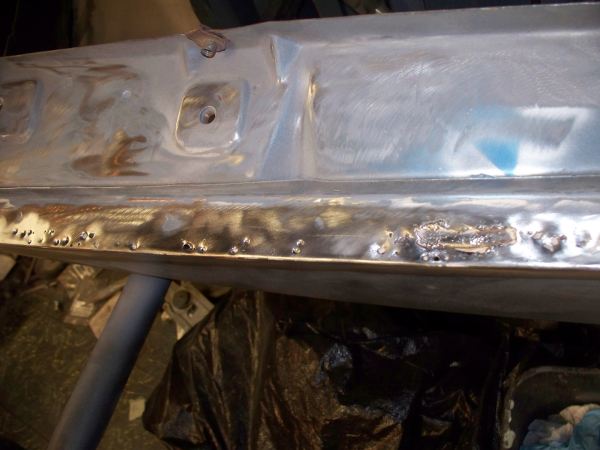 Now I need to decide if I should try and repair this mess or buy one a reproduction fender.
__________________
68 Lemans - GTO appearance LS3 68 Eldorado - waiting for restoration 96 Roadmaster Wagon 2014 Infiniti Q50S Hybrid Marietta GA |
|
#182
05-20-2011, 08:15 PM
|
|||
|
|||
|
I decided the repair the passenger side fender after stripping the driver side. There is no doubt that this thing is beyond hope. It even looked smooth on the back side. But had been covered with a very thick under-body coating. You never know what's under the paint till you strip it.
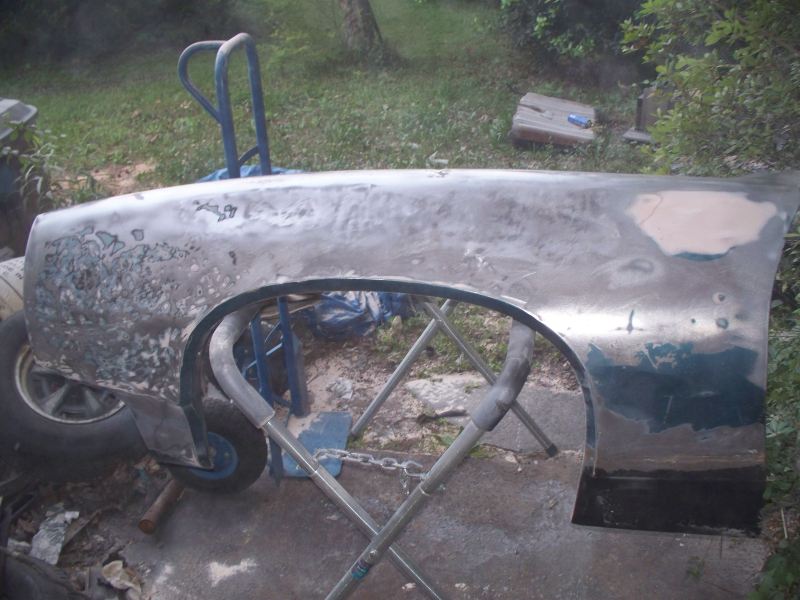 So much for bolting the front end on this weekend 
__________________
68 Lemans - GTO appearance LS3 68 Eldorado - waiting for restoration 96 Roadmaster Wagon 2014 Infiniti Q50S Hybrid Marietta GA |
|
#183
06-01-2011, 10:28 PM
|
|||
|
|||
|
Not getting much done lately, summer flu kept me in bed several days leading up to and over the memorial day weekend. Here are a few minor things that I was working on before getting sick.
Painted the welded parts of the GTO seat frame. 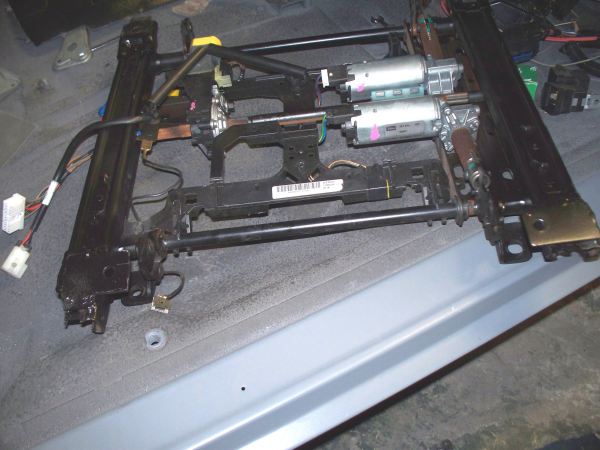 Here are both seats installed. 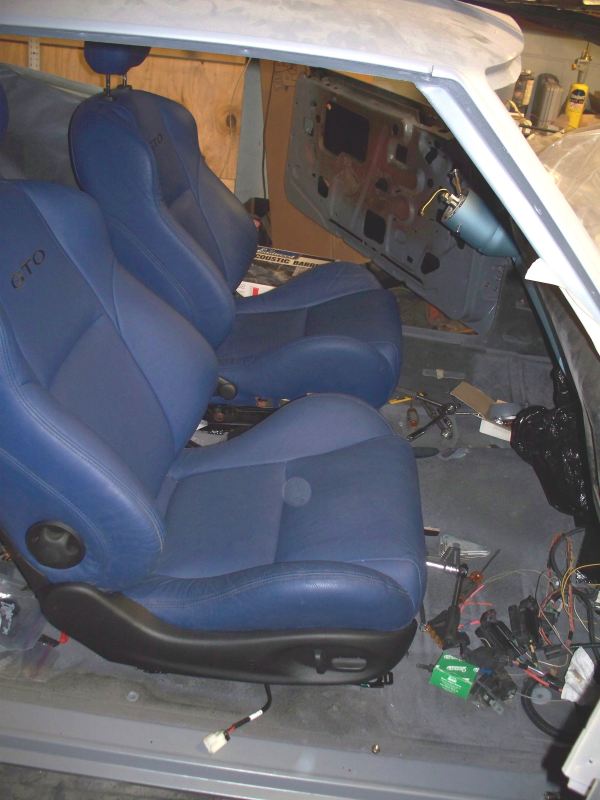 I had also stripped the rust and painted the headliner supports. 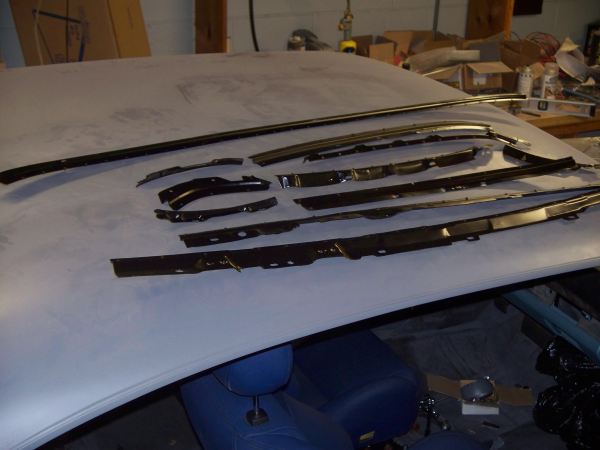 I had restored the ashtray mount. This piece was bead blasted and then clear coated. 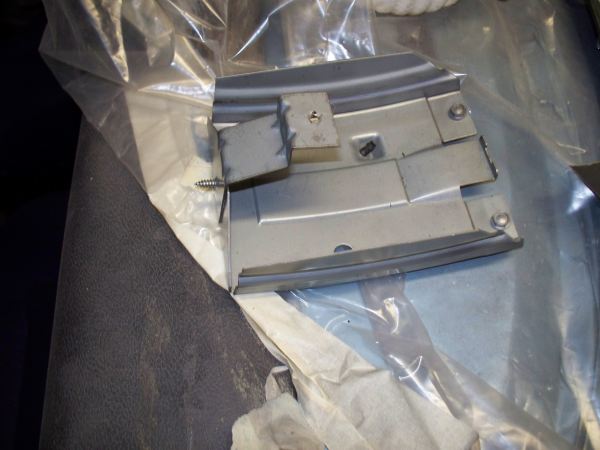 I had started modifying the radio opening. This is the stock opening with the divider bar removed. 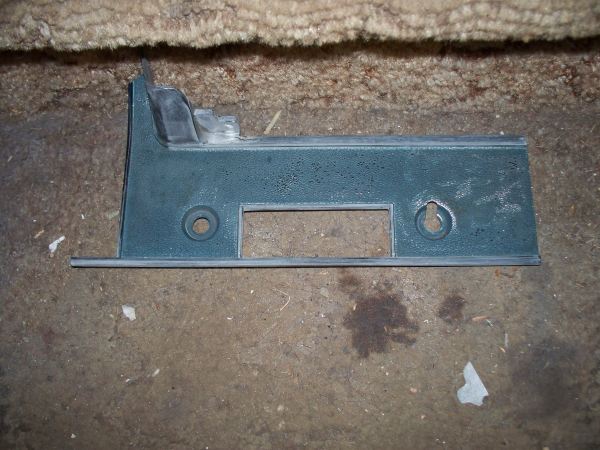 The tape marks where I am cutting the bezel. The bezel needs to be 5/32" taller than stock. This will allow the RetroSound Radio to fit. I was tempted to narrow the opening to the exact size of the RetroSound radio but this would create problems with the wood grain being too small to cover the opening. 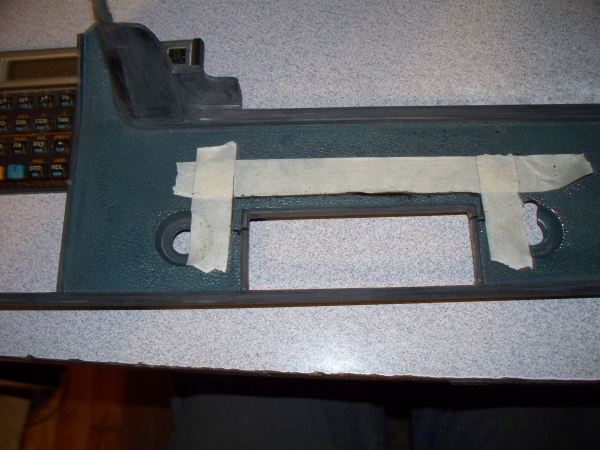 The piece that I cut out is laying on top on the tape. 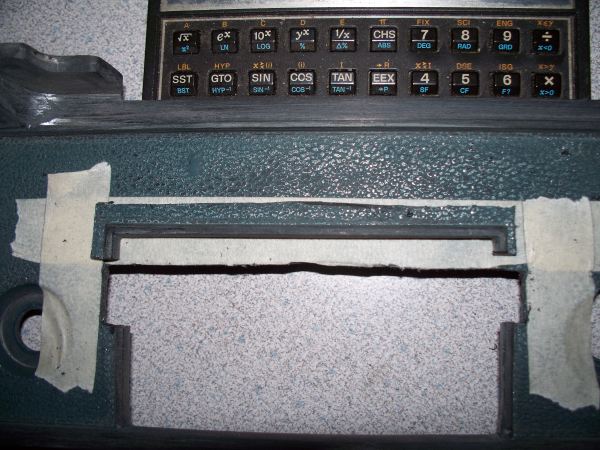 This is where the bezel needs to be relocated to. The open spots will be filled with a plastic compound that will be solvent welded. 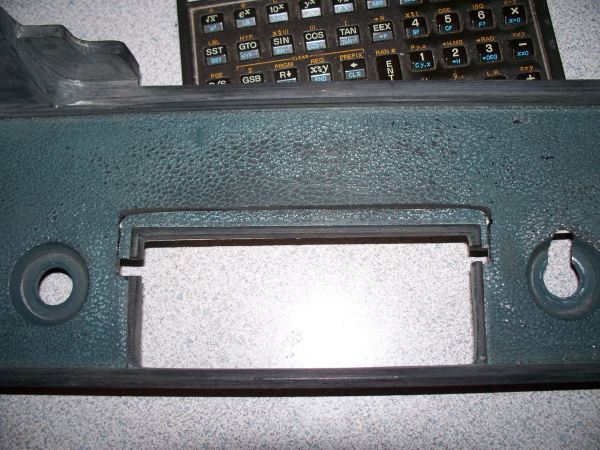 I have joined the two pieces together with plastic powder and used a solvent to weld the pieces together. I'm not concerned with the textured surface since it will be covered by wood grain. I still need to fill the gaps. Of course this piece still need to be reattached to the rest of the dash but I won't do that until I finish with the radio opening. 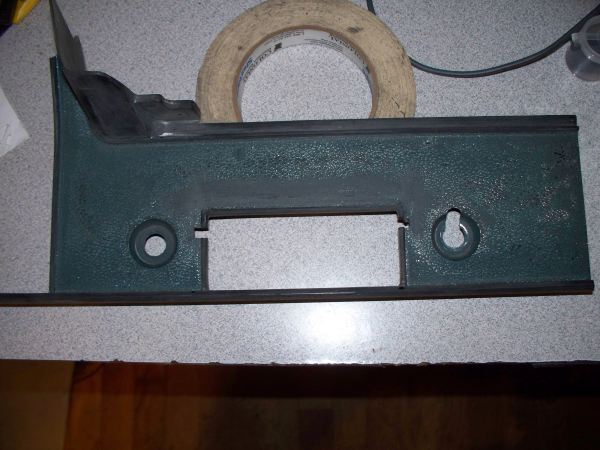 That about it for now.
__________________
68 Lemans - GTO appearance LS3 68 Eldorado - waiting for restoration 96 Roadmaster Wagon 2014 Infiniti Q50S Hybrid Marietta GA |
|
#184
06-02-2011, 12:55 PM
|
|||
|
|||
|
Your really making progress on that car. Keep the pics coming. Hoping to get back out to mine now the weather is finally good. Im still undecided as to what im going to run for exhaust. Really wanted the Edelbrock headers but I was a day late on them. Im thinking there might be a chance I can use the Camaro manifolds with a little massaging around the outside of the flanges. Didnt realize how much narrower the 64-67s are in the engine bay.
|
|
#185
06-02-2011, 07:27 PM
|
|||
|
|||
|
Quote:
__________________
68 Lemans - GTO appearance LS3 68 Eldorado - waiting for restoration 96 Roadmaster Wagon 2014 Infiniti Q50S Hybrid Marietta GA |
|
#186
06-02-2011, 07:36 PM
|
|||
|
|||
|
I filled the last gaps in my enlarged radio face plate today. This is only rough sanded.
 A shot of the back side in case anyone wonders what the joint looks like. With a little more sanding and a coat of paint, the join line would disappear. 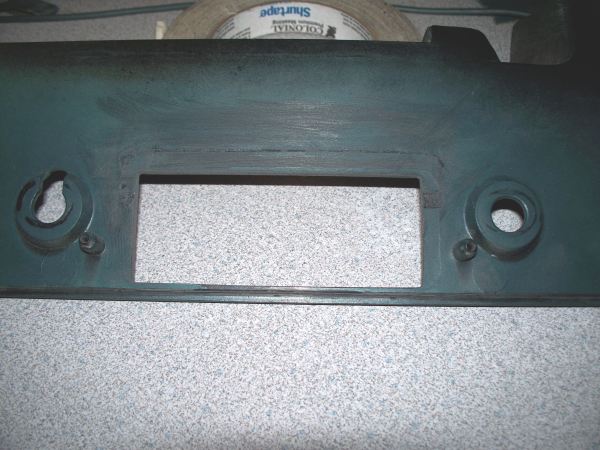
__________________
68 Lemans - GTO appearance LS3 68 Eldorado - waiting for restoration 96 Roadmaster Wagon 2014 Infiniti Q50S Hybrid Marietta GA |
|
#187
06-03-2011, 03:07 PM
|
|||
|
|||
|
Thanks FB, hopefully these manifolds will work out, if not im leaning towards the S&P shorties. I also read where the 98-02 F body manifolds are a good fit. Yours, Bmans and Andrews threads on here have been a big help.
|
|
#188
06-04-2011, 06:19 PM
|
||||
|
||||
|
I just finished reading, and all I can say is wow! You are doing some outstanding work and I have a much better appreciation for all the stuff we talked about today. Hopefully the fenders will work out for you- I can't think of a better home for them.
I am in your area every now and then since my son and most of my family live in the Atlanta area. Would love to drop by some time and take a close look. We talked a little about chrome work- I have been using a guy out in Snellville. Not the cheapest, but he has done a nice job even on pot metal parts like the corner light bezels. And he is close enough for you to drop stuff off and pick it up if you want. Custom Plating 770-736-1118. Walt
__________________
1969 Lemans vert, matador red, 462 CI, 3.07 12-bolt posi 1974 455 TA, admiralty blue/red interior HPP "cover car" - sold "The best way to show a car is to drive it" |
|
#189
06-05-2011, 09:39 PM
|
|||
|
|||
|
Quote:
I would like to thank Walt for his donation of fenders he no longer needs. I dropped by his house to pick up the fenders Saturday and got a look at his project. His project, a Red 69 Lemans convt, is almost complete. Walt only needs to get his interior door panels installed to complete his project. Here a picture of the donated fenders. 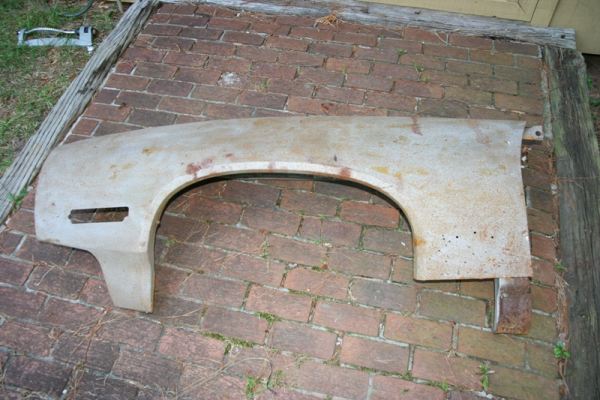 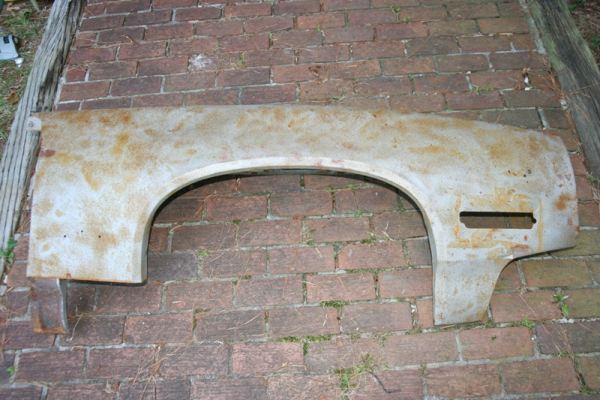 There is no doubt I will use Walt's driver side fender. For the passenger side I am still trying to decide if I will use Walt's fender or repair the one I have. The driver side fender got banged up a bit in storage so I had to start will a little body work to straighten to front area. I have already got this area mostly done. The before: In the Green the bracing is bent and broken loose from the fender. The red shows the additional bends. 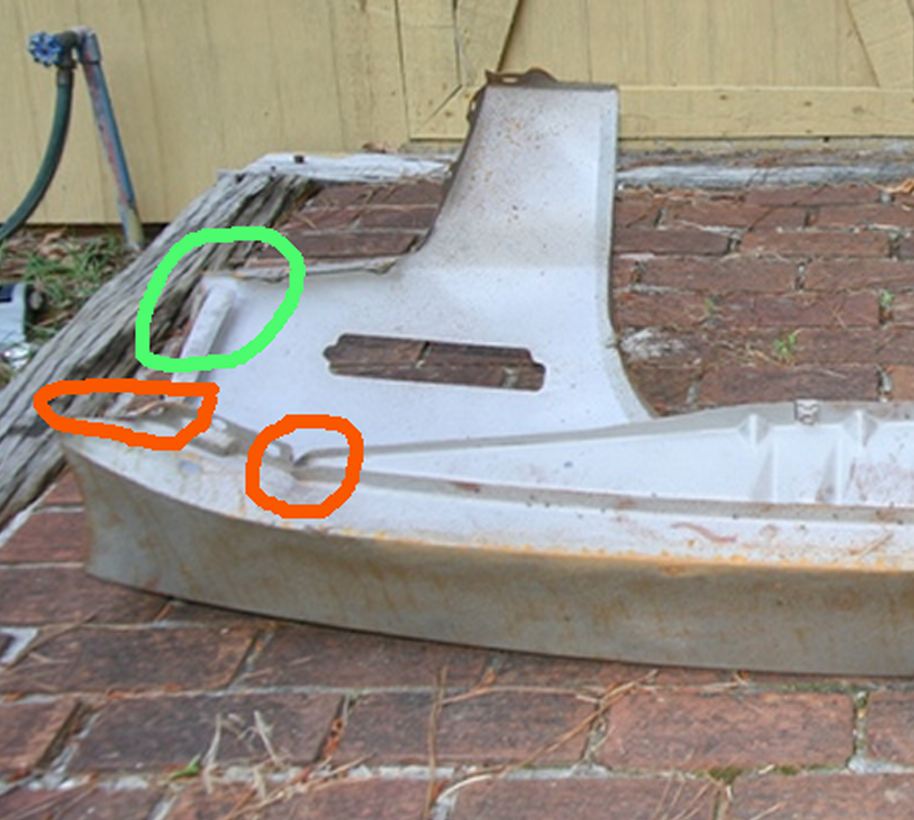 I got the front bracing straighten, I still need spot weld the bracing to the fender shell. 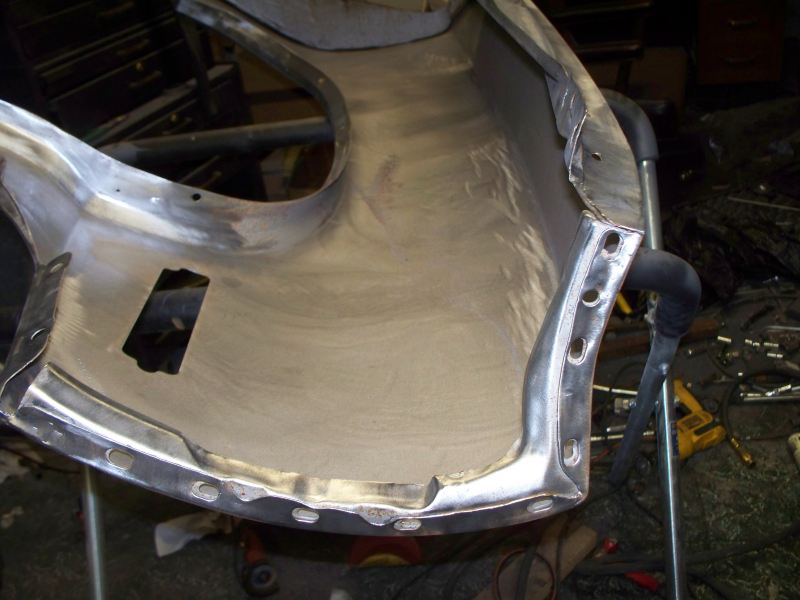 I got the other bracing straight, I clamped 1/4" thick flat iron stock to the back side of the frame and beat it with a BFH. I got it pretty good. A little more work remains before I will be happy with it. The mounting tab that bolts to the core support was bend out almost 2 inches. 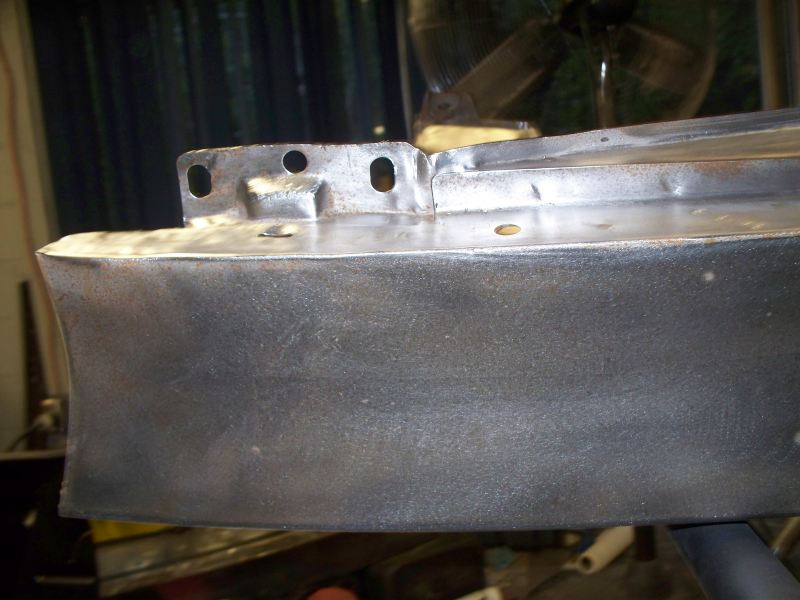 The fender cleaned up very nicely. Now to weld in a patch panel. It will probably take a few days for the patch panel to arrive. 
__________________
68 Lemans - GTO appearance LS3 68 Eldorado - waiting for restoration 96 Roadmaster Wagon 2014 Infiniti Q50S Hybrid Marietta GA |
|
#190
06-05-2011, 10:35 PM
|
||||
|
||||
|
This is what is GREAT about our hobby - people sharing information. You have provided an education to an entire group who would not have had a clue about these problems. Thank you!
__________________
'68 GTO 4-spd Hardtop (11) '68 GTO Convertible AT (1) '70 LeMans Sport Land of Lakes Muscle Car Classic Facebook Event Facebook Wall (Kurt Smith,Minneapolis) |
|
#191
06-07-2011, 11:33 PM
|
|||
|
|||
|
I remembered throwing a patch panel in the junk pile because I was not happy with the shape of it. When I cut it to size, there was a bow of about 5/8" compared with the fender. I got out the panel and since I would be cutting several inches off maybe the shape would not be off as much. When cut down if was only about 1/4" of bow so I though I would get it a shot.
First since the bottom part of the fender had already been cut off and used to repair another car, there is nothing to use for a guide. The only solution is to bolt on the fender and align it with the door edge. I had already checked the cut edge of the fender and determined that it was straight. 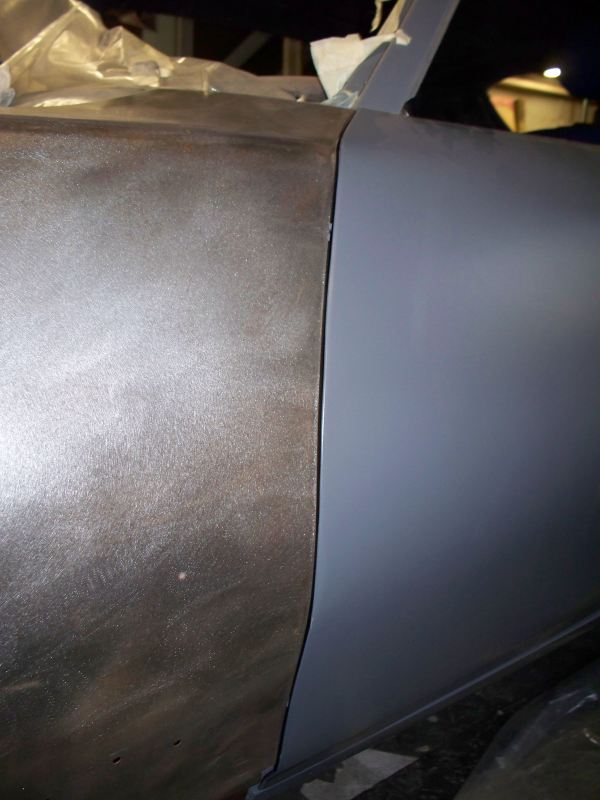 It is then possible to obtain a measurement to use with the patch.  Then transfer the tape to the patch and mark. 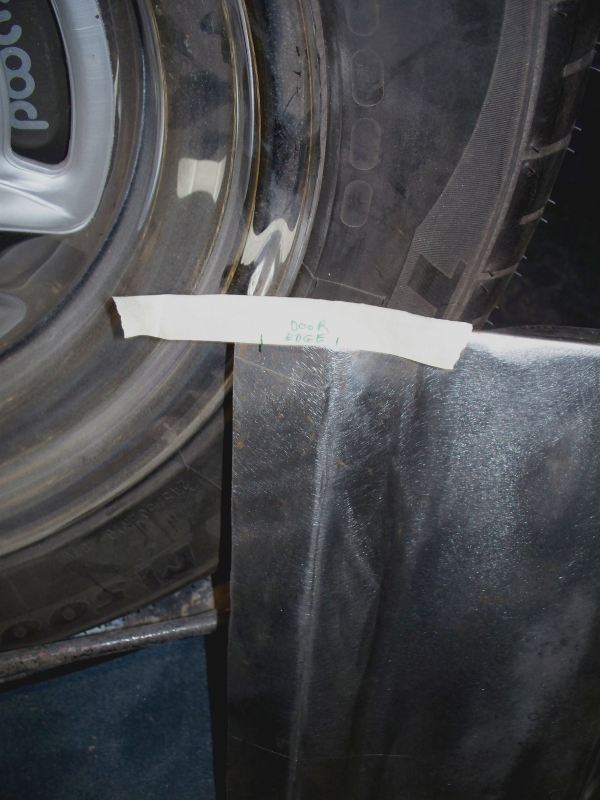 For the front edge it's a little harder and I won't bore you with all the details, except to say I used a bolt hole for the inner fender mount in order come up with a tape for the front edge showing how much to leave. Next thing is to check the edges. On the fender it's very straight across where the cut was made.  However the patch is not straight. This can't be simply bent since the crease near by with keep it front bending. The solution is the put the patch in a stretcher and work the metal until the edge is straight. 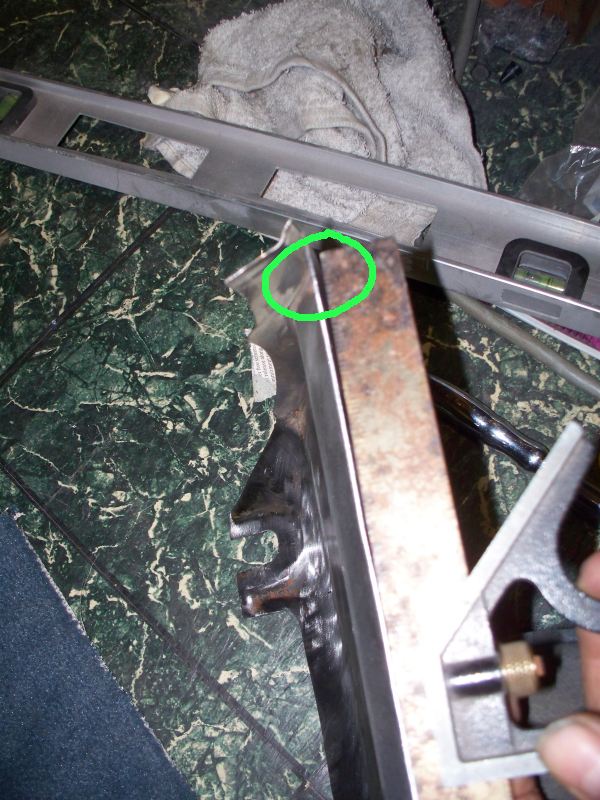 After a minute or two with the stretcher and a straight edge to constantly check the work, the edge is straight. I later gently hammered the edge against an anvil and now have the edge arrow straight, it should be very easy to but weld to the fender now that it's straight. 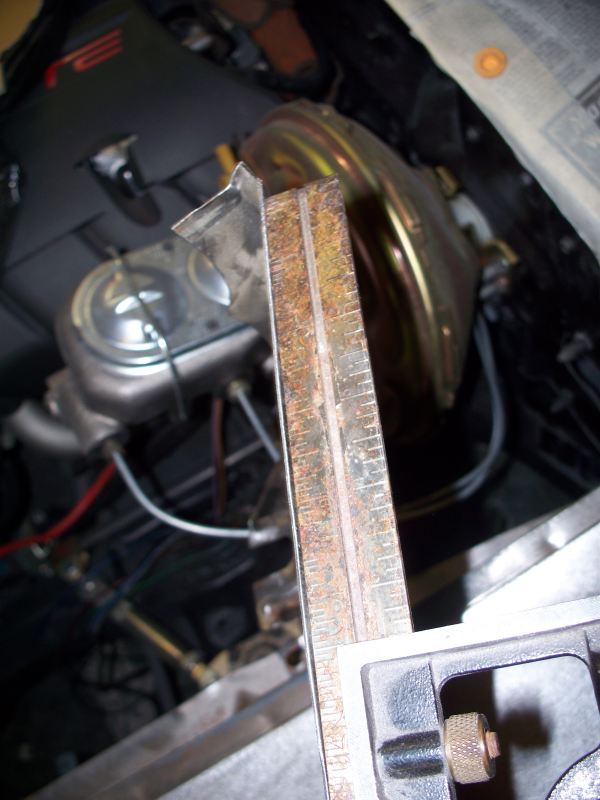  Too late to finish tonight. I don't have the energy I once did. Hopefully I will get this fender done in a couple of days. Too late to finish tonight. I don't have the energy I once did. Hopefully I will get this fender done in a couple of days.
__________________
68 Lemans - GTO appearance LS3 68 Eldorado - waiting for restoration 96 Roadmaster Wagon 2014 Infiniti Q50S Hybrid Marietta GA |
|
#192
06-09-2011, 11:01 PM
|
|||
|
|||
|
I didn't get to weld patch on today. It's taking longer than I thought to get rid of the rust on the inner brace. I'm using naval jelly and it can take a while. Forget about the 5-30 minute time on the label, heavy rust pits will take many hours, then you need to clean it off with water, go over it with a wire brush and then apply another coating. It will take several treatments. So far I have applied Naval Jelly 3 times to the brace.
Important note - The gray coating that forms is zinc phosphate. If you are going to use an epoxy primer, this coating must be completely removed. Epoxy will peel off in sheets in a few weeks if you don't remove the since phosphate. One way remove the coating is to go over the metal with a wire brush until it shines. I got most of the rust out of the pits but not all. 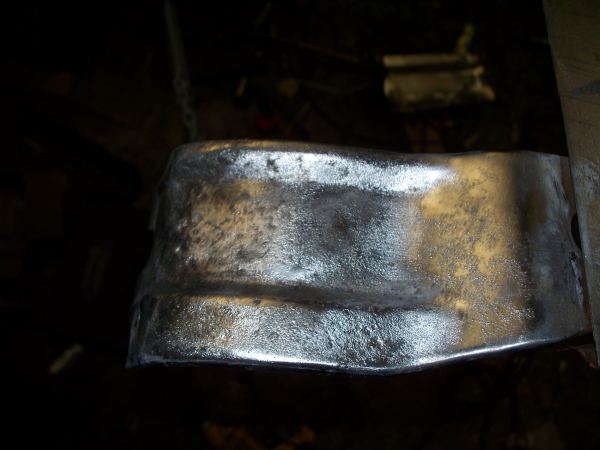 I will apply another treatment and let it sit overnight. 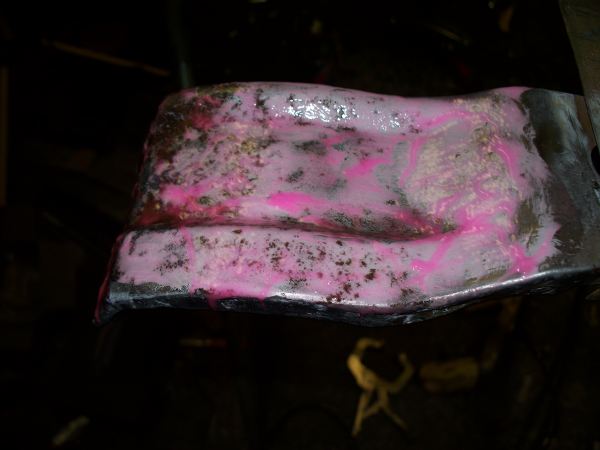 Cover your work with plastic to keep the naval jelly from drying. 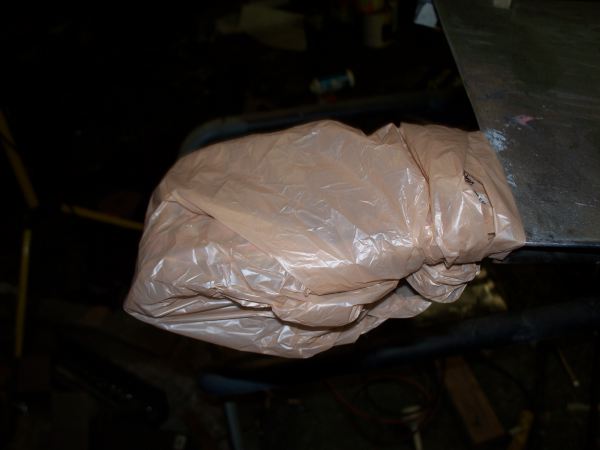 I am ready to weld the patch as soon as the rust of the brace is treated. 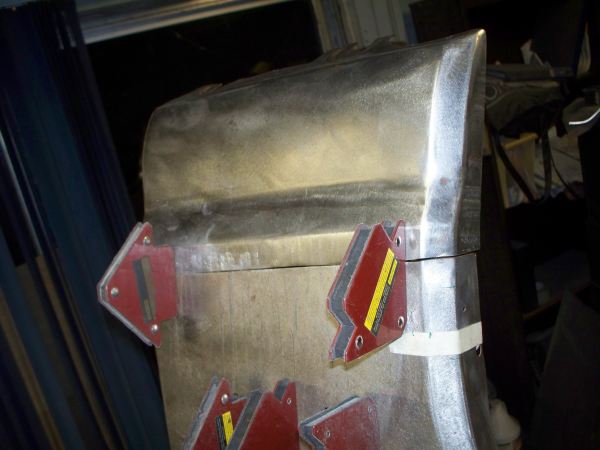 I had to rework the shape here, it didn't match very well. I'm doing this much too often and have gotten very good at it, the first it took me about a hour to get the shape right. I may have spent 2 minutes this time. 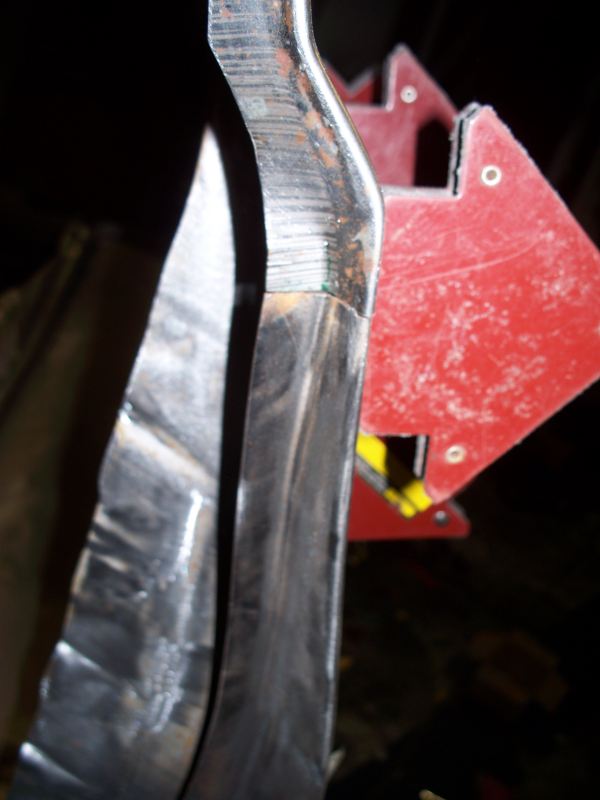 In between rust treatment sessions I started joining the broken pieces of my dash panel. This is a first pass on solvent welding the parts together. I still have a bit of work left. 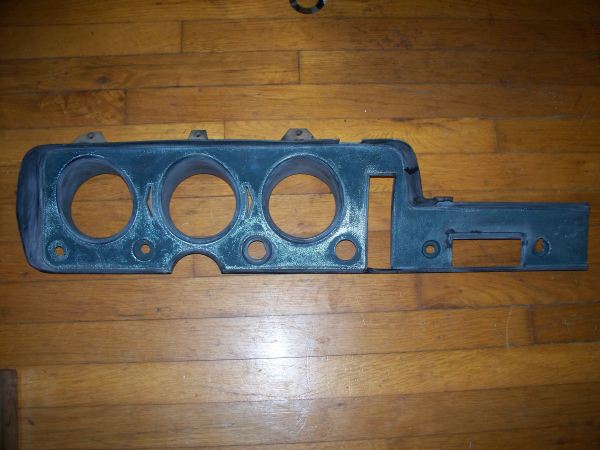
__________________
68 Lemans - GTO appearance LS3 68 Eldorado - waiting for restoration 96 Roadmaster Wagon 2014 Infiniti Q50S Hybrid Marietta GA |
|
#193
06-12-2011, 02:01 AM
|
|||
|
|||
|
Driver fender continued.
This is the final result of Naval Jelly treatment, this represents 5 treatments. All of the rust has been dissolved from the pits, this is after zinc phosphate has been removed with a wire brush. 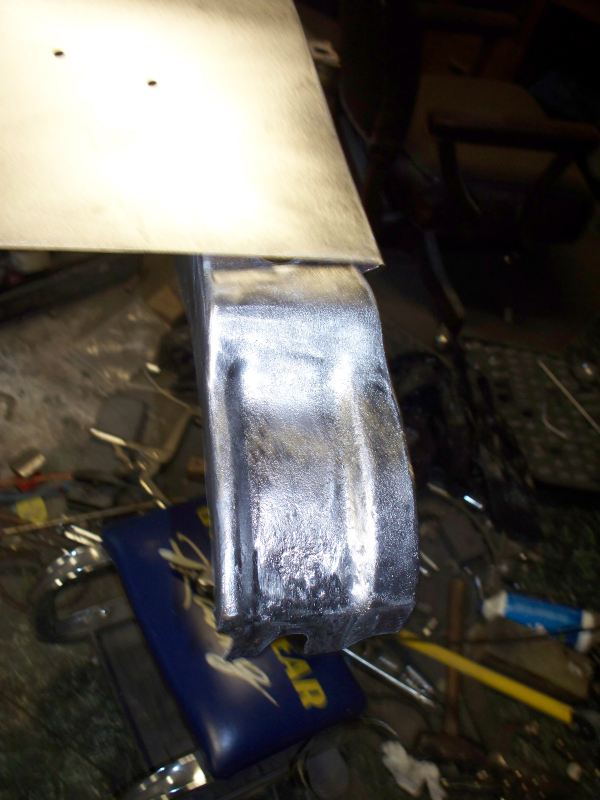 Painted the brace with an epoxy paint. 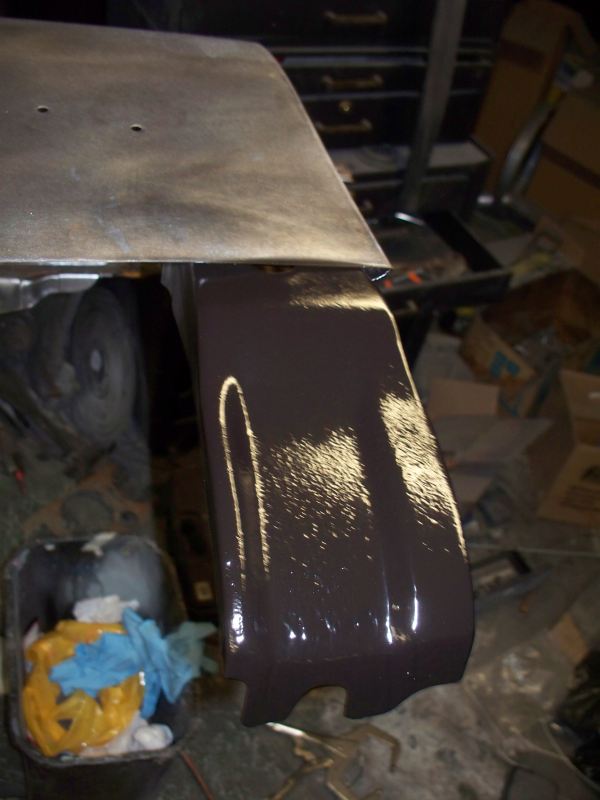 I tack welded the patch panel in a few places and installed the fender to check the contour. From the crease upward the fender matches the door perfectly. From the crease downward the patch panel does not match the contour of the door. I will correct this by using All Metal to get the basic shape. 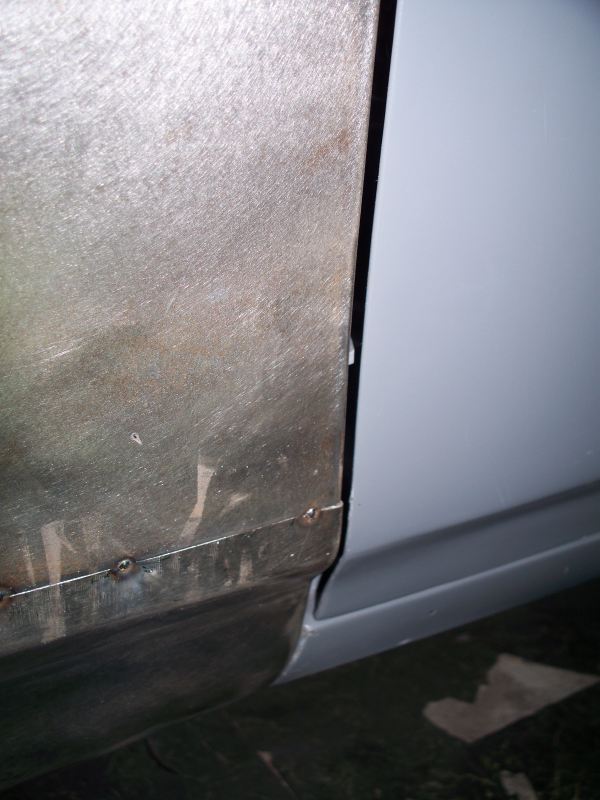 Removed the fender to finish welding. Tacked welded. 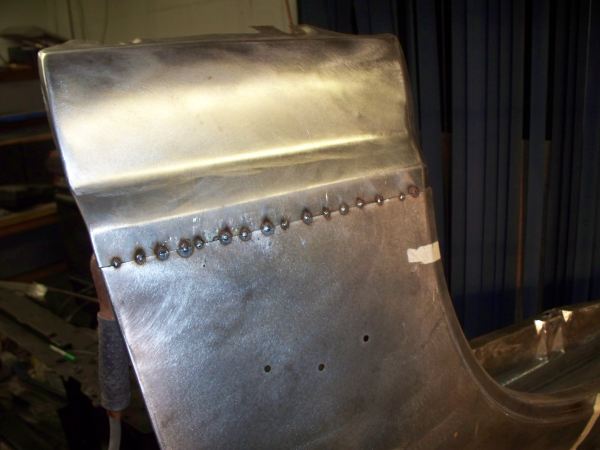 The joint welded. 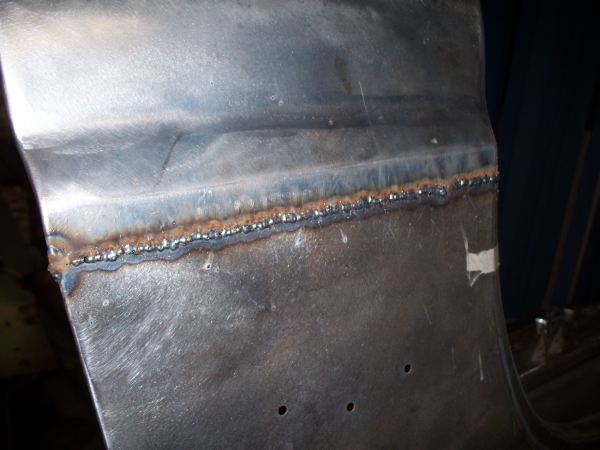 The weld bead trimmed with a cut-off wheel. 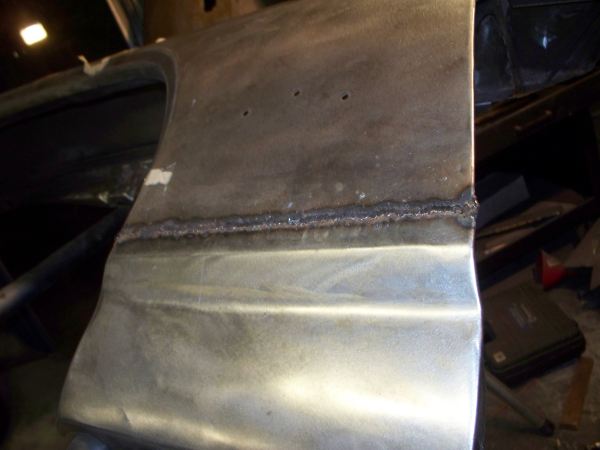 The completed weld. Door side 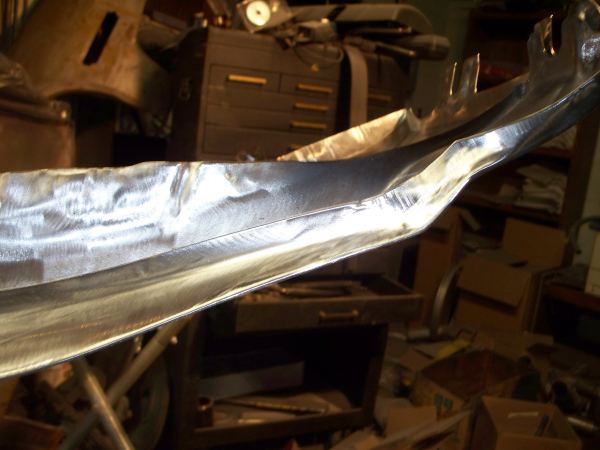 There is a little misalignment along the green lines. The amount is about the thickness of a Business Card. This occurred because I didn't have access to the back of the joint due to the inner brace being in the way.  I got the instrument housing ready for paint prep. This is result of solvent welding the two pieces together. The housing broke with a crack from the green arrow to the corner of the AC control opening.  The bar was broke at the bottom of the AC control opening 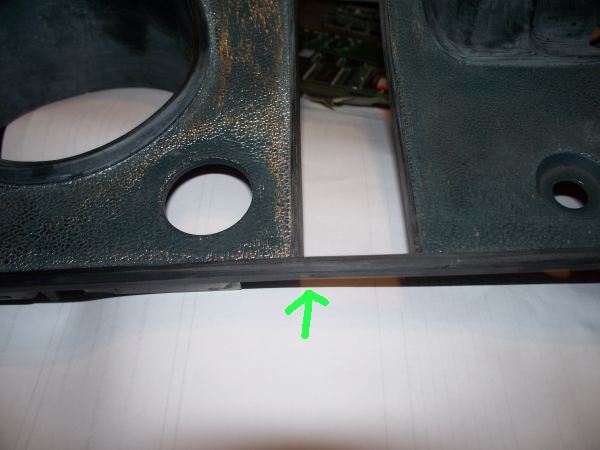 It repair looks good. After being painted the former breaks won't be visible. The housing gets a glossy black finish before chrome can be applied.
__________________
68 Lemans - GTO appearance LS3 68 Eldorado - waiting for restoration 96 Roadmaster Wagon 2014 Infiniti Q50S Hybrid Marietta GA |
|
#194
06-13-2011, 12:39 AM
|
|||
|
|||
|
I finished the basic work on the driver fender today.
Sanded the backside and cleaned with a degreaser. 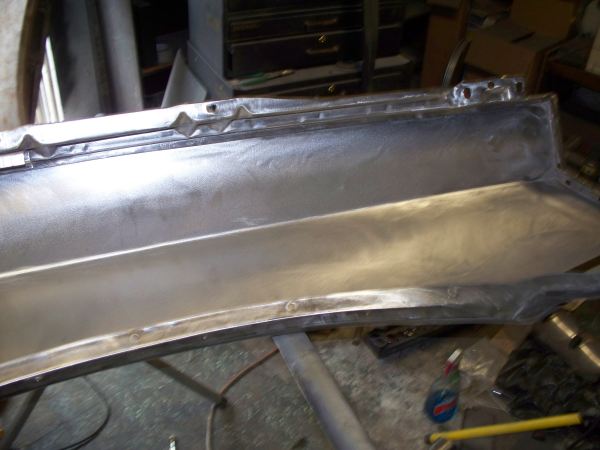 Spot welded the brace at the front which had broken free when the fender got banged up.  Spot welded the patch to the brace. 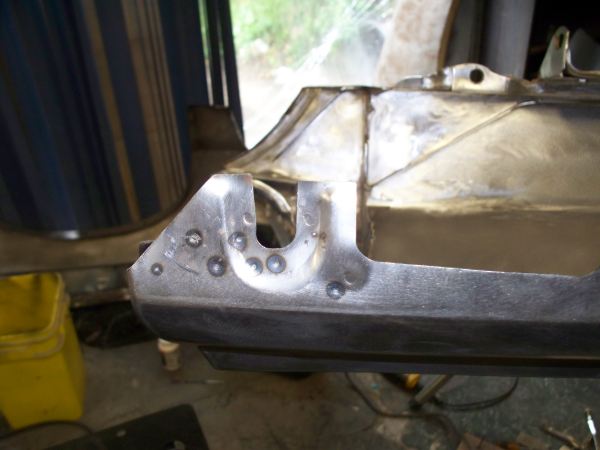 The spot welder I use is sold by HTP. This welder is able to weld through primer and is automatic. Set it for the panel thickness and pull the trigger. The machine does the rest and stops when the weld is complete.  I painted the backside with an epoxy paint. 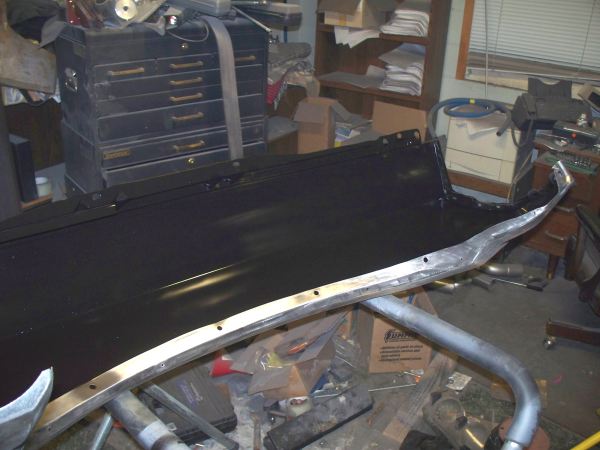 This puts me one fender away from being able to test fit the front end. Next the passenger fender.
__________________
68 Lemans - GTO appearance LS3 68 Eldorado - waiting for restoration 96 Roadmaster Wagon 2014 Infiniti Q50S Hybrid Marietta GA |
|
#195
06-21-2011, 01:30 AM
|
|||
|
|||
|
Mostly finished with the rust repair on passenger fender. I ender cutting out most of the section from the top of the fender where it bends to form a channel for the hood to sit in.
Before cutting out so much of the fender it is important to put some temporary bracing to keep the fender from sagging. Any scrap will do, this was some pieces I had collected by my cut off saw (OK I was lazy and didn't throw this junk out right away) but it was perfect for the temporary bracing. 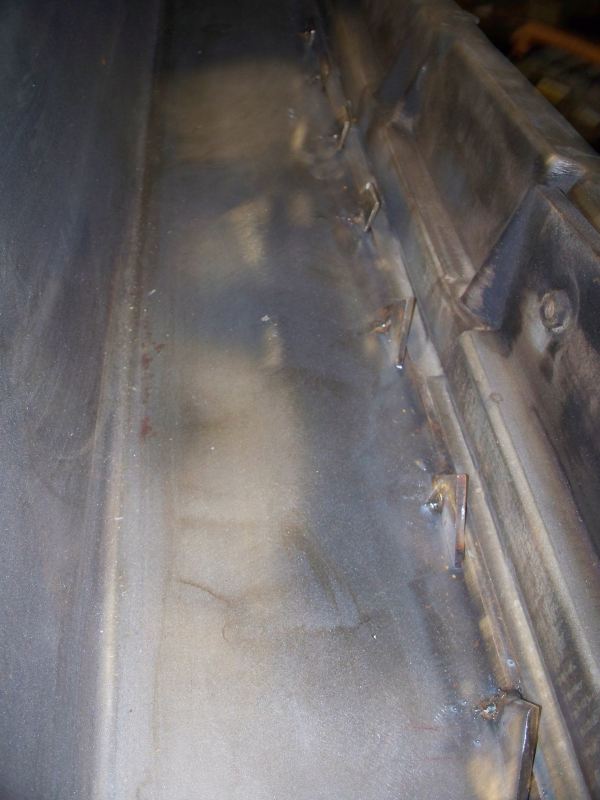 I started cutting and for the first cut I cut out about 14 inches.  How bad was the metal? You can tell how deep the pits are in the photo, but this whole piece was about to become swiss cheese.  I didn't take many pictures of the resulting repair but you can see the completed portion here. And you can see where I had started tacking the next portion.  The next cut removed all of the channel all the way to the front of the fender. I failed to photograph the removed metal but here is the next piece tacked in and then welded.   And the final result 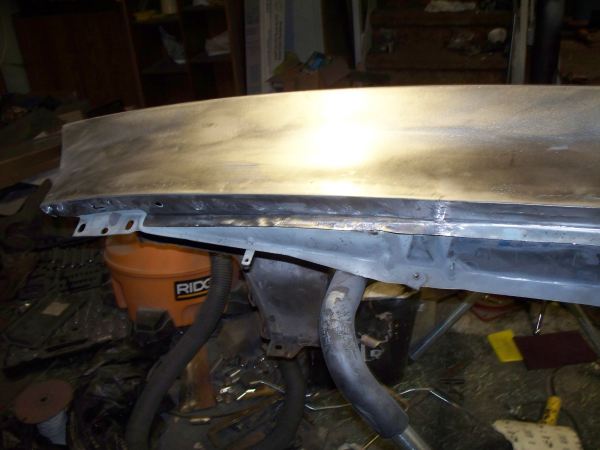 I have a little cleaning up to do, but hope to install the fenders tomorrow for a test fitting.
__________________
68 Lemans - GTO appearance LS3 68 Eldorado - waiting for restoration 96 Roadmaster Wagon 2014 Infiniti Q50S Hybrid Marietta GA |
|
#196
06-29-2011, 12:51 AM
|
|||
|
|||
|
It's been a while since I could work on the LeMans, I got covered up with computers to repair, recover data etc. After the storms hit I had 14 computers which took first priority for my time. (I'm self employed and own 2 companies)
I have spent about a day attempting the align the doors and fenders. Part of my problem is I don't know what the gaps were since the fenders and hood had been removed and when reinstalled no shims were replaced and the bolts were finger tight. I can't find any gap information in the service manual, maybe it's there and I missed it. I also suck when it comes to panel alignment and it probably doesn't help that I have to work alone. It looks like panel alignment is really a 2 person job. I will post some pictures in the 68-69 section asking for opinions a little later when I can get some time. I went to install the hood on and found the hood hinges I have are wrong. The hood sits up about 2 inches in the back with the hinge at the lowest position in the slot. I ended up reinstalling the old factory hinges so I can check hood gaps, right now it looks like I would end up with about 1/8" gap. I don't know it this is enough. It's starting to look more like a car again.  I don't know how normal this is but when everything else looks like its aligned good, the gap grows from 3/16" to 1/4" at the top of the fender where it meets the door. Assuming that this is not a screw up on my part, I guess the door or fender would need the be welded to fill this gap. 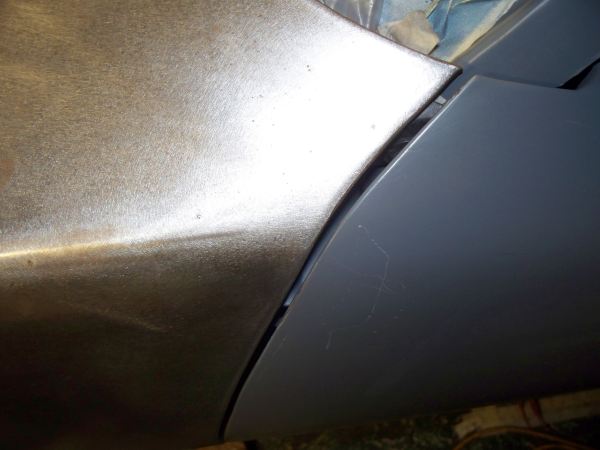 So far I have identified about a dozen items that need attention a partial list includes 1. Rework the top corner of the rear quarter panel where it meets the door 2. There is still some straighting to do on the driver fender inner bracing. 3. Passenger fender at the very bottom does not match very well to the rocker panel. This was caused by the patch panel not being formed correctly. 4. Driver fender patch panel does not match the contour of the door near the bottom. It did however match the rocker panel. 5 to ? other minor items to deal with not worth listing here.
__________________
68 Lemans - GTO appearance LS3 68 Eldorado - waiting for restoration 96 Roadmaster Wagon 2014 Infiniti Q50S Hybrid Marietta GA |
|
#197
06-29-2011, 06:41 AM
|
||||
|
||||
|
Looks like you are making good progress!
I never measured the gaps at the top of my doors but they do seem to grow a bit where they meet the top of the fender, and no major repairs were done to the original sheet metal in this area. Visually it depends on the angle that you are looking at (see pic).
__________________
1969 Lemans vert, matador red, 462 CI, 3.07 12-bolt posi 1974 455 TA, admiralty blue/red interior HPP "cover car" - sold "The best way to show a car is to drive it" |
|
#198
06-29-2011, 11:22 AM
|
||||
|
||||
|
I've spent the last two days placing the front clip on my '68 and this is the 3rd or 4th time I've done it.
The gaps were simply never as good as we're used to seeing on 21st century cars. My car also shows a bit more gap at the tops of the doors. I also have a little inconsistency with the shape of the bottom, front edge of the door and the bottom rear edge of the dogleg of the fender. The body line of the fender and the body line of the door has a slightly different profile when viewed from the front. That's on my car at least. You can tweak everything pretty close if you spend a lot of time and think about how moving one thing affects everything else. Sometimes you may have to take the entire fender off because you know you need to move that door, just a weeeee bit. You just have to be willing to do it. By the way, I think you're doing a great job. The car looks very good to me.
__________________
Greg Reid Palmetto, Georgia |
|
#199
07-01-2011, 01:08 AM
|
|||
|
|||
|
Another day of panel fitting. I addressed the ill fitting passenger patch today. Though I might help with the alignment.
This is what I started with. 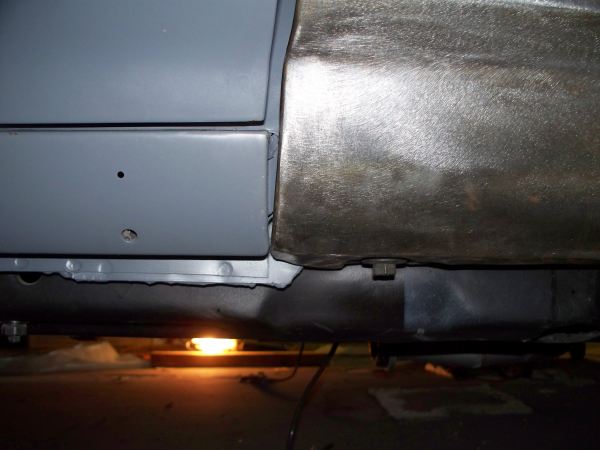 First cut a slot in the metal so you can push it in to create the proper angle.  Tack weld the bottom and then test fit the fender, nothing elaborate, just set the fender in place. This looks pretty good. The fit doesn't have to be perfect anyway since it will be covered by the rocker trim. 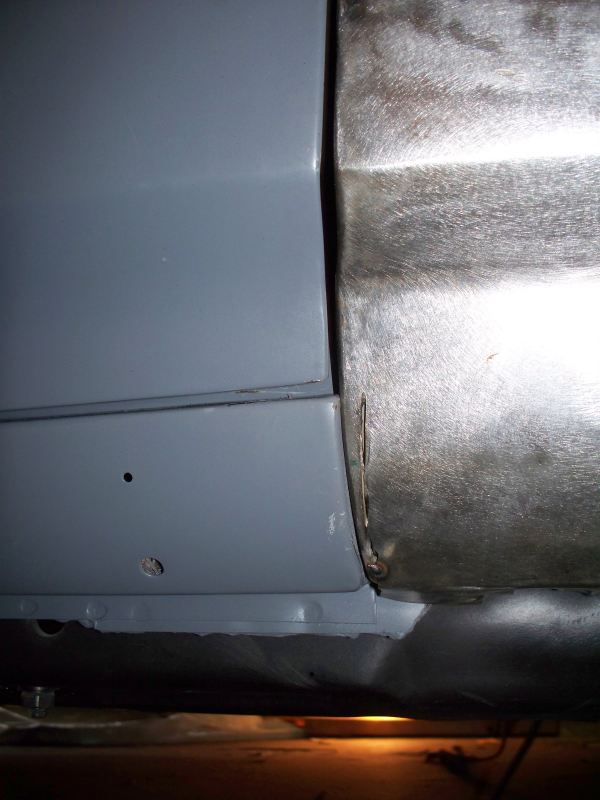 Removed the fender and tack welded the cut.  I spent extra time to make sure that this weld would not need to be covered with any filler. 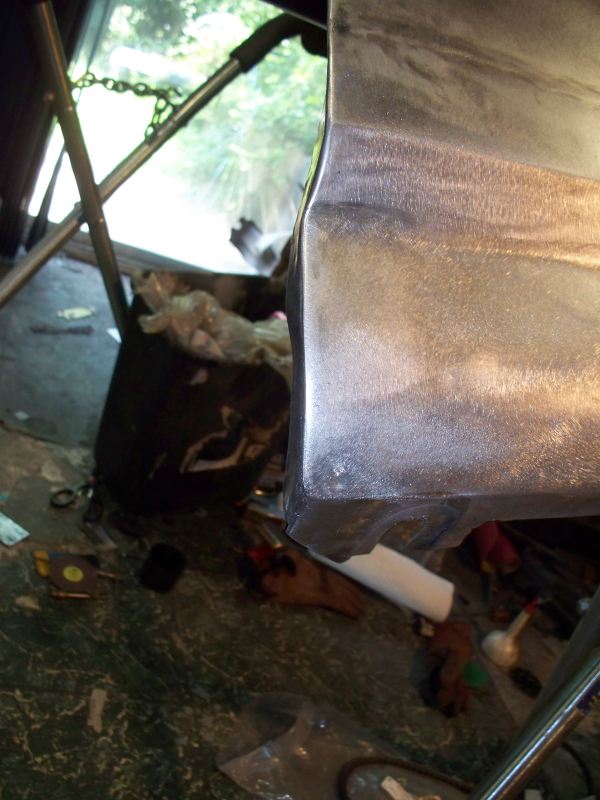 I spent some time to square the core support with the body. I ended up sliding the core support as far as it could be solved to the left. With the core support centered between the frame x-dimension checks were off by nearly an inch. After shoving the core support as far as it would go I am only off by 1/16". This should be close enough. There should be enough adjustment in the fender mounting holes to take care of this small error. How did all of this work out? The panels look better, still not good enough. Gaps are OK but door to rear quarter contour does not match is a couple of places. I think the only solution is to apply filler across the door and quarter panel to make the panels even. The door to fender alignment is getting better but still not what I want. I don't mind if the gaps vary slightly but want the panel to panel alignment to be perfect. I may require filler to be applied across the door the fender gap to get perfect alignment. I'm not ready to do this yet. Tomorrow I will try again to get a better fender to door alignment. 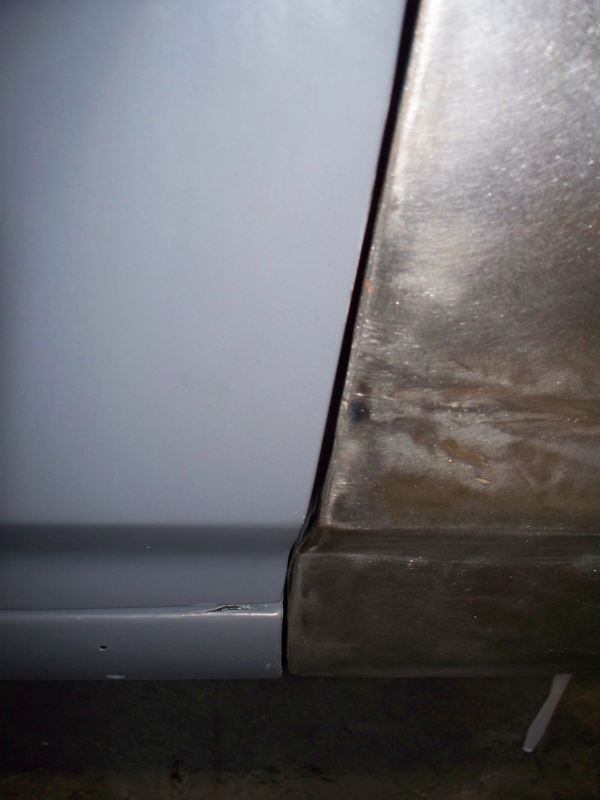 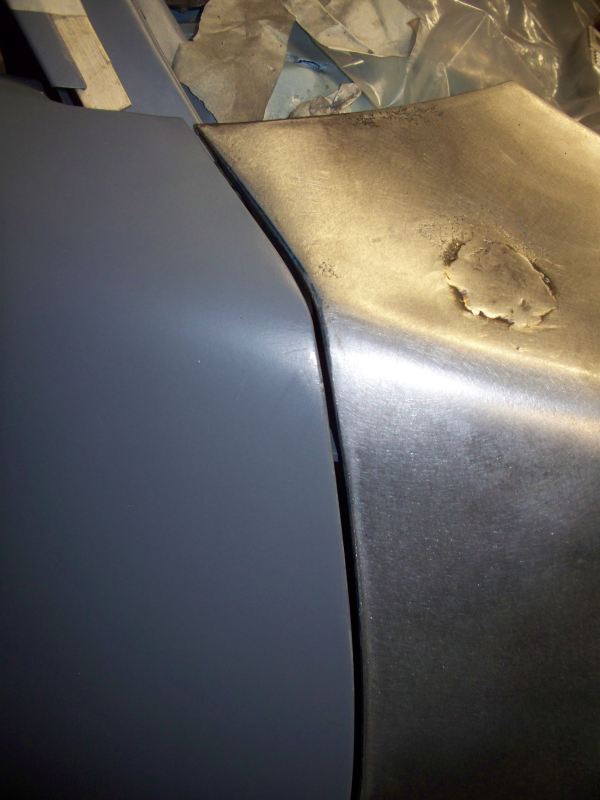
__________________
68 Lemans - GTO appearance LS3 68 Eldorado - waiting for restoration 96 Roadmaster Wagon 2014 Infiniti Q50S Hybrid Marietta GA |
|
#200
07-01-2011, 10:53 AM
|
||||
|
||||
|
That's a big improvement. FWIW, you probably know this, but I'd spend as much time as needed to get the door to quarter right before I did anything else with the front clip.
Everything up front is built on the door to quarter/rocker fit and alignment. Note: Novice Disclaimer
__________________
Greg Reid Palmetto, Georgia |
| Reply |
|
|
The PY Online Forums is the largest online gathering of Pontiac enthusiasts anywhere in the world. Founded in 1991, it was also the first online forum for people to gather and talk about their Pontiacs. Since then, it has become the mecca of Pontiac technical data and knowledge that no other place can surpass.





 Linear Mode

