Reply
 
Thread Tools Display Modes
  #221  
Old 01-19-2009, 05:45 AM
Greg Reid's Avatar
Greg Reid Greg Reid is offline
Ultimate Warrior
 
Join Date: May 2003
Location: Palmetto, GA. USA
Posts: 16,175
Default

Hey Mark. It's right off of I-85 not far from the Airport. It's called "Chef Anna's".
Any time you're coming up that way, let me know and I'll guide you right to the door. We might even have to put biscuits on the menu for you. lol

__________________
Greg Reid
Palmetto, Georgia

  #222  
Old 02-10-2009, 03:00 PM
blue71ta's Avatar
blue71ta blue71ta is offline
Ultimate Warrior
 
Join Date: Feb 2005
Location: America's Dairyland
Posts: 1,587
Default

Any progress updates for us Bub?

  #223  
Old 02-10-2009, 06:17 PM
TransAmRIP's Avatar
TransAmRIP TransAmRIP is offline
Chief Ponti-yacker
 
Join Date: Jun 2006
Location: Slidell, La.
Posts: 780
Default

Not really. Just doing some little things. Just completed the wiring in the new shed. Its complete now. Should get back on the car full time starting this week.

Bub

__________________
1974 400 4 speed
  #224  
Old 02-24-2009, 11:40 PM
TransAmRIP's Avatar
TransAmRIP TransAmRIP is offline
Chief Ponti-yacker
 
Join Date: Jun 2006
Location: Slidell, La.
Posts: 780
Default

Just an update: Started aligning the doors, fenders, header panel, and hood to get an idea of how many shims I need(since I didn't keep track of them when I took the car apart) and to see about alignment before I start blocking and final skimming and more high build and blocking. You catch my drift. Once I get all that lined up the engine is off to the engine shop.

Bub

__________________
1974 400 4 speed
  #225  
Old 03-05-2009, 03:48 PM
TransAmRIP's Avatar
TransAmRIP TransAmRIP is offline
Chief Ponti-yacker
 
Join Date: Jun 2006
Location: Slidell, La.
Posts: 780
Default Aligning sheet metal

Boy, what a pain in the a$$ aligning the doors, fenders, hood, header and trunk. Just about got the car all shimmed out and aligned to within a 1/4" gap. Still need some minor adjustments to be happy with it. The next thing will be installing the front bumper and lower valance to get an idea of the fit. More fun ahead!
This is the first time I had the hood on the car since I bought it 2+ years ago.
Attached Thumbnails
Click image for larger version

Name:	014.jpg
Views:	70
Size:	54.7 KB
ID:	160507   Click image for larger version

Name:	015.jpg
Views:	71
Size:	61.1 KB
ID:	160508   Click image for larger version

Name:	017.jpg
Views:	70
Size:	70.0 KB
ID:	160509   Click image for larger version

Name:	008.jpg
Views:	68
Size:	30.2 KB
ID:	160510  

__________________
1974 400 4 speed

Last edited by TransAmRIP; 03-05-2009 at 04:10 PM.
  #226  
Old 04-21-2009, 10:41 PM
blue71ta's Avatar
blue71ta blue71ta is offline
Ultimate Warrior
 
Join Date: Feb 2005
Location: America's Dairyland
Posts: 1,587
Default Bump

bringing this one back to the top - can't let it die!

Any progress? Just curious...

  #227  
Old 04-22-2009, 10:31 AM
TransAmRIP's Avatar
TransAmRIP TransAmRIP is offline
Chief Ponti-yacker
 
Join Date: Jun 2006
Location: Slidell, La.
Posts: 780
Default

Quote:
Originally Posted by blue71ta View Post
bringing this one back to the top - can't let it die!

Any progress? Just curious...
Just recently completed mounting all the body parts back together including the bumpers and front valance making sure everything fit right and had the correct shims in place. Measured everything and took pictures and notes of spacing. Next up I'll start fixing minor body dings and start putting a few coats of high build primer to see where the body needs improvements. Hopefully the next couple of weeks I'll be posting pictures of the blocking and painting phases.

Thanks for asking,
Bub

__________________
1974 400 4 speed
  #228  
Old 04-22-2009, 11:40 AM
blue71ta's Avatar
blue71ta blue71ta is offline
Ultimate Warrior
 
Join Date: Feb 2005
Location: America's Dairyland
Posts: 1,587
Default

Quote:
Originally Posted by TransAmRIP View Post
Thanks for asking,
Bub
Sure, thanks for posting.

  #229  
Old 04-24-2009, 01:05 PM
Rack776's Avatar
Rack776 Rack776 is offline
Chief Ponti-yacker
 
Join Date: Mar 2007
Location: Eastern Pennsylvania
Posts: 516
Default

First I read this Post:

"Just an update: Started aligning the doors, fenders, header panel, and hood to get an idea of how many shims I need(since I didn't keep track of them when I took the car apart)"


Then I read This Post and Laughed Like Crazy:

"Boy, what a pain in the a$$ aligning the doors, fenders, hood, header and trunk."


Note to Self for When I Paint my own Car: KEEP TRACK OF THE FENDER SHIMS LOL!

I've been reading this Post for a while, Good Luck with the T/A and dont get too side tracked with that shiny new Dodge.

I'd like to see all the posts compiled into a PDF file or something when its done
to have as a resto reference, Good Job on documenting the work done.

__________________
Jason Rackawack
1975 455 Trans Am - 1975 Firebird 400
  #230  
Old 05-02-2009, 01:11 PM
TransAmRIP's Avatar
TransAmRIP TransAmRIP is offline
Chief Ponti-yacker
 
Join Date: Jun 2006
Location: Slidell, La.
Posts: 780
Default

Thanks Rack, The new Dodge is tucked away and I am trying to stay focused on the TA at hand.

__________________
1974 400 4 speed
  #231  
Old 05-02-2009, 02:00 PM
TransAmRIP's Avatar
TransAmRIP TransAmRIP is offline
Chief Ponti-yacker
 
Join Date: Jun 2006
Location: Slidell, La.
Posts: 780
Default Steering Hub

Removed the steering hub from the column. Sanded it, primed it, and painted it with Plasti-Kote MAGNIFIQUE Silk Finish paint. The color is #40015 Black Tuxedo Silk.

Steps I took:
1. Sanded
2. Cleaned
3. Primed
4. Painted (heavy coat)
5. Baked at 350 for 10 minutes
6. Painted (second coat light)
7. Baked at 350 for 10 minutes
8. Painted (third coat light) and let air dry
9. Results
10. Thanks Jay
Attached Thumbnails
Click image for larger version

Name:	SteeringCollarSanded.jpg
Views:	40
Size:	61.3 KB
ID:	167243   Click image for larger version

Name:	SteeringCollarPrimed.jpg
Views:	47
Size:	51.3 KB
ID:	167244   Click image for larger version

Name:	SteeringCollarPainted.jpg
Views:	99
Size:	119.0 KB
ID:	167245   Click image for larger version

Name:	SteeringCollarPaint.jpg
Views:	64
Size:	43.7 KB
ID:	167246  

__________________
1974 400 4 speed
  #232  
Old 05-02-2009, 07:01 PM
1qikta's Avatar
1qikta 1qikta is offline
Ultimate Warrior
 
Join Date: May 2006
Location: Woodstock,Ga
Posts: 2,085
Default

Looks good buddy.

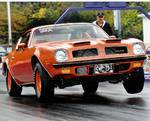
I want to see that car at the Ban One show next year. You missed a good one today!
We had over 30 second gens alone. Here is just the Stock 1970-1981 row.

I was impressed Big John did a great job.
Attached Thumbnails
Click image for larger version

Name:	DSC03757.jpg
Views:	62
Size:	65.4 KB
ID:	167281   Click image for larger version

Name:	DSC03758.jpg
Views:	53
Size:	91.1 KB
ID:	167282  

__________________


Nothing is impossible if you break it down into possibilities. It's all a matter of "Want to".
  #233  
Old 05-03-2009, 06:06 AM
Greg Reid's Avatar
Greg Reid Greg Reid is offline
Ultimate Warrior
 
Join Date: May 2003
Location: Palmetto, GA. USA
Posts: 16,175
Default

Quote:
Originally Posted by TransAmRIP View Post
Removed the steering hub from the column. Sanded it, primed it, and painted it with Plasti-Kote MAGNIFIQUE Silk Finish paint. The color is #40015 Black Tuxedo Silk.

Steps I took:
1. Sanded
2. Cleaned
3. Primed
4. Painted (heavy coat)
5. Baked at 350 for 10 minutes
6. Painted (second coat light)
7. Baked at 350 for 10 minutes
8. Painted (third coat light) and let air dry
9. Results
10. Thanks Jay
Wow Bub, that looks factory. Did you let it cool between coats/oven curings?

Jay, Was that the show at Summit? I went to Dennis' Birthday show/burnout contest yesterday and got rained on trying to get my old '66 out of the swamp down there.

__________________
Greg Reid
Palmetto, Georgia

  #234  
Old 05-03-2009, 12:09 PM
TransAmRIP's Avatar
TransAmRIP TransAmRIP is offline
Chief Ponti-yacker
 
Join Date: Jun 2006
Location: Slidell, La.
Posts: 780
Default

Did you let it cool between coats/oven curings?

Thanks Jay and Greg,

Greg, I let it cool just enough so I could handle it. Then resprayed.

Jay, I still have an extra can of paint reserved for you.

Bub

__________________
1974 400 4 speed
  #235  
Old 05-06-2009, 01:04 AM
sinister76ta's Avatar
sinister76ta sinister76ta is offline
Member
 
Join Date: Mar 2009
Location: Sheboygan, WI
Posts: 76
Default

Quote:
Originally Posted by TransAmRIP View Post
Removed the steering hub from the column. Sanded it, primed it, and painted it with Plasti-Kote MAGNIFIQUE Silk Finish paint. The color is #40015 Black Tuxedo Silk.

Steps I took:
1. Sanded
2. Cleaned
3. Primed
4. Painted (heavy coat)
5. Baked at 350 for 10 minutes
6. Painted (second coat light)
7. Baked at 350 for 10 minutes
8. Painted (third coat light) and let air dry
9. Results
10. Thanks Jay
That looks outstanding.

  #236  
Old 05-06-2009, 11:51 AM
TransAmRIP's Avatar
TransAmRIP TransAmRIP is offline
Chief Ponti-yacker
 
Join Date: Jun 2006
Location: Slidell, La.
Posts: 780
Default

Quote:
Originally Posted by sinister76ta View Post
That looks outstanding.

Thanks!

__________________
1974 400 4 speed
  #237  
Old 05-27-2009, 03:05 PM
Rack776's Avatar
Rack776 Rack776 is offline
Chief Ponti-yacker
 
Join Date: Mar 2007
Location: Eastern Pennsylvania
Posts: 516
Default

I figured this thread needs a "bump"

Hows the T/A going?

__________________
Jason Rackawack
1975 455 Trans Am - 1975 Firebird 400
  #238  
Old 05-28-2009, 01:16 AM
TransAmRIP's Avatar
TransAmRIP TransAmRIP is offline
Chief Ponti-yacker
 
Join Date: Jun 2006
Location: Slidell, La.
Posts: 780
Default

Quote:
Originally Posted by Rack776 View Post
I figured this thread needs a "bump"

Hows the T/A going?
Hey Rack, Thanks for your interest. I completed installing the doors, fenders, hood, trunk and front header panel and got everything lined up correctly and shimmed out. I even installed the front bumper and rear bumper to make sure those fit properly.

Currently, I am doing some final smoothing out of some of the body panels. Rear quarters, doors and fenders to be exact. Once i feel they are straight and look good I plan on shooting some high build primer and start the blocking process until I get it smooth and even. Than hopefully shoot some B/C Admiralty Blue by mid to end of June. The process is taking much longer than I anticipated....
Thanks for your interest..

Bub

__________________
1974 400 4 speed
  #239  
Old 06-16-2009, 10:37 PM
BAD455TA's Avatar
BAD455TA BAD455TA is offline
Senior Chief
 
Join Date: Nov 2006
Location: Shady Shores TX
Posts: 290
Default

Bump!!! Great thread! Thanks for all the pics I think they will help me on my project...God Bless you for taking the time to do it right!

  #240  
Old 06-16-2009, 11:16 PM
TransAmRIP's Avatar
TransAmRIP TransAmRIP is offline
Chief Ponti-yacker
 
Join Date: Jun 2006
Location: Slidell, La.
Posts: 780
Default

Quote:
Originally Posted by BAD455TA View Post
Bump!!! Great thread! Thanks for all the pics I think they will help me on my project...God Bless you for taking the time to do it right!
Thanks Bad, Its been a long road to get to that point in the restoration. Still chugging
though.

Bub

__________________
1974 400 4 speed
Reply


Posting Rules
You may not post new threads
You may not post replies
You may not post attachments
You may not edit your posts

BB code is On
Smilies are On
[IMG] code is On
HTML code is Off

Forum Jump


All times are GMT -4. The time now is 08:53 AM.


About Us

The PY Online Forums is the largest online gathering of Pontiac enthusiasts anywhere in the world. Founded in 1991, it was also the first online forum for people to gather and talk about their Pontiacs. Since then, it has become the mecca of Pontiac technical data and knowledge that no other place can surpass.


Copyright © 2017