Non Pontiac Motors in Pontiacs includes factory 403,305,350 Chevy, Buick V6,
Also Pontiac Motors in non-Pontiacs!

          
Reply
 
Thread Tools Display Modes
  #1  
Old 07-16-2014, 02:12 PM
Greg Reid's Avatar
Greg Reid Greg Reid is offline
Ultimate Warrior
 
Join Date: May 2003
Location: Palmetto, GA. USA
Posts: 16,177
Default

One more reference to the Z and I'll let it go... Fred, considering the cost of restoration vs. the very low value of these cars...have you considered talking her into replacing it? They are pretty cheap.
Ran across this driver on ebay for the cost of weatherstripping alone... That's about what I paid for my daily driver also...
http://www.ebay.com/itm/Datsun-Z-Ser...20206#ht_0wt_0

__________________
Greg Reid
Palmetto, Georgia

  #2  
Old 07-16-2014, 11:12 PM
fbrown fbrown is offline
Senior Chief
 
Join Date: Jul 2008
Location: Marietta GA
Posts: 387
Default

Discussions about the Z are welcome. In Carol's case the value of the car after it's restored is irreverent. She never intends to sell the car. While the Ebay car would be a much cleaner car to start with, she only wants her car, not another one. I tried to convince her to sell the car 20 years ago with no luck. The car has great sentimental value to her, having owned it since it was new. It was her only car from 1982 to 1997. She was then forced to replace the 280ZX as her daily driver because it because unreliable after hydro locking. Fortunately it locked while cranking, but never ran the same after being repaired. She has said for years, if she ever won the lottery she would get her 280ZX restored. Of all the cars she has owned, the 280ZX is her favorite. Unfortunately the last several years of sitting under a cover have not been kind to the car. Five years ago it didn't look like it would be hard to restore, now it needs a lot. I'm not real sure if the cover actually helps.

After seeing my Lemans nearly complete, she wants her car restored to show room new or better. She wants the same quality paint job as I did on the LeMans. BTW the last paint job on the 280ZX was a basic Maaco enamel paint job.

So now I get to restore her car before I start on my next project, my 68 Eldorado will have to wait a while longer. Her car shouldn't take too long, maybe 6 months to a year. Her car looks to be an interesting project.

My budget looks like around 4-5K for the body work, paint and interior. It looks like a mixture of NOS and reproduction weather stripping will run around $1200 for the whole car, not the 2K I originally guessed. What I don't know is how much I will spend on the power train. She needs either a new long block or a complete rebuilding of the current engine. The transmission will almost certainly need rebuilding (original and never rebuilt). After sitting for 15 years, I don't even know if the engine will turn over. I don't know much about Nissan engines, but I guess I'm about to learn. Budget for engine and trans, guessing 3K.

Of course the budget is subject to change after I take the car apart. The current budget is based on the 200+ pictures I took of the car a couple of weeks ago.

I agree that another car would be cheaper to restore, but Carol would never accept that. For instance if a tree fell on her car and destroyed it, she would not want to replace it with another 280ZX.

__________________
68 Lemans - GTO appearance LS3
68 Eldorado - waiting for restoration
96 Roadmaster Wagon
2014 Infiniti Q50S Hybrid
Marietta GA
  #3  
Old 07-17-2014, 12:10 AM
fbrown fbrown is offline
Senior Chief
 
Join Date: Jul 2008
Location: Marietta GA
Posts: 387
Default

Now with all the talk about the 280ZX lets give the 68 Lemans some time. I'm going to refer to it a 68 GTO moving forward, since after all, it was converted to look like a 68 GTO.

I feel like the last 1% of the build takes 90% of the time.

A Partial list of remaining things to do.

Screw ups. I went to install the windshield wiper motor and found that the motor hit where I ran the fuel line up the firewall. This sucks big time since it will be hard to make and install another fuel line with the car all put together.

I hope to repaint the hood and bumper this month. I decided to make a priority of getting an alignment and getting the car tagged, so I didn't paint the hood last month.

I'm talking to Vintage Air tomorrow about ordering an AC unit.

Install Vintage Air unit.

Cornering light bezels rechroming won't be complete until September.

Adjust brake proportioning Valve . I need a few more miles before testing the brakes at their limits.

Need to order seat belts and shoulder belts. Planning on ordering deluxe style OEM belts. Decided that 68 OEM style belts would hold me in the seat better since you can adjust them tight. I considered a 3 point modern style, but it suffers from not holding you in the seat unless breaking. Don't want to go flying out of the seat when cornering.

I need to write a program to read the PCM temp and display it on the temperature gauge. I have a Arduino single board controller and OBD2 interface for completing this task.

The Corvette alternator does not control the GEN light. I can either build a small board to activate the GEN light on low voltage (<12.3) or I could program the Arduino board to do this function. I like the small purpose built board better. If I keep adding functions to the Arduino board, it will become a BCM.

Since the steering column does not have a switch to activate the cornering lights, I need to write programming in the Arduino board to control the cornering lights.

PCM needs to be tuned. I should probably have 500 miles on the car before I do any dyno tuning.

Cruise control does not work. Need to troubleshoot .

Fabricate a blank panel in location where the AC control panel was. The bottom portion will contain the vintage air controls. The upper will have the MIL display, Blinking car alarm LED, switch to reset trip meter.

Trunk weather strip leaks, need to look into this.

Console is not fully mounted. Figure I need to remove it to install vintage air, so pointless to bolt everything down.

Actually I think this is all of what remains. The list is getting smaller.

__________________
68 Lemans - GTO appearance LS3
68 Eldorado - waiting for restoration
96 Roadmaster Wagon
2014 Infiniti Q50S Hybrid
Marietta GA
  #4  
Old 10-25-2014, 04:44 AM
Aus Goat Aus Goat is offline
Chief Ponti-yacker
 
Join Date: Apr 2006
Location: Brisbane - AUS
Posts: 668
Default

Frank its been awhile on a update of the 68 GTO .
I know I would like to see pictures of the finished car in all her glory from the front to the back. Even another drive video

Craig

  #5  
Old 10-27-2014, 01:49 AM
fbrown fbrown is offline
Senior Chief
 
Join Date: Jul 2008
Location: Marietta GA
Posts: 387
Default

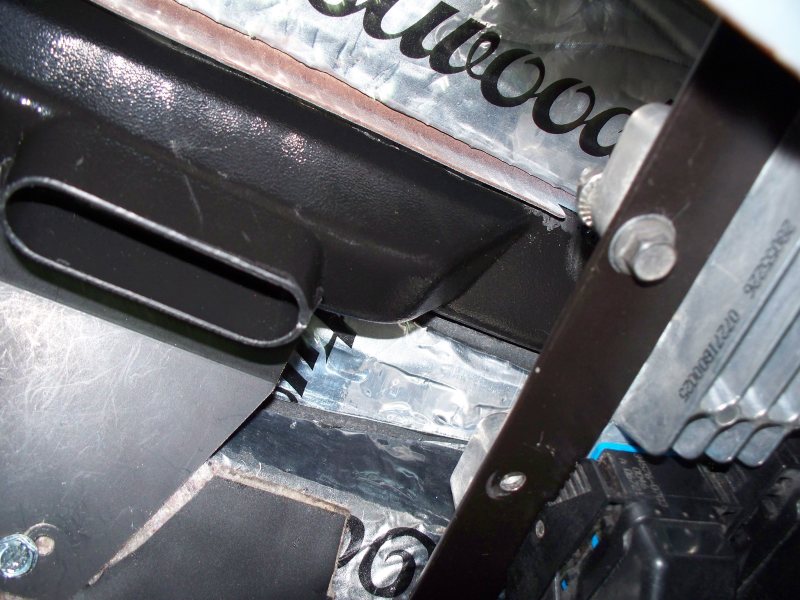
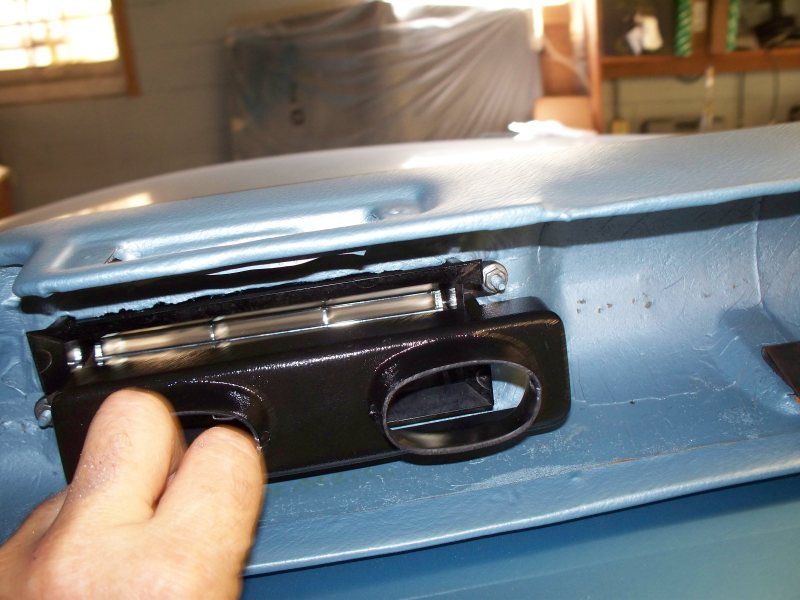
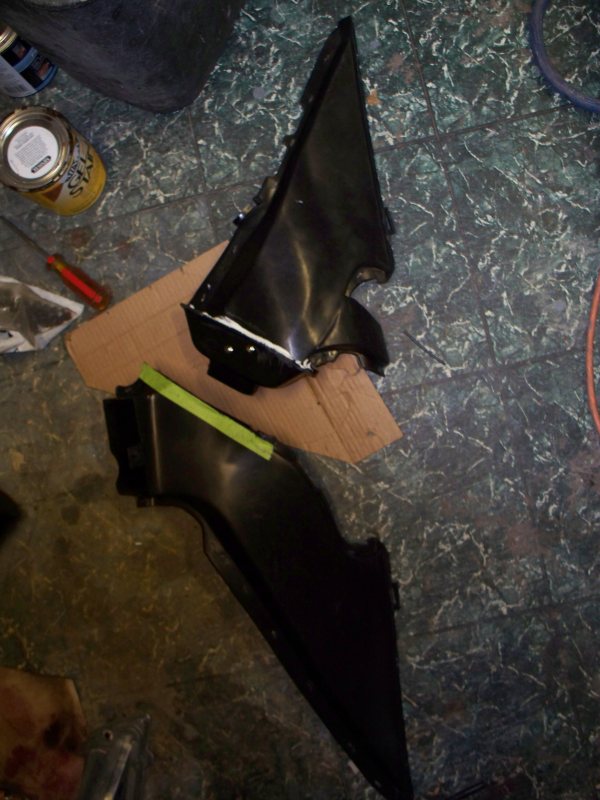
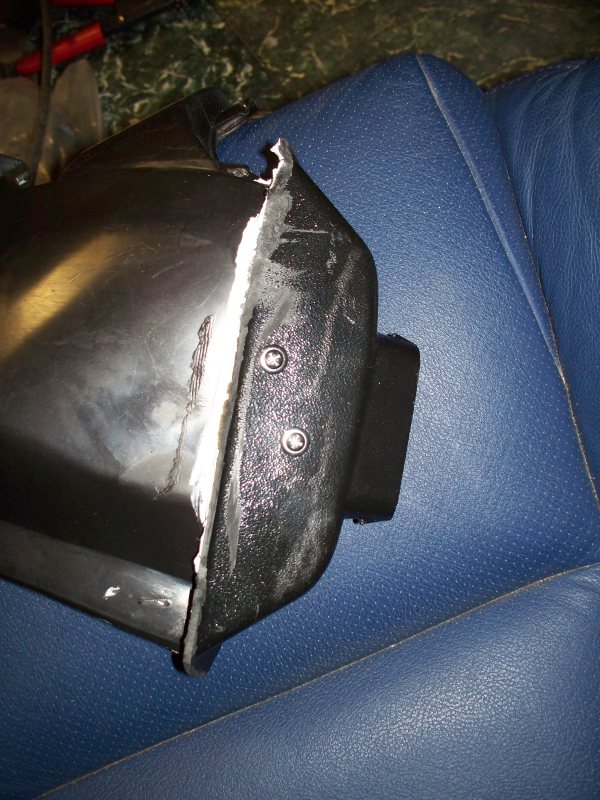
It feels like I'm going back wards. I received the Vintage Air unit around the first of August. It turns out that I have to remove the dash in order to install the vintage Air Unit. Access to the Windshield vents is not possible with the dash installed and I had to cut up the factory vent and use part of the factory vent and part of the vintage air unit in order to hook up the driver side windshield vent.

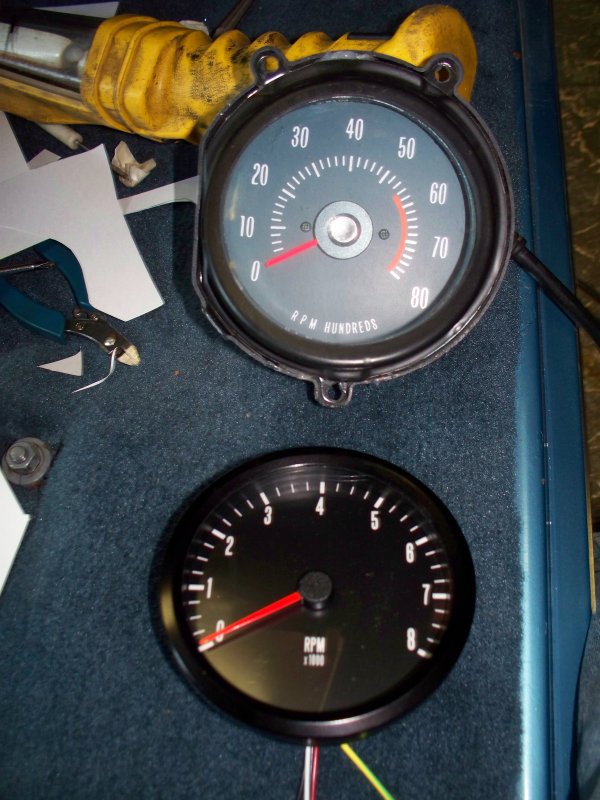
The in dash factory tach would not work with the ECM tach signal. I gave up on making it work and purchased a Speedhut unit.

Cruise Control - I think I found the problem. I forget to hook 12V to the stalk.

I managed to strip the threads on the ignition switch. Waiting for another one.

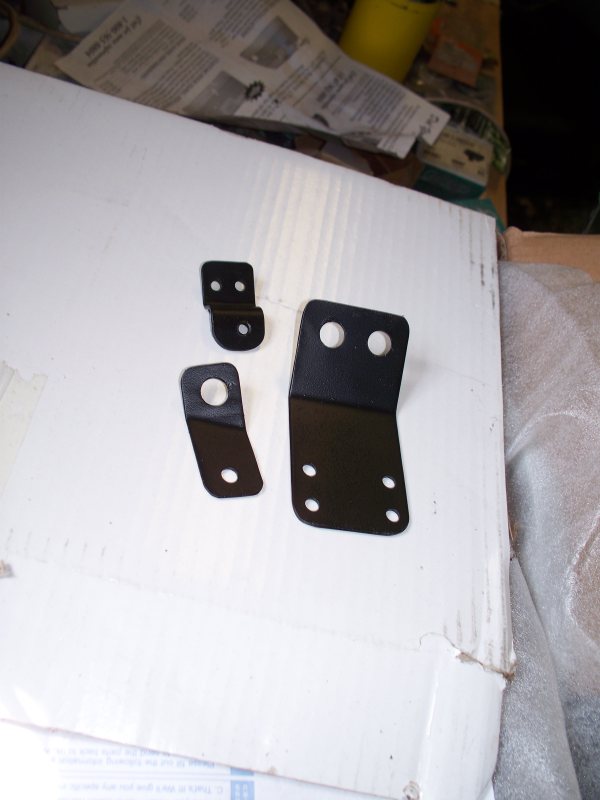
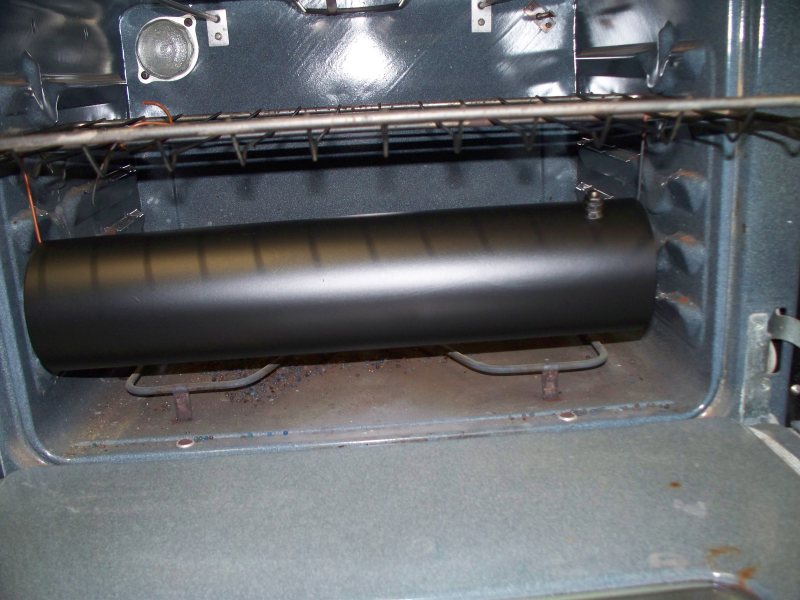
I started powder coating brackets and other parts. I wish I had done this sooner. I had an Eastwood unit for a long time, but didn't use it because I thought the learning curve would take too long. WRONG - powder coating is quick and easy compared to painting with epoxy based paints. No mixing, no induction time, (time after mixing before you should spray), no messy cleanup, three coats of epoxy takes around 90 minutes. It takes around 2 hours from start of mixing to end of cleaning and you can't really install the part for a couple of days. Powder coating from start to finish takes about 40 minutes and you can install the part right away.

Vacation and work has slowed my build down in the last two months. I usually work three days a week helping my girl friend with her business, but I picked up an engineering job and found myself helping her 5 days a week for a while. Things have been a bit busy lately.

I ordered a Vintage Air unit for a 68 Chevelle. While I am showing some of what I went through, Vintage Air should have a SureFit unit for a 68 GTO available by next summer. I am told they have a car in their shop and are working on the kit now, but don't expect to have anything available for many months.

I used the Chevelle lower bracket. I made an upper one. Failed to take a photo but was a simple bracket.
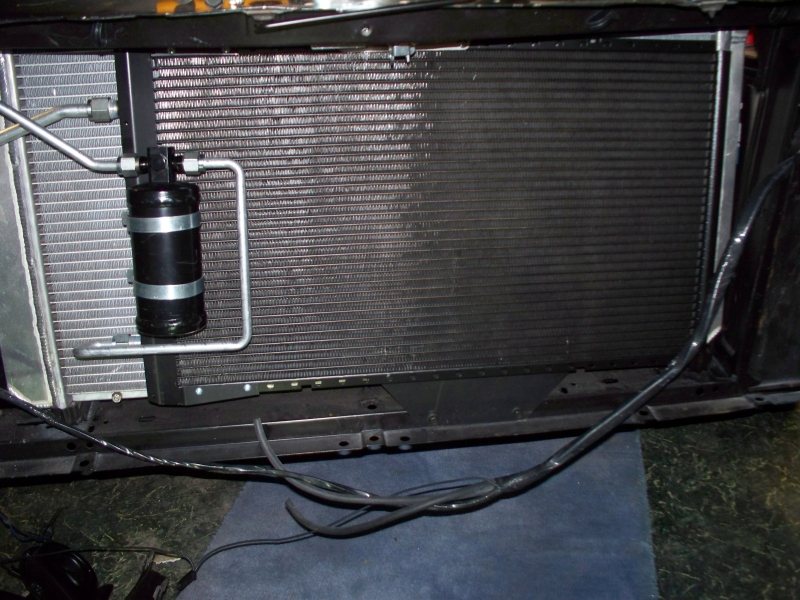

The lines as supplied for the Chevelle, there is a place for the lines to go. All I had to do was drill a couple of holes and make a bracket to support the lines.
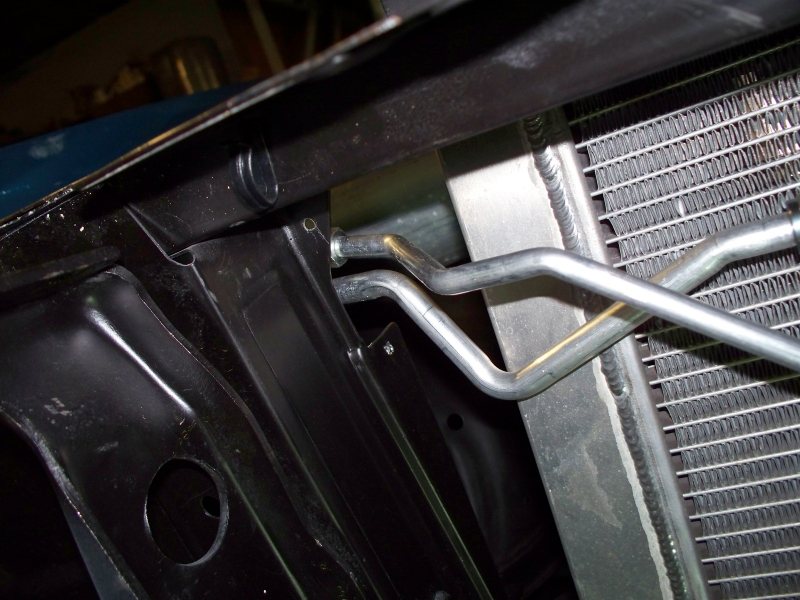
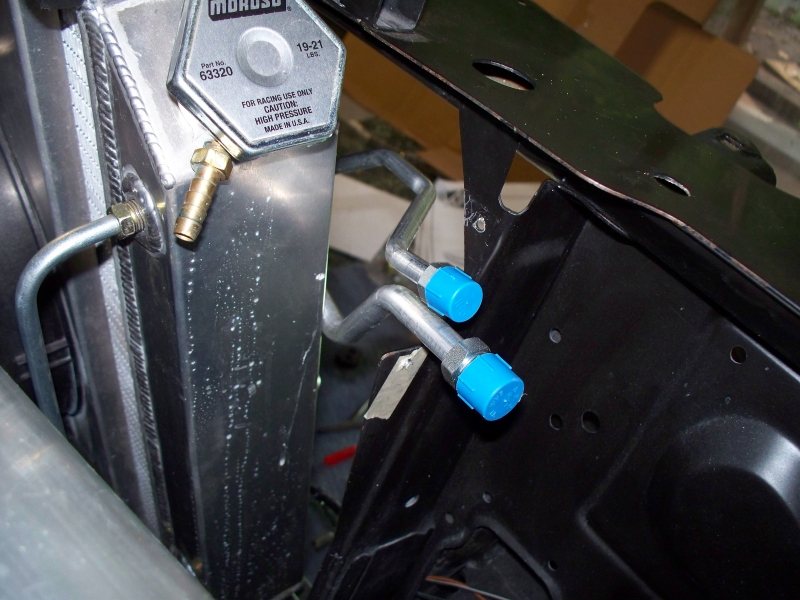


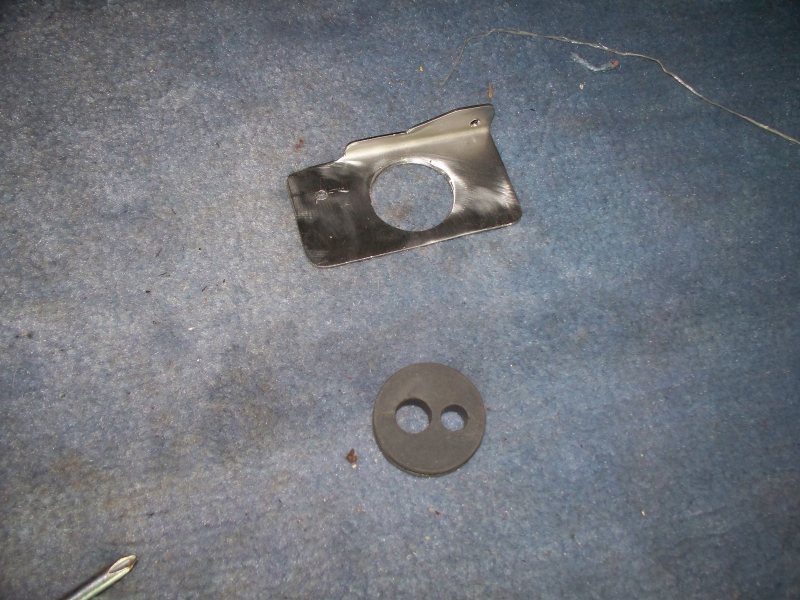
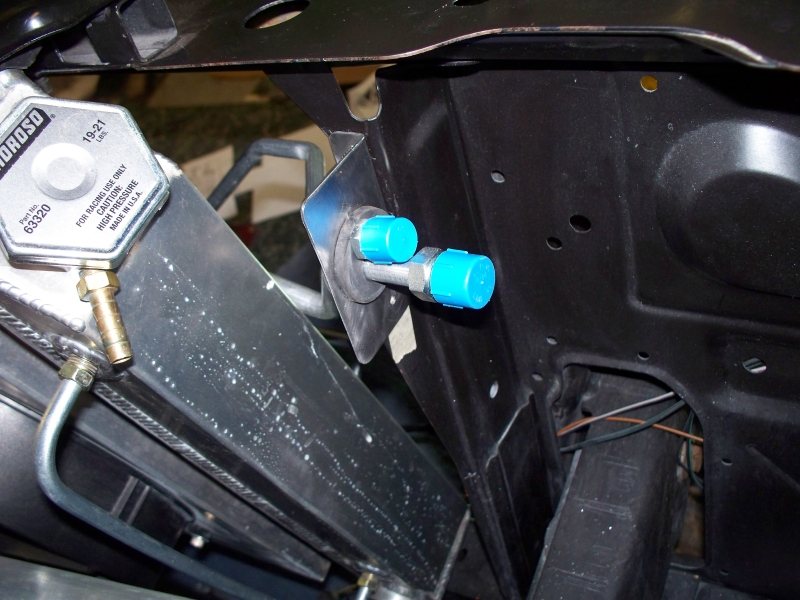
The bracket to support the lines.

And yes the hidden headlights miss the lines and dryer.

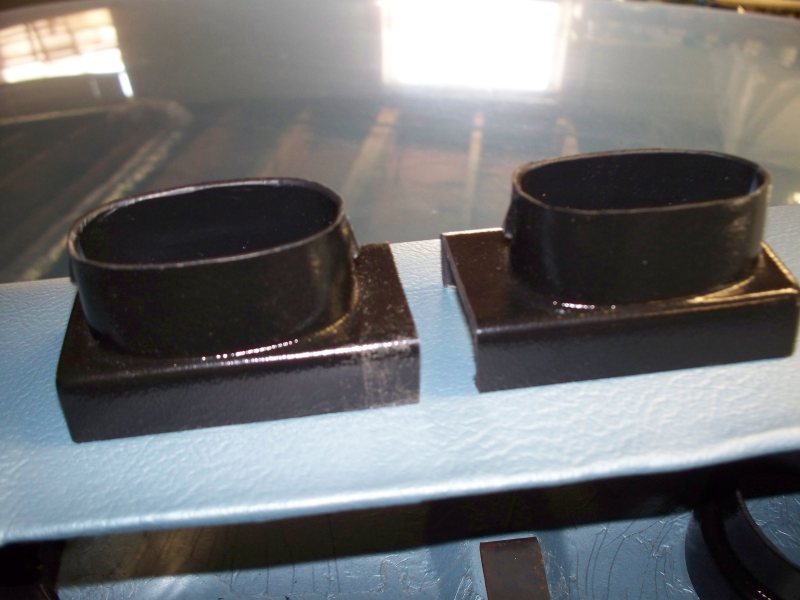
Cutting the old windshield duct. You can see where I grafted part of the vintage outlet to the Pontiac piece.


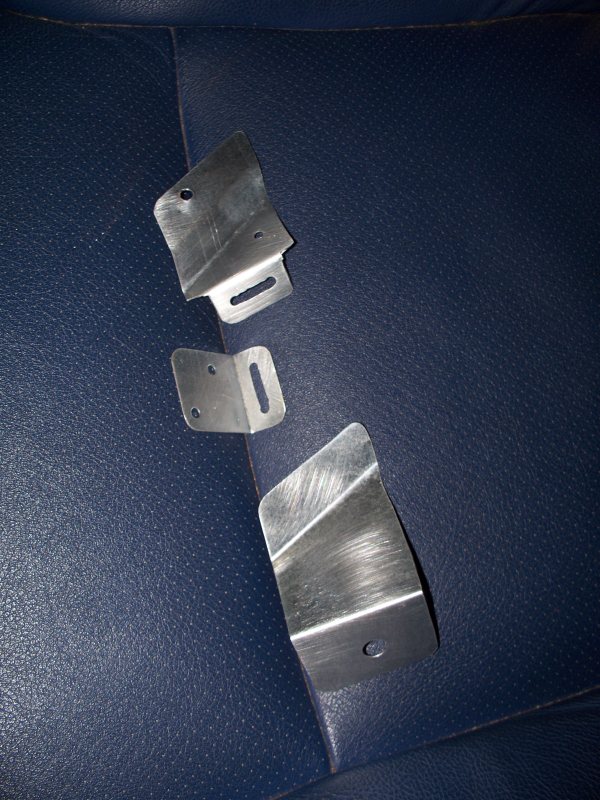
Brackets to hold the driver side duct


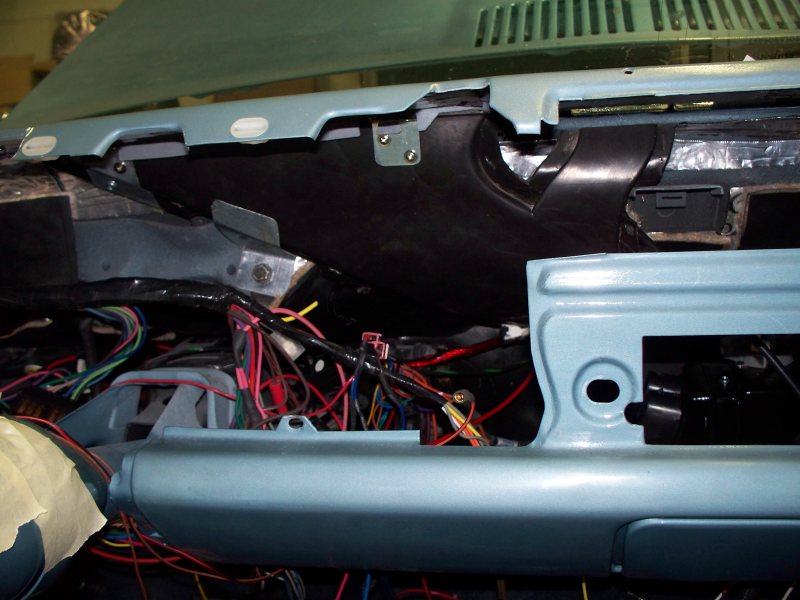
Driver side installed


The passenger side was easier. Some modification to the vintage air part.


Trial fit of the evaporator unit.


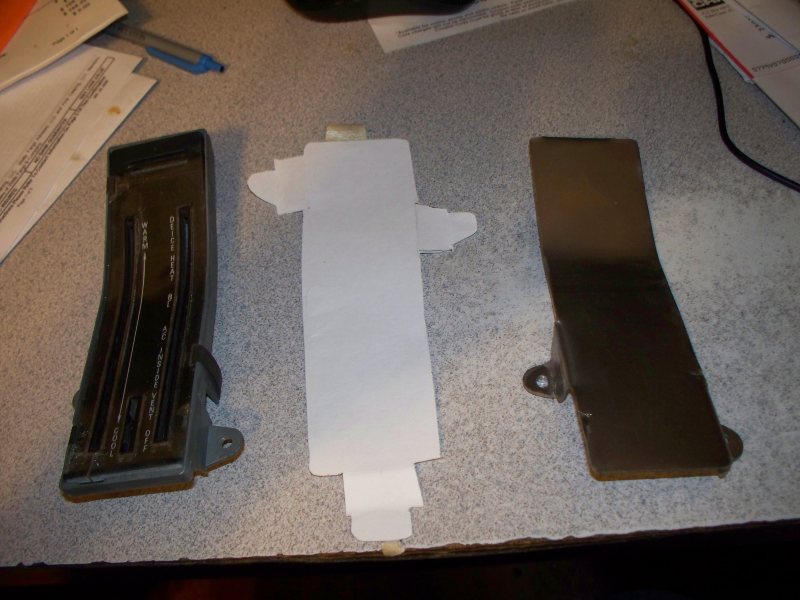
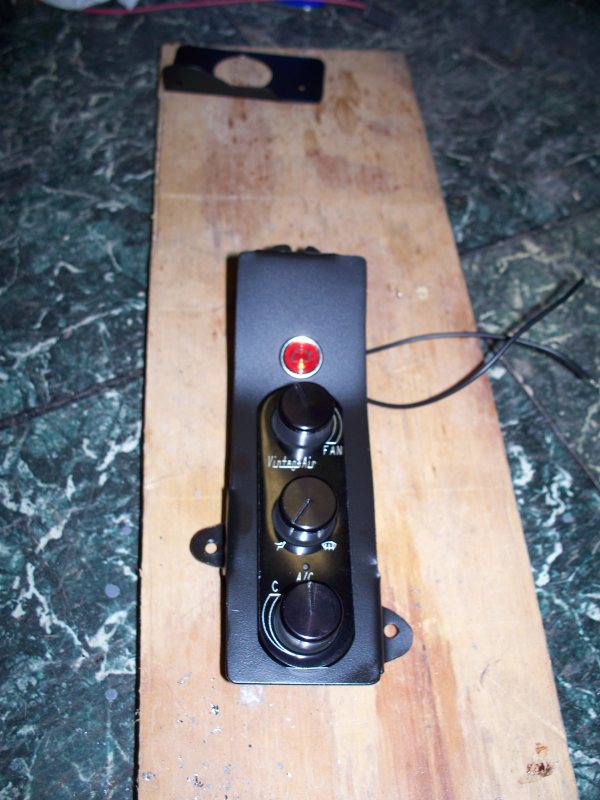
Bracket for the vintage air controls


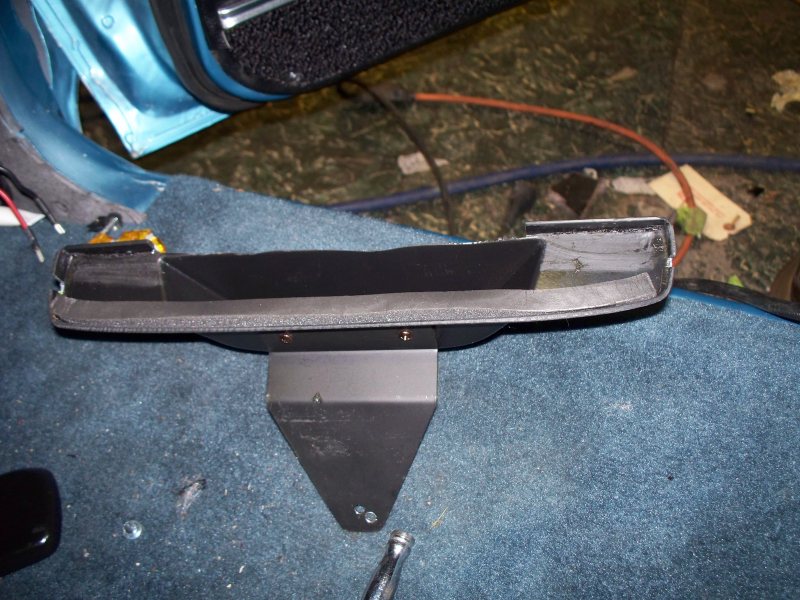
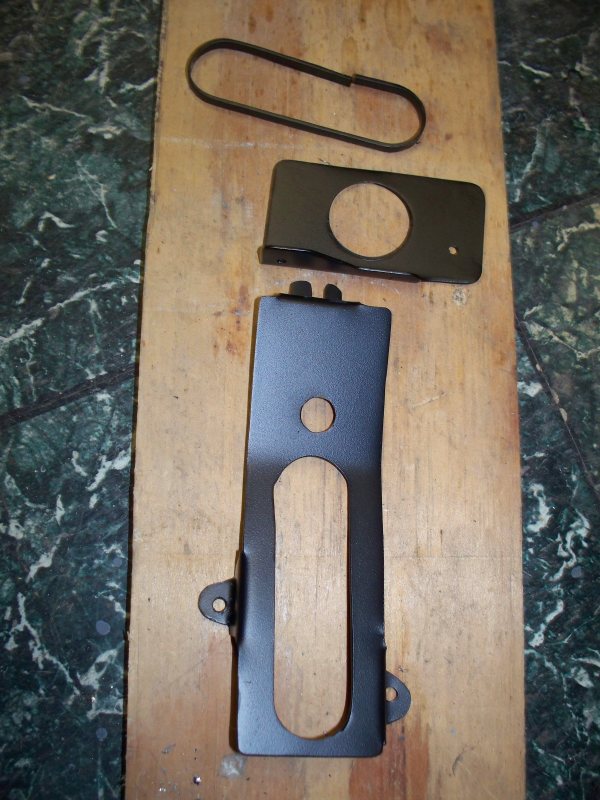
These are the first parts I powder coated. Used Eastwood Satin Black. The bracket with the large hole the one that supports the hard lines at the core support. The ring is a spacer to hold the vintage air control out from the panel.


Vintage air control unit installed in custom bracket


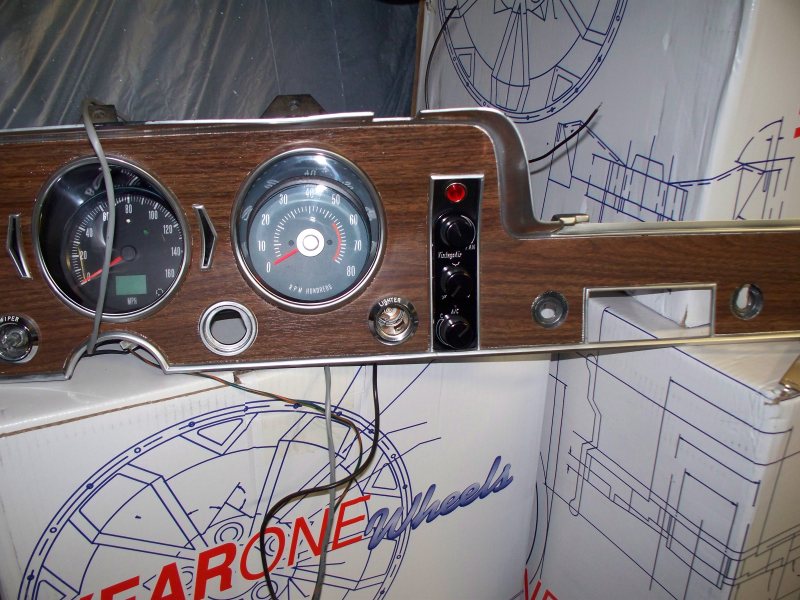
I did have to grind the edge of the vintage air controls to fit in the dash, about 1/32" each side. While the ground edge is not black, it is not visible since it is against a silver/chrome dash.

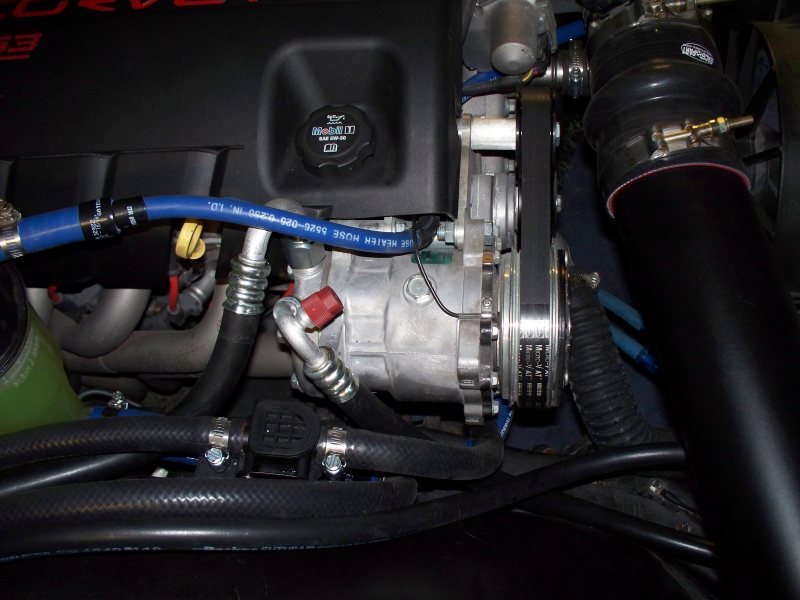
Charging the system was troublesome. My vacuum pump failed 20 minutes after I started. Needed to run for at least 45 minutes. My vacuum pump was at least 30 years old, so I can't complain. Had to buy new gauges since I didn't have a 4 port gauge set for R134 , my set was for R12. After reading about how critical it is to get the right amount of R134 in the system, I ending up buying a special scale for AC work. I have to say the charging of the system was very simple with the right tools and the system blows cold air.

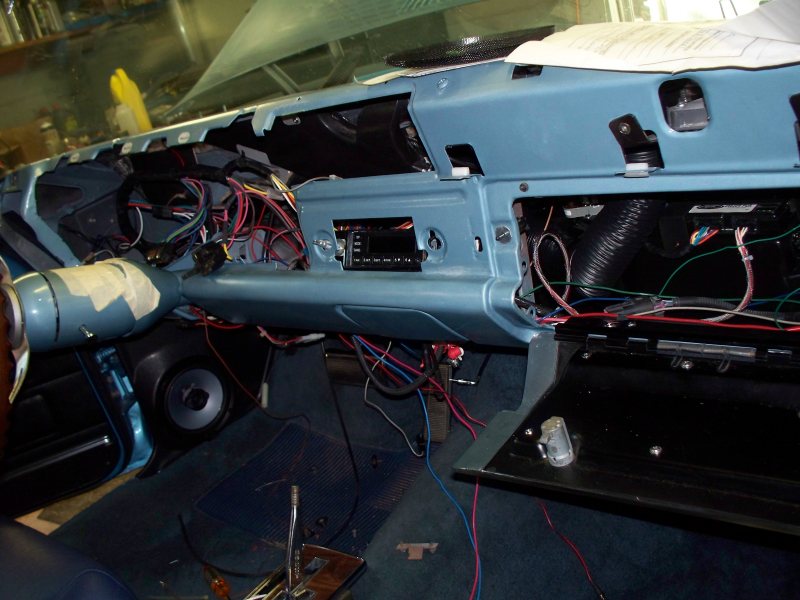
So this is how my car looks now, waiting for the tach and the ignition switch.

__________________
68 Lemans - GTO appearance LS3
68 Eldorado - waiting for restoration
96 Roadmaster Wagon
2014 Infiniti Q50S Hybrid
Marietta GA
  #6  
Old 10-27-2014, 08:34 PM
Greg Reid's Avatar
Greg Reid Greg Reid is offline
Ultimate Warrior
 
Join Date: May 2003
Location: Palmetto, GA. USA
Posts: 16,177
Default

Excellent skill on display as usual Fred. Just keep chipping away at it.
Say, did you ever get rid of that repop dash pad you were thinking about ebaying? I'm going to have to dye some interior parts and I might be interested in it.

__________________
Greg Reid
Palmetto, Georgia

  #7  
Old 10-27-2014, 10:15 PM
paint guy paint guy is offline
Ultimate Warrior
 
Join Date: Feb 2008
Posts: 1,865
Default

fbrown, just to recap specifically how you installed the ls motor/trans: you used Chevy frame mounts with Edelbrock motor mounts, retaining the factory motor position. An AC relocating bracket from Kwik used with the GMPP LS2 corvette accy kit meant no frame notching required. Your existing crossmember was used after drilling two additional holes. A good idea to install 90* fittings for the trans cooler lines before installing tranny. Fuel reg. used is a GM 10299146. Please correct me if anything I posted pertaining to your build is incorrect.
As you can tell, I am very much interested in your project. I will be installing a GM "connect and cruise' package in my 69, which should eliminate some of the things you had to deal with because of the "plug and play" nature of the kit. Nontheless, I am hoping you will answer some questions for me. First off, the cruise control stalk part number if you happen to know? Second, what would you do differently if you were to do another ls install in a GTO? What is your opinion of the Holley oil pan for this type of install? Last, with a different oil pan, do you see any way you could have installed the motor/trans as a unit? thanks in advance for your time.

  #8  
Old 10-28-2014, 08:10 PM
fbrown fbrown is offline
Senior Chief
 
Join Date: Jul 2008
Location: Marietta GA
Posts: 387
Default

Greg - Yes the Pad is still available - never got around to listing it.

Paint Guy

Cruise Control stalk - The Company selling it is out of business. According to John at Speartech any GM cruise control stalk from the 70's - 80's would work. I didn't think the connect and cruise packages supported cruise control.

Installing LS into another A-Body - The Edelbrock parts I used are no long available so that would no longer be an option. The Edelbrock headers don't fit that well so I guess that is no real loss. The biggest problem of the Edelbrock headers is that they hang below the frame.

Oil Pan - I would use the Holley 302-2 - it is reported to fit A-body's and clear the tie-rod ends. It also connects to the transmission which gives extra support, the MAST pan does not tie-in to the transmission but is reported to clear tie-rod ends. I had to raise
my engine for clearance. I don't know if I have a vibration issue yet since I have only reached 75 MPH for a couple of hundred feet.

My engine and transmission might could have been installed as a unit if the car was higher. ie - placing blocks under the front wheels. It's possible with the Holley pan, the engine and trans could be installed as a unit without raising the front end of the car since the front of the pan is not as deep.

I would try and use engine mounts and headers from the same company. I think problems often occur when people use engine mounts from one company and buy headers/exhaust system from another. At the very least determine what motor mounts the headers were test fitted with and use the same motor mounts. It will probably save you a lot of time getting everything to fit.

Quote:
just to recap specifically how you installed the ls motor/trans: you used Chevy frame mounts with Edelbrock motor mounts, retaining the factory motor position. An AC relocating bracket from Kwik used with the GMPP LS2 corvette accy kit meant no frame notching required. Your existing crossmember was used after drilling two additional holes. A good idea to install 90* fittings for the trans cooler lines before installing tranny. Fuel reg. used is a GM 10299146.
This is correct - and I will add it is very difficult to impossible to connect the transmission lines after the transmission is in place. I connected the lines before installing the transmission.

FWIW - My next LS install will probably be a LSA engine, 6L90 transmission. This would require someone one Speartech to supply the harness and computer since GM does not support the 6L90 in any of their packages. This setup would be installed in my 68 Eldorado. The frame would be a modified 94 B-body frame. That is to say I am converting it to rear wheel drive. This would be my choice today. If the direct injection LS/LT1 engines become available from GM, I might select a direct injection engine instead. Right now support is very limited for the LT1 and since it would be around a year before I start on the Eldorado, a lot could change.

__________________
68 Lemans - GTO appearance LS3
68 Eldorado - waiting for restoration
96 Roadmaster Wagon
2014 Infiniti Q50S Hybrid
Marietta GA
  #9  
Old 10-28-2014, 09:38 PM
fbrown fbrown is offline
Senior Chief
 
Join Date: Jul 2008
Location: Marietta GA
Posts: 387
Default

More on the AC install

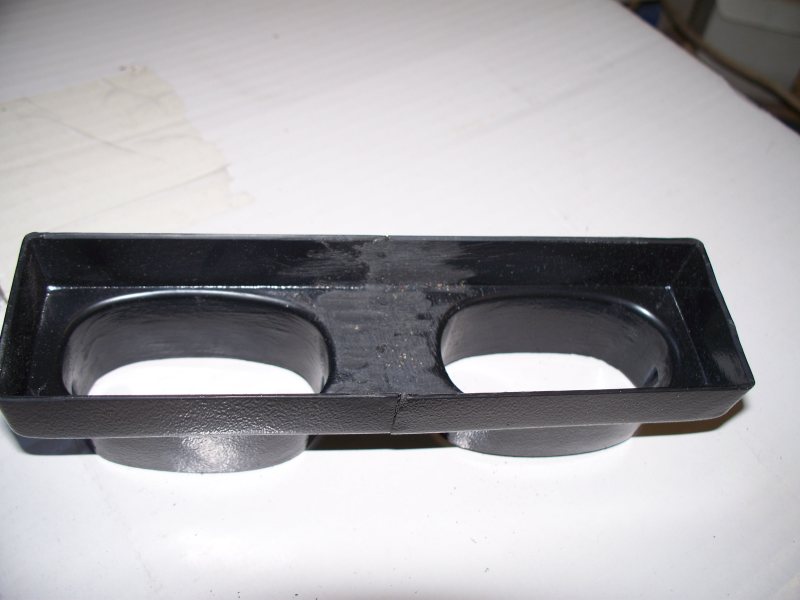
Center Vent had to be modified


I melted the ends together with a soldering iron using strips cut from the cut out section to function as welding rod. Stock S clips hold it in perfectly.


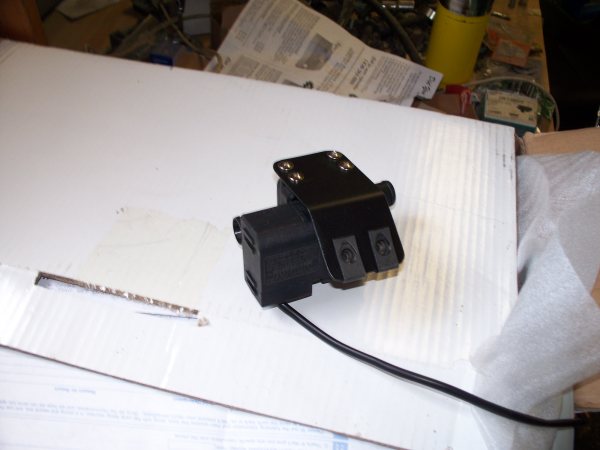
Various brackets - Powder coated - water valve, support for overflow tank, support for carpet protector. After market carpet protector is wider than the 68 with mounting hole in different location.


Water valve with bracket installed


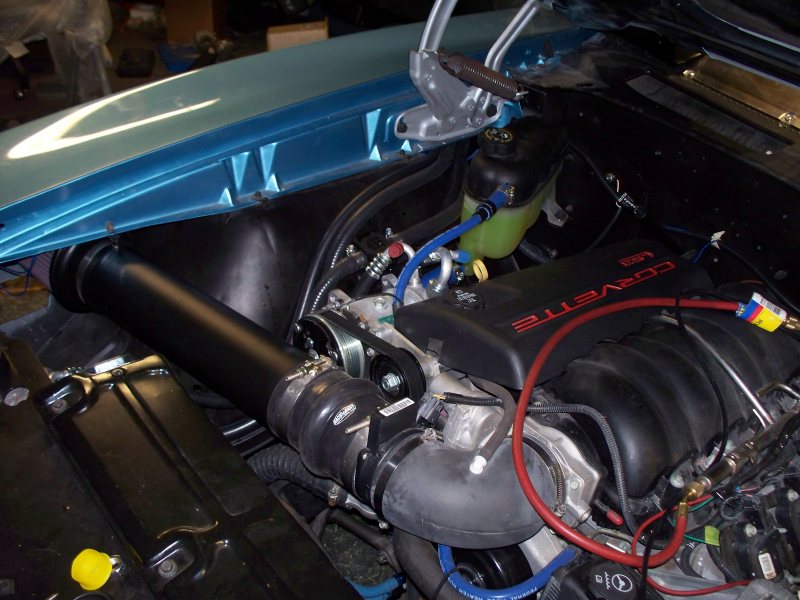
Power coated the air intake tube


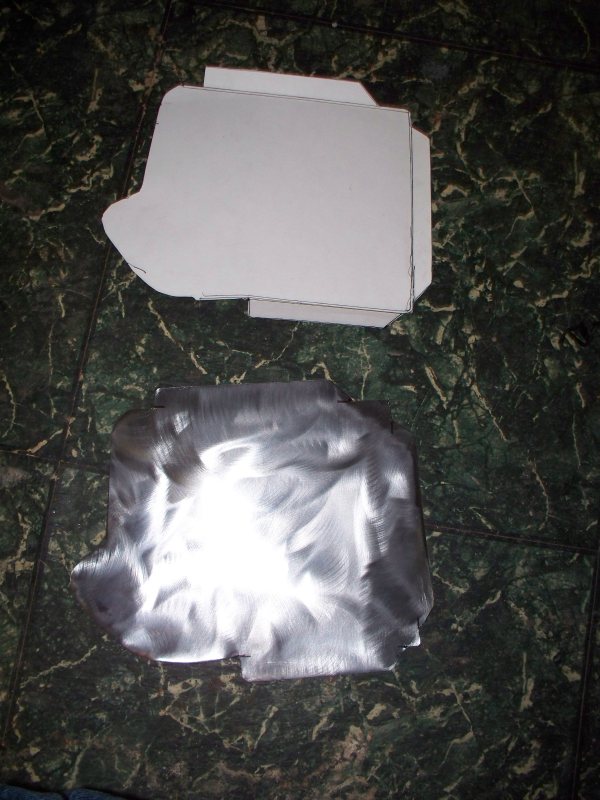
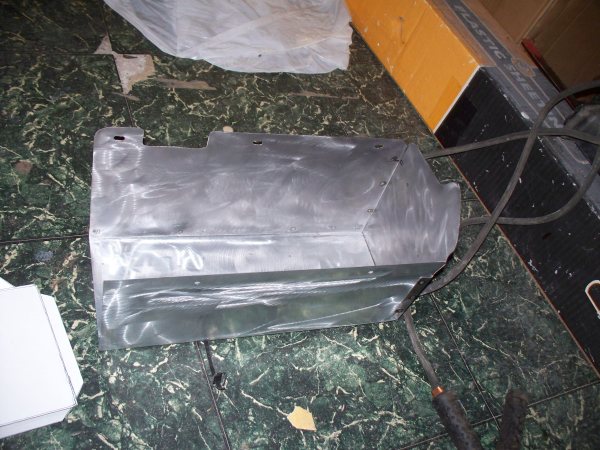
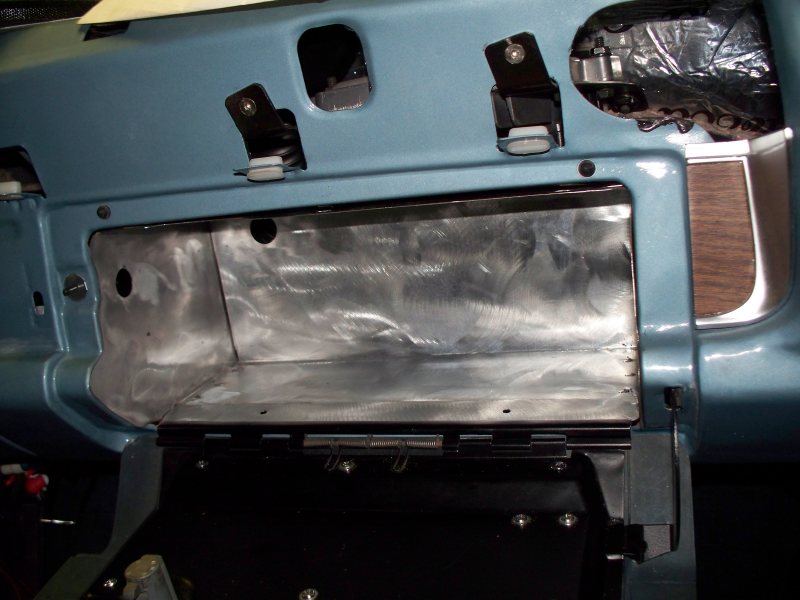
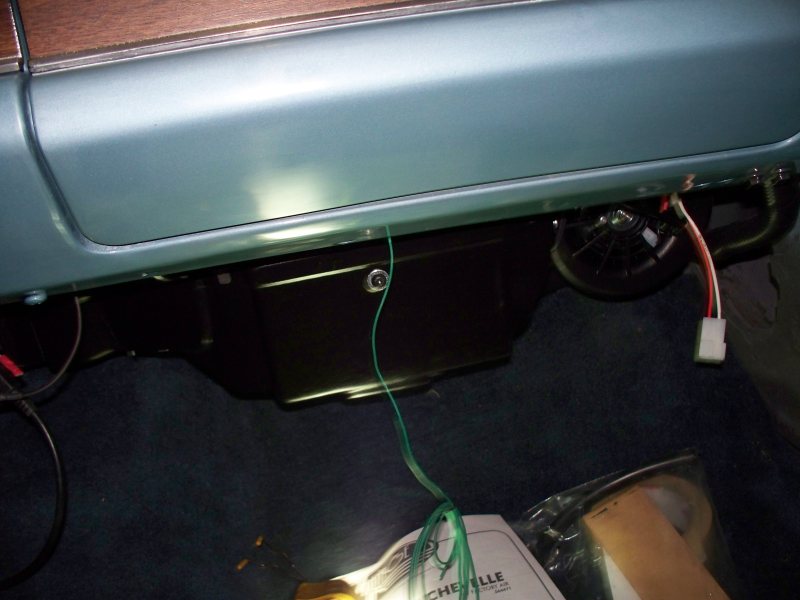
Glove box no longer fits. The vintage air unit sticks our farther from the firewall. Guess I will make one in metal.


Test fit - one of many - left side not welded on yet


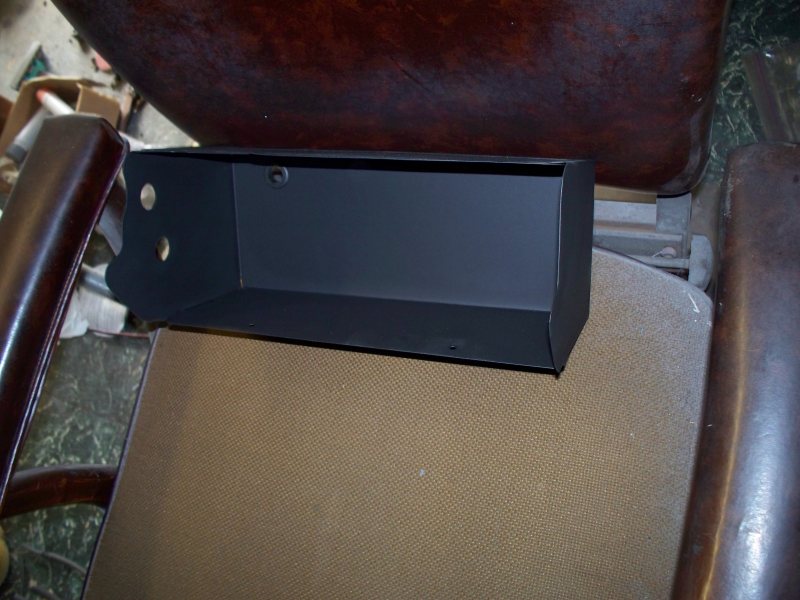
Power coated


A couple of under hood shots


Tach and ignition switch should be here in a couple of days. I hope to get it put back together by the weekend.

__________________
68 Lemans - GTO appearance LS3
68 Eldorado - waiting for restoration
96 Roadmaster Wagon
2014 Infiniti Q50S Hybrid
Marietta GA
  #10  
Old 10-28-2014, 11:16 PM
paint guy paint guy is offline
Ultimate Warrior
 
Join Date: Feb 2008
Posts: 1,865
Default

fbrown, thanks for the reply. I wasn't aware that the connect and cruise package may not support cruise control, it will be another question to ask before placing the order. I'm not a header guy anymore, will probably use the manifolds that come with the package knowing full well I'll be giving up some top end. I will use the Holley pan, was considering the GM "muscle car pan" (LH8 I think) but based on yours and others advice, have changed my mind. Thanks again for all your help.

  #11  
Old 10-29-2014, 12:26 AM
fbrown fbrown is offline
Senior Chief
 
Join Date: Jul 2008
Location: Marietta GA
Posts: 387
Default

Don't use the LH8 pan. GM wrongly promotes the LH8 pan for retrofit applications. The only thing that pan might work in is older trucks. I believe the LH8 pan was used on the Hummer. Many people have installed this pan in 94-96 B-Body (Impala, Roadmaster, Fleetwood) and had it hang 3 or more inches below the frame.

The one thing I will not do on future swaps is to raise the engine for clearance. I fought with adjusting the drivetrain for a couple of days. I think I ended up with an angle of 3.4 degrees. I don't yet know if I will have a high speed vibration issue but if I do it will be both hard and expensive to correct.

__________________
68 Lemans - GTO appearance LS3
68 Eldorado - waiting for restoration
96 Roadmaster Wagon
2014 Infiniti Q50S Hybrid
Marietta GA
  #12  
Old 10-29-2014, 12:41 AM
GTO4spd's Avatar
GTO4spd GTO4spd is offline
Member
 
Join Date: Nov 2007
Location: Alburtis, PA
Posts: 34
Default Fantastic

That is one fantastic looking car now!

  #13  
Old 10-29-2014, 12:57 AM
fbrown fbrown is offline
Senior Chief
 
Join Date: Jul 2008
Location: Marietta GA
Posts: 387
Default

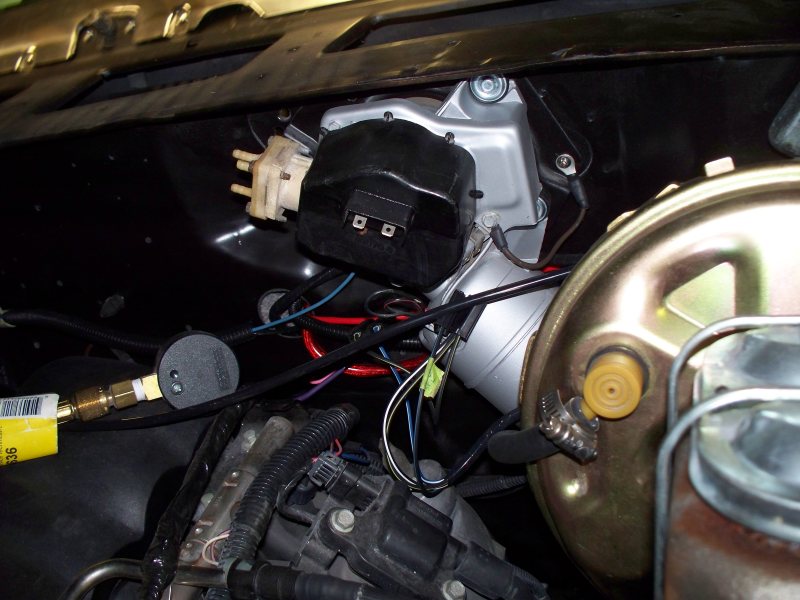
As I said a few posts ago, it seems that everything is fighting me. I forgot to mention the problems with the windshield wiper. I did a quick check to see it the windshield wiper motor worked, then did a cosmetic restoration on it. Looked really good.


Then I discover that the wiper won't stop sometimes. Keeps on running after turning the switch off. This was around July, I ordered new wiper motor and washer. Was back ordered and I forgot about it. Checked on it last week to find no record of my order and none in stock. Checked Rockauto found no listing for a wiper motor under GTO but found that it was listed under Tempest. Ordered wiper motor, arrived a couple of days ago, broken, they put it in a box with no packing and one of the mounting ears broke off. So waiting for a replacement.

It seems that the last few remaining items are the creating the most problems.

Some things are kind of funny, my girlfriend is laughing at me, she said now that its winter you got the air conditioning working.

Anyway I have to get in high gear and clean my basement. It's takes a lot of time to clean the dust out and get it clean enough to paint. It's been almost two years since I painted the car and still have the hood to redo. There is only about a month before it's too cold to paint.

__________________
68 Lemans - GTO appearance LS3
68 Eldorado - waiting for restoration
96 Roadmaster Wagon
2014 Infiniti Q50S Hybrid
Marietta GA
  #14  
Old 11-04-2014, 02:37 AM
cuz68's Avatar
cuz68 cuz68 is offline
Ultimate Warrior
 
Join Date: Dec 2002
Location: Elizabethton, TN
Posts: 3,269
Thumbs up

As aways looking great, Thank you Fred for the updates. Randy.

__________________
Cuz68
  #15  
Old 11-05-2014, 01:35 AM
fbrown fbrown is offline
Senior Chief
 
Join Date: Jul 2008
Location: Marietta GA
Posts: 387
Default

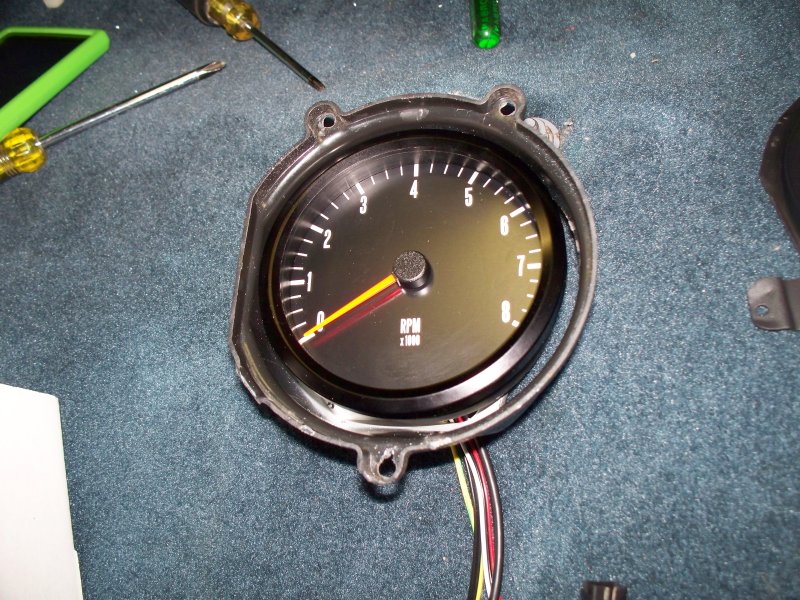
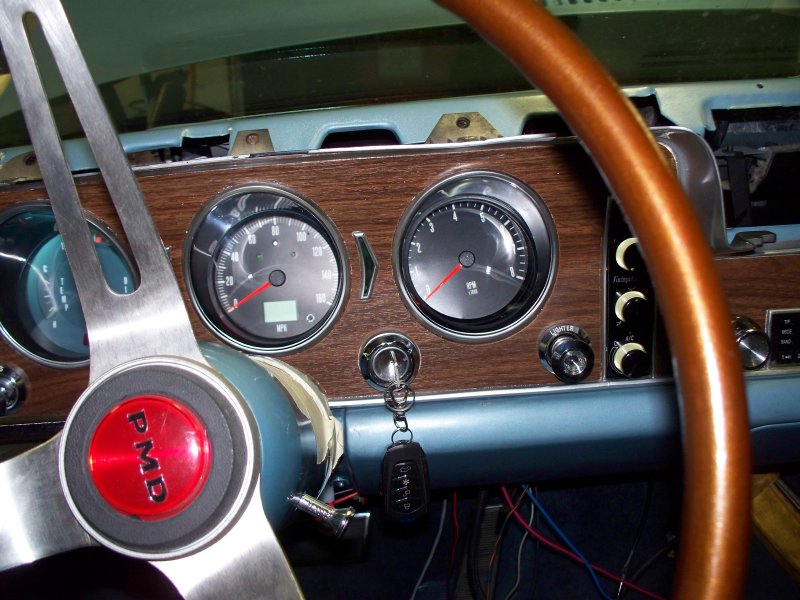
I got the Speedhunt tach installed and it works.


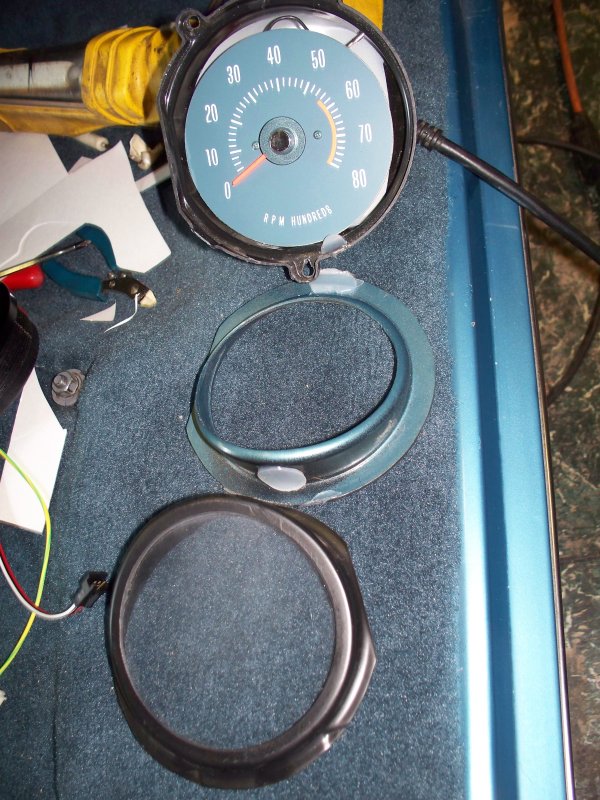
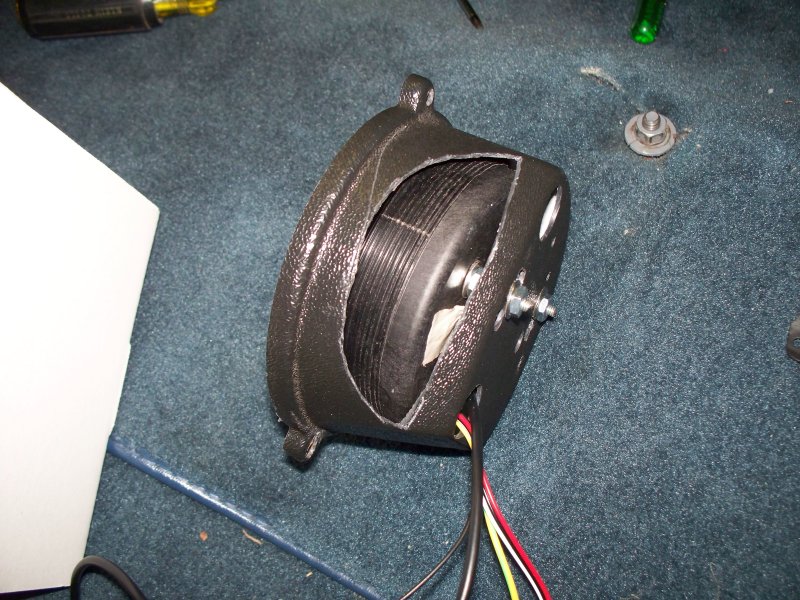
This is what the reproduction in dash tach looked like after breaking it open. It was held together by some blobs of silicon.


Looks like the Speedhunt unit can be installed in the old tach housing.


Test fit


I did have to cut the housing a bit. The side that got cut was slanting in.


I will say I give the aftermarket tach housing an "F" for quality. The fit of the lens and bezel was very poor. There was 3/16" gap on one side of the bezel. However at least when it's put together and installed you cannot see the poor fit of the parts. One of the reasons the tach was held together with silicon was because the parts just did not fit together. They used silicon to bridge the gap.

I did remove the lens on the speedhunt unit. There might be glare if I had both the Speedhunt lens and the GTO tach housing lens.


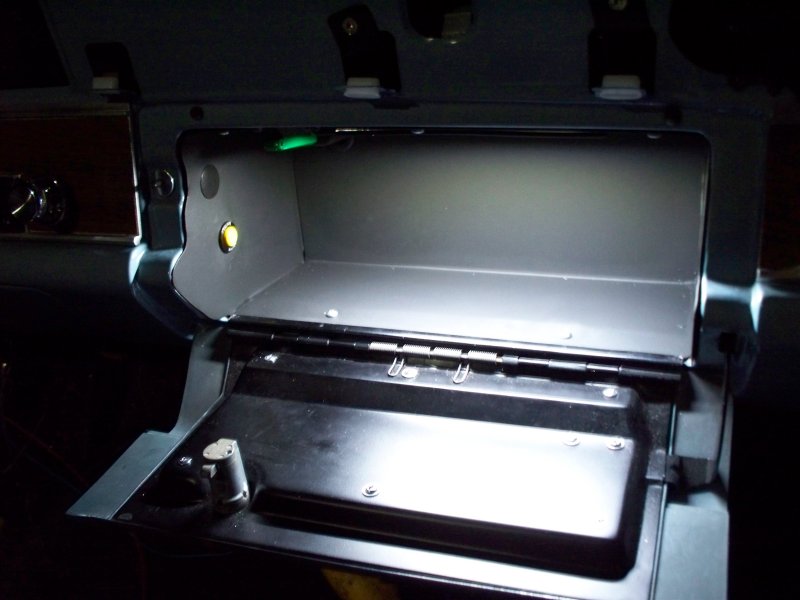
They glove box took far more time than it should have, but it turned out well.

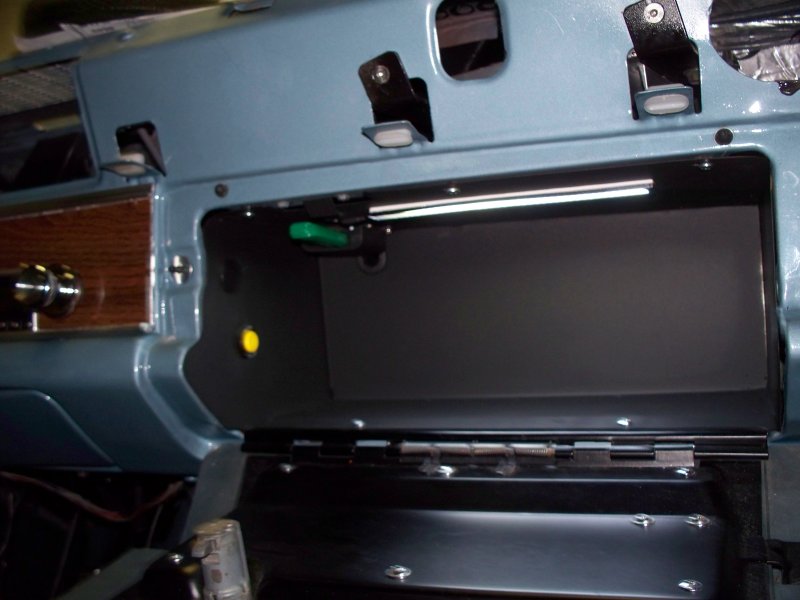
I added a light strip to light up the box. The factory light is almost useless, I also installed the USB port for the radio in the glove box. The trunk release has also been mounted. This is a shot of the glove box in the dark.


Another view - You can see the light strip here. The green unit is my USB strip. I used a panel plug to hide the hole left for the factory glove box light.


Still fighting the windshield wiper motor. I got the replacement for the damaged one and found things still didn't work right. I have only one speed and the park does not work. After testing and tracing wiring for a while, I believe the wiper switch I have is for a non-park wiper motor. It was on of the few things I did not replace. I didn't replace the switch because I don't expect to need wipers very often. That is so say I don't plan on driving the car when its likely to rain. It turns out that the original wiper motor was completely shot, extreme wear, no grease, the switch that reverses the motor was cracked. Anyway I ordered a wiper motor switch today.

__________________
68 Lemans - GTO appearance LS3
68 Eldorado - waiting for restoration
96 Roadmaster Wagon
2014 Infiniti Q50S Hybrid
Marietta GA
  #16  
Old 07-20-2015, 12:46 AM
Scarebird's Avatar
Scarebird Scarebird is offline
Ultimate Warrior
 
Join Date: Nov 2002
Location: Moita, Portugal
Posts: 5,387
Default

Did you do a CASE relearn? My LS3 in a 79 TA is MUCH faster than my old 2004 GTO.

  #17  
Old 07-22-2015, 01:59 AM
fbrown fbrown is offline
Senior Chief
 
Join Date: Jul 2008
Location: Marietta GA
Posts: 387
Default

I did not do a CASE relearn. I happened to have a 2008 Corvette pull up next to me and I could tell his idle quality was much better than mine. I ran an spark tester and found 6 cylinders are firing around 18K volts at idle, one is firing at 6K and one at 27K. My rough idle is probably caused by the 18k and 6k cylinders.

It's too hot during the day and we have had rain almost every night, so not much is going on with troubleshooting the problem.


If any one wants to follow the restoration of my girl friends 280zx, the restoration thread can be found here. http://www.zdriver.com/forums/280zx-...oration-40747/

__________________
68 Lemans - GTO appearance LS3
68 Eldorado - waiting for restoration
96 Roadmaster Wagon
2014 Infiniti Q50S Hybrid
Marietta GA
  #18  
Old 07-26-2015, 05:39 PM
fbrown fbrown is offline
Senior Chief
 
Join Date: Jul 2008
Location: Marietta GA
Posts: 387
Default

I changed the plug wires to MSD. Now how good clearance. Engine idles well. There is still some surging, so I suspect the PCM needs some tuning. Maybe need to drive a few more miles and see what happens. About 45 miles on car at this point.

Now have 55 miles on car. Transmission dead. No drive, no reverse, engine just revs. Happened while driving down the road. Was able to coast out of the main road onto a side street.
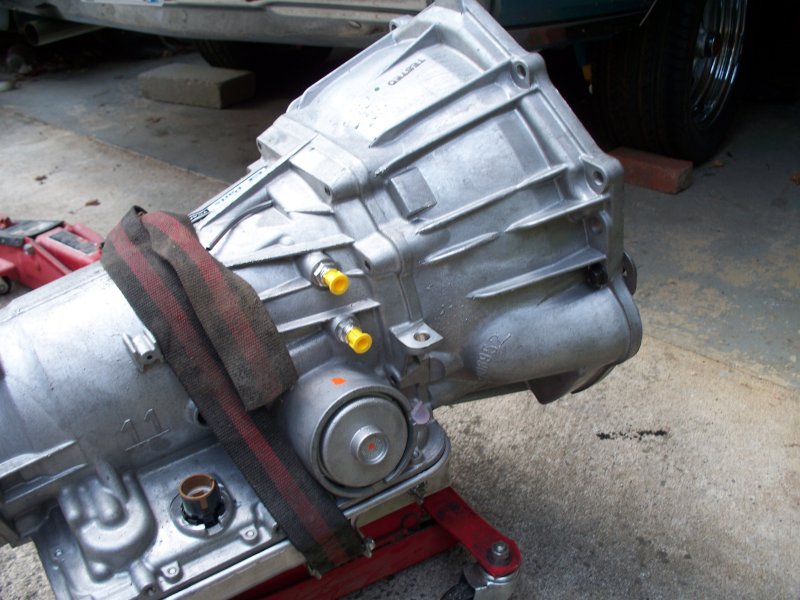
Since I didn't like the 9" TC, guess I will get a normal street type TC. I'm leaning toward the GMHP 4L70E, SuperMatic transmission with the matching GM TC 11" about 2400 Stall. I'll probably wait until September to swap the trans/TC . It's too hot right now to work in my garage right now and I just tore my GF's 280ZX completely apart in my basement shop.

About the 9" TC, I'm either accelerating like a old lady or repaving the road two strips at a time. There is no inbetween acceleration, it's fairly slow or up in smoke. Maybe the 9" TC would be a good for use with slicks on the strip, but strip use was not my intention. I wish to accelerate quickly without spinning the tires. The current TC would have really sucked for running an autocross.

__________________
68 Lemans - GTO appearance LS3
68 Eldorado - waiting for restoration
96 Roadmaster Wagon
2014 Infiniti Q50S Hybrid
Marietta GA
  #19  
Old 07-26-2015, 08:24 PM
Greg Reid's Avatar
Greg Reid Greg Reid is offline
Ultimate Warrior
 
Join Date: May 2003
Location: Palmetto, GA. USA
Posts: 16,177
Default

The car is really looking good Fred. I hope you get all the bugs worked out soon. I'd love to see you bring it to next spring's BOP since it's generally right in your neighborhood.

__________________
Greg Reid
Palmetto, Georgia

  #20  
Old 09-03-2015, 12:13 AM
fbrown fbrown is offline
Senior Chief
 
Join Date: Jul 2008
Location: Marietta GA
Posts: 387
Default

I bought a GM Supermatic 4L70E and a stock 2006 GTO TC. The only bad thing is GM no longer offers a new TC for the GTO application. I had to buy a remanufactured part. GM part number 17803808. The stall is listed at 1800-2000 RPM.

I should be happy with this combination since I owned a 2006 GTO in the past and had not complaints with how the 2006 GTO drove.

Removed the transmission last weekend and found the fittings for the cooler lines in my old transmission would not fit. case fittings for the cooler line is larger for the 4L70E. Size was 9/16-17 the old transmission had 1/2-17. Still waiting for the correct fittings to arrive. Should get here tomorrow, so I will have a long weekend to get the new transmission installed.


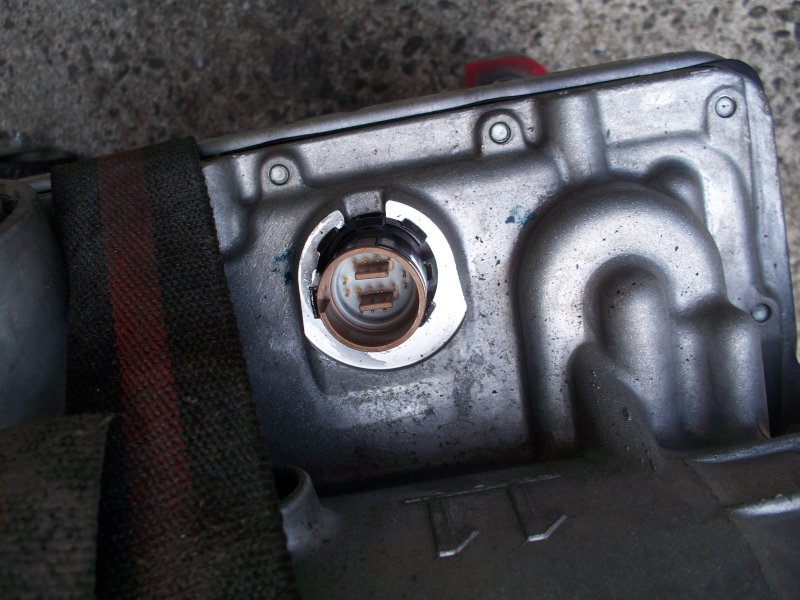
I couldn't confirm in advance if the 4L70E Supermatic had a input speed sensor. It appears that it does by the pins that are installed in the connector. 15 pins are present, there are 13 for the older 4l60E. GM apparently does not use ISS in their retrofit transmission controller, so I was worried that GM wouldn't bother to install a ISS in their aftermarket transmission. Had this been a 13 pin transmission, my TCU could be reprogramed.


__________________
68 Lemans - GTO appearance LS3
68 Eldorado - waiting for restoration
96 Roadmaster Wagon
2014 Infiniti Q50S Hybrid
Marietta GA
Reply


Posting Rules
You may not post new threads
You may not post replies
You may not post attachments
You may not edit your posts

BB code is On
Smilies are On
[IMG] code is On
HTML code is Off

Forum Jump


All times are GMT -4. The time now is 02:26 AM.


About Us

The PY Online Forums is the largest online gathering of Pontiac enthusiasts anywhere in the world. Founded in 1991, it was also the first online forum for people to gather and talk about their Pontiacs. Since then, it has become the mecca of Pontiac technical data and knowledge that no other place can surpass.


Copyright © 2017