


| FAQ |
| Members List |
| Social Groups |
| Calendar |
| Search |
| Today's Posts |
|
#581
 03-12-2008, 08:51 AM
|
||||
|
||||

Quote:
__________________
1974 400 4 speed |
|
#582
03-12-2008, 11:06 AM
|
||||
|
||||
|
Inline Tube
There are plenty of threads here on how bad of a company Inline Tube is. Customer service is not there forte!
__________________
TODD |
|
#583
03-12-2008, 05:20 PM
|
||||
|
||||
|
Bub, I sent you a PM.
|
|
#584
03-31-2008, 02:26 PM
|
||||
|
||||
|
Some more recent progress on the car. They are hanging the doors and pre-aligning the front end sheet metal. Looks like a whole lotta block sandin' going on.
|
|
#585
03-31-2008, 02:28 PM
|
||||
|
||||
|
Some work on the right side trunk to rear quarter seam. Looks like he didn't like the taper to the gap, so he cut and rewelded the edge section to get it straight.
|
|
#586
03-31-2008, 02:29 PM
|
||||
|
||||
|
The rear, lower, tail panel area, after the dented section was undented and welded back in.
|
|
#587
03-31-2008, 07:26 PM
|
||||
|
||||
|
Quote:
__________________
keith k 70 Trans Am RA III / T400 / Lucerne Blue / Bright Blue 70 Trans Am RA III / M20 / Lucerne Blue / Sandalwood 70 Formula RA III / M21 / Lucerne Blue / Bright Blue |
|
#588
03-31-2008, 08:59 PM
|
|||
|
|||
|
did you go with part of a repop quarter on driver's side and most of your original on passenger side? reason i ask, looks like he's having some fun with the door/quarter body line on the driver's side. nice work through and through.
|
|
#589
03-31-2008, 09:23 PM
|
||||
|
||||
|
If you go back a few pages on this thread you will see what he did. No reproduction sheetmetal other than the trunk floor center section. The drivers door has an NOS 1970-73 doorskin installed. The pass side is all the original sheetmetal from the car. They spend a lot of time getting everything perfectly straight.
|
|
#590
04-01-2008, 05:23 PM
|
||||
|
||||
|
Here's an underside shot of the smoothed out trunk floor repair. Ready for the red oxide primer.
|
|
#591
04-01-2008, 05:24 PM
|
||||
|
||||
|
The passenger side lower rear quarter had a rust hole in the lower section behind the wheelwell. Since I didnt want to be worrying about what exactly was inside there for the next 20 years, my bodyman did the right thing and cut the outer skin off in an example of automotive exploratory surgery.
I'm glad he did, since the trunk extension was very scaly and needed to have a good sized area replaced, even though it looked perfect from the outside. He ended up using pieces from the donor quarter I bought for the drivers side front quarter repair and a reproduction passenger side Camaro trunk extension, to make an accurate repair. The outer skin repair comes next. |
|
#592
04-12-2008, 09:02 PM
|
||||
|
||||
|
I stopped by the shop today to bring him the rear window trim so he can set the lower back window/upper trunk panel in place and match the curve of the trim properly. Here are some photos. It's looking more and more like a car now.
|
|
#593
04-26-2008, 09:16 PM
|
||||
|
||||
|
Well she is home now. I picked her up a couple days ago so I can put the exhaust, gas tank and lines etc., back in. And also to let the body work set and shrink a few weeks too.
|
|
#594
04-26-2008, 09:17 PM
|
||||
|
||||
|
I spent the past couple of days working on fitting the front polyethylene valance to the car. These things were a crappy design back in 1972 and 99% of them were replaced under warranty with a different looking steel valance when new.
I wouldn't call it planned obsolesence, more like catastrophic, instantaneous obsolesence. I spent the weekend massaging the valance and inhaling polyethylene fumes. (Here is the original link to when I repaired the valance with the plastic welder: http://www.yenko.net/ubbthreads/show.../fpart/12/vc/1 ) With the plastic welder and polyethylene welding rods, I added 3/8" to the drivers side turn signal area at the top and it fits flush now to the bottom of the urethane bumper. There was a 3/8" gap before. I also made a solid 1" thick mounting pad on top of both driver's side top mounting pounts so that when the screw is tightened the tall pad locks into the recessed area under the rubber nose piece at the exact moment when the valance edge mates with the lower part of the bumper curve. The stupid factory design of this setup has the mounting pads for the ends of the valance too short to reach their mating point under the bumper. The result is that you tighten the bolts to get it to mate with the bumper, the mount itself breaks off and then it touches down but the valance edge never moves up. Dumb design. I am also using a portion of 1/8 steel barstock to add as a load distributor for the outer 2 mounting bolts so the bolts aren't just pulling against plastic - kind of like the small block chevy valve cover bolt load spreaders. It will be hidden inside the upper valance area. I also had to heat the outer edges of the valance to get them to more closely conform to the lower fender edge. There was a 1/2" gap before, where the valance ended but the fender kept going. Another great design feature of this valance, it was an inch narrower than the area it had to cover. I also added 1/8" to 1/4" of material to the outer edges and filed and sanded until they mate perfectly with the lower fender edge, with no gap. I also had to add about 1/2" on the lower edge of the valance at each bolt hole, which didnt line up with the existing bolt holes in the lower radiator support. That is one of the reasons these things shattered to begin with - instead of simply making the hole longer and/or wider, the assembly line guys would just try to stretch the heck out of the hard plastic and stress it to such a level that one good pothole and the whole valance would explode. I welded closed the original bolts holes in the valance and made new ones that mount up perfectly without stretching or stressing the valance. I also bent the lower radiator support edges where the speed nuts mount, so they align with the valance without bending it. I probably spent about 24 hours total doing all this. Just so she has the pretty, little face she was originally built with, instead of that gaptoothed, slack jawed, look of the warranty replacement valance. (No offense to you guys with a 70 or 71 Firebird out there that came with the "other valance" originally 
Last edited by njsteve; 04-26-2008 at 10:00 PM. |
|
#595
04-27-2008, 08:00 AM
|
||||
|
||||
|
Nice job, looks awesome!
Pat |
|
#596
04-27-2008, 11:05 AM
|
|||
|
|||
|
That's going to look great when you are done. But I am a little offended, I think my nose turned out pretty good with the old steel valence. I still have that1/8 to 1/4 inch gap on top but I have seen some with 1/2-5/8 gaps that look pretty bad. Pictures over here.
http://forums.maxperformanceinc.com/...d.php?t=558650
__________________
1971 Firebird Formula 400 |
|
#597
04-27-2008, 11:36 AM
|
||||
|
||||
|
Fodder69, I just love that silver.
Steve, I don't know how many times we can say it, Great Job Here is the gaptoothed, slack jawed valance on my 70...( really I am just trying to get my car in Steve's thread). I think it looks pretty good.. 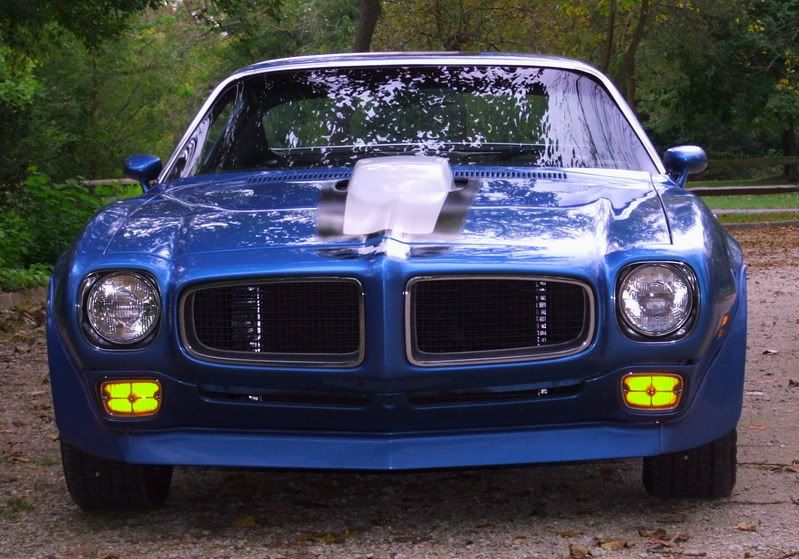
|
|
#598
04-27-2008, 11:43 AM
|
||||
|
||||

LOL. I was just trying to get a rise out of you guys. It must have been the polyethylene fumes doing the talking. :-)
|
|
#599
04-27-2008, 03:28 PM
|
||||
|
||||
|
Wow, I'm so used to seeing the gaptoothed, slack jawed valance I thought that was the way they came
__________________
************************************************** ******************* 73 TA 4 spd #'s match red/white - "STOLEN" AT TERRY SPEAR's SHOP IN Columbia TN ~mid 2014 Last offical pic of the car can been seen here: http://clubs.hemmings.com/pontiactn/...%20-%20rev.pdf People have seen it posted FS on Craigs List back in late 2013 early 2014.... ^^^^^^^^^^^^^^^^^^^^^^^^^^^^^ IF YOU HAVE ANY INFO ABOUT IT PLEASE CONTACT ME!!! |
|
#600
04-27-2008, 04:06 PM
|
|||
|
|||
|
I hate that slack jawed look . Good job Steve , looks very good Was it a original piece you started with ?
|
| Reply |
|
|
The PY Online Forums is the largest online gathering of Pontiac enthusiasts anywhere in the world. Founded in 1991, it was also the first online forum for people to gather and talk about their Pontiacs. Since then, it has become the mecca of Pontiac technical data and knowledge that no other place can surpass.




 Linear Mode

