


| FAQ |
| Members List |
| Social Groups |
| Calendar |
| Search |
| Today's Posts |
|
#741
 02-23-2013, 10:46 AM
|
||||
|
||||

Quote:
Jim |
|
#742
02-23-2013, 09:12 PM
|
||||
|
||||
|
Same up here. A lot of smaller but plentiful car shows around the cities.
I got a lot more done today. Finished the rear motor plate mounts. Welded in, bolted to the frame and the motor plate, and painted.     More good pics coming. MArk L
__________________
My Gasser '63 Catalina build. Oh sorry, it's a Street freak. Either way it's a fun build. |
|
#743
02-23-2013, 09:18 PM
|
||||
|
||||
|
I also got started on mounting the turbos. Made a mount and welded the turbo flange to it. Still have to finish the drivers side. But. It enable me to do a mochup of almost everything in the engine compartment except the piping of course.
  It's starting to all come together. A place for everything and everything in its place. Mark L
__________________
My Gasser '63 Catalina build. Oh sorry, it's a Street freak. Either way it's a fun build. |
|
#744
02-27-2013, 03:15 AM
|
||||
|
||||
|
Yesterday I finally pulled the rear end out so I could see where it was leaking the gear oil from. The good news was, the passenger side was the axle bearing seal leaking around the o-ring. I pulled the axle and coated the inside of the bearing cavity with a fine layer of silicone sealer. Slid the axle back in and it's tight as a drum. The drivers side did have a pin hole leak in the weld. Very fine and minimul. So I cleaned the area of all paint as well as I could to get rid of the oil. The welding was good so I did not worry about the strength of the origial weld. I took my little 60 amp welder and put down a series of little spot welds all over the pin hole area. Refilled the gear oil and left the rear end over night to see if there were any leaks. Nice and dry this morning.
Ever since I looked at the pic of my car from the side on the trailer, I have disliked the look of the rear tire being too far to the rear of th ewheel well. I've already welded the ladder bar front crossmember in so I cannot move that. I had all the joints turned all the way in to shorten the bars but it was not enough. Good thing I made them 50 inches long. I cut off 2 1/2 inches from the front of the bars which took away the front weld bungs for the joints. The place I get my steel from sells hiem end and weld bungs. So I got a pair of them and the bars are at the welders getting put back together. I cut enough off so I can install the bars with tires all the way up against the front of the wheel wells. And still have some adjustablilty of the joints. I just stuck the tire back in the wheel well with the rearend out, but all the way forward and I really like that much better. This the tire/wheel just setting in the wheel well.  I took the original speedometer plastic face. Painted it black and reinserted it into the dash. Since I'm not using the old speedometer, the newly painted plastic just fills the hole back up. I'll do the same on the other side with a piece of sheet metal.  Getting the bars back tomorrow. Throw the whole shebang back in and place the rearend/wheel/tire assembly where I want it. If it needs to be up tight on the front of the wheel well, the I'll do some surgery on the lower front of the opening for clearence. Mark
__________________
My Gasser '63 Catalina build. Oh sorry, it's a Street freak. Either way it's a fun build. |
|
#745
03-17-2013, 10:00 PM
|
||||
|
||||
|
I've not been doing anything big for a while. I've been playing with the front brakes and I'm getting all of the lines run, the line loc in place along with the adjustable proportioning valve. Bought one of those pretty chrome master cylinders and I'm waiting for more fittings to come from Speedway to finish off the front brakes.
I went to a swap meet Saturday and found a pair of wheelie bars/wheels.  I've been playing with making my own but these popped up for $10 so I grabbed them. I bought a pair of Honda chrome spring/shock assemblies with intentions of using them like this. In the next pic you can see how the shock/spring bottom mount fit the wheelie bar mounts as if they were meant to be together.  So I threw a bolt onto the wheelie bar mount that's already on the rearend and propped the Honda spring up against the rear frame crossbar. This makes it lean backwards and it's not what I really had in mind.  I would rather extend/lengthen the bars farther rearward and then lean the spring forward.  Then I would run a cross bar between the two to keep them straight. I may not keep this but I thought I'd play with it. Mark L
__________________
My Gasser '63 Catalina build. Oh sorry, it's a Street freak. Either way it's a fun build. |
|
#746
03-18-2013, 12:12 PM
|
||||
|
||||
|
what is next? Wings perhaps?? LOL keep it going Mark!!!!!!!!!!!!!
|
|
#747
03-18-2013, 12:19 PM
|
||||
|
||||
|
Not sure if the scoop or the Steering column mount is my favorite part of the build so far.
__________________
DOC'S TA  Turbo 535, CV 1 heads. Built by Cerralli Competition Engines Tenth Anniversary (Van Nuys) restored. Tenth Anniversary Barn Find (Norwood) Both 4 speeds! |
|
#748
03-18-2013, 02:42 PM
|
||||
|
||||
|
Ok. If that's all that you don't like then I'm doing good, heh. If you're talking about the support out from the firewall, that all gets covered with a finished dash bottom. If you're talking about the connecting rod, that stays. The ladder bars may never stay. Or I was thinking of replicating some of the older solid tube bars that came straight down from the bumper area and a solid diagonal back up forward to the frame. With larger wheelie wheels. It's all for looks. This thing will never get off the ground on a lunch. Mark L
__________________
My Gasser '63 Catalina build. Oh sorry, it's a Street freak. Either way it's a fun build. Last edited by marks73ta; 03-18-2013 at 02:48 PM. |
|
#749
03-19-2013, 12:50 PM
|
||||
|
||||
|
I've been chasing pin hole leaks in the rearend housing. So I decided I would try a gas tank sealer to coat the inside of the axle tubes and stop the leaks. Yesterday I took the housing to the car wash and thoroughly cleaned the housing inside and out. Took it home and sprayed brake cleaner all around inside the axle tube and let it puddle at the leak points. This way it woul dwork itself down into the pin hole and clear out anything but brake cleaner. Then I let it set and dry. Took it to the car wash again and did another clean out. Letting it dry out all night.
This morning I did the slosh and cover with the tank sealer. Just layed the housing across my saw horses and poured enough into the tube to puddle a little where the leak is and then rolled the housing to cover the whole tube inside. Actually went pretty easily. The instructions said not to get so much in so it puddles. It would skim over harden and the inside of the bubble will never harden. Nice thing about having the open axle tubes is, I could go in after it set up a little, using a long metal rod, I could insert it into the tubes to bust open any puddles and spread around the liquid so it will dry. I think it's going to work well. It's all up to the intgerity of the product now. I used Northern gas tank sealer I got at CarQuest. About $34 a QT. My son is playing around with a paint called Plastic Dip coating. So far he has painted the front facia on his car and the rims. It is pretty durable, adhears well, and if you don't like it, you can just peel it off. It creates a semi gloss finish. He did a photoshop of my Catalina in green and flat black. Not that I would do this but it is interesting to see your car in a painted condition.  Kinda funky. AND YES, the Dog is next to get painted. LOL! MArk L
__________________
My Gasser '63 Catalina build. Oh sorry, it's a Street freak. Either way it's a fun build. |
|
#750
03-19-2013, 05:04 PM
|
||||
|
||||
|
Keep at it Mark... I want to see that thing moving!!
|
|
#751
03-21-2013, 12:44 AM
|
||||
|
||||
|
Finally got the whole master cylinder, line loc, and proportioning valve all in and hooked up. The front brakes are all lined too.
  I did the sealer in the rearend, and I welded on spring perches to bolt the original springs on. Then I completely reassembled the rearend. I'm going to reinstall it all back into the car tomorrow, and locate the cross member above the rearend to attach the upper spring perches to. Hopefully I can incorporate the upper spring crossmember into the upper mounts for the rear shocks too. Kill two birds with one stone. Plus I have to keep watching those pinhole leaks to see if all that work was worth it. If not I'll be P O'd. Mark L
__________________
My Gasser '63 Catalina build. Oh sorry, it's a Street freak. Either way it's a fun build. |
|
#752
03-21-2013, 12:46 AM
|
||||
|
||||
|
The two feed lines from the master to the proportioning valve locations are a little too tight, stretched. I'm going to go to a little bit longer lines. Just have to order them. They are almost kinked and probably would only get worse with time. Mark L
__________________
My Gasser '63 Catalina build. Oh sorry, it's a Street freak. Either way it's a fun build. |
|
#753
03-21-2013, 01:19 AM
|
||||
|
||||
|
I forgot to mention that I picked up a pair of 50MM Blow Off Valves yesterday off of Craigslist. So all I need now is twin wastegates.
  Mark L
__________________
My Gasser '63 Catalina build. Oh sorry, it's a Street freak. Either way it's a fun build. |
|
#754
03-24-2013, 08:45 PM
|
||||
|
||||
|
Well, the Cat hit a major milestone today. Front suspension DONE. Rear suspension DONE. Waiting for the rear shocks to arrive, they will bolt in. I have to weld in shock brackets for the front but I have the shocks. But today the car sat completely on its own for the first time, on its own suspension, and ready to roll. Man that is a great feeling.
 This is the rear crossmember I built to span the frame rails, hold the springs, and the shock tops.    So I am steadily getting to a point that I can actually think about starting the motor. I have the full wiring kit to install. But next I have to concentrate on the final location for the turbos and get them installed. Plus I have to get a driveshaft. I found the old shaft from my '63 Catalina back in 1973-75. I had it modified for my Trans am but used a differnet shaft. This shaft is too long but it is narrow at the ends and flairs out down the middle. I think there is enough of the smaller diameter section on one end to allow it to be shortend and reused for this. I have to find a drive shaft place to check it out. So it's been a very good (long) day in the garage. Mark L
__________________
My Gasser '63 Catalina build. Oh sorry, it's a Street freak. Either way it's a fun build. |
|
#755
03-24-2013, 09:46 PM
|
|||
|
|||
|
Mark! DONT bother with stock driveshaft tubing on this. Strange Engineering or Dennys! Especially stick shift, especially your weight range. Suggest yokes from Strange as well. Not a piece to skimp on.
I like the way it sits... I forget...what size are those back tires? |
|
#756
03-24-2013, 11:10 PM
|
||||
|
||||
|
That '63 driveshaft is a really stout piece. If I can afford the Denny's or Strange unit I would rather do that. More piece of mind etc.
The rear tires are ET Streets 31X 16.5X15 on 15X15 rims. The rims are just there for the build. I hope to get rear Cragars to match the fronts in a 15X14 size. I don't think Cragar will go bigger than 14 wide but if I keep this size tire, then the 14 wide rims will actually be better than the 15 wide. The 15 wides stretch the tire too much for me. Mark L
__________________
My Gasser '63 Catalina build. Oh sorry, it's a Street freak. Either way it's a fun build. |
|
#757
03-25-2013, 03:49 AM
|
|||
|
|||
|
Hey mark, this is Adam, with the "merrik66" handle. Your car is so freakin unique! Thanks for sharing your project. I always dig seeing your progress. I too have a 63 cat. Currently it's a 2 barrel 389 column auto rig. Someday to be a 59' 389 turbo powered street strip car. I've been driving mine around tacoma wa for may years. Starlight black, steel wheel, and no hubcap is what I like. I even prefer the original bench seat to anything else. I look forward to more Picts on your rig and hopefully soon I will start posting some Picts of mine. So much planning involved. Probably won't touch a camera for 6 months!
|
|
#758
03-25-2013, 03:57 AM
|
|||
|
|||
|
Must also say I love the organzation and cleanliness of you garage!
|
|
#759
03-25-2013, 09:02 AM
|
||||
|
||||
|
Yep,yep....sitting on all fours at last...a good feeling I'm sure! Congrats Mark..been a long time coming. I agree with Bruce....sits great.
Notice you have "upside down" shock mount plates...Didn't know they existed until I got the Prix. What lenght shocks did you go with...I went with 12" on my 60 conversion but wished I had went with 14" now....for racing. Seems most of the "full size" guys are using 14" shocks...FWIW. might help shocks live longer?? But I am certainly no expert... Keep on truckin'...  I'll get some pics of front motor plate project soon..
__________________
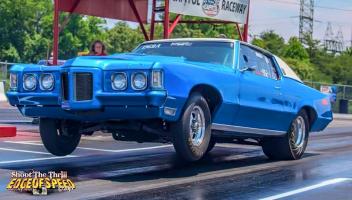 ECM member. 2008 Outlaw Pontiac Drag Series Champion MANDRA Do it now fool! Life is short. 69 Grand Prix/3163lbs / IAII 535 w/ Tiger heads by Gaydosh....9.35@ 144 so far..  through mufflers. 1.26 60'. through mufflers. 1.26 60'. Going back to track with pump gas engine.... My 60 Ventura retired to street/strip duty.. |
|
#760
03-25-2013, 11:53 AM
|
||||
|
||||
|
Looking forward to seeing it at Pontiac Heaven. Now you've got an extra month to get it running.
Jim
__________________
****'63 Tempest, 475" IAII, Wenzler Super Chief heads, converted to blown alcohol, Birdcatcher, Littlefield 10-71 high helix. Best pass to date: 7.67 @ 181.59 (1/4 mi.), 4.95 @ 143.67 (1/8 mi.), 1.18 (60 ft) 7.75 @ 178 pass: https://www.youtube.com/watch?v=Iez3...ature=youtu.be First seven second pass(7.98): https://wwwoutube.com/watch?v=DK17...ature=youtu.be Thanks to Paul Carter @ Koerner Racing Engines 
|
| Reply |
|
|
The PY Online Forums is the largest online gathering of Pontiac enthusiasts anywhere in the world. Founded in 1991, it was also the first online forum for people to gather and talk about their Pontiacs. Since then, it has become the mecca of Pontiac technical data and knowledge that no other place can surpass.






 Linear Mode

