Reply
 
Thread Tools Display Modes
  #101  
Old 03-08-2016, 02:56 AM
Garry Sr Garry Sr is offline
Suspended
 
Join Date: Feb 2002
Location: Lake Havasu, AZ
Posts: 844
Default

Quote:
Originally Posted by NOT A TA View Post
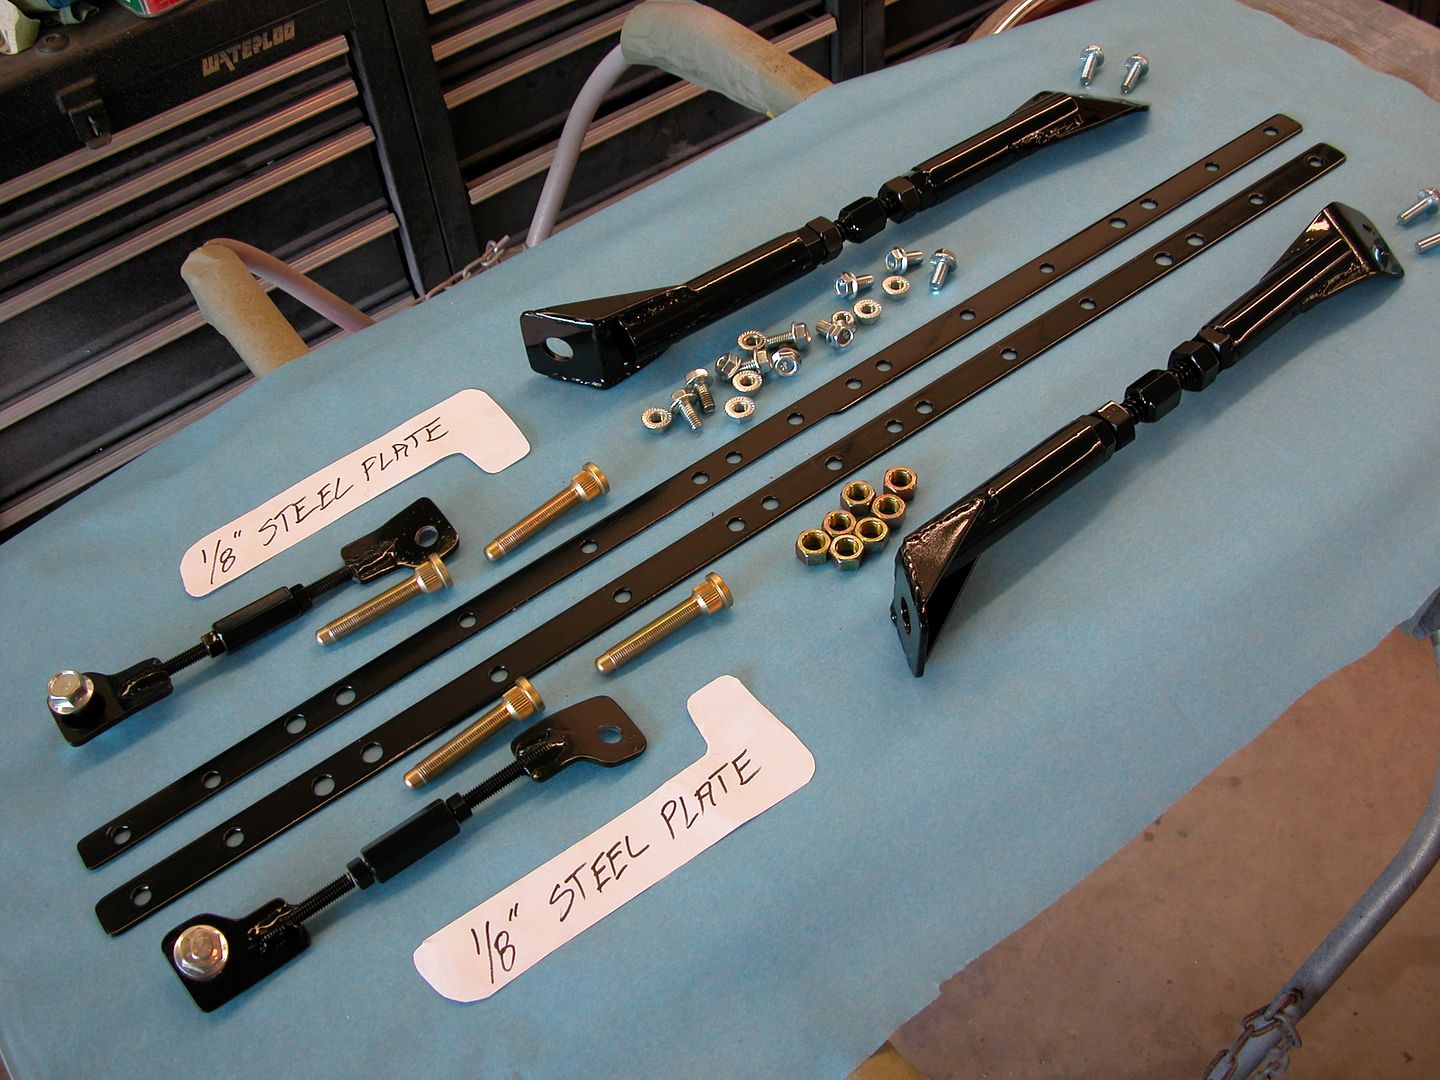
The GEN II Pro G-Braces are a common bolt on. I reinforced the UCA mount, added additional center triangulation upper braces, and added UCA stud support lower braces.
I'd be tempted to weld 9 studs to that flat bar running along the cowl, it'd clean it up a little bit

  #102  
Old 03-09-2016, 12:26 AM
NOT A TA NOT A TA is offline
Senior Member
 
Join Date: May 2005
Posts: 178
Default

Quote:
Originally Posted by Garry Sr View Post
I'd be tempted to weld 9 studs to that flat bar running along the cowl, it'd clean it up a little bit
There's another steel plate below the ledge that's used to sandwich the cowl shelf by bolting tightly. Here's a pic of all the pieces I used besides the GEN II Pro G-braces.


  #103  
Old 07-23-2016, 05:49 PM
Garry Sr Garry Sr is offline
Suspended
 
Join Date: Feb 2002
Location: Lake Havasu, AZ
Posts: 844
Default

Just did the front springs on my DD 73. Previous owner heated them to lower. Sure is nice not having to worry so much about speed bumps. Lower control arm bushings were totally trashed also. Car drives much better now.

  #104  
Old 07-23-2016, 06:09 PM
Garry Sr Garry Sr is offline
Suspended
 
Join Date: Feb 2002
Location: Lake Havasu, AZ
Posts: 844
Default

I'll throw in a shot of me testing the mini-spool while I'm at it

Click image for larger version

Name:	IMG_20160722_173815736.jpg
Views:	616
Size:	52.6 KB
ID:	433357

That was from a 10 or 20 roll with an automatic.

  #105  
Old 07-27-2016, 12:13 AM
NOT A TA NOT A TA is offline
Senior Member
 
Join Date: May 2005
Posts: 178
Default

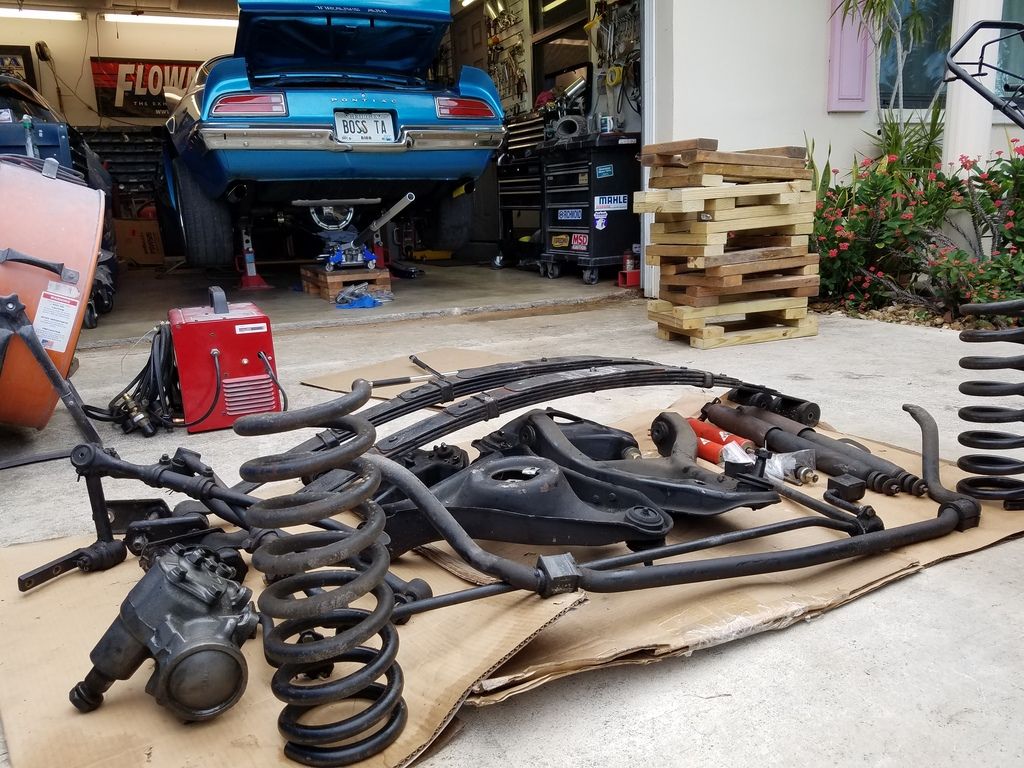
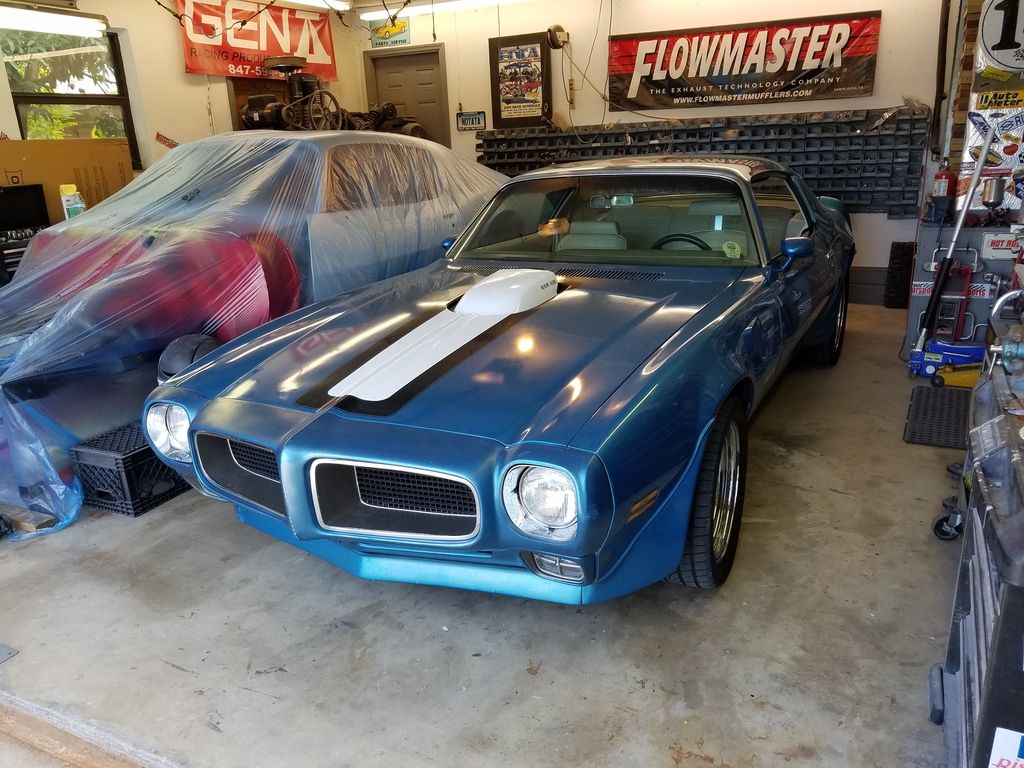
Working on a 70 TA this week. Replacing all suspension, sway bars, steering, and installing solid body mounts & frame connectors.


  #106  
Old 07-27-2016, 06:36 AM
TTOP350 TTOP350 is offline
Senior Chief
 
Join Date: Feb 2004
Location: IL
Posts: 385
Default

Hoping my 70 shell hits the paint booth in a month or less.

__________________
http://www.fquick.com/garages/viewga...ewimg&id=74990
"You people have stood in my way long enough. I'm going to clown college."
-Homer Simpson
  #107  
Old 07-29-2016, 04:38 PM
3tas4me's Avatar
3tas4me 3tas4me is offline
Ultimate Warrior
 
Join Date: May 2004
Location: Wisconsin
Posts: 1,256
Default

Mine is still at the shop for the metal replacement. Don't have any fresh pics at the moment.

__________________
1970 Trans Am
1971 Trans Am
1974 Trans Am
1978 Y88 Trans Am W72/auto
1979 10th Anniversary Trans Am
1984 Trans Am
1993 Trans Am
1999 30th Anniversary Trans Am
2001 10th anniversary Firehawk #104
2006 GTO
  #108  
Old 07-29-2016, 07:45 PM
Brewster's Avatar
Brewster Brewster is offline
Ultimate Warrior
 
Join Date: Aug 2004
Location: North Woods of Wisconsin
Posts: 4,817
Default

Time to rebuild my M-22 due to a slight vibration at higher speeds (80+). I got a Master Rebuild kit from The Gear Box. I have never done one of these before before but looks pretty basic.
One of my buds sent me this link which tells it all.

http://www.superchevy.com/how-to/tra...-rock-crusher/

Brew
Attached Thumbnails
Click image for larger version

Name:	Trans.jpg
Views:	99
Size:	30.3 KB
ID:	433822  

  #109  
Old 07-29-2016, 09:13 PM
necdb3's Avatar
necdb3 necdb3 is offline
Ultimate Warrior
 
Join Date: Jul 2004
Location: Mt. Laurel NJ, now Melbourne, FL
Posts: 1,385
Default

Quote:
Originally Posted by Brewster View Post
Time to rebuild my M-22 due to a slight vibration at higher speeds (80+). I got a Master Rebuild kit from The Gear Box. I have never done one of these before before but looks pretty basic.
One of my buds sent me this link which tells it all.

http://www.superchevy.com/how-to/tra...-rock-crusher/

Brew
They are very simple rebuilds. If you have done mechanical work before, it will be easy. I would question if the vibration is coming from the trans though. Short of a bent Input shaft, I can't see you getting vibration without some other issues ( bad bearing, etc) but you would hear that.

Dave

  #110  
Old 07-29-2016, 09:36 PM
keith k's Avatar
keith k keith k is offline
Ultimate Warrior
 
Join Date: Feb 2005
Location: SE Michigan
Posts: 3,594
Default

I haven't had much free time for car project stuff this year, but did recently complete the re-finishing of my Formula's original JS wheels.
Putting trim rings on them will be painful...!


__________________
keith k
70 Trans Am RA III / T400 / Lucerne Blue / Bright Blue
70 Trans Am RA III / M20 / Lucerne Blue / Sandalwood
70 Formula RA III / M21 / Lucerne Blue / Bright Blue
  #111  
Old 07-29-2016, 10:02 PM
eaglesan13 eaglesan13 is offline
Ultimate Warrior
 
Join Date: May 2002
Location: California
Posts: 2,607
Default

Nice job Keith. Did you use the Eastwood's paints? They look shiny, what clear coat did you use.

Quote:
Originally Posted by keith k View Post
I haven't had much free time for car project stuff this year, but did recently complete the re-finishing of my Formula's original JS wheels.
Putting trim rings on them will be painful...!


  #112  
Old 07-30-2016, 06:44 AM
Judge273's Avatar
Judge273 Judge273 is offline
Ultimate Warrior
 
Join Date: Aug 2004
Posts: 7,519
Default

Very nice Keith...what's the process in detail you used?

__________________
Mike/Illinois
  #113  
Old 07-30-2016, 07:08 AM
Brewster's Avatar
Brewster Brewster is offline
Ultimate Warrior
 
Join Date: Aug 2004
Location: North Woods of Wisconsin
Posts: 4,817
Default

I hear you Keith they look awesome. I have to do my KR rims in the near future please do tells us what system or materials you used.
Thanks


Last edited by Brewster; 07-30-2016 at 07:30 AM.
  #114  
Old 07-30-2016, 09:20 AM
Pepi's Avatar
Pepi Pepi is offline
Ultimate Warrior
 
Join Date: Jan 2008
Location: Sussex, WI
Posts: 1,520
Default

Keith, those look great. I have a set need to do for mine. Definitely let us know your process and materials. I am worried about doing anything from a rattle can and lasting.

Thanks,
Karl

__________________
1973 Formula 400 4 spd 04C build date Norwood assembly plant.
  #115  
Old 07-30-2016, 11:57 AM
Judge273's Avatar
Judge273 Judge273 is offline
Ultimate Warrior
 
Join Date: Aug 2004
Posts: 7,519
Default

Never heard the rattle can stuff had lasting issues? Source?

__________________
Mike/Illinois
  #116  
Old 07-30-2016, 12:28 PM
Pepi's Avatar
Pepi Pepi is offline
Ultimate Warrior
 
Join Date: Jan 2008
Location: Sussex, WI
Posts: 1,520
Default

Quote:
Originally Posted by Judge273 View Post
Never heard the rattle can stuff had lasting issues? Source?
It has just always been my impression and opinion that a two part mixture with hardener is better than aerosol cans. You can't mix the hardener in with them, so other chemicals can easily remove their paint. JMO

__________________
1973 Formula 400 4 spd 04C build date Norwood assembly plant.
  #117  
Old 07-30-2016, 10:12 PM
keith k's Avatar
keith k keith k is offline
Ultimate Warrior
 
Join Date: Feb 2005
Location: SE Michigan
Posts: 3,594
Default

Quote:
Originally Posted by eaglesan13 View Post
Nice job Keith. Did you use the Eastwood's paints? They look shiny, what clear coat did you use.
Thanks. No, I didn't use Eastwood paint - see below for materials. They aren't clear coated, either, but they did turn out shinier than I had expected. Oh well, the trim rings will cover up most of that. And when I get around to doing the rest of the car, it will probably be shinier than it originally was, too, so things will be in balance

Quote:
Originally Posted by Judge273 View Post
Very nice Keith...what's the process in detail you used?
The process:
1) The de-bossed triangles on the spokes are always bumpy, rippled, and scored with die marks, etc. So I flat filed them down so the surface was as level as possible.
2) Had them dip stripped and e-coated at a place local to me.
3) Scuffed them with Scotchbrite pads, then sprayed them in urethane primer filler. Before hitting them with the primer filler, I taped over the stamped letter codes and dates, so they wouldn't get filled up with the primer and become unreadable.
4) Hand sanded all the surfaces to get the minor imperfections, trim ring scratches, etc. out of them (don't ask me why, since they're just going to get rings put back on them... it's an OCD problem I have).
5) A coat of primer sealer.
6) Scuffed again with Scotchbrite pads.
7) Painted the backside with a light grey 2K/urethane paint that I had mixed up in a rattle can at my local auto paint store. I picked a color by eye that seemed a close match to the color originally on the wheels. It was PPG 35413. For those that haven't used this stuff (picture of the can below), there's a button on the bottom of the can you push to start the mixing process. Once it's mixed, the paint can is only good for 24 - 48 hours. And it has isocyanates in it, so you need to use an appropriate respirator when painting with it. These paints flow nicely, and harden to a shiny gloss if the prep work is good.
8) Sprayed the front side coves in dark grey. I used Duplicolor wheel paint you can get at most auto parts stores (see picture below).
7) Masked off the dark grey and painted the argent silver on the spokes and outer rims. The argent silver was also 2K stuff I had mixed at the auto paint store. The PPG code for rally wheel argent silver is 8568.
8) Submit to quality inspector for approval....
Attached Thumbnails
Click image for larger version

Name:	Backside Paint.jpg
Views:	115
Size:	50.0 KB
ID:	433877   Click image for larger version

Name:	Wheel Charcoal Paint.jpg
Views:	120
Size:	49.5 KB
ID:	433878   Click image for larger version

Name:	Silver Wheel Paint.jpg
Views:	115
Size:	68.3 KB
ID:	433879   Click image for larger version

Name:	Quality Inspector.jpg
Views:	121
Size:	79.1 KB
ID:	433880  

__________________
keith k
70 Trans Am RA III / T400 / Lucerne Blue / Bright Blue
70 Trans Am RA III / M20 / Lucerne Blue / Sandalwood
70 Formula RA III / M21 / Lucerne Blue / Bright Blue
  #118  
Old 07-31-2016, 12:25 AM
Transamric's Avatar
Transamric Transamric is offline
Ultimate Warrior
 
Join Date: May 2006
Location: Western WA.
Posts: 2,613
Default

Quote:
Originally Posted by Brewster View Post
Time to rebuild my M-22 due to a slight vibration at higher speeds (80+). I got a Master Rebuild kit from The Gear Box. I have never done one of these before before but looks pretty basic.
One of my buds sent me this link which tells it all.

Brew
Well there's the problem,....it's upside down!!

  #119  
Old 07-31-2016, 01:49 AM
Dens71TA's Avatar
Dens71TA Dens71TA is offline
Ultimate Warrior
 
Join Date: Jul 2002
Location: Midwest
Posts: 2,316
Default

Waiting for the final pieces to come back from the painter. Car has been off the road for almost 7 years.
Attached Thumbnails
Click image for larger version

Name:	P1010243.jpg
Views:	105
Size:	34.6 KB
ID:	433886  

__________________
1971 Trans Am 455 H.O. - Cameo white
1982 Recaro T/A 305 - Black
  #120  
Old 08-01-2016, 10:13 PM
Formulabruce's Avatar
Formulabruce Formulabruce is offline
Ultimate Warrior
 
Join Date: Nov 2004
Location: North East of AMES PERFORMANCE, in the "SHIRE"
Posts: 9,428
Default

Helping a friend fix his 70 Formy that was supposed to be "restored" but was somewhat hacked, especially the frame rails, Here is the Torque plate Out of the Pass side . The repop is NOT good and needs HOURS of beating into submission, adding holes, fixing other hole locations. Will "shoe horn" ( flange the cut end ) a new frame rail section in when this is done. YUp this car is painted

Attached Thumbnails
Click image for larger version

Name:	floor pass Allan.jpg
Views:	327
Size:	45.2 KB
ID:	434002   Click image for larger version

Name:	Allan 2.jpg
Views:	332
Size:	51.3 KB
ID:	434003  

__________________
"The Future Belongs to those who are STILL Willing to get their Hands Dirty" .. my Grandfather
Reply


Posting Rules
You may not post new threads
You may not post replies
You may not post attachments
You may not edit your posts

BB code is On
Smilies are On
[IMG] code is On
HTML code is Off

Forum Jump


All times are GMT -4. The time now is 07:42 AM.


About Us

The PY Online Forums is the largest online gathering of Pontiac enthusiasts anywhere in the world. Founded in 1991, it was also the first online forum for people to gather and talk about their Pontiacs. Since then, it has become the mecca of Pontiac technical data and knowledge that no other place can surpass.


Copyright © 2017