


| FAQ |
| Members List |
| Social Groups |
| Calendar |
| Search |
| Today's Posts |
|
#1421
 12-02-2010, 08:37 AM
|
|||
|
|||

sure ...temporarily ... ;~)
|
|
#1422
12-02-2010, 05:58 PM
|
||||
|
||||
|
Quote:
At 60 mph it reads around 2,700 rpm (that website chart says 2,642 rpm) Yippy! |
|
#1423
12-02-2010, 06:14 PM
|
||||
|
||||
|
good deal, it's nice to have an accurate tach reading for those "rare" occasions when you flogg it a bit too hard!
__________________
'72 Formula 455HO TH400, Revere Silver, black deluxe '74 Trans Am SD 4 speed, Admiralty Blue, blue deluxe |
|
#1424
12-04-2010, 05:25 PM
|
||||
|
||||
|
Took her out for a ride today and finally made the magic 1000 mile mark on the car. So everything is run-in and still actually functioning.
Funny thing is that the a/c compressor finally stopped seeping oil and spraying it around the engine compartment. Of course that then lead me to double check that there was still freon in the system and that it didn't all leak out somewhere. Thankfully it is still holding pressure and blowing cold. So I guess it takes 1000 miles of run-in to get the compressor front seal, to seal. |
|
#1425
12-05-2010, 11:42 AM
|
|||
|
|||
|
Enjoyed reading the second part of the article about your car. It's true, the most enjoyment comes from the actual restoration process; hunting down replacement parts, repairing, cleaning, refinishing. Yes, it's great to drive the finished product, but you're always worried about any damage that may ruin all that hard work.
Also, another way to copy markings like the code on the springs, is by using tracing paper. Easier than having to scale a photograph. Nice to see you're nearing completion...? |
|
#1426
12-12-2010, 04:30 PM
|
||||
|
||||
|
If anyone needs a driver's side rear frame rail, PM me. Its free to someone who can use it. This was the leftover quarter section that we used to take the patch panel off of the outer skin.
See the posting here: http://forums.maxperformanceinc.com/...47#post4178847 |
|
#1427
12-22-2010, 09:52 PM
|
||||
|
||||
|
I'm short on projects at the moment so I decided to tackle the original busted-up shaker so I have a spare eventually.
As you may recall the original was damaged in the carb fire and the edge was run over during the prior owner's rush to get the fire put out. I had my body guy strip it but when he found it was so damaged I told him to stop the work on it. The basic shaker domes are interchangeable from 71 to 76 (1970 had a thin edge version) but were modified depending upon the year it was used. From 70 to 72 they had a flapper valve that would be activated by two solenoids but starting in 73 the flapper was cancelled and a riveted cover and frame took their place in the rear opening. Here's my busted original: 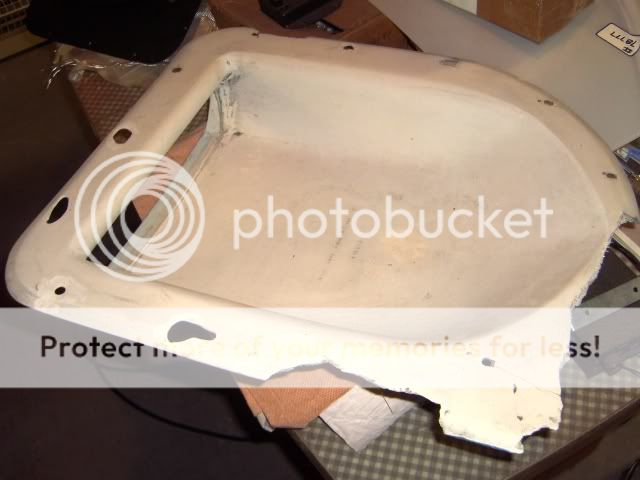 With the mounting flange set on it. These were riveted to the shakers in a process that usually caused stress cracks in the fiberglass. The 70-72 mounting flanges have a two stud mounting system that attaches to the air cleaner with two wing nuts. The 73-76 units used a large ring that used a single screw to retain it to the air cleaner. 
Last edited by njsteve; 12-22-2010 at 10:41 PM. |
|
#1428
12-22-2010, 09:53 PM
|
||||
|
||||
|
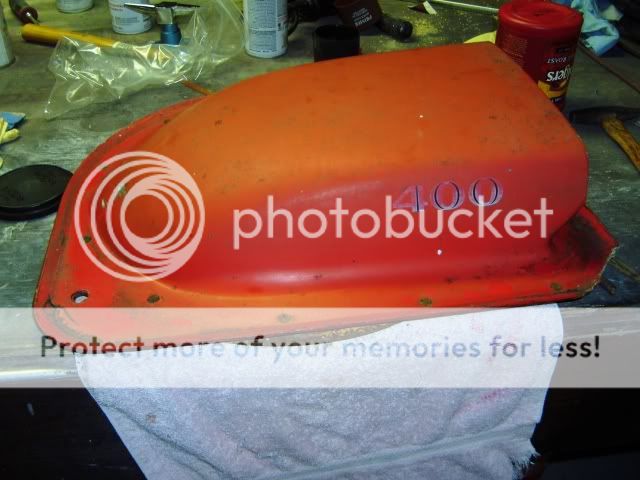
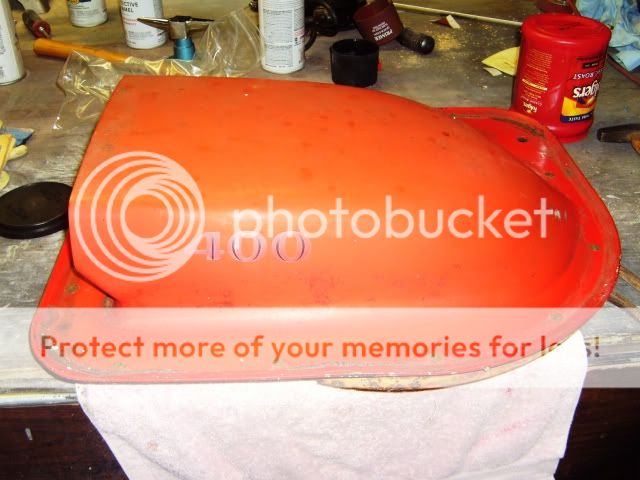
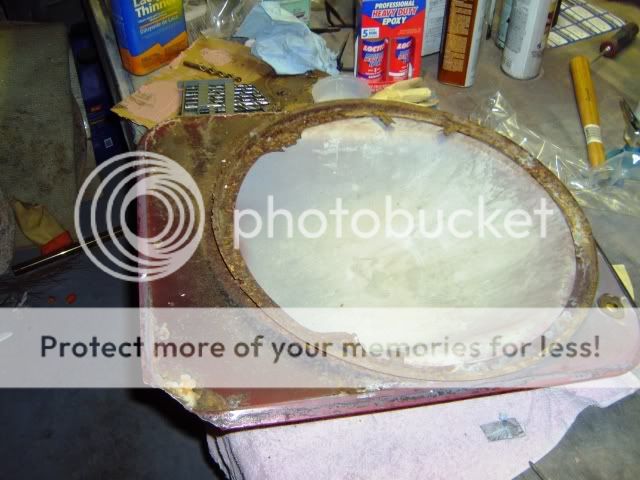
I found a 76 shaker dome on ebay for $70. I got it rather cheaply, since nobody wanted it because the metal mounting flange was unuseable as it was rusted with holes in it. The fiberglass, though was in remarkably nice shape with only one rivet stress crack and a small edge of the lip missing.
Last edited by njsteve; 12-22-2010 at 10:20 PM. |
|
#1429
12-22-2010, 09:59 PM
|
||||
|
||||
|
Removing the rusted late model base plate flange was rather easy. There are a dozen or so rivets and I gently used a drill to cut the bottom of the rivet off, allowing the base plate to be removed.
 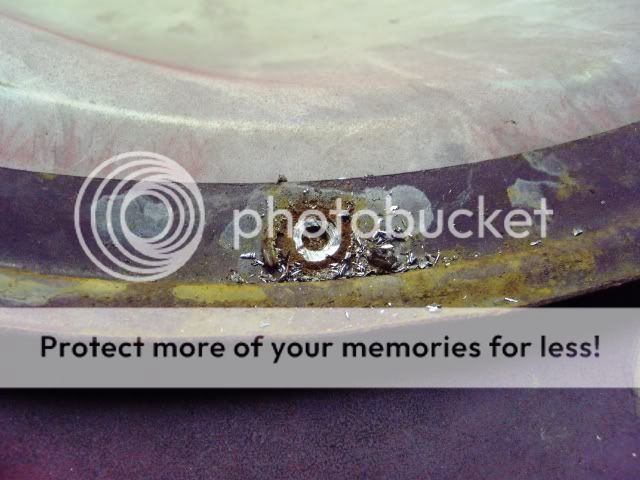  The remaining portion of the rivet can then be popped out of the hole with the tip of a pencil. 
|
|
#1430
12-22-2010, 10:08 PM
|
||||
|
||||
|
This is the flapper door assembly. Sorry I didn't take any photos but I was so busy fixing it, I forgot. The frame was a fiberglass jigsaw puzzle, busted into four different pieces but I was able to reassemble and repair it with epoxy and fiberglass bondo.
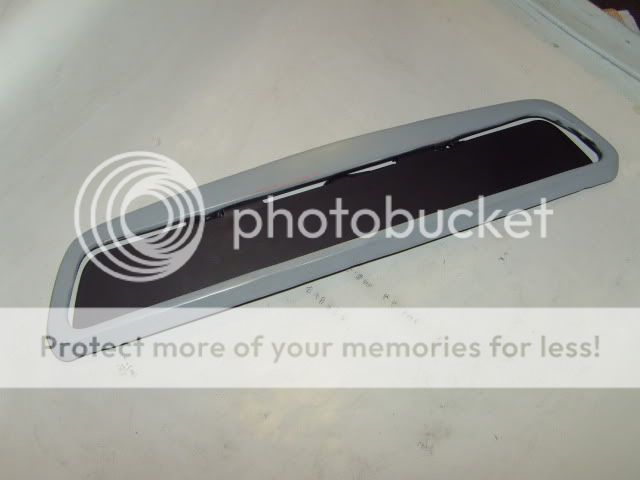 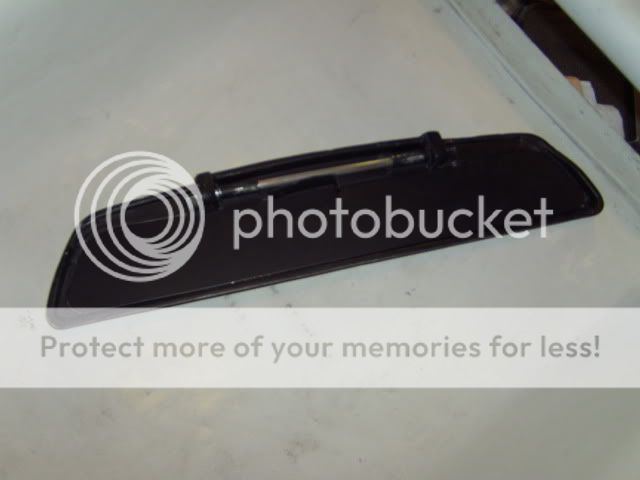 This assembly was originally glued into the shaker domes with some type of red resin epoxy that gets rather brittle with age, which is actually a benefit since it is easy to chip away in order to free either the flapper door assembly or the block off plate assembly. Here it is set into its original position in the busted shaker. 
|
|
#1431
12-22-2010, 10:18 PM
|
||||
|
||||
|
Luckily the prior owner of the 76 shaker dome had already relieved it of the block off plate and frame, leaving only some excess red resin epoxy to remove.
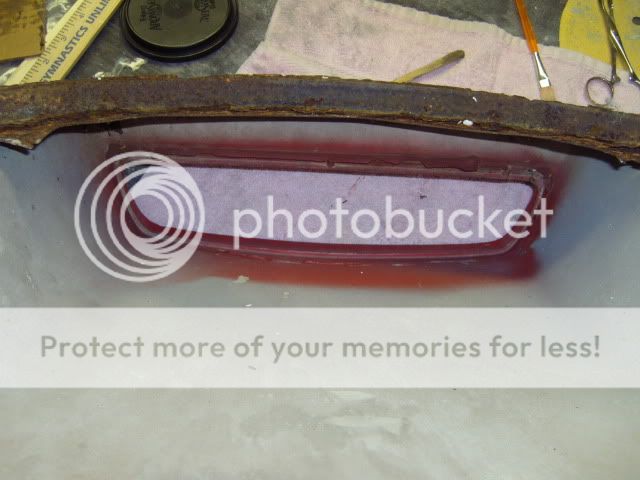 That's it at the moment. Next step is to strip the paint off the red shaker and do the repairs of the rivet crack and the missing edge. |
|
#1432
12-26-2010, 10:43 PM
|
||||
|
||||
|
I used some paint stripper and got the majority of the original red paint off the dome. Went pretty quick. I then washed and sanded it down with a handheld Black and Decker mouse sander.
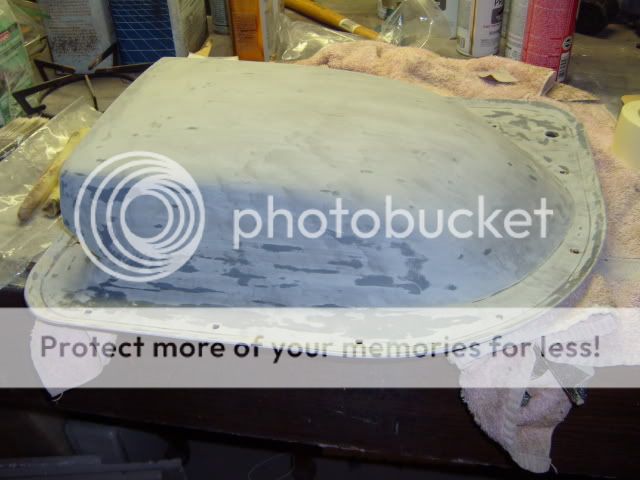 You can see the missing edge that needs to be reconstructed on the lower left. Also, anywhere I thought it looked like a stress crack was forming from a rivet hole, I grooved that area out with a Dremel tool. 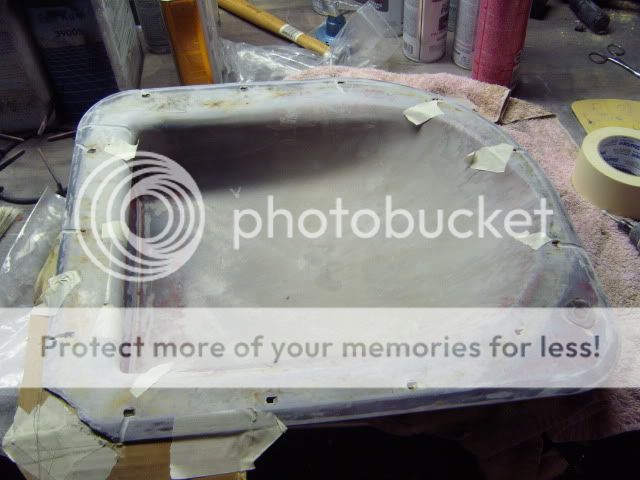
|
|
#1433
12-26-2010, 10:46 PM
|
||||
|
||||
|
To map out the area for the reconstruction, I taped some cardboard underneath and then estimated the outer dimensions.
 I then used a plastic bag under the supporting cardboard to prevent the fiberglass filler from sticking to the cardboard. After mixing the fiberglass Bondo, I applied it "liberally" to all the grooved areas and the edge area. 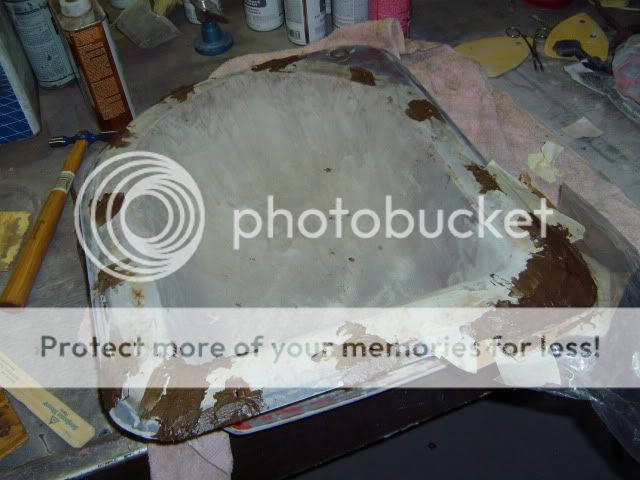
|
|
#1434
12-26-2010, 10:46 PM
|
||||
|
||||
|
Here's what the repair looked like from the top side, after pulling the plastic bag and cardboard off. You can see one of the rivet hole stress cracks on the upper right rivet hole.
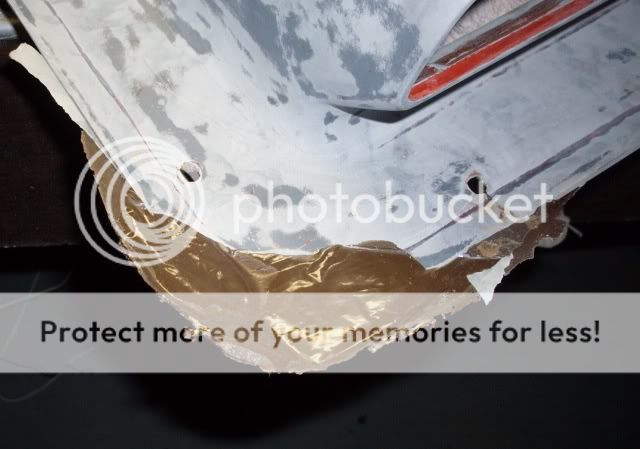 And after some preliminary trimming and sanding. Once I got the underside flat, I used the busted shaker as a stencil, placing the two, flange to flange and traced the correct curve with a pencil onto the new shaker dome's underside. 
|
|
#1435
12-26-2010, 10:47 PM
|
||||
|
||||
|
Once all the underside repairs were done, I grooved out the corresponding areas on the top side and applied more fiberglass filler to repair the remnants of the stress cracks on top.
Here is the semifinished shaker dome after all the fiberglass repairs were done. Still needs some primer, redrilling of the rivet holes to the correct size, and epoxying of the door assembly into the opening, before the metal base plate can be riveted back on. 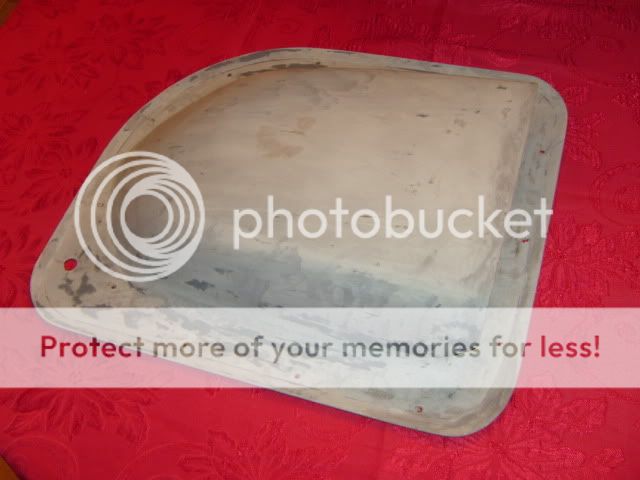  And the underside: 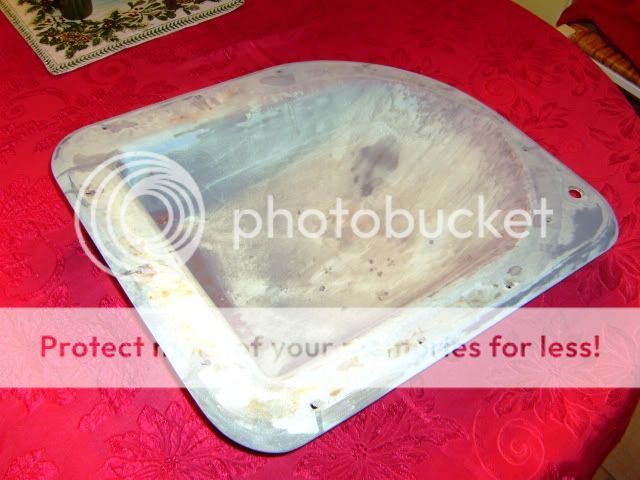 The before and after of the reconstructed missing edge: 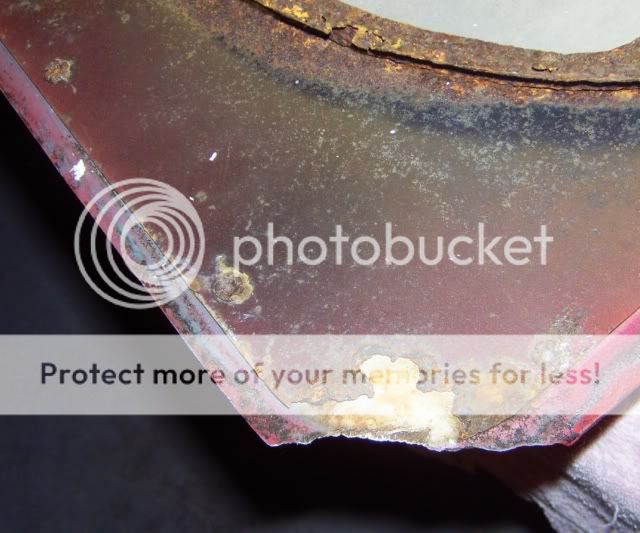 
Last edited by njsteve; 12-26-2010 at 10:53 PM. |
|
#1436
12-27-2010, 11:03 AM
|
||||
|
||||
|
Excellent work as to be expected!
LMK if you ever "run out of projects" as I can surely send you a few... Happy Holidays to you Steve 
__________________
************************************************** ******************* 73 TA 4 spd #'s match red/white - "STOLEN" AT TERRY SPEAR's SHOP IN Columbia TN ~mid 2014 Last offical pic of the car can been seen here: http://clubs.hemmings.com/pontiactn/...%20-%20rev.pdf People have seen it posted FS on Craigs List back in late 2013 early 2014.... ^^^^^^^^^^^^^^^^^^^^^^^^^^^^^ IF YOU HAVE ANY INFO ABOUT IT PLEASE CONTACT ME!!! |
|
#1437
12-27-2010, 11:05 PM
|
||||
|
||||
|
Thanks for the support! :-)
Primed the shaker today and epoxied in the flapper door. More sanding on the schedule for tomorrow.  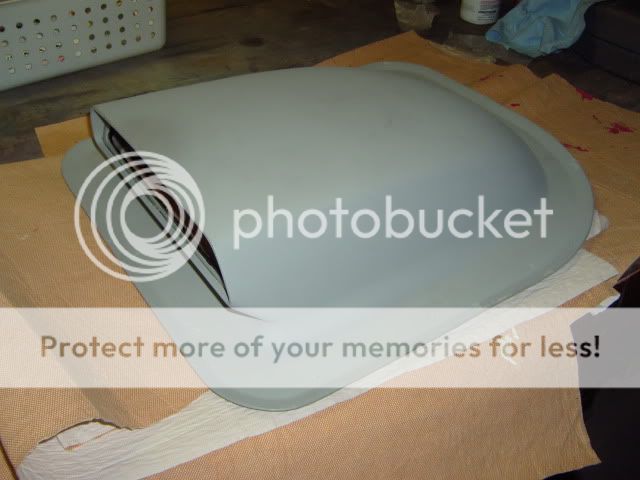  
|
|
#1438
12-30-2010, 03:26 PM
|
||||
|
||||
|
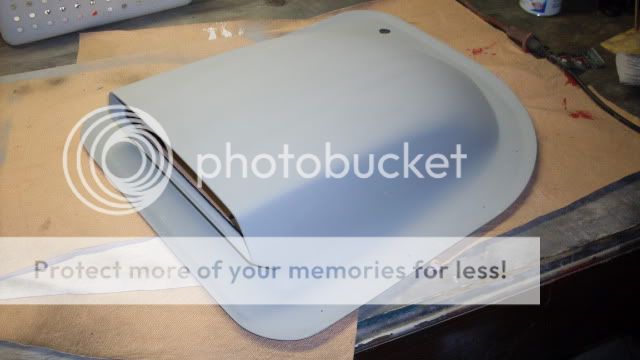
Almost done! Got the final layer of primer on and the detail work on the seam where the trap door mounts.
|
|
#1439
12-30-2010, 03:27 PM
|
||||
|
||||
|
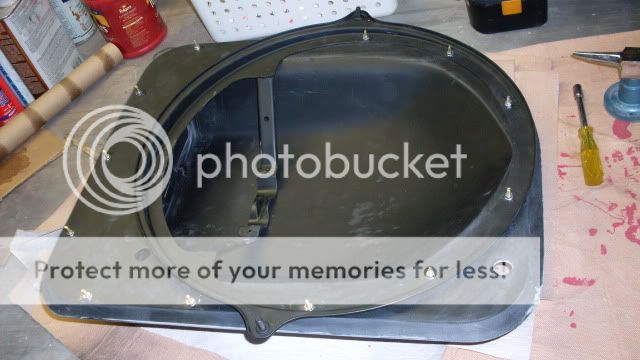
I did the preliminary mounting of the base plate ring. I carefully drilled the holes in sets of two at a time, and then secured the plate to the shaker with 13 small nuts and bolts that are the same diameter as the rivets in order to get everything fixed in place and mated up properly.
|
|
#1440
12-30-2010, 08:08 PM
|
||||
|
||||
|
GREAT WORK Steve...This is the kinda stuff I enjoy doing as well...Always comes out better than the repop stuff you find in the market today (If they're even available)....
__________________
1969 GTO 400-4speed, H/T 1969 GTO 400-RAIII-4speed, Convertible 1969 Grand Prix SJ |
| Reply |
|
|
The PY Online Forums is the largest online gathering of Pontiac enthusiasts anywhere in the world. Founded in 1991, it was also the first online forum for people to gather and talk about their Pontiacs. Since then, it has become the mecca of Pontiac technical data and knowledge that no other place can surpass.




 Linear Mode

