


| FAQ |
| Members List |
| Social Groups |
| Calendar |
| Search |
| Today's Posts |
|
#141
 12-03-2010, 01:21 AM
|
|||
|
|||

Quote:
 Quote:
I finally got the body back on the frame. I raised the body using the engine hoists that I have at each end of the car. I then put woods blocks under the home made saw horses raising the body 30 inches off the ground. I then disconnected the front engine hoist and moved it out of the way. Next roll the frame under the body, reconnect the front engine hoist to the front of the car, lift the body up enough to remove the saw horses and then lower the body onto the frame. About 2 hours of work all total. It took another hour to center the body on the frame. 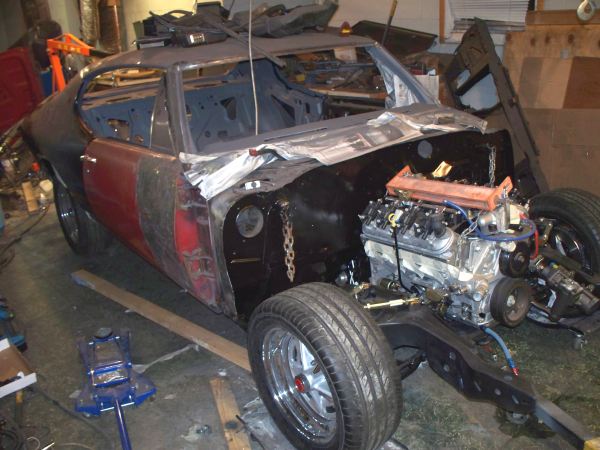
__________________
68 Lemans - GTO appearance LS3 68 Eldorado - waiting for restoration 96 Roadmaster Wagon 2014 Infiniti Q50S Hybrid Marietta GA |
|
#142
01-19-2011, 02:15 AM
|
|||
|
|||
|
I have not updated this for a while, so I guess its time for some updates. I have sprayed lizard skin in the interior. So far I have used 8 gallons for the interior and underside of the car. It would appear that I will need at least 4 more gallons to compete the trunk and rear quarter panels.
Here is the roof. I had already covered the floor and firewall with plastic before I started taking photos so the roof is it for now. 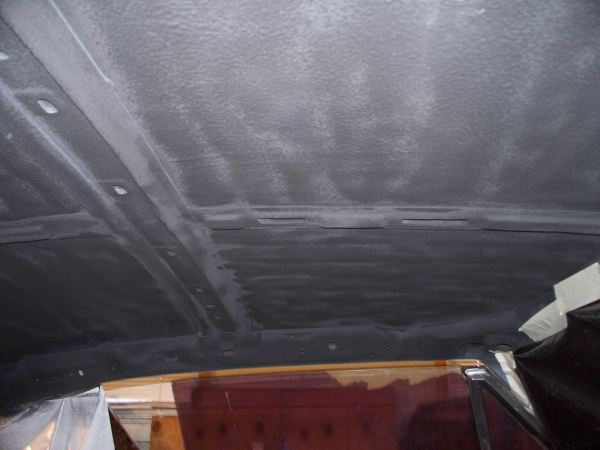 I repaired the rear trunk channel. The piece that I cut out is much worse than it appears in the picture. It had rusted from the back side. 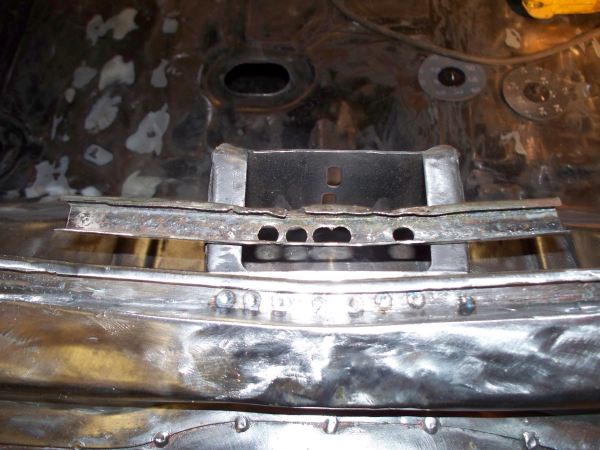 I have been working the corners of the rear window where the molding goes. Original dynacorn fit. 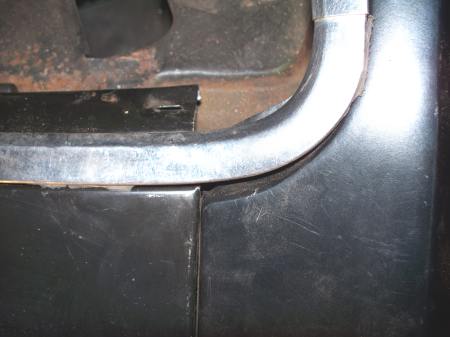 New metal installed to make fit better. 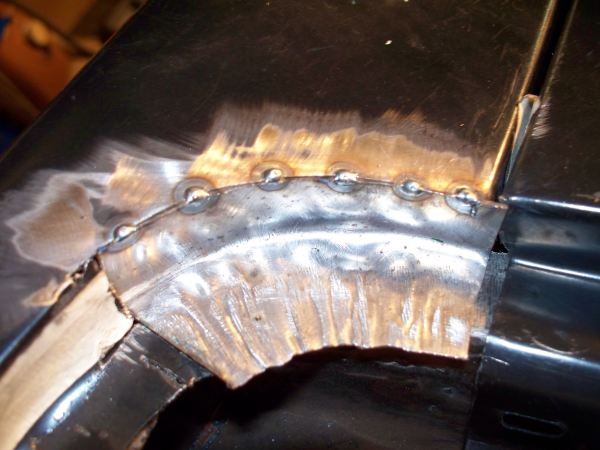 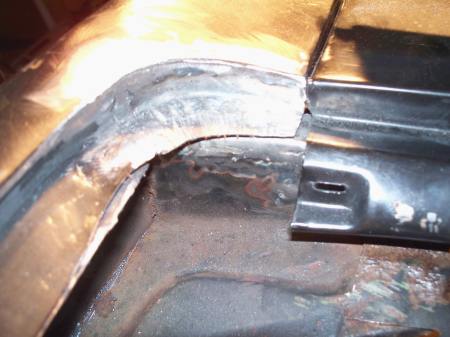 And the final work. First covered with "All Metal" and then skimmed with Rage Extreme 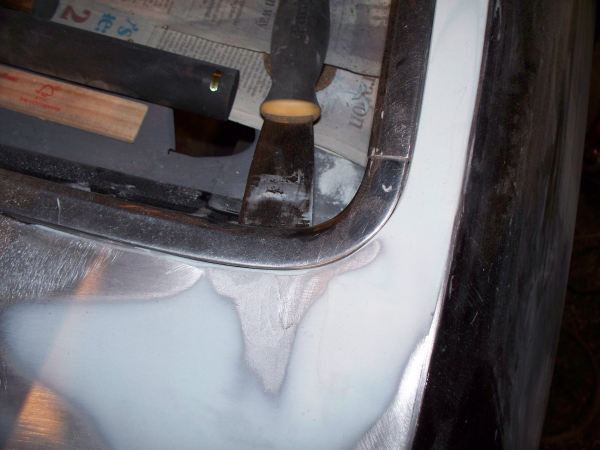 The dynacorn quarter is very distorted and wrinkled in the door area so I covered the flaws with "All Metal" and then Rage extreme. 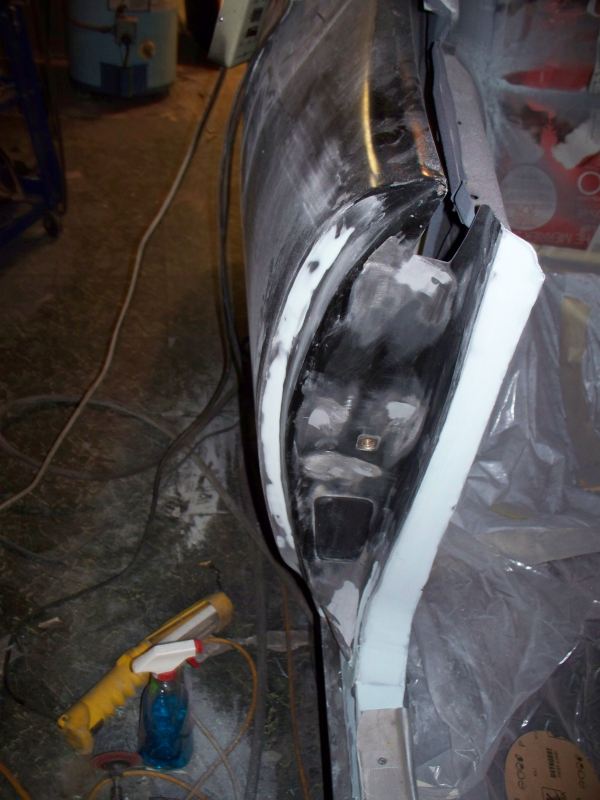 After reworking the quarter panel door jam I decided to fill the indention at the front.  I removed the rust from the pits on the roof. It took several treatments of PJ but finally got all of the rust out. I think I will skim a coat of "All metal" to fill in the pits. I will probably need to skim the entire roof with Rage. 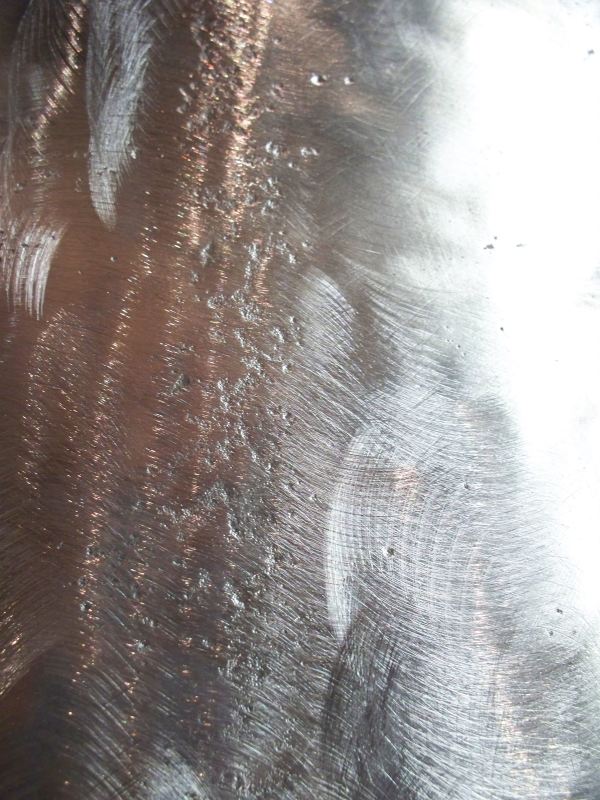 I still have a lot of filler work before I can prime the car.
__________________
68 Lemans - GTO appearance LS3 68 Eldorado - waiting for restoration 96 Roadmaster Wagon 2014 Infiniti Q50S Hybrid Marietta GA |
|
#143
01-25-2011, 12:09 AM
|
|||
|
|||
|
Not too much going on that is news worthy. I got a couple of items in. I'm Working on the roof panel. I filled the deepest of the rust pits with "all metal", I then covered the entire roof with Rage Extreme. I was forced to do this because of very minor pitting in most of the roof. I found out that its extremely hard to block sand the entire roof. I probably have another couple of days before I get it straight.
My power window kit came. 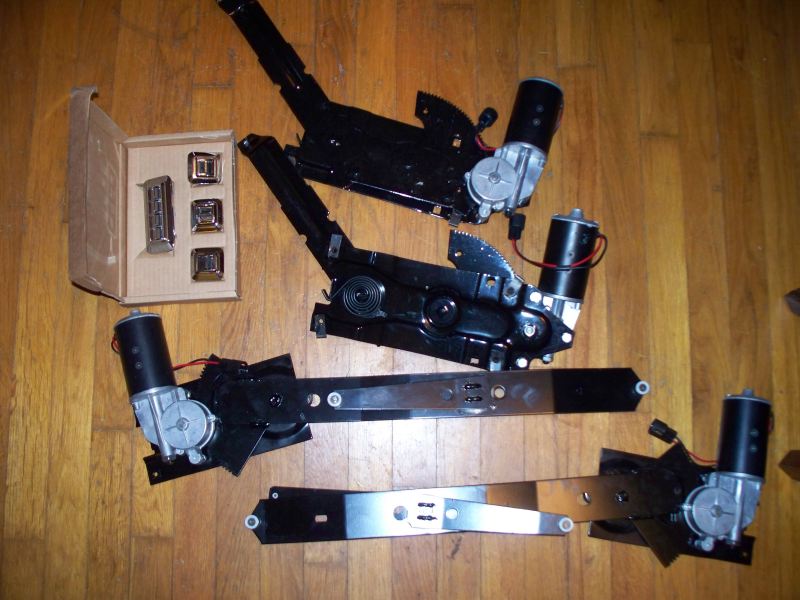 And a Ebay find, got this for $50 from someone who abandoned their project. 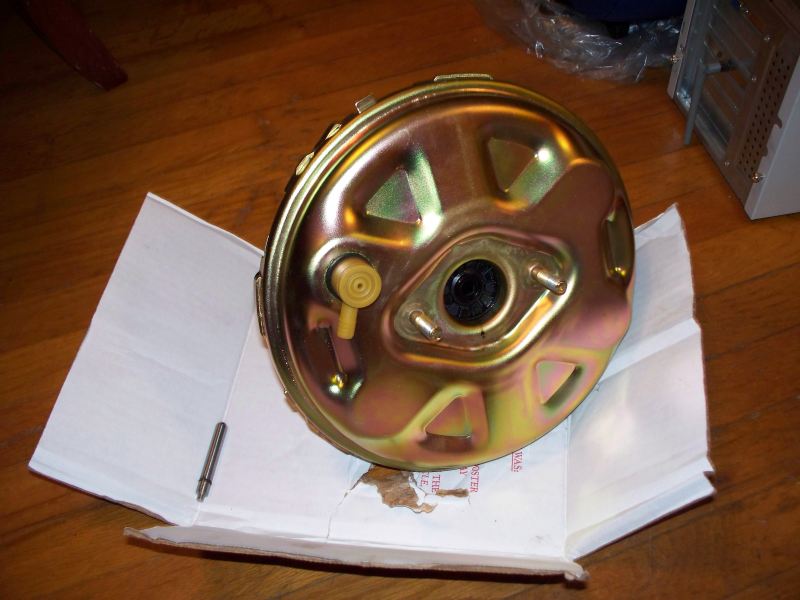 I probably won't have much to report for a while, the blocking is going extremely slow.
__________________
68 Lemans - GTO appearance LS3 68 Eldorado - waiting for restoration 96 Roadmaster Wagon 2014 Infiniti Q50S Hybrid Marietta GA |
|
#144
01-25-2011, 08:12 AM
|
||||
|
||||
|
Would you tell us where you got that power window kit and how much it cost?
Charles |
|
#145
01-25-2011, 12:13 PM
|
|||
|
|||
|
I got it from the Parts Place, the kit also included a wiring harness and a poor quality rubber boot, The Parts place recommends buying a different boot which I did. Cost was $799 + $54 for the rubber boot. I got mine with a 10% discount that is offered 3 to 4 times per year. (Christmas, 4Th July, Labor day, etc). You must have made at least one purchase from the Parts Place and they email you the code for these 10% sales.
The kit appears to include everything you need to do the conversion. The window switches include the bezel you need to install the switch's. The instructions show the wiring harness running by the door sill, but I think that was done for ease of installation in a competed car. I my case I will install the wiring harness where the factory did. This was the only complete kit I found and I selected it since I didn't want to chase down individual pieces or even know what I needed to order.
__________________
68 Lemans - GTO appearance LS3 68 Eldorado - waiting for restoration 96 Roadmaster Wagon 2014 Infiniti Q50S Hybrid Marietta GA |
|
#146
01-25-2011, 01:51 PM
|
||||
|
||||
|
Thanks Mr. Brown, nice info. Let us know how the install & operation go.
|
|
#147
02-13-2011, 02:30 AM
|
||||
|
||||
|
I just read through your entire thread tonight. I really enjoyed the details of the build, and with the exception of the genius with all the uneducated opinions, the LS swap is a great idea. I always said I would never take out the Pontiac engine, but I cant deny the advantage the modern LS has over our traditional engines. I did a body off on my GA and can appreciate the amount of work that is involved. You look like you are making great progress, and you have stepped up to some top shelf components. Good luck with the rest of the build.
__________________
1973 Pontiac Grand Am ERL built 430 CI LS7, Brodix STS BR7 heads, Magnum T-56 6-speed, Modulare 19" wheels, QA1/Global West/Speedtech suspension, Wilwood 6/4 piston brakes. BMW Donnington Gray paint. All wrapped up in a Hurst Pontiac tribute theme. |
|
#148
02-13-2011, 03:18 AM
|
||||
|
||||
|
Good stuff for sure....I'm watching closely. My engine bay is begging for a LS.
__________________
Curt '69 GTO Ragtop, 455, RA, KRE SD Perf ported heads and "old Faithful" cam, Sean Murphy Q-Jet, Tremec 5spd, Moser Trutrac 3:73, Hotchkiss, Speedtech, Wilwood  '64 Lemans Convertible, Tremec TKO600 |
|
#149
03-06-2011, 02:36 AM
|
|||
|
|||
|
Several things done.
Trunk is painted. I will cover this with lizard skin. 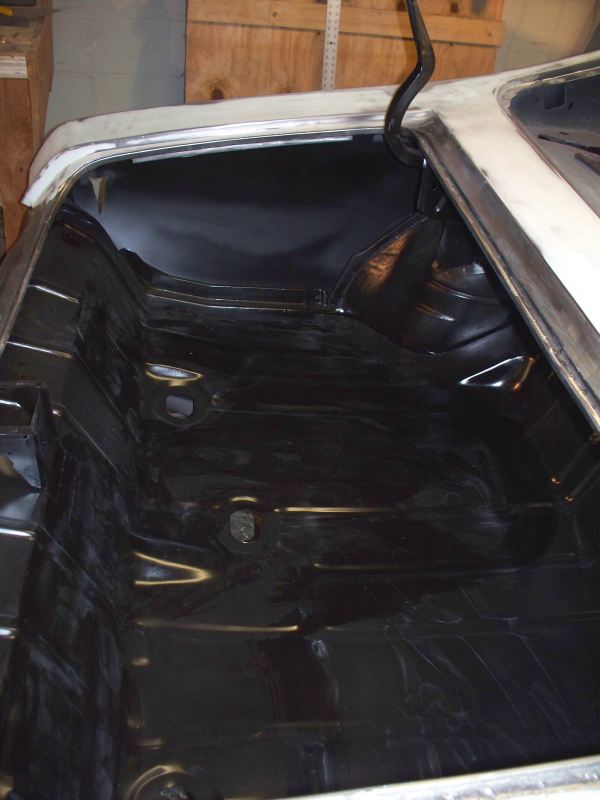 Painted the cowl area. 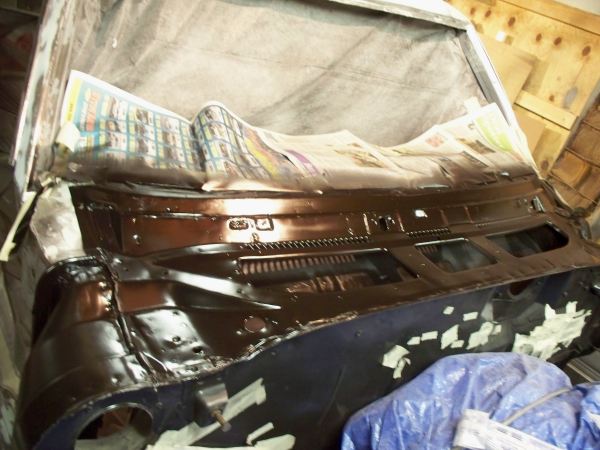 Cut Holes for the side marker. Although some like to remove the cutout from the old quarter and butt weld them in, this seems like too much work. Here is my efforts it took about 20 minutes per side. Center punched the corners, used a drill, cut-off wheel, saber saw and 2" disc grinder. The piece from the old quarter. 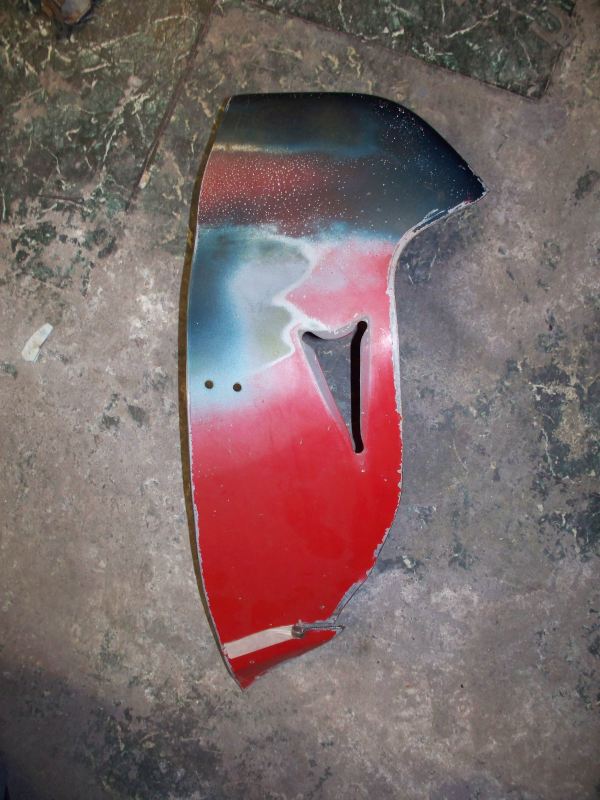 Marked cutout  Finished cutout.  And test fit with old light. 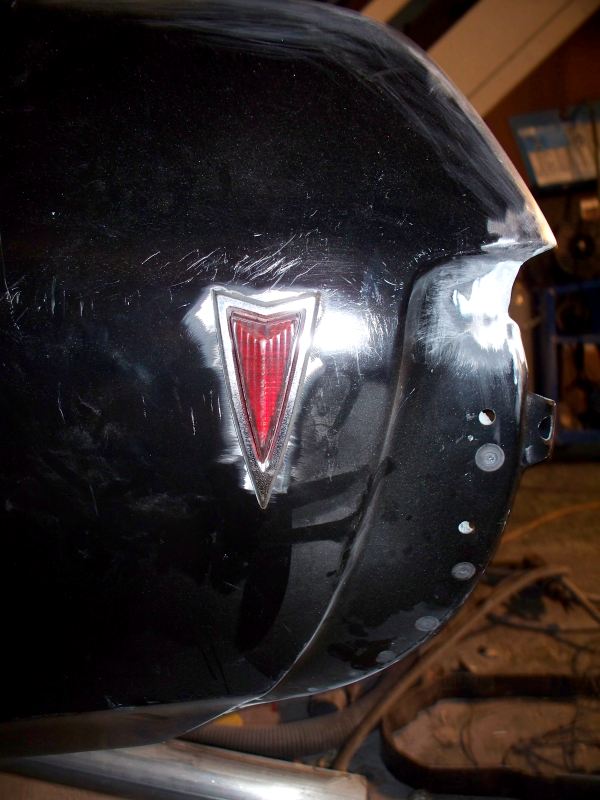 Almost ready to spray primer. Weather is not good this weekend, rain and high humidity. Maybe Monday night. 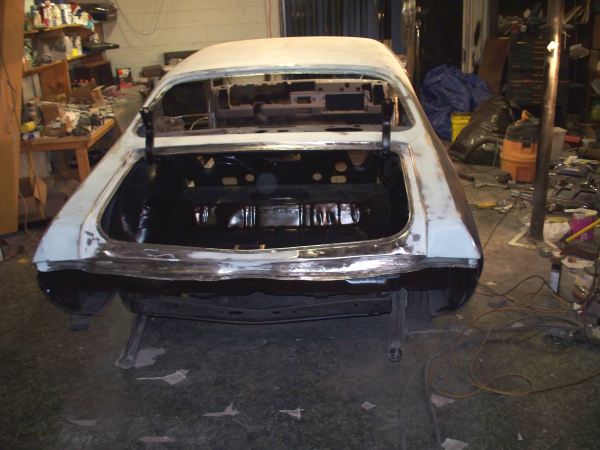 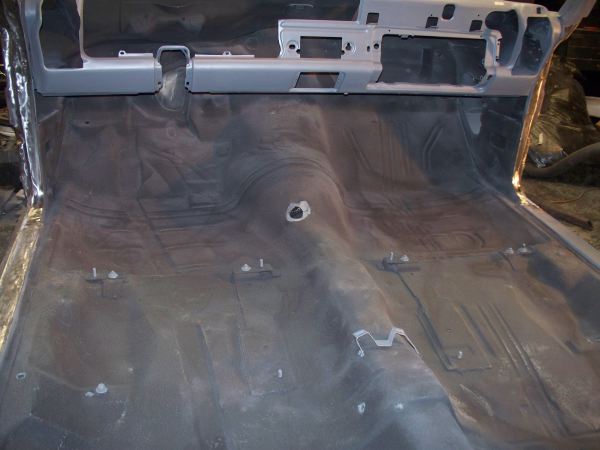 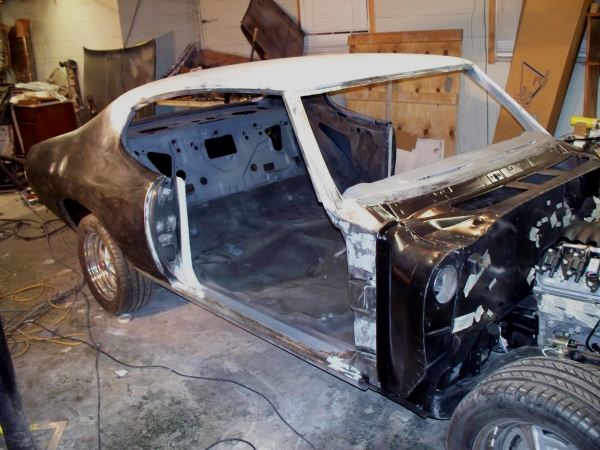 I'm planning on adding power door locks. Right now plans are to use a solenoid from a 77 Cadillac. I selected this one because it is used in millions of GM cars from 77 to the 90's and I own a 77 Cadillac. I will provide pictures after completing the installation. I need to have my vent frames rebuild/re-chromed. The chrome is not in great shape. The only place I have found to offer a rebuild service is "The Parts Place" any other suggestions are welcome. 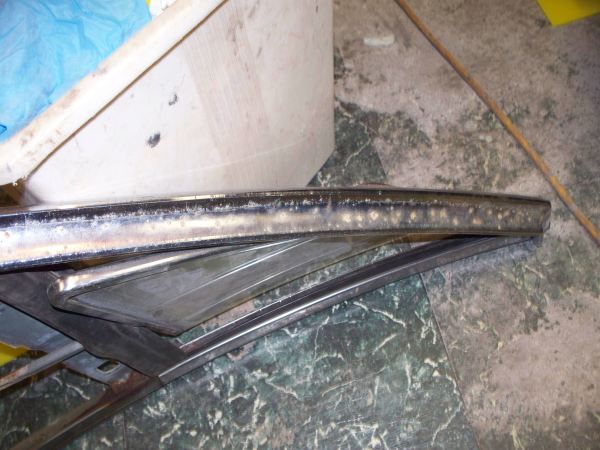 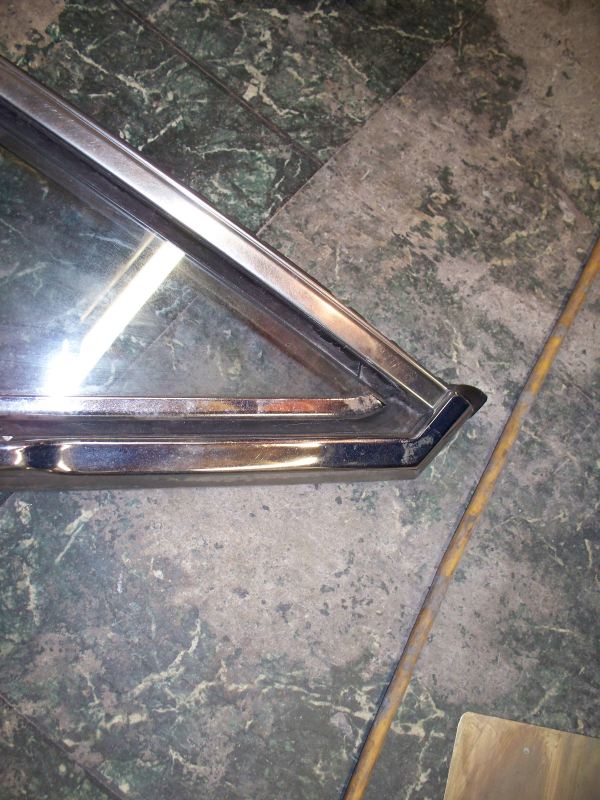 That's it for now
__________________
68 Lemans - GTO appearance LS3 68 Eldorado - waiting for restoration 96 Roadmaster Wagon 2014 Infiniti Q50S Hybrid Marietta GA |
|
#150
03-06-2011, 01:16 PM
|
|||
|
|||
|
looking great, iam starting to restore a 1970 lemans and i have a couple questions. first is can you get a brake line kit to fit as i have nothing left of the brake lines or any of there other parts. 2nd is i have the body off and should i do the brakes before i put the body back on?? thanks for any help.. chuck
|
|
#151
03-06-2011, 03:27 PM
|
|||
|
|||
|
Quote:
I strongly suggest than you run all of your brake lines and or fuel lines while the body is off the frame. It is not even possible to install the fuel lines with the body on the frame unless you cut the line and join them or at the very least you would need to remove the body mount bolts on the driver side and loosen the others and lift the driver side up a few inches in order to install the lines. If you are making your own lines you need to make and install the lines before reinstalling the body. If you wish to make your own lines you will need to find pictures of the frame showing the line routing. I found several pictures on this site in the 68-69 GTO section. Here is one post http://forums.maxperformanceinc.com/...rame+fuel+line
__________________
68 Lemans - GTO appearance LS3 68 Eldorado - waiting for restoration 96 Roadmaster Wagon 2014 Infiniti Q50S Hybrid Marietta GA |
|
#152
03-06-2011, 06:57 PM
|
|||
|
|||
|
thanks for the advice as i had not thougth about the fuel lines, probably since i dont have them also. another question for you guys i have the body off on wood frame and need to replace the passenger side rear quarter,, so can i cut out the old one with it off the frame, it worries me that it may flex .. the quarter panel is on order thru summit racing and wont be in until april 11 so i would like to cut the old one out while waiting ... this forumn is great ..iam a noob at these cars
|
|
#153
03-22-2011, 12:43 AM
|
|||
|
|||
|
Got the shell primed. Not without problems. Weather delayed me for a while. I ran out of primer. I though a gallon would be enough but I had print through and needed more coats than I planned to spray. I was unable to get more primer during the recoat window, so I had to scuff the whole thing again. I ended up spraying 5 coats before I had a uniform color.
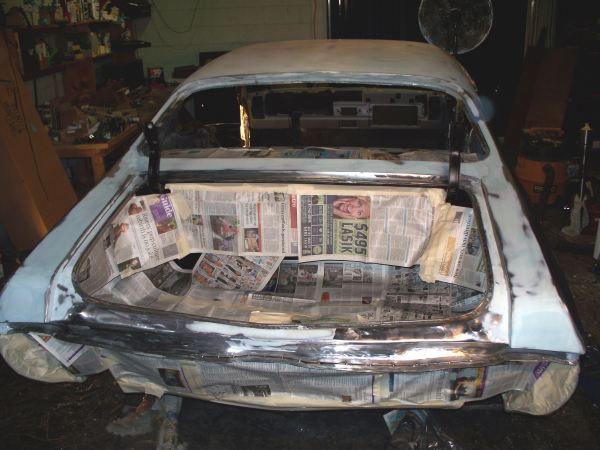 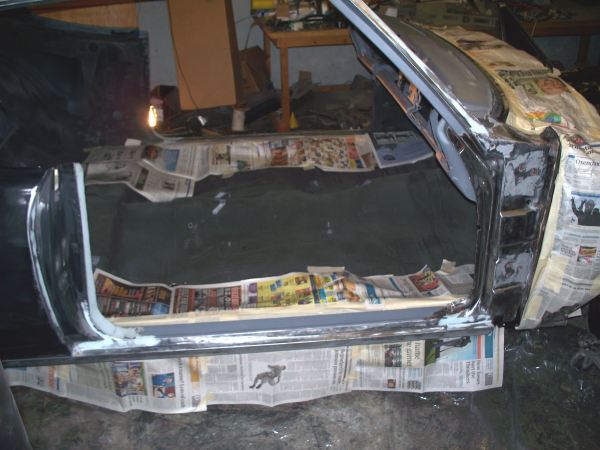 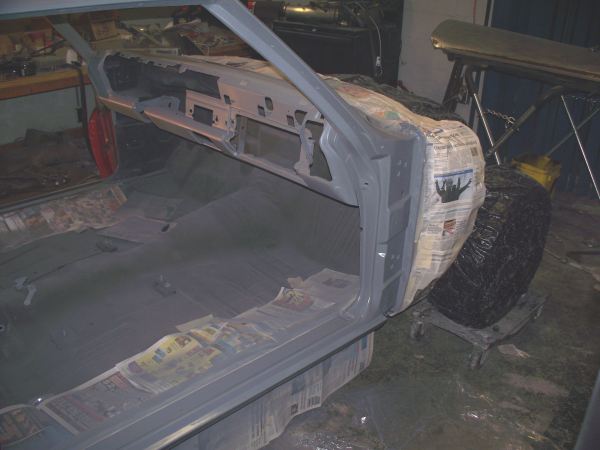 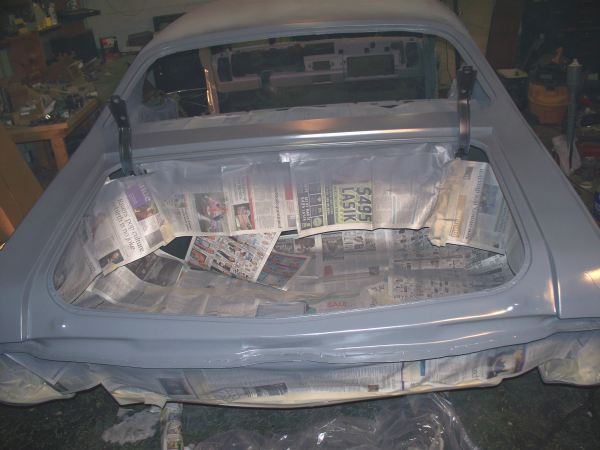 Ran out of primer at three coats. Painted the dash. 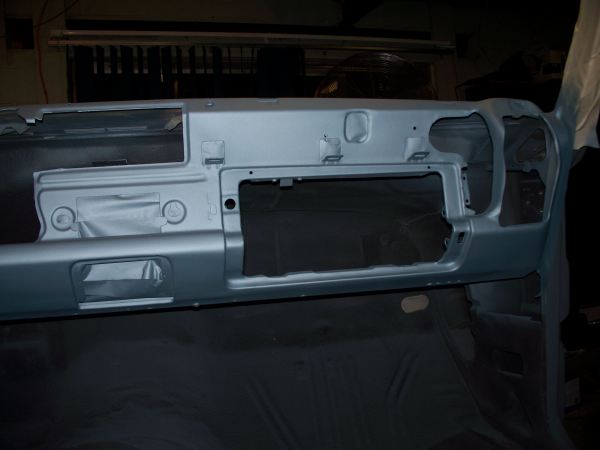 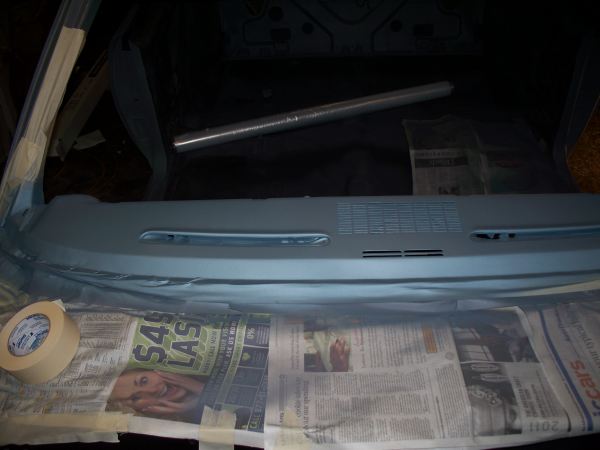 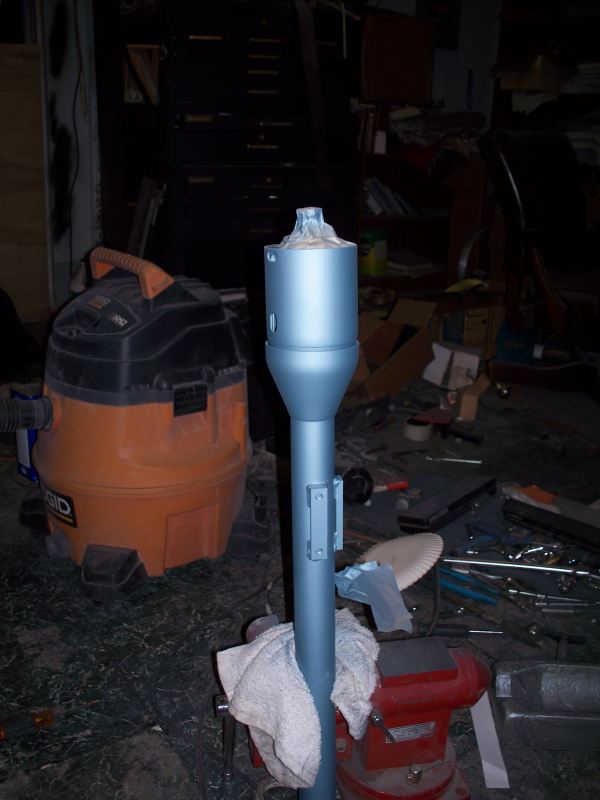 Round 2 - scuff paint, remask 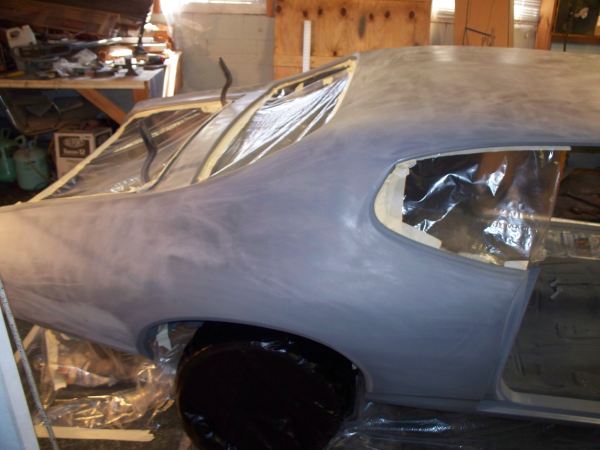 Final results after 5 coats total Glass bead blasted several parts 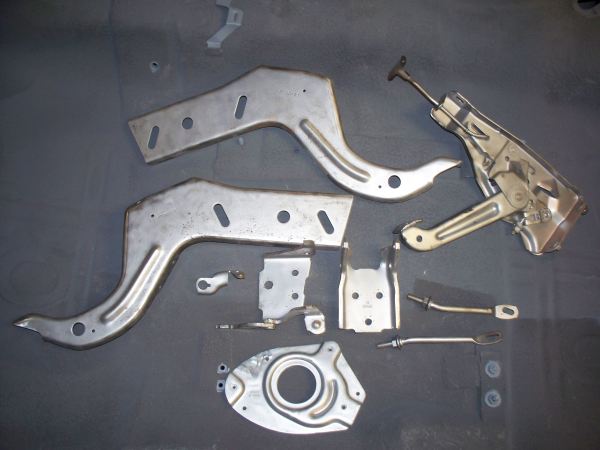 Rebuild door hinge. 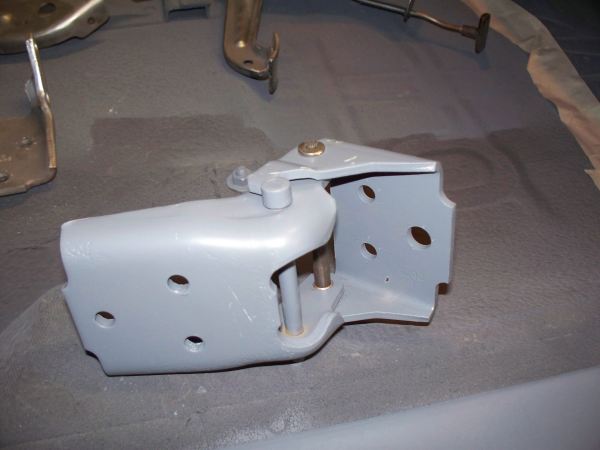
__________________
68 Lemans - GTO appearance LS3 68 Eldorado - waiting for restoration 96 Roadmaster Wagon 2014 Infiniti Q50S Hybrid Marietta GA |
|
#154
03-25-2011, 03:26 PM
|
||||
|
||||
|
Love this thread. They look so far from done till a solid color is put on. Then looks so much better. Body looks great. I will say I can't wait to see it done. I am really looking forward to seeing the modern gto seats in with the compleat interior.
Great job !
__________________
Send it! It’s going home on a trailer. |
|
#155
03-28-2011, 12:59 AM
|
|||
|
|||
|
After stripping the paint on the door I found a little swiss cheese. . . . decided to take a break from body work since this will not be easy. Making the patch not too difficult, but joining to the wrinkled metal will take some effort. Decided to put a few pieces back on the car.
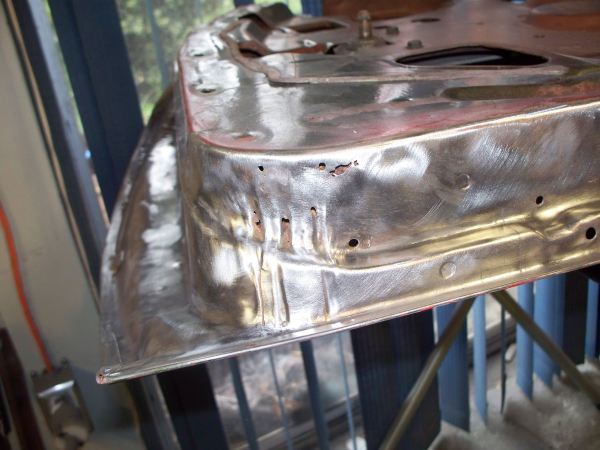 I installed firewall jute with plastic cover. With the lizard skin under this the car should be pretty quiet. I also install a few pedals. 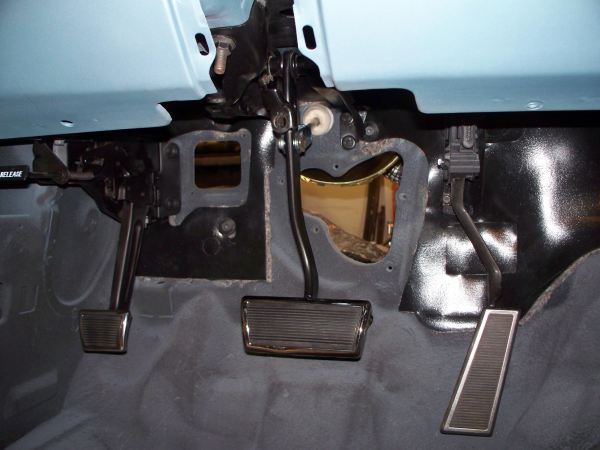 Installed the steering column, mocked up the steering wheel, couldn't install the wheel since I didn't get the correct type of bolts, got machine screws when I needed flat head, also need to paint the wheel adapter. 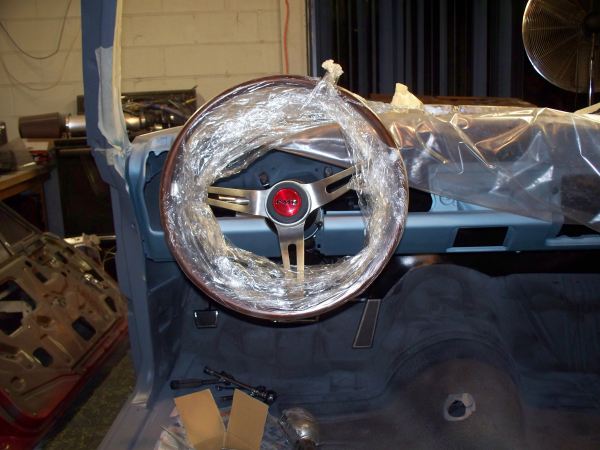 Cruise control and tilt visible here. It took a while to fish the cruise control wire down to column, used some aluminum welding rod to fish the wire through. The welding rod was flexible enough to feed through the column, but stiff enough to push through. 
__________________
68 Lemans - GTO appearance LS3 68 Eldorado - waiting for restoration 96 Roadmaster Wagon 2014 Infiniti Q50S Hybrid Marietta GA |
|
#156
03-30-2011, 01:04 AM
|
|||
|
|||
|
I repaired the door today.
 One of the many trial fits of the patch. I started out forming the patch with an English Wheel but decided the patch was too small and just bent it around one of the legs of the work stand holding the door. A slip roller would have been the ideal tool to make the bend, but I don't have one. 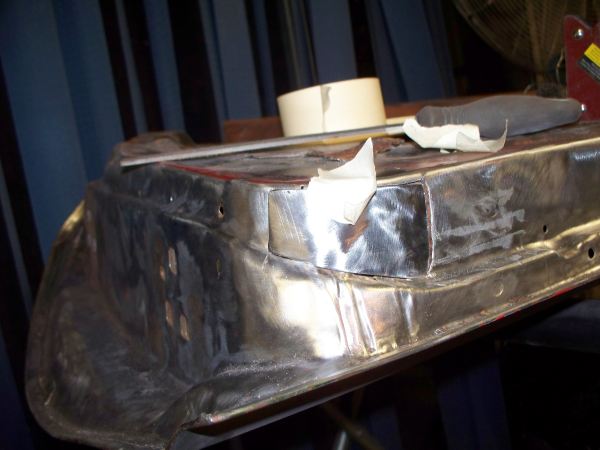 Tacking the patch in 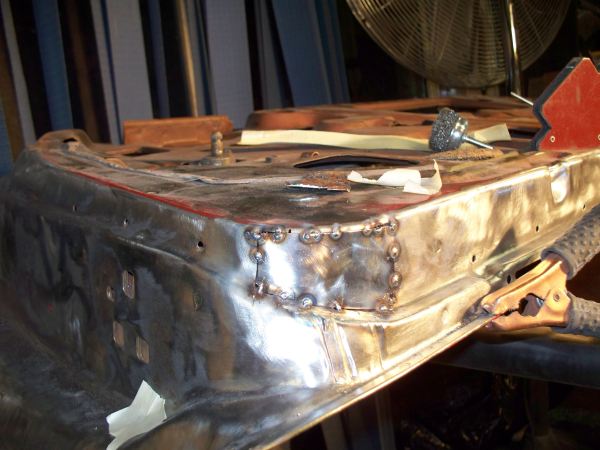 Filler? We don't need no stinking filler. 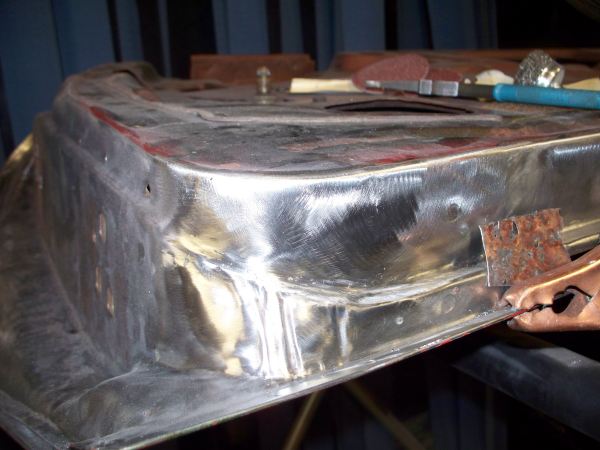 And the before for comparison.
__________________
68 Lemans - GTO appearance LS3 68 Eldorado - waiting for restoration 96 Roadmaster Wagon 2014 Infiniti Q50S Hybrid Marietta GA |
|
#157
03-30-2011, 07:23 PM
|
|||
|
|||
|
That is some impressive work you're doing there, all of it. Gotta say, though, you sure have a lot of patience.
|
|
#158
03-31-2011, 01:38 AM
|
|||
|
|||
|
Quote:
Started on power door locks tonight. There are no reproduction power door locks parts (except for the switch) so I am going to use later model GM parts. While cheap door solenoids are available on Ebay, what happens 5 years later when one of these cheap units fails and is no longer available. I selected a solenoid from a 77 Cadillac. Why a 77, well for one I own a 77 and that solenoid is used in many GM cars through the 90's so future availability should be no problem. Here is an inside shot of the door. There is already a place to connect a solenoid, I have marked it with a green box. The only thing I need to do is make a bracket to hold the solenoid and mount it below the latch unit. 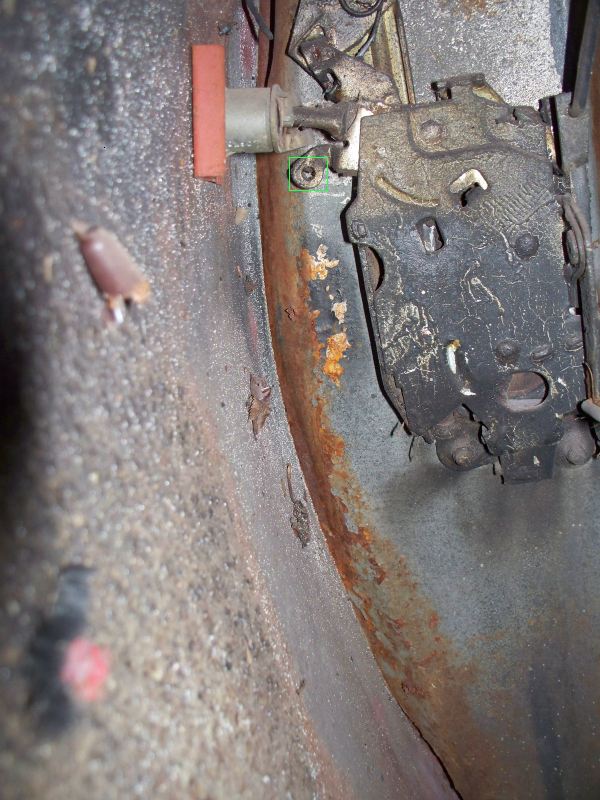 Here is the bracket I made tonight. 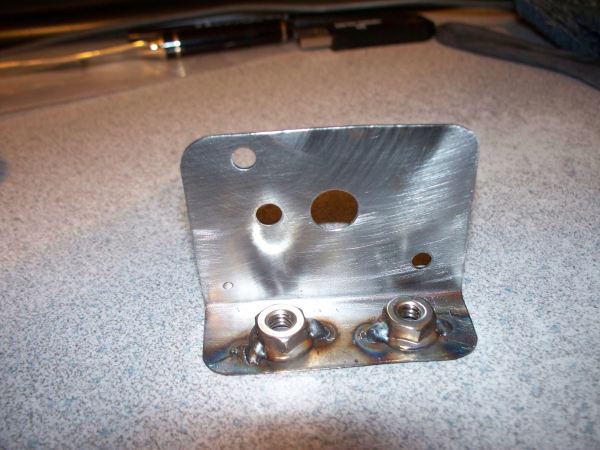 Here is the bracket with the Cadillac solenoid. While Cadillac used a rivet to attach the solenoid to the door, I will use nuts and bolts to attach the solenoid to the bracket and bolts to attach the bracket to the door, rivets were done as a time saver on the assembly line. This is as far as I could get tonight since I don't have the hardware I need to continue. 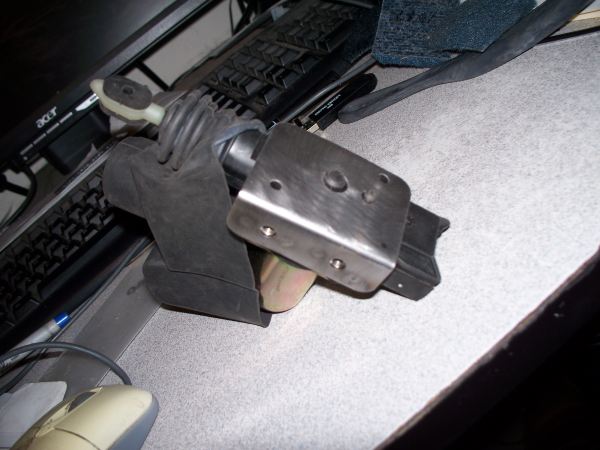
__________________
68 Lemans - GTO appearance LS3 68 Eldorado - waiting for restoration 96 Roadmaster Wagon 2014 Infiniti Q50S Hybrid Marietta GA |
|
#159
04-01-2011, 02:16 PM
|
|||
|
|||
|
Awesome work, especially on that door.
|
|
#160
04-04-2011, 01:10 AM
|
|||
|
|||
|
I got the solenoid mounted. I need to make a better rod, this one was bent from brake tubing and has nothing to keep it from falling out.
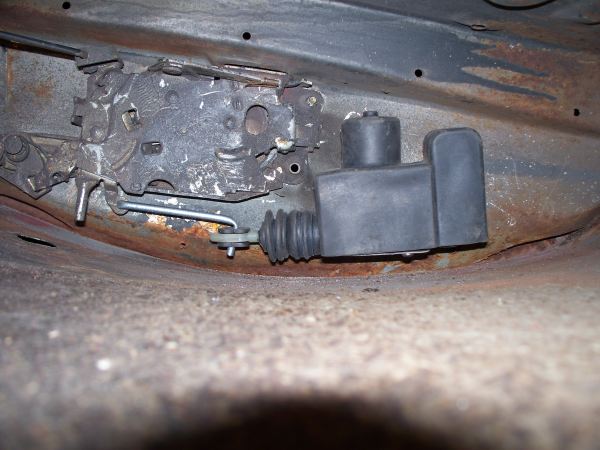 Painted and installed the steering rod. Installed the driver side header, installed spark plugs and wires.  Plenty of clearance between shaft and header. I dented one of the tubes earlier for clearance but ended spacing the engine up about 3/8" on driver side to create clearance between tie rod ends and oil pan.  Another shot of the driver side. That's filler dust on the frame, not a poor paint job. It's hard to keep things clean. 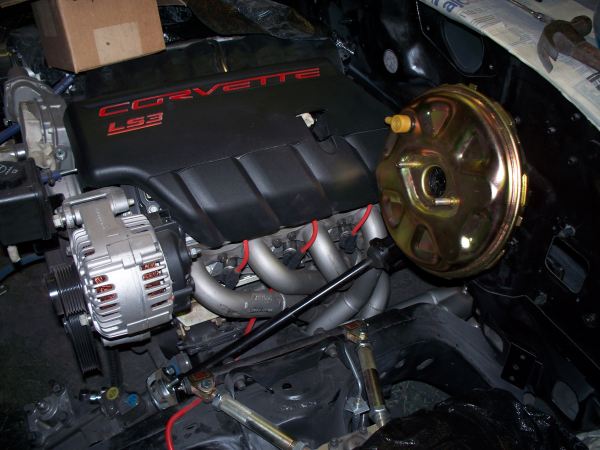 I thought there might have been comments about my strange steering wheel emblem. maybe I didn't show up good enough in the previous photo. Thats a GM reproduction wheel not a GRANT. 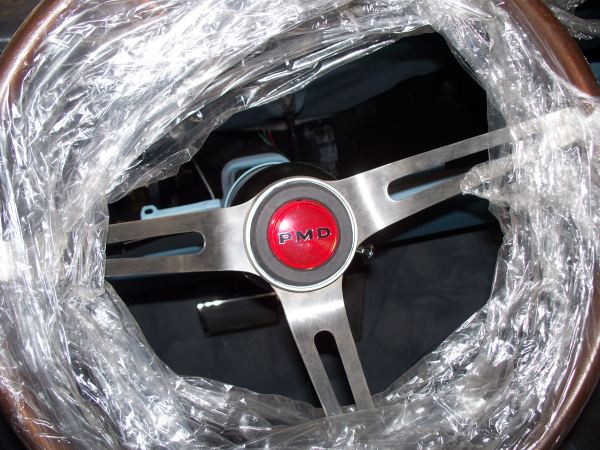 I Painted a few more parts. 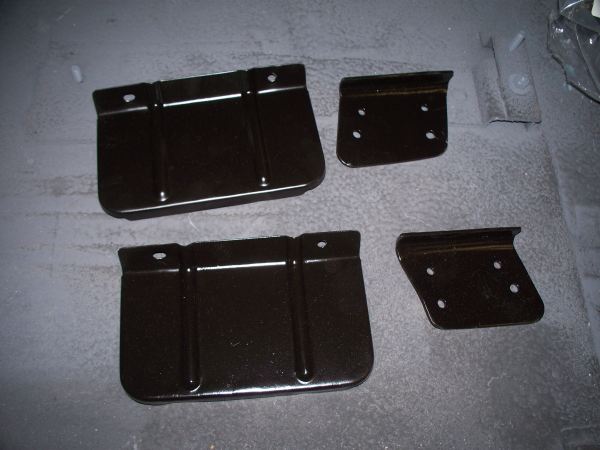 I trying to decide what to do about the ashtray. While the exterior cleaned up OK, the inside looks like the surface of the moon. OPG lists a ashtray but $79 seems a little high. I may still try to rework mine. Before bead blasting  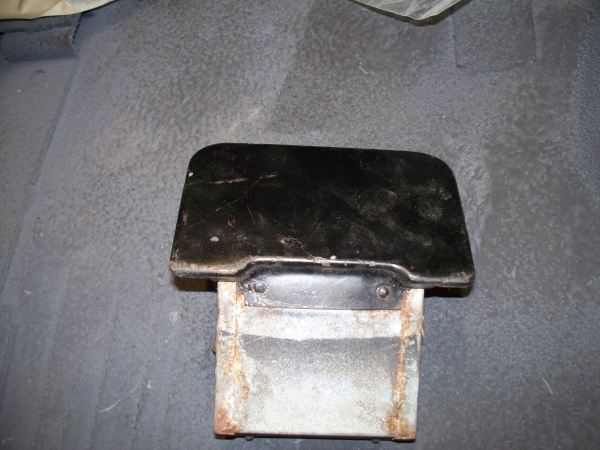 After bead blasting  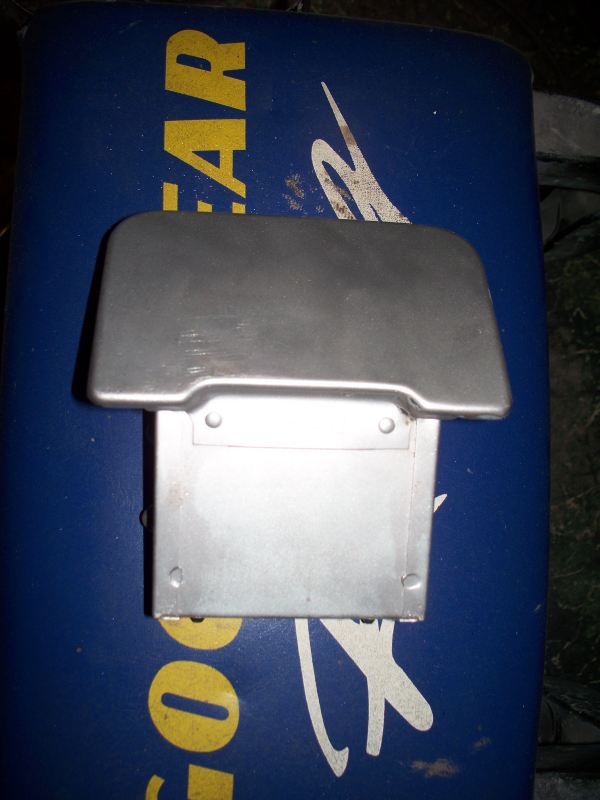 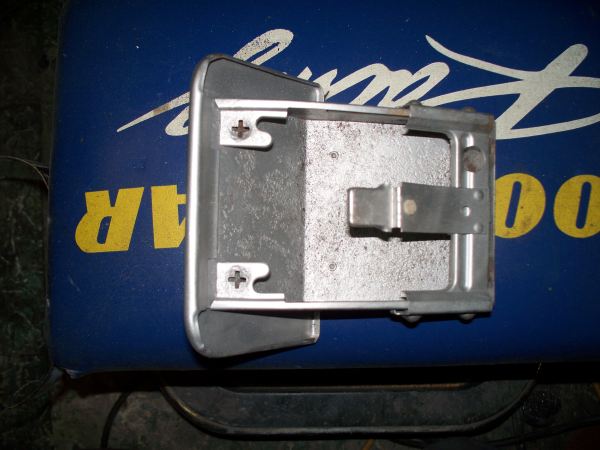 The steering column cover I purchased doesn't look anything like the one that came with the car. The new one looks like it would fit but I would need to drill a hole for the left mount 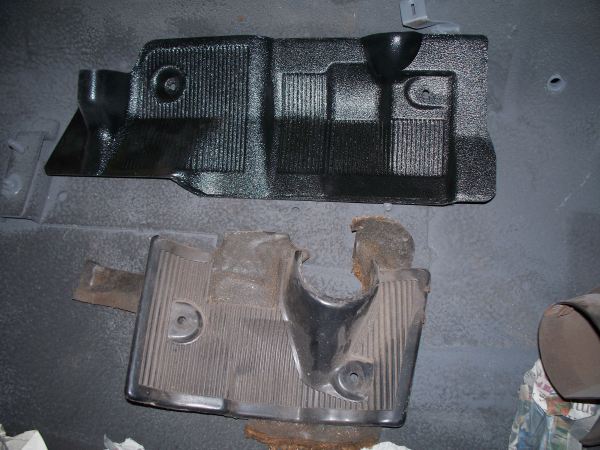
__________________
68 Lemans - GTO appearance LS3 68 Eldorado - waiting for restoration 96 Roadmaster Wagon 2014 Infiniti Q50S Hybrid Marietta GA |
| Reply |
|
|
The PY Online Forums is the largest online gathering of Pontiac enthusiasts anywhere in the world. Founded in 1991, it was also the first online forum for people to gather and talk about their Pontiacs. Since then, it has become the mecca of Pontiac technical data and knowledge that no other place can surpass.




 Linear Mode

